
Creating a SwiftUI App to interact with the OpenAI ChatGPT API
Understand how to use the OpenAISwift Package to easily connect with the OpenAI API to create your own ChaptGPT SwiftUI app.

The internet is overflowing with many examples of OpenAI's ChatGPT use cases, ranging from funny to mindblowing 🤯. We already explored its ability to create usable Swift code based on simple prompts. Today we want to help you to get started with creating your own ChatGPT-based app.
Adam Rush recently provided a first version of an OpenAI API Client Library in Swift that abstracts access to OpenAI HTTP API for ChatGPT. It is really easy to use and allows anyone to create apps that interface with ChaptGPT.
As a prerequisite, register at openai.com/api and obtain an API key to get started. It is free to register and for testing purposes also the free version of the API is more than sufficient.
Follow along to learn how to interact with the OpenAI API with just a few lines of code.
Using the OpenAISwift Package
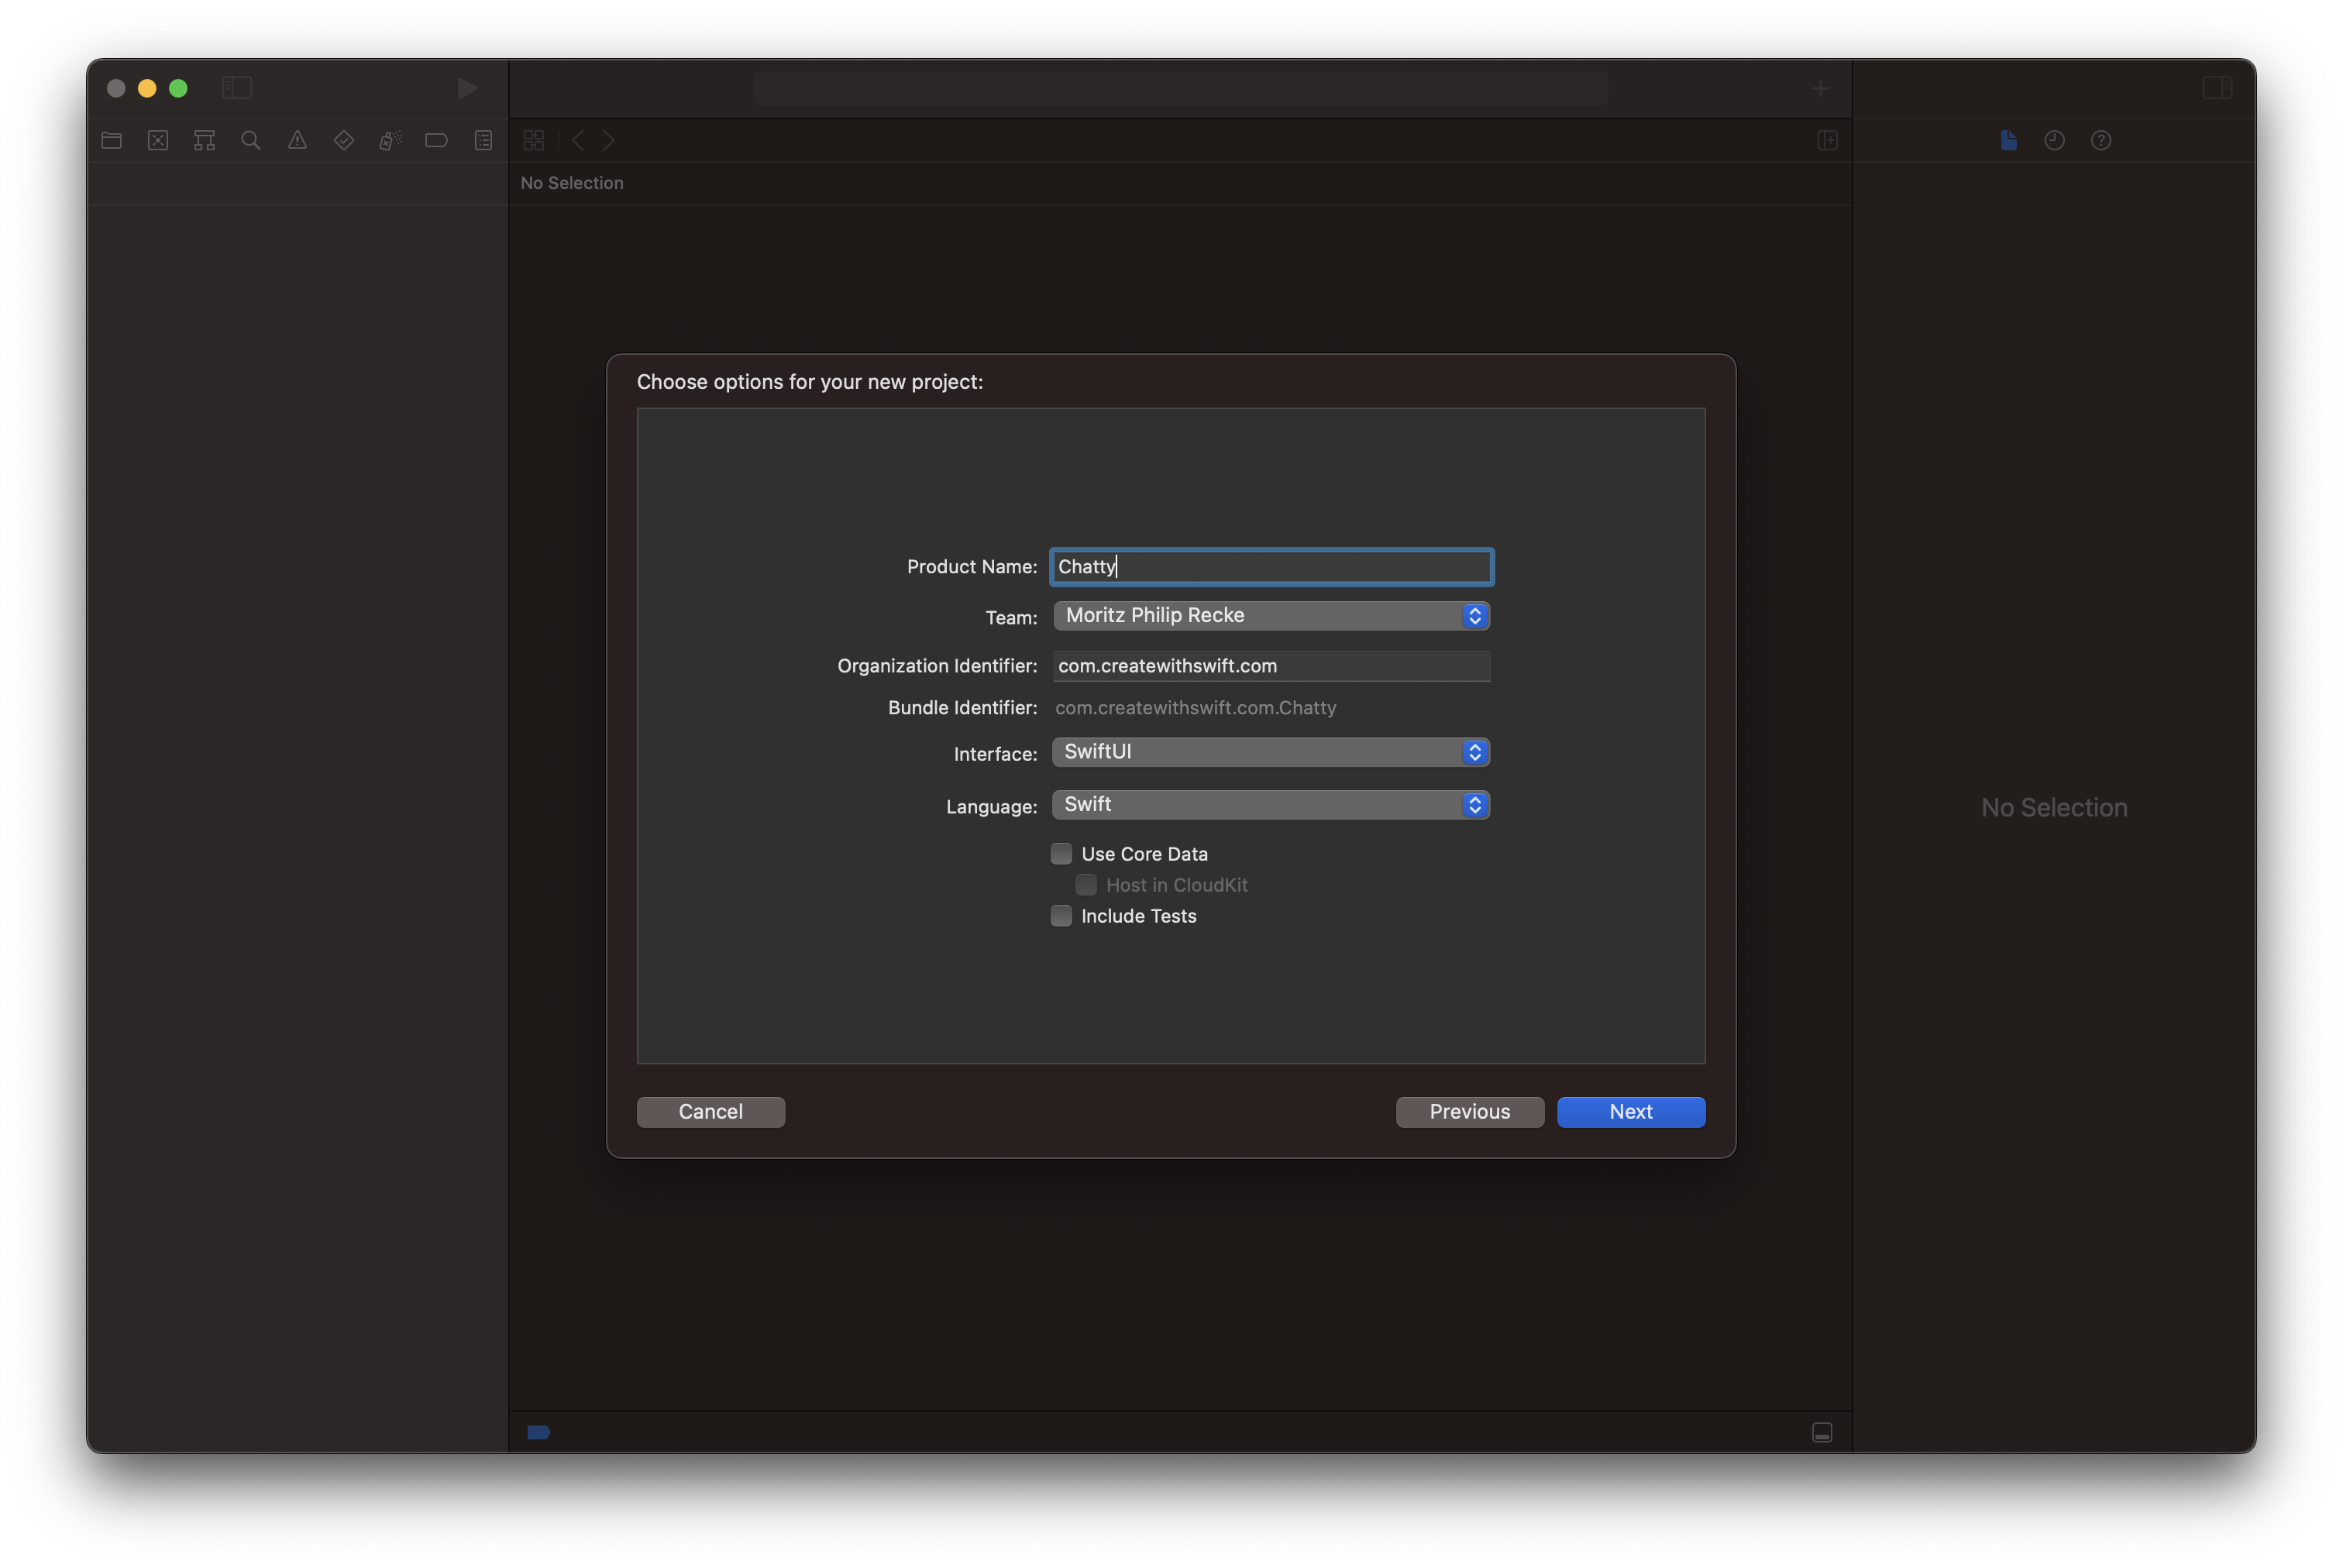
For the purpose of this example, let's create a new Xcode project named Chatty for an iOS app using SwiftUI. We will then add the OpenAISwift package and create a simplified chat interface to demonstrate the functionality.
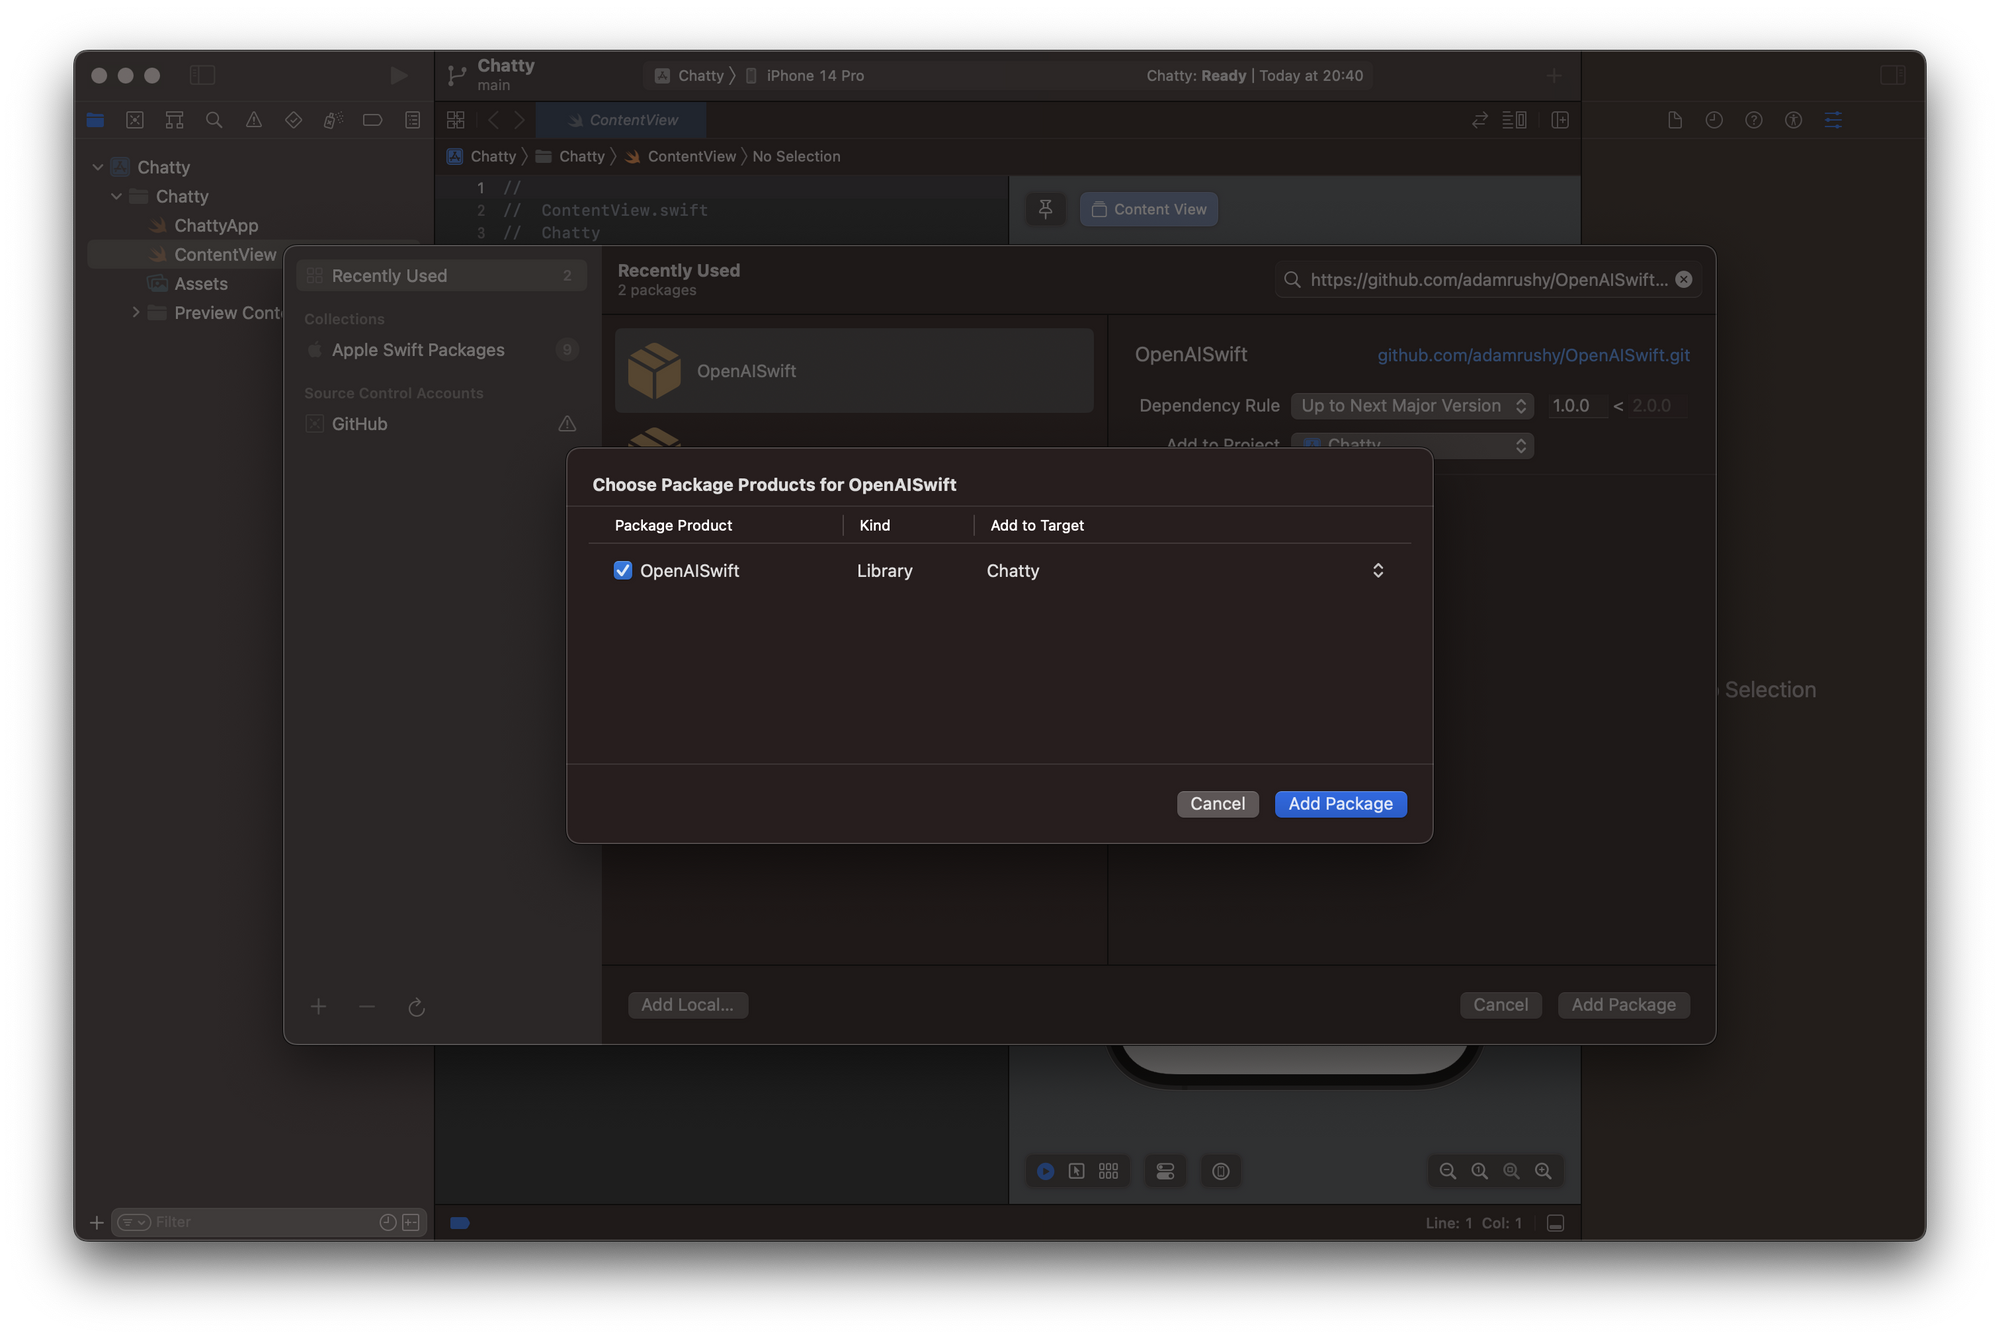
First, select Add Packages from the File menu and add the package's URL https://github.com/adamrushy/OpenAISwift.git to the search bar. You can then add the OpenAISwift package product as a library to your project. The Swift Package Manager (SPM) handles all dependencies and automatically downloads any needed files.
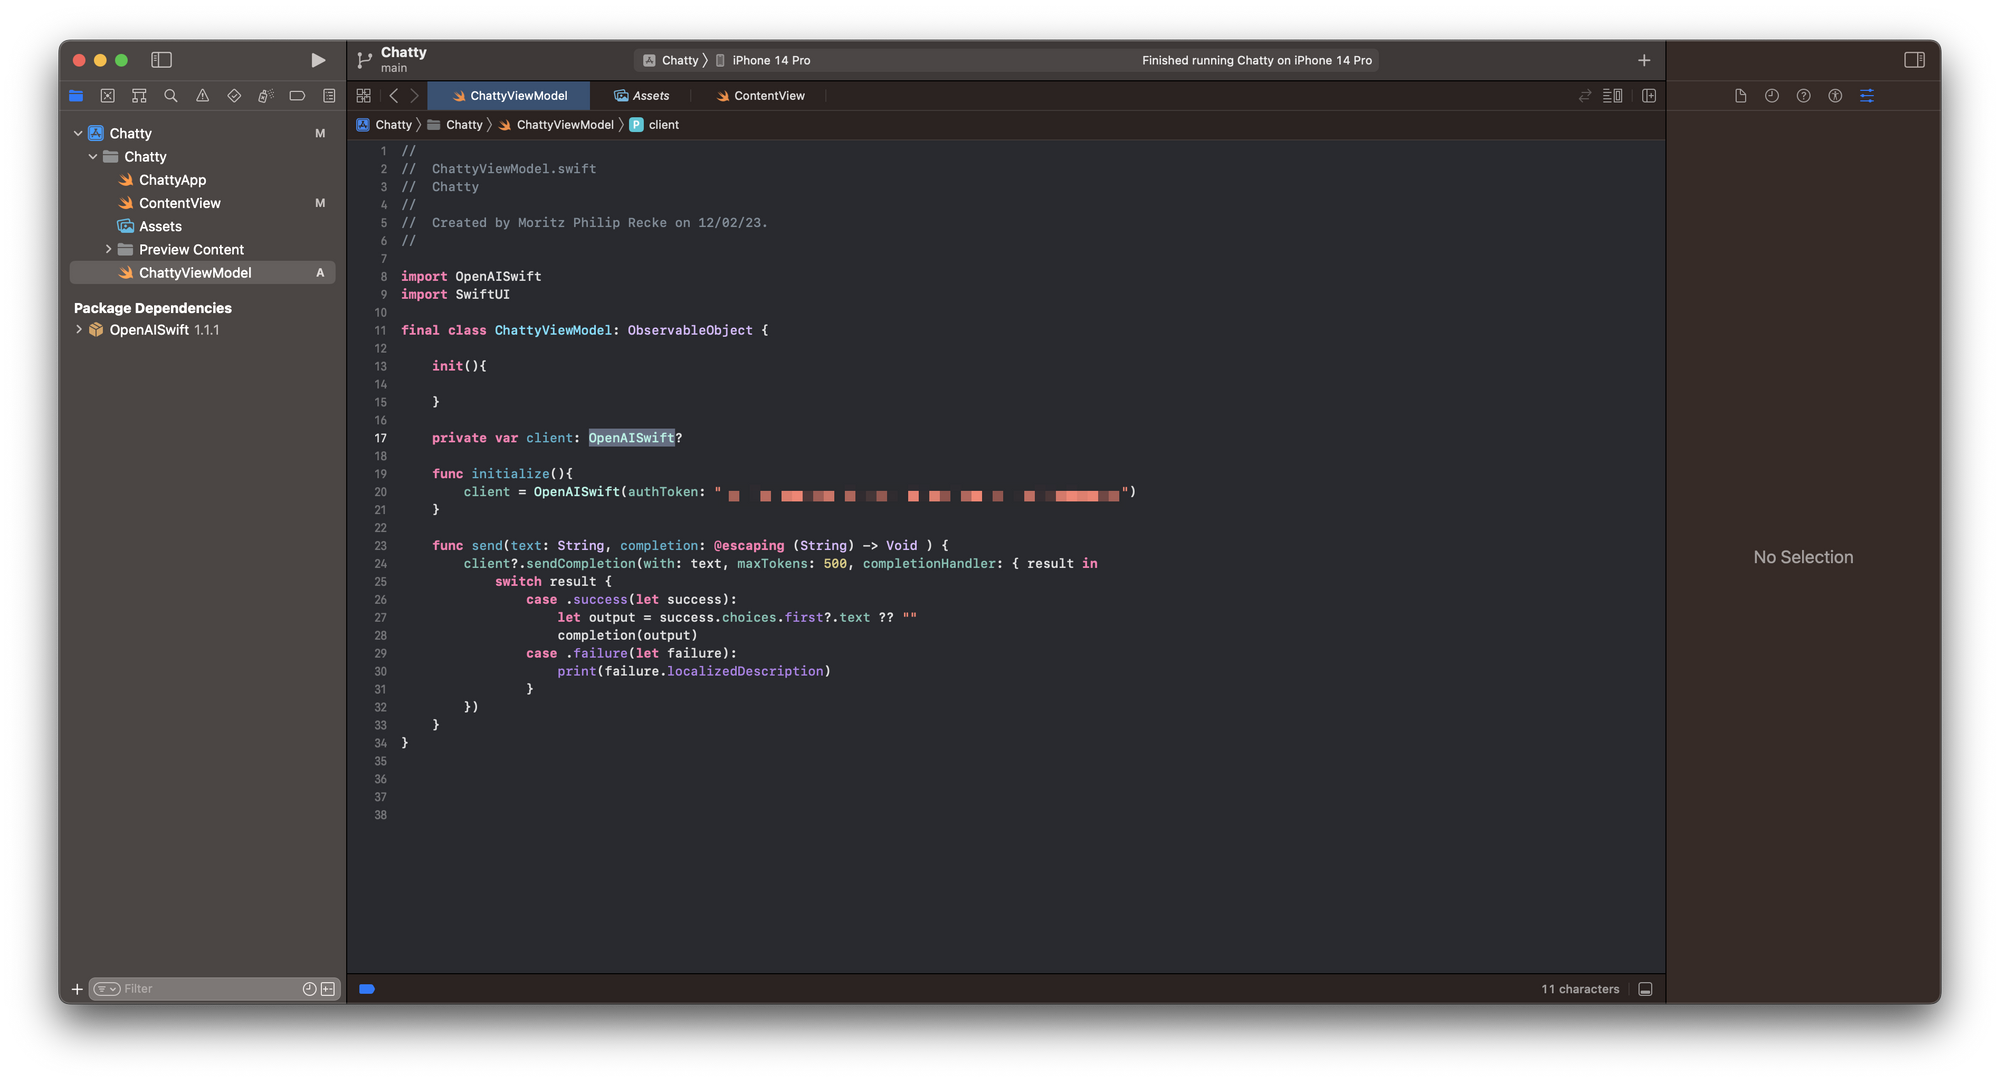
Then, let's create a new File named ChattyViewModel.swift to create a simplistic view model for our app that will manage the interaction with the OpenAI API through the OpenAISwift package. To use the package, import OpenAISwift.
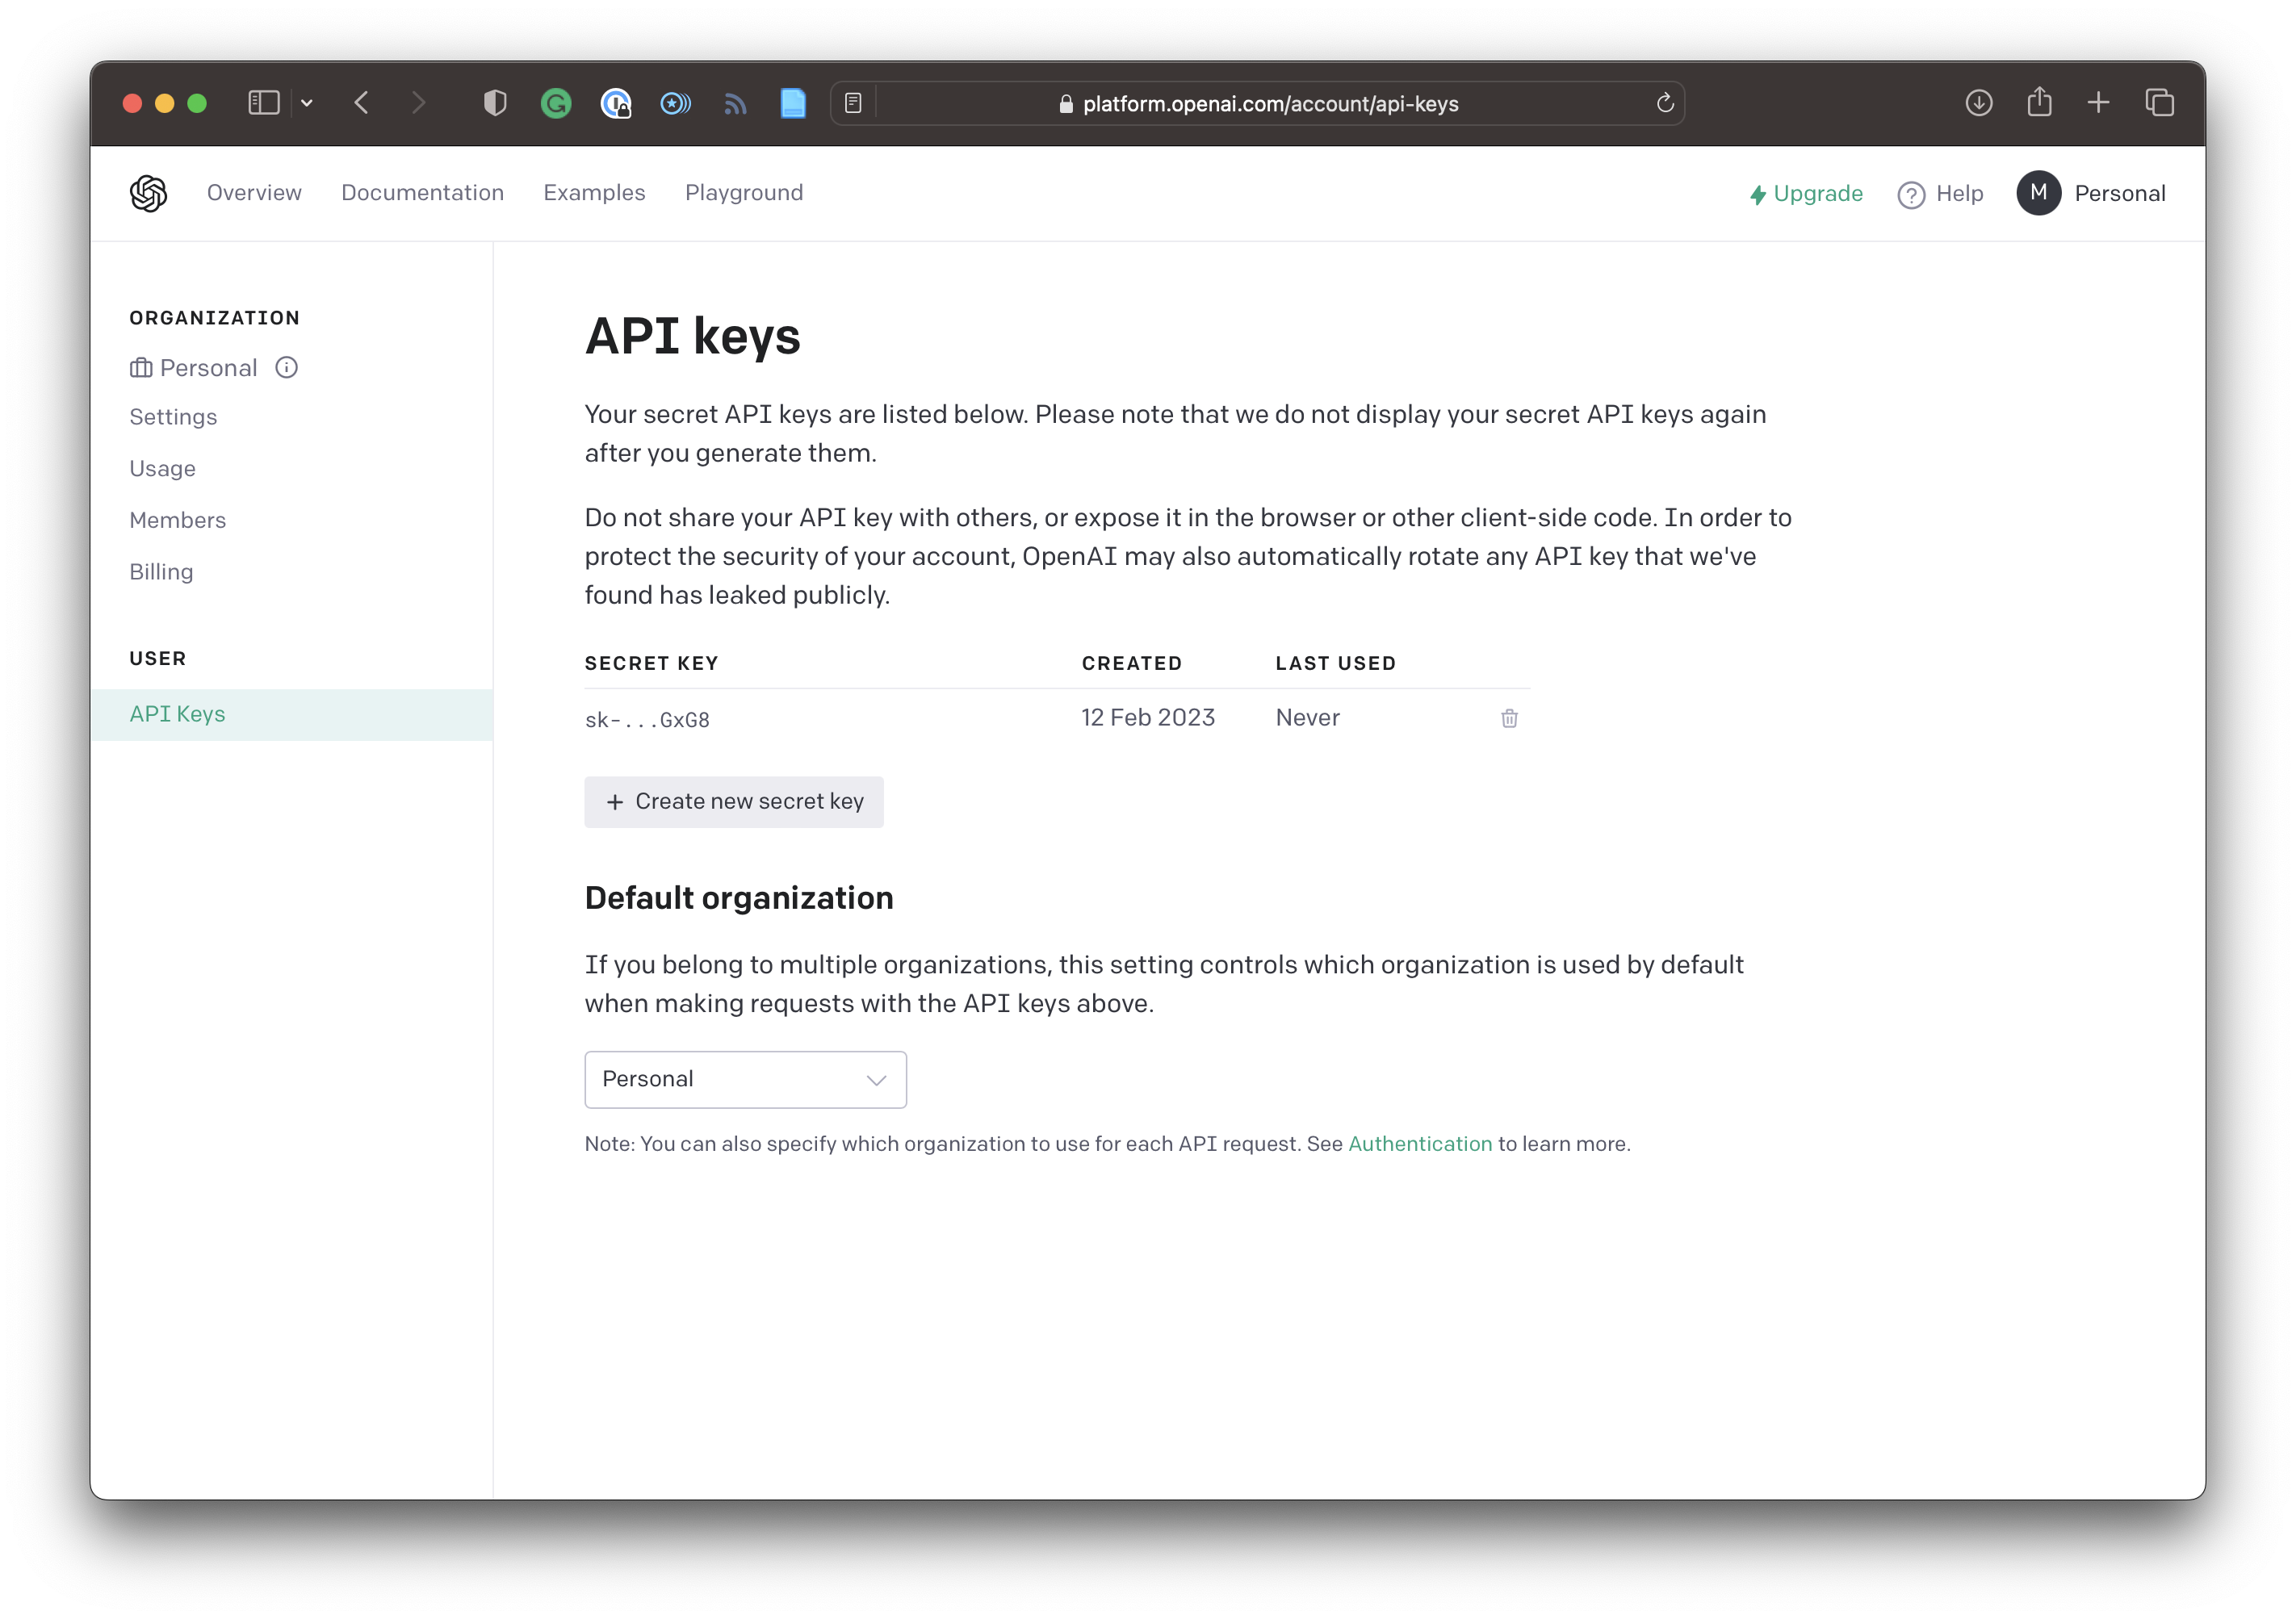
The ChattyViewModel is a final class and OberservableObject and contains an OpenAISwift object as a private client variable. It can be initialized with a initialize function by providing the API token from the OpenAI platform that can be generated and accessed at https://platform.openai.com/account/api-keys.
To keep it straightforward the ChattyViewModel contains only one additional function to send requests to the API, called send(text: String, completion: @escaping (String) -> Void ). It takes a String as an argument and is an escaping function that is either returning the successful response or an error message as a String.
import OpenAISwift
import SwiftUI

final class ChattyViewModel: ObservableObject {

    init(){

    }

    private var client: OpenAISwift?

    func initialize(){
        client = OpenAISwift(authToken: "YOUR API TOKEN")
    }

    func send(text: String, completion: @escaping (String) -> Void ) {
        client?.sendCompletion(with: text, maxTokens: 500, completionHandler: { result in
            switch result {
                case .success(let success):
                    let output = success.choices.first?.text ?? ""
                    completion(output)
                case .failure(let failure):
                    print(failure.localizedDescription)
                }
        })
    }
}
Creating a simple UI to test the ChatGPT API
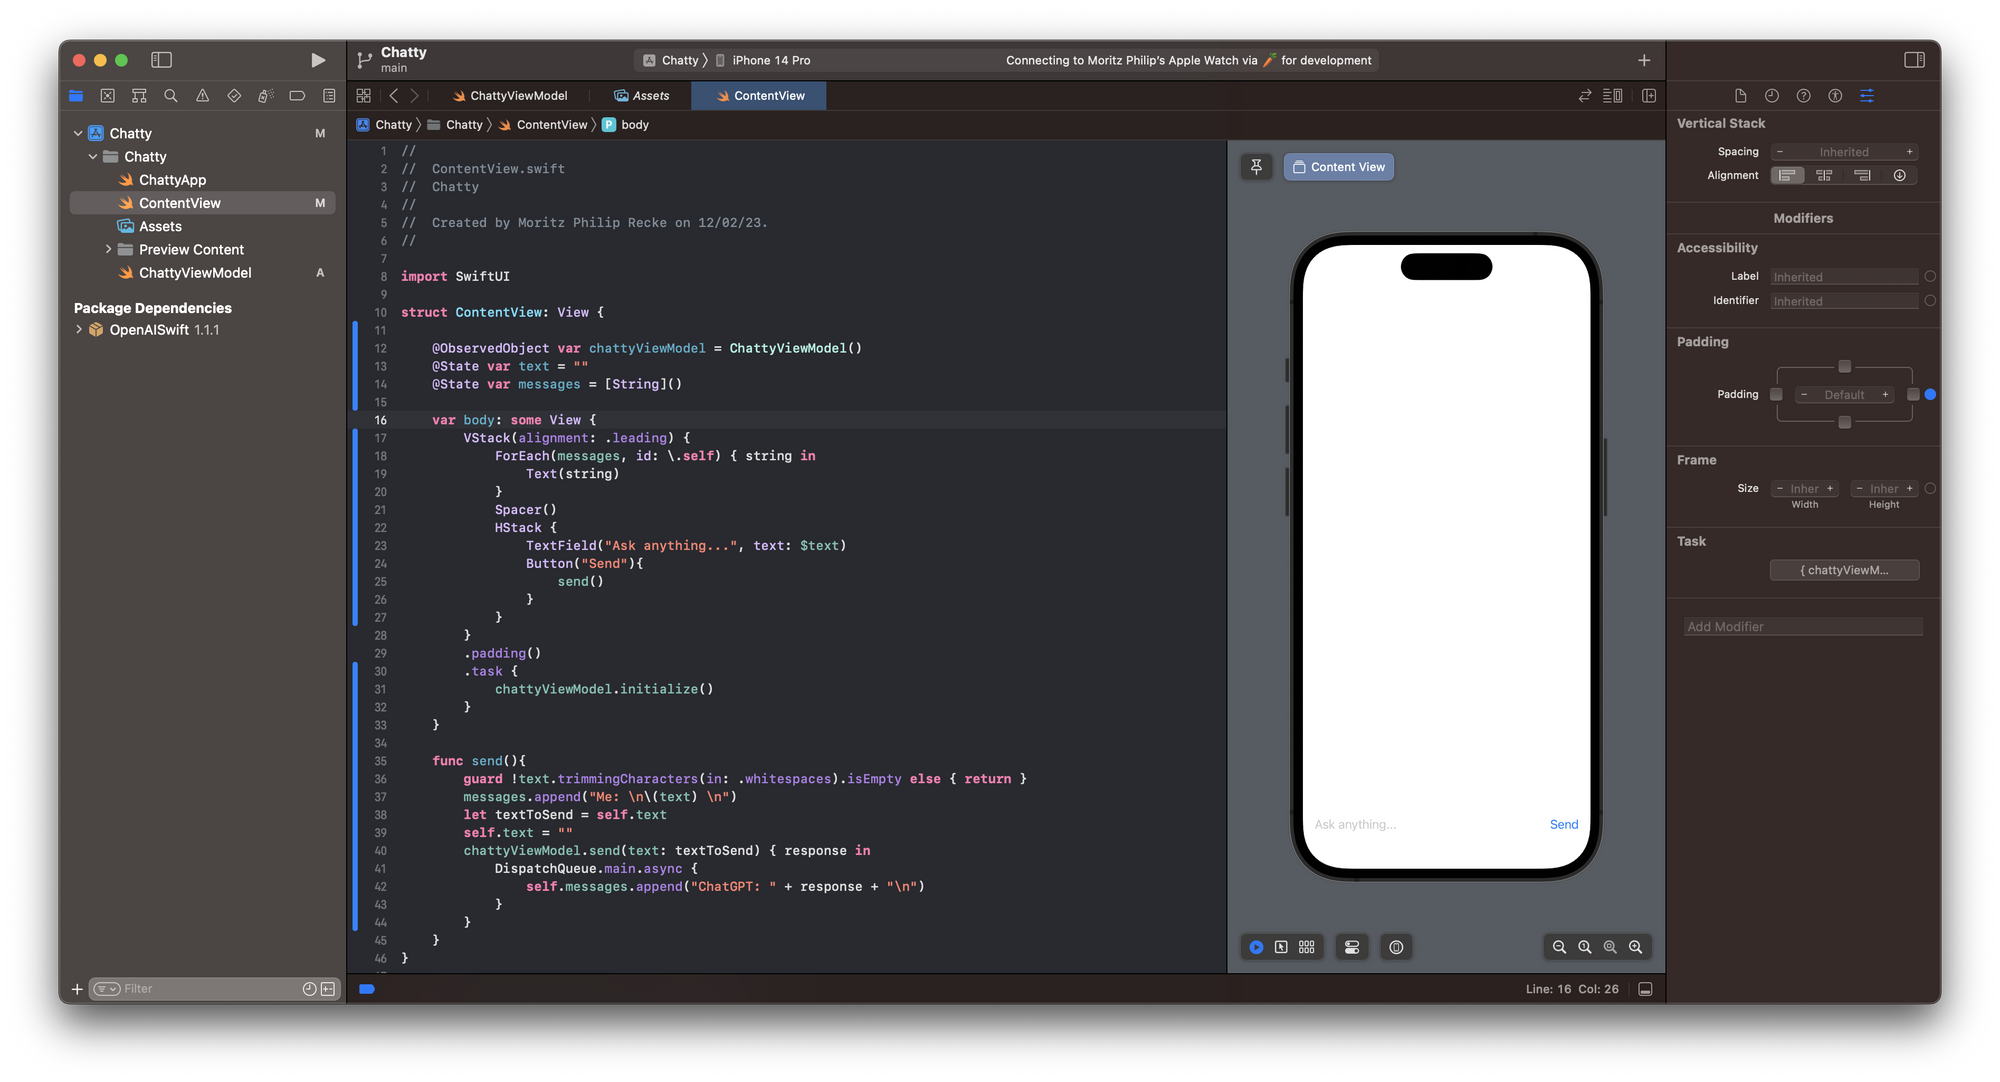
Inside the ContentView.swift file you can add the ChattyViewModel as an @ObservedObject as well as 2 @State objects for the prompt and an Array of messages sent to and received from the API.
The interface itself contains a VStack to vertically align the content and display the messages sent to and received from the API by iterating over the messages array. Then at the bottom of the view, there is a TextField that has a @Binding to the text object and a Button to send the inserted text as a prompt to the OpenAI API.
The interaction with the API is implemented in a send() function. It checks first, whether the TextField is empty or just contains spaces. In this case, it would not send anything to the API. In case the TextField is not empty, its content is sent to the API using the ChattyViewModel function send() with a closure. Inside the closure, the API's response is asynchronously appended to the Array of messages.
import SwiftUI

struct ContentView: View {

    @ObservedObject var chattyViewModel = ChattyViewModel()
    @State var text = ""
    @State var messages = [String]()

    var body: some View {
        VStack(alignment: .leading) {
            ForEach(messages, id: \.self) { string in
                Text(string)
            }
            Spacer()
            HStack {
                TextField("Ask anything...", text: $text)
                Button("Send"){
                    send()
                }
            }
        }
        .padding()
        .task {
            chattyViewModel.initialize()
        }
    }

    func send(){
        guard !text.trimmingCharacters(in: .whitespaces).isEmpty else { return }
        messages.append("Me: \n\(text) \n")
        let textToSend = self.text
        self.text = ""
        chattyViewModel.send(text: textToSend) { response in
            DispatchQueue.main.async {
                self.messages.append("ChatGPT: " + response + "\n")
            }
        }
    }
}
That's it. With this basic setup, you can test the functionality of the OpenAISwift package. Obviously, to build a full-fledged chat app more steps are necessary, starting from making the view scrollable with a ScrollView and further styling the interface to look like a real chat UI. Then, the API might also return more than just text, so more work is needed. Still, the example shows how easy it is to get started.
With this tutorial, you can now create your own ChatGPT app to enhance apps with its smart features. OpenAI seems to be already offering a ChatGPT Pro license for their API priced at $42 per month, even though an official announcement is still pending. Keep an eye on the Open AI API Pricing page to avoid missing it once available.
This article was partially inspired by the video tutorial Build SwiftUI App with ChatGPT. If you want to create a chat app with UIKit instead of SwiftUI, consider the video tutorial Build An AI ChatBot with OpenAI (Swift, Xcode 14, 2023). If you are interested in other OpenAI APIs, check out MacPaw's Swift Package.
If you are curious, also feel free to explore how you can use OpenAI's ChatGPT conversational machine learning model to create working code for SwitfUI apps within a few minutes. Have fun.