Changing the Thumbnail of an App in Swift Playgrounds
By the end of this tutorial, you will be able to change the thumbnail of an App project in Swift Playgrounds for iPad.

Since the latest update to the Swift Playgrounds app for iPad it is possible to create App projects using it, enabling you to develop and publish iOS applications even without Xcode.
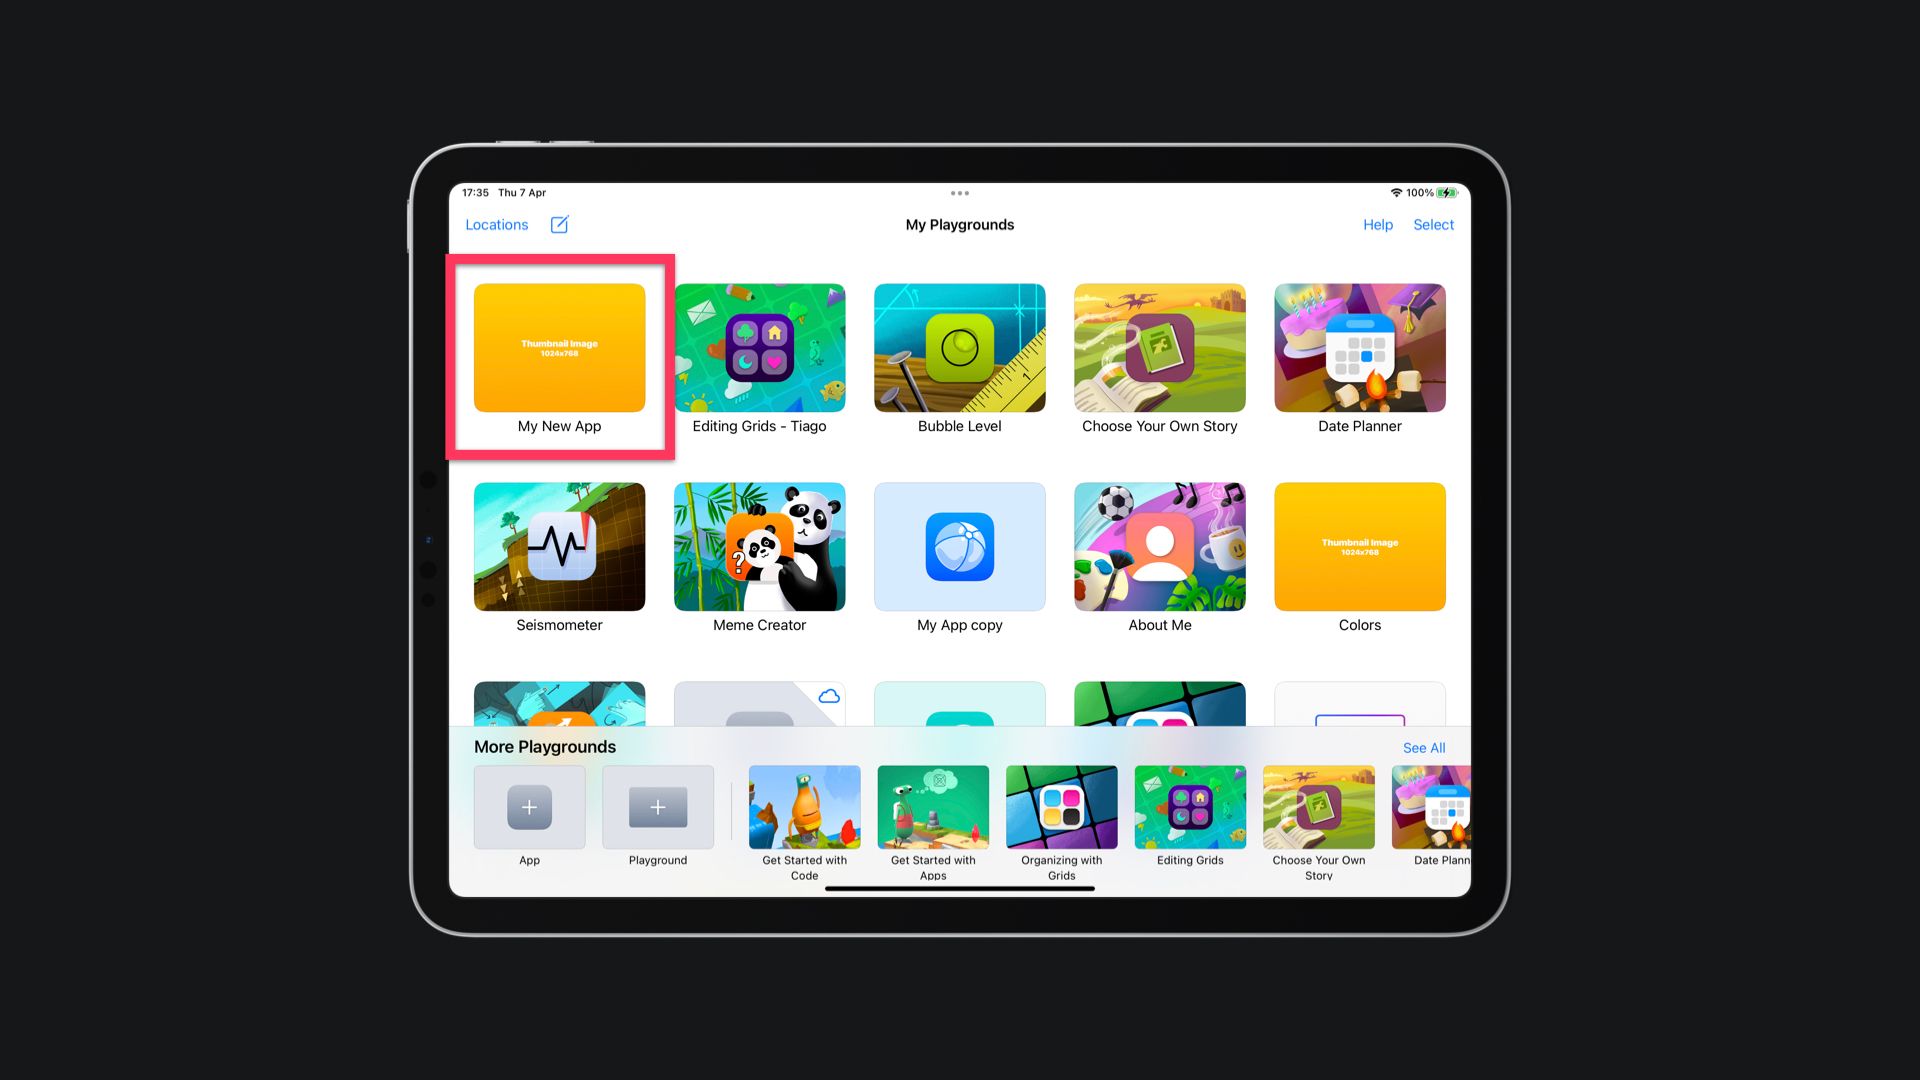
The thumbnail of the project on your playgrounds gallery is based on your app icon and the accent color of your application, and it is automatically generated by Swift Playgrounds.
And even if you upload a custom icon to your application, the thumbnail will still be automatically generated, but using your custom image instead of one of the predefined placeholder icons you can choose from.

Recently Apple has released a series of sample apps on their tutorials portal and all those apps became available to be downloaded at the new App Gallery section of the Swift Playgrounds app on the iPad.
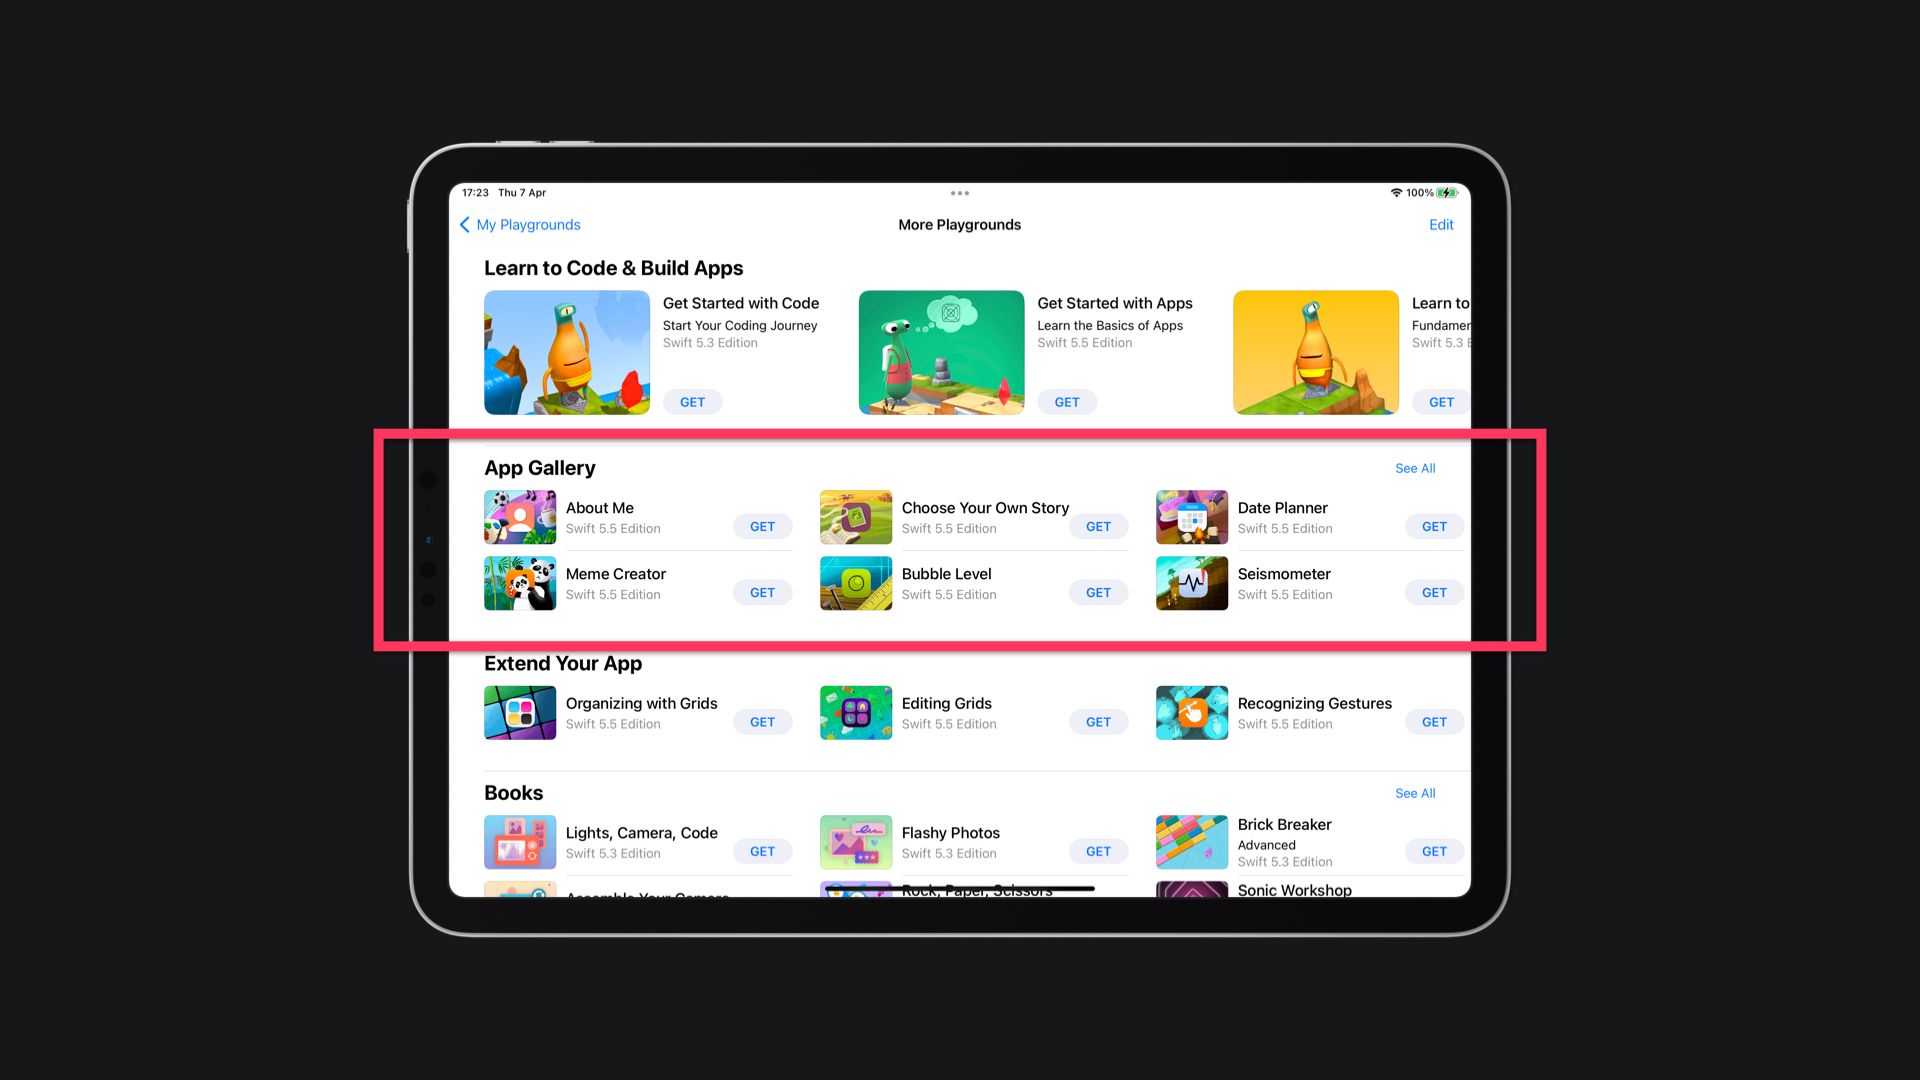
You might have noticed that the thumbnails of the sample apps provided by Apple are not the thumbnail that is automatically generated by Swift Playgrounds, but a custom image, even though there is no way to change the thumbnail of the project using the interface of Swift Playgrounds or even opening the project on Xcode.
So, how can we change the thumbnail of our app project on Swift Playgrounds?
Exporting the App Project to the Mac
The first thing we need to do is export our App Project to the Mac.
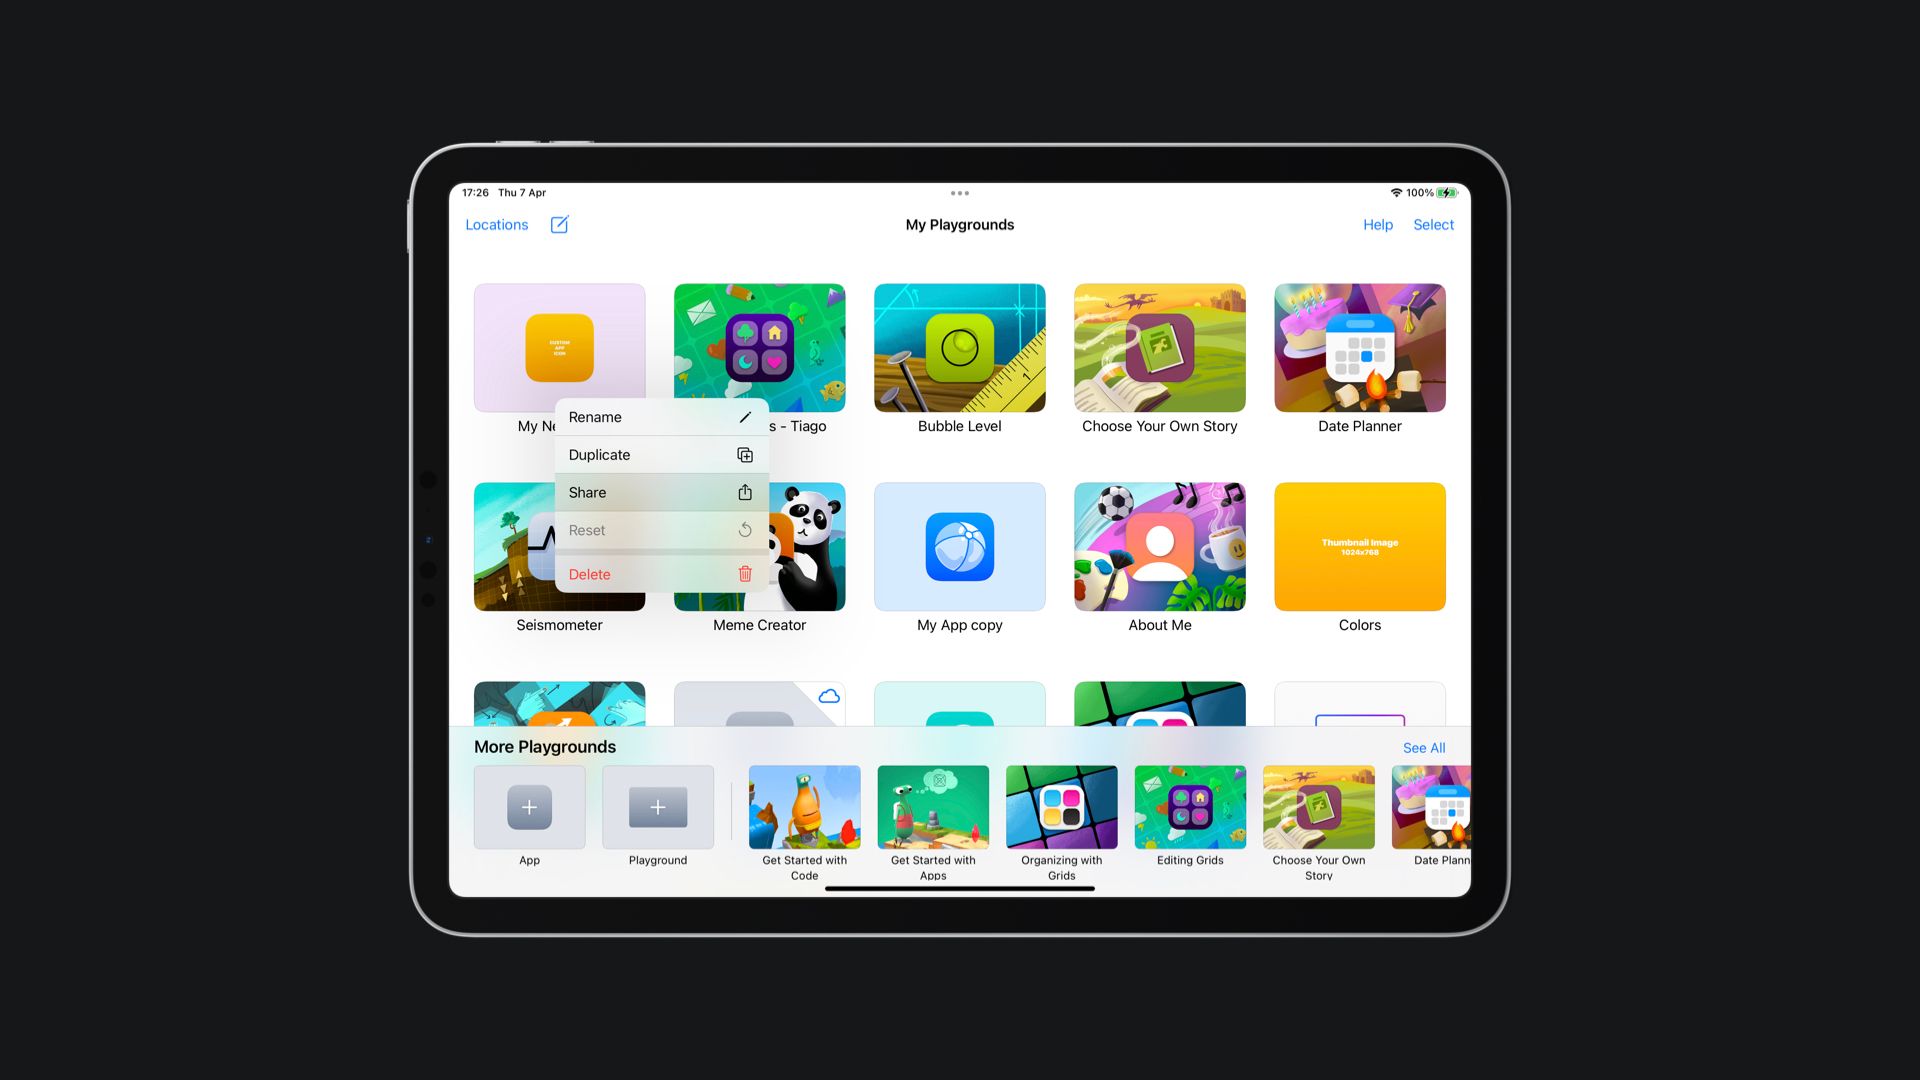
Step 1: Long press the project you want to export to the Mac and select the Share action.
Step 2: AirDrop the project to your Mac
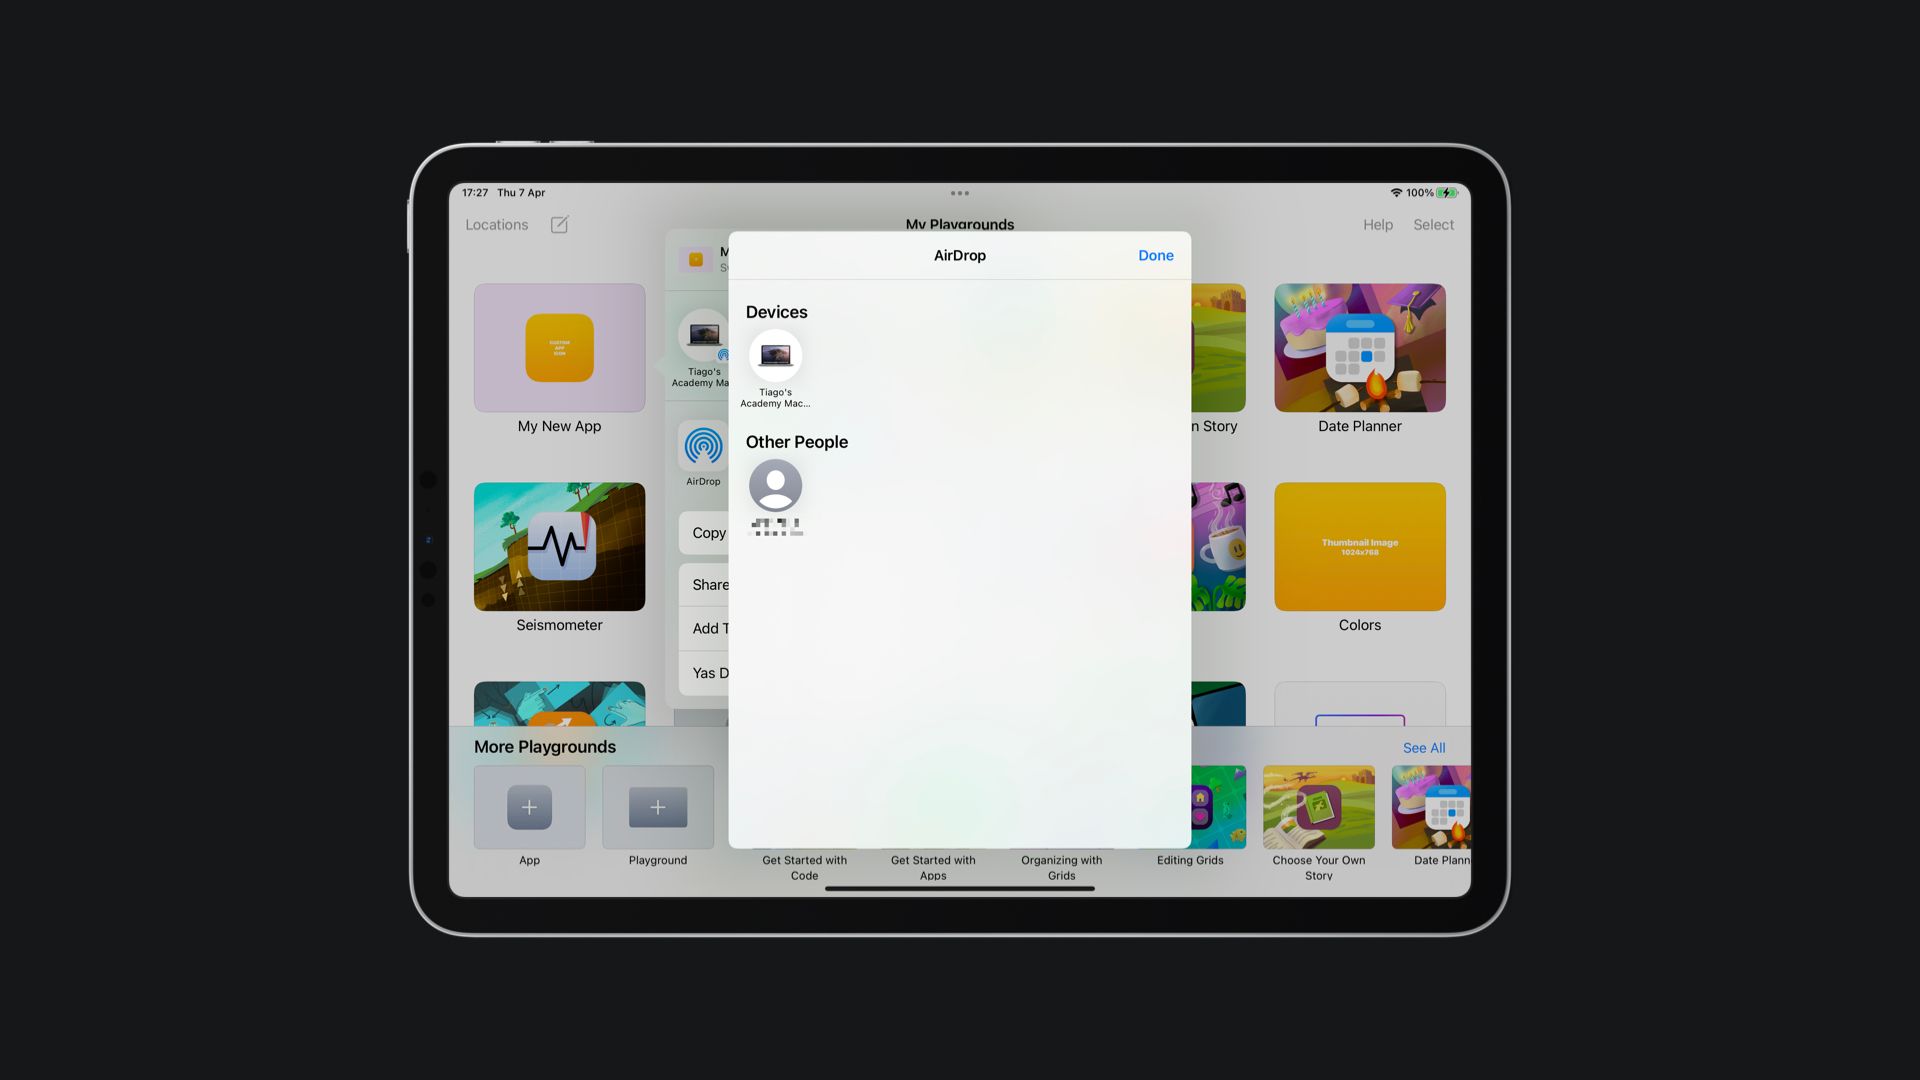
You can also take advantage of iCloud and the macOS version of the Swift Playgrounds app to synchronize the apps and just drag the project to your Desktop.
Changing the Thumbnail Image
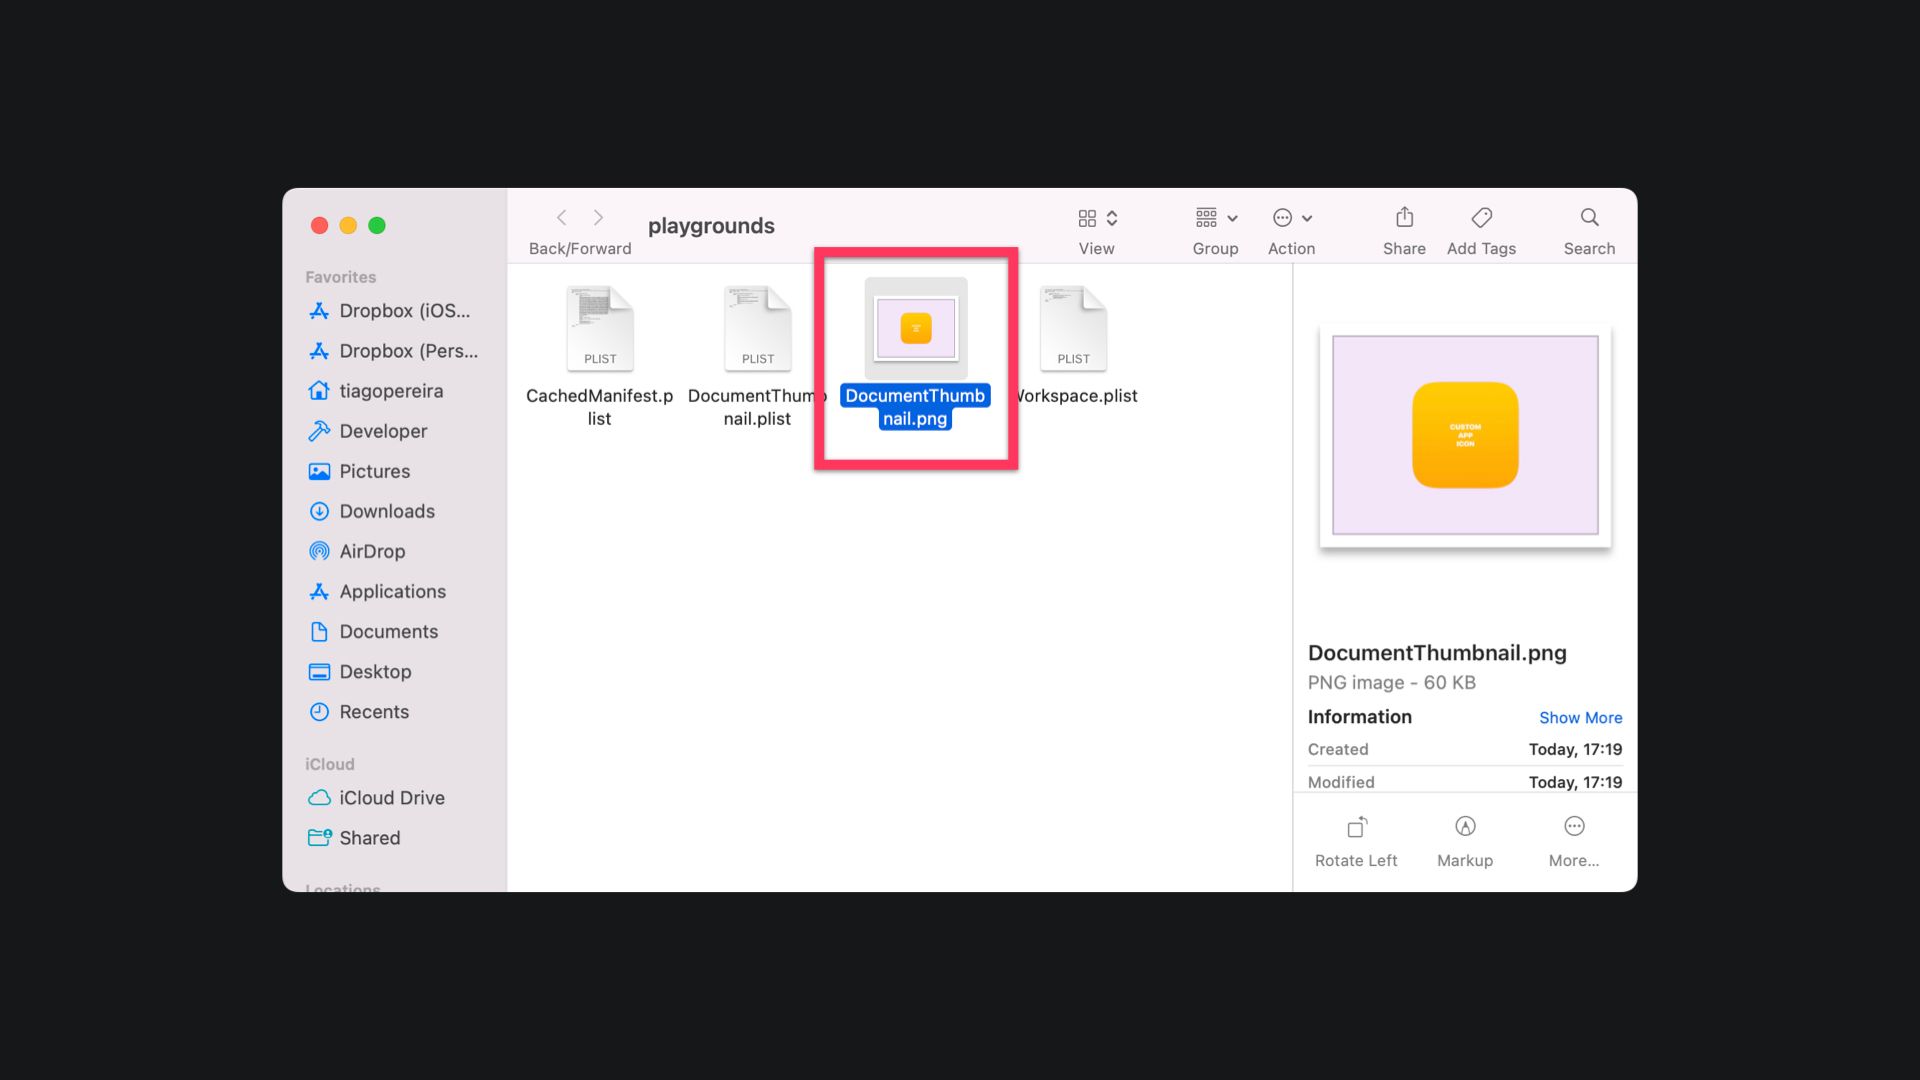
Now that you have your App Project in your Mac, we must find a hidden folder inside your project package. This hidden folder is called .swiftpm and inside this folder, there is another folder called /playgrounds.
Step 1: You can have access to the /playgrounds folder with the following command on the terminal.
open YOUR-PROJECT-NAME.swiftpm/.swiftpm/playgrounds
Replace YOUR-PROJECT-NAME with the name of your app package
This will open on Finder the /playgrounds folder inside your App Project package. Inside, among other files, you will find two important files:
DocumentThumbnail.pngDocumentThumbnail.plist
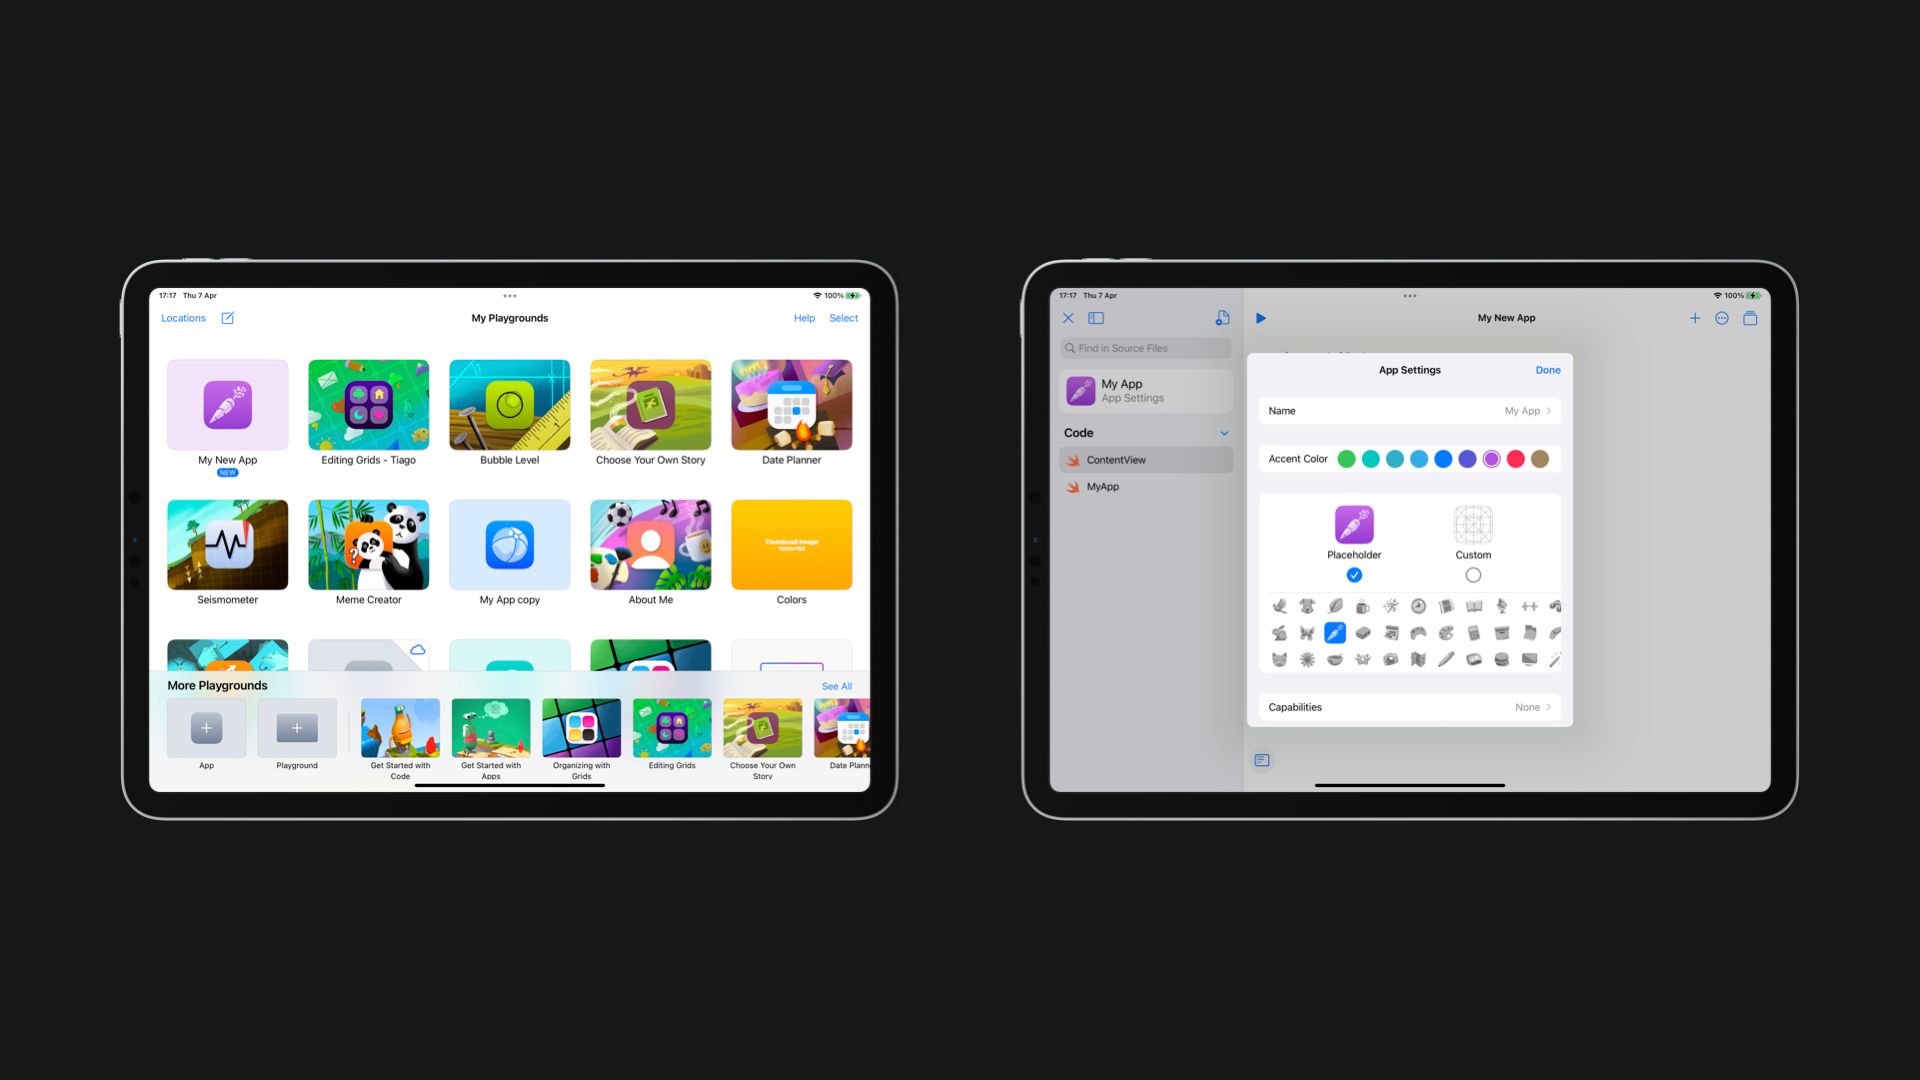
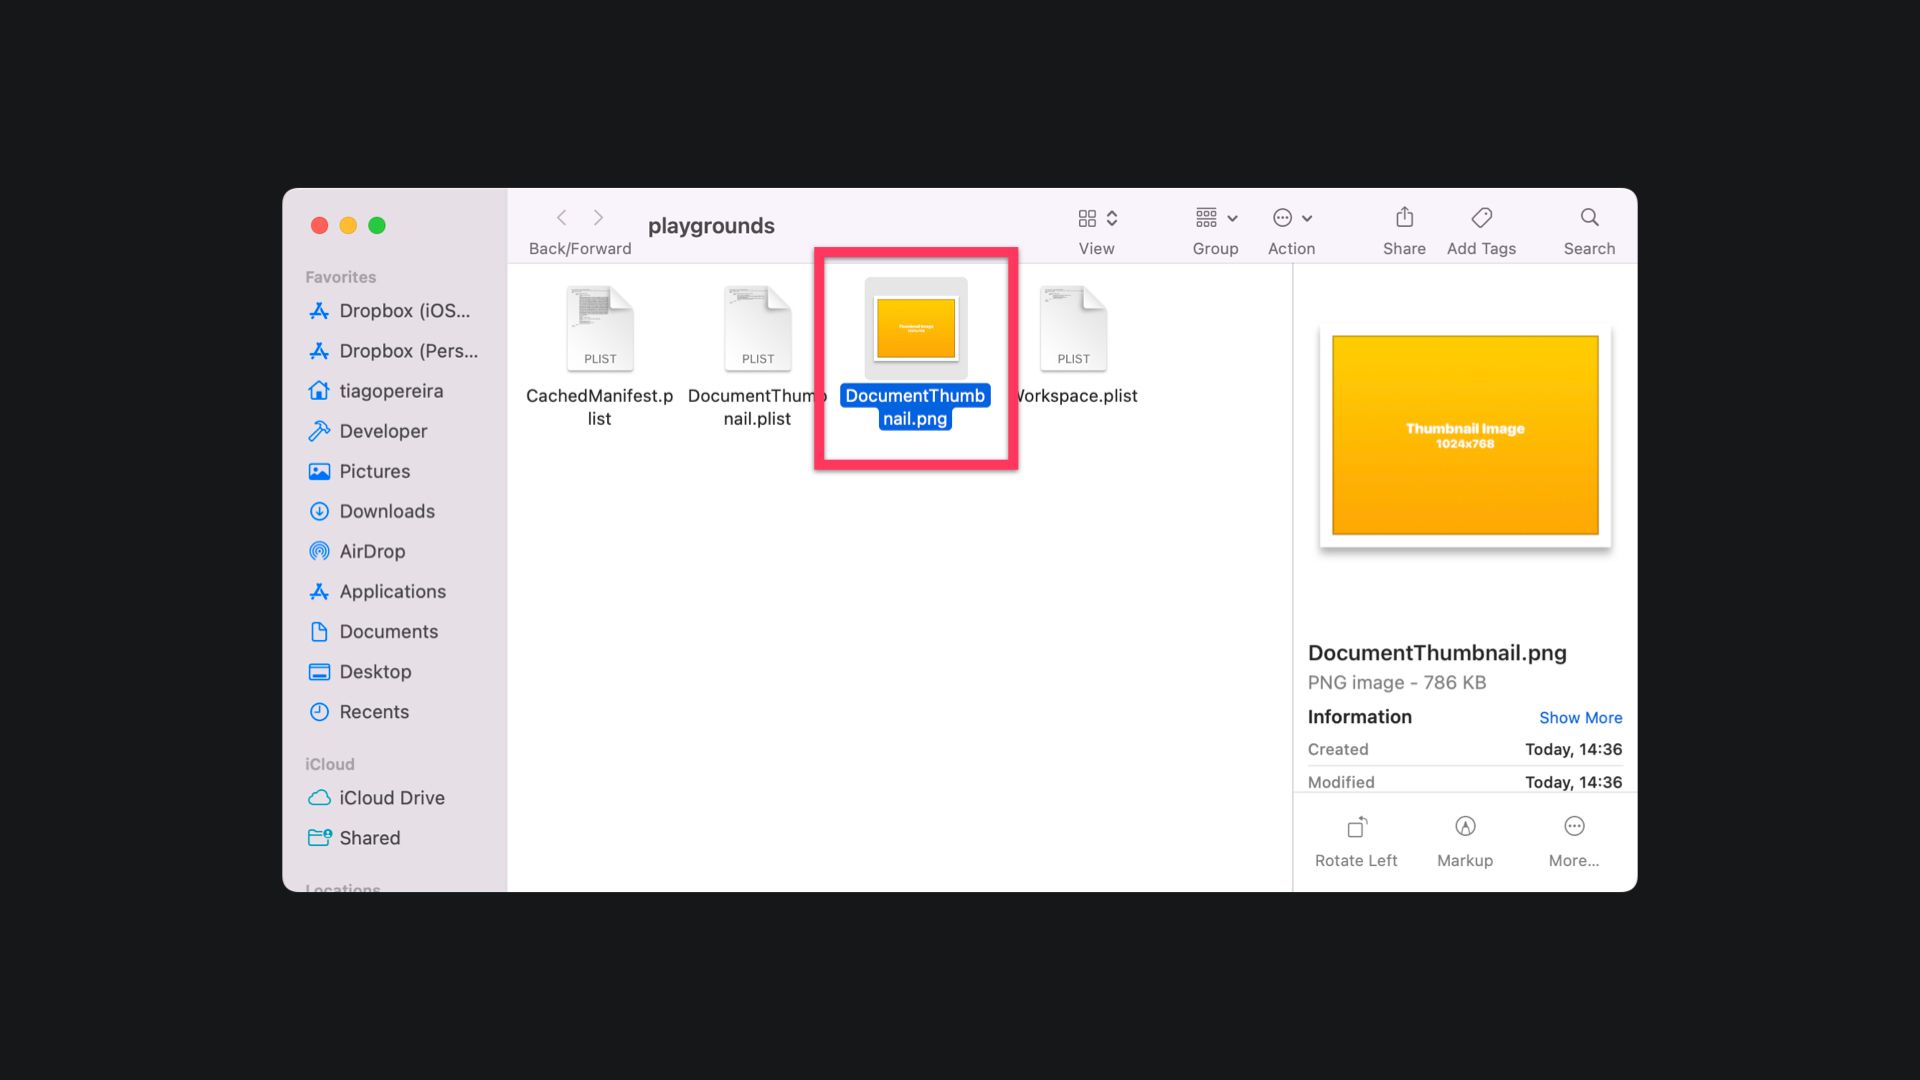
The DocumentThumbnail.png is the image file for your thumbnail. The one you are seeing right now is automatically generated by Swift Playgrounds.
Step 2: Replace the DocumentThumbnail image with your own image to update the thumbnail of your project.
Since the size of the image generated by Swift Playgrounds is 1024x768 pixels, replace it with an image with these same dimensions.
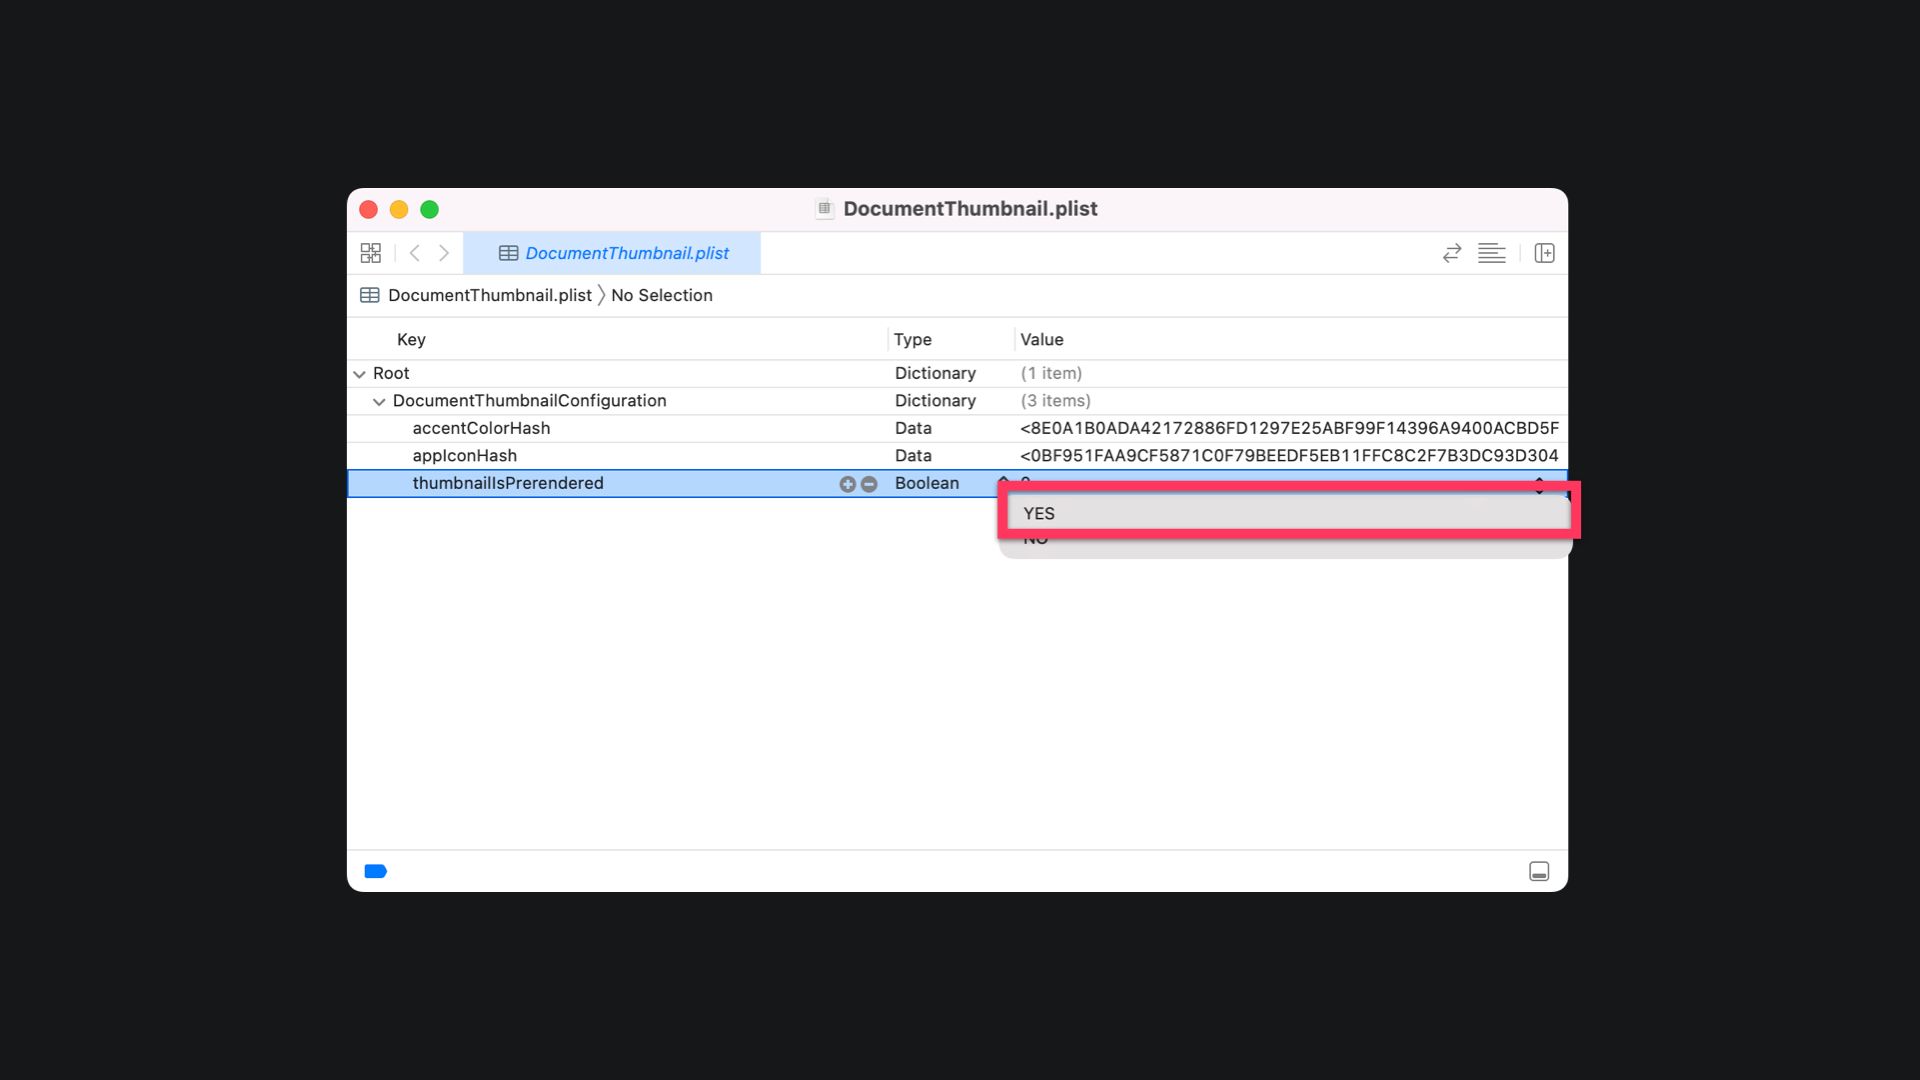
Step 3: Changing the value of the property thumbnailIsPrerendered in the DocumentThumbnail.plist to YES.
- Right click on the
DocumentThumbnail.plistfile and open it using Xcode. - Change the value of the
thumbnailIsPrerenderedkey toYESon the dropdown (<true/>if you are editing it on a text editor) and save the changes.
Sending the Project to Swift Playgrounds
Now that all the changes have been made you just need to send your App Project package back to the iPad using AirDrop. Once your iPad receives the file you will see that your custom image will be the new thumbnail image of your app project.