
Configuring default window and volume size in visionOS
Learn how to set up the size of windows and volumes in visionOS applications.

Let's explore the methodologies and constraints involved in configuring window sizes in visionOS apps and discover the essential techniques for configuring window sizes and positions in macOS and visionOS applications.
We will cover scene modifiers that influence window geometry, standard and volumetric windows, system constraints, and platform-specific considerations.
Window size in visionOS
As visionOS continues to evolve, blending the boundaries between 2D and 3D interfaces, the role of traditional windows remains fundamental, serving as the cornerstone of user interaction and experience. Mastering window configurations in this dynamic environment is essential for crafting applications that seamlessly integrate the familiar 2D space with the emerging realm of volumetric, immersive experiences.
Checking the default window size in visionOS
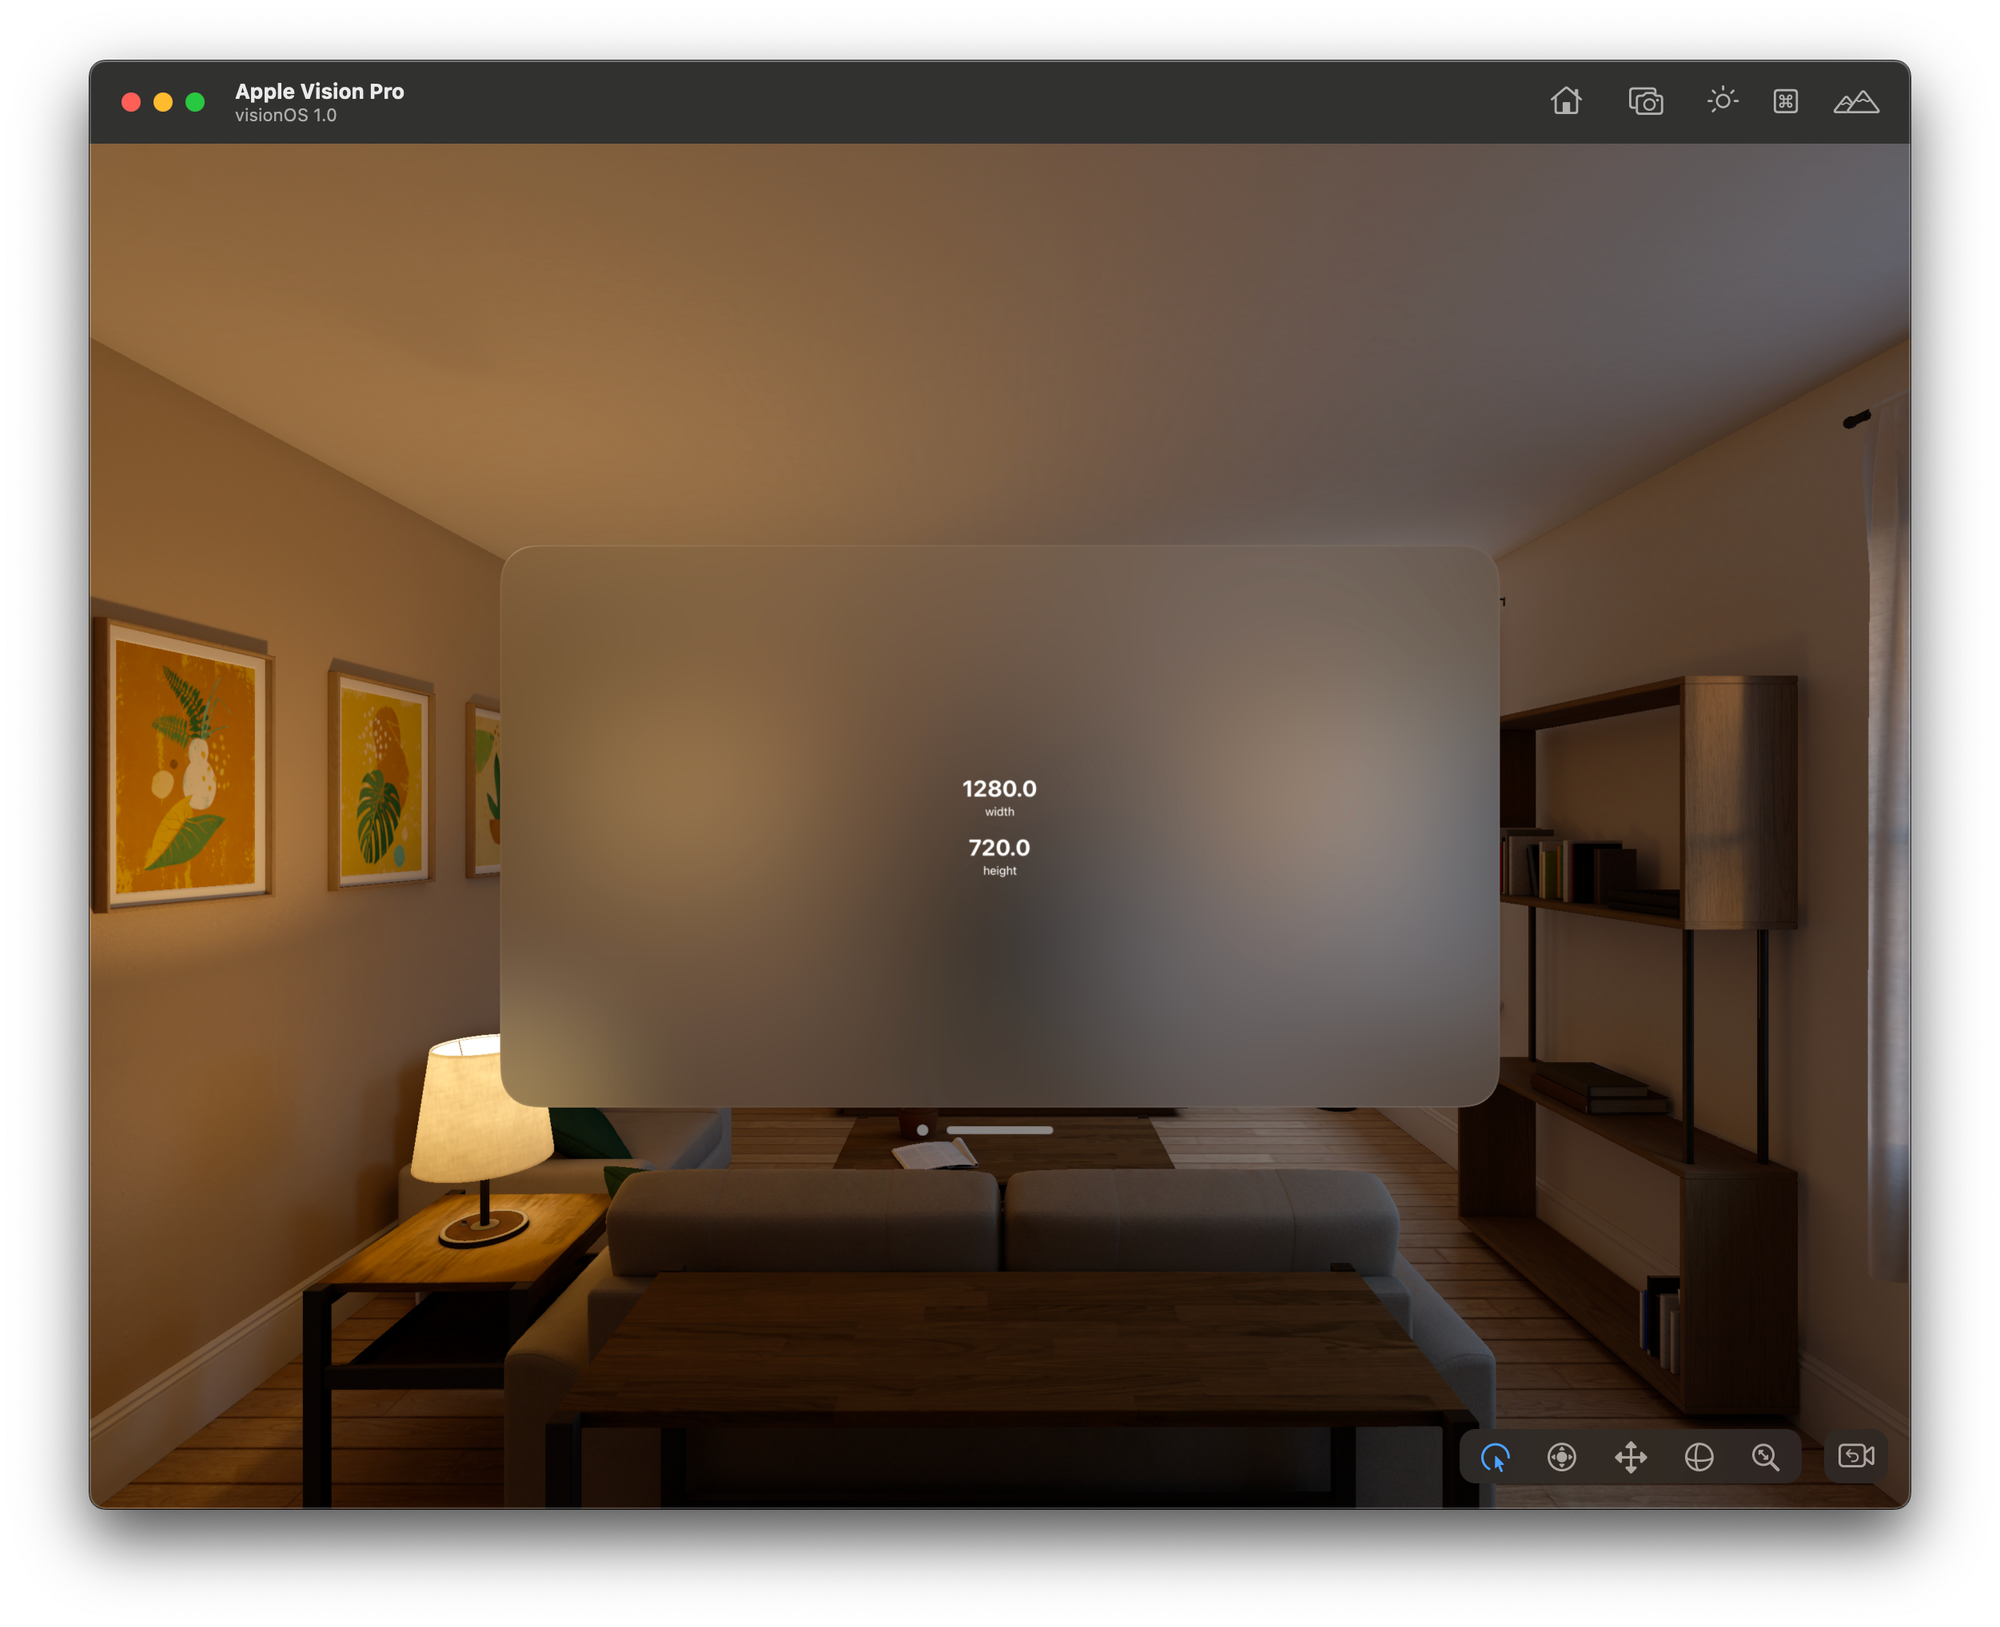
Before setting custom sizes for windows in visionOS applications, it's beneficial to understand how to determine the current window size. This is especially important for designing responsive interfaces that adapt to various screen sizes. The default window size in visionOS typically starts at 1280 points in width and 720 points in height. To check and display the current window size, you can use the following Swift code in a ContentView structure:
struct ContentView: View {
    var body: some View {

        GeometryReader { geometry in

            VStack(spacing: 20.0) {
                VStack {
                    Text(geometry.size.width.description)
                        .font(.largeTitle)
                    Text("width")
                        .font(.subheadline)
                }
                VStack {
                    Text(geometry.size.height.description)
                        .font(.largeTitle)
                    Text("height")
                        .font(.subheadline)
                }
            }
            .position(
                x: geometry.frame(in: .local).midX,
                y: geometry.frame(in: .local).midY
            )

        }

    }
}
This code utilizes a GeometryReader to access the size of the current view. Inside the reader, the width and height of the window are extracted and displayed.
The geometry.size.width and geometry.size.height provide the current width and height of the window, respectively, which are then displayed using Text views. The .position modifier is used to center the text within the window.
Setting Default Size for Standard Windows
The defaultSize(_:) modifier allows developers to specify a default initial size for new windows generated from a Scene. This applies to various scene types, such as WindowGroup, Window, DocumentGroup, and Settings. For example:
This modifier sets the initial dimensions of the window when it first appears. Users have the flexibility to resize the window later using system-provided interface controls.
@main
struct MyApp: App {
    var body: some Scene {
        WindowGroup {
            ContentView()
        }
        .defaultSize(CGSize(width: 600, height: 400))
    }
}
Understanding Default Size Behavior
It's important to note that the specified default size is a starting point. During state restoration, the system restores windows to their most recent size rather than this default size.
If a specified default size is outside the window's resizability range, the system adjusts it to fit within permissible limits. This behavior ensures that windows adheres to both developer specifications and user adjustments.
Direct Width and Height Specification
Alternatively, developers can use the defaultSize(width:height:) modifier to directly specify the width and height for new windows. This approach simplifies the syntax and can be more intuitive in certain situations.
@main
struct MyApp: App {
    var body: some Scene {
        WindowGroup {
            ContentView()
        }
        .defaultSize(width: 600, height: 400)
    }
}
Volume size in visionOS
With the advent of volumetric windows in visionOS, understanding the default size of these 3D spaces becomes crucial for developing immersive and interactive applications.
Checking the default volume size in visionOS
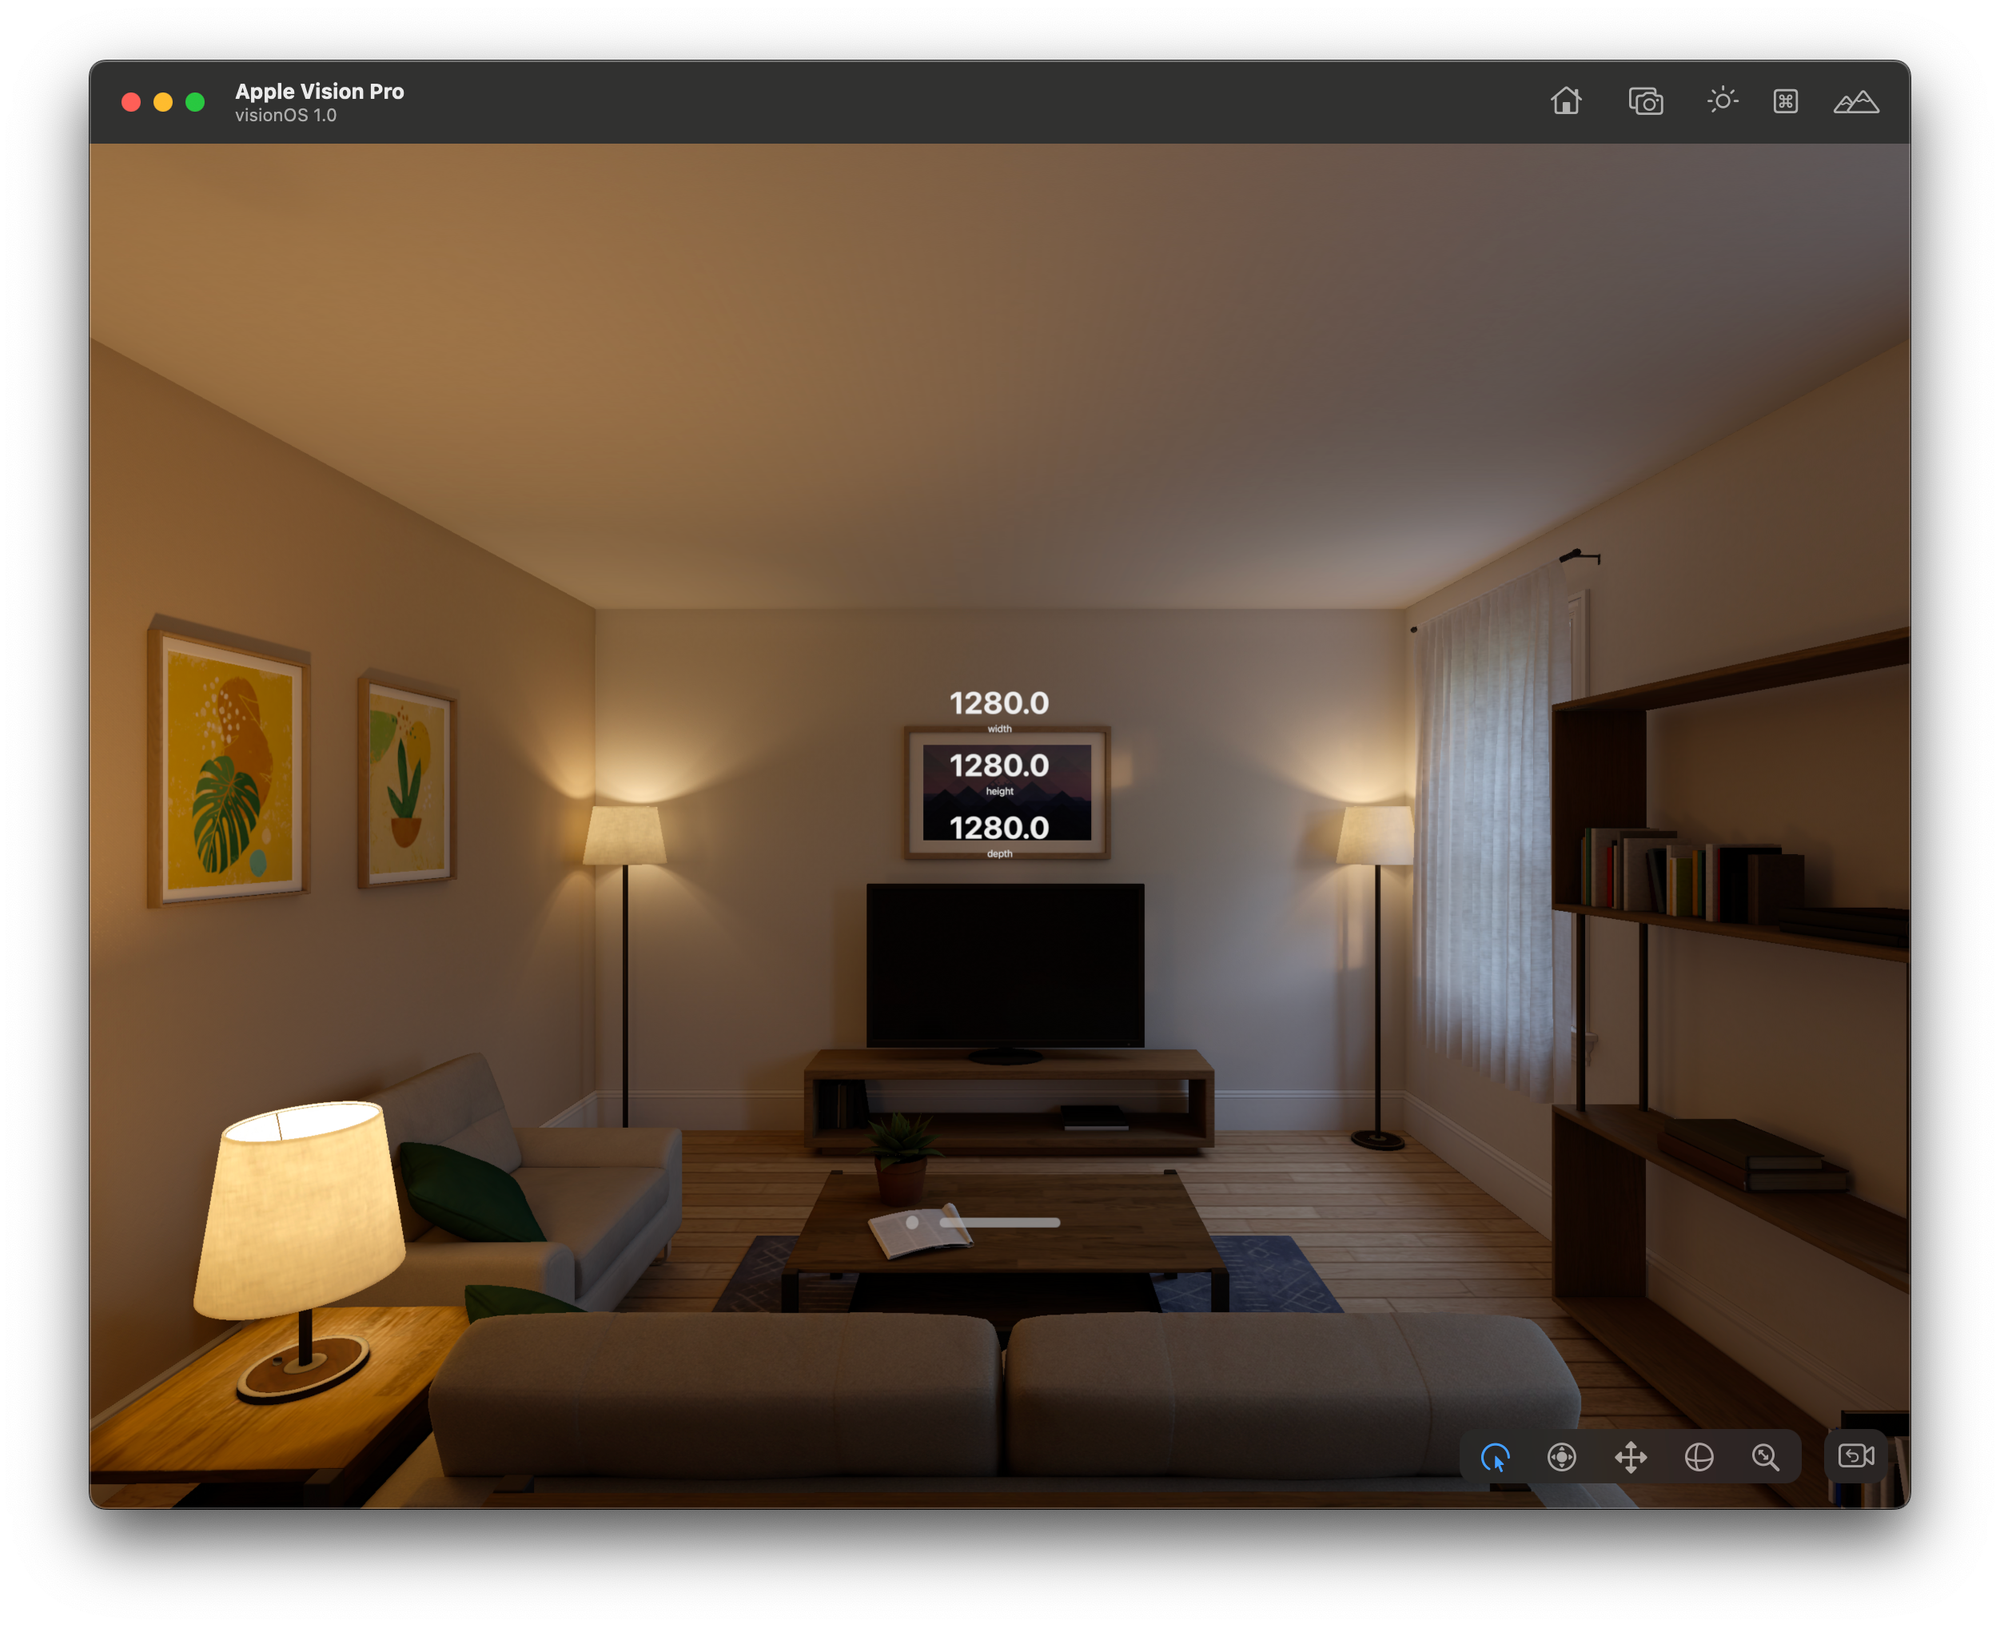
The default volume size for a volumetric window in visionOS typically begins at 1280 points for width, height, and depth. To check and display these dimensions, you can use the following Swift code in a ContentView structure designed for 3D space:
struct ContentView: View {
    var body: some View {
        GeometryReader3D { geometry in

            VStack(spacing: 20.0) {
                VStack {
                    Text(geometry.size.width.description)
                        .font(.extraLargeTitle)
                    Text("width")
                        .font(.subheadline)
                }

                VStack {
                    Text(geometry.size.height.description)
                        .font(.extraLargeTitle)
                    Text("height")
                        .font(.subheadline)
                }

                VStack {
                    Text(geometry.size.depth.description)
                        .font(.extraLargeTitle)
                    Text("depth")
                        .font(.subheadline)
                }
            }
            .frame(maxDepth: .infinity, alignment: .front)

            .position(
                x: geometry.frame(in: .local).center.x,
                y: geometry.frame(in: .local).center.y
            )

        }
    }
}
This code utilizes GeometryReader3D, a 3D variant of GeometryReader, to access the size of the volumetric view. It displays the width, height, and depth of the volume, which are essential dimensions for 3D applications.
The .frame(minDepth:idealDepth:maxDepth:alignment:) modifier is used to properly frame the content in a 3D space, and the .position(x:y:) modifier is used to center the content within the volumetric window.
As with standard windows, developers need to remember that 1280x1280x1280 points are the default size for volumes.
Setting default size for volume
In addition to the previously mentioned window configuration techniques, visionOS introduces the modifier .defaultSize(width:height:depth:) for setting up volumetric windows. This is particularly useful for applications that utilize three-dimensional space.
WindowGroup {
    ContentView()
}
.windowStyle(.volumetric)
.defaultSize(width: 600, height: 400, depth: 600)
This code snippet sets the default size of a 3D window in points, with width, height, and depth parameters. It's important to note that the size of a volumetric scene is immutable after its creation.
Specifying units for volumes
Developers can also specify the size of a volumetric window in units other than points. The .defaultSize(width:height:depth:in:) modifier allows for the dimensions to be defined in different units, such as meters:
WindowGroup {
    ContentView()
}
.windowStyle(.volumetric)
.defaultSize(width: 1, height: 1, depth: 0.5, in: .meters)
This approach provides flexibility in defining the spatial parameters of a volumetric window, catering to applications that operate on a real-world scale.
Utilizing the Size3D struct for volumes
Another variation involves using the Size3D struct to define window dimensions with the modifier .defaultSize(_:) . This approach simplifies the syntax and maintains clarity:
WindowGroup {
    ContentView()
}
.windowStyle(.volumetric)
.defaultSize(Size3D(width: 600, height: 400, depth: 600))
or with specified units, using .defaultSize(_:in:):
WindowGroup {
    ContentView()
}
.windowStyle(.volumetric)
.defaultSize(Size3D(width: 1, height: 1, depth: 0.5), in: .meters)
Other Resources
Whether you're configuring standard windows or delving into the innovative realm of volumetric windows and volumes in visionOS, understanding and effectively managing window sizes and dimensions is pivotal for creating robust, user-friendly applications.
Here are other resources you will find useful when diving deeper into the subject:
- Positioning and sizing windows: An Apple documentation article about how to influence the initial geometry of windows that your app presents.
- Hello World sample code: An Apple Xcode project on how to use windows, volumes, and immersive spaces to teach people about the Earth.
- Presenting windows and spaces: An Apple documentation article about how to open and close the scenes that make up your app’s interface
By harnessing the power of visionOS's flexible and intuitive tools, developers can ensure their applications not only meet but exceed user expectations in both two-dimensional and three-dimensional environments.