Creating an augmented reality app in SwiftUI using RealityKit and ARKit
Learn how to build your first augmented reality application for Apple devices


Augmented Reality allows developers to create new engaging experiences, projecting digital objects in a real-world environment. Apple has contributed to the development of this amazing technology by releasing powerful frameworks like RealityKit, which has the capability to render 3D graphics in real time on the most recent Apple devices.
In this tutorial, you’ll understand how RealityKit works behind the scenes and how to create a beautiful app in SwiftUI that implements RealityKit.
RealityKit vs ARKit
Diving into the world of augmented reality can be a little confusing for beginners since Apple has different technologies available for this purpose. ARKit and RealityKit are the main frameworks for building amazing AR experiences, and while they work seamlessly together, they have two different roles:
RealityKit provides high-performance 3D simulation and rendering capabilities you can use to create visionOS apps or to create augmented reality (AR) apps for iOS, macOS, and tvOS. RealityKit is an AR-first 3D framework that leverages ARKit to seamlessly integrate virtual objects into the real world.
Apple Documentation
ARKit integrates hardware sensing features to produce augmented reality apps and games combining device motion tracking, world tracking, scene understanding, and display conveniences to simplify building an AR experience.
Apple Documentation
To understand better the workflow behind these two frameworks, let’s consider the process of displaying a 3D asset on a surface, like a table:
- ARKit is responsible for tracking the device’s position and orientation in the real world and detecting features like surfaces and objects.
- ARKit provides information about the environment, such as camera images, depth information, and tracking status.
- RealityKit uses this information to create and update the AR scene. It places virtual entities in the AR space, aligning them with the detected real-world features.
The USDZ format
USDZ is a file format developed by Apple in collaboration with Pixar, designed specifically for 3D augmented reality experiences. It is crucial for AR applications because it allows developers to efficiently store and exchange 3D assets, animations, and scenes in a compact, standardized format that is optimized for mobile AR performance. When you develop your AR app, remember to adopt this format for your 3D assets. Fortunately, Apple provides a powerful tool to easily convert your assets in .usdz: Reality Converter.

Building your first AR app
By the end of this tutorial, you'll have an augmented reality application that places a 3D model of an airplane right on your desk. It's a fun way to explore the possibilities of AR development, even if you're new to it.
Before you start
Before starting to develop the app we need to download and import the model into our project and ask the user to allow our application to have access to the camera.
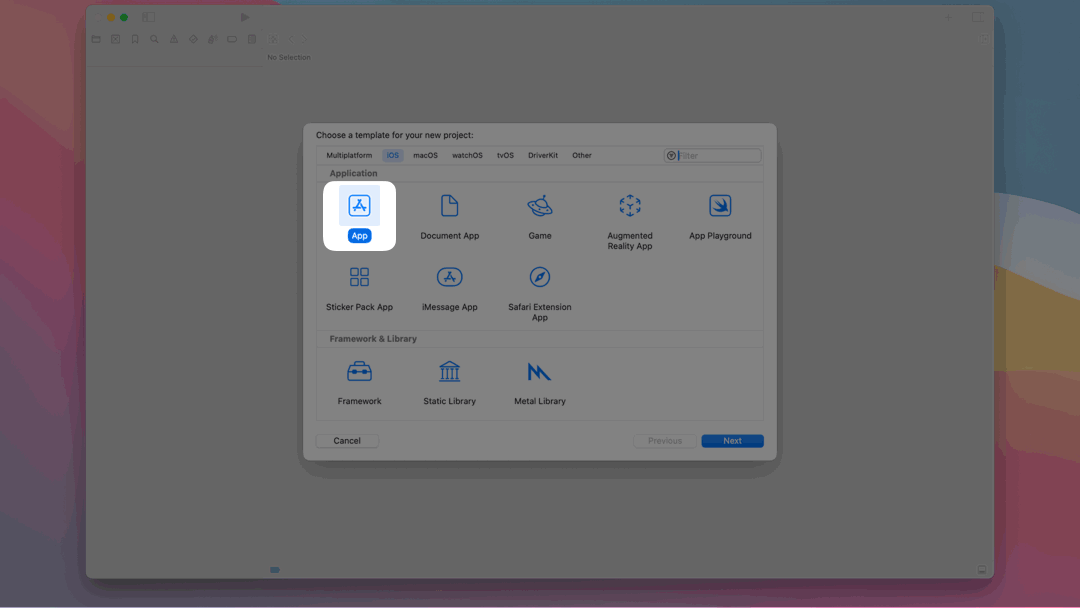
Start creating a new Xcode project selecting SwiftUI.
Download the model
First of all, we need to download our .usdzmodels model. Fortunately, Apple has a list of free models that you can easily download here. For this project, we will use the model called toy_biplane_idle.usdzand don’t forget to also download the image linked to the model and move it into the Assets folder (we will need it for our basic UI).
- Download the Toy Biplane Idle model from the 3D models section in the augmented reality quick look gallery and save the image of the model from the website (you can right-click and download the image with most browsers)
- Import the model into Xcode by dragging and dropping it into your project's
- Once imported, check the option “Copy items if needed”
- Add the image of the Toy Biplane model to your Assets folder.
Privacy Options
When developing an app that uses APIs requiring camera access, such as ARKit for augmented reality experiences, it is mandatory to add a description for the request for authorization to access the camera into the Info.plist file of your project.
This step is essential because you must ensure that users are informed and have control over how their device's camera is used.
- Go into your project settings and navigate to the Info tab, as part of your project’s target
- Add a new Key in the Custom iOS Target Properties:
Privacy - Camera Usage Description - Add a string value describing why the app needs access to the camera
Creating the Application
In this project we will need three views:
- The
ARViewContainerto set all the things to get RealityKit to work properly. - A
SheetViewthat will display the device’s camera - The
ContentViewfor displaying a basic UI
ARViewContainer
This view conforms to the UIViewRepresentable protocol. This means that what we are doing is embedding a UIView object from UIKit (in this case, an ARViewconfiguring from RealityKit) into a SwiftUI view.
// 1.
import SwiftUI
import RealityKit

// 2.
struct ARViewContainer : UIViewRepresentable {
    // 3.
    @Binding var modelName: String

    // 4.
    func makeUIView(context: Context) -> ARView {
        return ARView()
    }

    // 5.
    func updateUIView(_ uiView: ARView, context: Context) {}
}
Creating the ARViewContainer and conforming it with the UIViewRepresentable protocol
Create a new Swift file and name it ARViewContainer.swift. In the file:
- Import the
SwiftUIand theRealityKitframeworks - Create a new structure called
ARViewContainerthat conforms to theUIViewRepresentableprotocol - Create a binding variable property called
modelNameto store the name of the 3D model that will be displayed in theARView. - Create the
makeUIView(context:)method, responsible for creating a view object and configuring its initial state. - Create the
updateUIView(_:context:)method, which will update the state of the specified view with new information from SwiftUI.
The next step is creating the view that will provide us the augmented reality capabilities and present the 3D model. We will do it in the makeUIView(context:) method, instantiating a new ARView used to display the rendered 3D model to the user.
import SwiftUI
import RealityKit
// 1.
import ARKit

struct ARViewContainer : UIViewRepresentable {
    @Binding var modelName: String

    func makeUIView(context: Context) -> ARView {
        // 2.
        let arView = ARView(frame: .zero)

        // 3.
        let config = ARWorldTrackingConfiguration()
				// 3.a
        config.planeDetection = [.horizontal,.vertical]
				// 3.b
        config.environmentTexturing = .automatic

        // 4.
        arView.session.run(config)
        return arView
    }

    func updateUIView(_ uiView: ARView, context: Context) {}
}
Creating the augmented reality view
- Import the
ARKitframework, necessary for tracking the real world with the device sensors - Create an
ARViewobject to display the rendered 3D model to the user - Create a
ARWorldTrackingConfigurationconfiguration object to set up how to track the real world. Then we need to set two properties:- The
.planeDetectionproperty in order to detect flat surfaces such as tables or walls in the camera-captured image - The .environmentTexturing property for providing realistic image-based lighting for virtual objects.
- The
- Configure the
arViewinstance with theconfigobject we just created. This sets up the AR environment with the specified configuration
Now you need to load the model downloaded before and tell RealityKit how to place it on a surface.
import SwiftUI
import RealityKit
import ARKit

struct ARViewContainer : UIViewRepresentable {
    @Binding var modelName: String

    func makeUIView(context: Context) -> ARView {
        let arView = ARView(frame: .zero)

        let config = ARWorldTrackingConfiguration()
        config.planeDetection = [.horizontal,.vertical]
        config.environmentTexturing = .automatic

        arView.session.run(config)
        return arView
    }


    func updateUIView(_ uiView: ARView, context: Context) {
        // 1.
        let anchorEntity = AnchorEntity(plane: .any)

        // 2.
        guard let modelEntity = try? Entity.loadModel(named: modelName) else { return }

        // 3.
        anchorEntity.addChild(modelEntity)

        // 4.
        uiView.scene.addAnchor(anchorEntity)
    }
}
Loading the 3D model in our augmented reality view
- Create an instance of the
AnchorEntityobject setting up the plane property to.anyto detect any type of plane in the environment. Anchors tell RealityKit how to pin virtual content to real-world objects - Load the specified model from the app’s assets using the
modelNamevariable - Add the loaded model as a child to the
anchorEntityinstance - Add to the scene the anchor which will cause the 3D model to be displayed in the AR environment
AnchorEntity(plane:) initializer, but when you build your app everything will work just fine. After investigating we could not find the reason behind it, get in touch with us if you have an idea of why the error shows up.Sheet View
The SheetView consists of two main components: the ARViewContainer, where the augmented reality magic happens, and a button for transitioning from the AR experience to the ContentView.
import SwiftUI

struct SheetView: View {
	// 1.
    @Binding var isPresented: Bool
	// 2.
    @State var modelName: String = "toy_biplane_idle"

    var body: some View {
				Text("Hello world!")
    }
}

#Preview {
	// 3.
    SheetView(isPresented: .constant(true))
}
Setting up the view that will present the 3D model
Create a new SwiftUI file and name it SheetView.swift. In the file:
- Create a binding to a boolean var to trigger the opening of this View
- Create a modelName variable to pass the name of the 3D model to the
ARViewContainer - The Preview will expect a boolean value, you can use
.costant(true)to make it work on the canvas
The next step is to use the previously created ARViewContainer in our view.
struct SheetView: View {
    @Binding var isPresented : Bool
    @State var modelName : String = "toy_biplane_idle"

    var body: some View {
        // 1.
        ZStack{
            // 2.
            ARViewContainer(modelName: $modelName)
                .ignoresSafeArea(edges: .all)
        }
    }
}

#Preview {
    SheetView(isPresented: .constant(true))
}
Instantiating the view container to present the 3D model
- Create a
ZStackcontainer - Put the
ARViewContainerview into theZStackwith a.ignoresSafeArea(edges: .all)modifier. This will guarantee that the view will take the entire screen
struct SheetView: View {
    @Binding var isPresented : Bool
    @State var modelName : String = "toy_biplane_idle"

    var body: some View {
        // 1.
        ZStack(alignment: .topTrailing) {

            ARViewContainer(modelName: $modelName)
                .ignoresSafeArea(edges: .all)

            // 2.
            Button() {
                isPresented.toggle()
            } label: {
                Image(systemName: "xmark.circle")
                    .font(.largeTitle)
                    .foregroundColor(.black)
                    .background(.ultraThinMaterial)
                    .clipShape(Circle())
            }
    		.padding(24)
        }
    }
}- Define the alignment of the
ZStackto be.topTrailingto position our button on the top right of the view - Create a
Buttonto close theSheetView. Notice that the background of the button is.ultraThinMaterial, so it’s not blocking the content behind it
Content View
This SwiftUI view is responsible for displaying a simple user interface consisting of an image and a button.
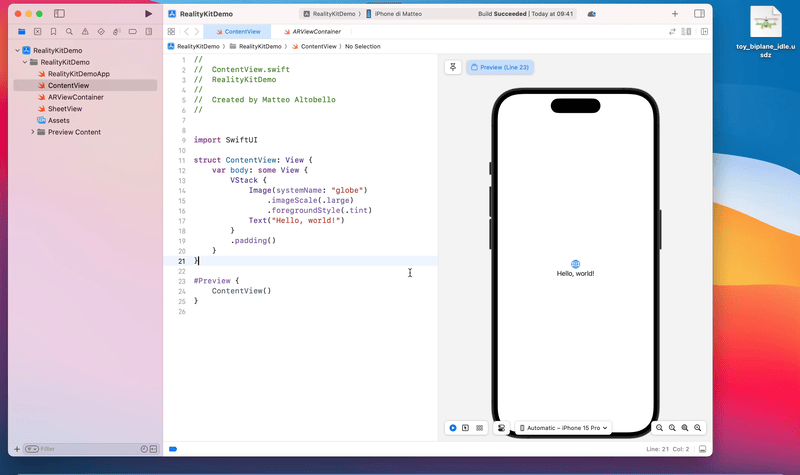
struct ContentView: View {
	// 1.
	@State var isPresented: Bool = false

    var body: some View {
        VStack {
            Image(systemName: "globe")
                .imageScale(.large)
                .foregroundStyle(.tint)
            Text("Hello, world!")
        }
        .padding()
    }
}
Creating the variable to show the augmented reality view
- In the
ContentViewdeclare a variable namedisPresentedof a boolean type, that will be used to present theSheetView
import SwiftUI

struct ContentView: View {

    @State var isPresented: Bool = false

    var body: some View {
        VStack {
            // 1.
            Image("plane")
                .resizable()
                .scaledToFit()
                .foregroundStyle(.tint)
                .clipShape(RoundedRectangle(cornerSize: CGSize(width: 20, height: 20)))
                .padding(24)

            // 2.
            Button {
                isPresented.toggle()
                    } label: {
                        Label("View in AR", systemImage: "arkit")
                    }.buttonStyle(BorderedProminentButtonStyle())
                .padding(24)


        }
				.padding()

        // 3.
        .fullScreenCover(isPresented: $isPresented, content: {
           SheetView(isPresented: $isPresented)
        })

    }
}
Example of a simple UI: how to display an image and a button
- Add an
Imageview to show the image of the 3D model, downloaded at the beginning - Add a
Buttonview to present theSheetViewwhen pressed - Add the
.fullScreenCover(isPresented:onDismiss:content:)modifier that will be triggered by theisPresentedvariable, presenting theSheetViewcovering the entire screen.
Conclusion
Now it’s time to see the result! You are ready to run the app on your iPhone or iPad.
We've seen that RealityKit offers a straightforward and intuitive approach to augmented reality development, unlocking a world of exciting possibilities for developers.
Now you are ready to build your amazing AR app. Don’t forget to check the Human Interface Guidelines in the Augmented Reality section, which will provide valuable insights and best practices for designing augmented reality apps.