
Creating an Object Detection Machine Learning Model with Create ML
By the end of this tutorial, you will be able to build and train an object detection machine learning model with Create ML

Let’s use Create ML to create a custom object detection machine learning model that would detect different types of sushi. I love sushi, so for me this makes perfect sense. Of course you can adapt this following demo to a use case that makes sense for you.
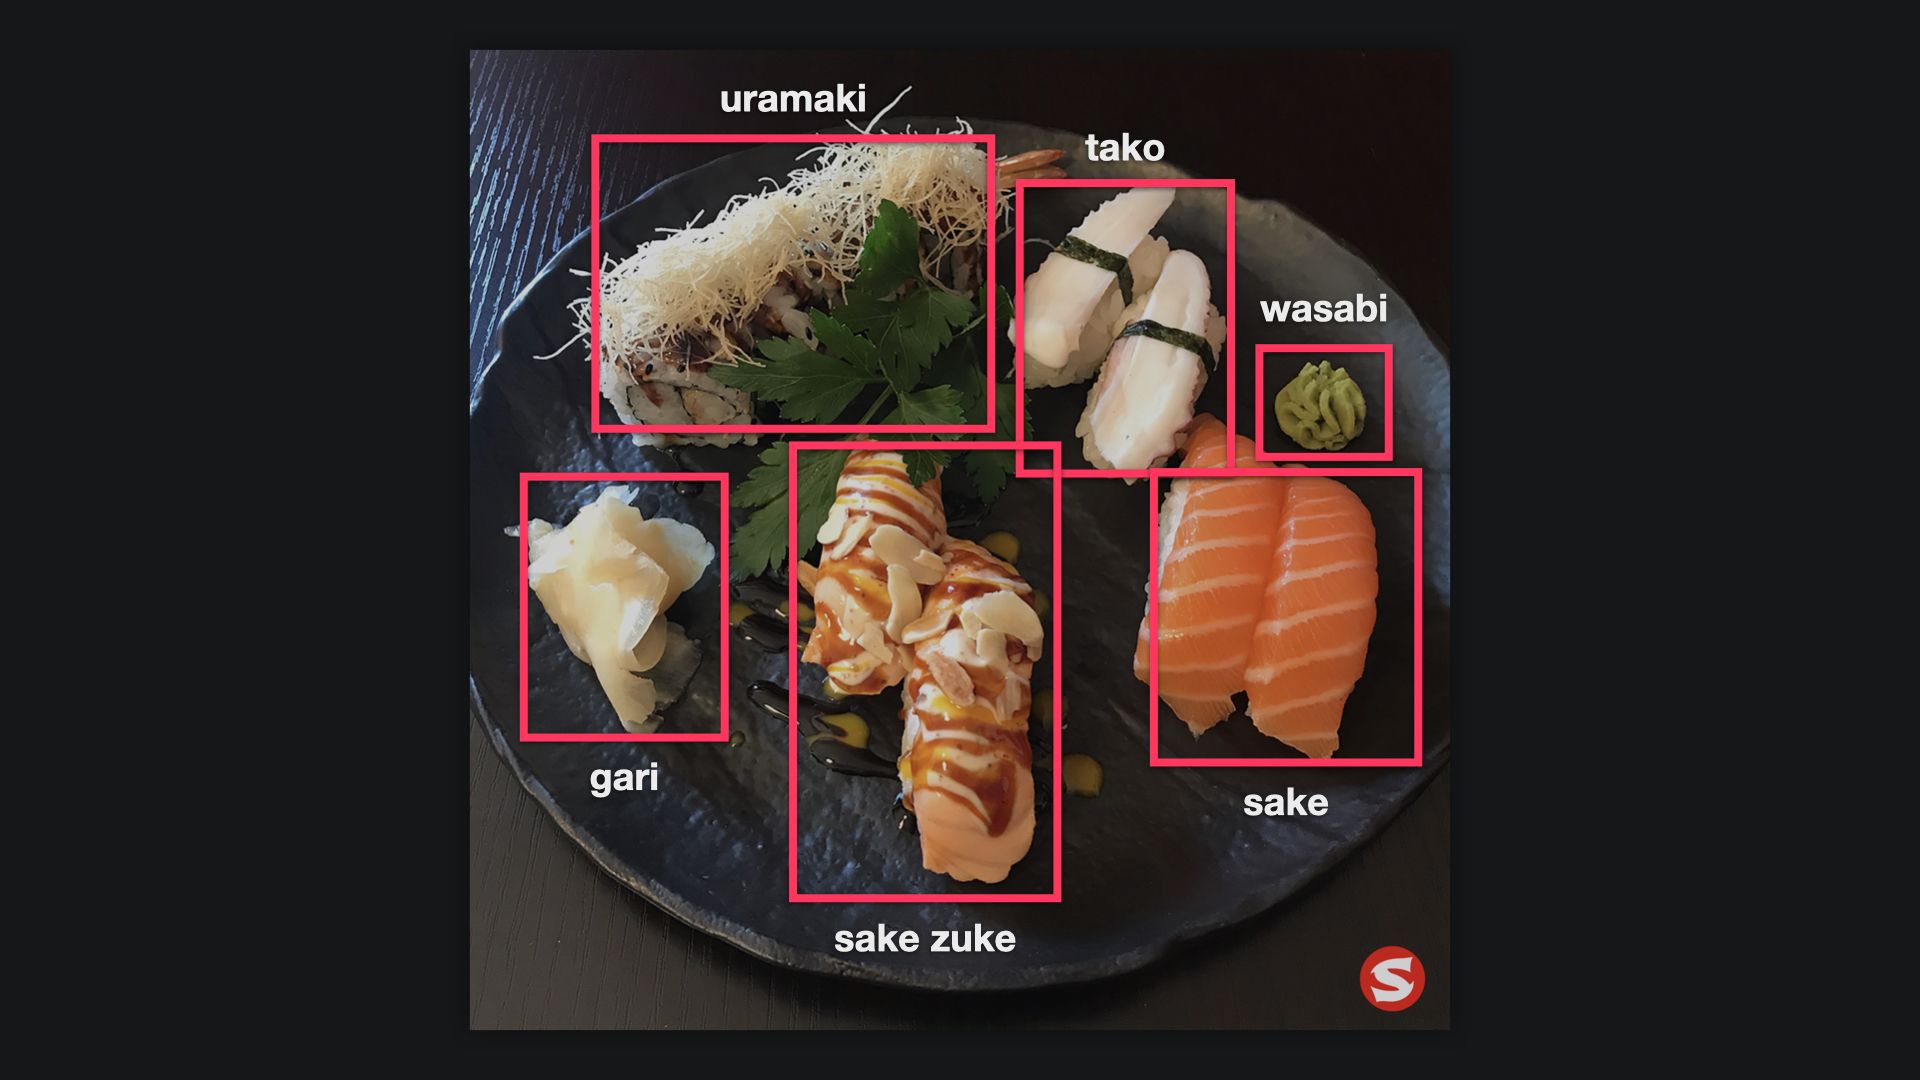
Object detection models focus on the detection of objects inside areas of an image that can be classified. If the goal would be to have a model to detect different types of sushi, an object detection model can detect multiple objects in any image. For example in this image, it would detect salmon but also other sushi types, such as taco, which is octopus, or gari, which is pickled ginger, and wasabi and so forth.
Let's see how we can create such an object detection model.
What you need
What you will need is sets of training data, validation data and testing data to build and train the model. In this case, it would have to be images of sushi dishes. Luckily, as a long time sushi aficionado, I took many photos of sushi dishes whenever I visited a sushi restaurant, so I got this covered. The images I took to training this model were all taken by me. For your use case, make sure you either create your own dataset of images or procure images from a data source that you have the right to use.
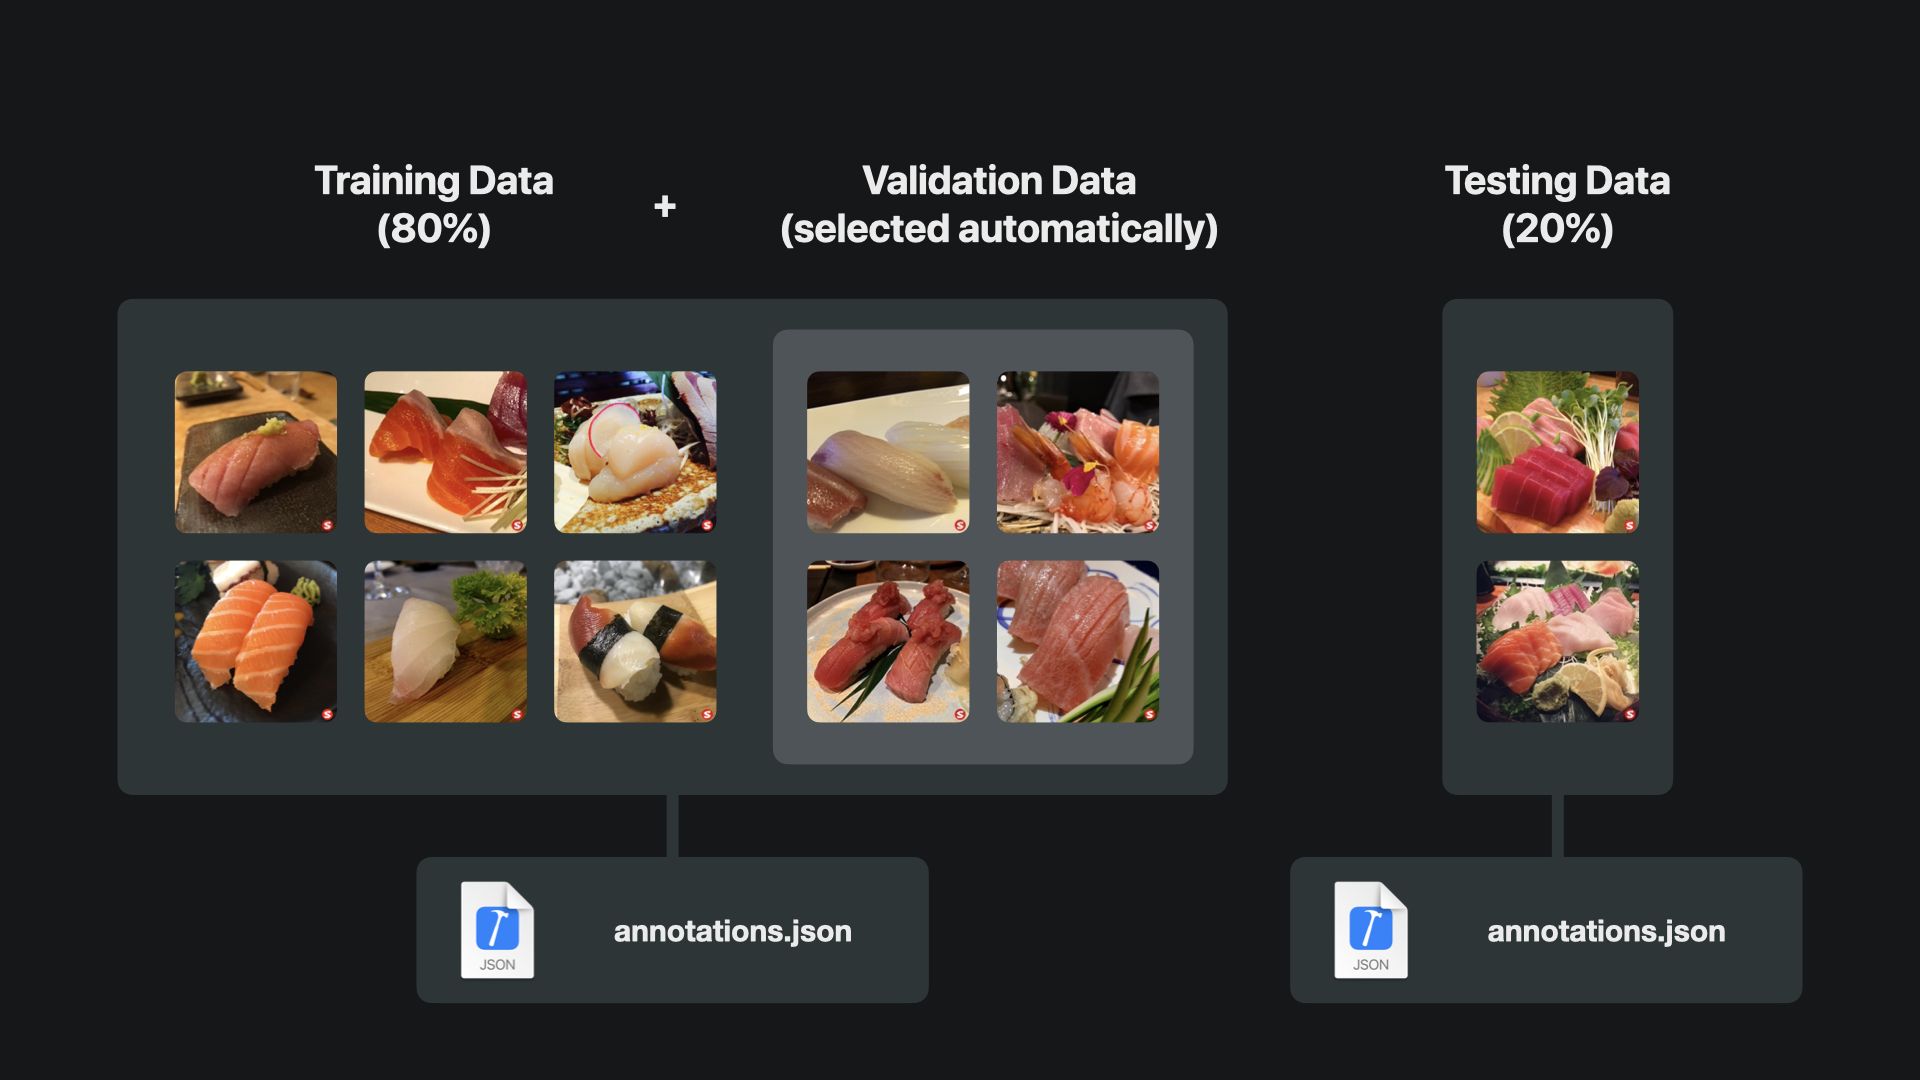
Object Detection models can be created with as few as just 30 images per class of sushi type and the amount of data should spread among 80% of training data and 20% testing data. For validation you can also provide a dedicated data set. But by default, Create ML will take a small subset of the training data and use it for validation automatically. Even though not so many images are needed to create a working object detection model, you might still require hundreds or even thousands of images to reach good results, depending on the amount of different classes you want to feature.
For this type of model you also need to create an annotations.json file that contains the metadata for all images to train the model.The annotation JSON file has to specify each object inside every image in the dataset. This means for every image you have to provide the coordinates and size of the box where the object is located, as well as the label for the class so Create ML understands how to use the dataset to train the model.
[
    {
        "image": "image1.jpg",
        "annotations": [
            {
                "label": "salmon",
                "coordinates": {
                    "x": 120, "y": 164, "width": 230, "height": 119
                }
            },
            {
                "label": "tuna",
                "coordinates": {
                    "x": 230, "y": 321, "width": 50, "height": 50
                }
            }
        ]
    }
]
Obviously, this doesn’t look very convenient, but luckily there are free toolchains to support this process and make the annotation of images light as a breeze. For example, you can use IBM Cloud Annotations, which is free and will cover everything that you need. If you are interested, check out our tutorial on how to create annotated datasets.
Once you have your training and testing datasets alongside the corresponding annotations.json files, you can create a start to train and build you custom Core ML model with Create ML.
Starting a new project in Create ML
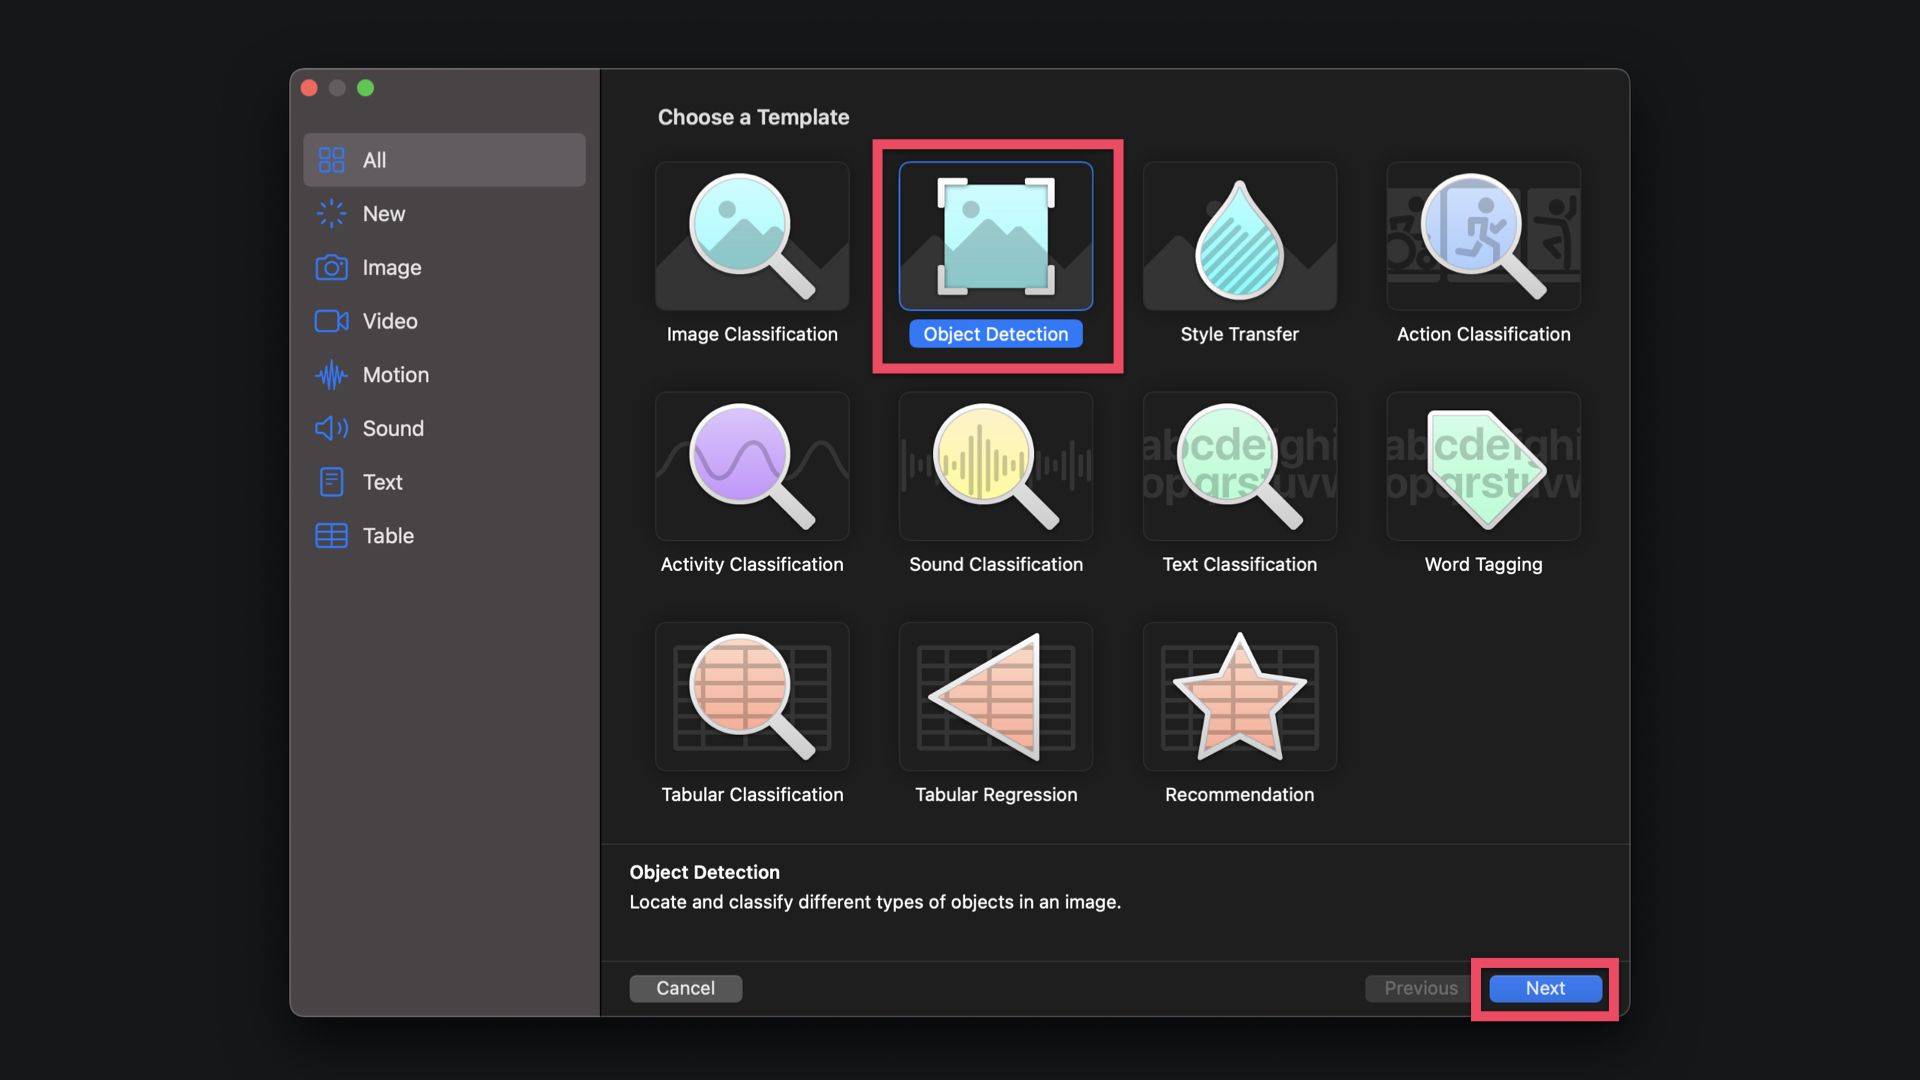
Now you have everything you need to start building and training the machine learning model in Create ML. For this, open the Create ML app and create a new project. From the template chooser, select Object Detection and click next.
In the following step you can provide a Project Name, the Author Name and a description of the project. If you want, you can also specify a license for your model.
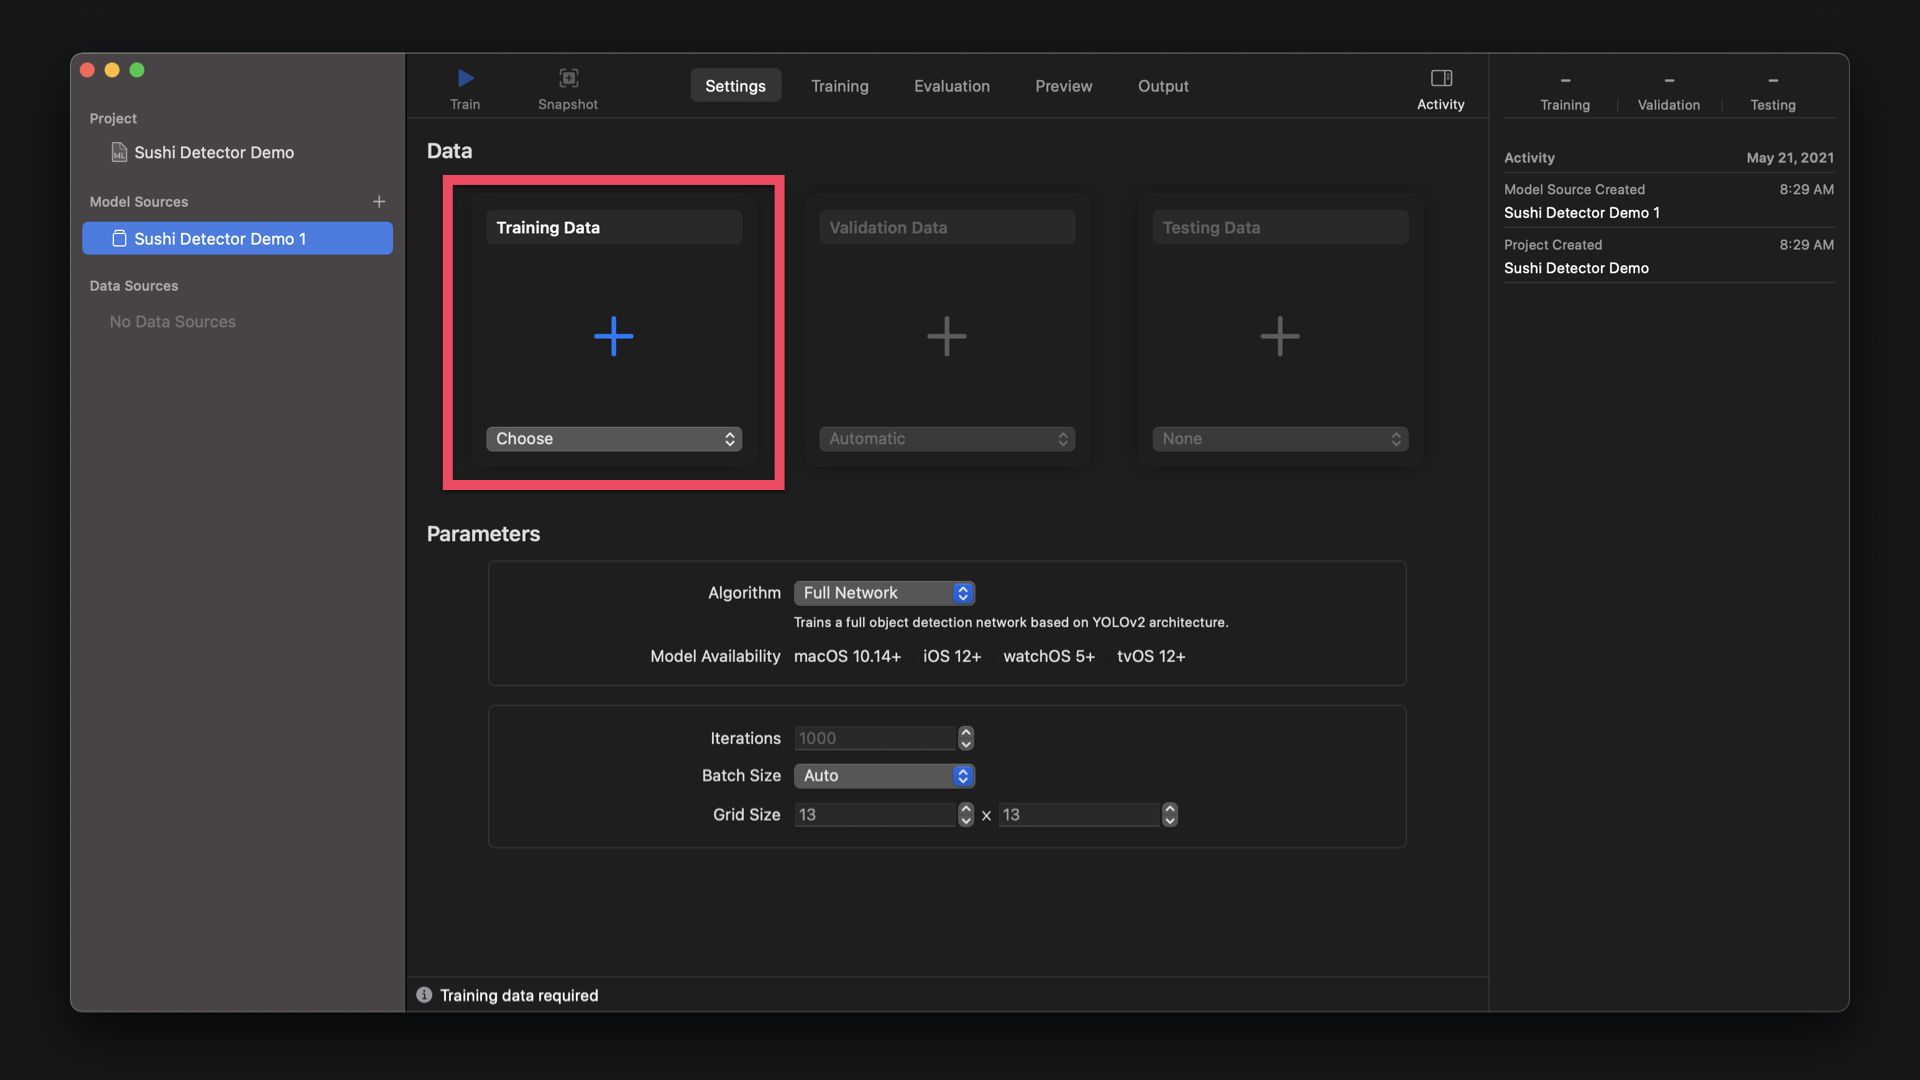
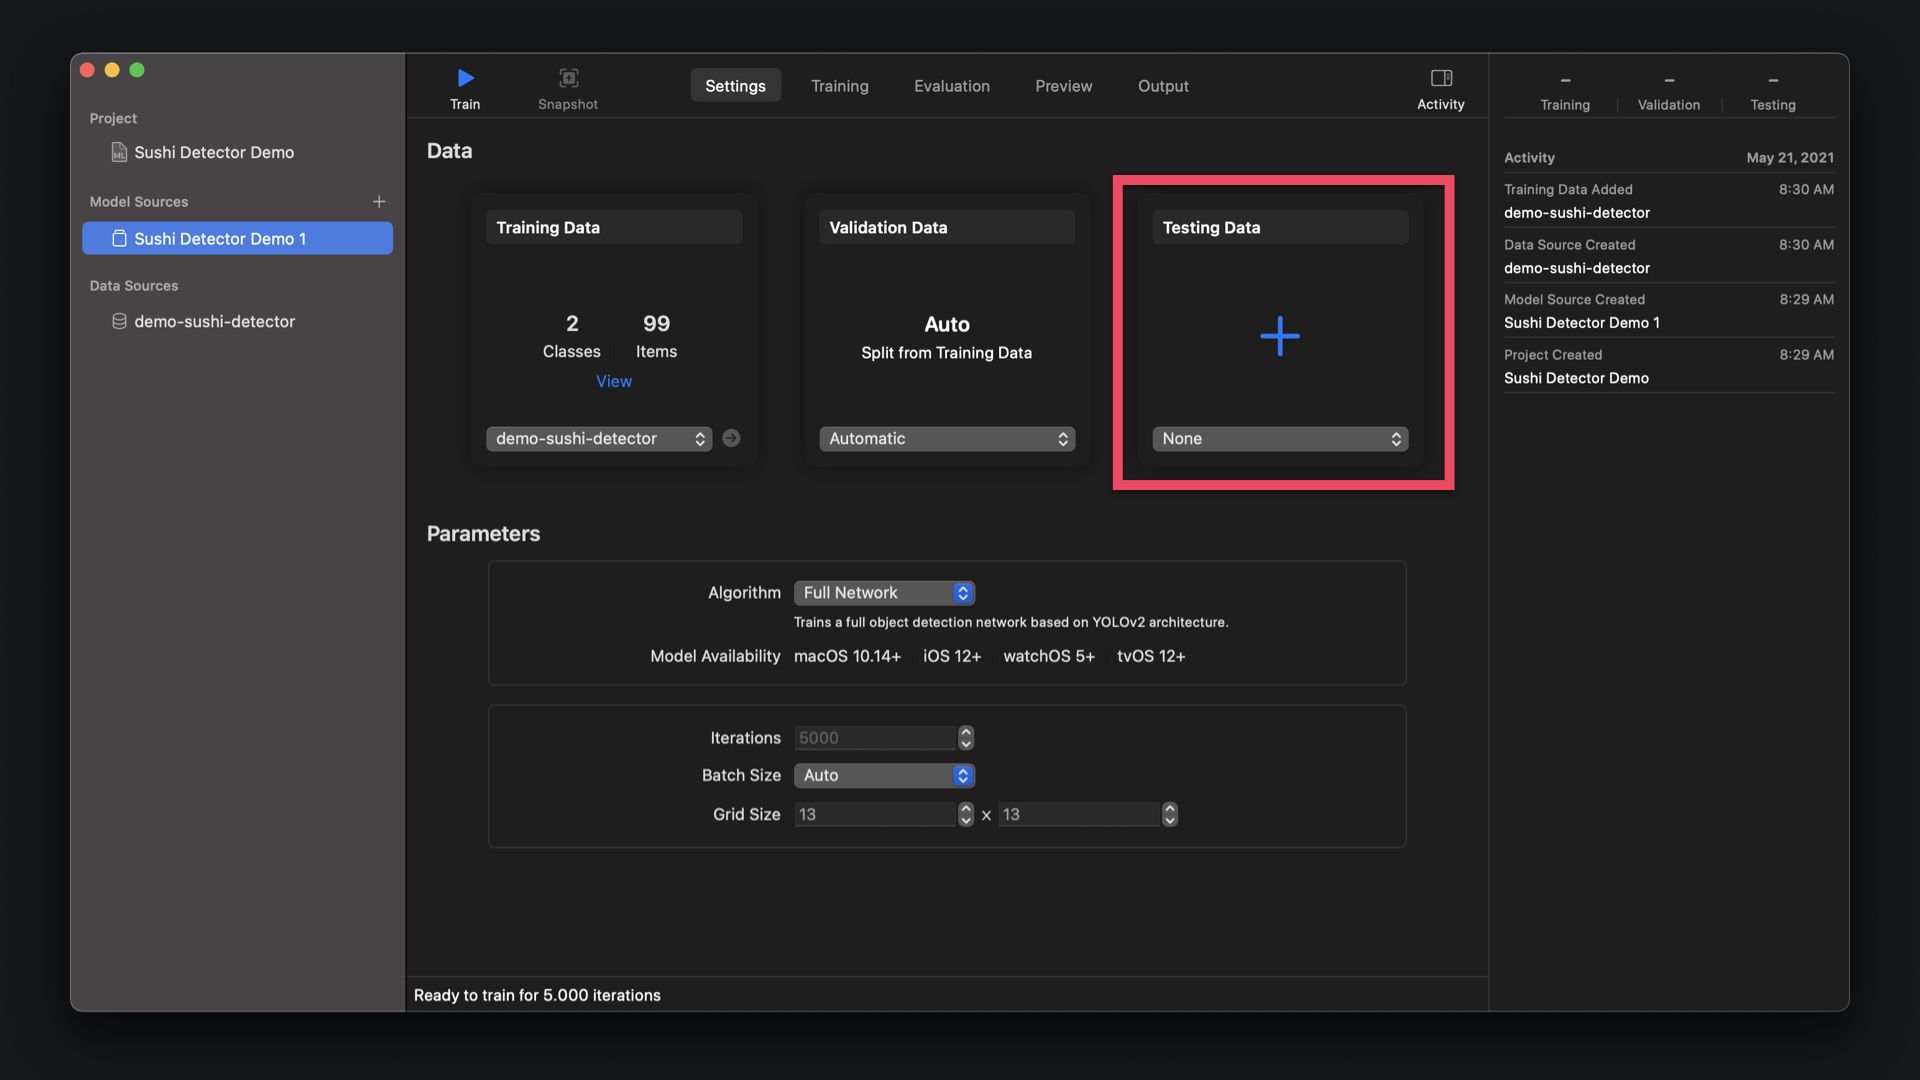
Now you are in the main project window of Create ML. For the model, let's now select the datasets to get started. For this, select the appropriate dataset you downloaded from Cloud Annotations. For the Validation Data, you can leave the settings at Automatic for now. Create ML will select a subset of the training data for validation. Alternatively, you could create a third dataset on Cloud Annotations and add it here. Last, but not least select the testing data set you downloaded from Cloud Annotations. Now everything is set up of training.
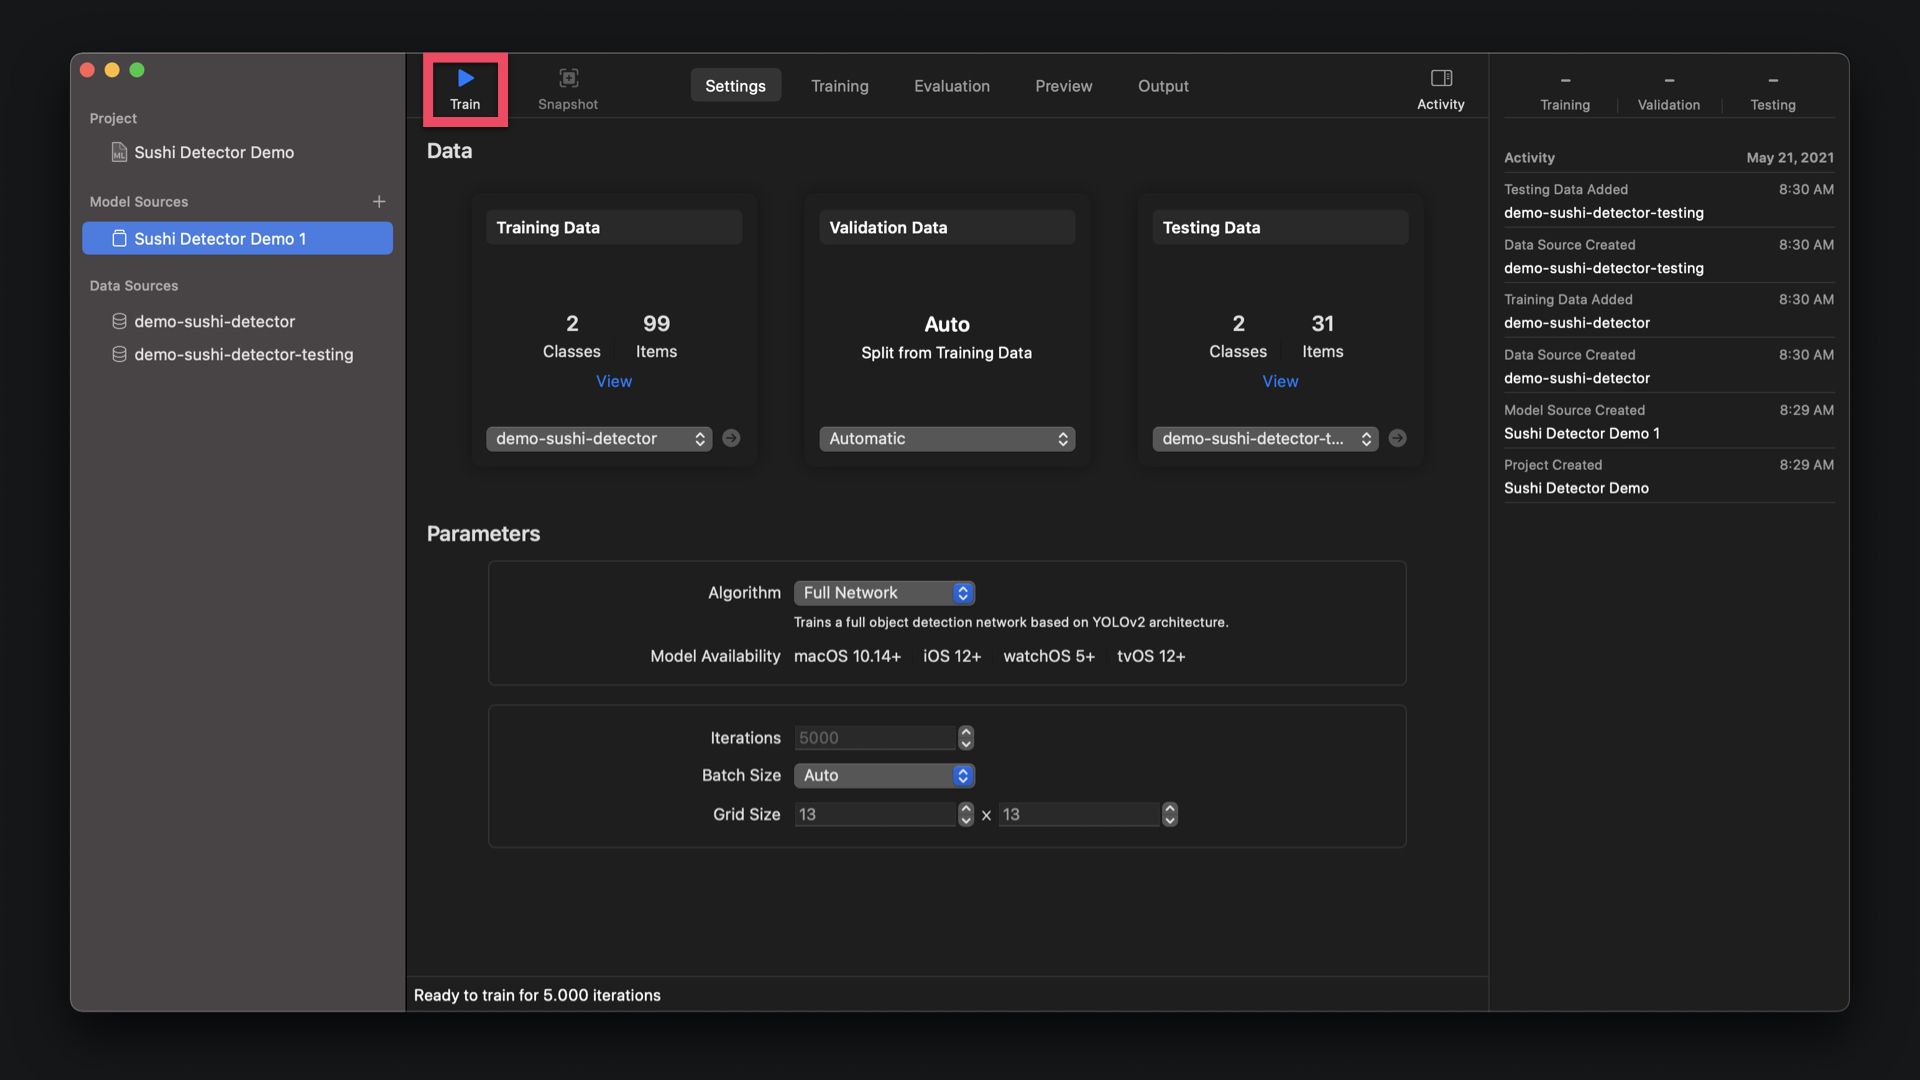
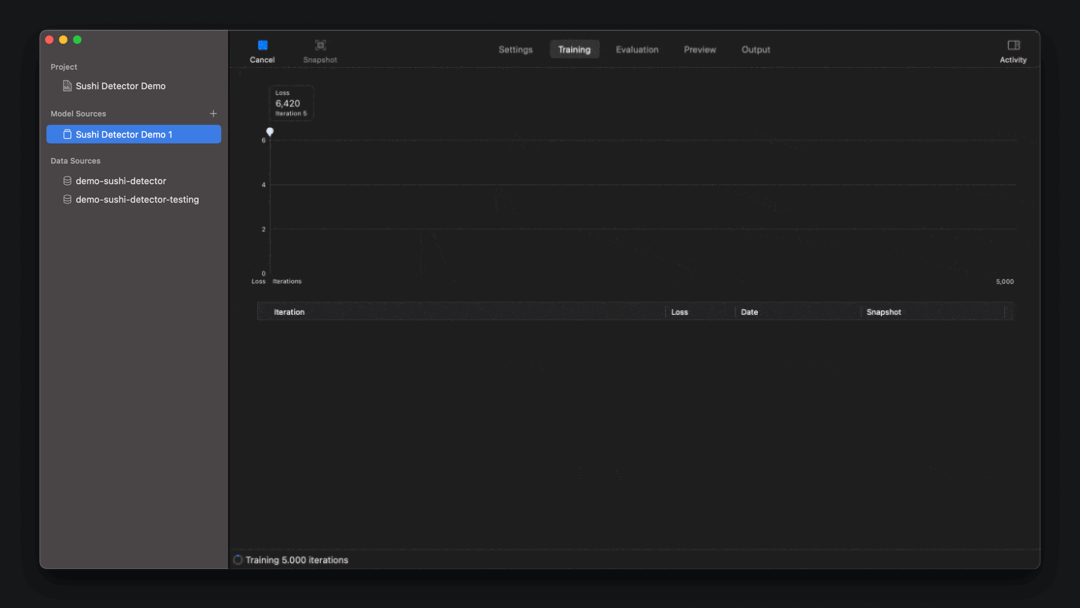
By clicking train in the upper menu bar, you can start the training process. Depending on your datasets and number of classes, the training process can take few minutes to many hours or even days. You can watch the progression of the training, but it might be smart to do this at times when you don’t need your machine. Once the training has completed, you can see the training outcome and the metrics in the evaluation tab for all the classes you are training.
Evaluating and Testing the Model
You can explore the training of your model and its validation, which will indicate how precise your model predicts objects using the validation subset of data. Similarly, with the testing data, you can verify how well your model performs with a set of data that is not known to the model.

Preferably, these values should be high to reach a result that would work well in production. Pay close attention to the Intersection over Union (IoU) indicator to evaluate your object detection model.
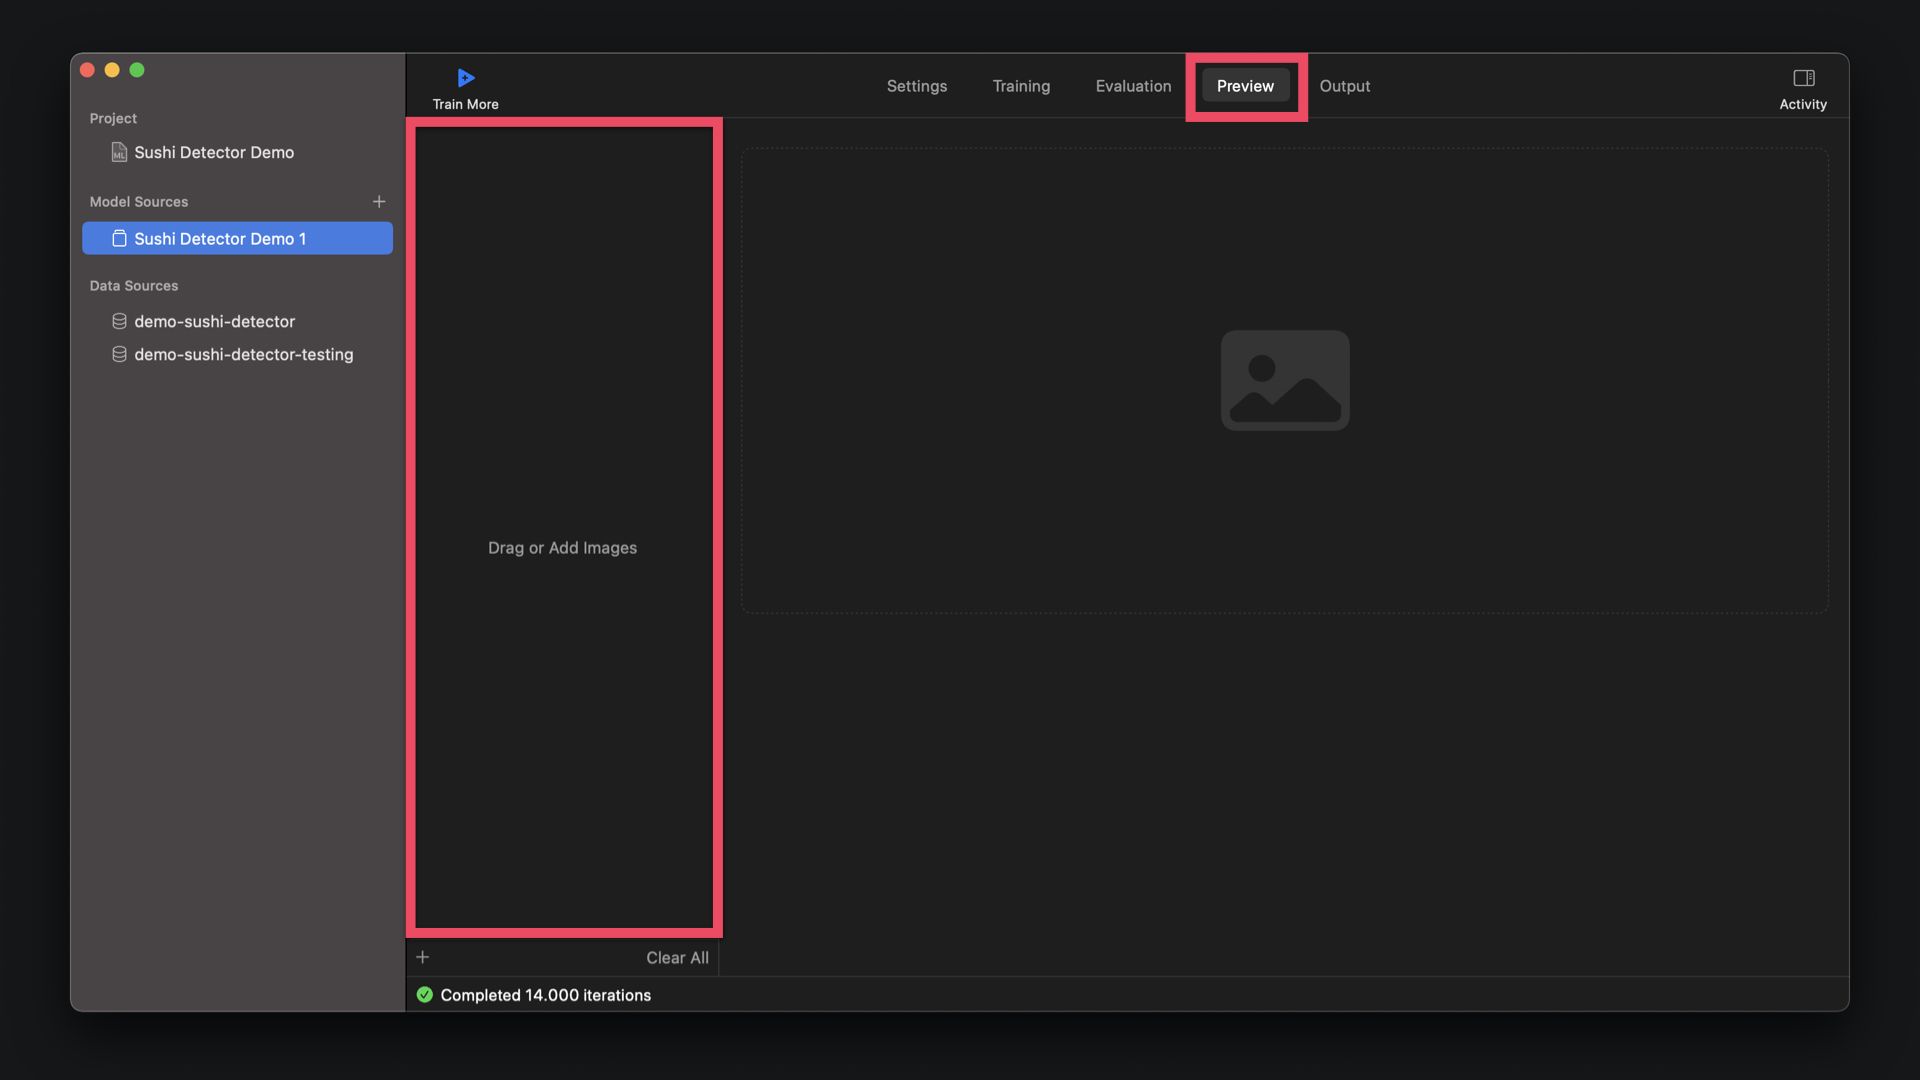
You can also also test your model by adding images to the preview section to trial run the model ad hoc. This is nice and convenient feature of Create ML and saves you a lot of time. You don't have to export the model into Xcode and install apps in your device for testing. You can even use Continuity to your iPhone camera to provide input data for Create ML to test model. Also, you can add images via drag and drop.
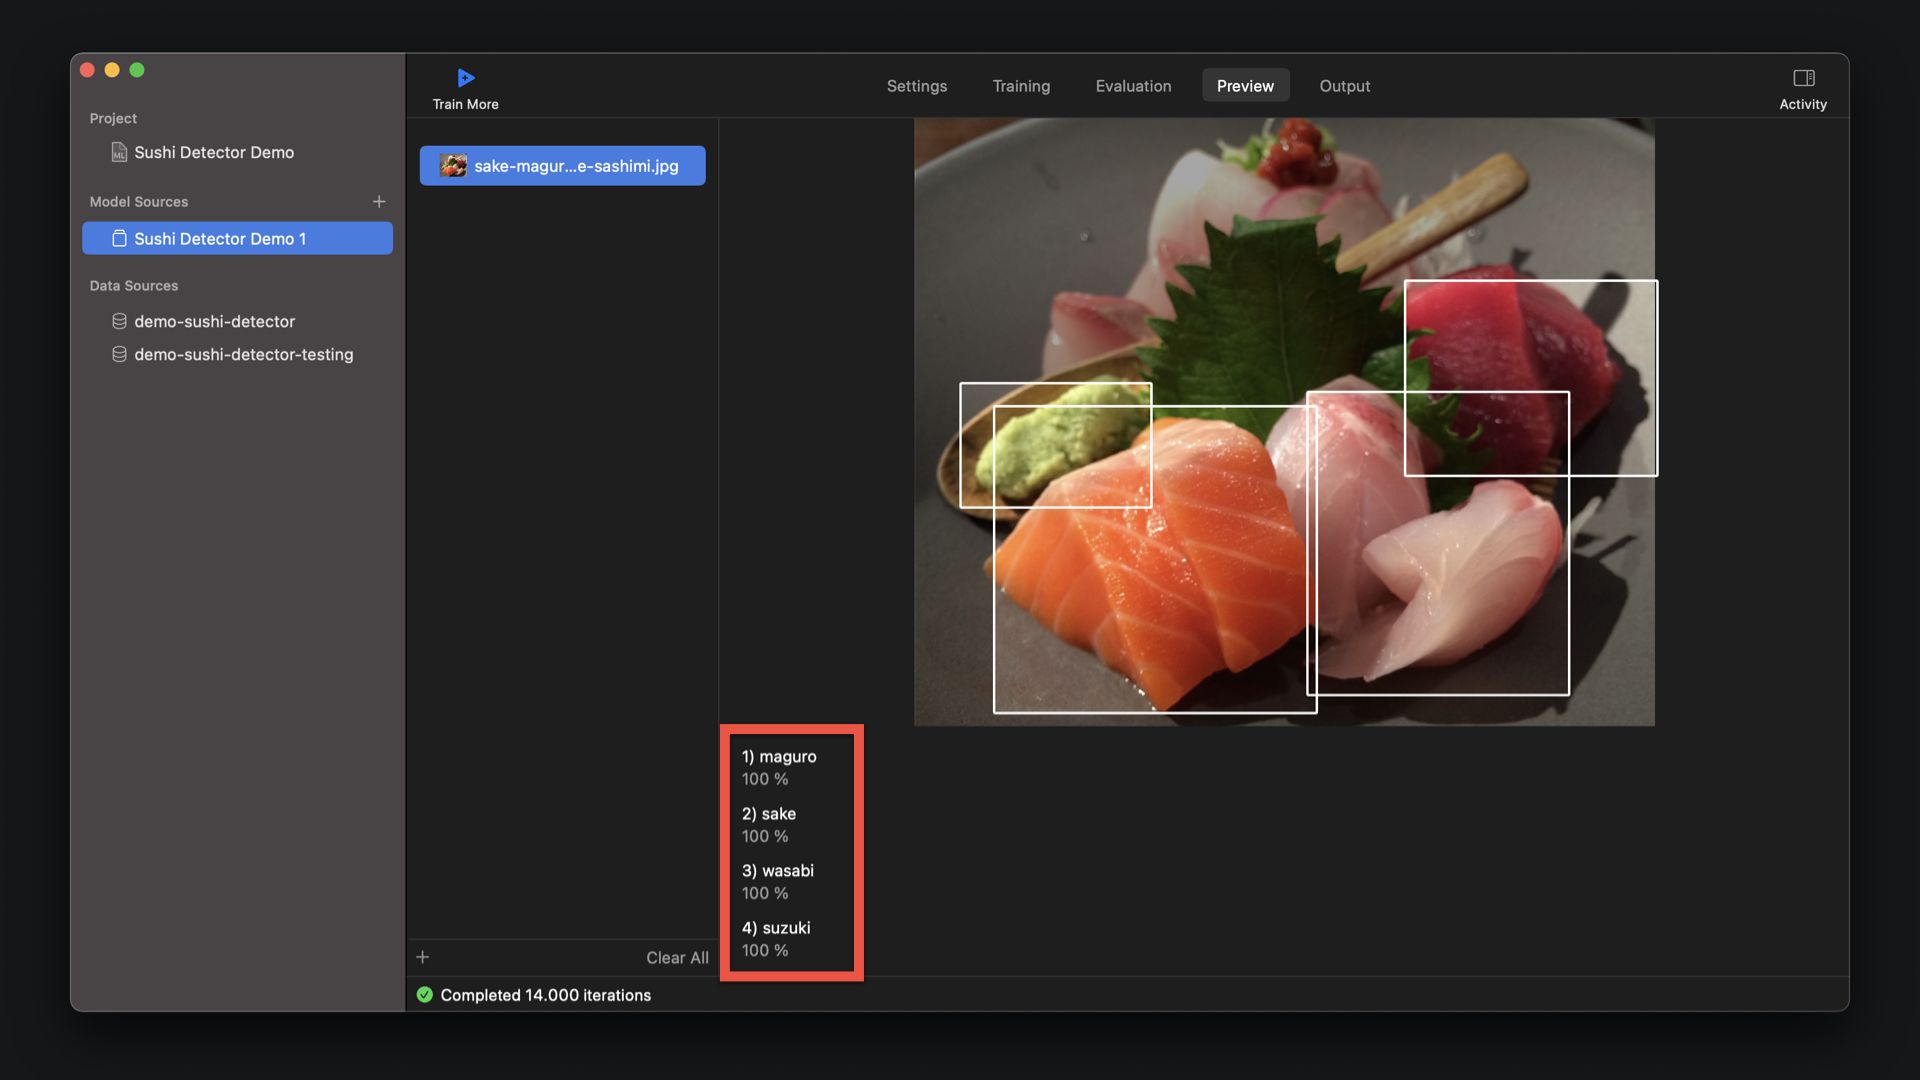
Here I have an image that works very well with the model. All three types of sushi have been correctly detected and marked in the image. With the second image however, only 4 sushi types have been detected. The fifth type, which is a bit hidden was not detected. This indicates areas of improvement for the model.
Exporting the Core ML Model
Once you are satisfied with the model you can directly use it in Xcode. For this you can go to the output tab and share the model with Xcode. You can also just sage the .mlmodel file or even share the Core ML model via email etc. For this however, you should consider the size of the model, which is not just critical when considering the size of the app you are creating, but also when sharing the model.
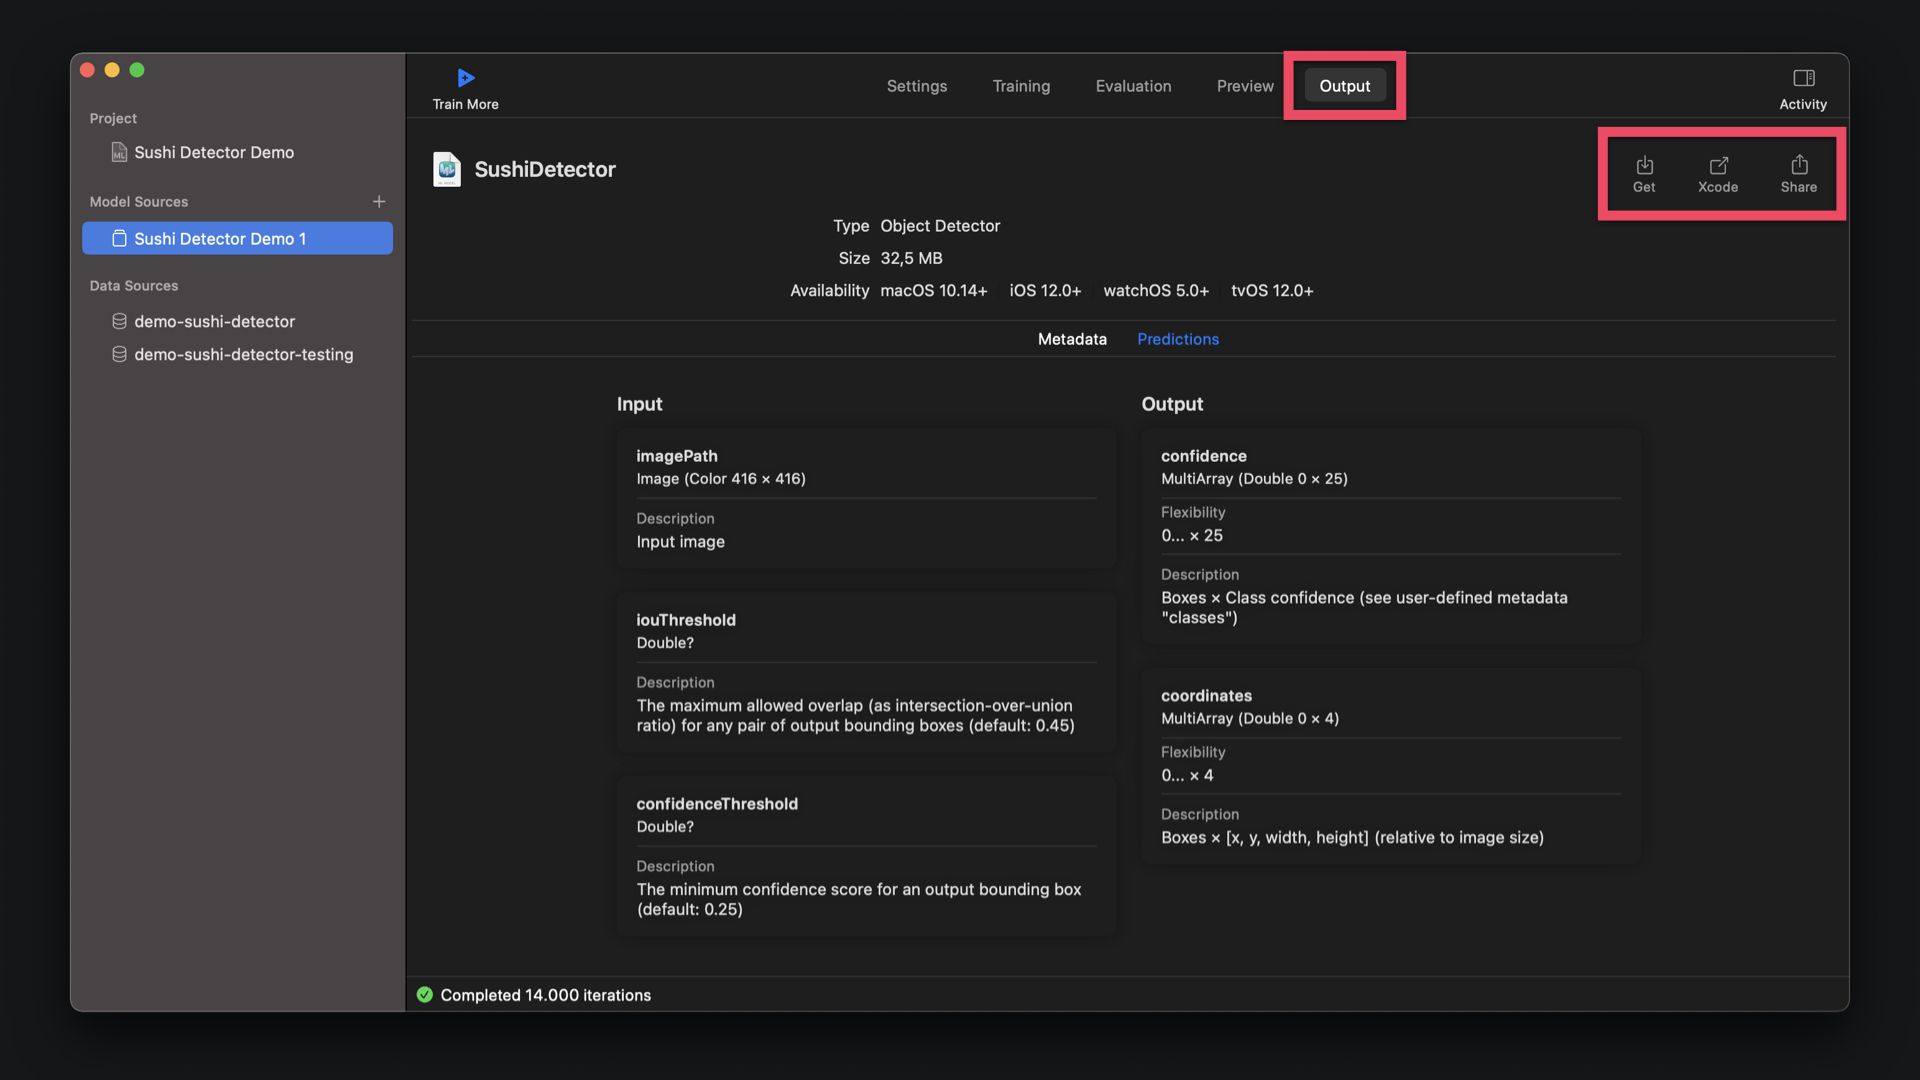
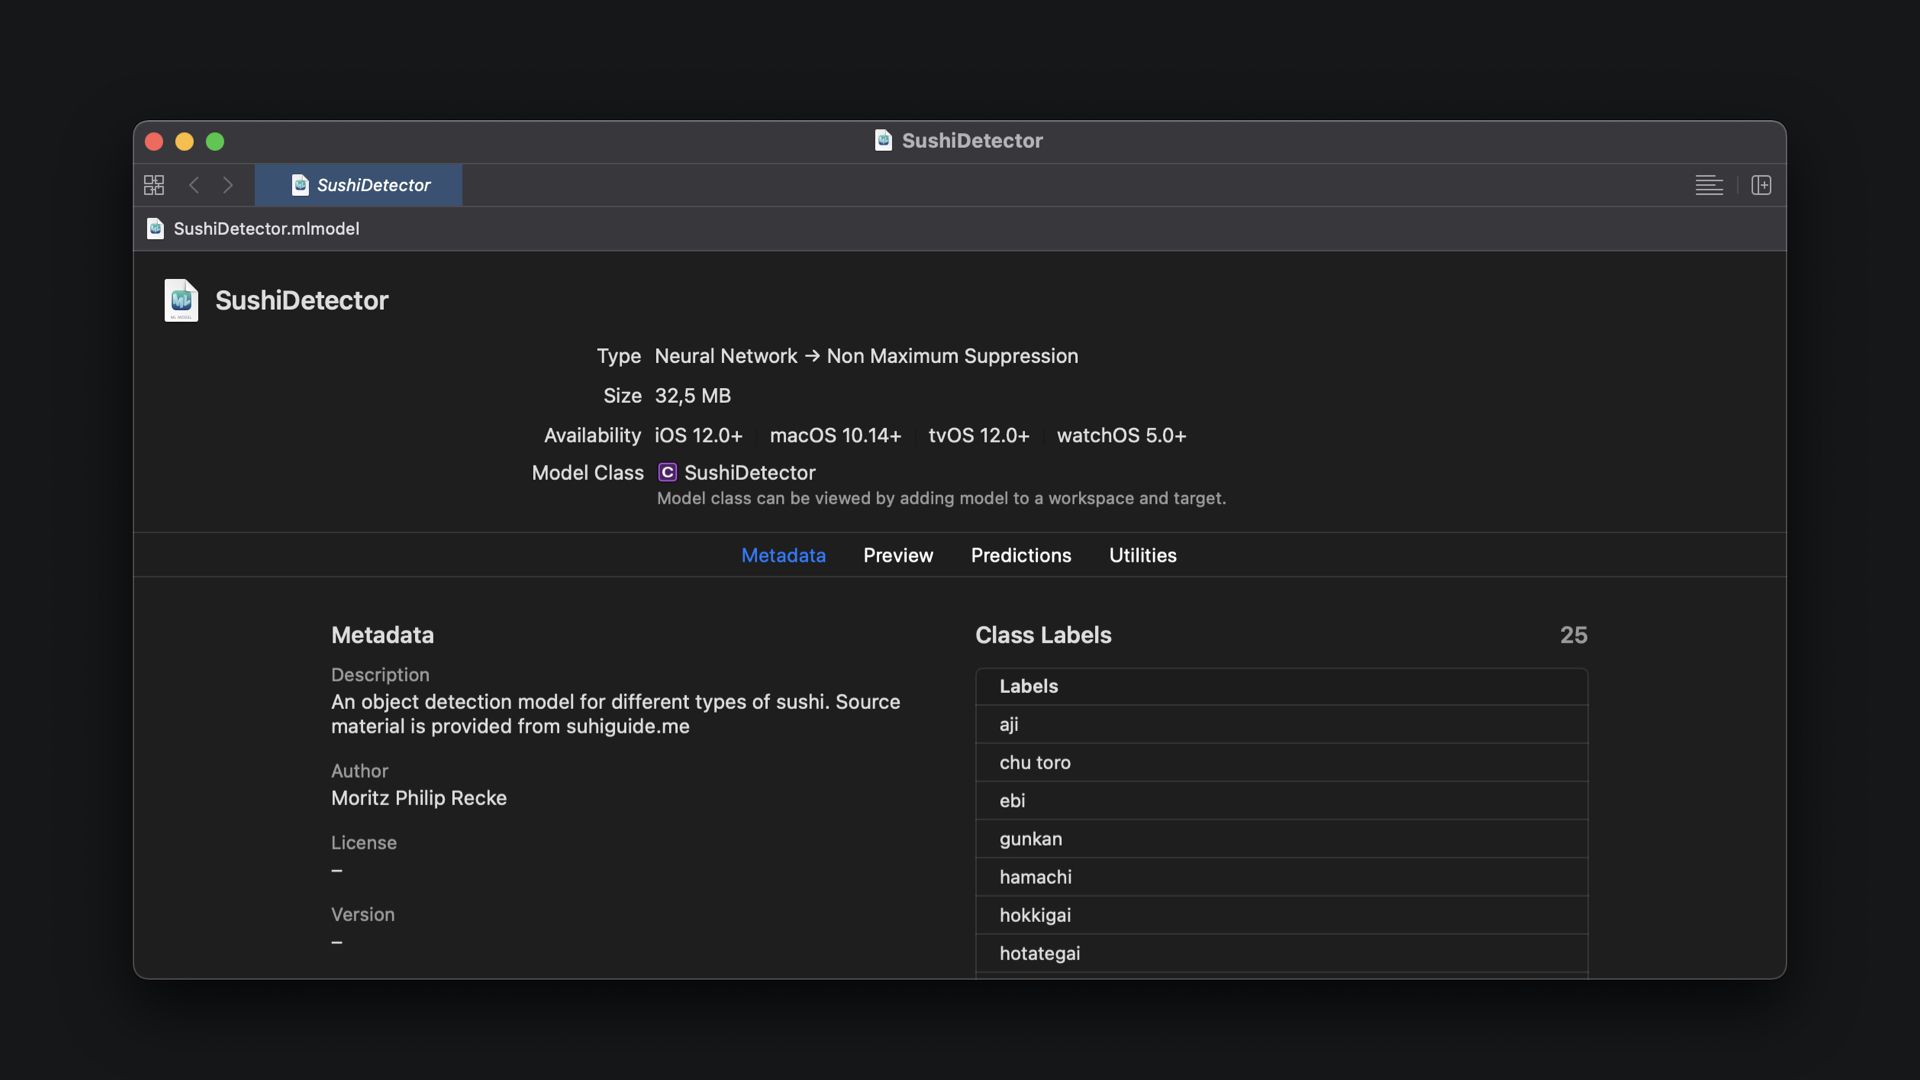
In the Output tab you can see also see the detailed specifications of the model. For example you can see input and output parameters and specific datatypes that are required to work within the app. This is the same overview that you can access by opening the Core ML model inside Xcode, showing how neatly the tools are integrated with each other.
This tutorial is part of a series of articles derived from the presentation Creating Machine Learning Models with Create ML presented as a one time event at the Swift Heroes 2021 Digital Conference on April 16th, 2021.
Where to go next?
If you are interested into knowing more about using Object Detection models or Create ML in general you can check other tutorials on:
- Creating annotated data sets with IBM Cloud Annotations
- Create ML Explained: Apple's Toolchain to Build and Train Machine Learning Models
- Core ML Explained: Apple's Machine Learning Framework
- Use an Object Detection Machine Learning Model in an iOS App using SwiftUI
- Use an Object Detection Machine Learning Model in Swift Playgrounds
You want to know more? There is more to see...
Recommended Content provided by Apple
For a deeper dive on the topic of creating object detection machine learning models, you can watch the videos released by Apple on WWDC:
- WWDC 2019 - Introduction the Create ML App
- WWDC 2019 - Training Object Detection Models in Create ML
- WWDC 2020 - Control training in Create ML with Swift
Other Resources
If you are interested into knowing more about creating machine learning models with Create ML, you can go through these resources:
- To understand the meaning of the graphs and metrics created by Create ML while building and traing models, read How to use Learning Curves to Diagnose Machine Learning Model Performance.
- To understand how the Intersection over Union (IoU) method for evaluating object detection models works, read Intersection over Union (IoU) for object detection.
- To learn how to use metrics to tune the performance of your machine learning model, consider Improving Your Model’s Accuracy in the official Apple documentation.