Developing Apps with the HomeKit Accessory Simulator
Understand how to use Apple's HomeKit Accessory Simulator (HAS) to simulate smart home accessories when developing HomeKit-enabled apps.

If you are developing a HomeKit-enabled app and want to test accessories your app may be able to control, Apple's HomeKit Accessory Simulator (HAS) is what you need.
The HomeKit Accessory Simulator can simulate any accessory and help automate your testing process. You can configure accessories with standard and custom services and characteristics and even simulate network cameras or video doorbells with your Mac's system camera.
The HAS comes as a part of the Additional Tools for Xcode package and can be downloaded from the Apple Developer Website. Inside the package, there is a Hardware folder in which you can find the HomeKitAccessorySimulator.app that you may put in your Applications folder.
Accessories, Services & Characteristics
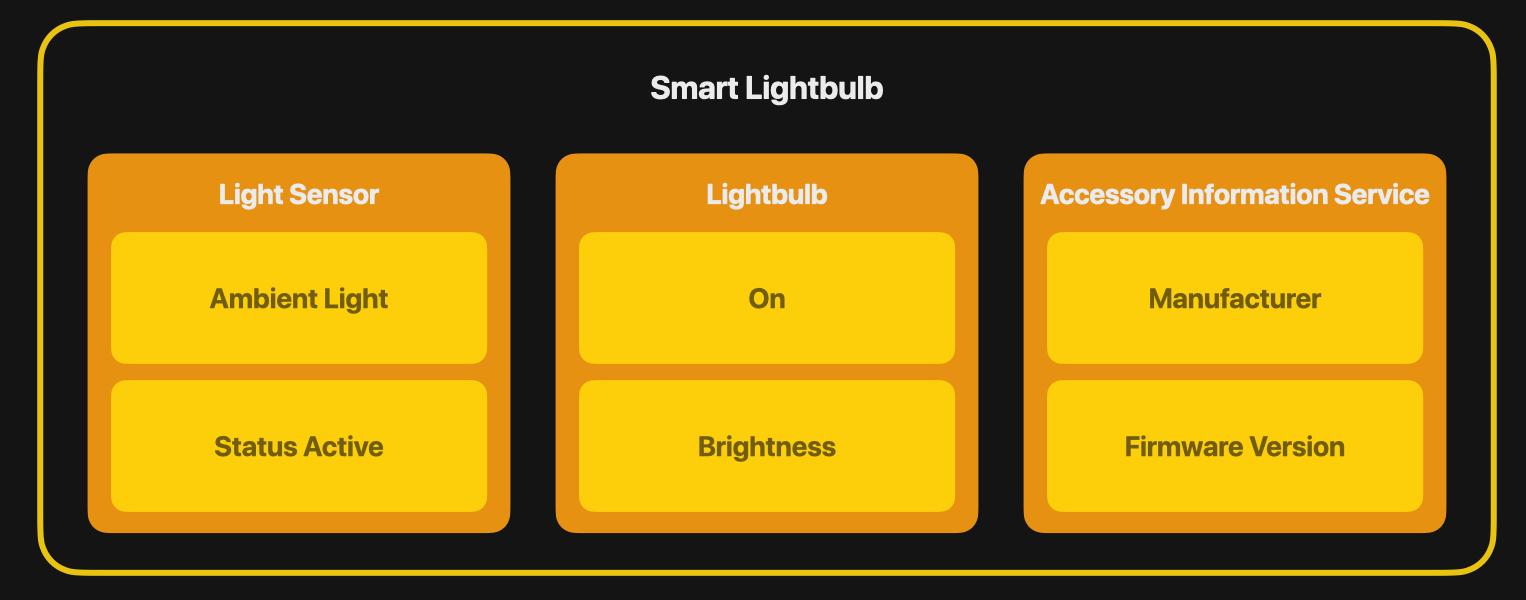
HomeKit supports all kinds of smart home accessories, ranging from lightbulbs to sensors, cameras, and door openers. An Accessory can have various control elements, which are called Services, e.g. a smart lightbulb might have an ambient light sensor service and a lightbulb service.
A Service can have various Characteristics you can use to control it. As in the previous example, the ambient light sensor service may have values to indicate the current ambient light level and an indication of whether ambient light detection is on or not. The lightbulb service may have an on-and-off state and a brightness level. With these Characteristics, the behavior of the accessory can be configured. Also, every accessory comes with a default accessory information service that contains manufacturer information, such as firmware version or model numbers, etc.
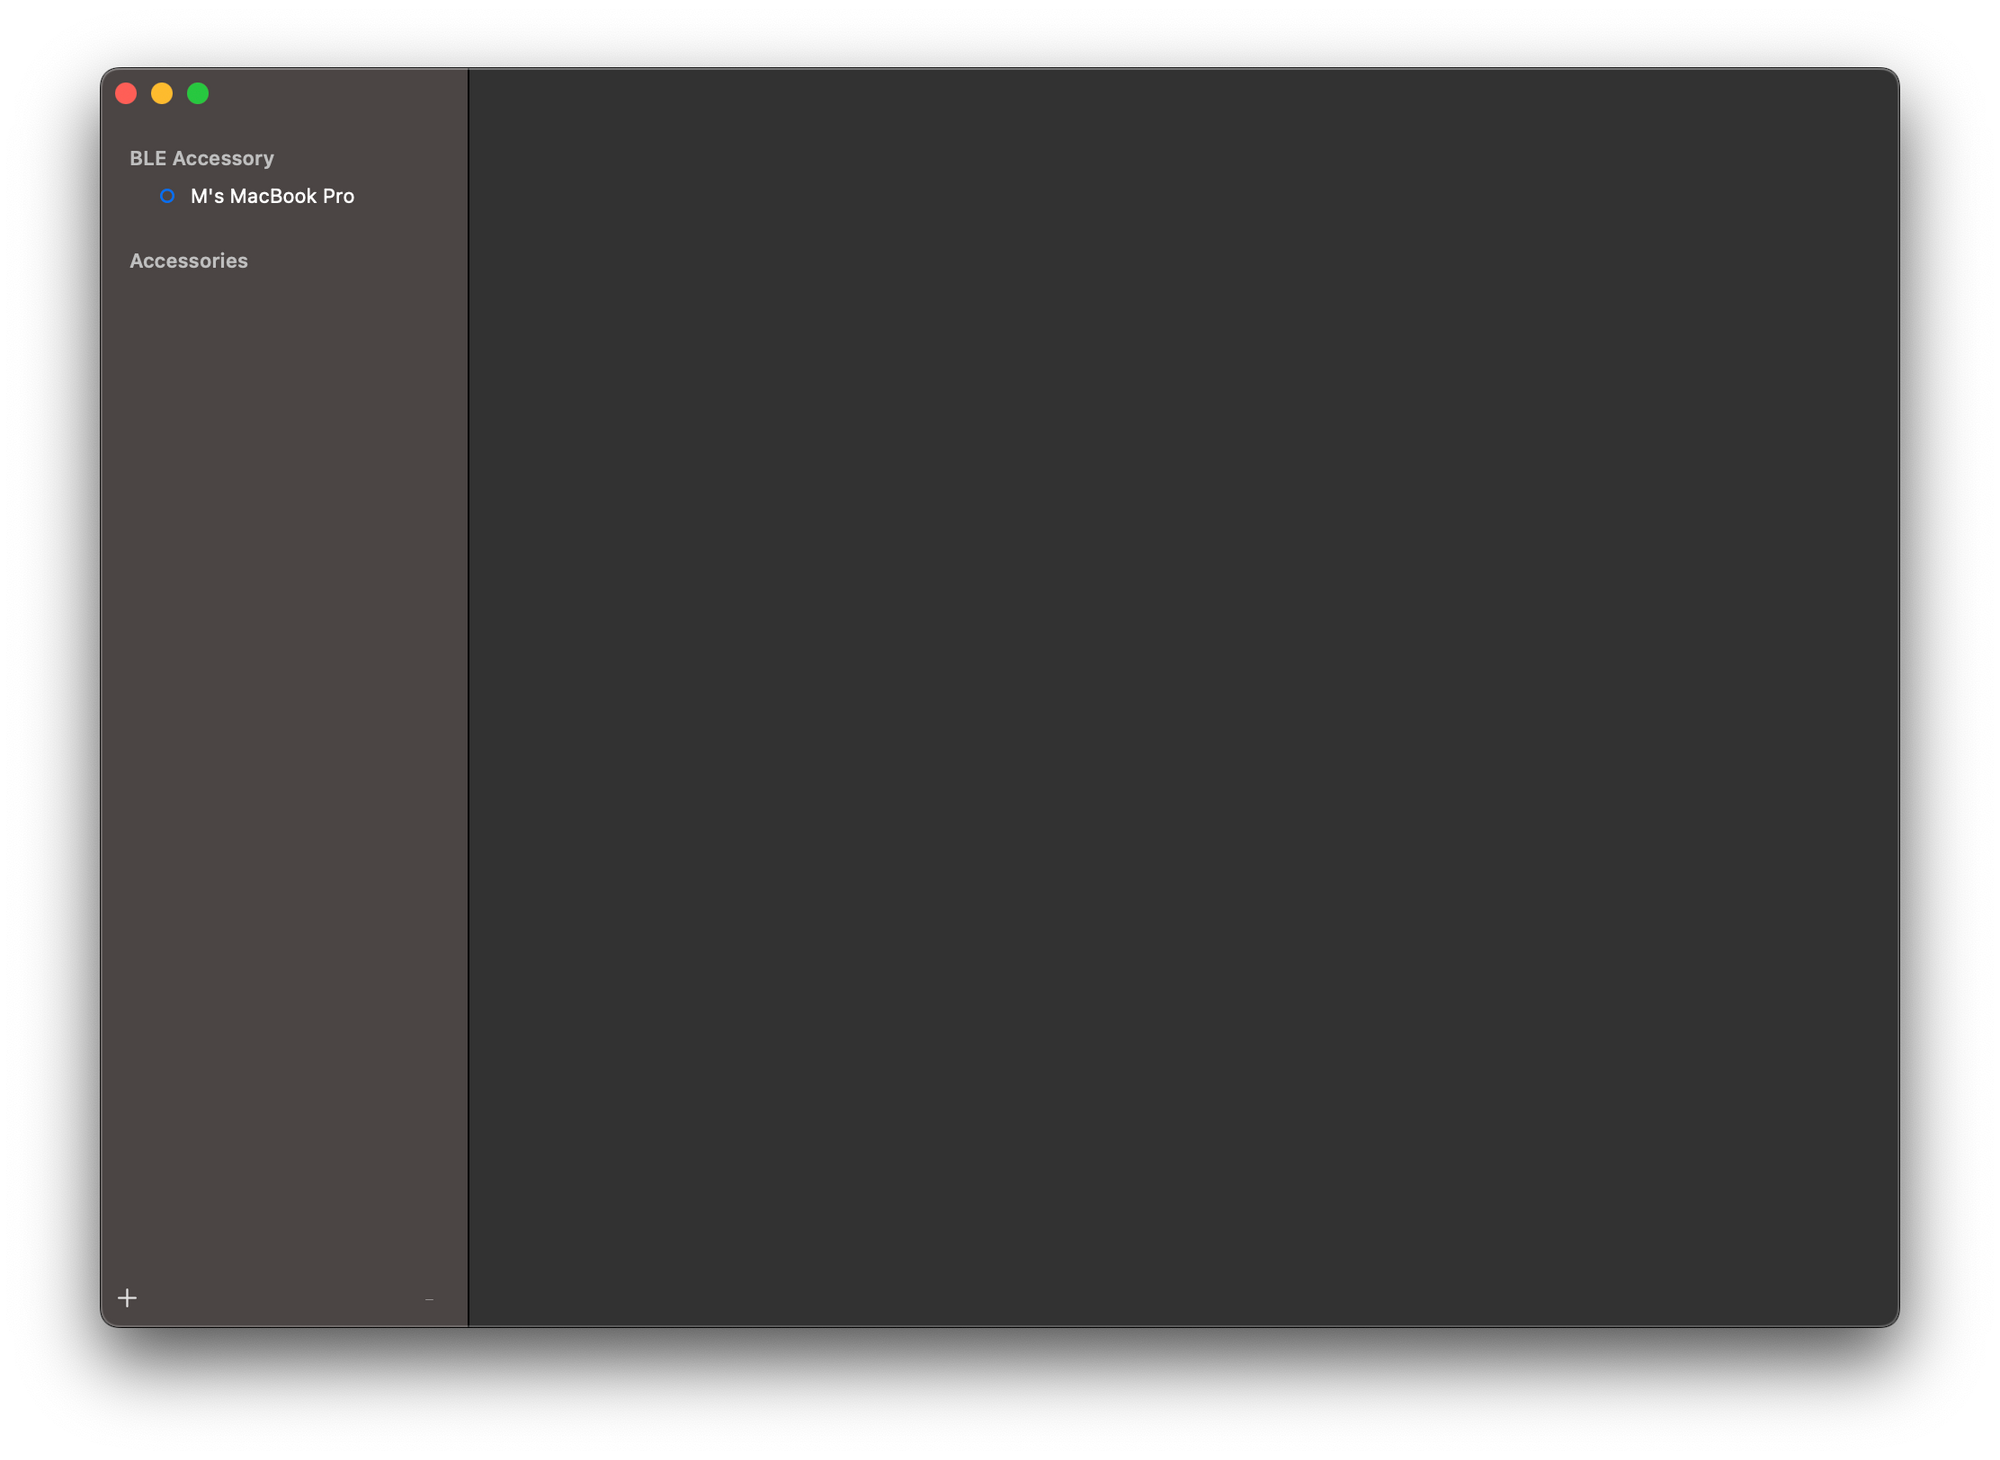
In the HomeKit Accessory Simulator, you can add accessories by clicking on the + symbol in the bottom left corner of the window.
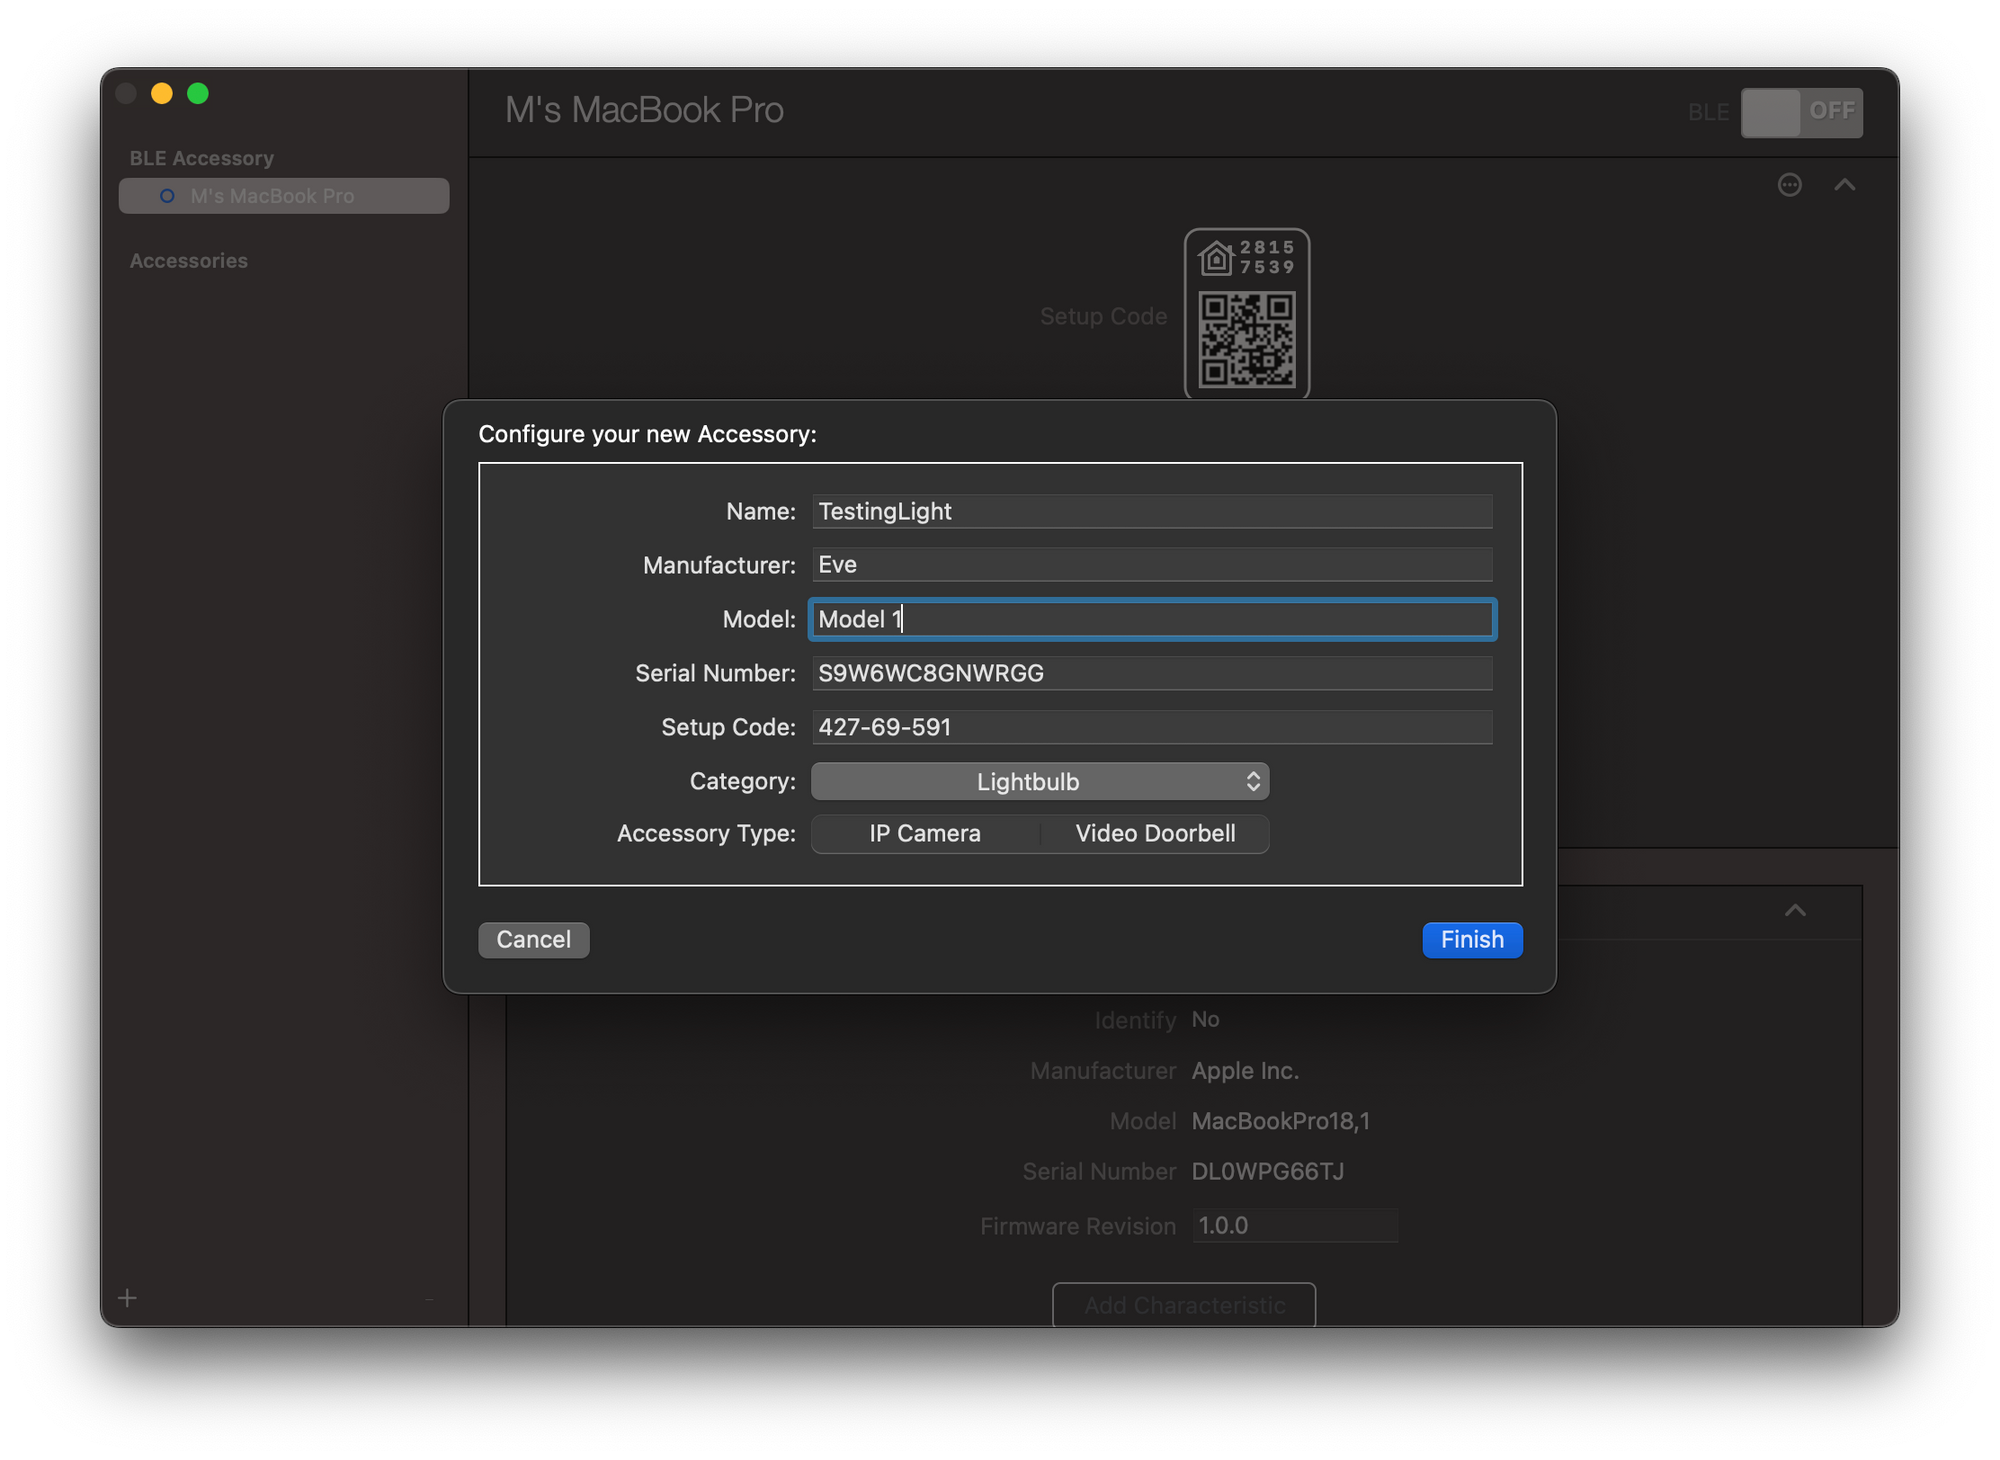
You can select the accessory category from an extensive list, ranging from air conditioners or door locks to lightbulbs, outlets, sensors, or thermostats. Also, you can specify in the accessory type whether it is an IP camera or video doorbell. For the simulation, you can add a name, manufacturer information, serial number, and setup code.
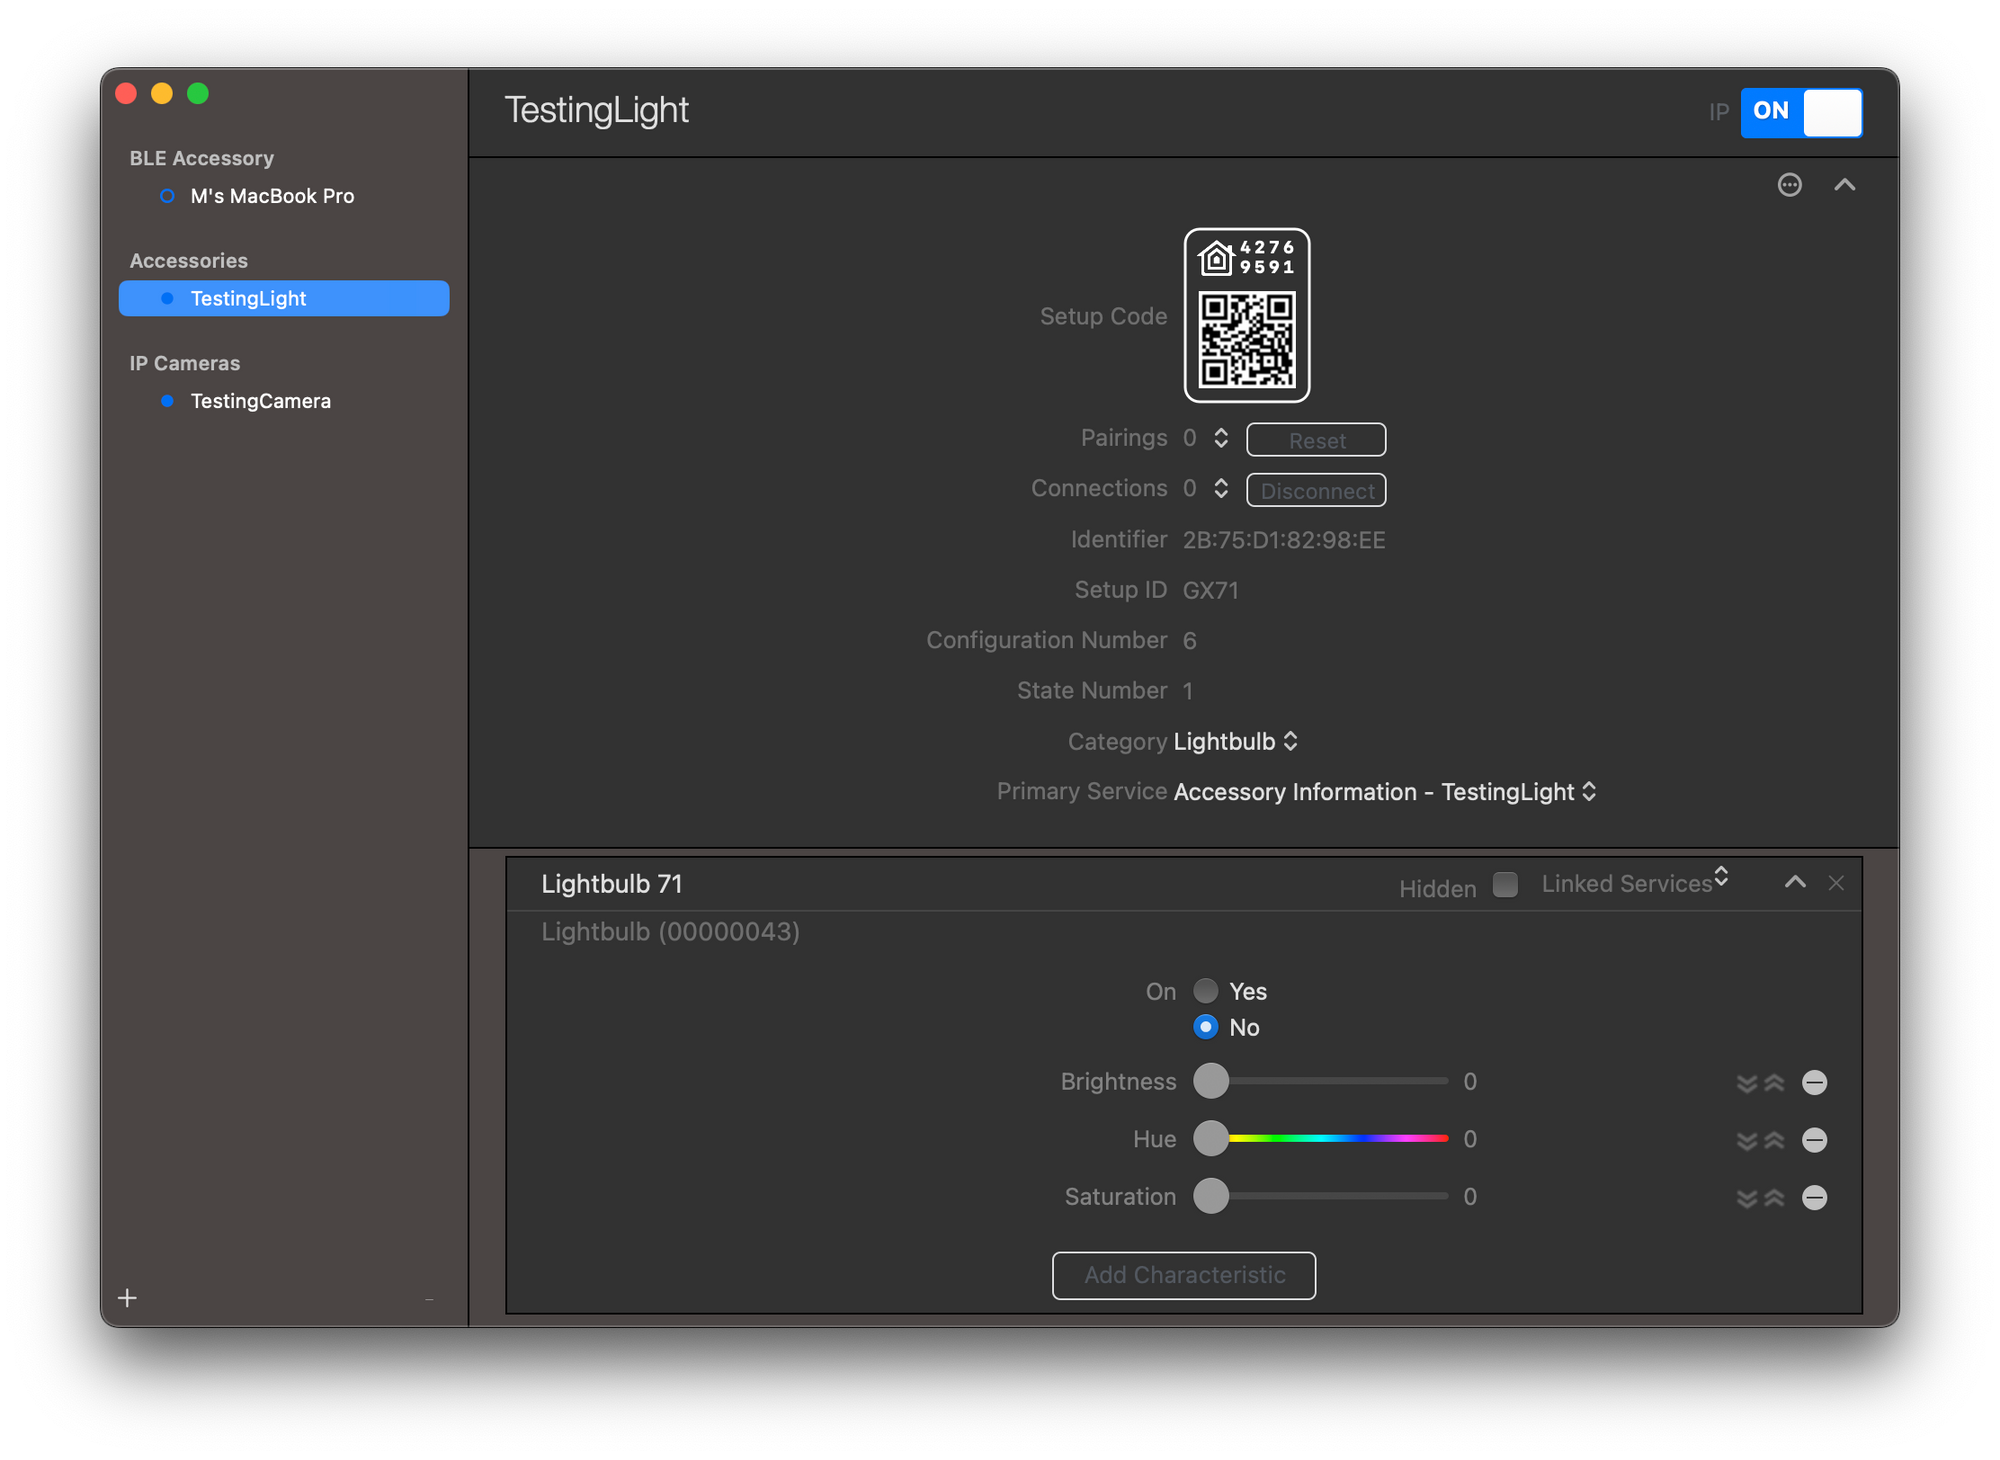
Once the accessory has been added, you can inspect the settings and you can also see the setup code that can be used to configure the accessory in the testing environment. Also, below the main information about the accessory, you can inspect its services and characteristics.
In this example, you can see the lightbulb 71 service and its characteristics On, Brightness, Hue and Saturation.
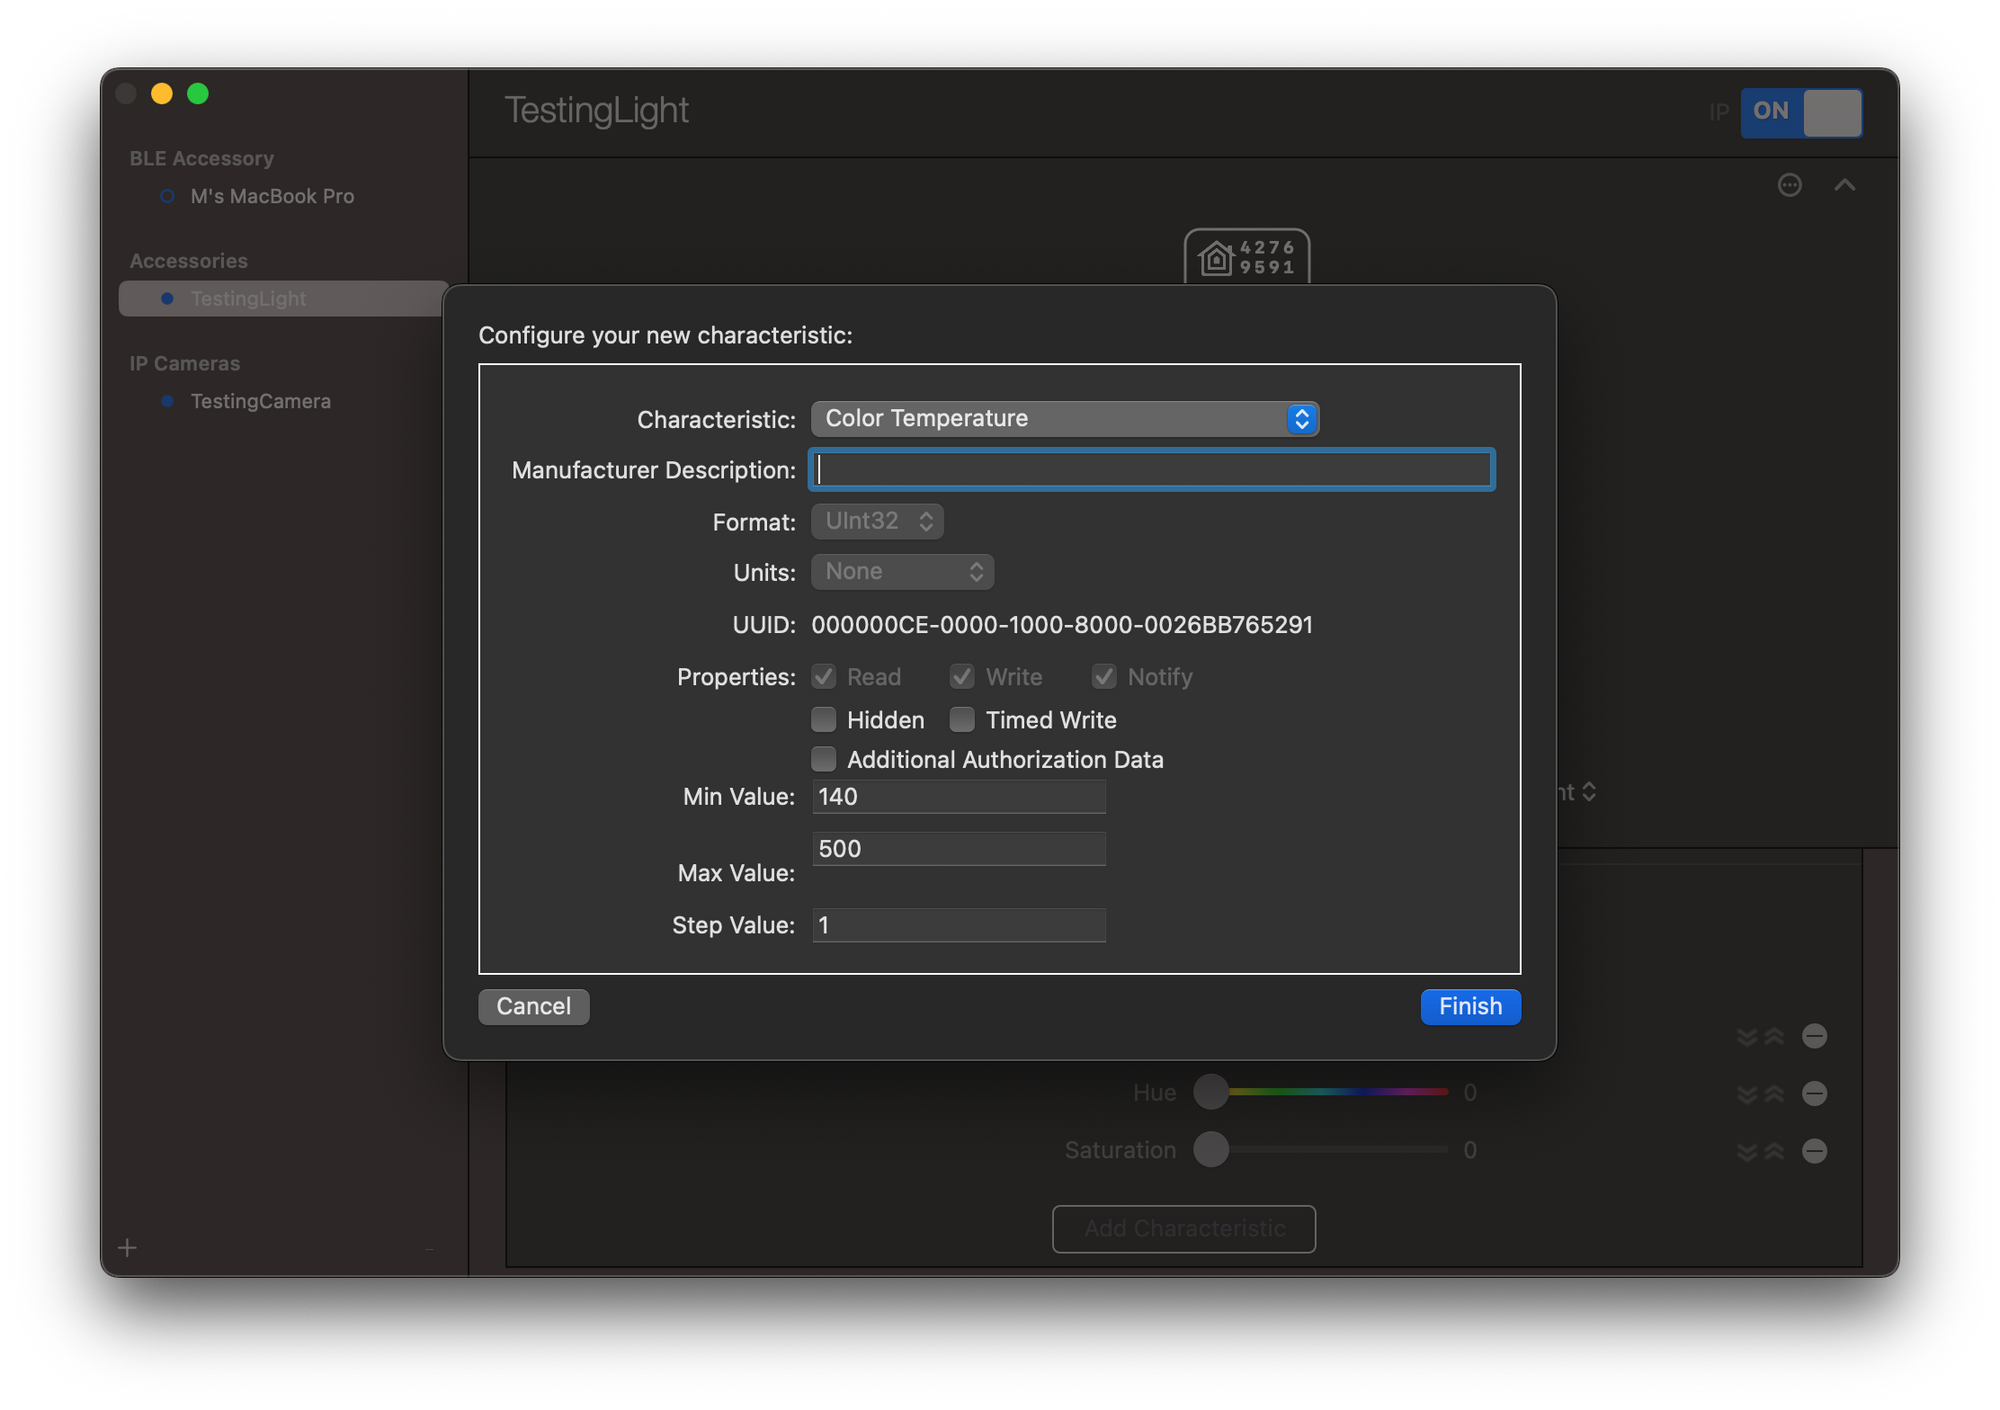
You can add additional characteristics to the service by clicking on the Add Characteristics button. You can select from an extensive list of characteristics, ranging from simple states such as active, in use, etc. to air quality, battery level, and all kinds of sensor characteristics. For example, you could add a Color Temperature characteristic to the lightbulb which might come in handy to indicate the lights' warmer or colder color temperature.
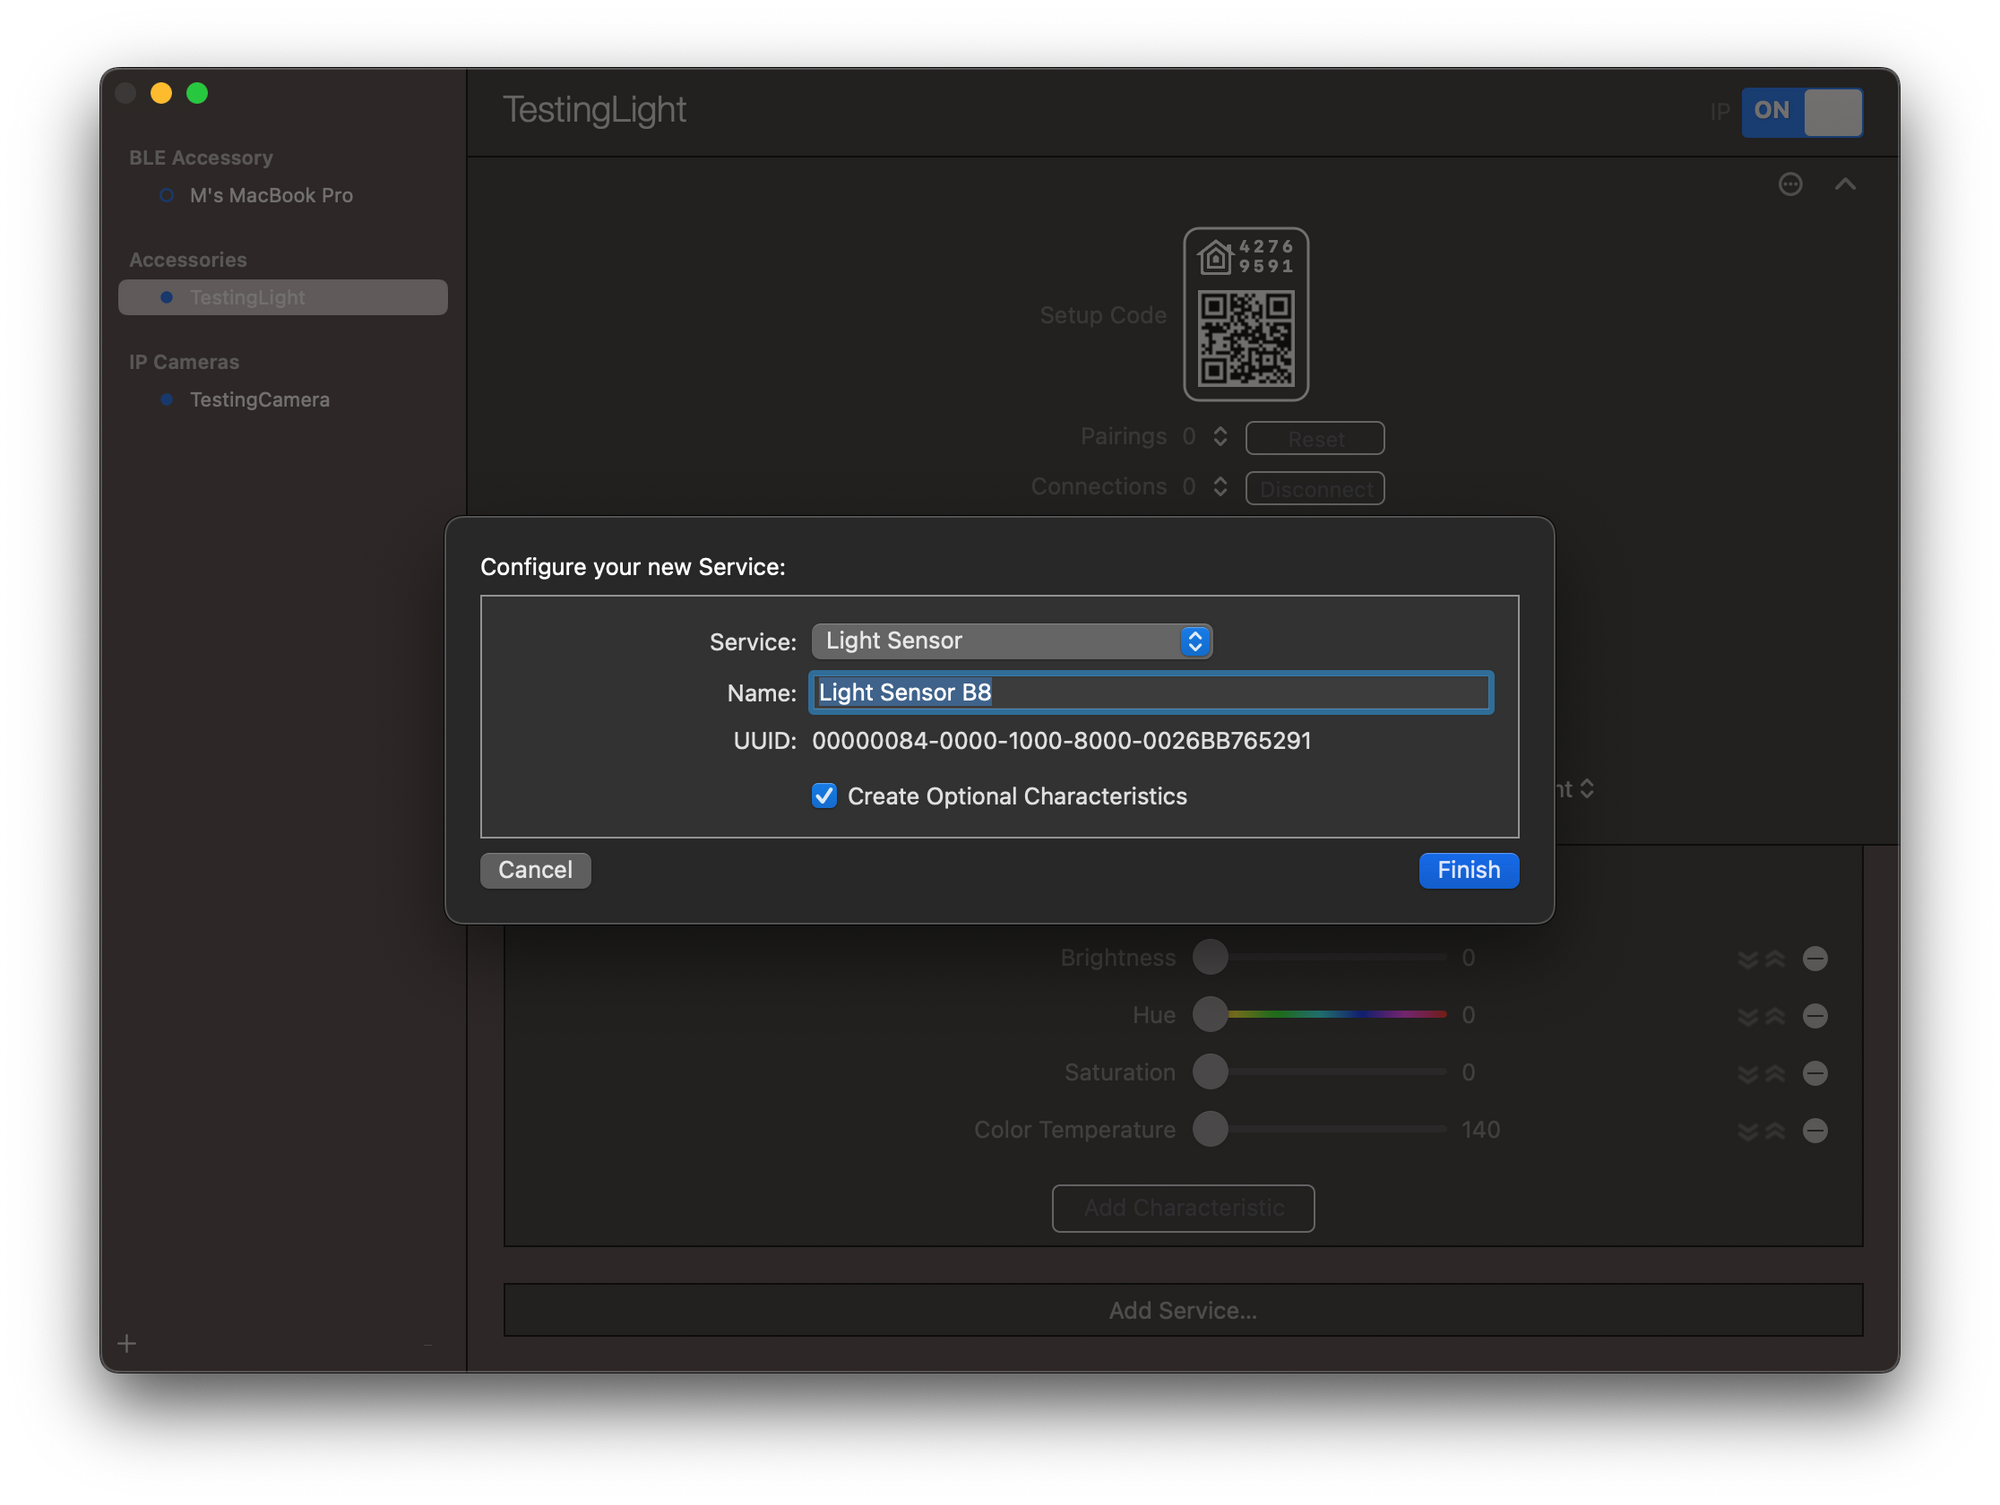
You can also add additional services to the accessory, for example, a Light Sensor. Again the list of possible services is extensive, ranging from air quality or carbon dioxide sensors to fans, lock mechanisms, or switches.
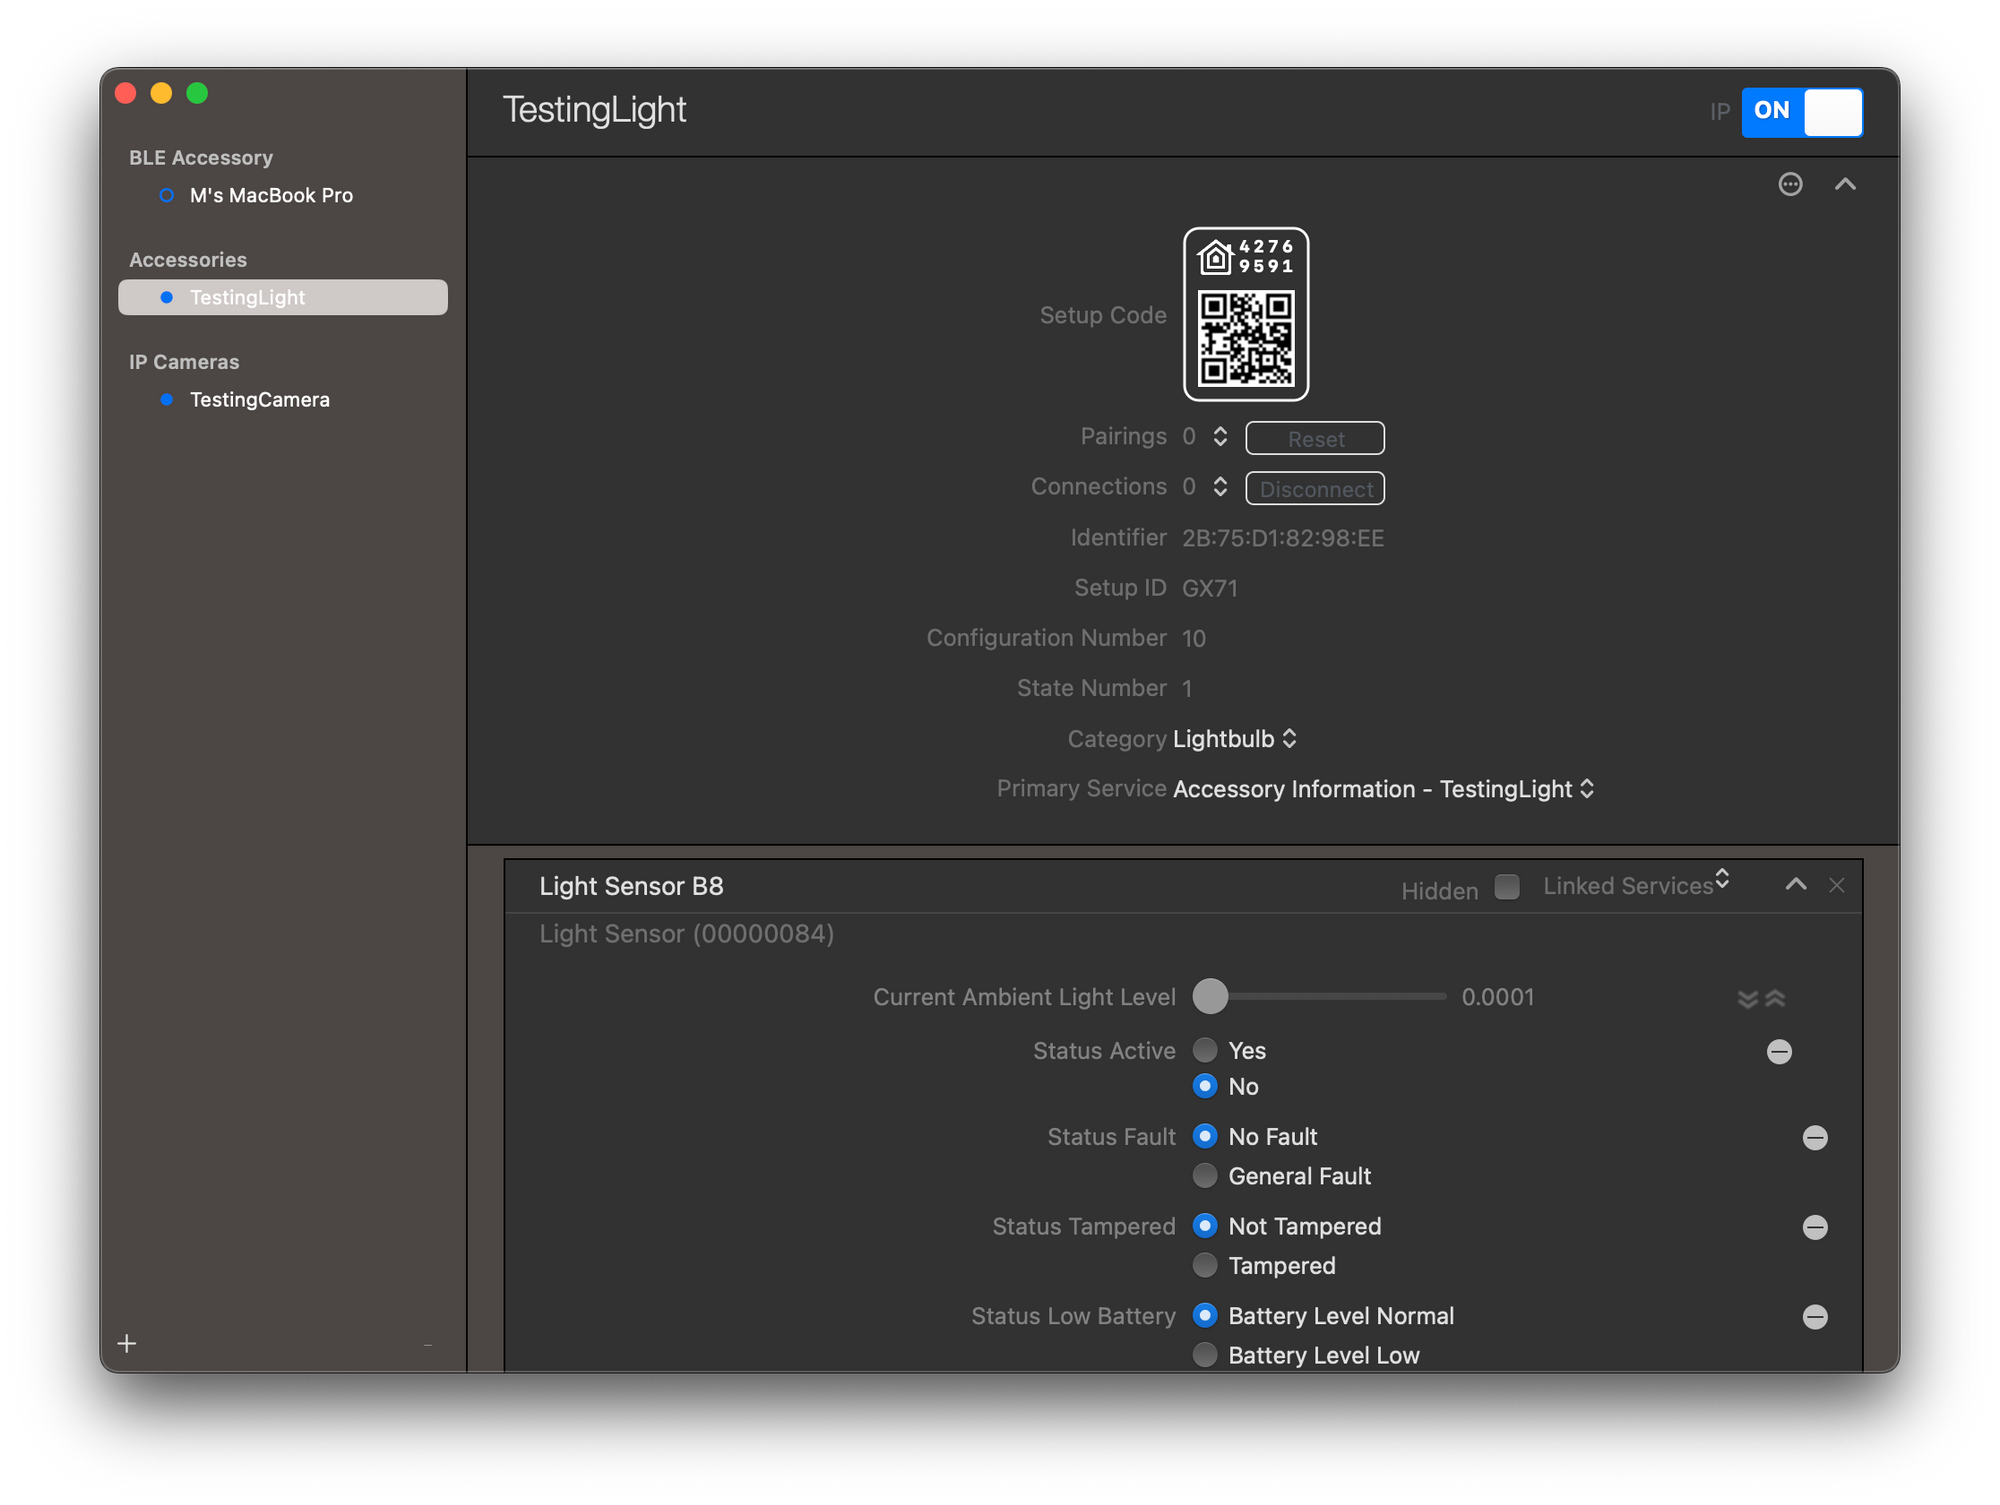
Once the service is added, it will appear in the accessory's overview and can be configured and extended with additional characteristics. If needed, characteristics can also be removed by clicking on the - symbol on the right side.
Next, let's see how we can add the accessory to our HomeKit environment.
Adding Accessories to a Home Network
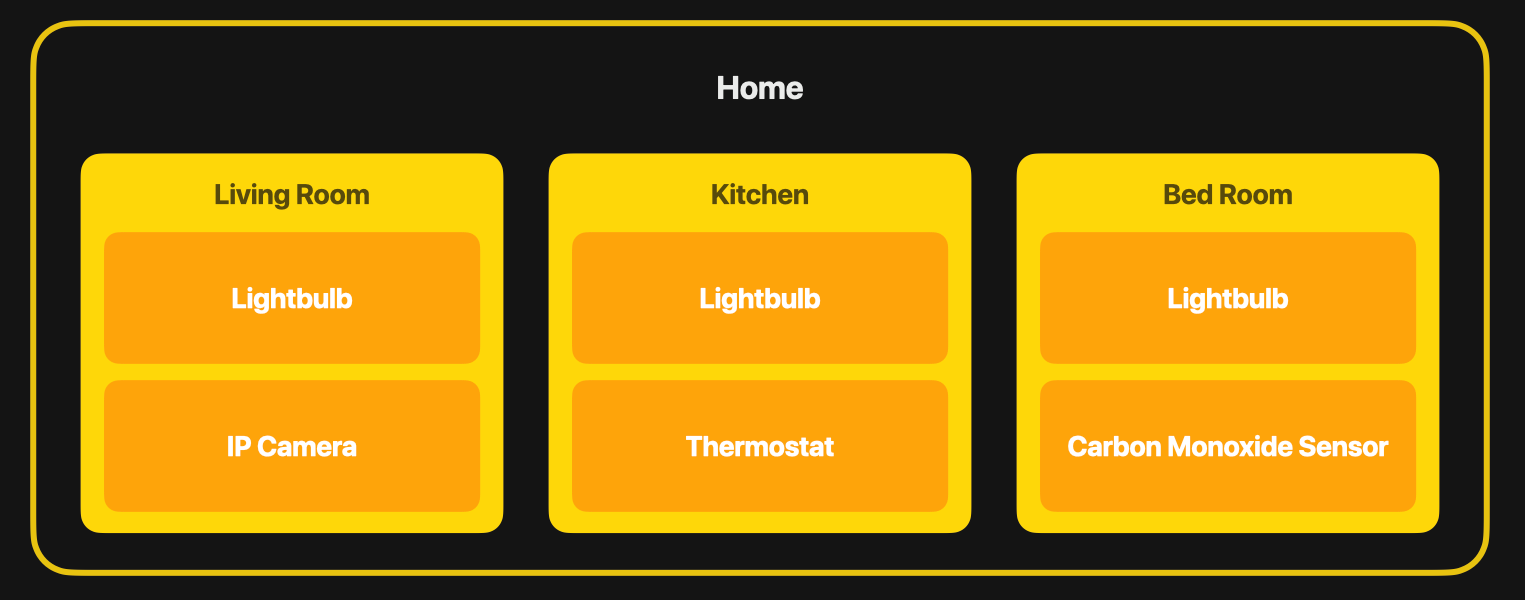
To use the simulated accessory you have to add it to a Home in HomeKit. This can be done from any compatible iPhone, iPad, or Mac in the local network with the Home app. In Homekit, the smart home experience is organized around Homes, with are divided into Rooms. Each Room can then have Accessories, which in turn have Services and Characteristics.
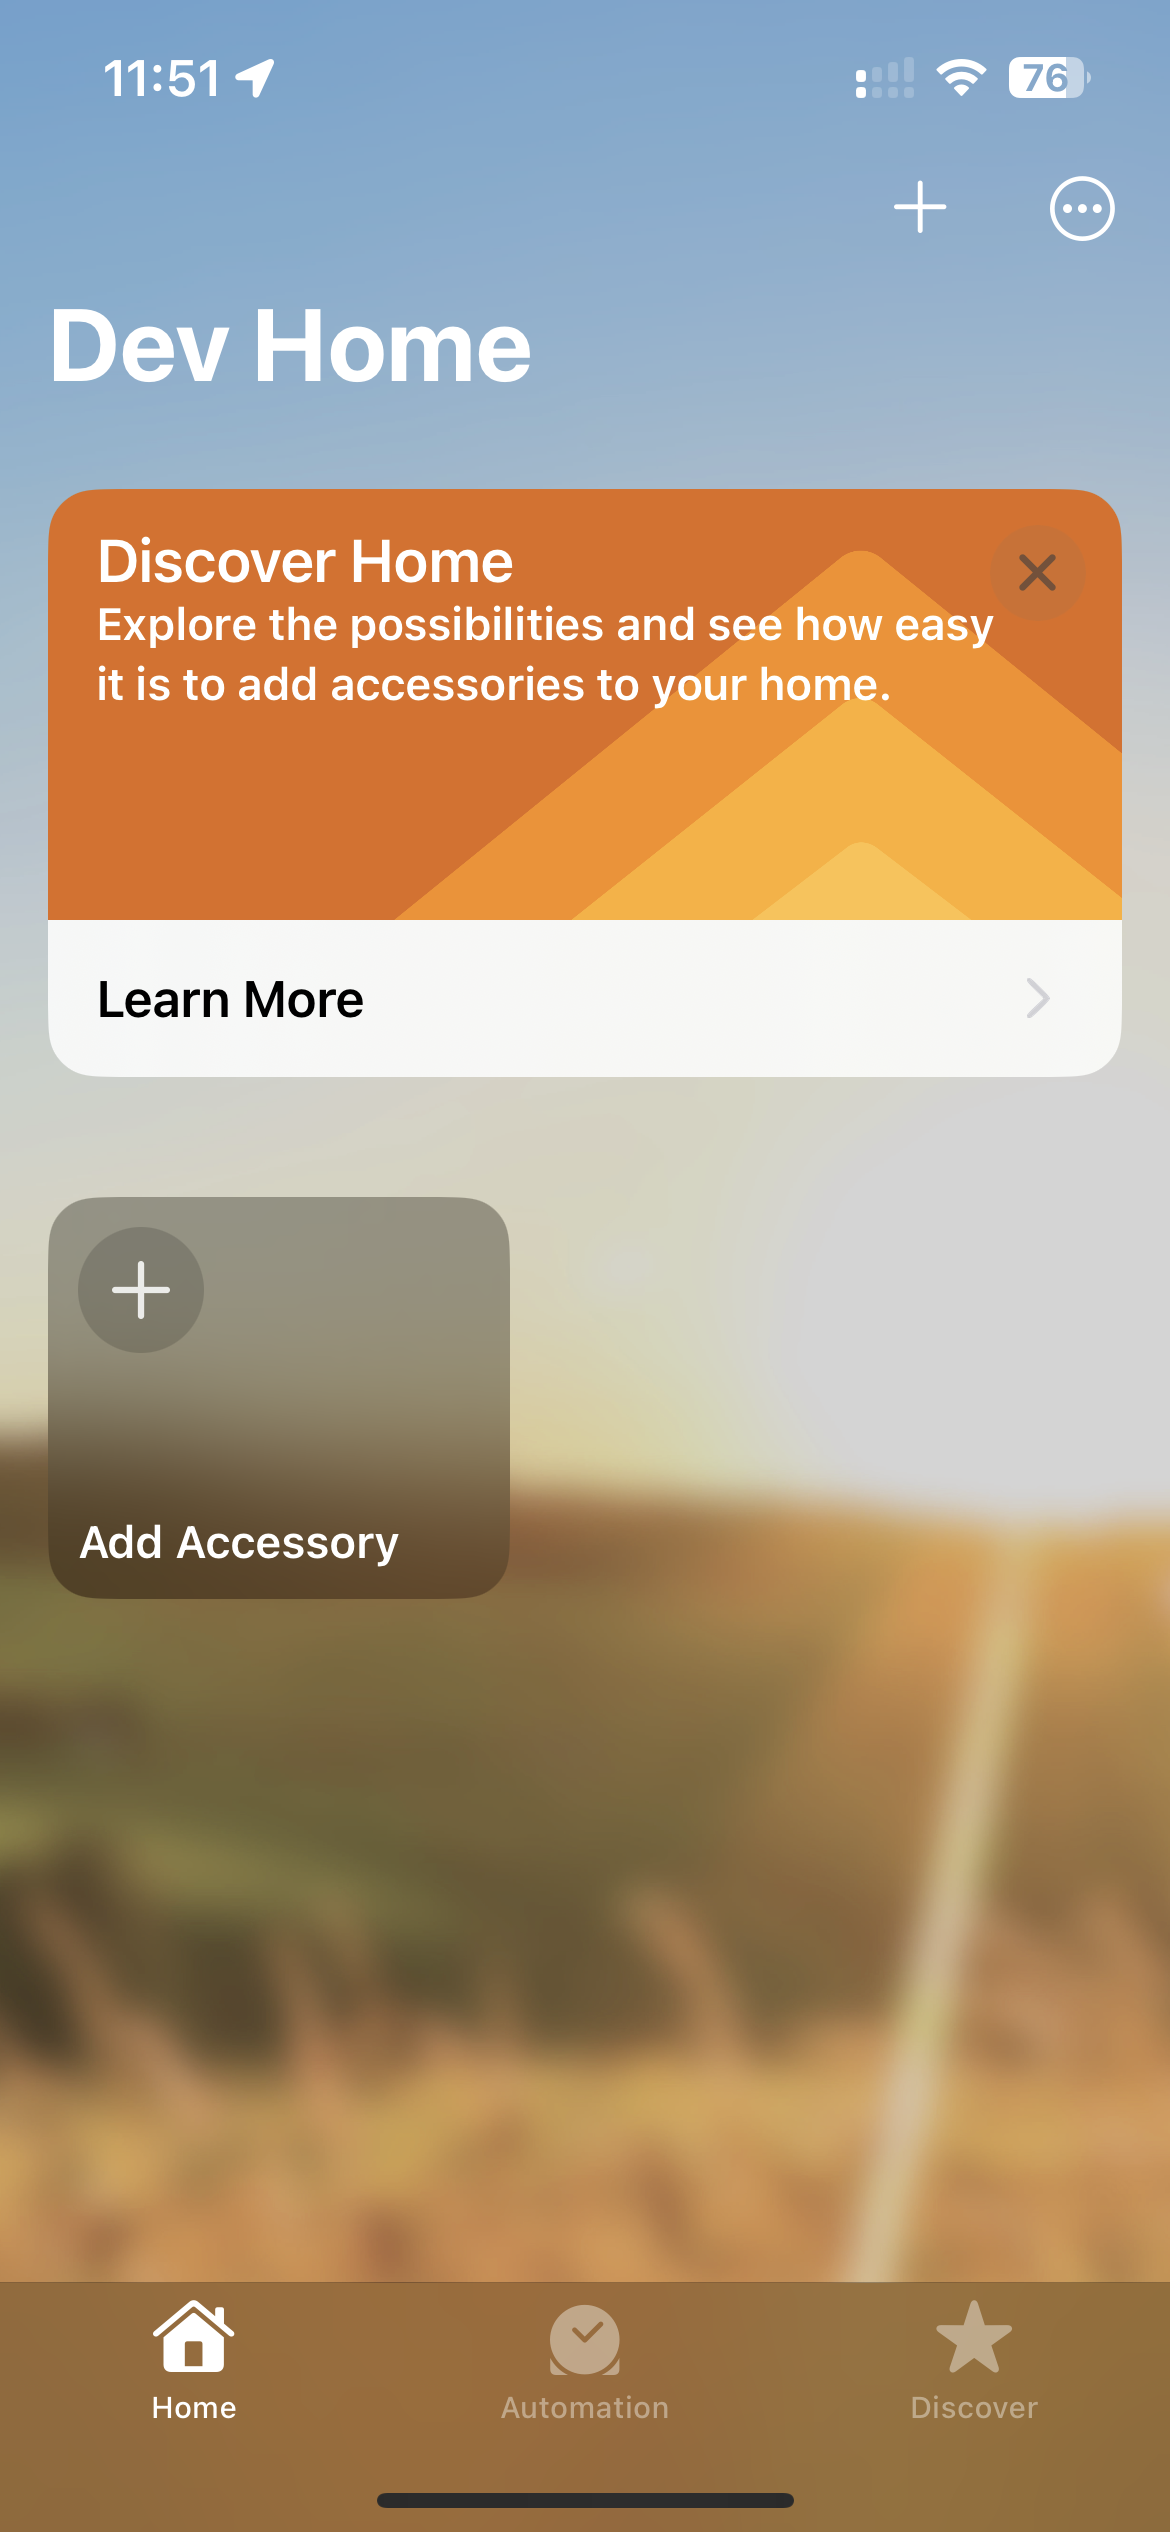
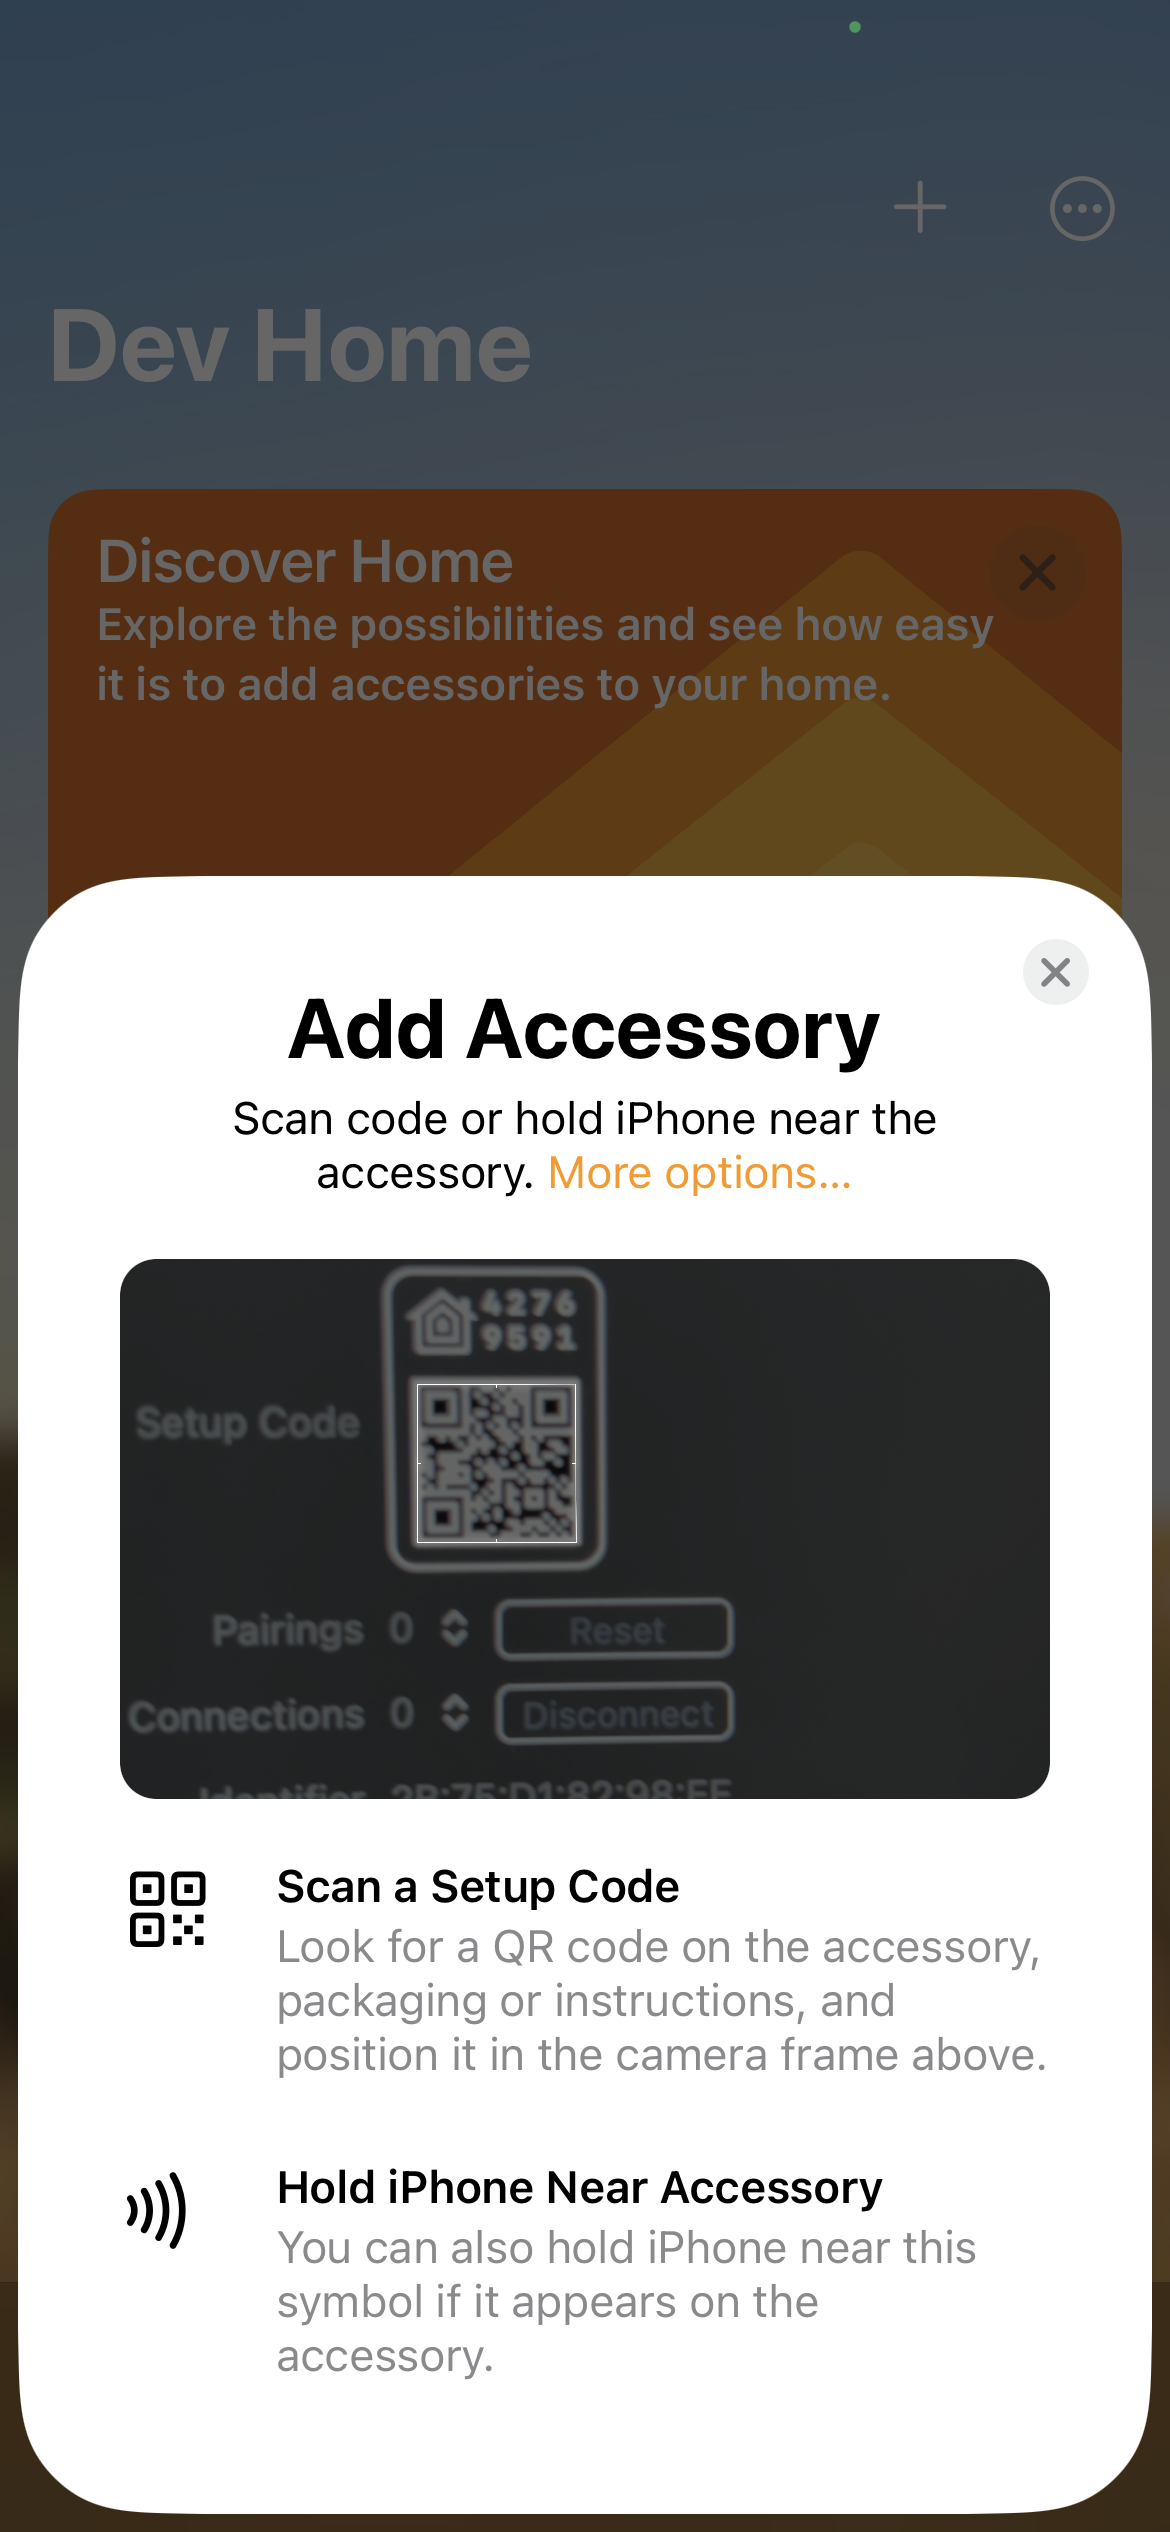
To add a new simulated accessory, open the Home app and click on the + symbol in the top right corner or - if the home doesn't have any accessory yet - on Add Accessory in the main View of the Home. You can then scan the setup code from the HomeKit Accessory Simulator, as you would with any real accessory when you want to add it to your Home.
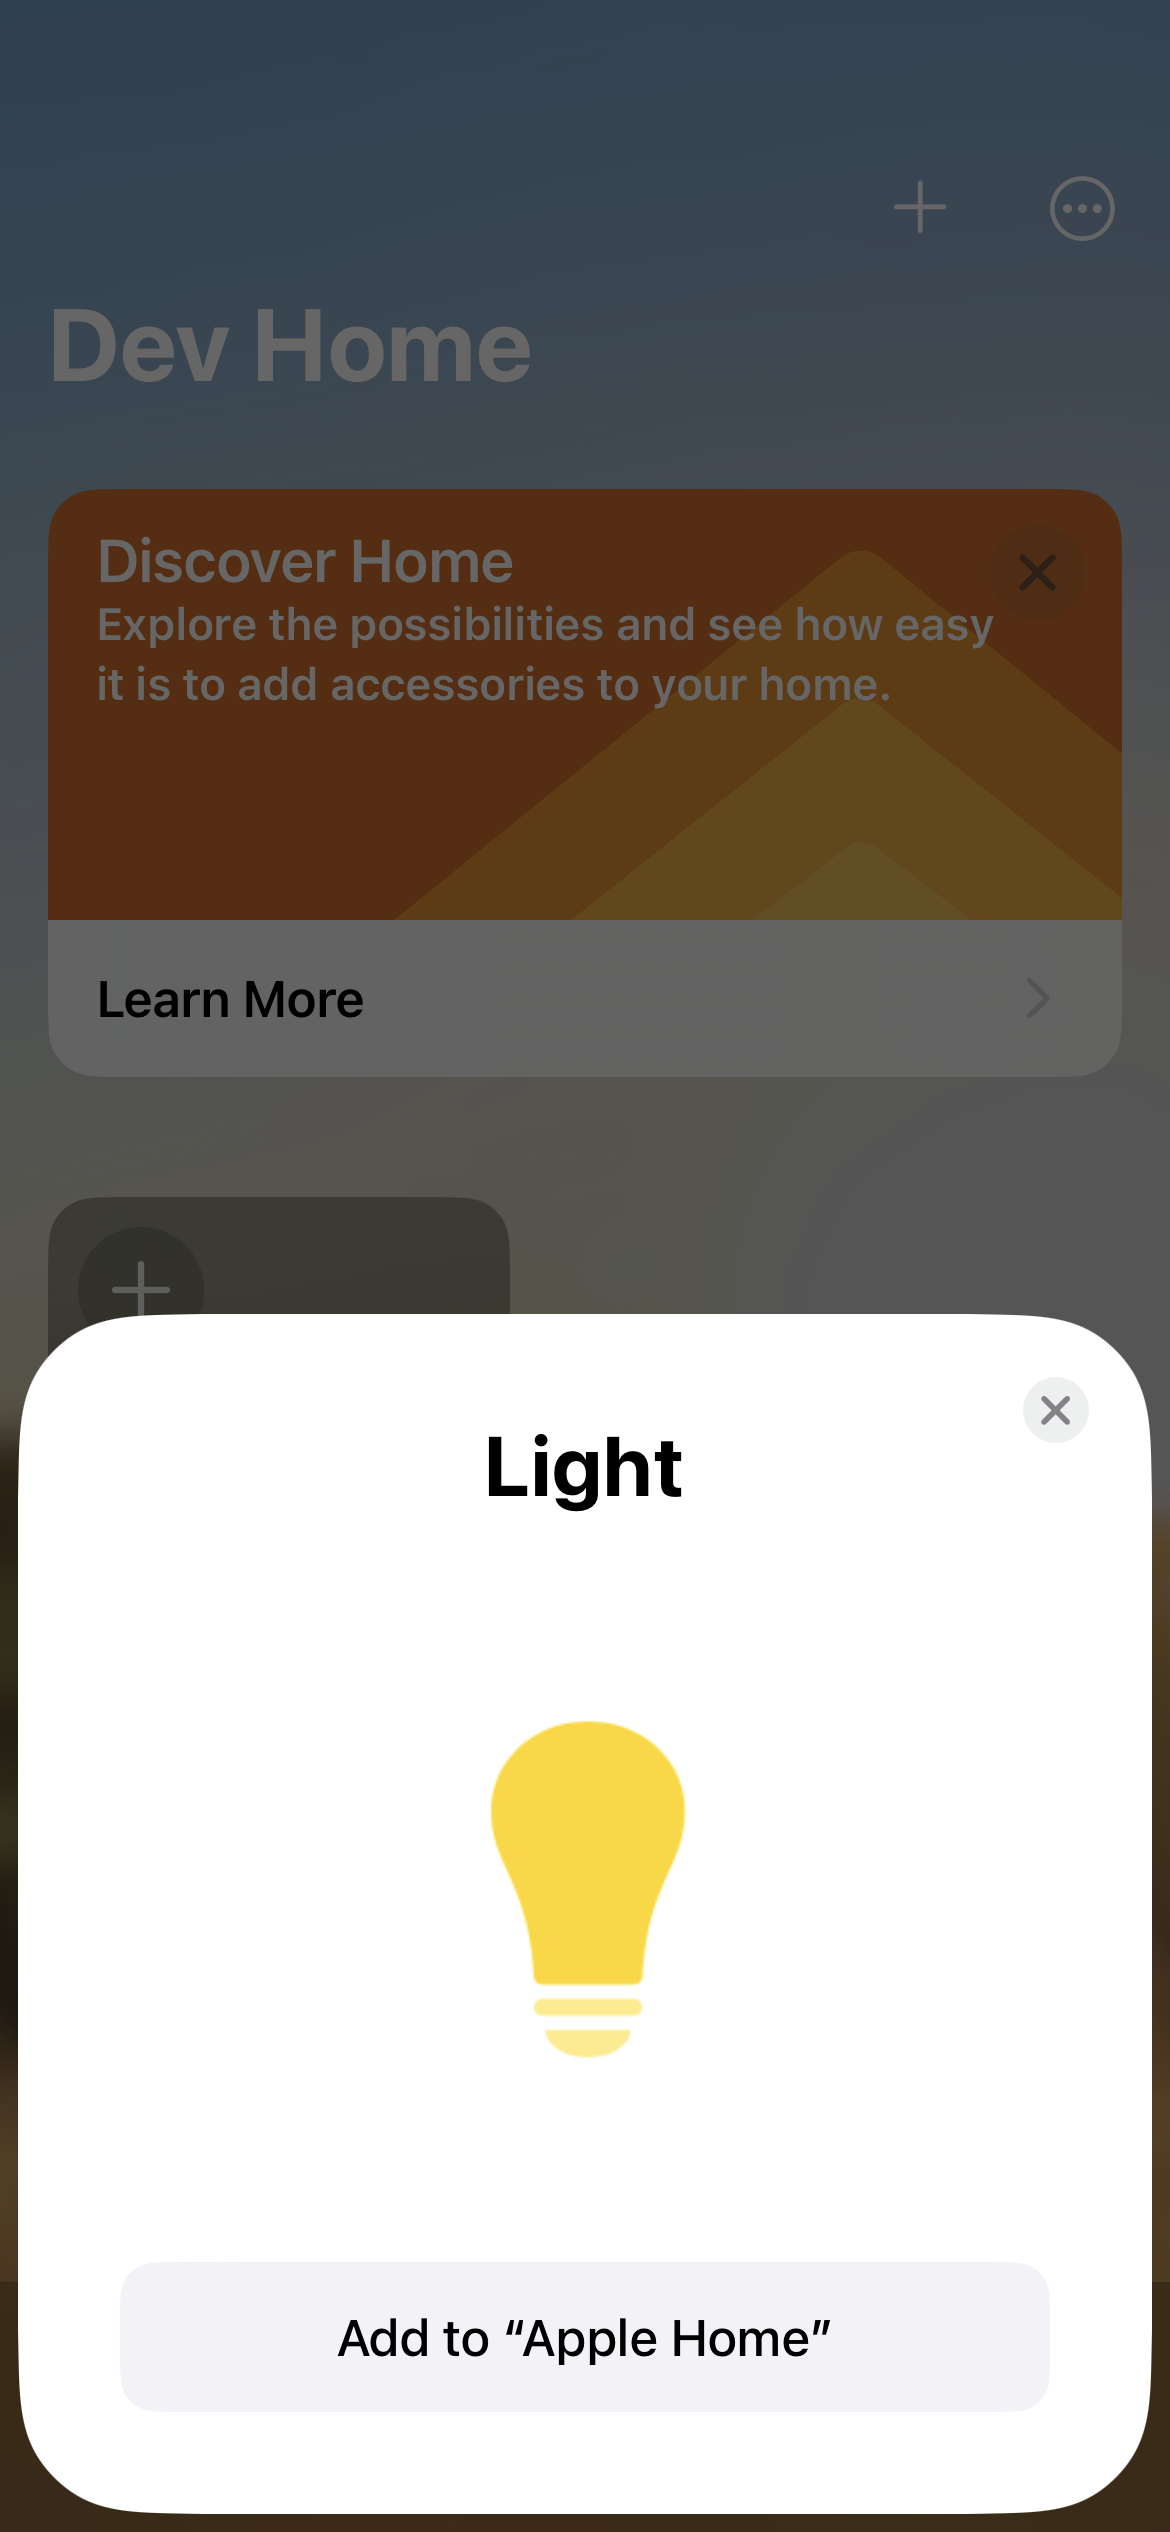
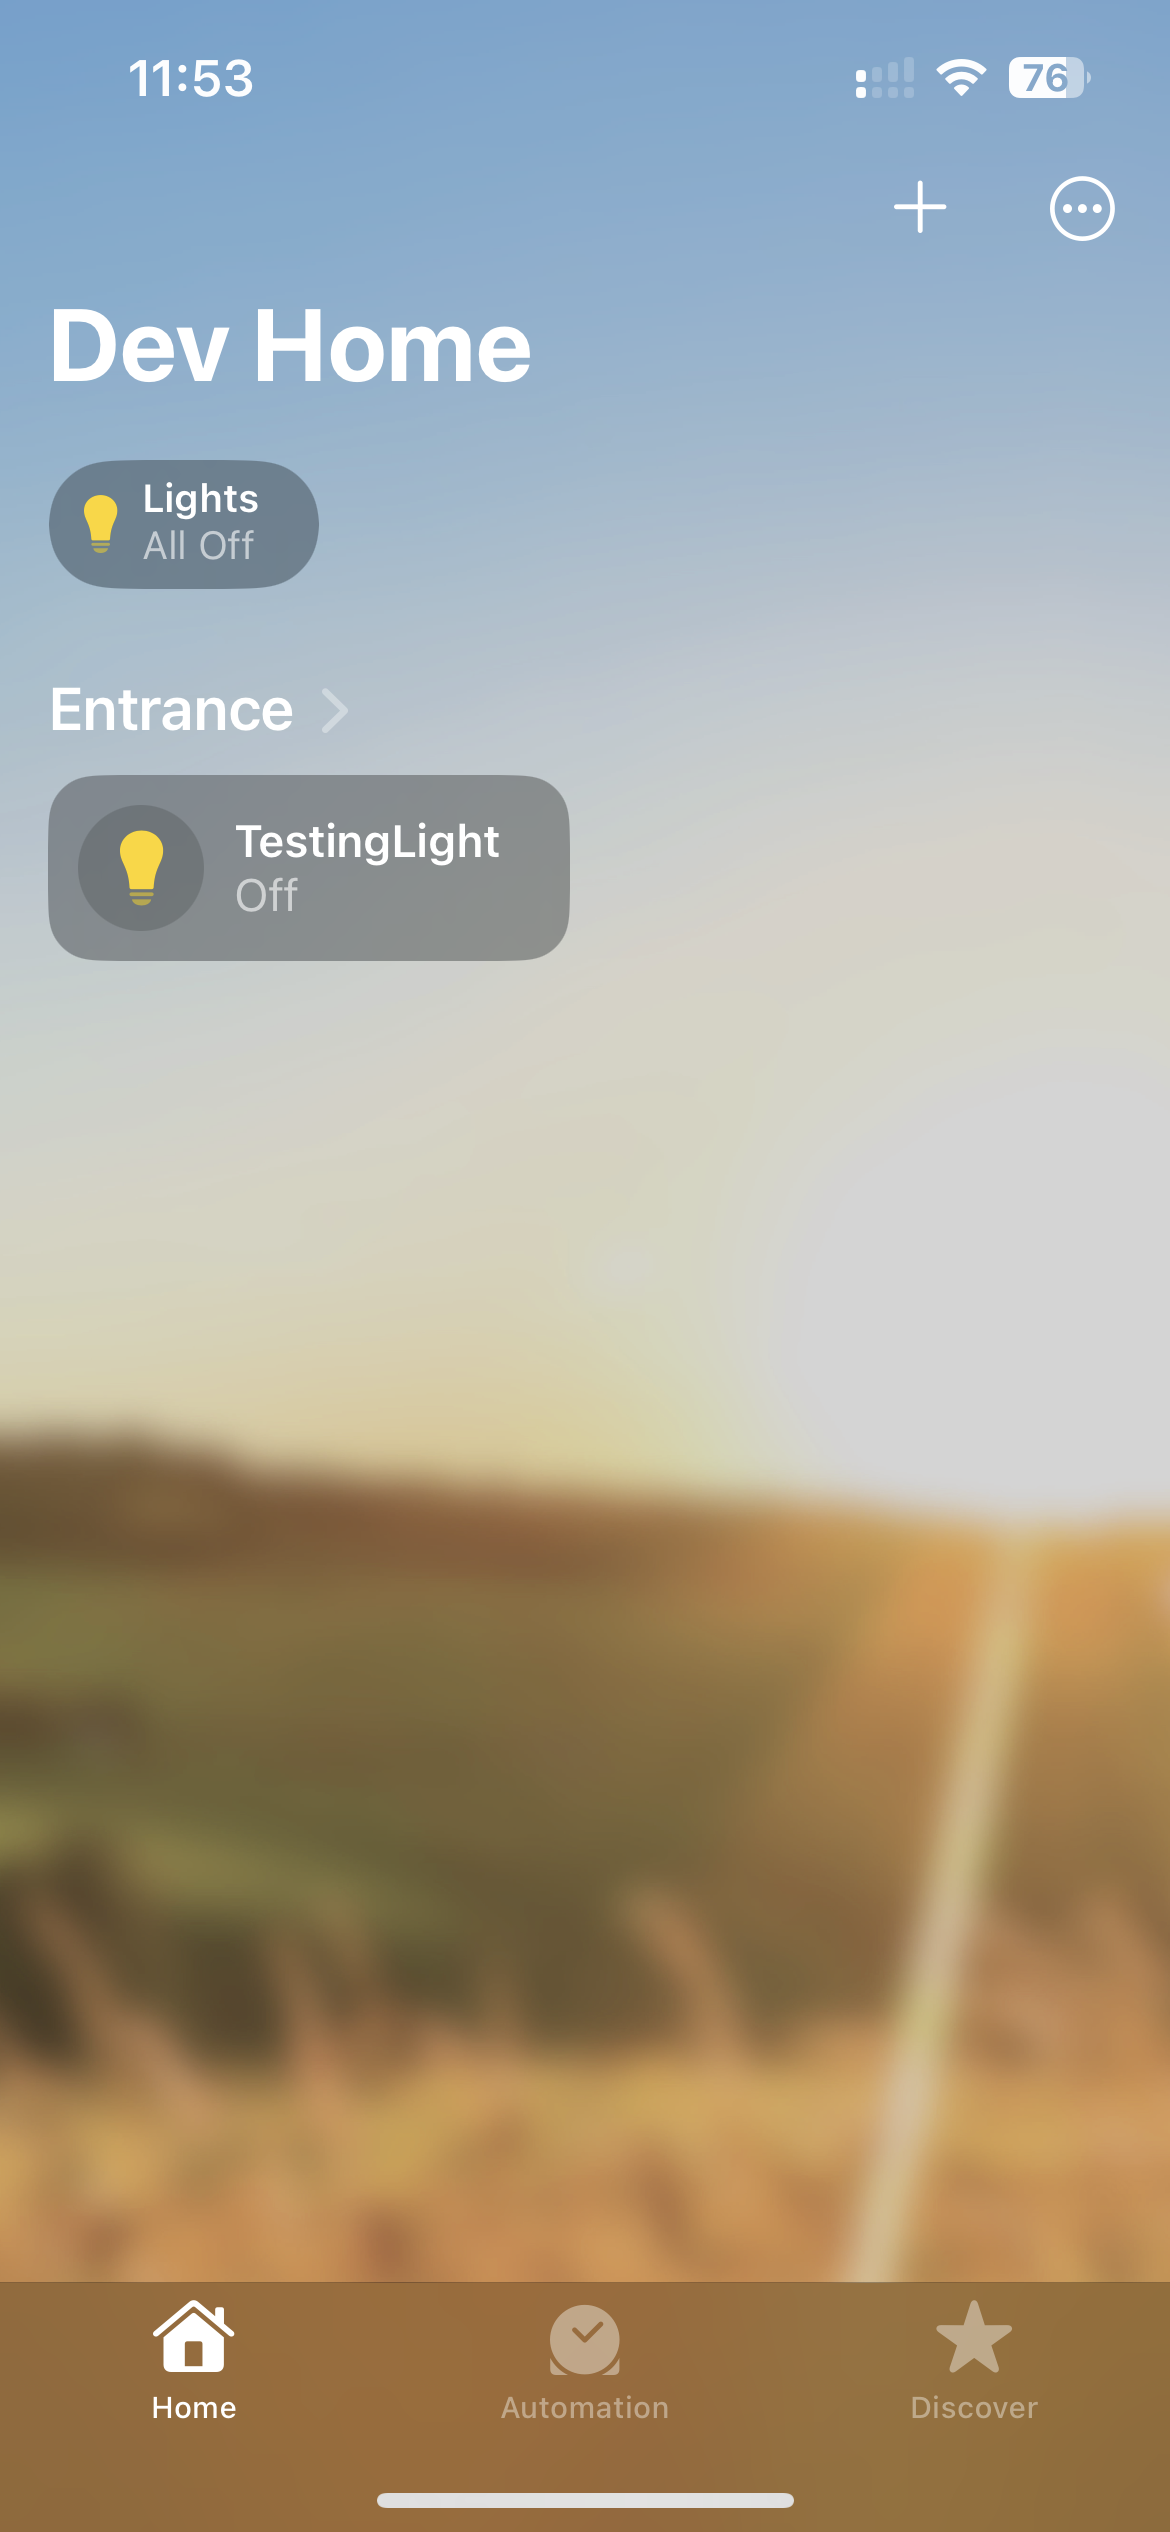
You can then follow the setup assistant that will guide you through the process of setting up the accessory, including adding it to a Room and configuring some automation that may be suitable to that accessory. You can also select a name and once the process is completed, the accessory is now visible in your home and can be used just as you would expect.
If you add an accessory on a device, including an iOS Simulator, without a logged-in iCloud account, the accessory is isolated to that device. This means that if you add an accessory to an iPhone simulator and then switch over to using an iPad simulator, you have to reassociate the accessory for it to appear in the new environment.
Apple Developer Documentation
You know can configure any number of smart home accessories to test your app while in development without physically having all the accessories available.
Next, we will cover how to develop an app to access and control HomeKit-compatible accessories, so stay tuned.