
Generating Images with Stable Diffusion on Apple Silicon with Core ML
Understand how to use Apple's Core ML Stable Diffusion Package to generate images with Stable Diffusion on Apple Silicon using Swift.

Stable Diffusion is a deep learning, text-to-image model released in 2022 and among the trending AI tools. It can be used to generate images based on text descriptions among other use cases. Unlike other models with similar features, Stability AI made the source publically available, accelerating its adoption. Beyond current copyright infringement lawsuits against Stability AI, Midjourney, and Devian Art, deep generative neural networks are becoming more and more powerful and find widespread adoption.
In December 2022, Apple released optimizations to Core ML to use Stable Diffusion with macOS 13.1 and iOS 16.2. The release contained a Python package for converting Stable Diffusion models from PyTorch to Core ML with Apple's coremltools, and a Swift package to deploy the models.
The Swift package can be added to Xcode projects as a dependency to empower apps with the powerful image generation capabilities. In this article, we will focus on image generation from text prompts using Swift and how this can be applied in a native app.
As a prerequisite, ensure Xcode 14.2. and the Command Line Tools for Xcode 14.2 or newer are installed. The mcomand Line Tools are available in the Downloads section of the Apple Developer Platform.
Using Core ML Models from Hugging Face Hub
While you can also convert any derivative Stable Diffusion model to Core ML, there are some pre-made models publicly available on Hugging Face Hub, such as Stable Diffusion v1-4, Stable Diffusion v1-5, and Stable Diffusion v2. Any of those can be downloaded and used to generate images with Python or Swift. As the models are quite large in size, you have to use the git Larg File Storage (git lfs) extension. It stores large files outside the main git repo, and downloads them from the appropriate server the repository is cloned.
As a first step, use Homebrew to install git lfs, a Git extension for versioning large files. If you don't have Homebrew installed, follow these setup instructions.
brew install git-lfsOnce the installation is completed, you can set up git lfs for our user account with the following command.
git lfs installThen you can use git clone to the Stable Diffusion repository that includes all model variants. As an example, you can clone Stable Diffusion version 1.4.
git clone https://huggingface.co/apple/coreml-stable-diffusion-v1-4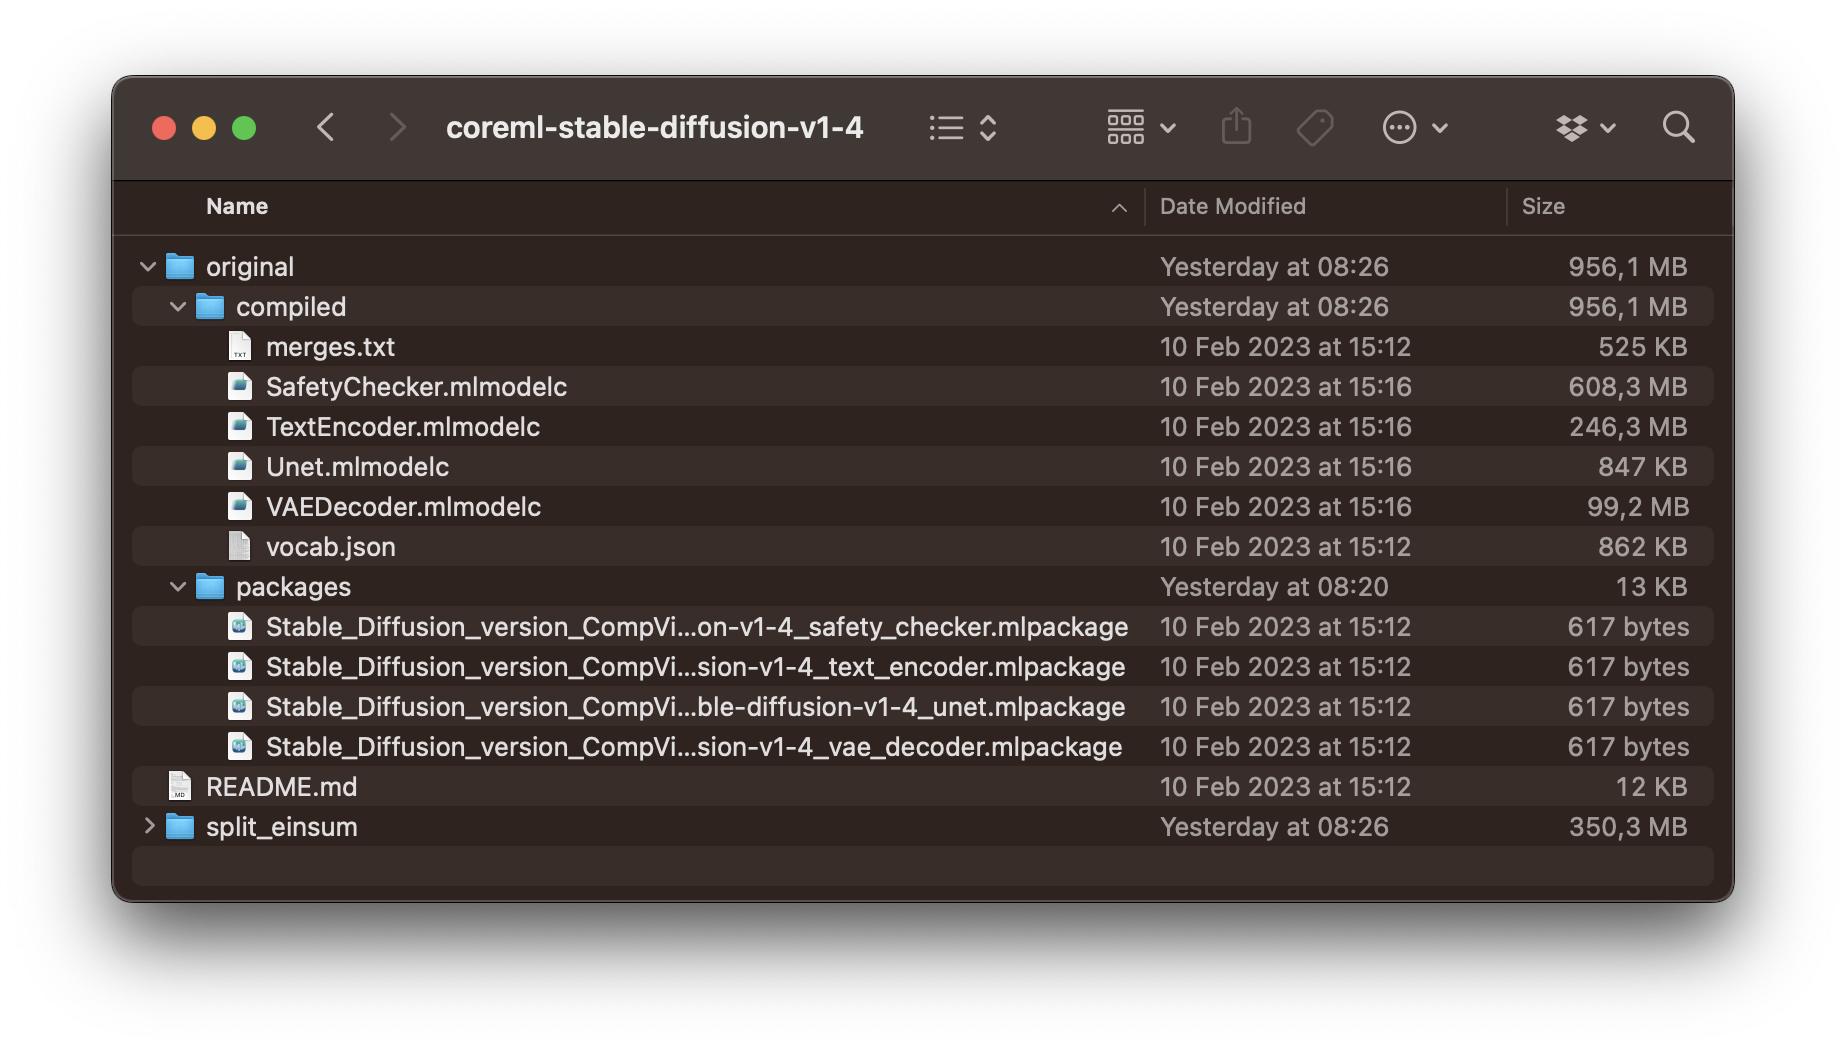
Now, you can also clone Apple's Core ML Stable Diffusion package to get started using the downloaded model. For this, use the following command.
git clone https://github.com/apple/ml-stable-diffusion.gitThe repository contains two packages, one python_coreml_stable_diffusion Python package for converting PyTorch models to Core ML formats and a StableDiffusion Swift package that can be used in Xcode projects.
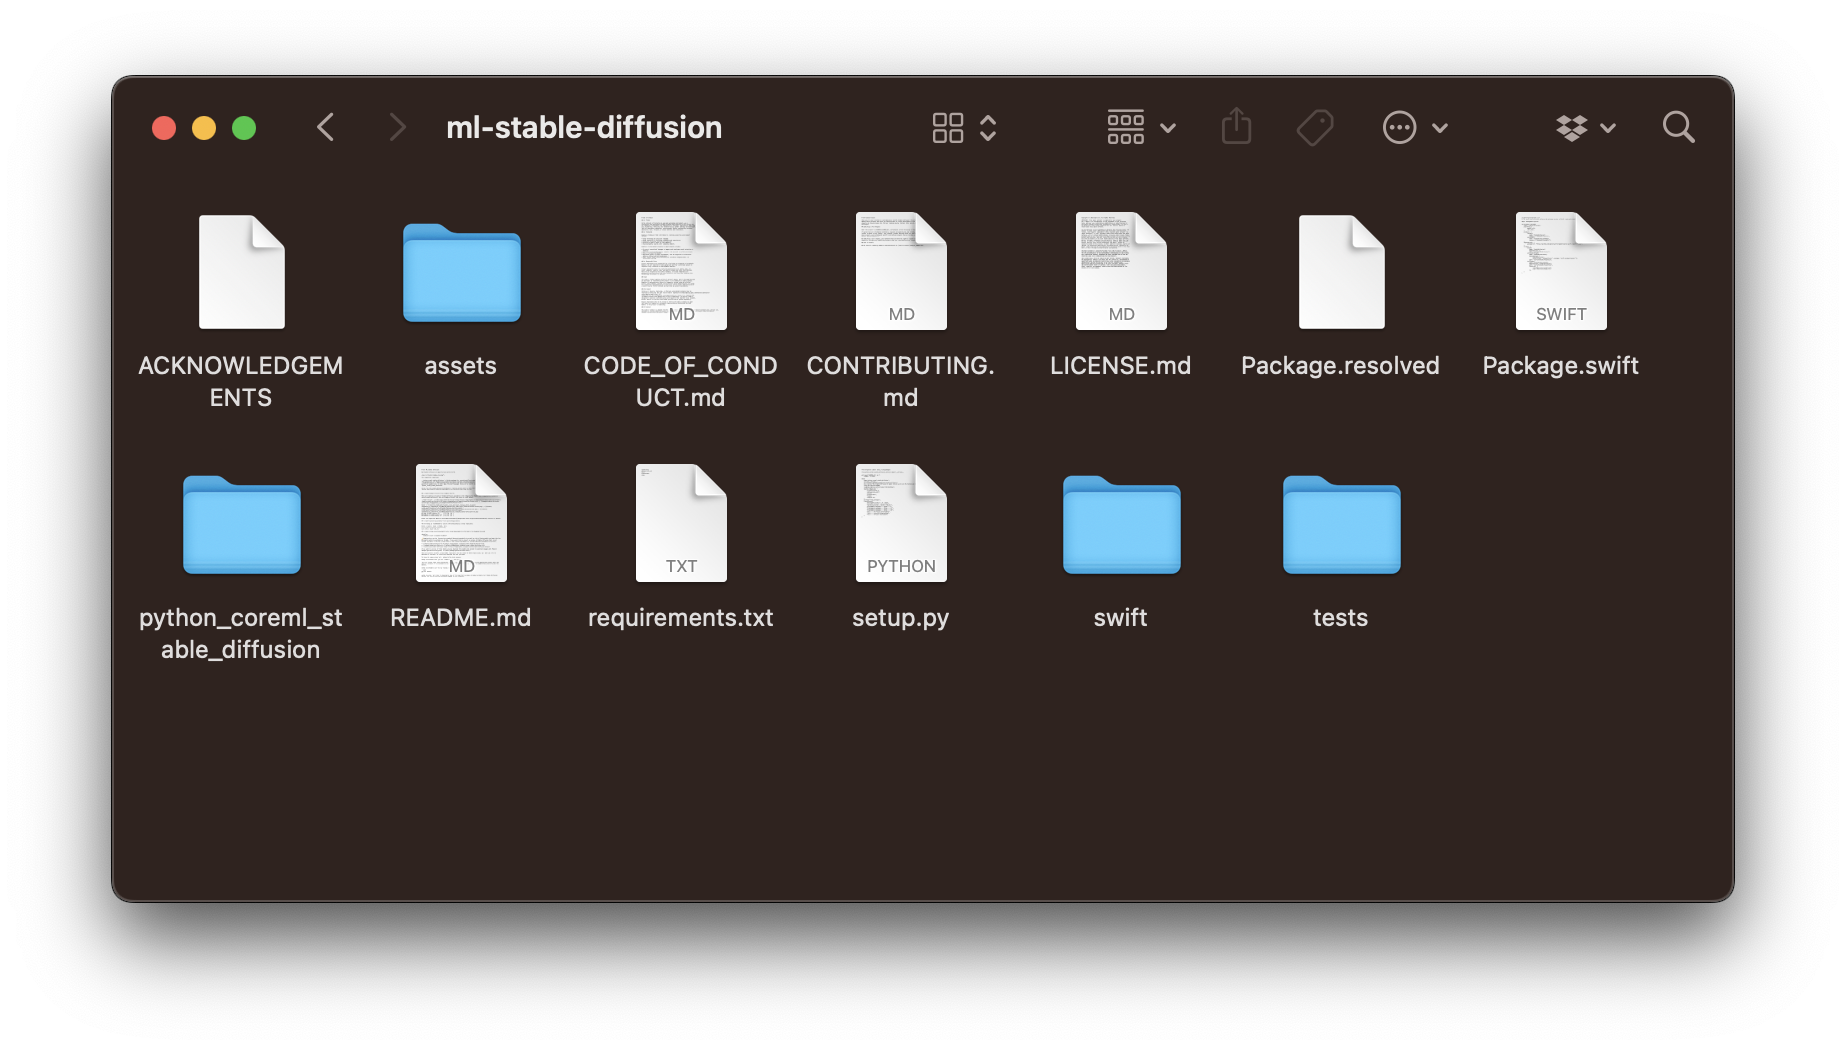
Image Generation with Swift and the CLI
The Swift package contains a StableDiffusion library as well as a StableDiffusionSample executable that allows you to generate images with Swift via the CLI (command line interface) in the Terminal. To test the capabilities with the previously downloaded pre-converted Core ML models, you can use the following command:
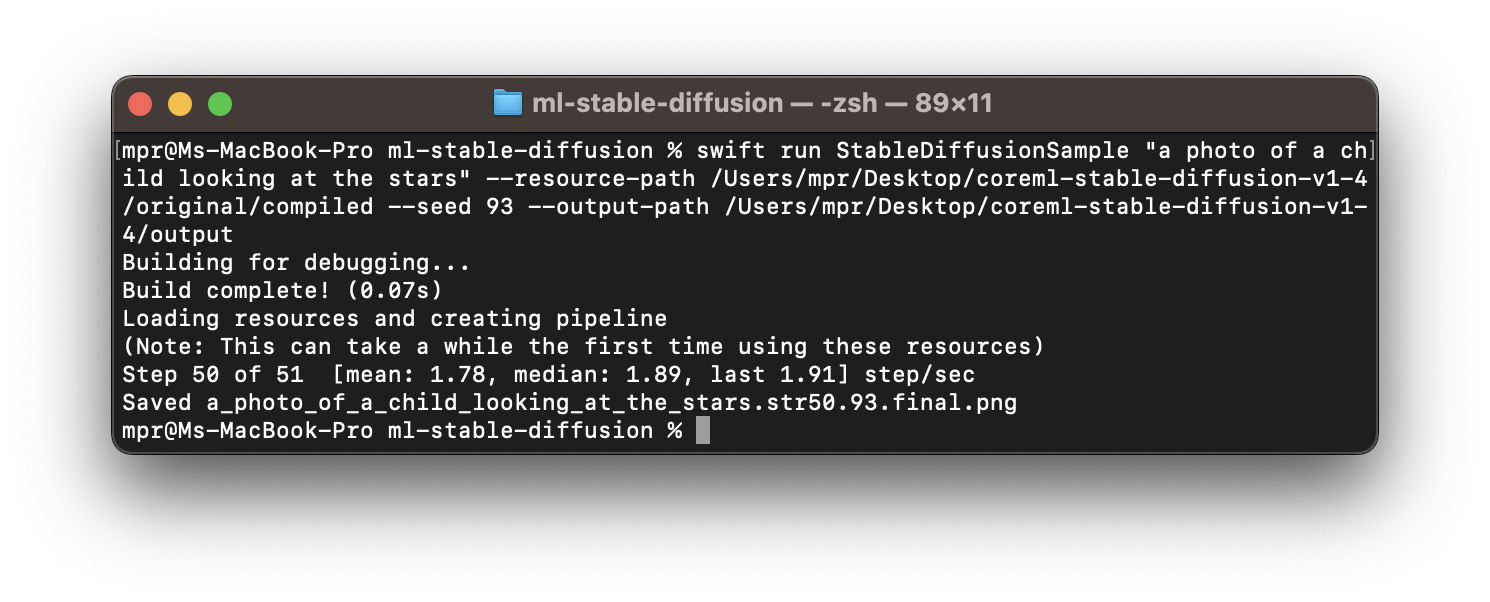
swift run StableDiffusionSample "prompt to use for the image generation" --resource-path <output-mlpackages-directory> --seed 93 --output-path </path/to/output>Note that beyond the prompt to inform the image generation process, there is a parameter to the --resource-path as well as for the --output-path. The resource path should be a folder containing the Core ML models and tokenization resources with at minimum following files:
TextEncoder.mlmodelc(text embedding model)Unet.mlmodelcorUnetChunk1.mlmodelc&UnetChunk2.mlmodelc(denoising autoencoder model)VAEDecoder.mlmodelc(image decoder model)vocab.json(tokenizer vocabulary file)merges.text(merges for byte pair encoding file)
The are some additional optional files for image2image or safety checker models that may also be included. Check out the package description for more details.
In our case, the previously cloned Stable Diffusion version 1.4 contains all the needed files in its original subfolder. There are also models optimized for low memory devices, such as iPhones etc., in the split_einsum subfolder. On Macs with M1 or M2 processors, the model files on the original subfolder can be used. However, models in the split_einsum subfolder will result in faster and more energy-efficient performance. In any case, with the Core ML model and a specified output path, you can run the command in Terminal to try Stable Diffusion.
A common reason for this may the usage of the Xcodes app to manage different versions of Xcode on the Mac, which adds version numbers to the Xcode versions in the Applications folder. So it may have to be set like this sudo xcode-select --switch /Applications/Xcode-14.2.0.app/Contents/Developer.
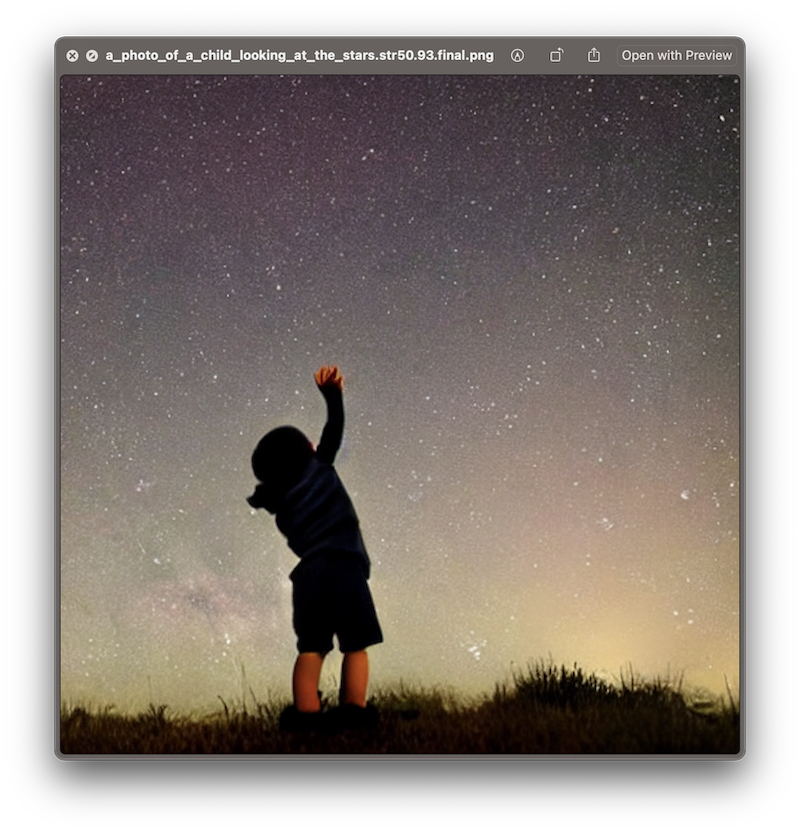
The first time the command is executed, the dependencies of the StableDiffusion Swift package have to be resolved, so it may take a few minutes. Then, the process is quite straight forward and the generated image will be stored at the output path using the prompt and random seed as a file name. In this example, the prompt of "a photo of a child looking at the stars" will result in a filename like /a_photo_of_a_child_looking_at_the_stars.93.final.png
Now, let's have a closer look at how to use the StableDiffusion library inside an Xcode project to empower Mac or iOS apps with the capability to generate images from text prompts.
Using the Swift library in Xcode Projects
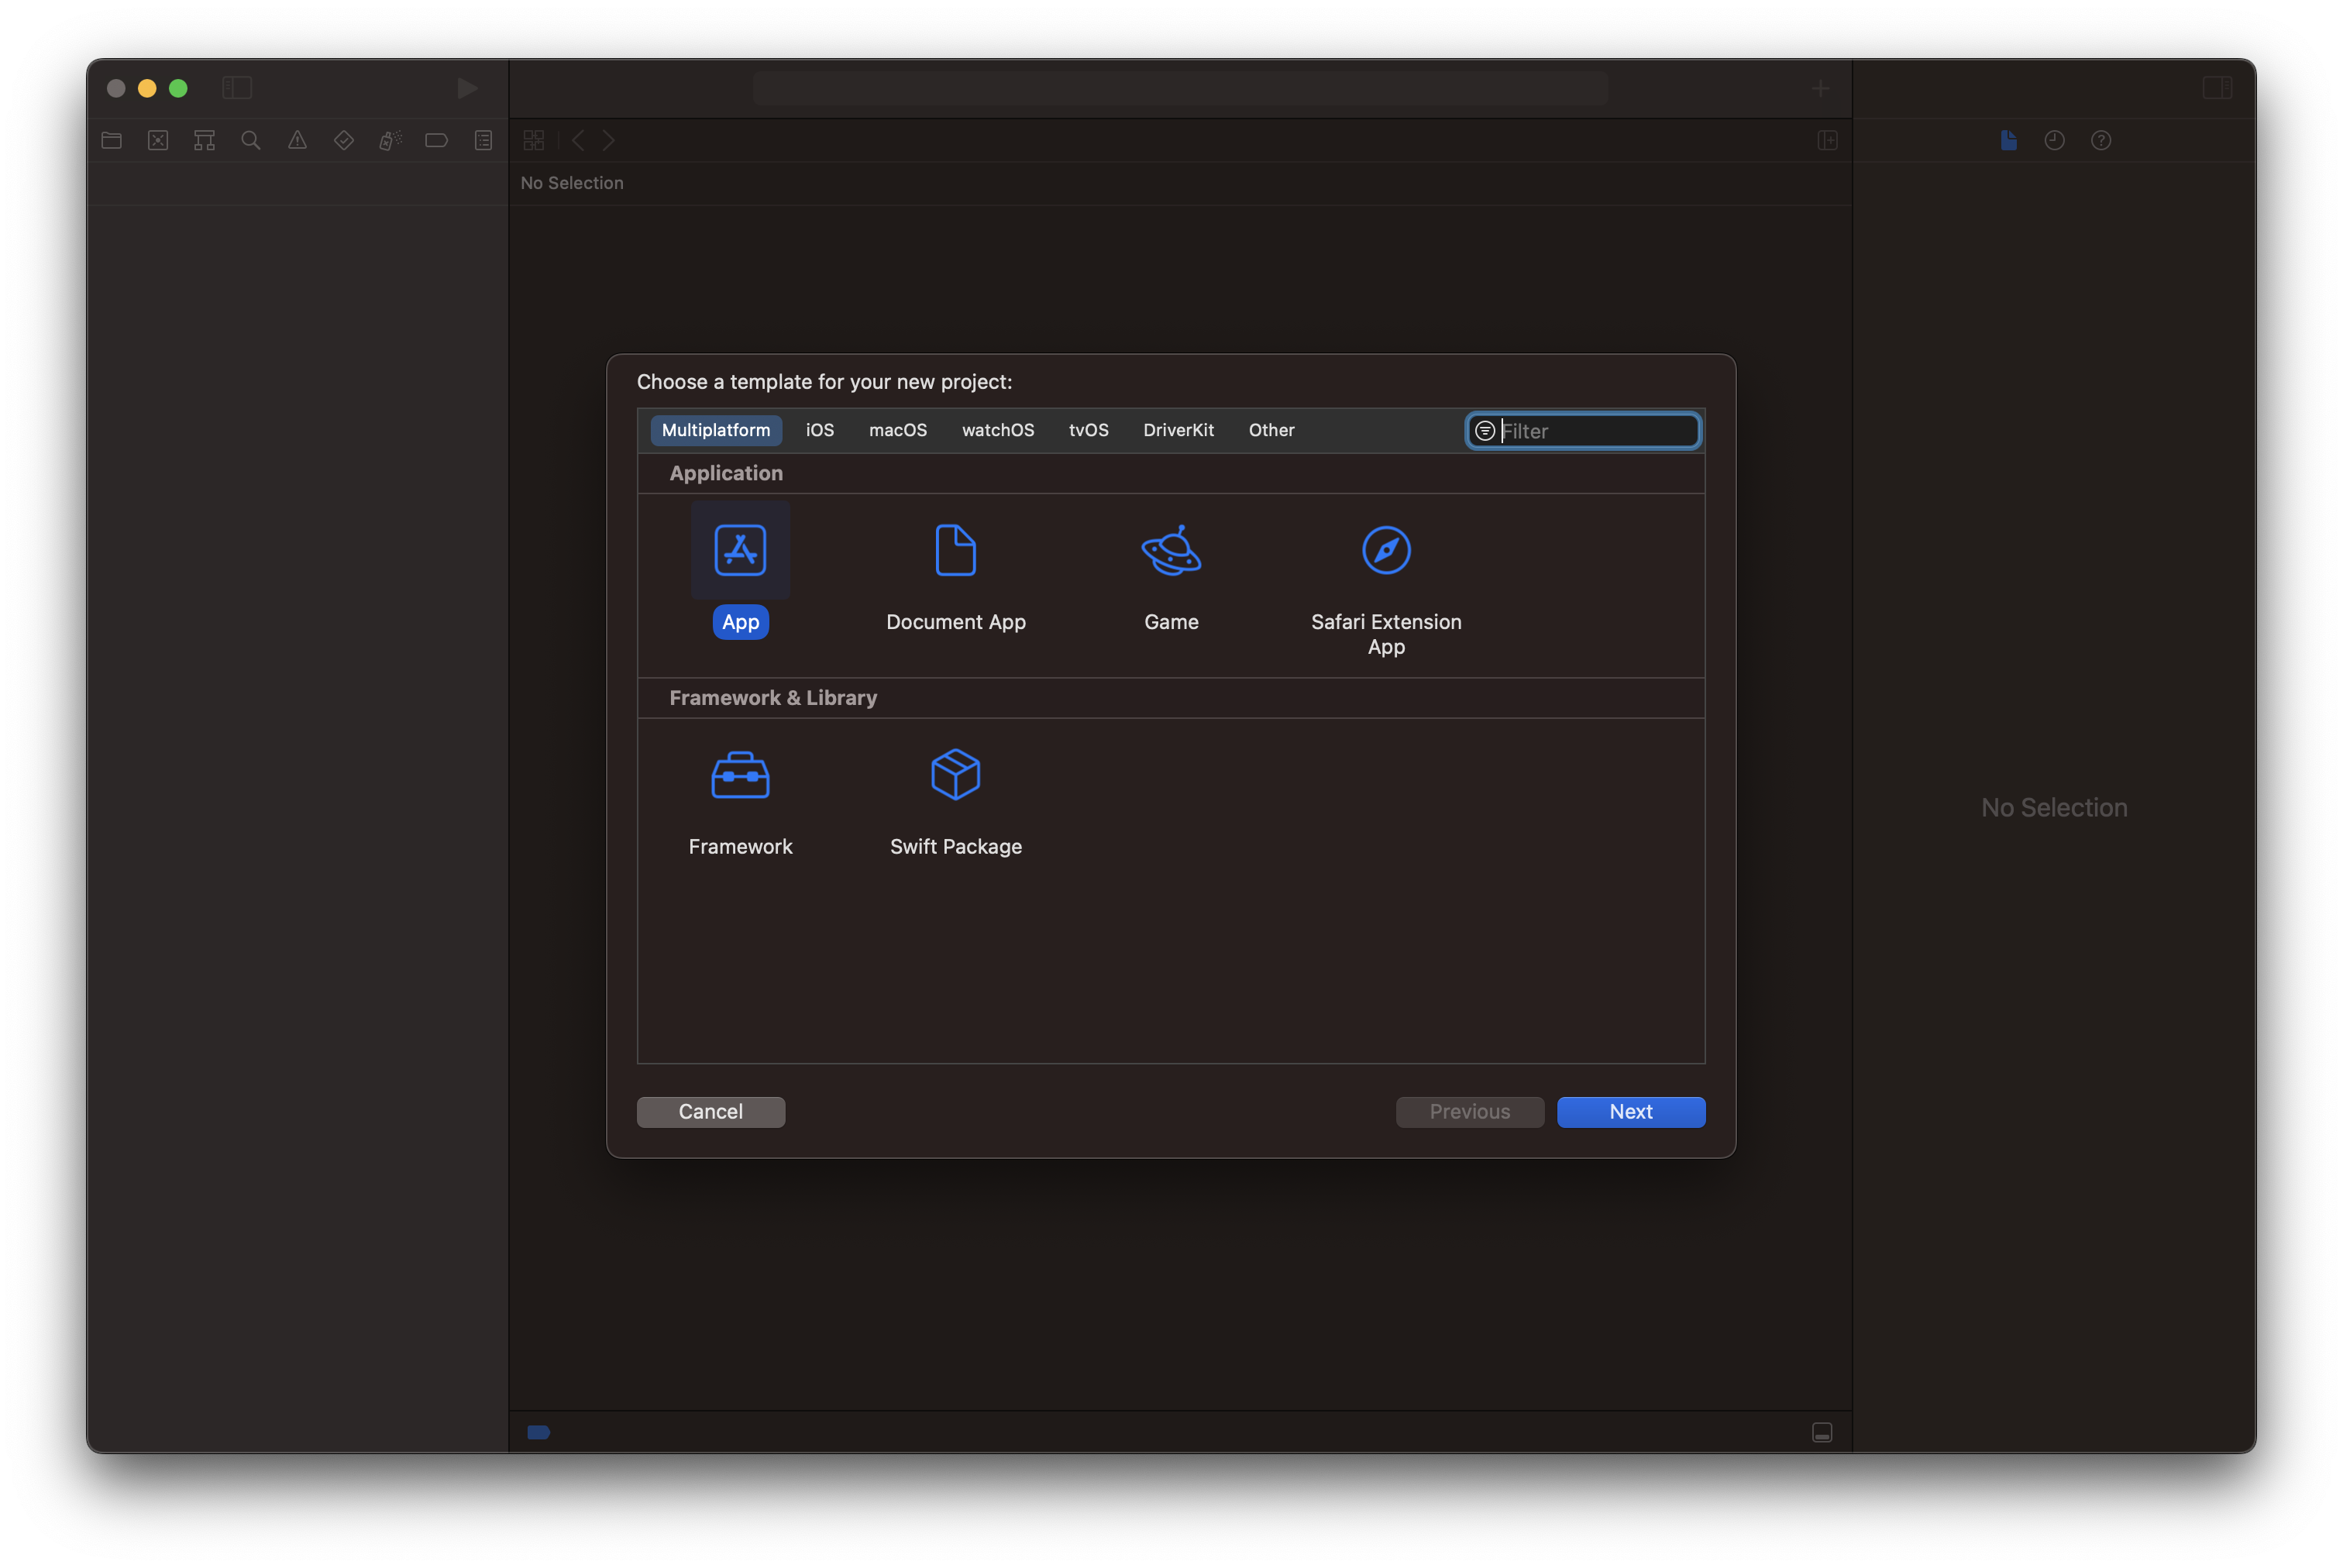
Start by creating a multiplatform app that will both run iOS and MacOS. It will allow the same code to be used for running both on iPhones and Macs.
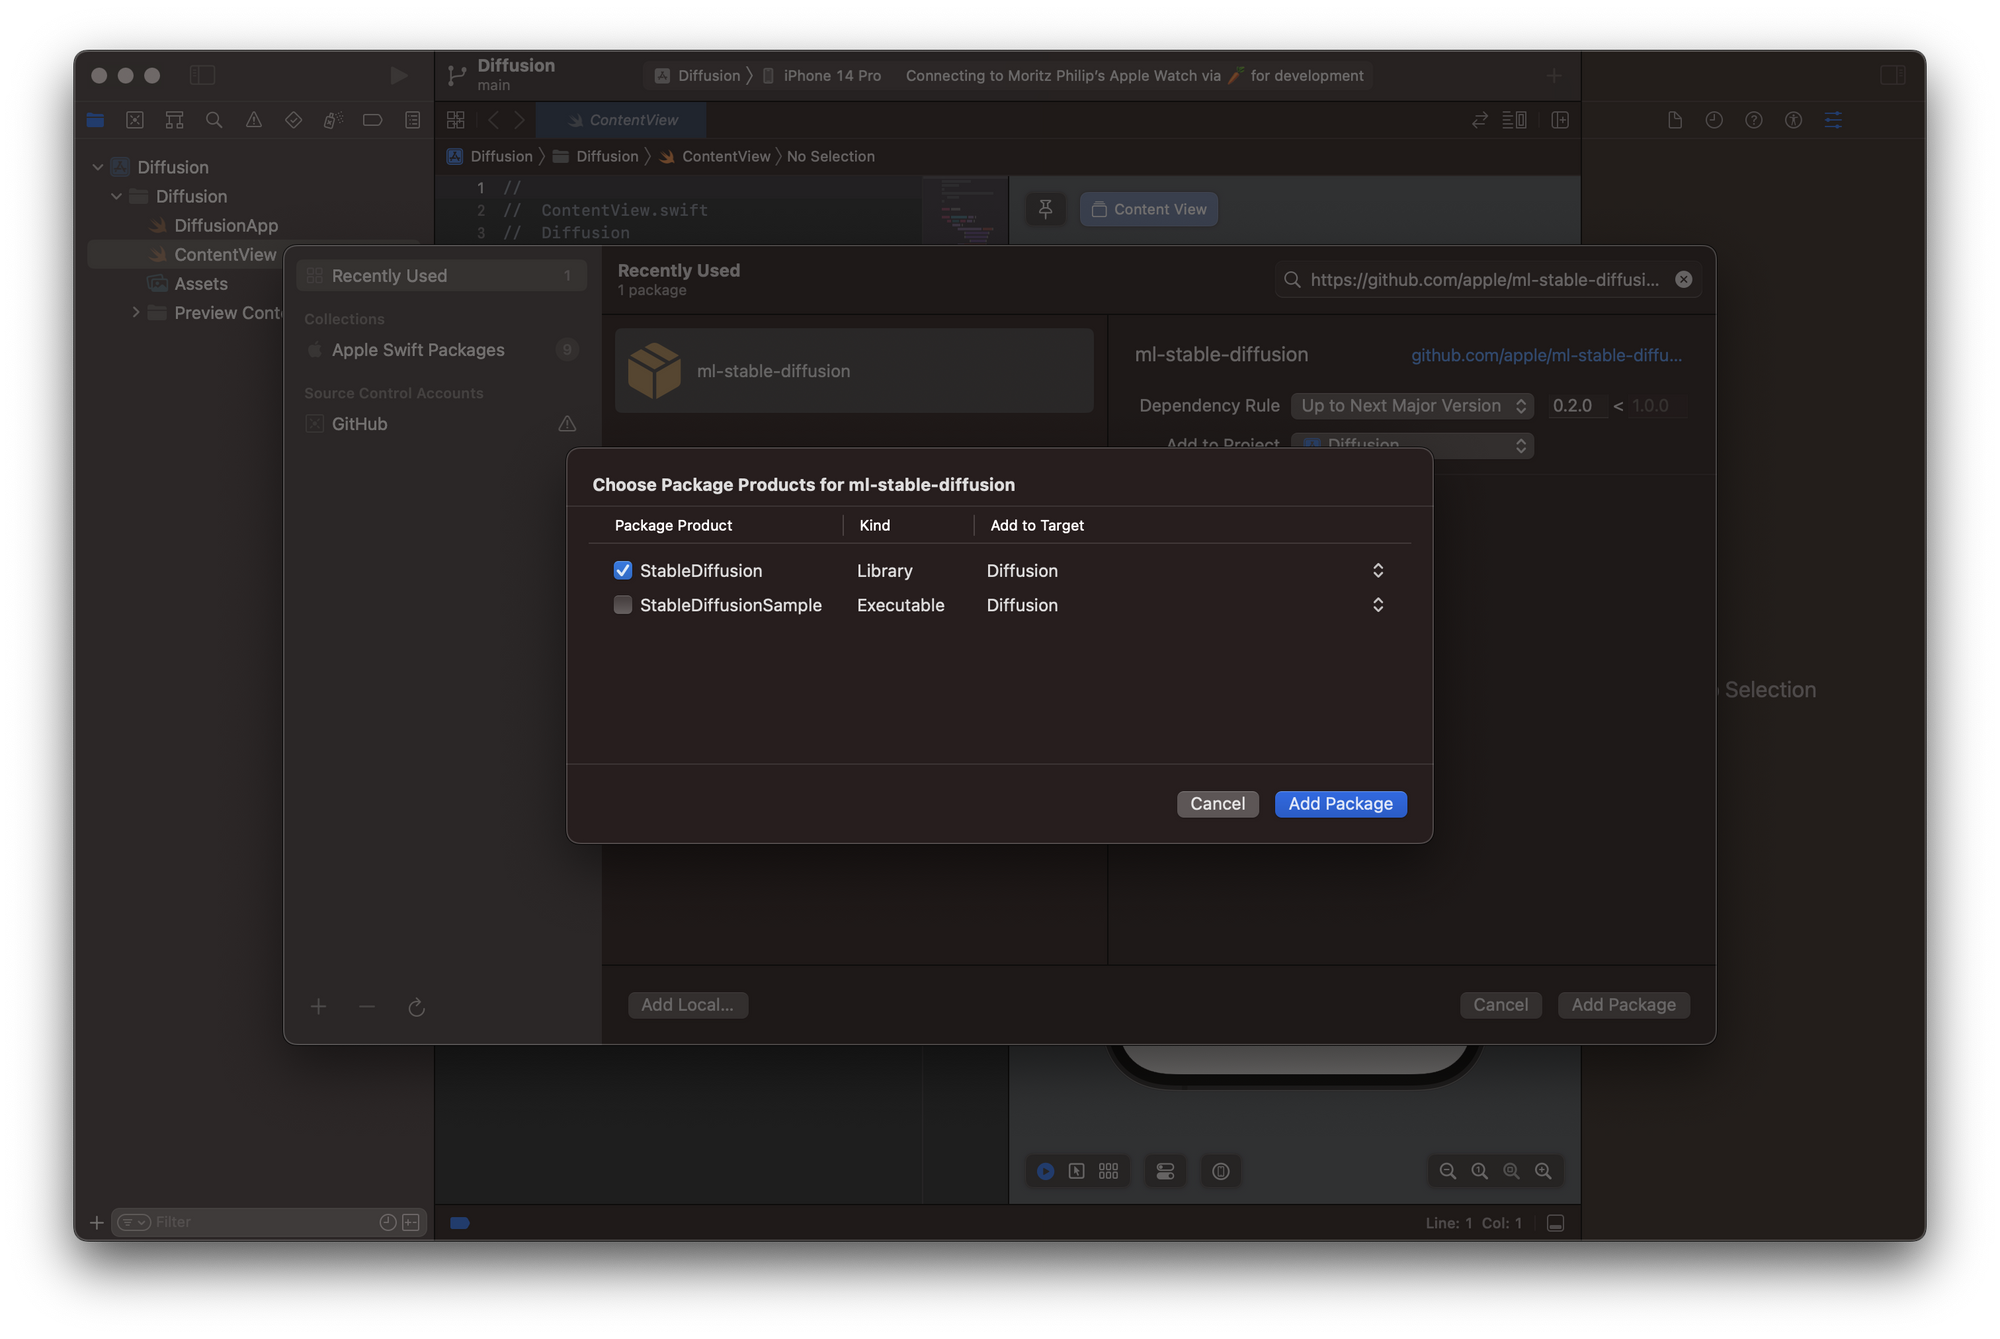
As a first step, select Add Packages from the File menu and paste the url to Apple's Core ML Stable Diffusion package https://github.com/apple/ml-stable-diffusion.git. When adding the package, Xcode will prompt you to select the Package Product and here you have to select the StableDiffusion library. The StableDiffusionSample executable is not required unless you want to use the CLI as described before.
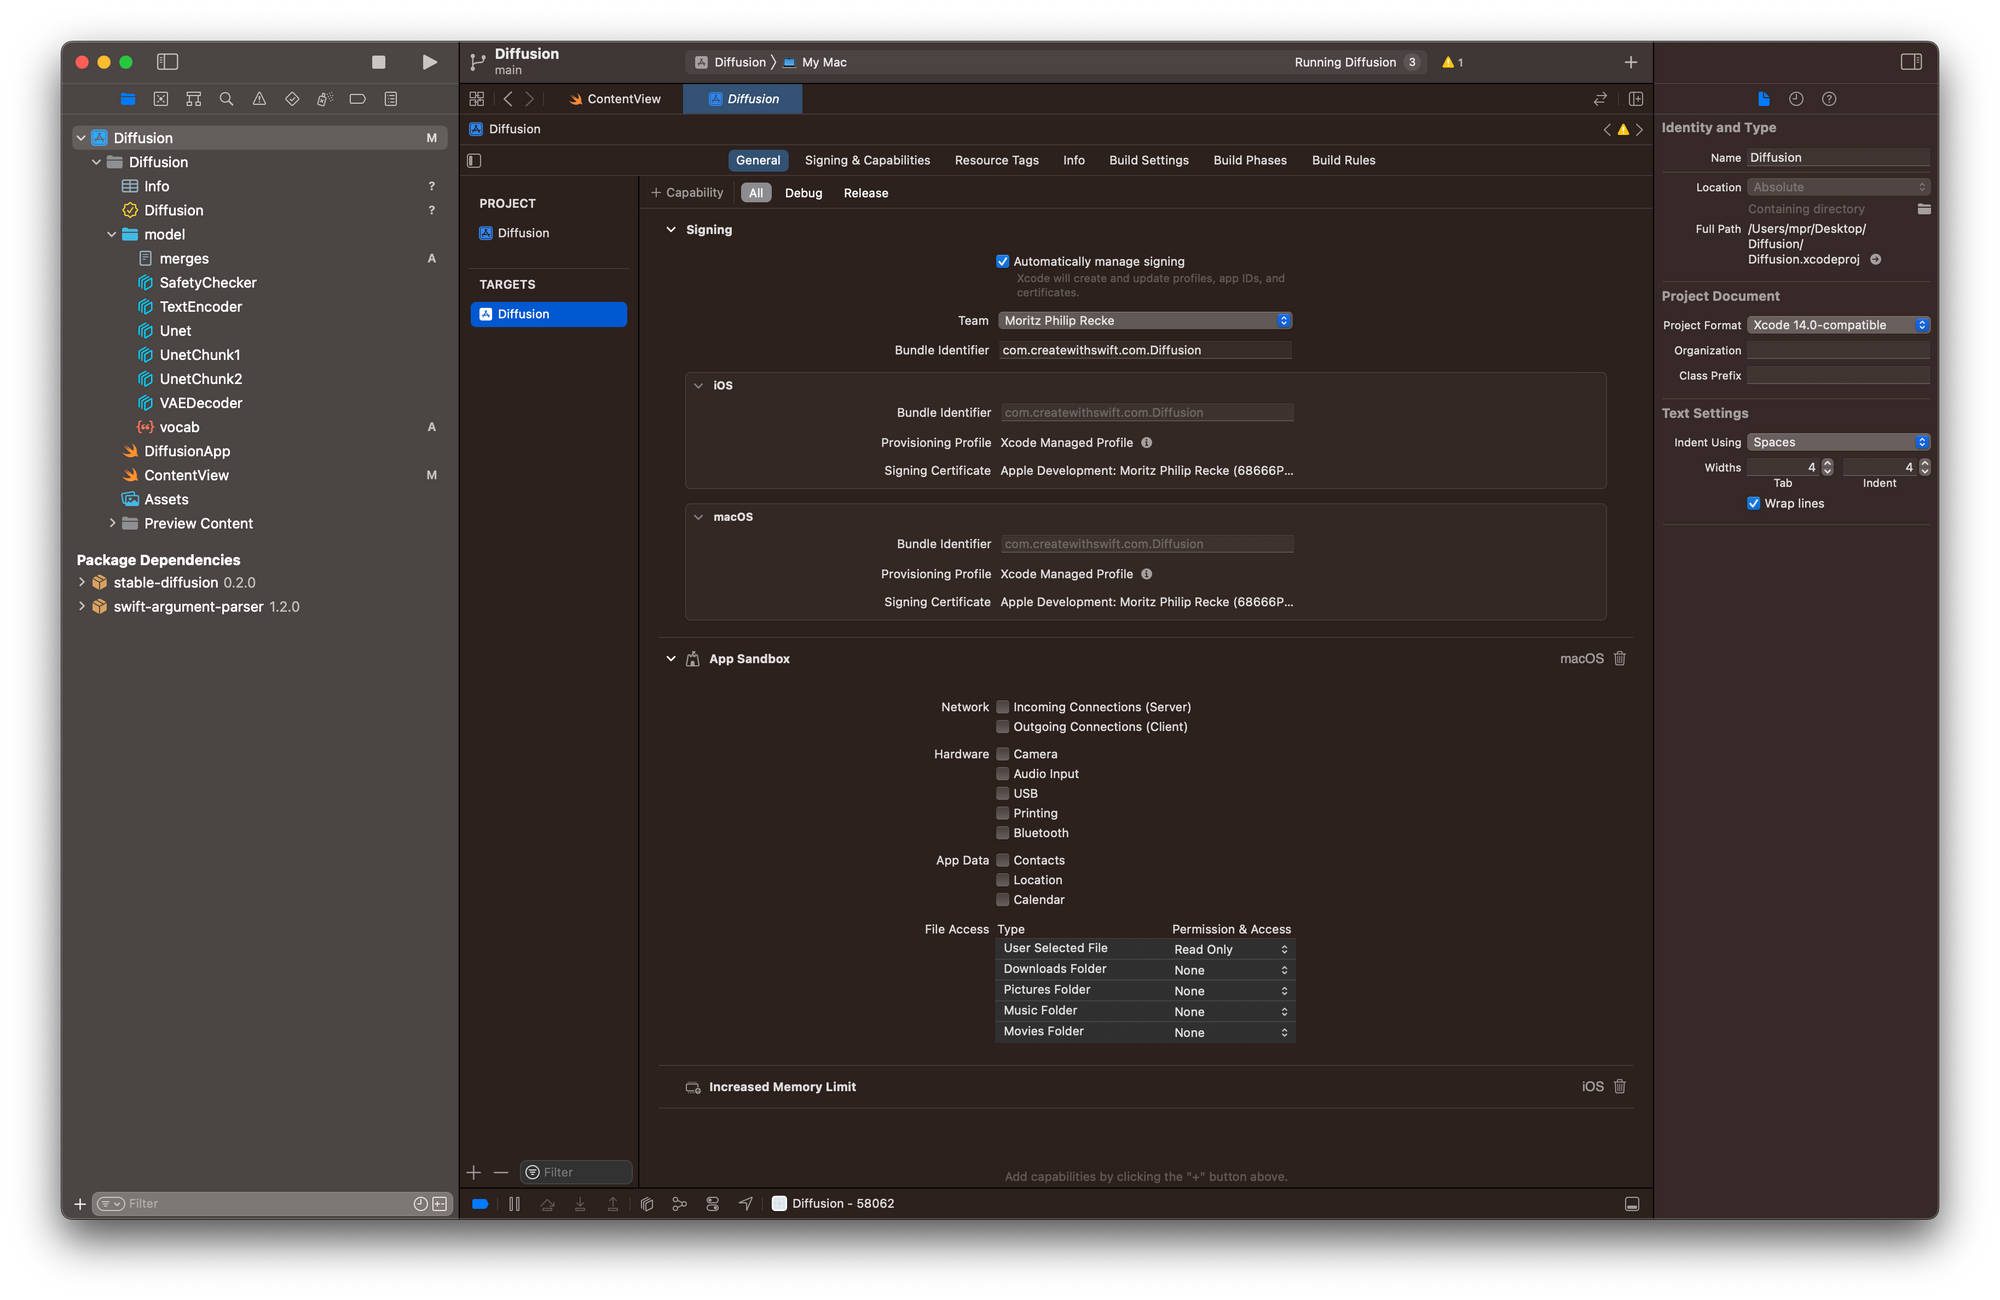
Inside the project folder, create a new group called model and then add all files from the split_einsum subfolder of the Stable Diffusion version 1.4 we previously downloaded from the Hugging Face Hub. It contains all pre-made models to use Stable Diffusion with Core ML. The folder has to contain the following files:
mergest.txtSafeyChecker.mlmodelcTextEncoder.mlmodelcUnet.mlmodelcUnetChunk1.mlmodelcUnetChunk2.mlmodelcVAEDecoder.mlmodelcvocab.json
With these prerequisites, you can get started by adding entitlements to the app. In the Signing & Capabilities pane of the Targets setting, add Increased Memory Limit and ensure that under File Access within the App Sandbox the permission and access for User Selected Files is set to Read Only.
Then, let's start setting up a very simple interface inside the ContentView.swift file. To use the StableDiffusion library, you have to import StableDiffusion. Then, let's add 3 @State Objects to the View. First, a String that contains the prompt you can use for the image generation, a StableDiffusionPipeline that will manage the image generation, and a Boolean to manage parts of the interface while the app is loading the model from the folder within the App bundle.
Within the body of the view, let's display a simple Text as long as the Boolean for the initialisation is true and otherwise a TextField that uses a Binding to the prompt String StateObject as well as a Button where you can later add execute the image generation.
With a .task() modifier you can manage loading of the model data and initializing the StableDiffusionPipeline. The new modifier starts executing asynchronous work as soon as the view is shown. Once the pipeline has been initialized, the Boolean for the initialization will be set to false, which will reload the view to then show the TextField and Button, allowing the user to edit the prompt and trigger the image generation.
import SwiftUI
import StableDiffusion

struct ContentView: View {

    @State var prompt: String = "a photo of a child looking at the stars"
    @State var pipeline: StableDiffusionPipeline?
    @State var initializing = true

    var body: some View {
        VStack {
            if initializing {
                Text("Initializing...")
            } else {
                TextField("Prompt", text: $prompt)
                Button("Generate") {
                    //generate image
                }
            }
        }
        .padding()
        .task {
            do {
                let url = Bundle.main.resourceURL?.appending(path: "model")
                pipeline = try StableDiffusionPipeline(resourcesAt: url!, disableSafety: false)
            } catch let error {
                print(error.localizedDescription)
            }
            initializing = false
        }
    }
}
Since the image generation will take quite some time even with powerful hardware such as the latest M2 Macbook Pros, it makes sense to extend the interface a little bit, to show a progress bar while the image is generated.
To that effect, let's add 3 additional @StateObjects to the view. First, you can add another Boolean to manage the state of the interface while the image is generated. Then, use a Double to create a nice progress bar and lastly a CGImage that will contain the output of the image generation.
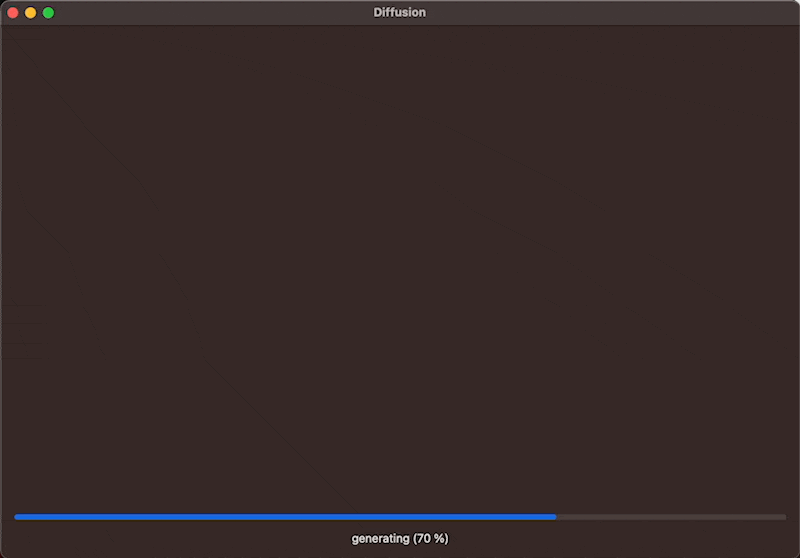
With these changes in mind, the body of the view can be setup up to show a ProgressView while the Boolean for the image generation is true. The progress view will use the progress Double to render and will be updated during the image generation. Lastly, if an CGImage is generated, you can display it even while the image generation progress is still ongoing.
struct ContentView: View {

	[...]

    @State var image: CGImage?
    @State var progress = 0.0
    @State var generating = false

    var body: some View {
        VStack {
            if initializing {
                Text("Initializing...")
            } else {
                if let image {
                    Image(image, scale: 1.0, label: Text(""))
                }
                if generating {
                    Spacer()
                    ProgressView(value: progress)
                    Text("generating (\(Int(progress*100)) %)")
                } else {
                    Spacer()
                    TextField("Prompt", text: $prompt)
                    Button("Generate") {
                        generateImage()
                    }
                }
            }
        }
        .padding()
        .task {
            [..]
        }
    }
}
As a last step, let's configure the image generation itself. This happens inside a generateImage() function that is called when the Button is pressed.
The function resets the progress and image and sets the Boolean for generating to true. This will re-render the view and show the ProgressView and Text. Then add a Task to execute the image generation asynchronously with the StableDiffusionPipeline by passing the prompt from the TextView to the pipeline. Within the closure of the progressHandler, updat the Double value for progress which will update the view continuously throughout the image generation to display the progress bar. Then, once images are available throughout the progress, you can assign the image to the image @StateObject to update the view. This will result in the interface showing the latest image of the image generation process, allowing the user to see the image evolve through its iterations.
func generateImage(){
    progress = 0.0
    image = nil
    generating = true
    Task.detached(priority: .high) {
        var images: [CGImage?]?
        do {
            images = try pipeline?.generateImages(prompt: prompt, disableSafety: false, progressHandler: { progress in
                self.progress = Double(progress.step) / 50
                if let image = progress.currentImages.first {
                    self.image = image
                }
                return true
            })
        } catch let error {
            print(error.localizedDescription)
        }
        if let image = images?.first {
            self.image = image
        }
        generating = false
    }
}
And that's it. It is quite easy to get started with Stable Diffusion and Core ML and the package released by Apple allows easy integration in Xcode projects across Apple platforms.
For your convenience, this is the entire code of the ContentView.swift:
struct ContentView: View {

    @State var prompt: String = "a photo of a child looking at the stars"
    @State var pipeline: StableDiffusionPipeline?
    @State var image: CGImage?
    @State var progress = 0.0
    @State var generating = false
    @State var initializing = true

    var body: some View {
        VStack {
            if initializing {
                Text("Initializing...")
            } else {
                if let image {
                    Image(image, scale: 1.0, label: Text(""))
                }
                if generating {
                    Spacer()
                    ProgressView(value: progress)
                    Text("generating (\(Int(progress*100)) %)")
                } else {
                    Spacer()
                    TextField("Prompt", text: $prompt)
                    Button("Generate") {
                        generateImage()
                    }
                }
            }
        }
        .padding()
        .task {
            do {
                let url = Bundle.main.resourceURL?.appending(path: "model")
                pipeline = try StableDiffusionPipeline(resourcesAt: url!, disableSafety: false)
            } catch let error {
                print(error.localizedDescription)
            }
            initializing = false
        }
    }

    func generateImage(){
        progress = 0.0
        image = nil
        generating = true
        Task.detached(priority: .high) {
            var images: [CGImage?]?
            do {
                images = try pipeline?.generateImages(prompt: prompt, disableSafety: false, progressHandler: { progress in
                    self.progress = Double(progress.step) / 50
                    if let image = progress.currentImages.first {
                        self.image = image
                    }
                    return true
                })
            } catch let error {
                print(error.localizedDescription)
            }
            if let image = images?.first {
                self.image = image
            }
            generating = false
        }
    }
}
Next Steps
Of course, this is just a sample implementation and there are many properties that can be configured to improve the performance of the image generation with Stable Diffussion. To showcase a few more features of the Core ML port of Stable Diffusion, Hugging Face creates a more advanced example app for iOS and MacOS that is using Swift and SwiftUI. It is open source and can be used also within other projects or as a starting point.
Of course, there are many other Stable Diffusion model derivatives around beyond the pre-made models for Core ML. These can be converted to Core ML models using Python and the python_coreml_stable_diffusion package for converting PyTorch models to Core ML format provided by Apple.
If you are interested in other machine learning topics or Core ML capabilities, take a look at our other articles and tutorials for Core ML or learn how to create your own models with Create ML. For the latest and greatest, explore how to use OpenAI's ChatGPT conversational machine learning model to create working code for SwitfUI apps.