Grouping elements within a Glass Effect Container in SwiftUI
Learn how to group items with a glass effect using the GlassEffectContainer view.

When designing an app, grouping UI elements ensures related items are easier to find, understand, and interact with, creating a cleaner, more intuitive user experience while maintaining consistency, simplicity, and usability across the app.
While adopting Liquid Glass design language into our app, there is one component that can be very useful for elements that need to be grouped together: GlassEffectContainer, a view that allows to gather a set of Liquid glass elements all together in one shape, available from 26.0 beta on.
GlassEffectContainer works along with glassEffect(_:in:isEnabled:) , the modifier that applies liquid glass effect to components.
// 1.
GlassEffectContainer(spacing: 30.0) {
    // 2.
    HStack {
        // 3.
        Image(systemName: "sun.max.fill")
        .padding()
        // 4.
        .glassEffect()

        Image(systemName: "moon.stars.fill")
        .padding()
        .glassEffect()

        Image(systemName: "cloud.rain.fill")
        .padding()
        .glassEffect()
    }
}
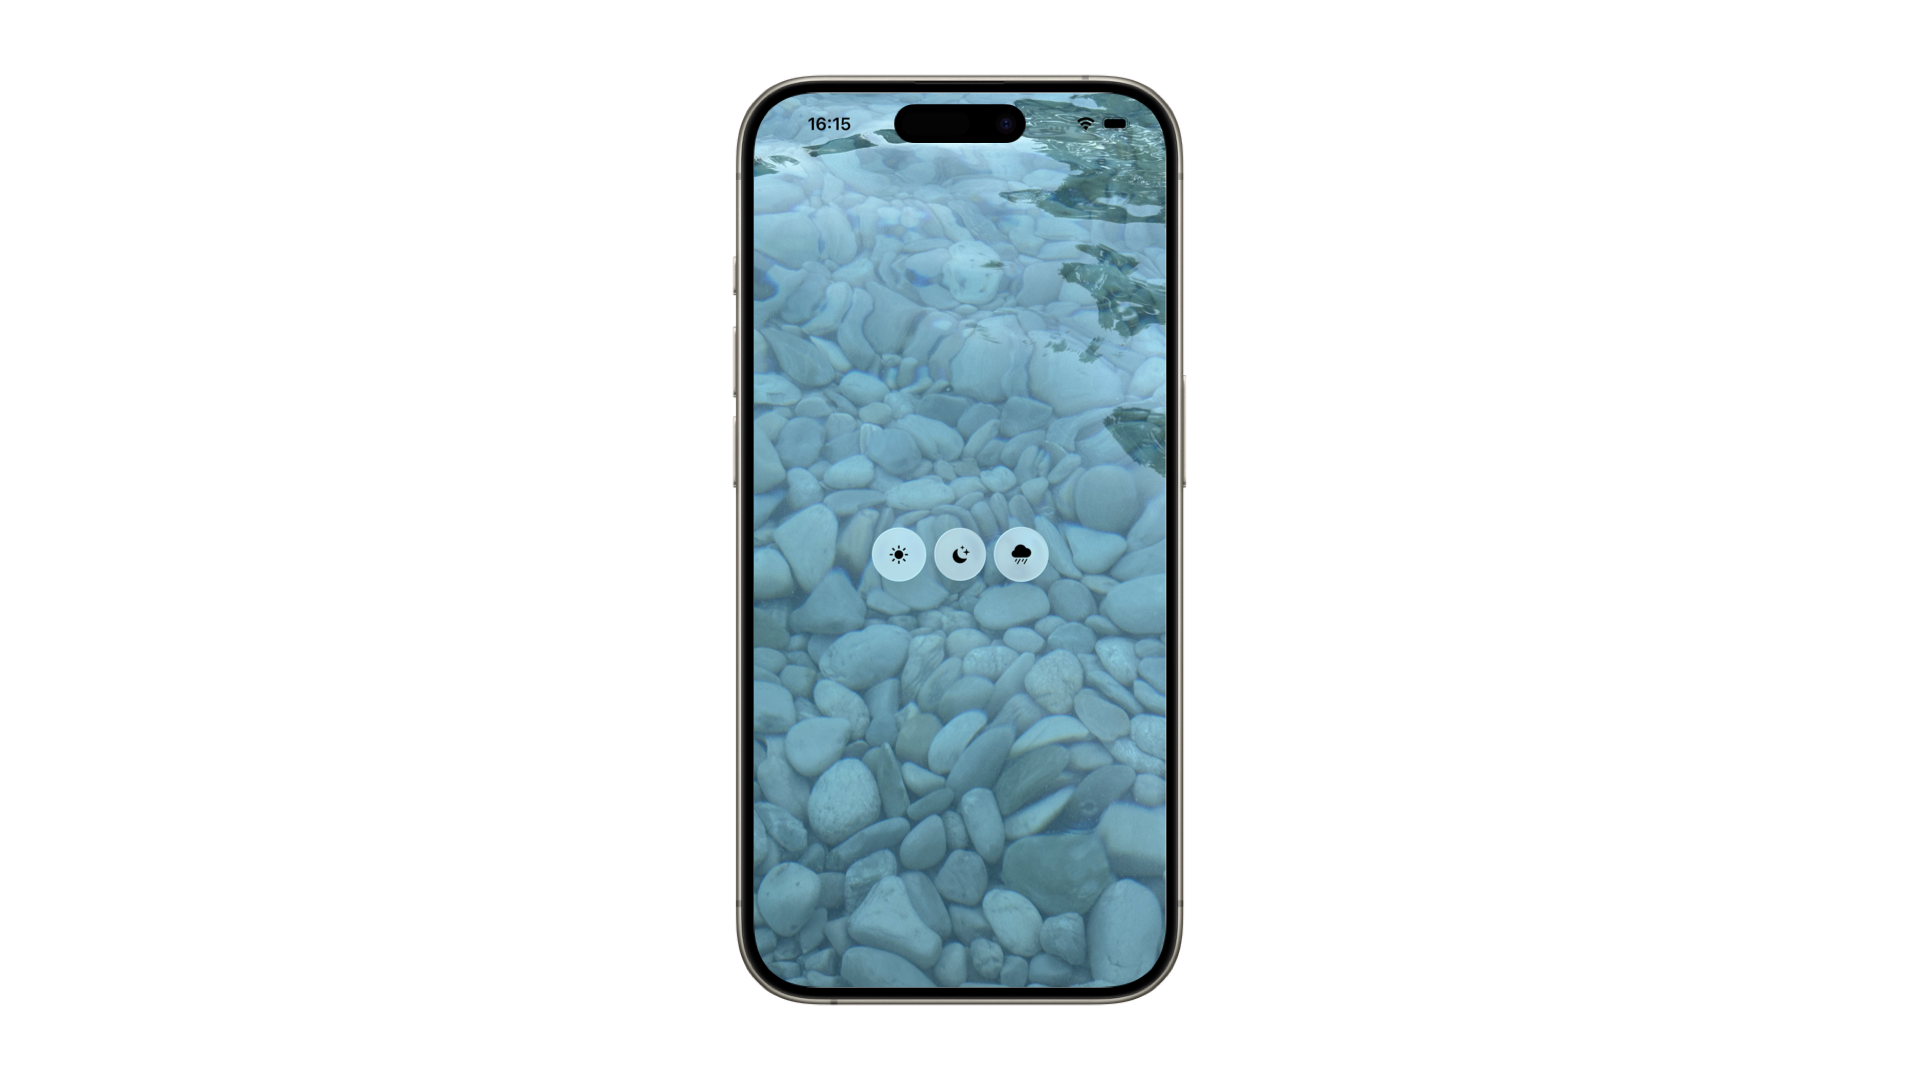
- Declare the
GlassEffectContainerand add the preferred space value as parameter. - Create a vertical or horizontal container.
- Declare the item that needs to be grouped together.
- Apply to each of them the
glassEffect(_:in:isEnabled:)modifier for enabling the liquid glass effect.

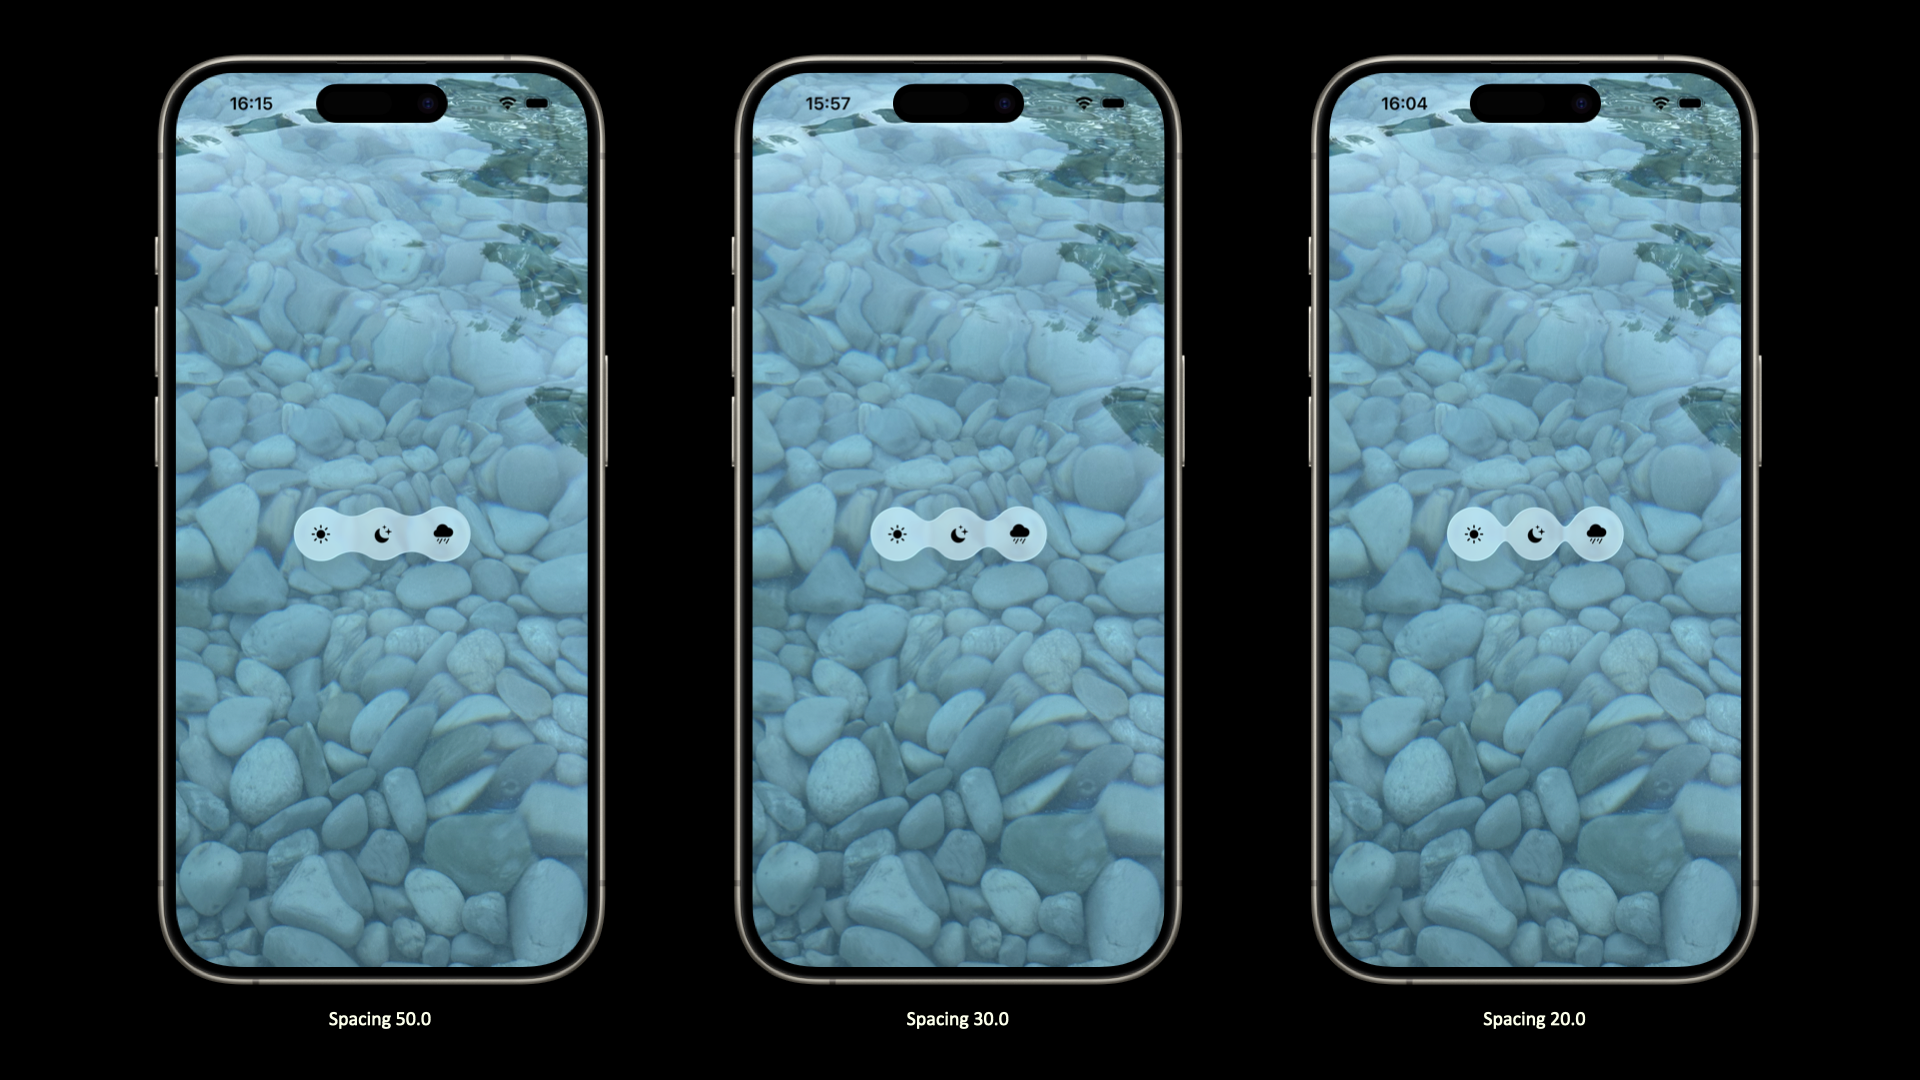
Its form may vary according to the amount of space among the grouped items.
GlassEffectContainer(spacing: 20.0) {
    ...
}
Also, GlassEffectContainer comes with an extra simple constructor that only requires views to be built, not allowing to specify the space among the elements.
// 1.
GlassEffectContainer {
    ...
}
It results in grouped elements that behave together but appear as single elements.
Furthermore, the visual effect differs accordingly to where you place the glassEffect(_:in:isEnabled:) modifier.
GlassEffectContainer(spacing: 30.0) {
    HStack {
        Image(systemName: "sun.max.fill")
        .padding()

        Image(systemName: "moon.stars.fill")
        .padding()

        Image(systemName: "cloud.rain.fill")
        .padding()
    }
}
// 1.
.glassEffect()
- If the
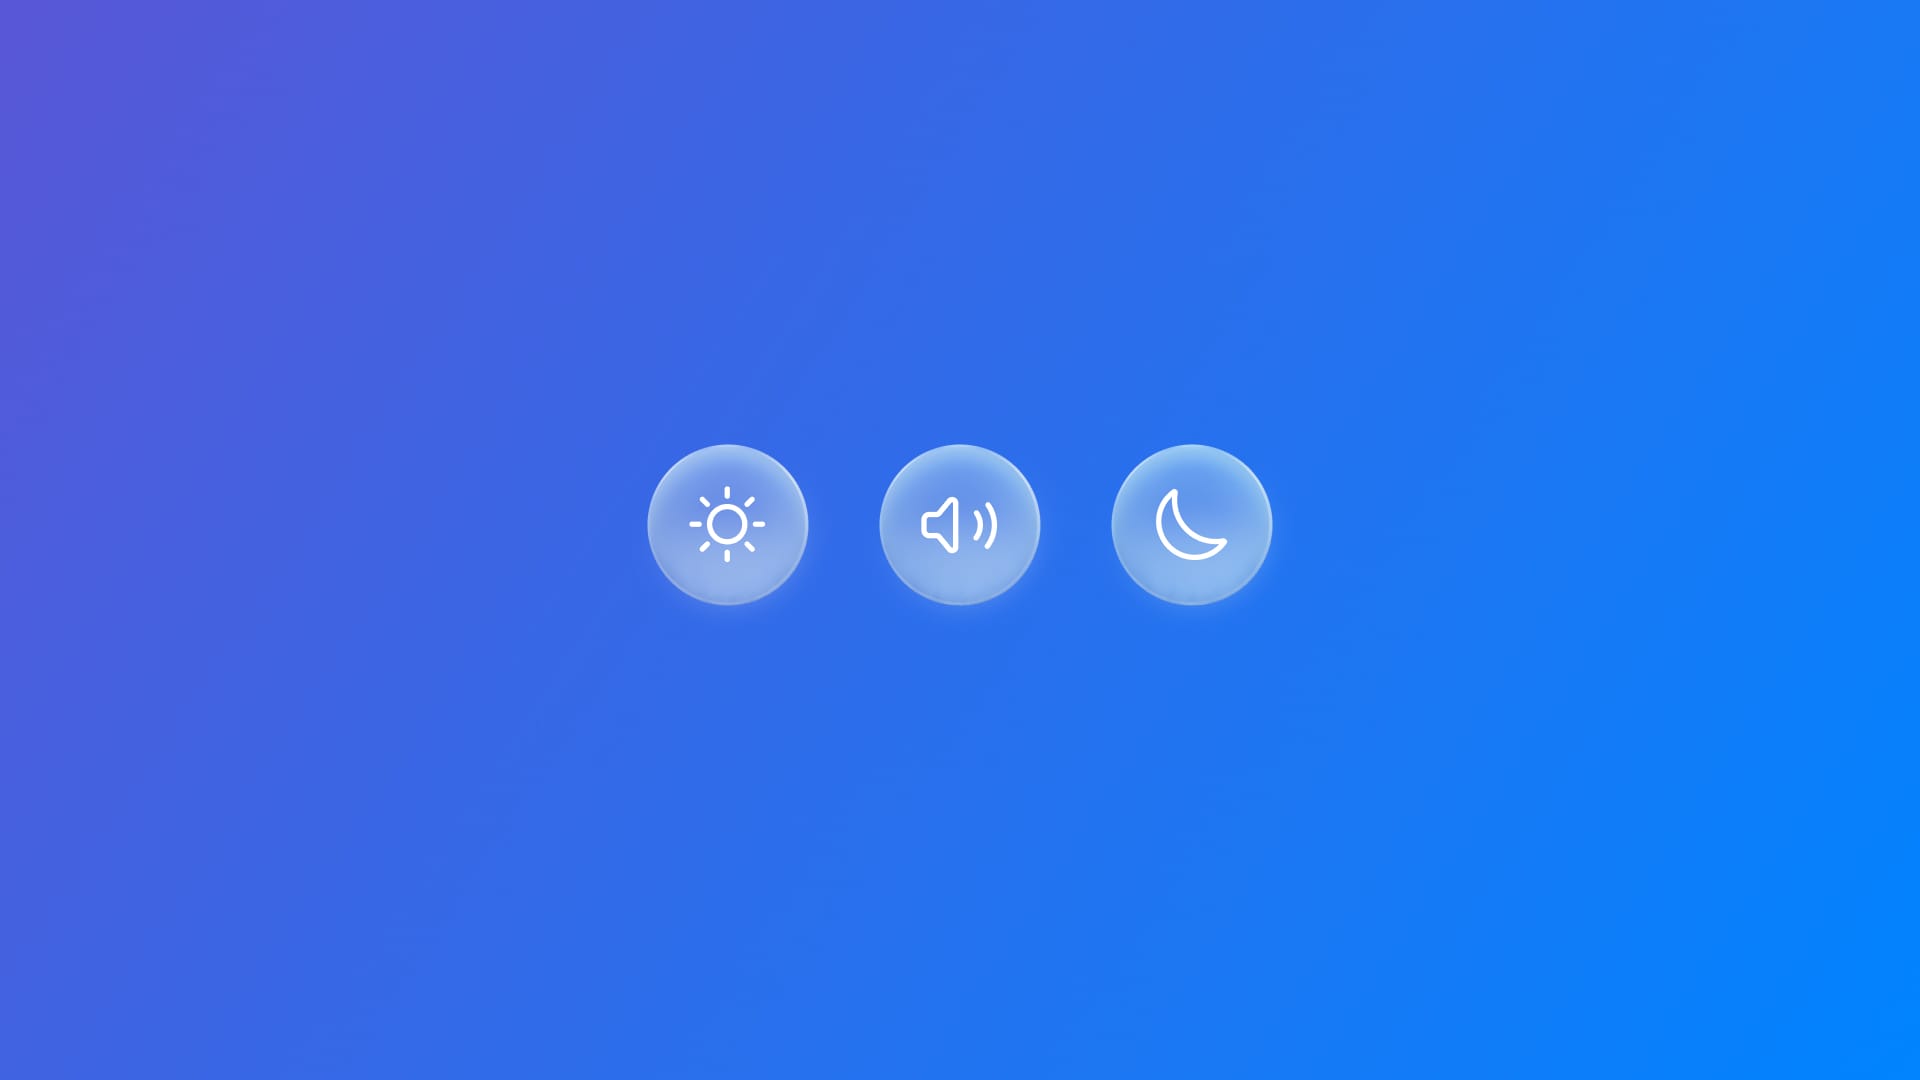
glassEffect(_:in:isEnabled:)is applied to theGlassEffectContainerrather than to each grouped element, it will result as follow.

And, even adjusting the value for spacing parameter won’t affect the final result, meaning that in order to insert space, you need to use a different approach like using Spacer and/or playing around with the frame size of the container.
With the introduction of Liquid Glass design language and the related GlassEffectContainer component, components can be elegantly unified with a visual effect and, by strategically applying the glassEffect(_:in:isEnabled:) modifier, you gain precise control over both appearance and behavior, allowing for cleaner, more immersive, and consistent UI experiences across your app.