Implementing Non-Consumable In-App Purchases with StoreKit 2
Learn how to start selling Non-Consumable In-App Purchases in your SwiftUI app.

The App Store supports multiple monetization options for your apps. You have a wide variety of options, ranging from charging upfront for your app to offering a subscription to unlock content or features.
Let’s explore how to get started with the simplest In-App Purchase type: the Non-Consumable. You can use this type, for example, to let users pay once to unlock a feature in your app (e.g., a black-and-white filter in a photo editor).
The goal of the tutorial is to guide you through creating, configuring, and testing a Non-Consumable In-App Purchase from Xcode to App Store Connect. By the end, you will have implemented a complete purchase flow using StoreKit 2.
Before We Start
To follow this tutorial successfully, basic familiarity with Xcode and SwiftUI is helpful, although no prior StoreKit knowledge is required.
First, create a new project called “PhotoEditor”. Create a new folder in the project and call it “Store”. This is where all your purchase-related management files will live during the tutorial.
In iOS, Apple provides you with a framework called StoreKit. This is the framework that gives everything you need to sell content in your apps with In-App Purchases. For StoreKit to know about the available In-App Purchases in your app, you need a StoreKit configuration file.
No additional assets are required for this tutorial.
Step 1 – Create the StoreKit Configuration File
Choose “New File from Template”, then search for “StoreKit” in the top-right search bar. In our example, we choose the name “PhotoEditor.storekit”. Make sure not to select “Sync this file with an app in App Store Connect.” You don’t need this for local testing, and enabling it only adds unnecessary complexity.
After creating the file, click the “+” button in the bottom-left corner and then “Add Non-Consumable In-App Purchase” from the popover menu. Now you have to give your new In-App Purchase a “Reference Name”, which is simply a human-readable name so you can easily identify the purchase later. You can choose “Black and White filter”, since the In-App Purchase will unlock an imaginary black and white filter inside the app. You also have to add a “Product ID,” which must be unique across the entire App Store — similar to how your app’s bundle identifier works. A good rule of thumb is to take your app’s bundle identifier and append another component, e.g. .BwFilter.
Now you have successfully created your first In-App Purchase. The last thing you need to do to be able to show this as an option to a user in your app, is setting a "Display Name" and "Description". I choose “Black and White filter” as the Display Name and “Unlocks a beautiful Black and White filter to give all your photos a special touch”
Step 2 – Display the Product in ContentView
Now you can go to your ContentView.swift and remove everything and add this block of code.
// 1
import StoreKit
import SwiftUI

struct ContentView: View {
    var body: some View {
        // 2
        ProductView(id: "dev.xbow.PhotoEditor.BwFilter")
            .padding()
    }
}
import StoreKitis required to load and display StoreKit productsProductView(id: ...)displays the product with the matching Product ID
Step 3 – Connect the StoreKit Configuration File
When the preview canvas on the right finishes re-rendering, you will see that your In-App Purchase is not shown, even though you correctly passed its ID to the ProductView. This happens because your app doesn’t yet know that you have a local StoreKit configuration file that includes the In-App Purchase with this Product ID. It tries to load the Product from App Store Connect, where it doesn’t exist either, so a placeholder view is shown.
To fix that, you tap on PhotoEditor in the top bar and then “Edit Scheme”. Under Options, you will find a dropdown menu next to “StoreKit Configuration” that lets you select the configuration file you just created. If you close the view and switch back to the Preview Canvas, your new In-App Purchase should now automatically be displayed with the Display Name, Description and Price.
Step 4 – Test the In-App Purchase on Device
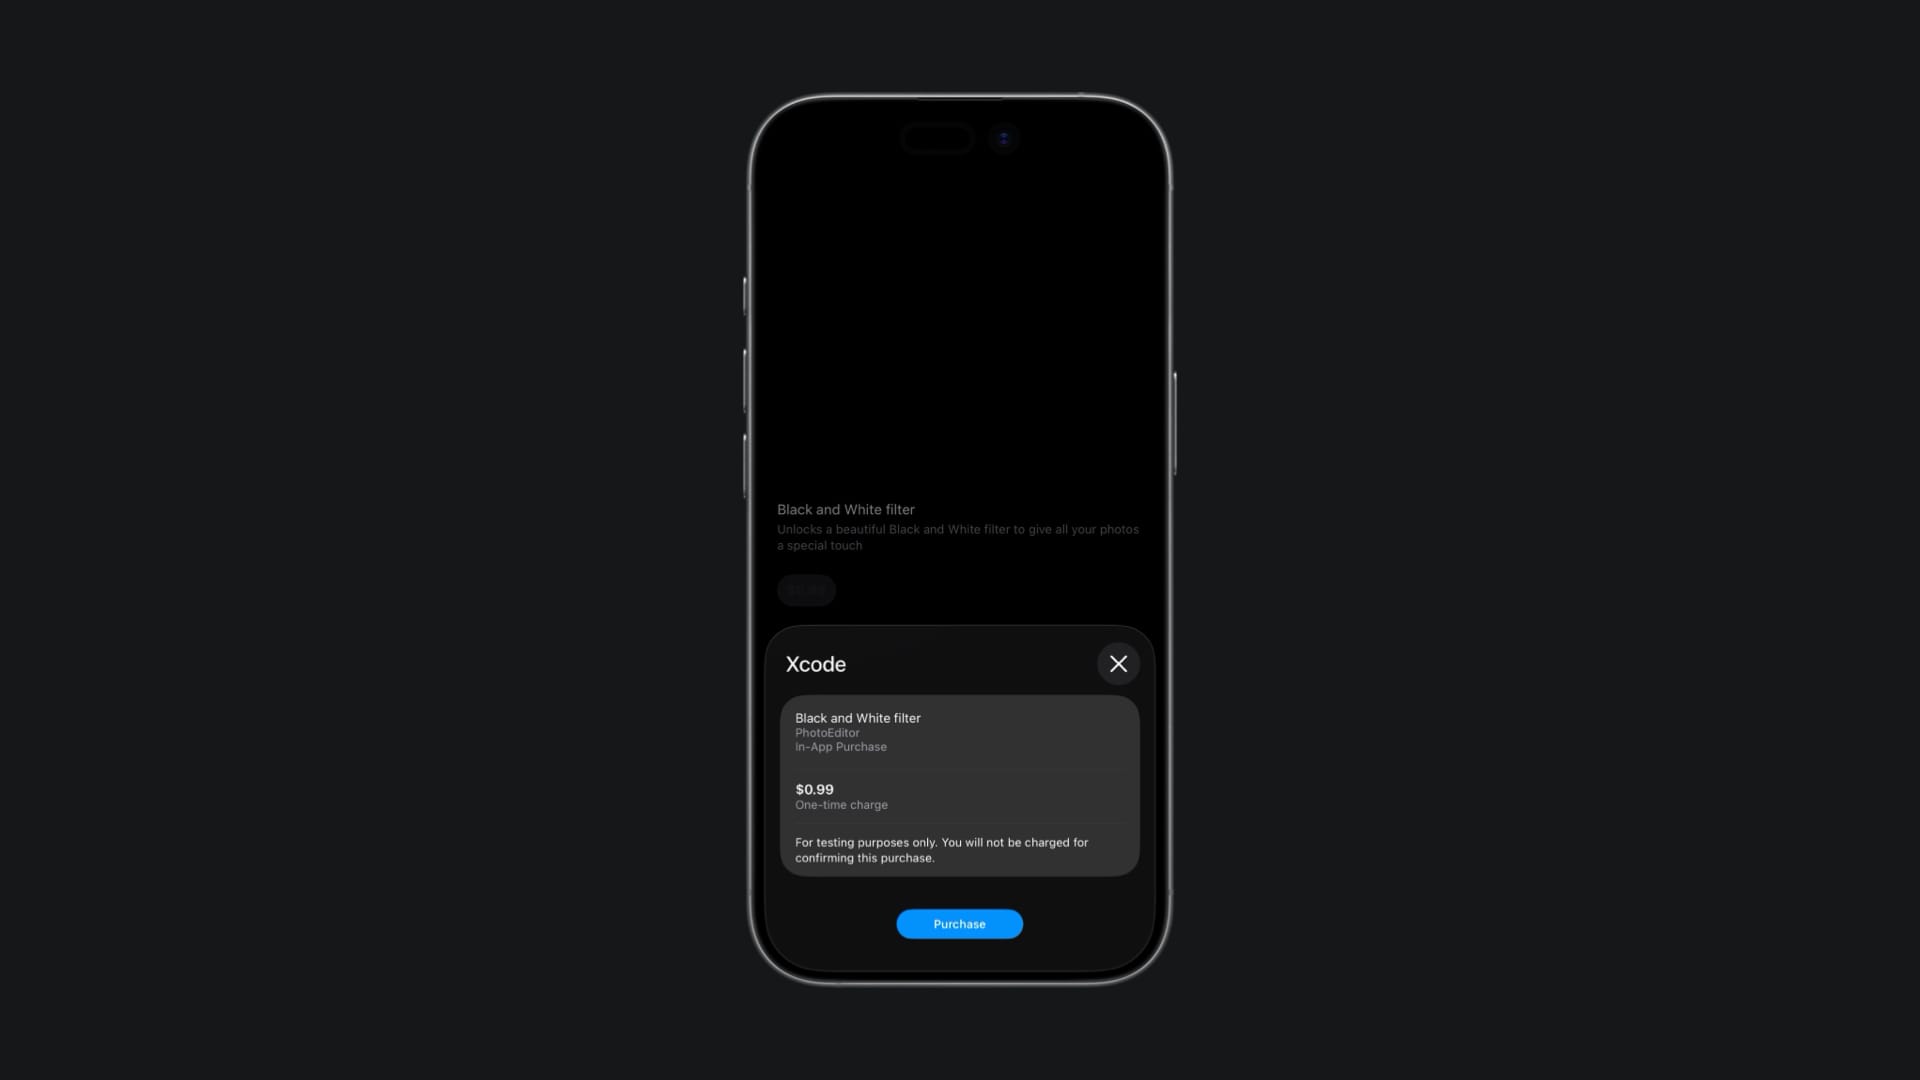
Now you can run the app on your device to test the In-App Purchase. When you tap the buy button, a payment sheet will appear, informing you that you won't be charged and that this is for testing purposes only.
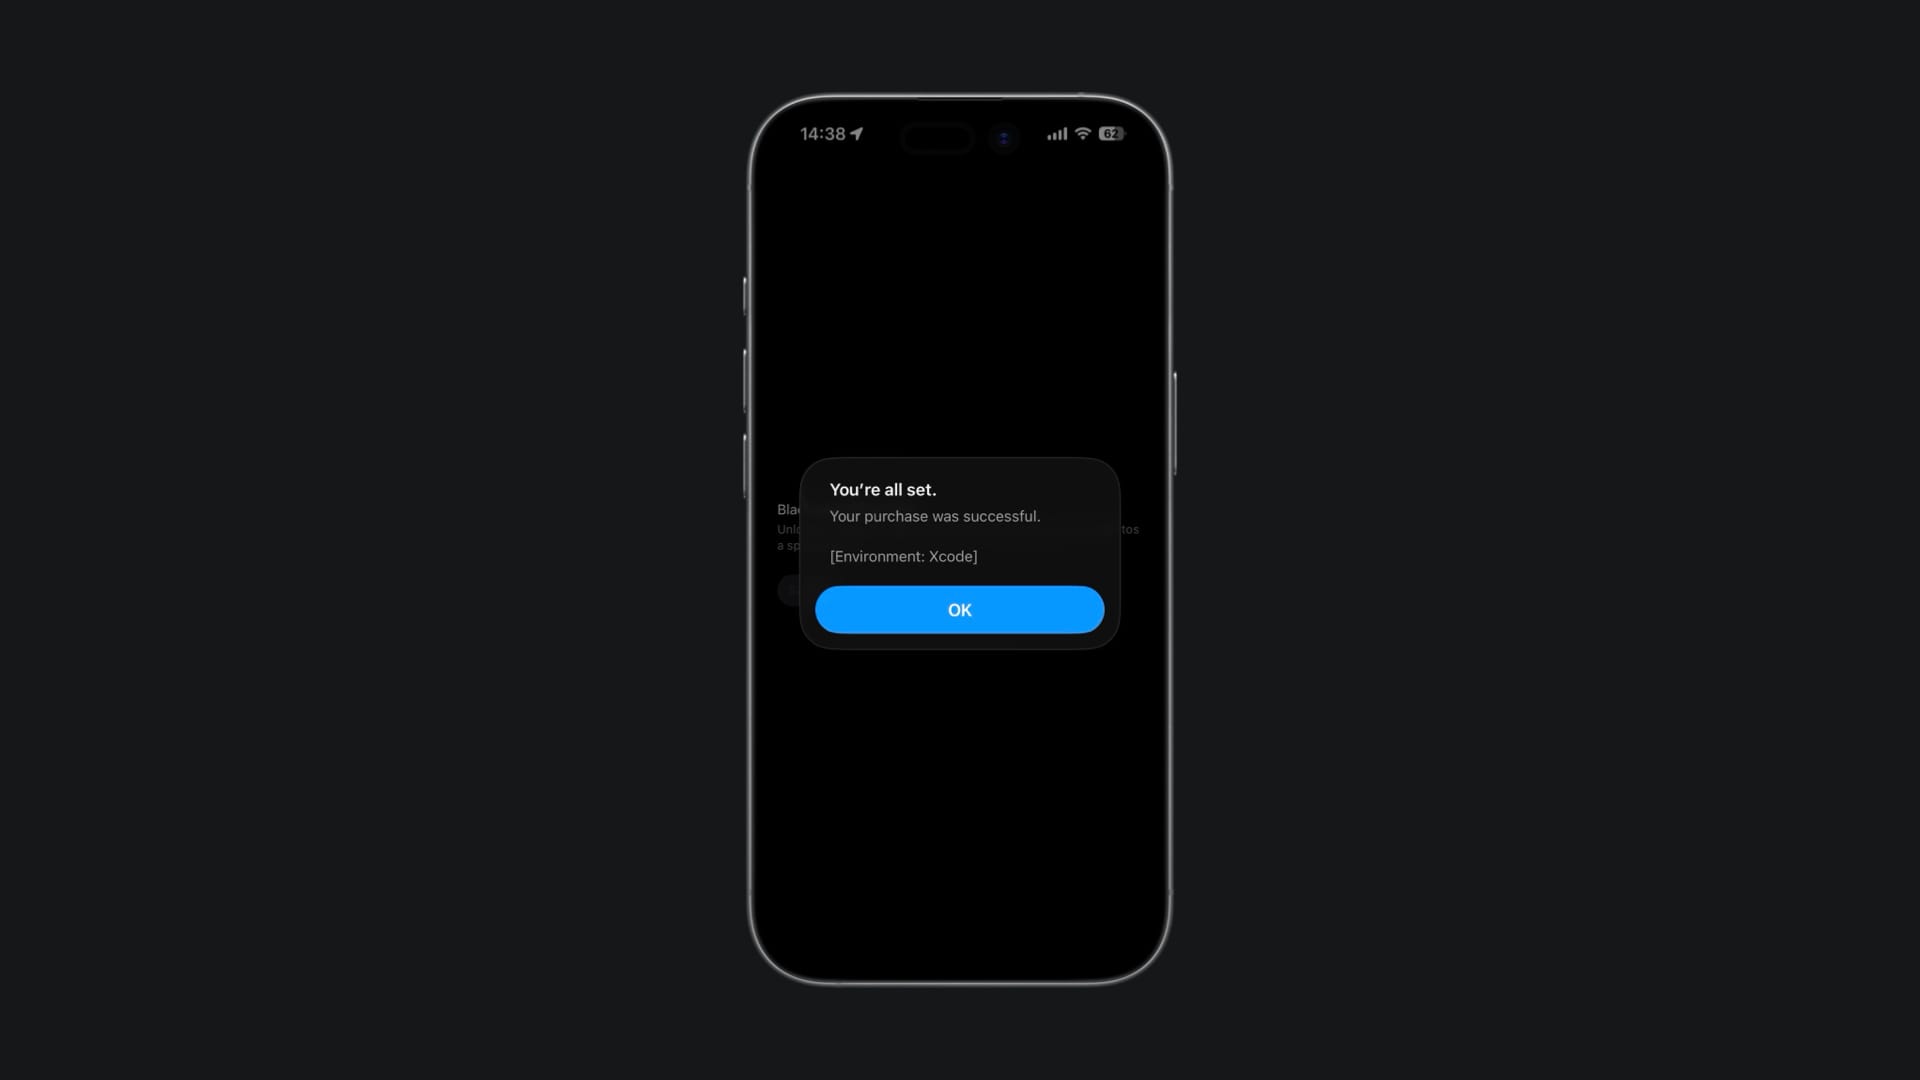
After tapping “Purchase”, another dialog confirms that the purchase was successful.
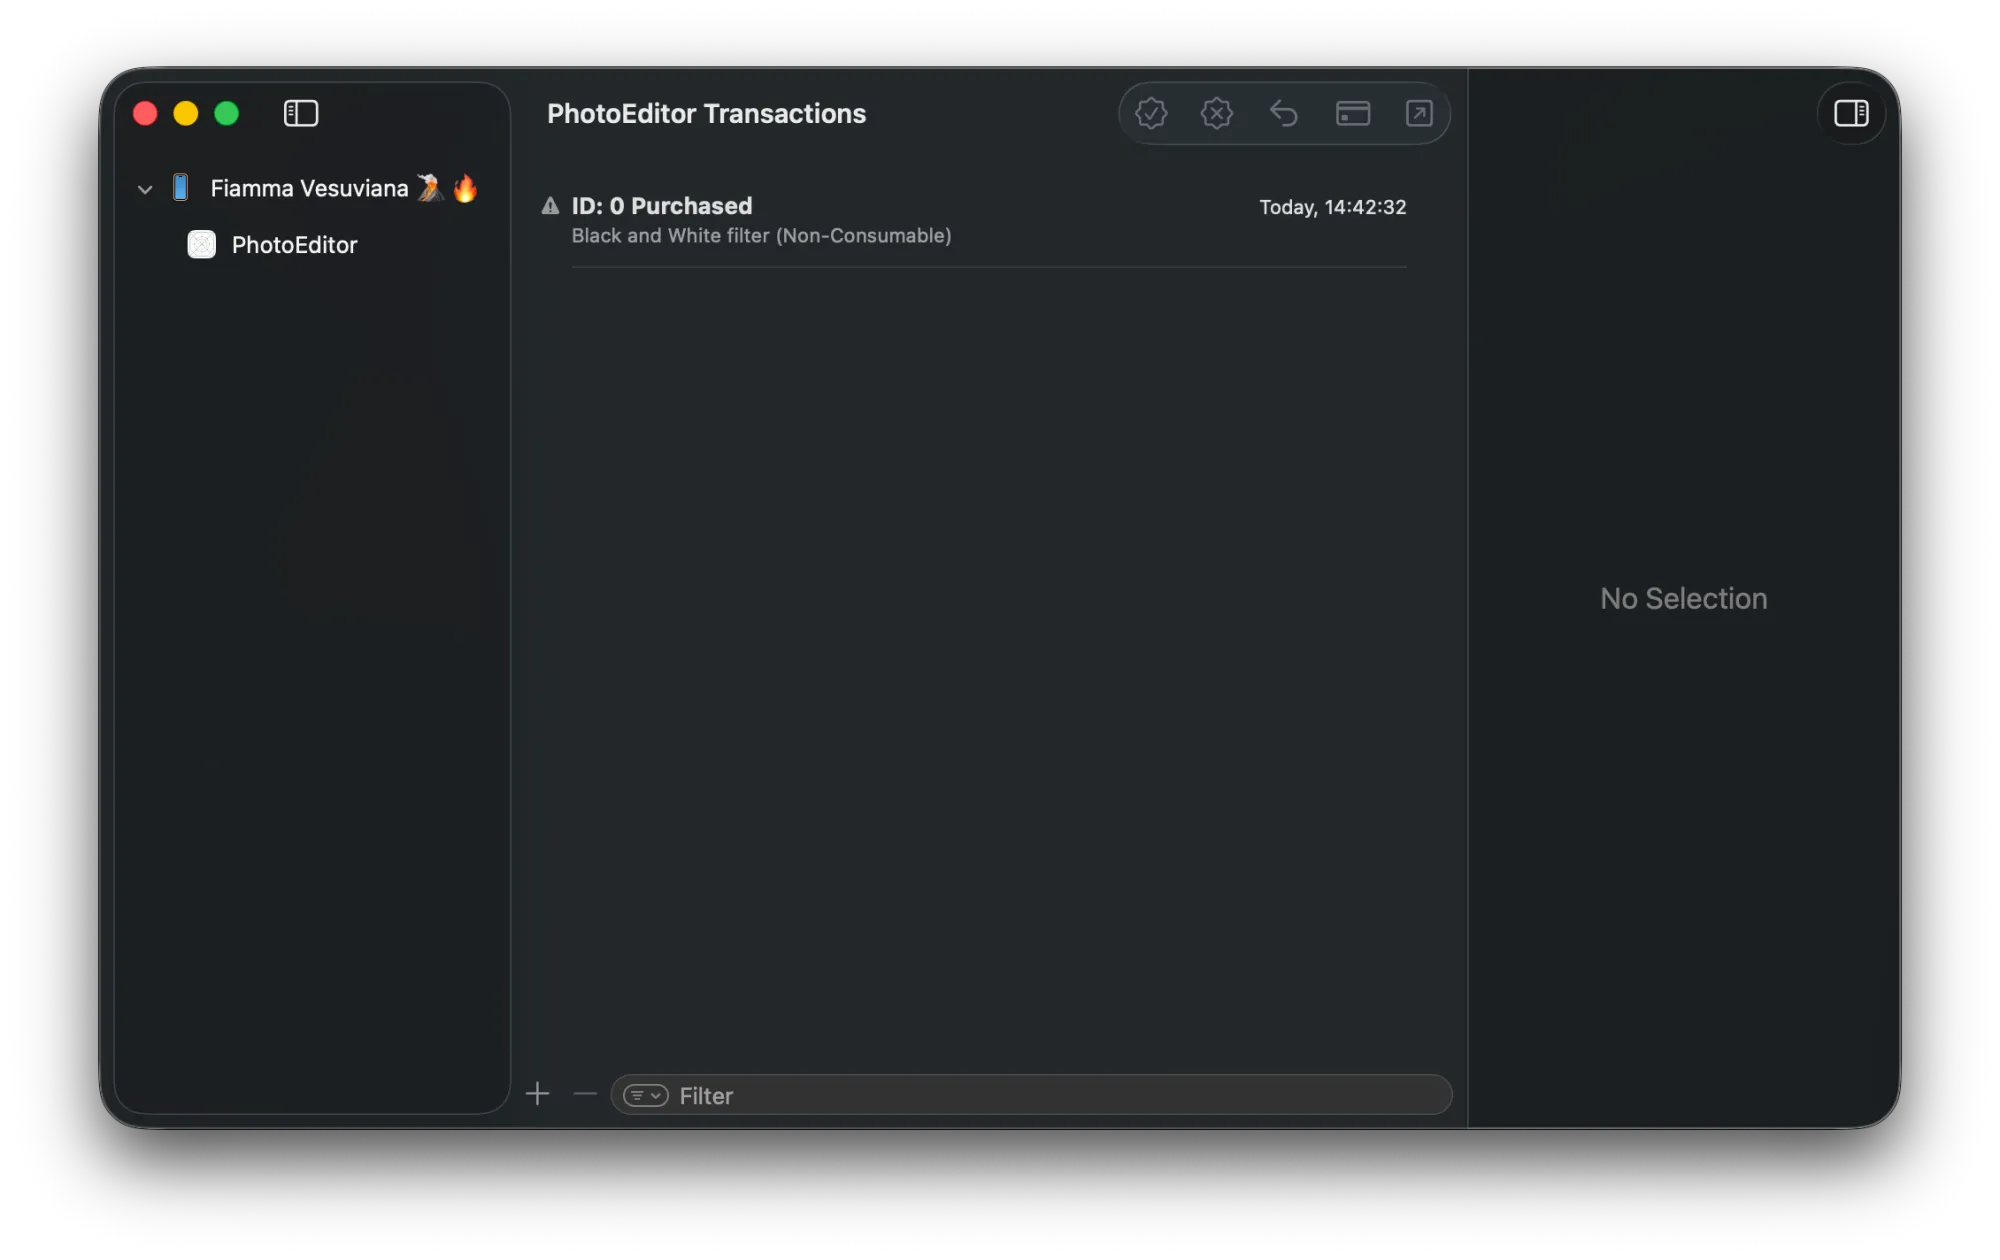
When you re-run the app on your device, you’ll notice that the button is now disabled because the purchase is already marked as completed. If you want to test different scenarios, you probably want to be able to do the purchase again. One solution would be to delete and re-install the app. But this is not nice to do, every time you want to test something you changed. Luckily, Xcode includes a handy tool for inspecting all purchases made in your app. It’s tucked away in the “Debug” menu. You need to select “StoreKit” and then tap on “Manage Transactions”.
This opens a new window where you can see your device and the “PhotoEditor” app on the right hand side. When you tap on it, all the transactions will be shown in the center section. If you select one of the transactions, you can see more details on the left hand side.
Select the purchase and tap the small arrow in the top-right corner to refund it. This resets your app’s state so the button becomes tappable again. Especially when testing App Store Connect-synced products later, this tool becomes essential for quickly cycling through different purchase states.
Step 5 – Create the Product in App Store Connect
Once you’re done testing locally, it’s time to test real products created in App Store Connect.
Archive your app and upload it to App Store Connect using the Organizer. Once this was successful, you go to the In-App Purchases section inside your app in App Store Connect.
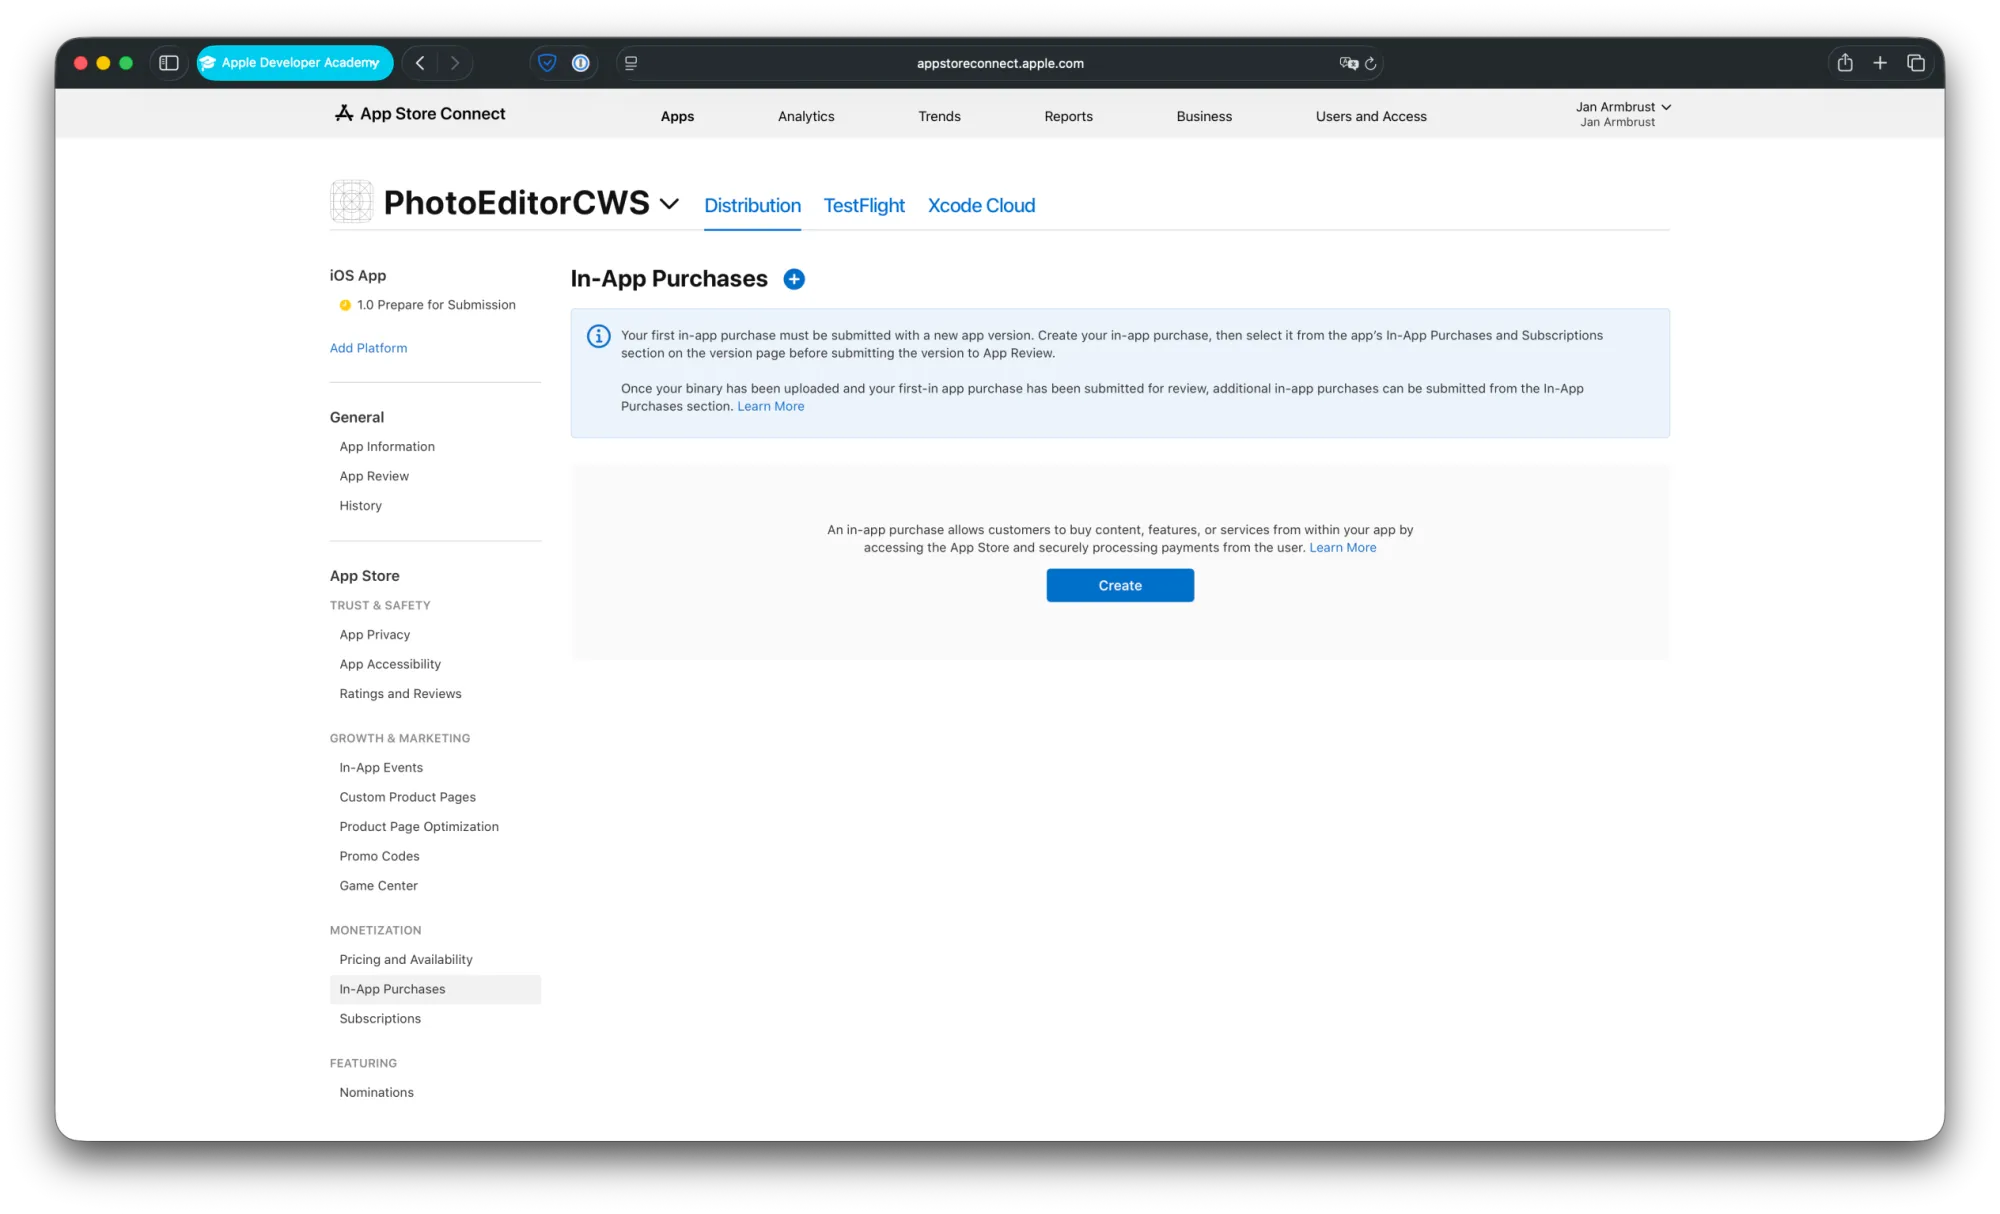
Here you create the same In-App Purchase as in the local StoreKit configuration file earlier.
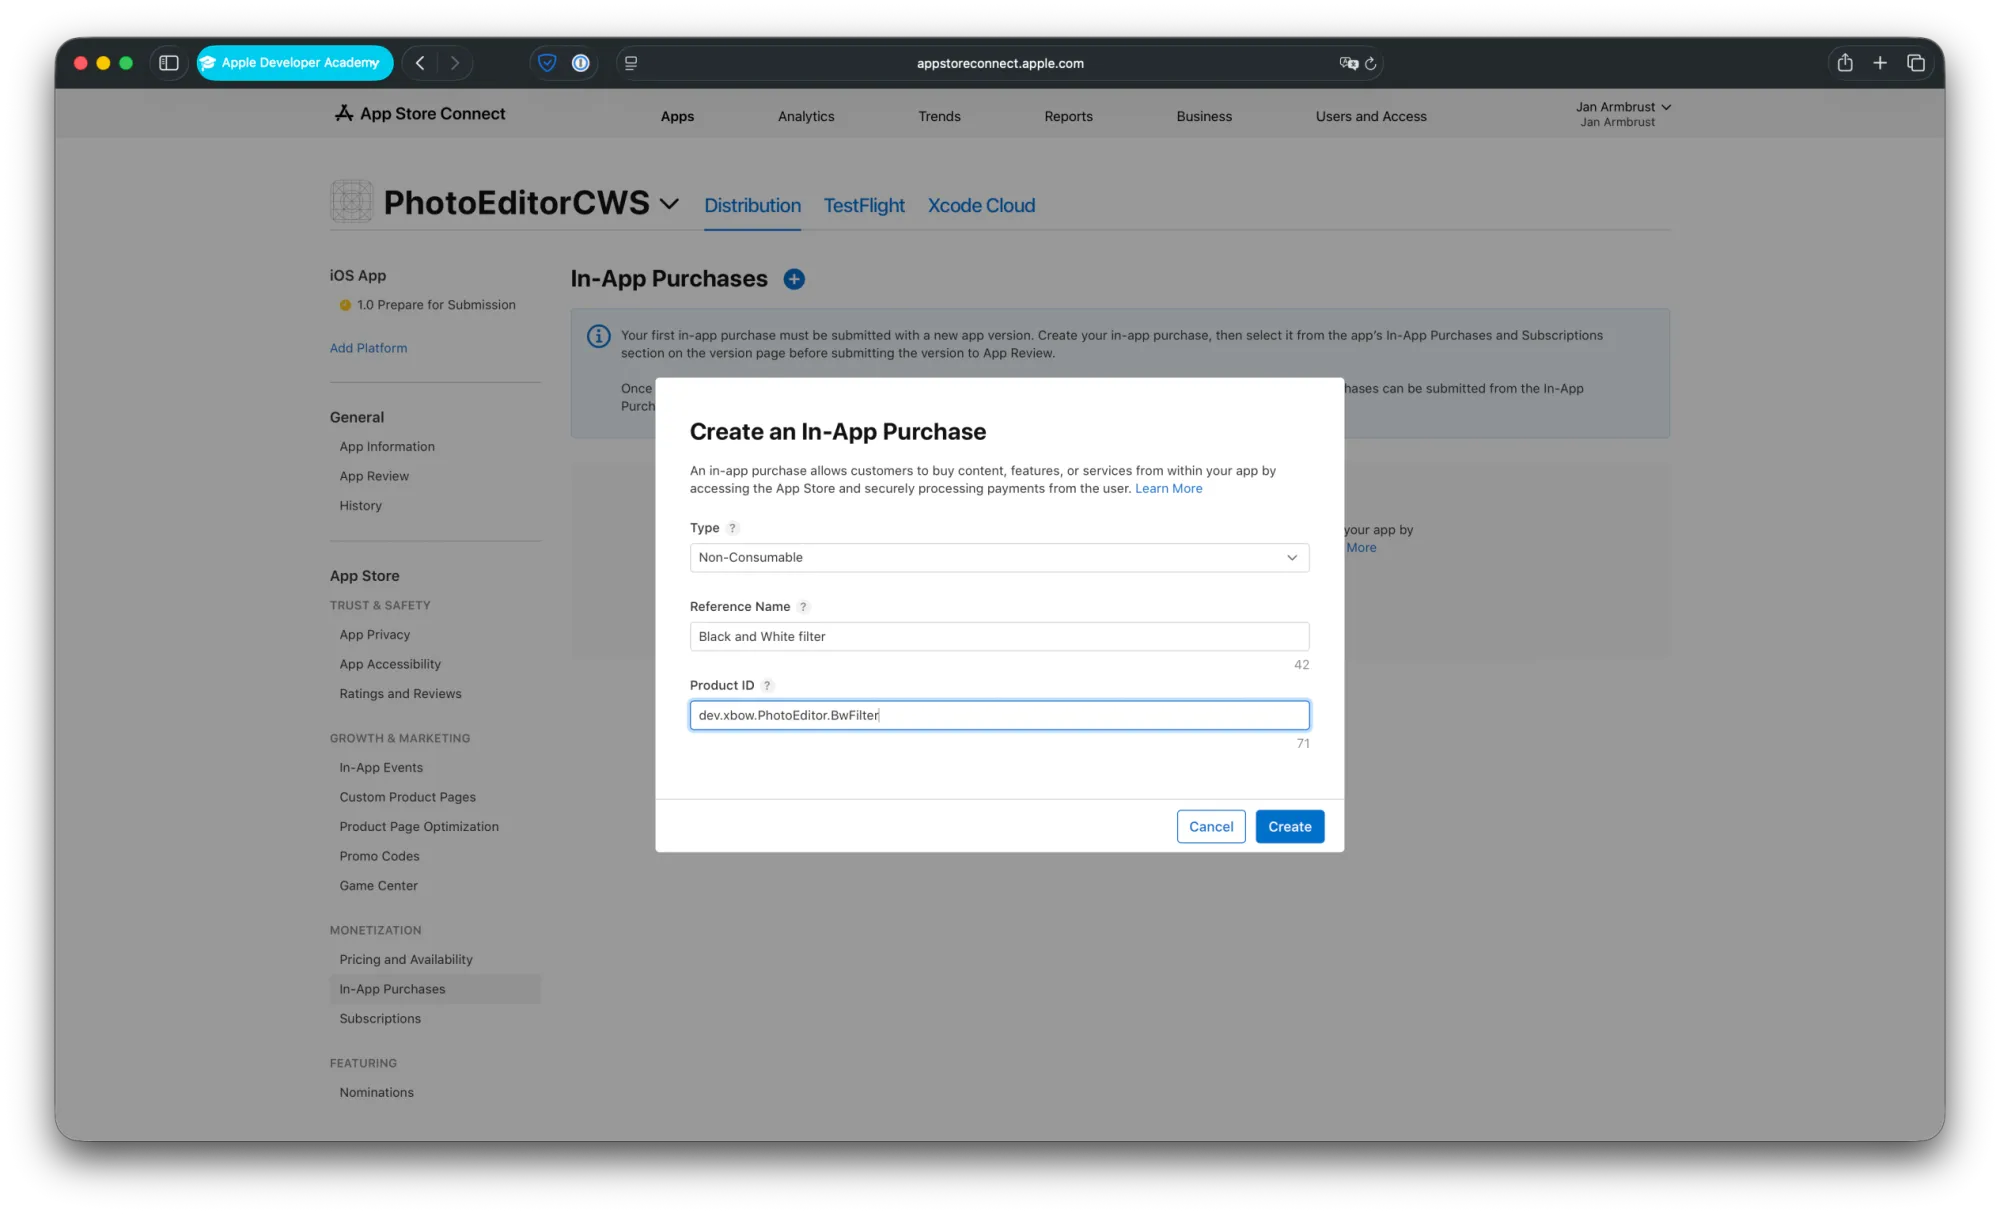
Select “Non-Consumable” as Type and fill Reference Name and Product ID with the respective values.
After that you’ll land on the details section of your newly created In-App Purchase. Here you now have to configure 3 things:
- Availability
- Price Schedule
- App Store Localization
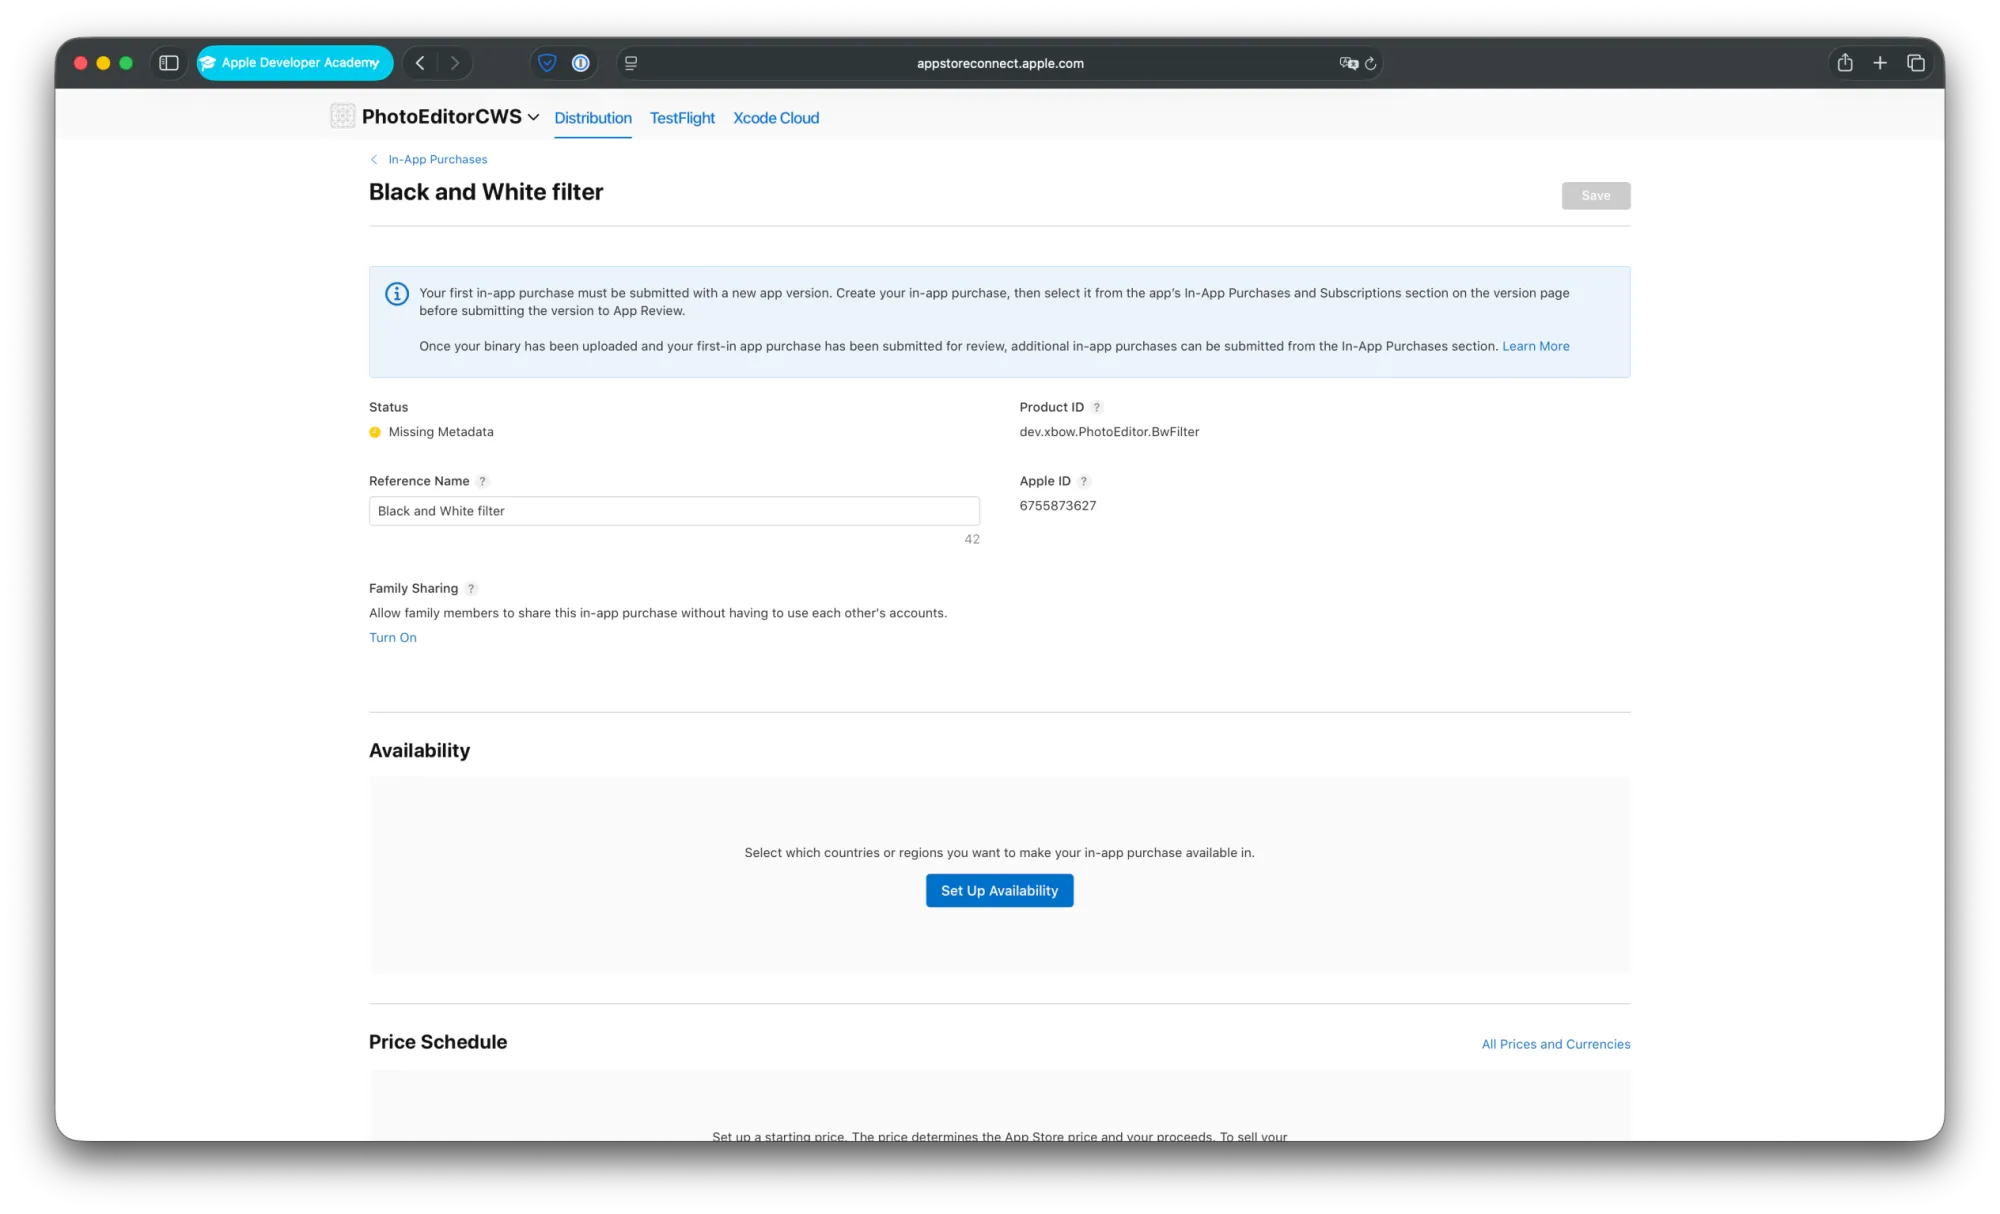
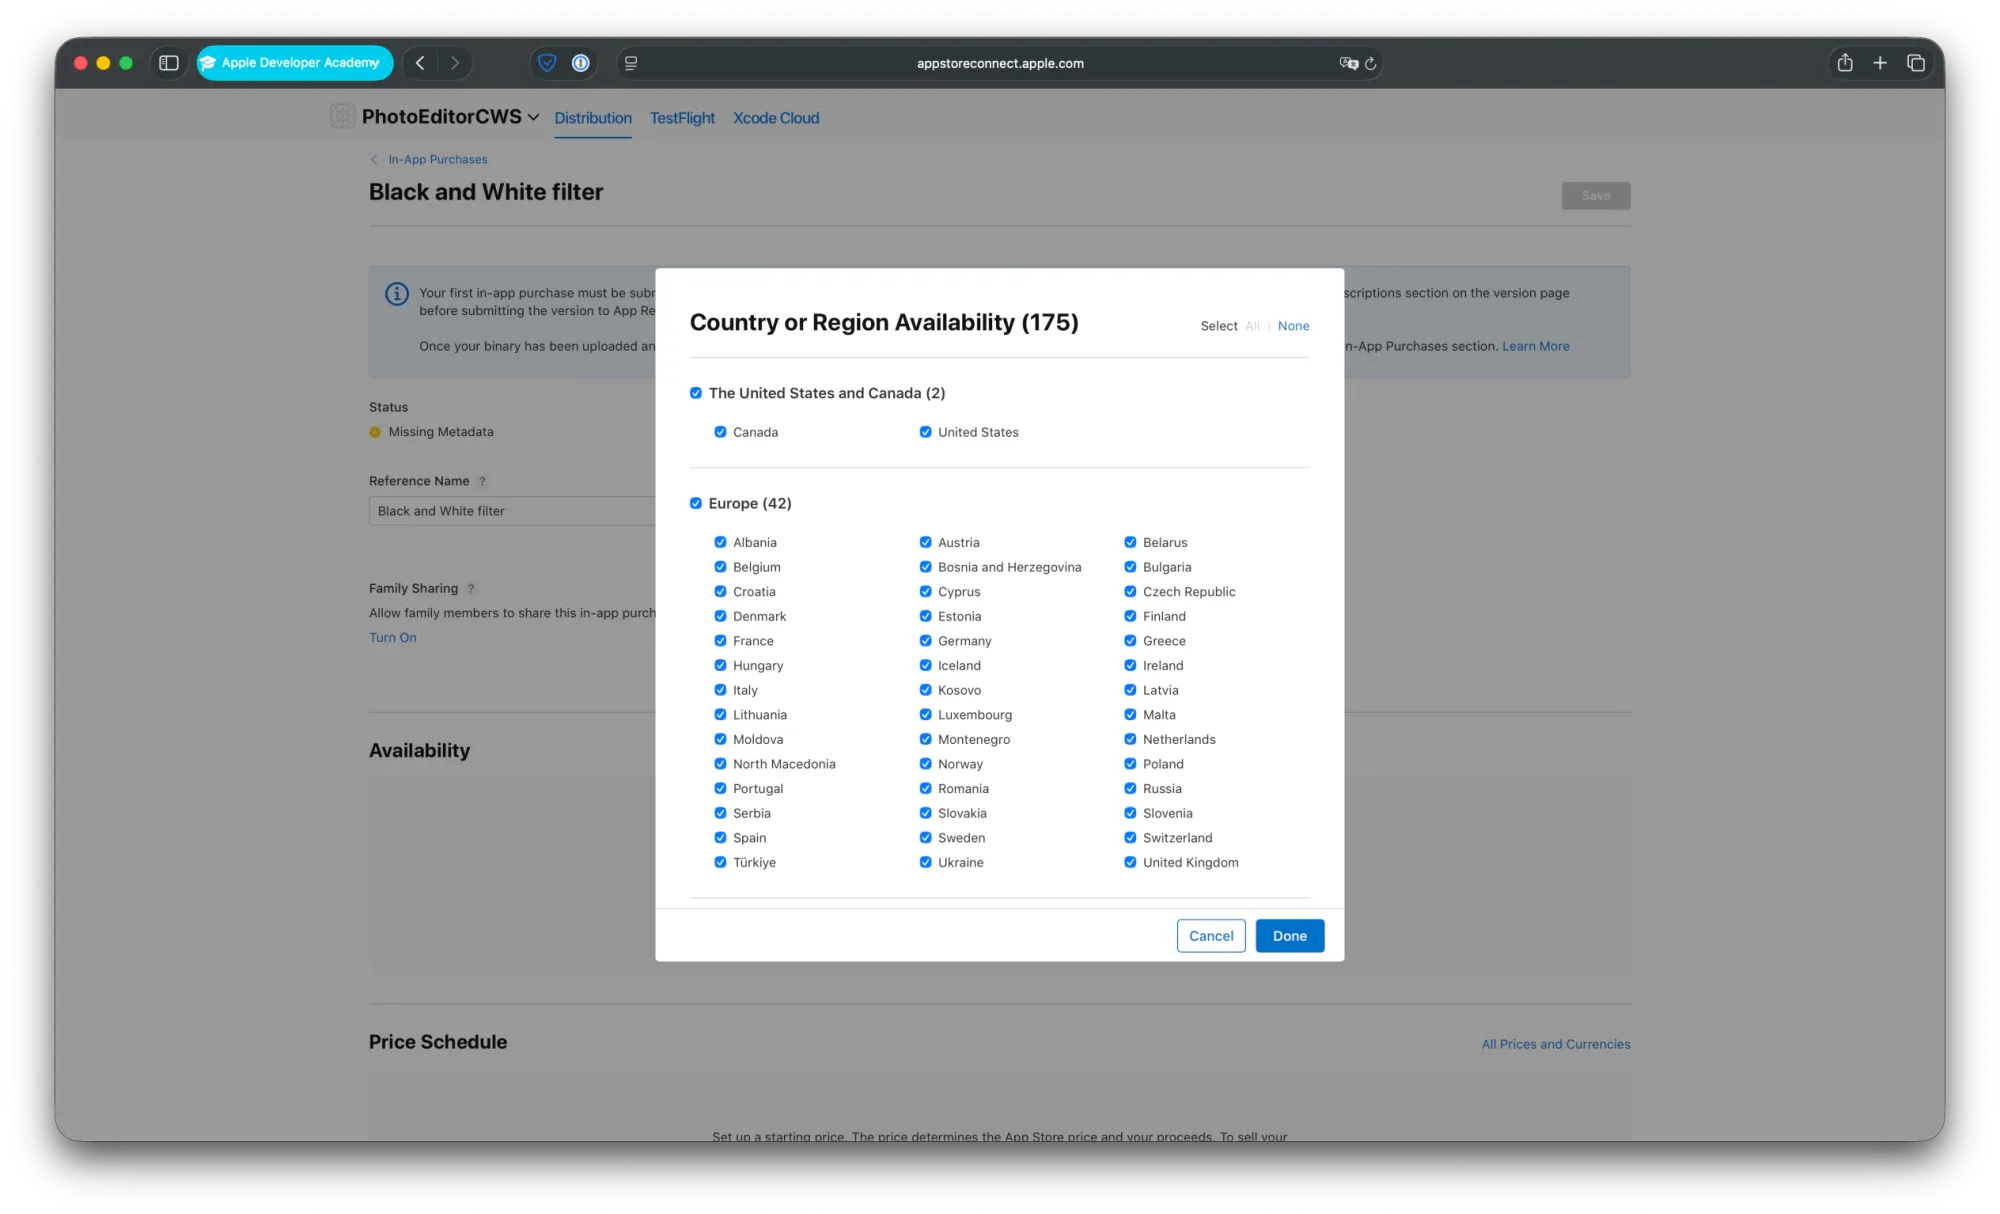
In the “Availability” section, choose the countries where your In-App Purchase should be available. You can just keep the preselection for all available countries here.
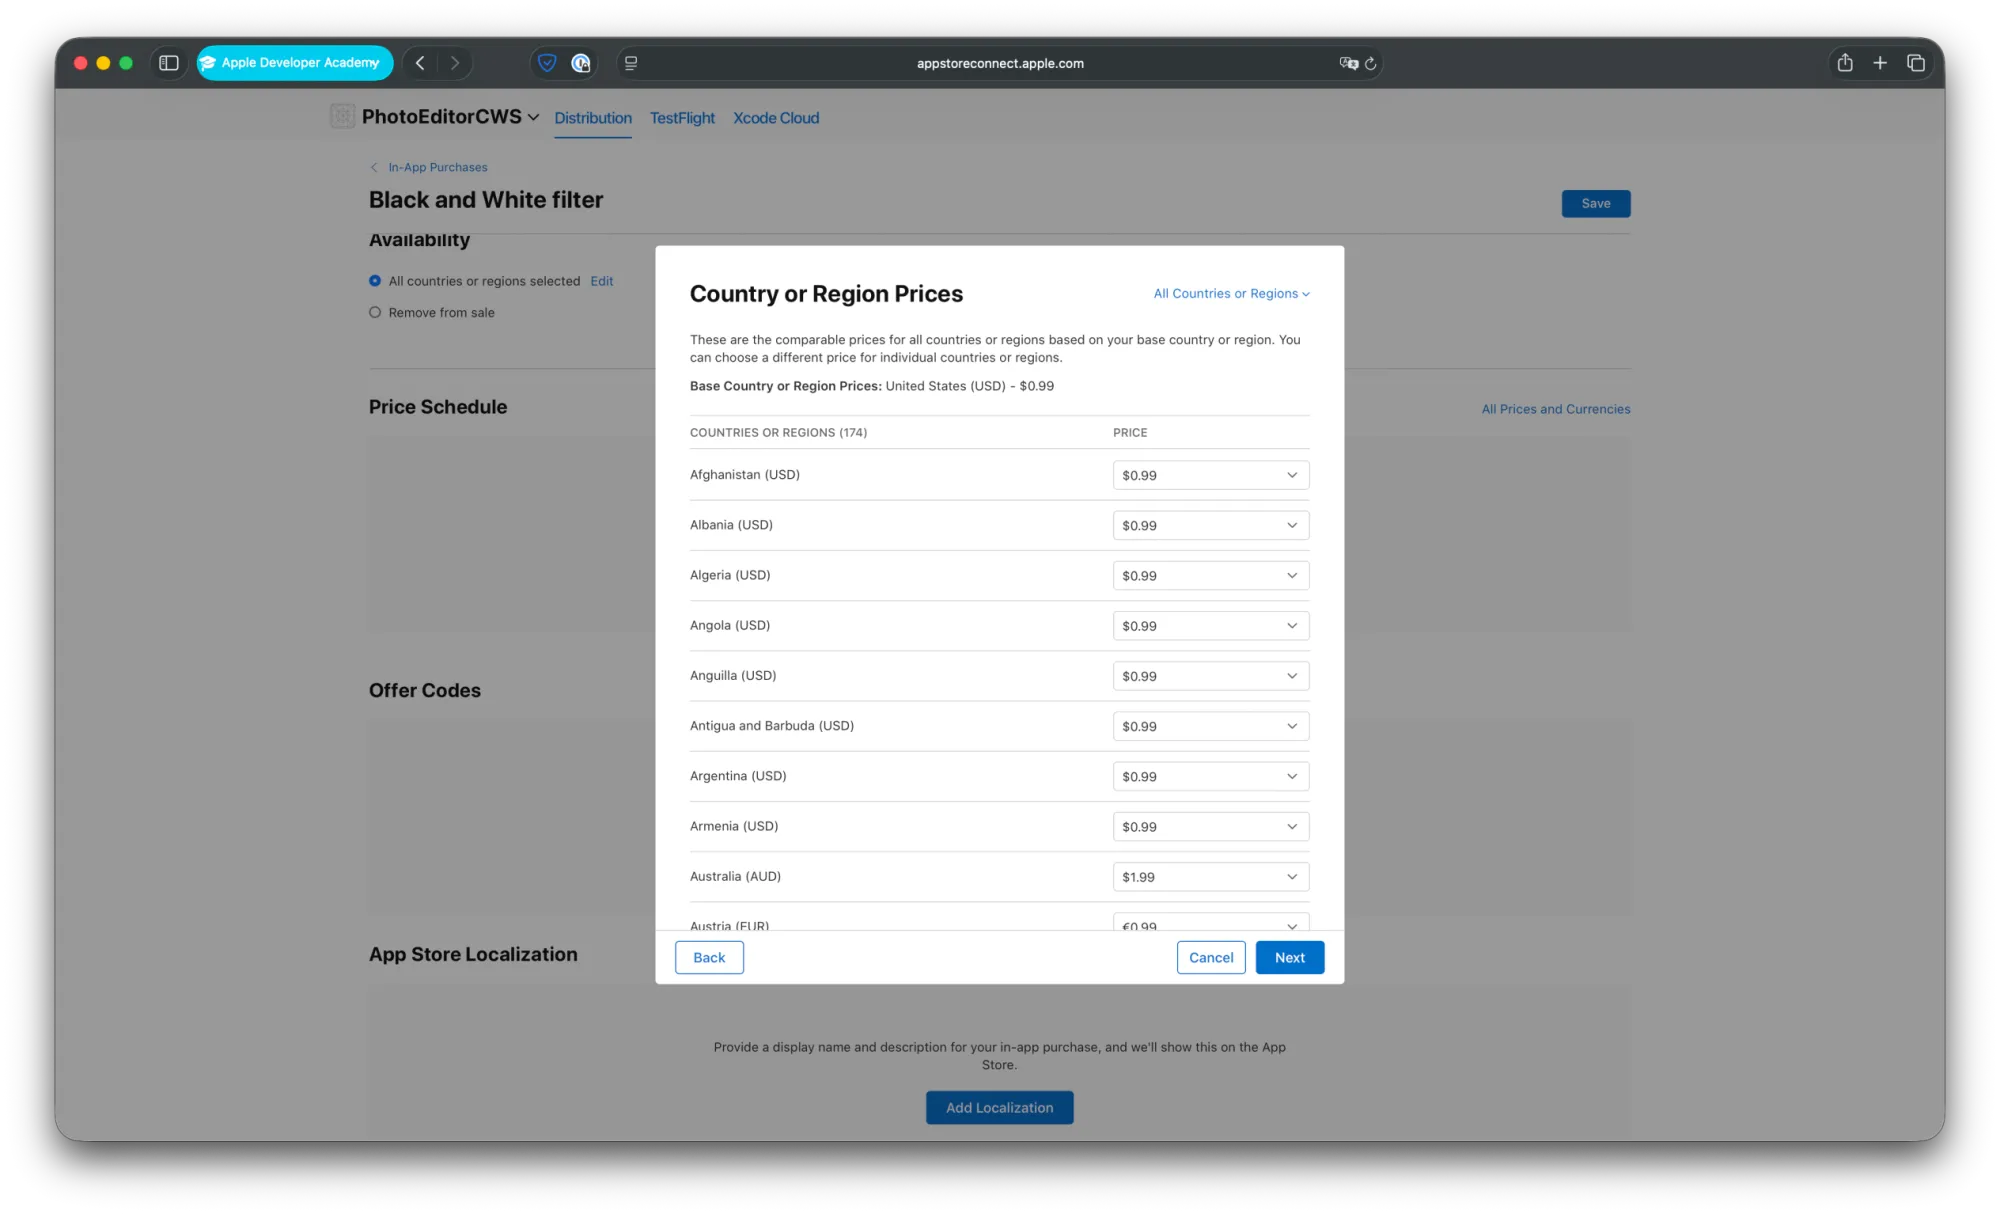
The next section “Price Schedule” is responsible for the price of you In-App Purchase in all of the selected countries. The base price you choose is always USD in the first step. Let’s select $0.99 here.

In the second step you could change regional prices for all your selected countries to differ from the base USD price, for example if you want to adjust your prices based on the purchase power of different countries to have a more fair pricing. We’ll keep the preselected regional prices here.
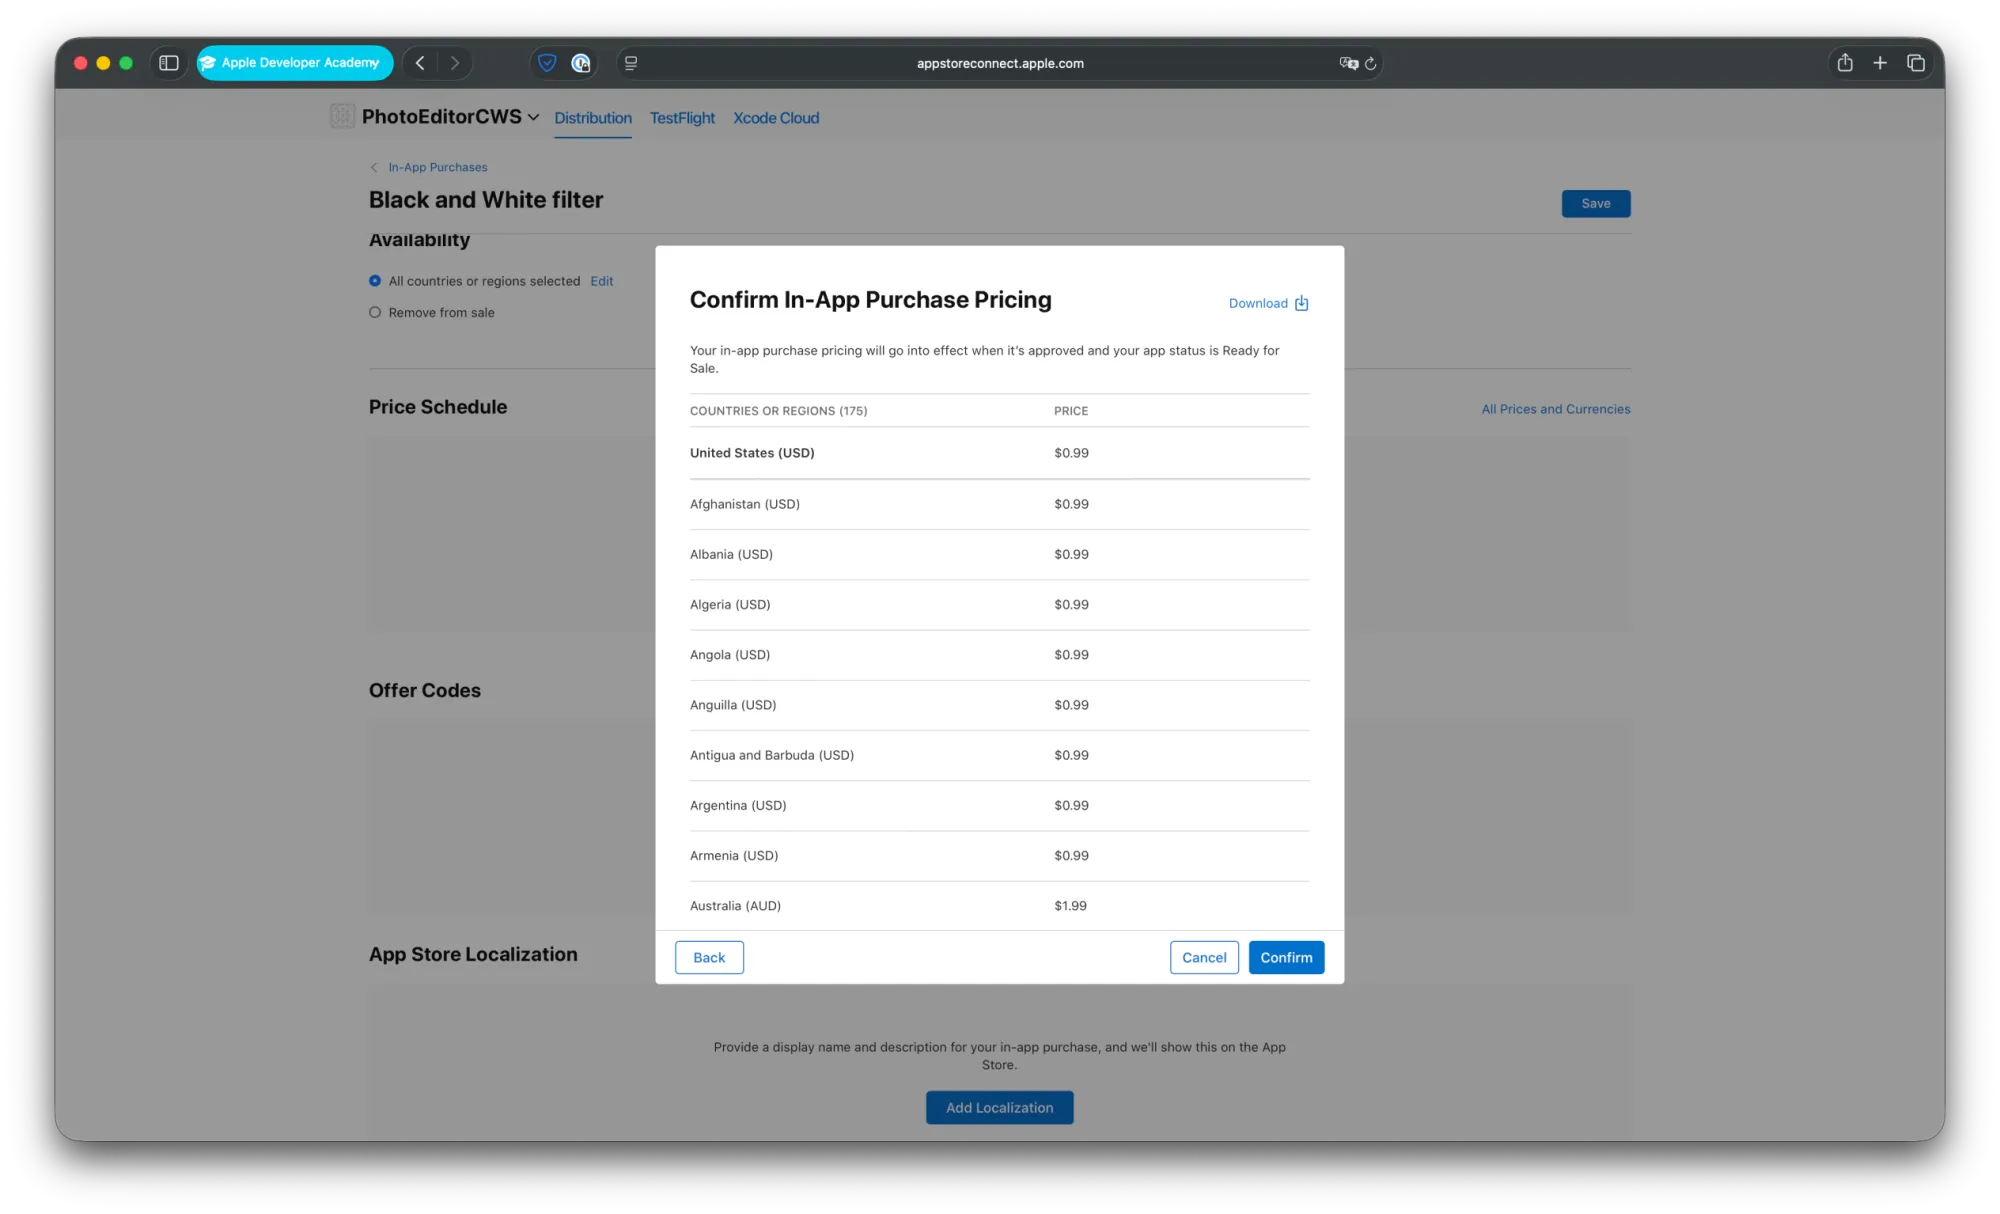
Step 3 of the “Price schedule” flow gives you an overview over your selected prices and you can just tap on “Confirm” to create the price schedule.
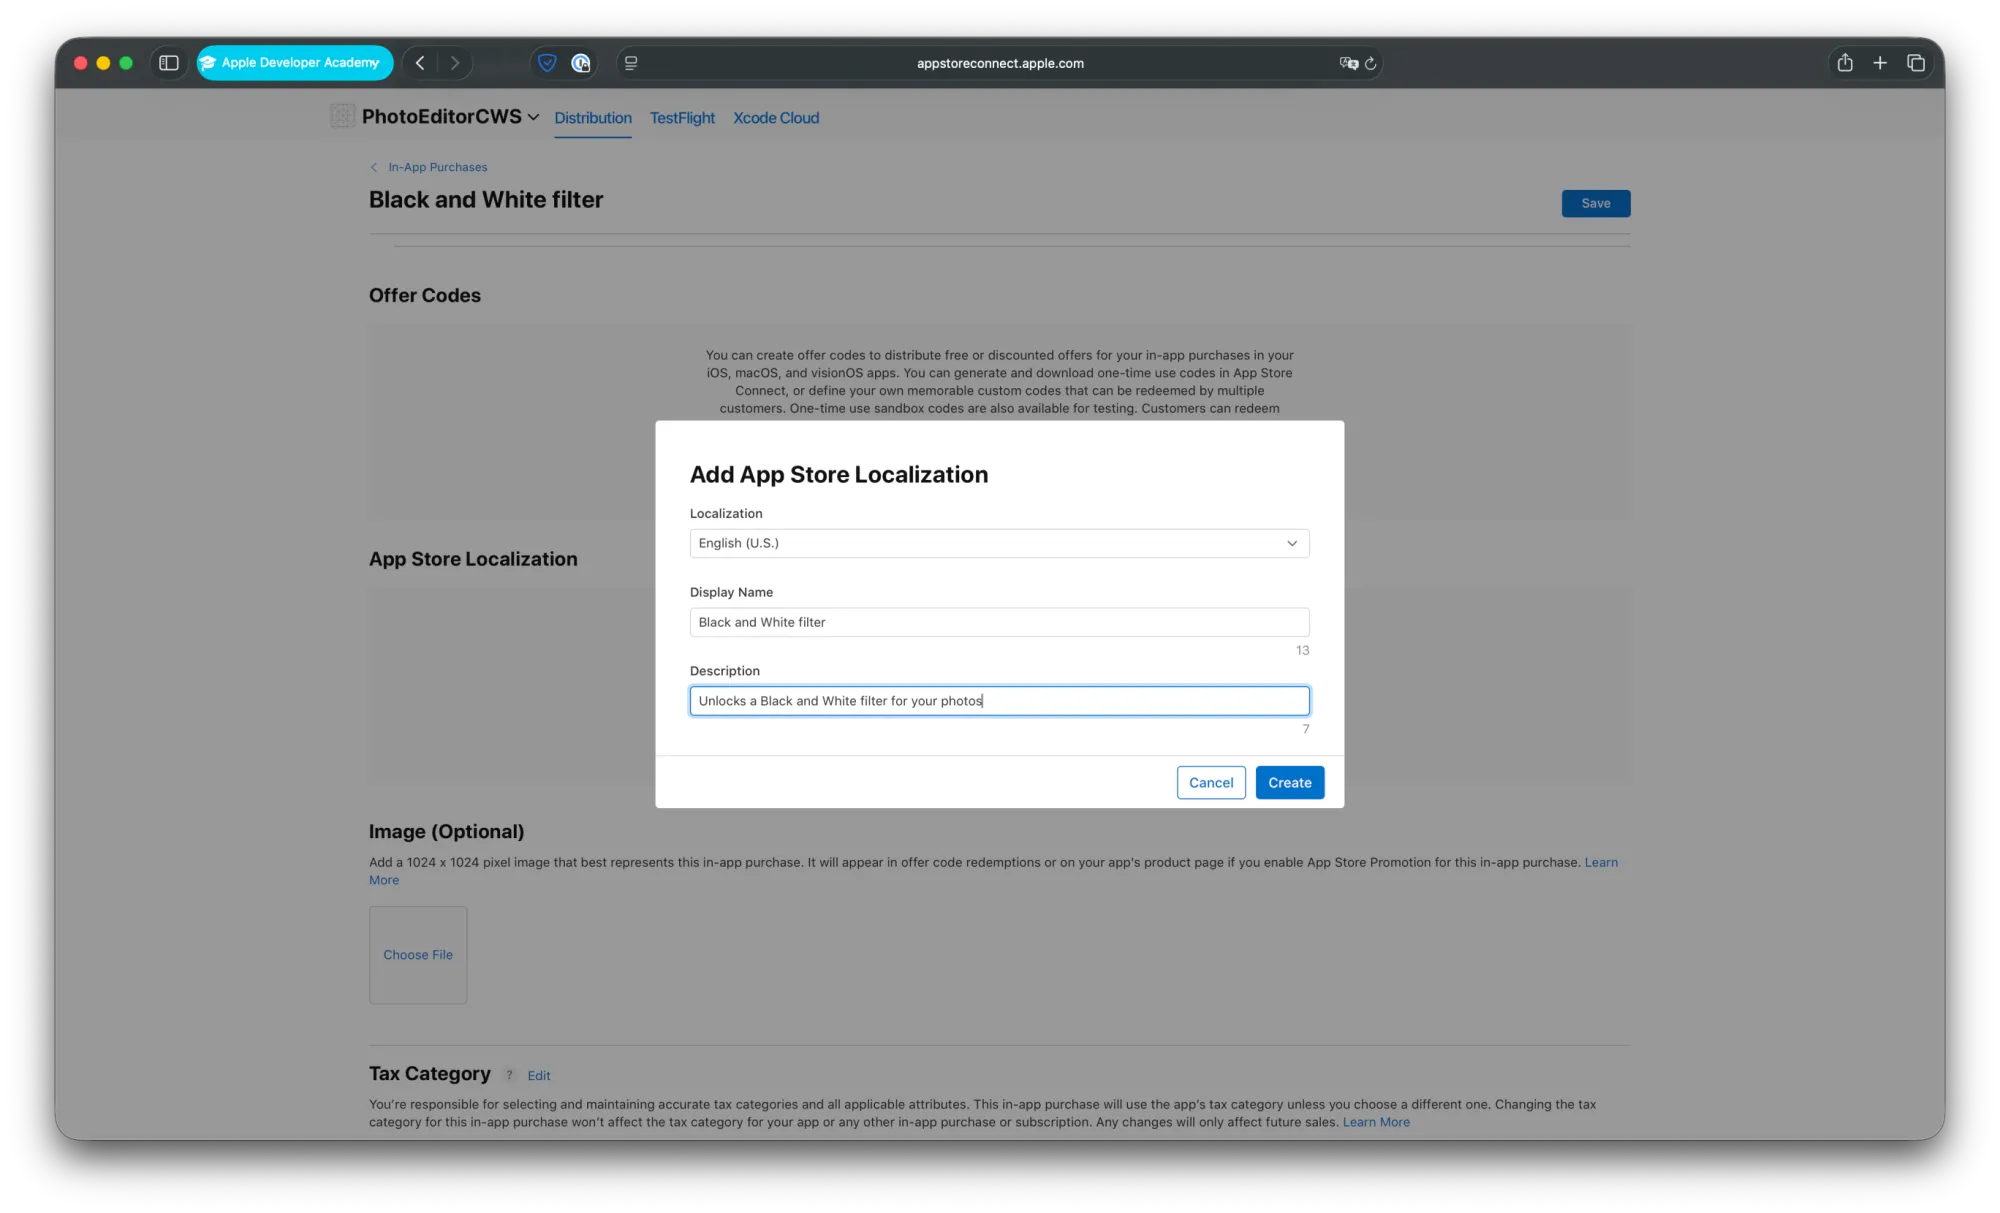
In the last step of the creation of your In-App Purchase, you create the “App Store Localization” that is shown when a user wants to buy inside your app. Here you can again just copy and paste the “Display Name” and “Description” from your local StoreKit configuration file.
Step 6 – Switch Back to App Store Connect Products
Now your In-App purchase is ready to use inside your app. To do so, just tap on PhotoEdior in the top bar and then “Edit Scheme”. Under “Options”, you will find the dropdown menu next to “StoreKit Configuration”, where you now select “None” again. Now your app will use the StoreKit configuration from App Store Connect. Archive your app again and upload it to App Store Connect again with the Organizer.
Now you can download your app from TestFlight and test the In-App Purchase. Same as when you test the In-App Purchase after building your app on device with Xcode, your card won’t be charged for this In-App purchase.
Final Result
And that’s it, you now know how to set up, test, and ship your first Non-Consumable In-App Purchase using StoreKit 2. We started with a local StoreKit configuration in Xcode, created our product, and tested it safely without charging anything. Then we moved on to App Store Connect, set up the real purchase there, assigned pricing, added localizations, and finally tested everything again through TestFlight.
The workflow (local config, App Store Connect, TestFlight), is the foundation for every monetization setup you’ll build in the future. Once you understand how these pieces fit together, StoreKit becomes much less mysterious and way more predictable.
With this in place, you can start expanding your store, unlocking more features, and building a real business inside your app. And the best part: none of this requires complicated backend work. StoreKit gives you everything you need.
Where to Go Next?
Here are helpful resources to continue learning about StoreKit and monetization:
- Apple StoreKit 2 documentation
- WWDC videos on In-App Purchases
These resources can help you expand your monetization setup or explore other types of In-App Purchases.