
Implementing volumes in visionOS
Learn how to embrace volumes for immersive 3D experiences in visionOS.


Content in visionOS apps can be presented through windows or volumes, each characterized by distinctive attributes. In general, windows typically showcase 2D or 3D content like a media gallery in Photos, while volumes are perfect for presenting immersive 3D objects and content.
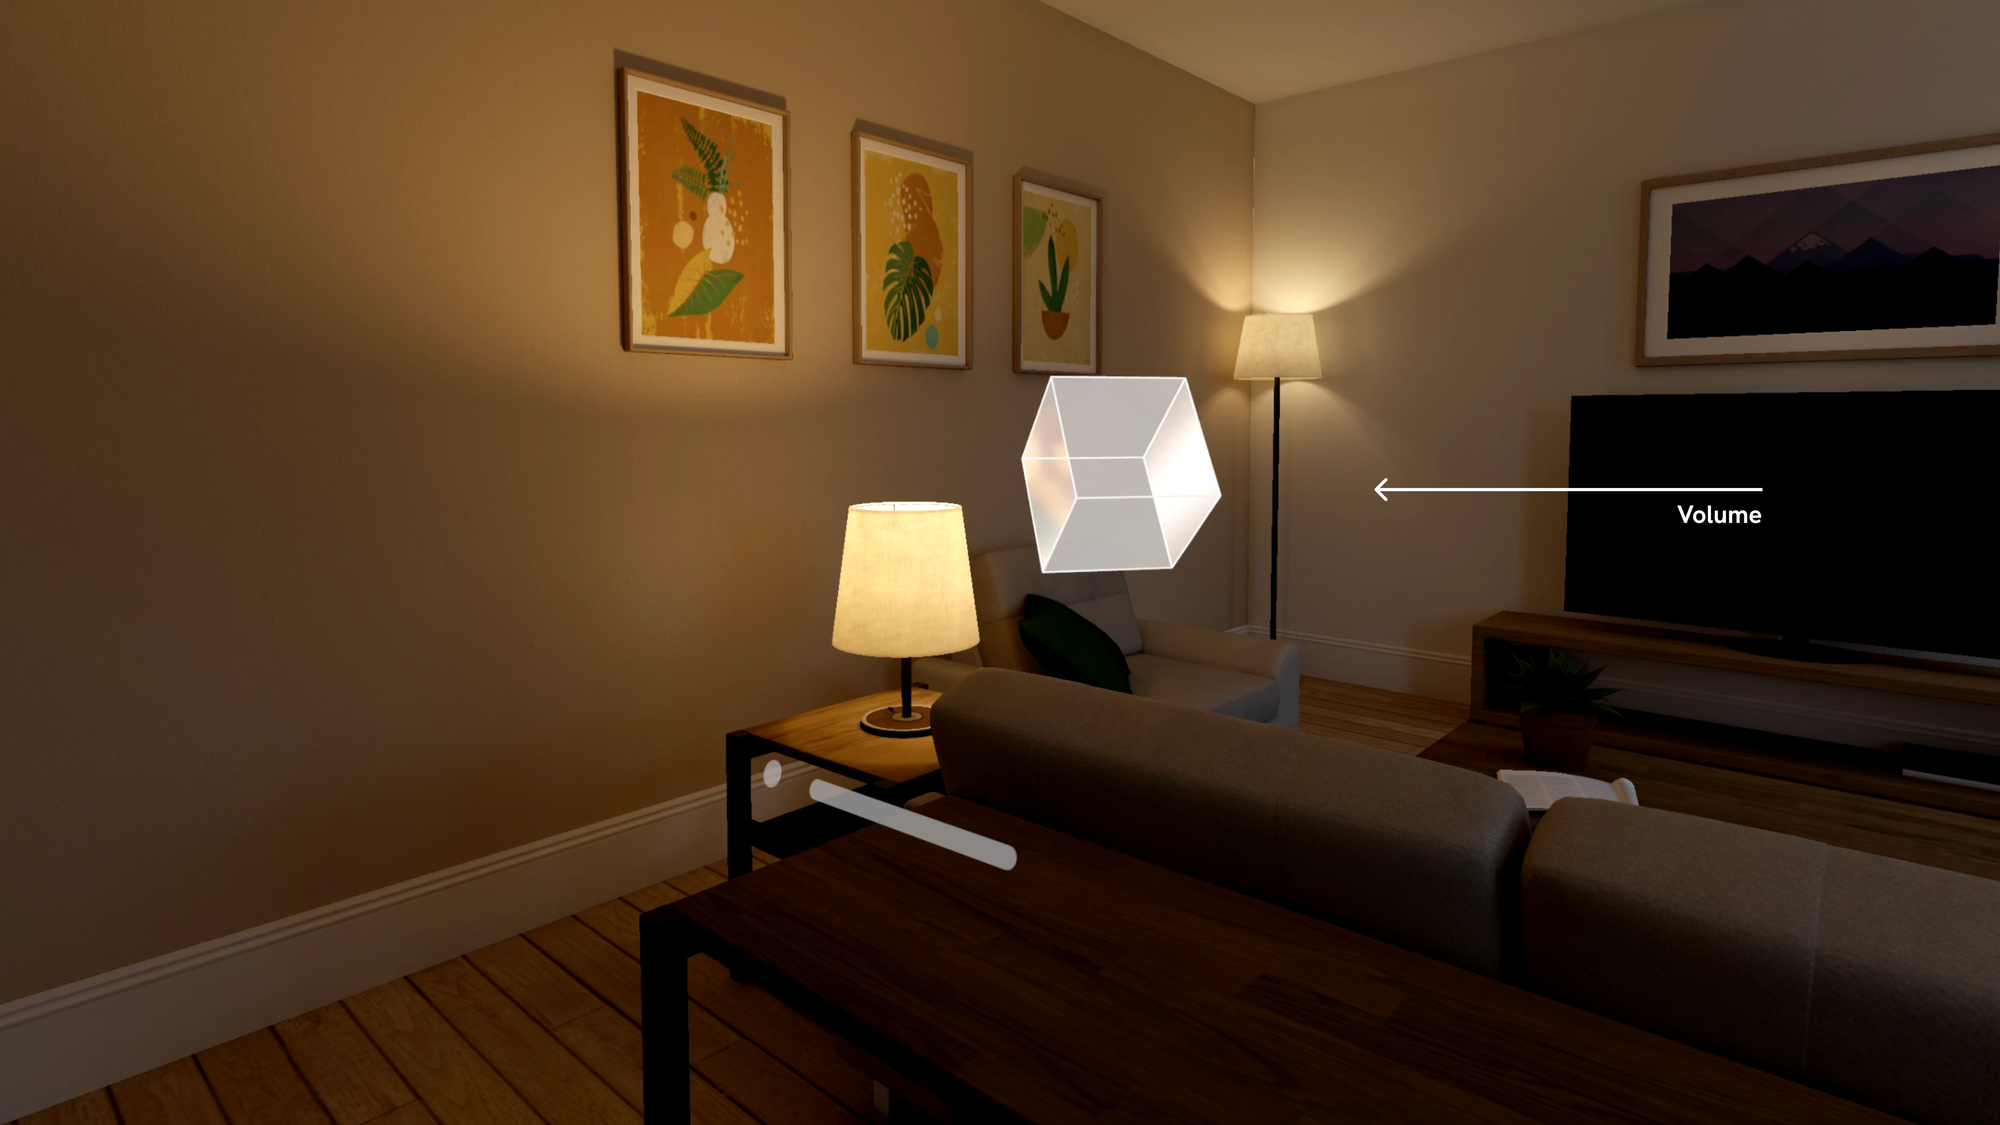
Volumes present 3D content, allowing users to view it from any perspective without taking over the entire space. Volumes serve as containers for immersive experiences, enabling the exploration of realistic 3D object representations.
Implementing volumes
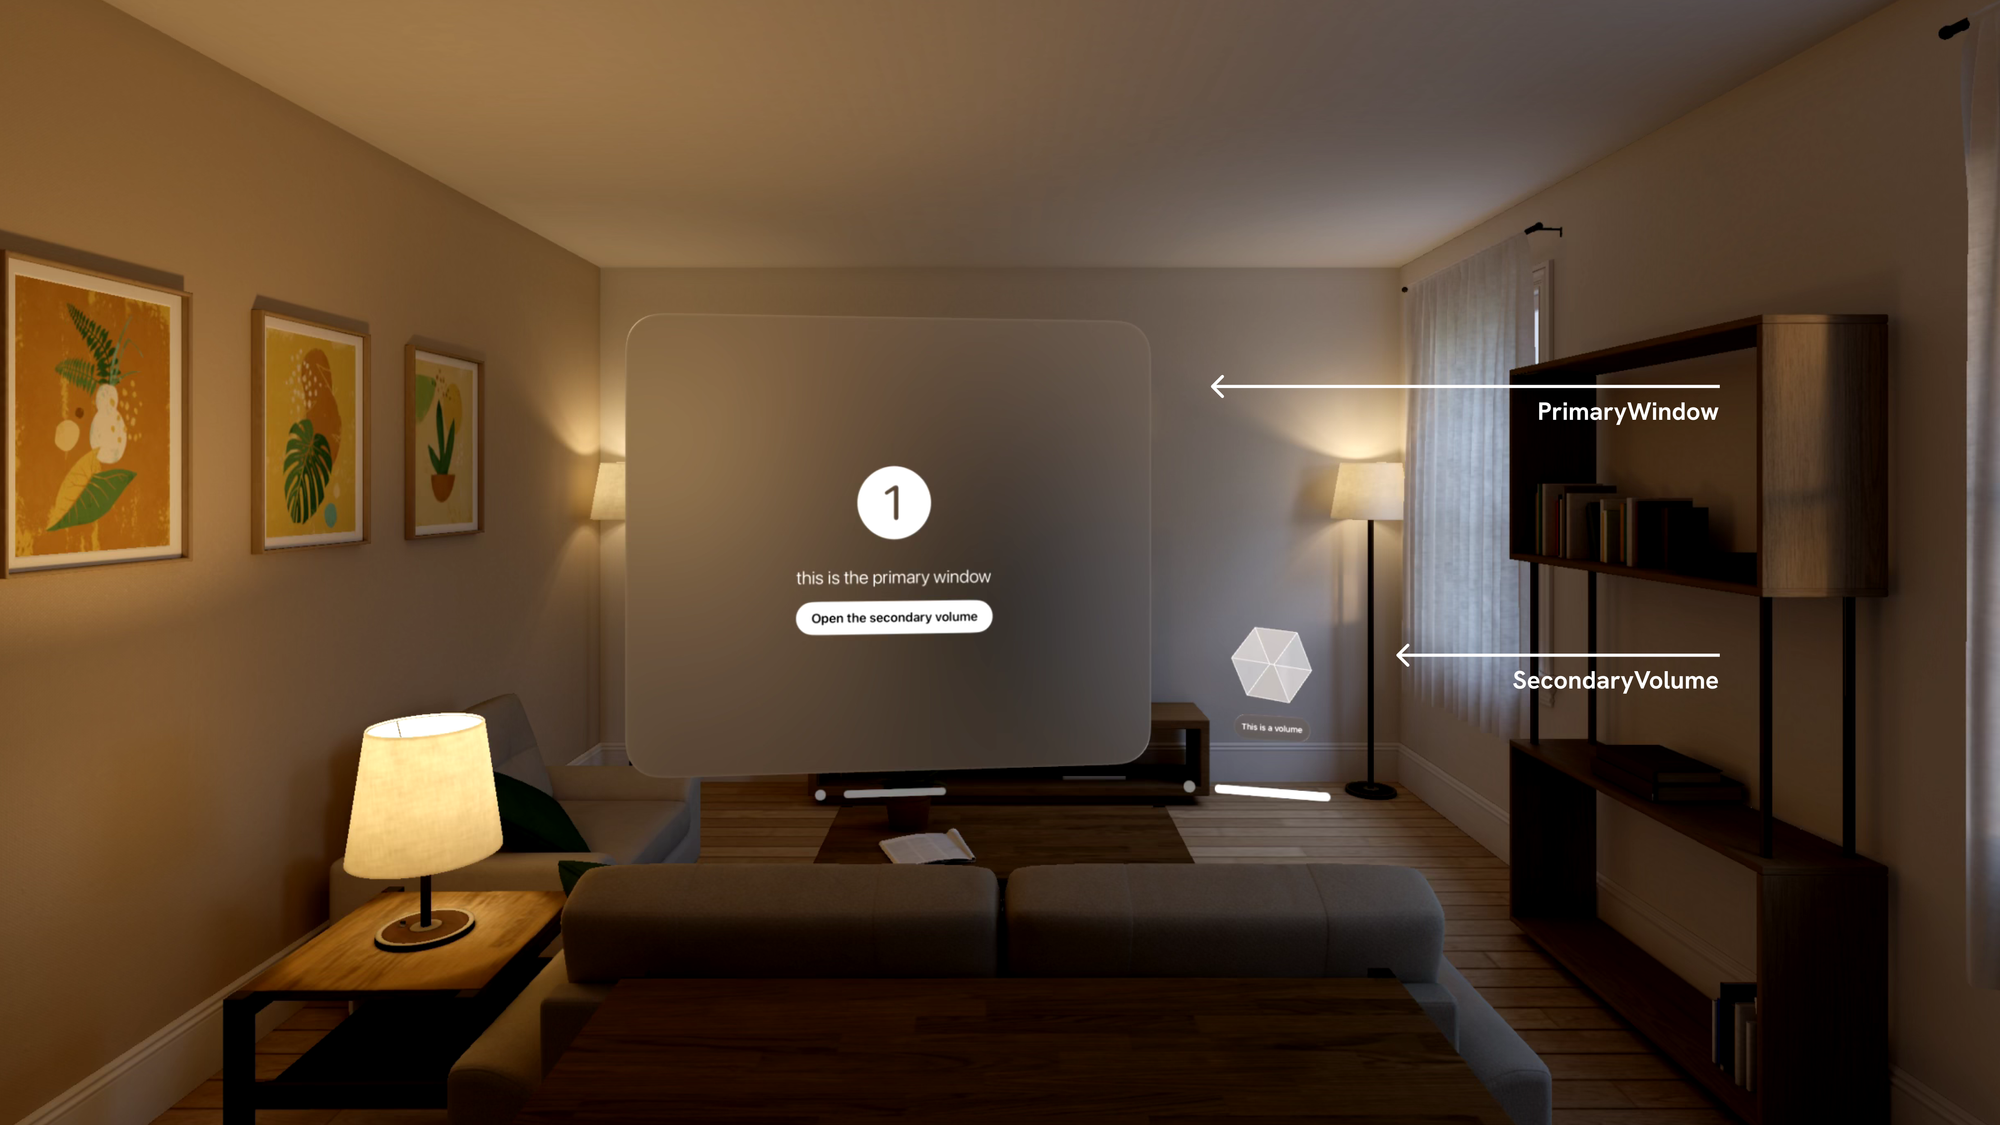
Let’s explore the steps to design a visionOS app using a volume. We will build a simple visionOS app made of a PrimaryWindowView that opens through a button a SecondaryVolumeView.
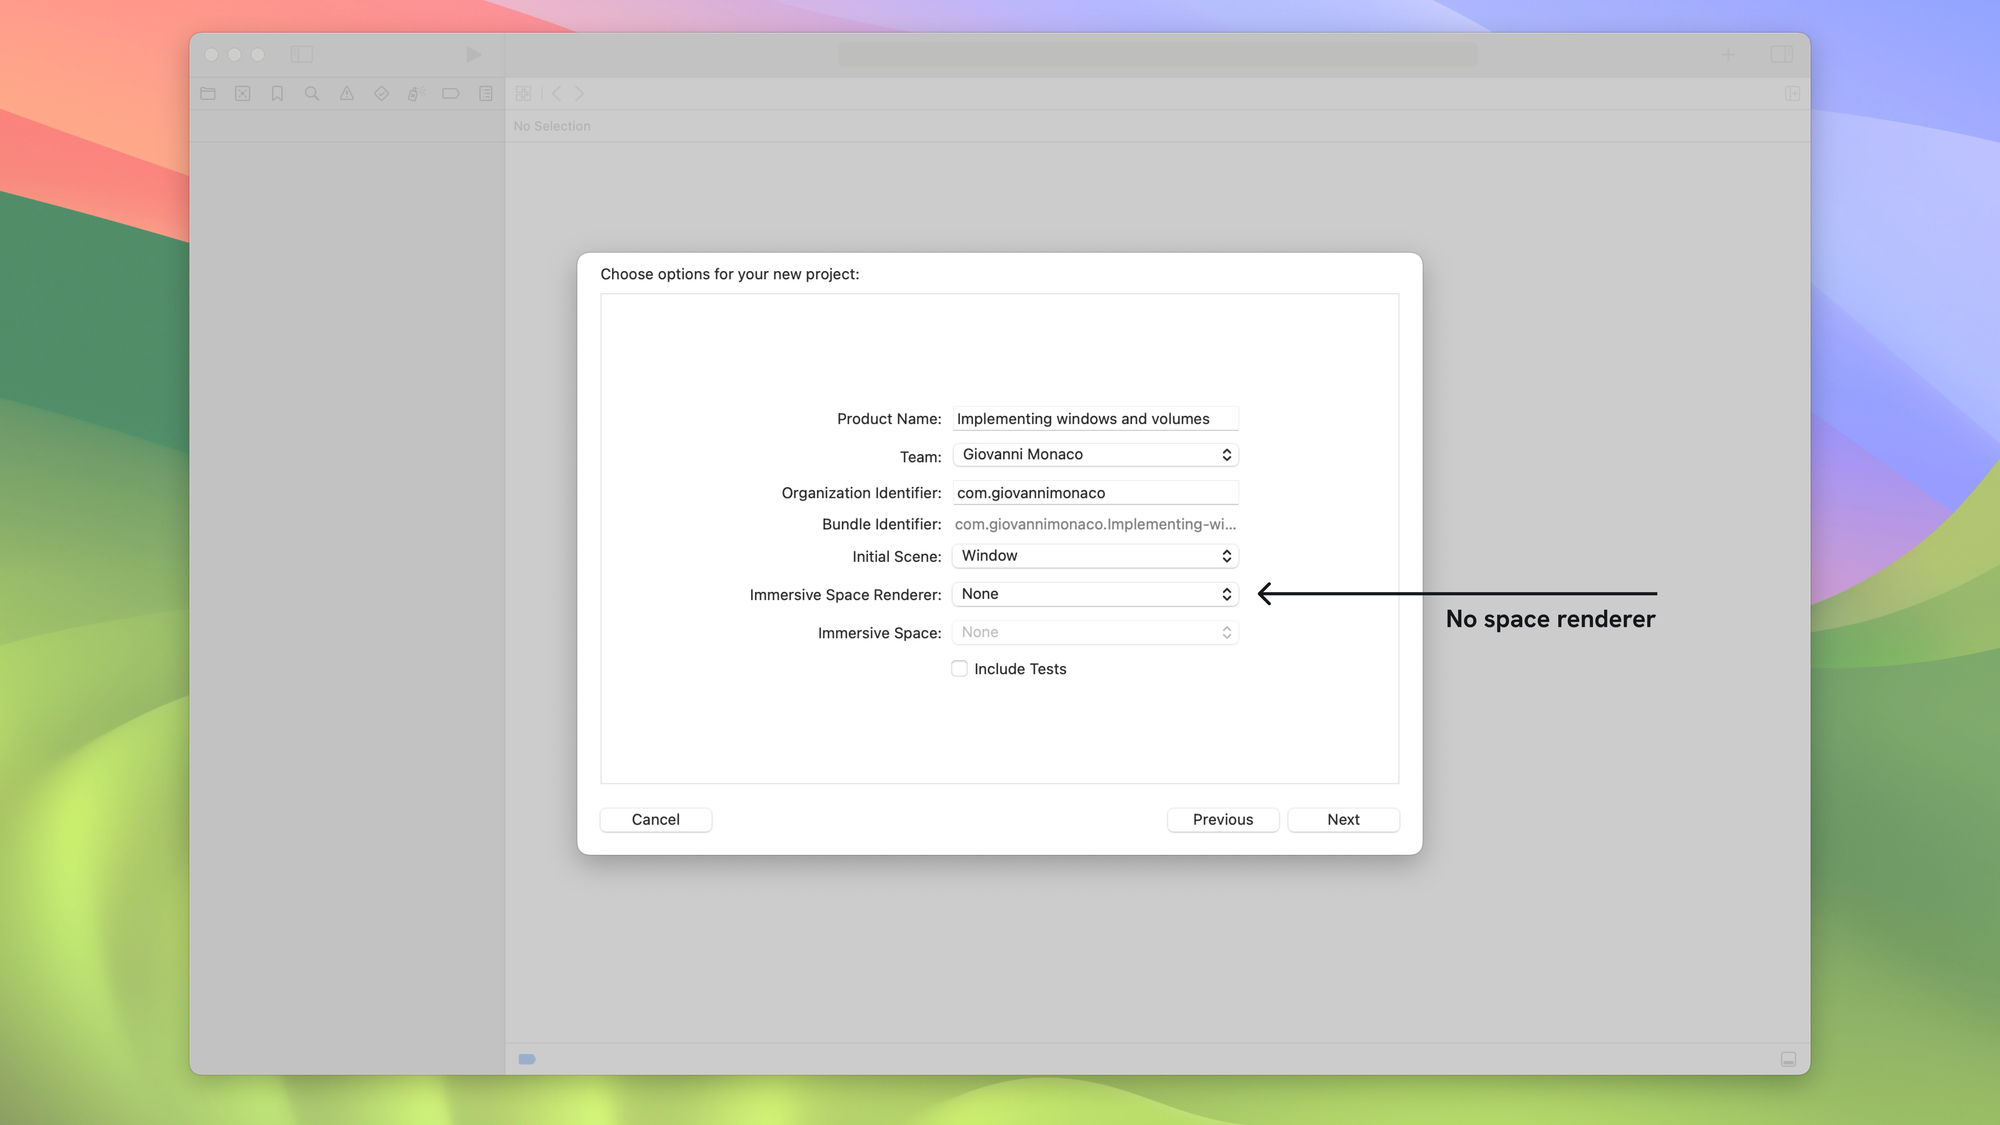
The journey begins by initiating a new project within visionOS. Ensure you have set up the necessary configurations and named the project appropriately.
When configuring the Immersive Space Renderer, opt for the None setting. While Apple offers templates for every possible immersive space, opting for the None setting allows us to understand the underlying processes from scratch.
We will use a .usdz 3D model file, a single, self-contained file format that includes all the necessary information to display a 3D object or scene without any external dependencies.
Bringing the file into Xcode couldn't be easier — drag and drop it into the primary project folder. Remember to ensure that 'copy item if needed' is selected when the import window pops up in Xcode.
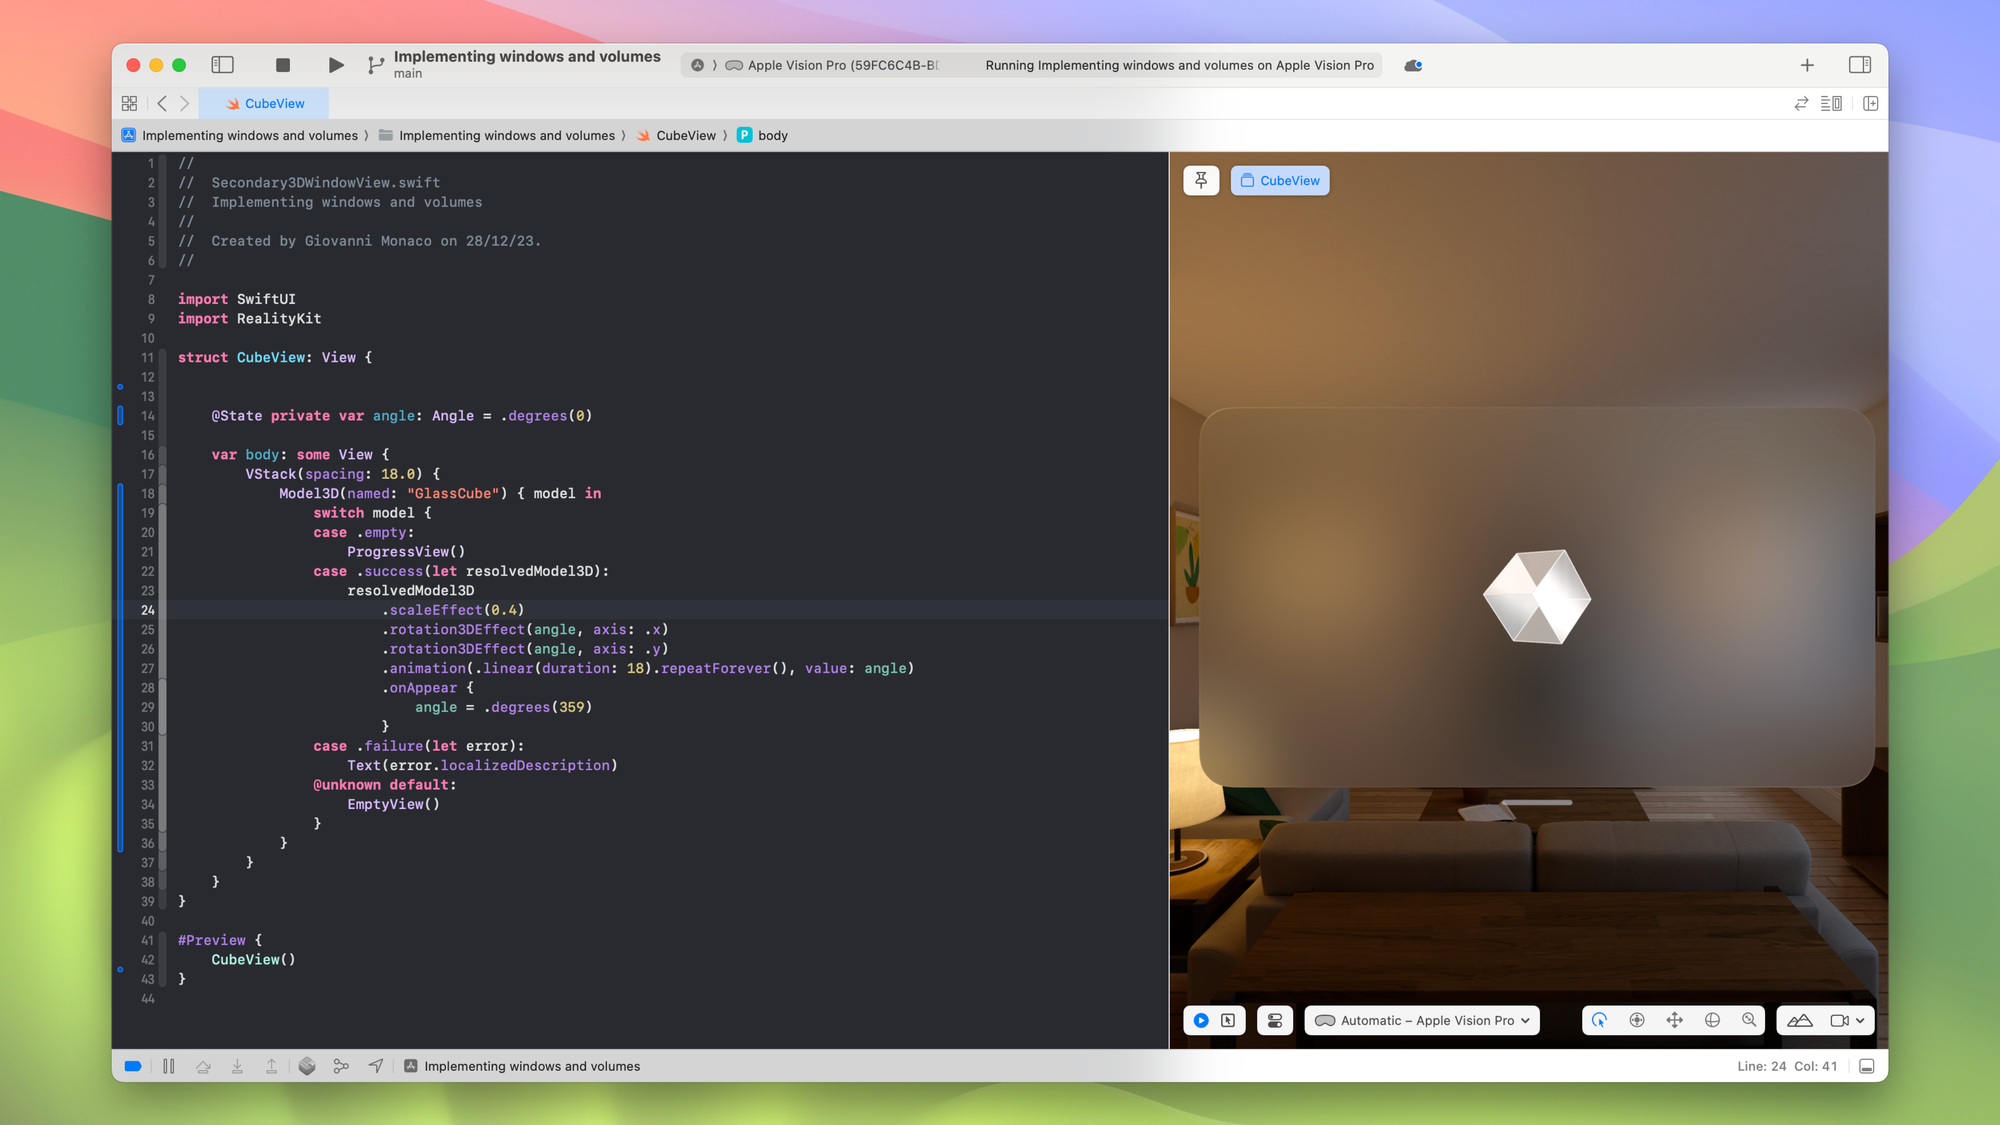
Let's start by creating for our convenience a new SwiftUI file called CubeView.
import SwiftUI
import RealityKit

struct CubeView: View {

    @State private var angle: Angle = .degrees(0)

    var body: some View {

        VStack(spacing: 18.0) {
            Model3D(named: "GlassCube") { model in
                switch model {
                case .empty:
                    ProgressView()

                case .success(let resolvedModel3D):
                    resolvedModel3D
                        .scaleEffect(0.4)
                        .rotation3DEffect(angle, axis: .x)
                        .rotation3DEffect(angle, axis: .y)
                        .animation(.linear(duration: 18).repeatForever(), value: angle)
                        .onAppear {
                            angle = .degrees(359)
                        }

                case .failure(let error):
                    Text(error.localizedDescription)

                @unknown default:
                    EmptyView()
                }
            }
        }

    }
}

#Preview {
    CubeView()
}
CubeView uses SwiftUI and RealityKit to create a view displaying a rotating 3D cube. It uses a Model3D view to load a 3D model named GlassCube. The cube rotates continuously around the x and y axes.
The initial preview showcases the cube within a window. In the upcoming setup, we'll configure the code to display the cube within a spatial volume.
Before moving on, let's add in our shared ViewModel a secondaryVolumeIsShowing variable. This variable will act as a new controller, determining whether the secondary volume is displayed or not.
import Foundation

@Observable
class ViewModel {
    var secondaryVolumeIsShowing: Bool = false
}
Let's create the SecondaryVolumeView first. This view will serve as the secondary volume, distinct from the primary window, providing an additional space for content display or interaction.
import SwiftUI

struct SecondaryVolumeView: View {

    @Environment(ViewModel.self) private var model

    var body: some View {

        ZStack(alignment: .bottom) {
            CubeView()

            Text("This is a volume")
                .padding()
                .glassBackgroundEffect(in: .capsule)
        }
        .onDisappear {
            model.secondaryVolumeIsShowing.toggle()
        }

    }
}

#Preview {
    SecondaryVolumeView()
        .environment(ViewModel())
}
With the SecondaryVolumeView in place, attention shifts to creating thePrimaryWindowView. This primary interface serves as the main hub of interaction. We need a simple button capable of opening/closing the SecondaryWindowView we have just created.
import SwiftUI

struct PrimaryWindowView: View {

    @Environment(ViewModel.self) var model

    @Environment(\.openWindow) private var openWindow
    @Environment(\.dismissWindow) private var dismissWindow

    var body: some View {

        @Bindable var model = model

        VStack(spacing: 18.0) {
            Image(systemName: "1.circle.fill")
                .resizable()
                .aspectRatio(contentMode: .fit)
                .frame(width: 100,height: 100)
                .fontWeight(.light)
                .padding()

            Text("this is the primary window")
                .font(.title)
                .fontWeight(.light)

            Toggle("Open the secondary volume", isOn: $model.secondaryVolumeIsShowing)
                .toggleStyle(.button)
                .onChange(of: model.secondaryVolumeIsShowing) { _, isShowing in
                    if isShowing {
                        openWindow(id: "secondaryVolume")
                    } else {
                        dismissWindow(id: "secondaryVolume")
                    }
                }
        }

    }
}

#Preview(windowStyle: .automatic) {
    PrimaryWindowView()
        .environment(ViewModel())
}
The last step is to update the structure that conforms to the App protocol, the file automatically generated by Xcode that provides the entry point into your app.
import SwiftUI

@main
struct ImplementingWindowsAndVolumesApp: App {

    @State private var model = ViewModel()

    var body: some Scene {

        WindowGroup {
            PrimaryWindowView()
                .environment(model)
        }

        WindowGroup(id: "secondaryVolume") {
            SecondaryVolumeView()
                .environment(model)
        }
        .windowStyle(.volumetric)
        .defaultSize(width: 0.1, height: 0.1, depth: 0.1, in: .meters)

    }
}
We're tweaking the style of this window using .windowStyle(.volumetric). What this does is it changes how the window looks and behaves. Instead of being flat and regular like most windows, this one's going to have some depth and volume, giving it a 3D-like appearance.
With .defaultSize(width: 0.1, height: 0.1, depth: 0.1, in: .meters) we are setting the default size of this window using. We are defining this window's initial size in a 3D space.

Wrapping up the coding segment, we've comprehensively established the structure for opening 3D objects as volumes within our application. Following this schema, you can implement as many volumes as necessary in your app.
Volumes considerations
Volumes and windows share certain characteristics within the shared space but exhibit distinctive traits that define their roles in spatial interfaces.
- Volumes contain 360° degrees 3D objects.
- Volumes do not display frames around 3D objects.
- A volume provides the same management controls to reposition or close a window.
- In the Shared Space, both a volume and a window have their initial position determined by the system.
- Volumes can also use a glass background.
- Windows are versatile enough to display 3D elements, yet volumes are generally preferred for showcasing 3D content.
Embrace the future with Apple's visionOS, an infinite canvas that transforms how you create the apps you love. Stay tuned and explore with us the latest advancements of this transformative digital experience.