Integrating App Intents with Control Action
Learn how to implement Controls to perform actions across the system.

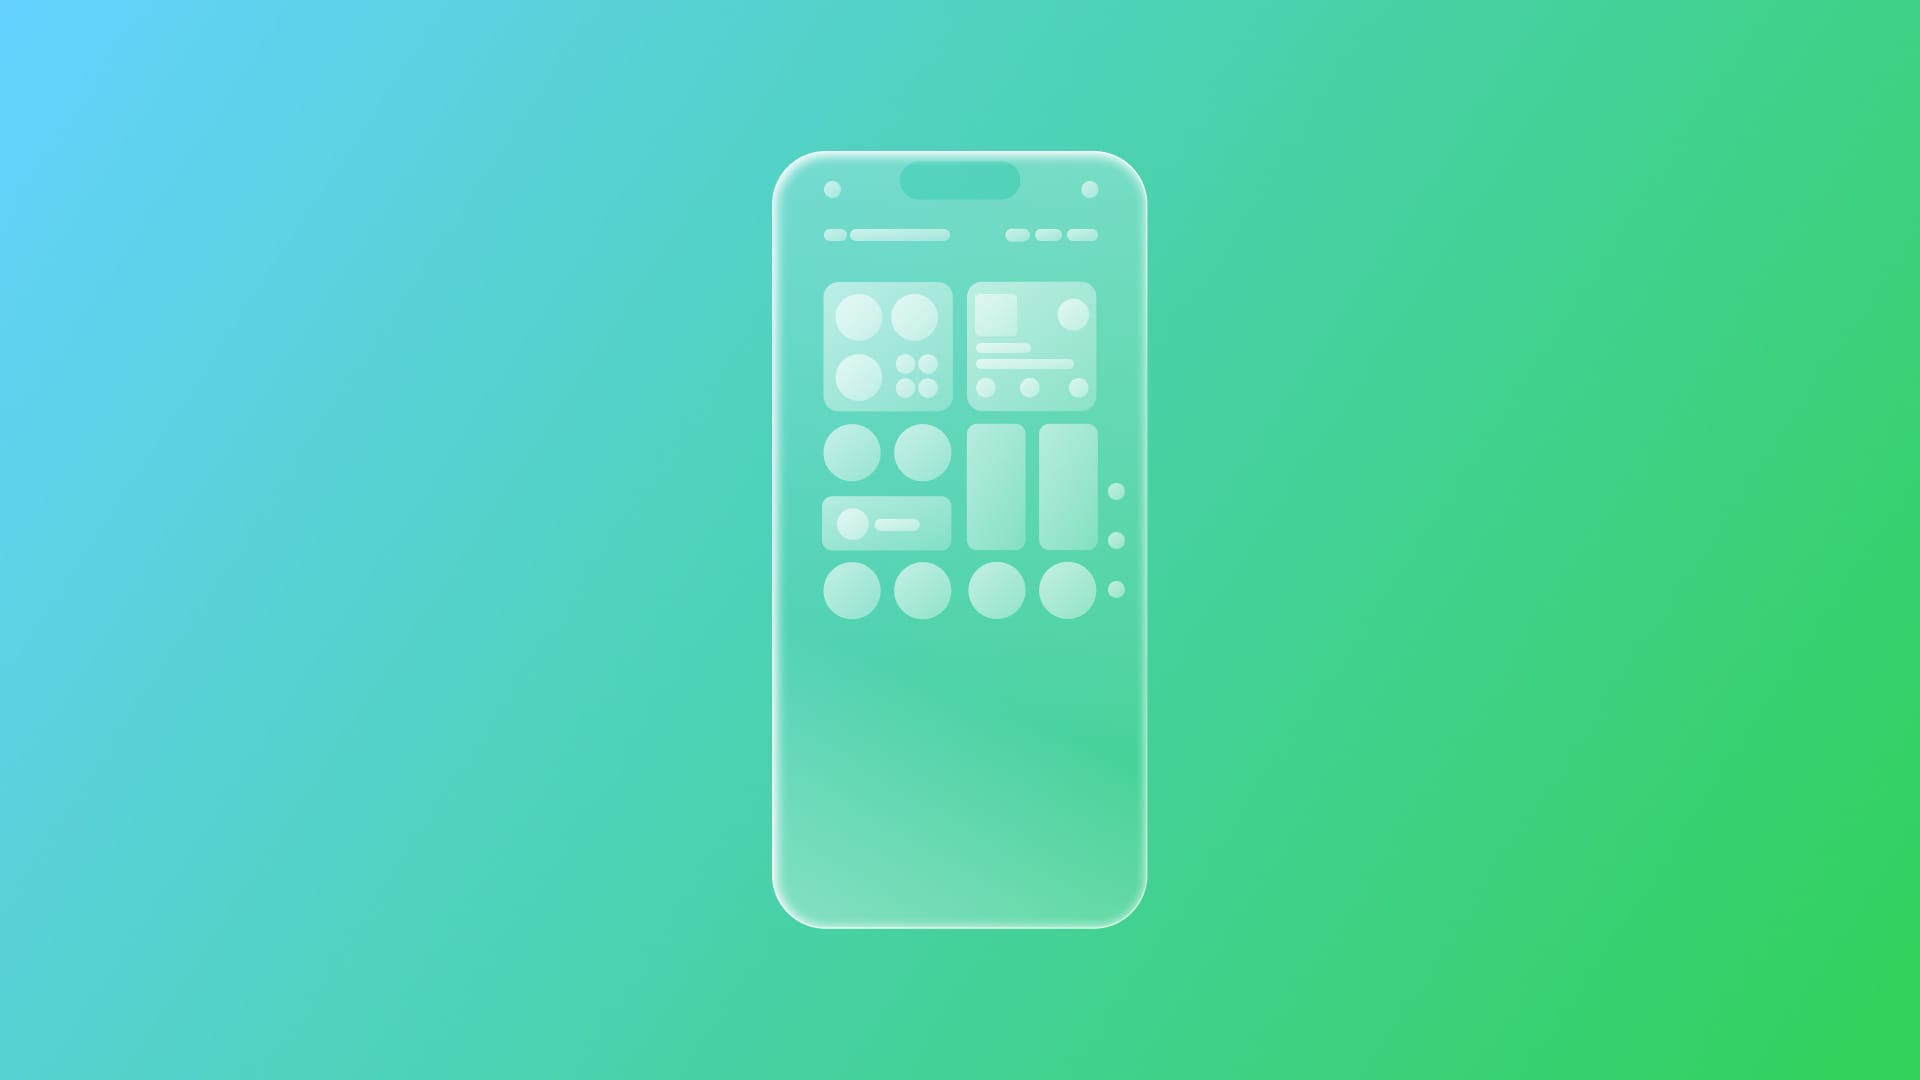
Controls are buttons that allow to toggle between two states or perform specific actions that are accessible from the control center. Users can create new controls by tapping on the plus action button from the control center. There, they are prompted with a series of possible actions that can be associated with the control.
In this tutorial we are going to explore how to expose app specific actions in order to allow users to create their control action to be added in the control center. to achieve such a result, we will:
- Create the action that we want to expose;
- Expose the action as a control action.
Before we start
To address the topics we are going to leverage on a simple sample project: a book library app that lets you keep track of your books on your shelf.
This starter project contains:
- View folder:
BooksListView- shows the stored books as a listBookDetailView- presents the details of a stored bookAddBookView- handles the addition of a new oneWebView- rendering the file
- Model folder, collecting all the model files
Book- defines the book typeDataModel- data persisted usingSwiftData
- Manager folder
NavigationManager- handles navigation within the appDataManager- handles the data operations
- The
BooksShelfCustomIntentAppfile - the entry point of the app - Intents folder - collecting all files related to intents
BookEntity- handling theAppEntityfor theBookmodelOpenBookIntent- handling theAppIntentthat allows opening a specific bookShorcutsProviders- handling theAppShortcutsProviderconforming type that enables the invocation of the intents via vocal commandsSearchIntent- handling theAppIntentthat allows to perform research inside your appAddBookIntent- handling theAppIntentthat creates a new instance of a book
The NavigationManager and the shared Modelcontainer are initialized at the app entry point. Launch the app and start storing your books; they will be needed to launch and test.
1. Create the action that we want to expose
Let’s suppose that with our control action we want to open the app directly on the view that allows to add a new book on your shelf. To achieve such a result we need to prepare the NavigationManager to be ready and have all the information to move to that path.
Step 1 - Prepare the navigation
At the moment, AddBookView, the modal to be opened on, is presented by leveraging a state var openAddBook instantiated directly in the BooksListView.
To integrate this presentation in the NavigationManager, we need to:
final class NavigationManager {

    ...

    // 1.
    var isAddBookOpen: Bool = false

    ...

    // 2.
    func openAddBook() {
        navigationPath = NavigationPath()
        isAddBookOpen = true
    }
}
- Add a
Booleanproperty set onfalsethat will be used to present and dismiss the modal toAddBookView. - Create a method that creates a new instance of
navigationPathand set the property you just created ontruewhen called.
So, in the BooksListView :
struct BooksListView: View {

    ...

    var body: some View {

        @Bindable var navigation = navigation

        NavigationStack(path: $navigation.navigationPath) {

            ...

            .toolbar {
                ToolbarItem(placement: .topBarTrailing) {
                    Button("Add new book", systemImage: "plus") {
                        navigation.openAddBook()
                    }
                    .labelStyle(.iconOnly)
                }
            }
            // 1.
            .sheet(isPresented: $navigation.isAddBookOpen) {
                AddBookView().environment(navigation)
            }

            ...
    }

    ...
}
- Change the
isPresentedparameter value to$navigation.openAddBookand remove the previousopenAddBookstate variable as it won’t be used anymore.
struct BooksListView: View {

    ...

    .toolbar {
        ToolbarItem(placement: .topBarTrailing) {
            Button("Add new book", systemImage: "plus") {
                // 1.
                navigation.openAddBook()
            }
            .labelStyle(.iconOnly)
        }
    }

    ...
}
- Apply the same change in the toolbar button as well.
Step 2 - Create the intent
Now, we need an intent that opens the app and navigates to the AddBookView .
Create a new GoToAddBookIntent.swift file in the intents folder.
import AppIntents

// 1.
struct GoToAddBookIntent: AppIntent {
    // 2.
    static var title: LocalizedStringResource = "Add a Book to your Shelf"

    // 3.
    @Dependency
    var navigationManager: NavigationManager

    // 4.
    static var openAppWhenRun: Bool = true

    @MainActor
    // 5.
    func perform() async throws -> some IntentResult {
        navigationManager.openAddBook()
        return .result()
    }
}
- Create a
GoToAddBookIntentconforming toAppIntentprotocol. - Specify the
LocalizedStringResourcefor the title. - Add the dependency to the
NavigationManager. - Set the
openAppWhenRunproperty ontrue. - Call the
openAddBook()method we just created to navigate toAddBookView.
2. Expose the action as a control action
Step 1 - Create the widget extension
We need to add the widget extension.
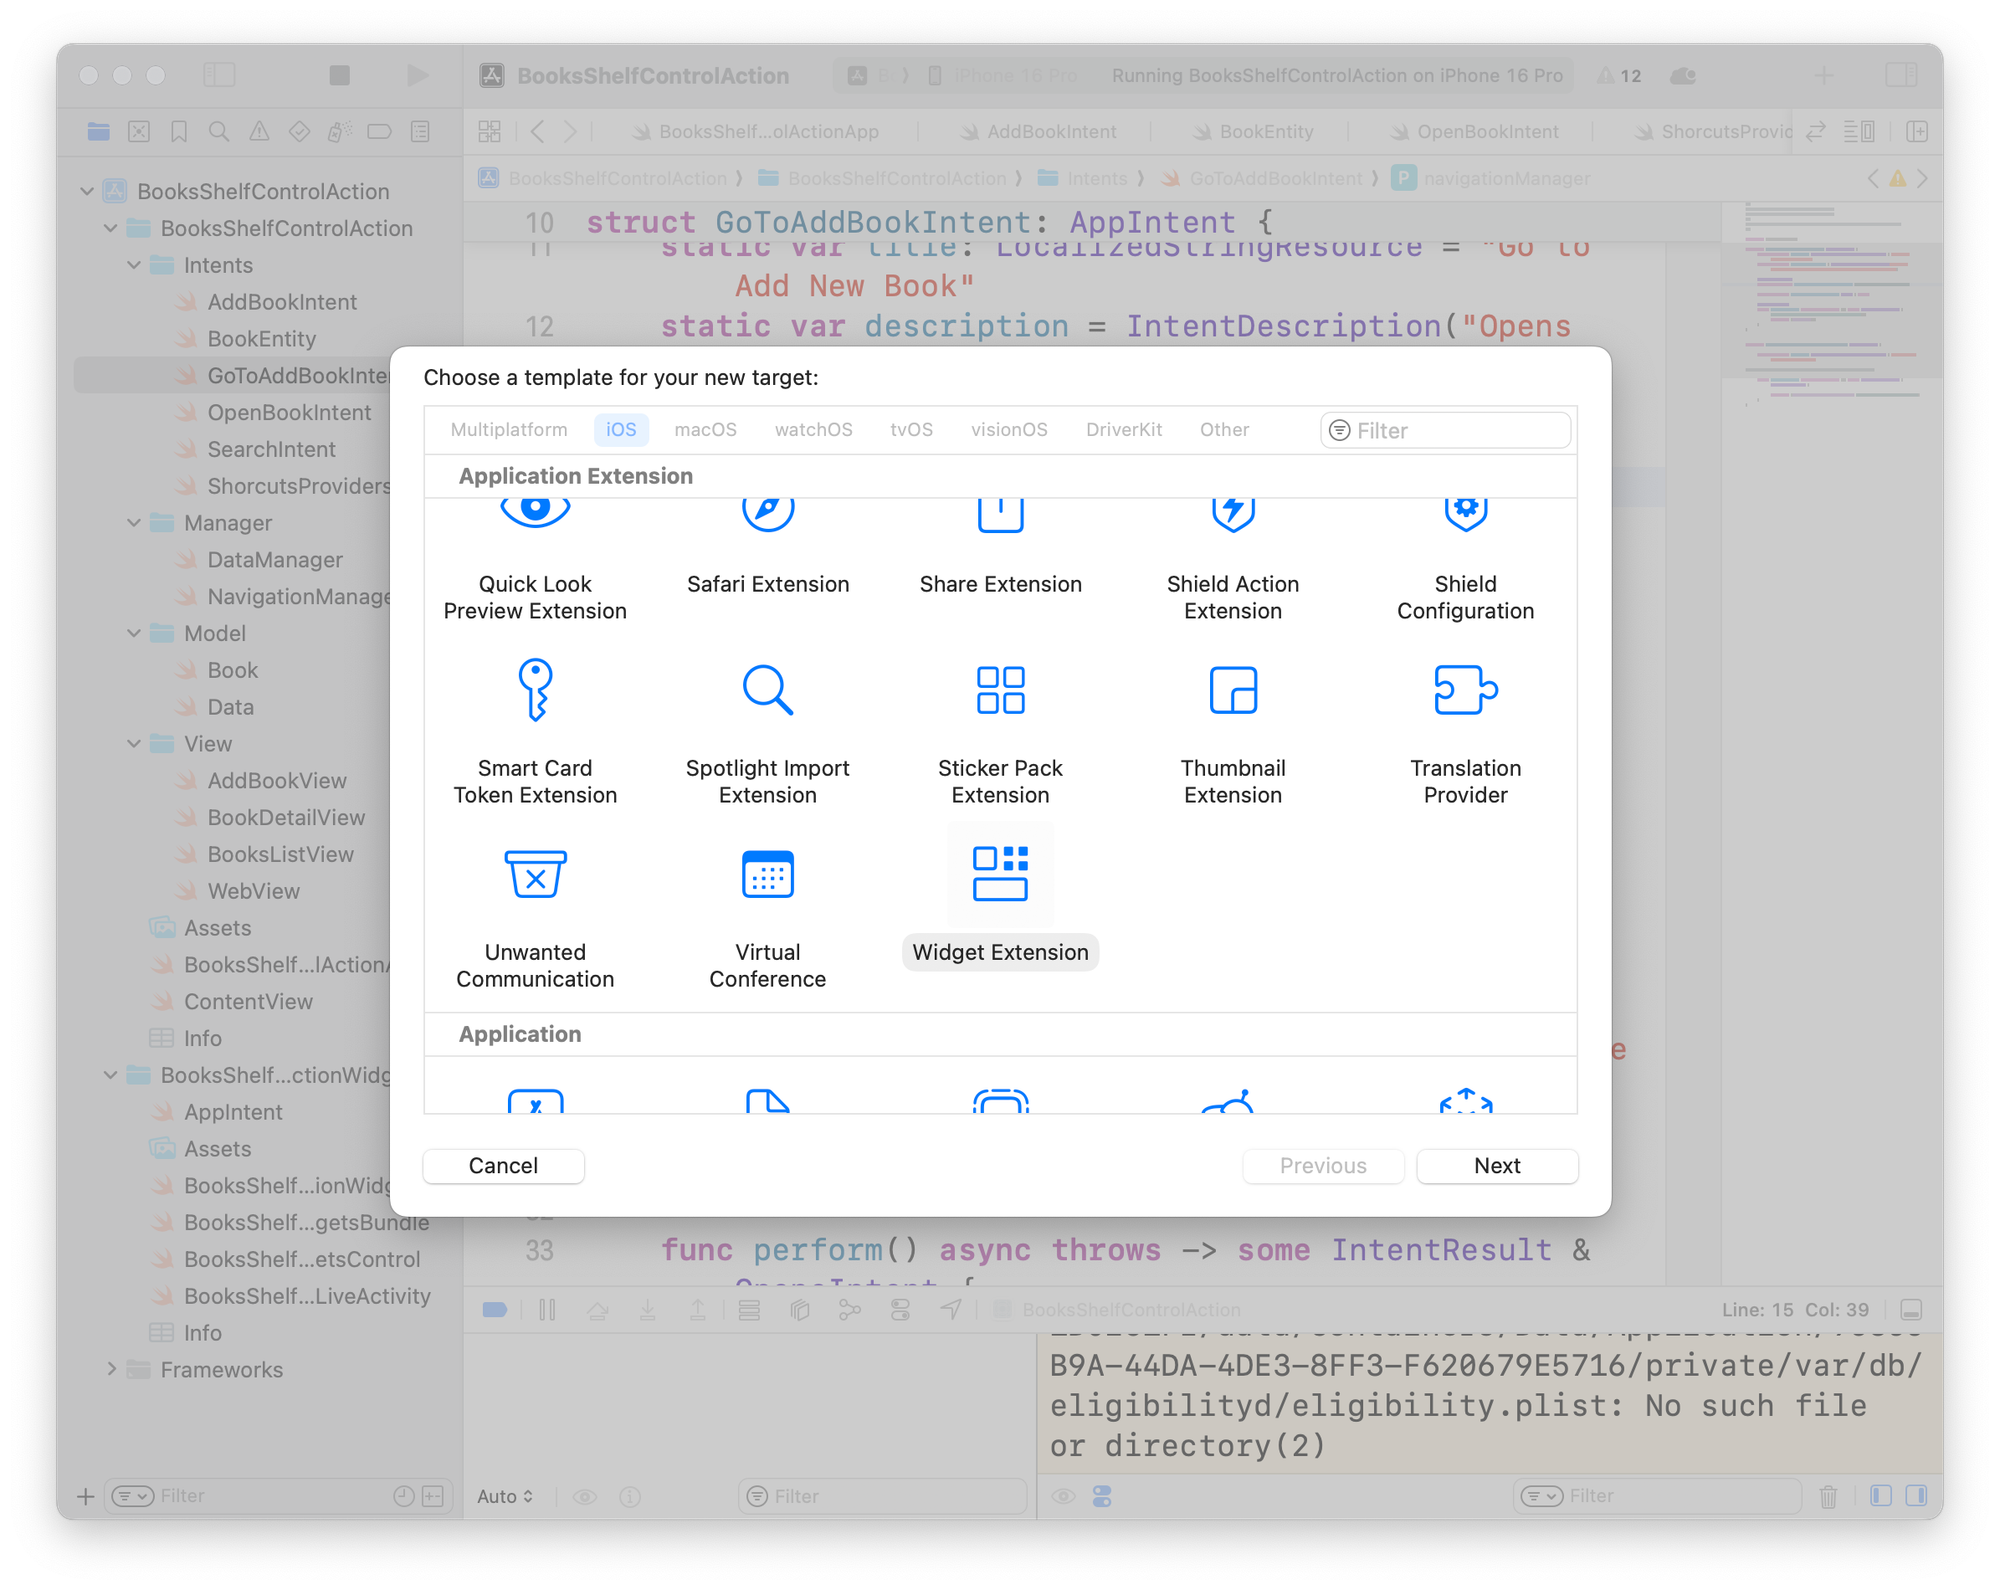
From the menu bar choose File - New - Target, and from the available options choose Widget Extension.

Be sure the include control option is checked.
It will automatically add the pre-built structs files for the the chosen widgets.
Step 2 - Modify the pre-built control widget
Let’s modify the ControlWidget it automatically created when adding the extension.
import AppIntents
import SwiftUI
import WidgetKit

struct BooksShelfControlActionStarterWidgetControl: ControlWidget {
    var body: some ControlWidgetConfiguration {
        StaticControlConfiguration(
            kind: "antonella.BooksShelfControlActionStarter.BooksShelfControlActionStarterWidget"
        ) {
            // 1.
            ControlWidgetButton(action: GoToAddBookIntent()) {
                Label("Add a new Book", image: "custom.books.vertical.badge.plus")
            }
        }
        .displayName("Go To Add Book")
        .description("A control that opens the app on the Add a new Book screen.")
    }
}
- Add the action that needs to be performed when from the control button, in our case it’s the intent we have just created.
Step 3 - Adding the target to the files
At this point, you should be prompted with an error saying “Cannot find 'GoToAddBookIntent' in scope”; to fix it, you need to:
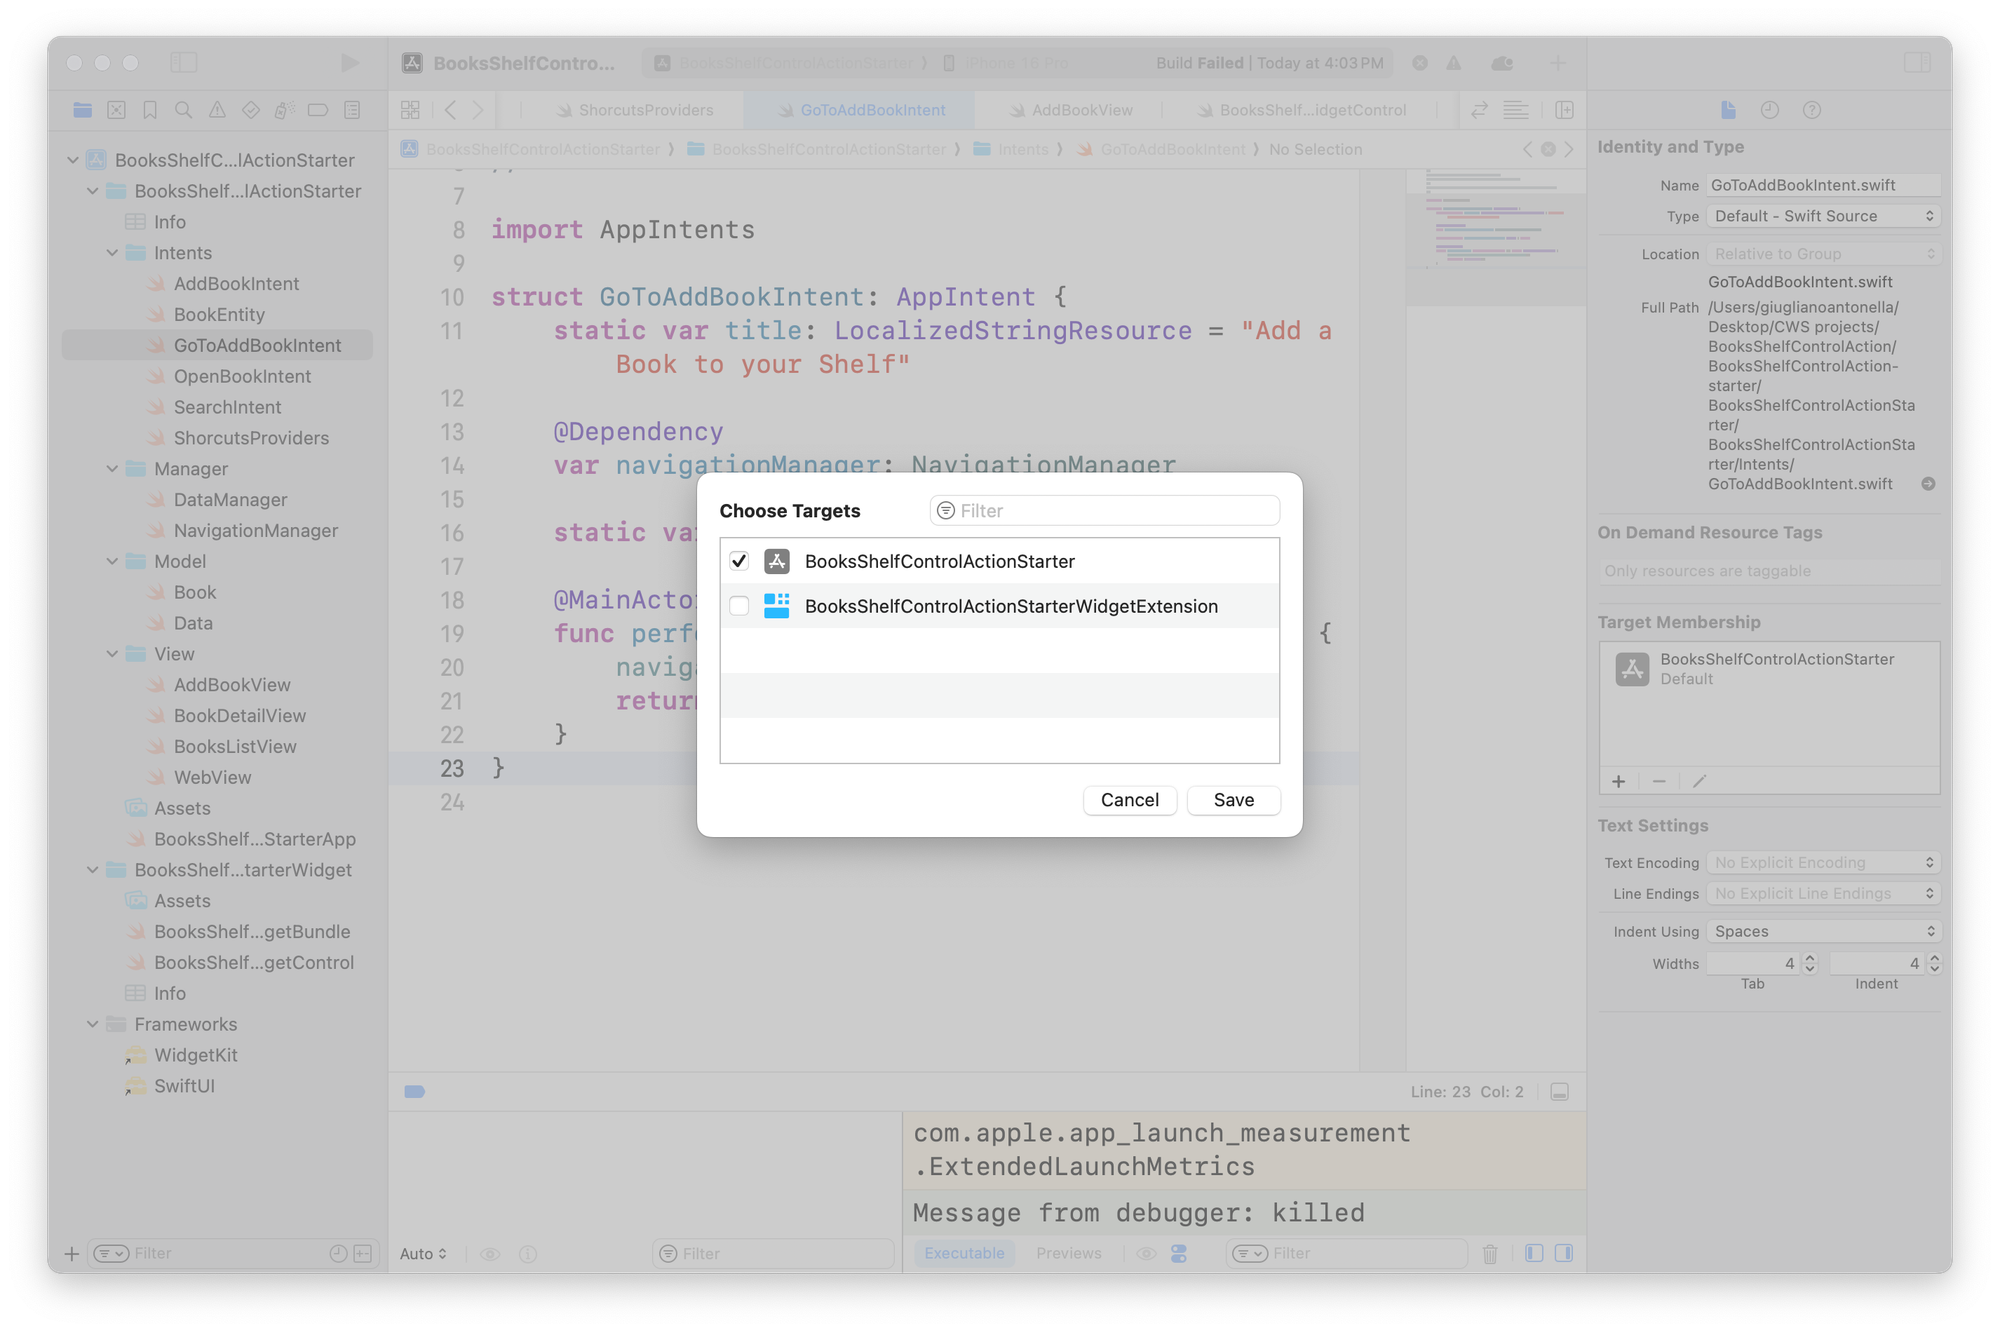
- Go to the GoToAddBookIntent.swift file.
- Open the Inspector.
- Add a new target from the Target Membership section.
- Check the widget extension.
- Save it.
If you try to launch the app, you will receive a series of errors as the files are not shared to the widget target. Repeat this process until all the files involved with the intent have the widget extension target included. At the point, you will be able to correctly build the app.
Step 4 - Connect the Intent with the action
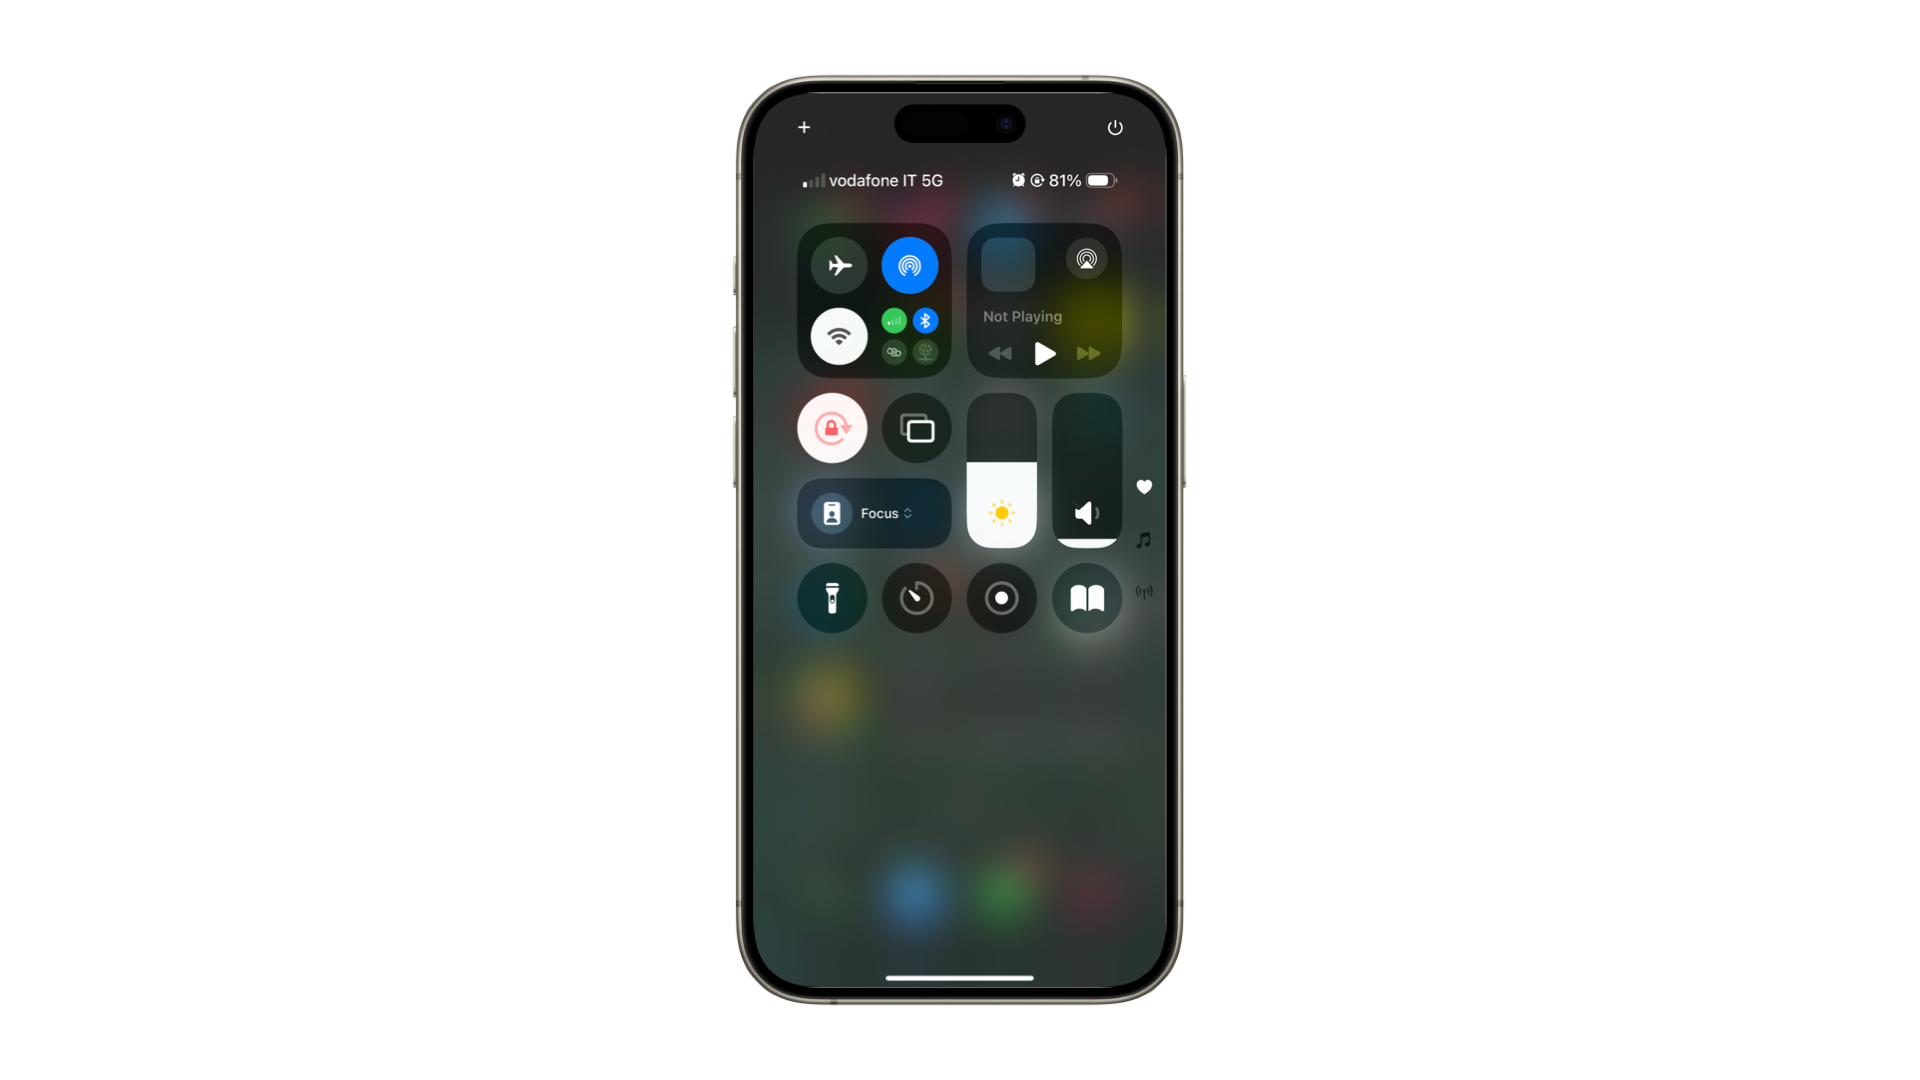
The very last step consists in connecting the action to the control button; to achieve that, build the app on your phone and from the control center:
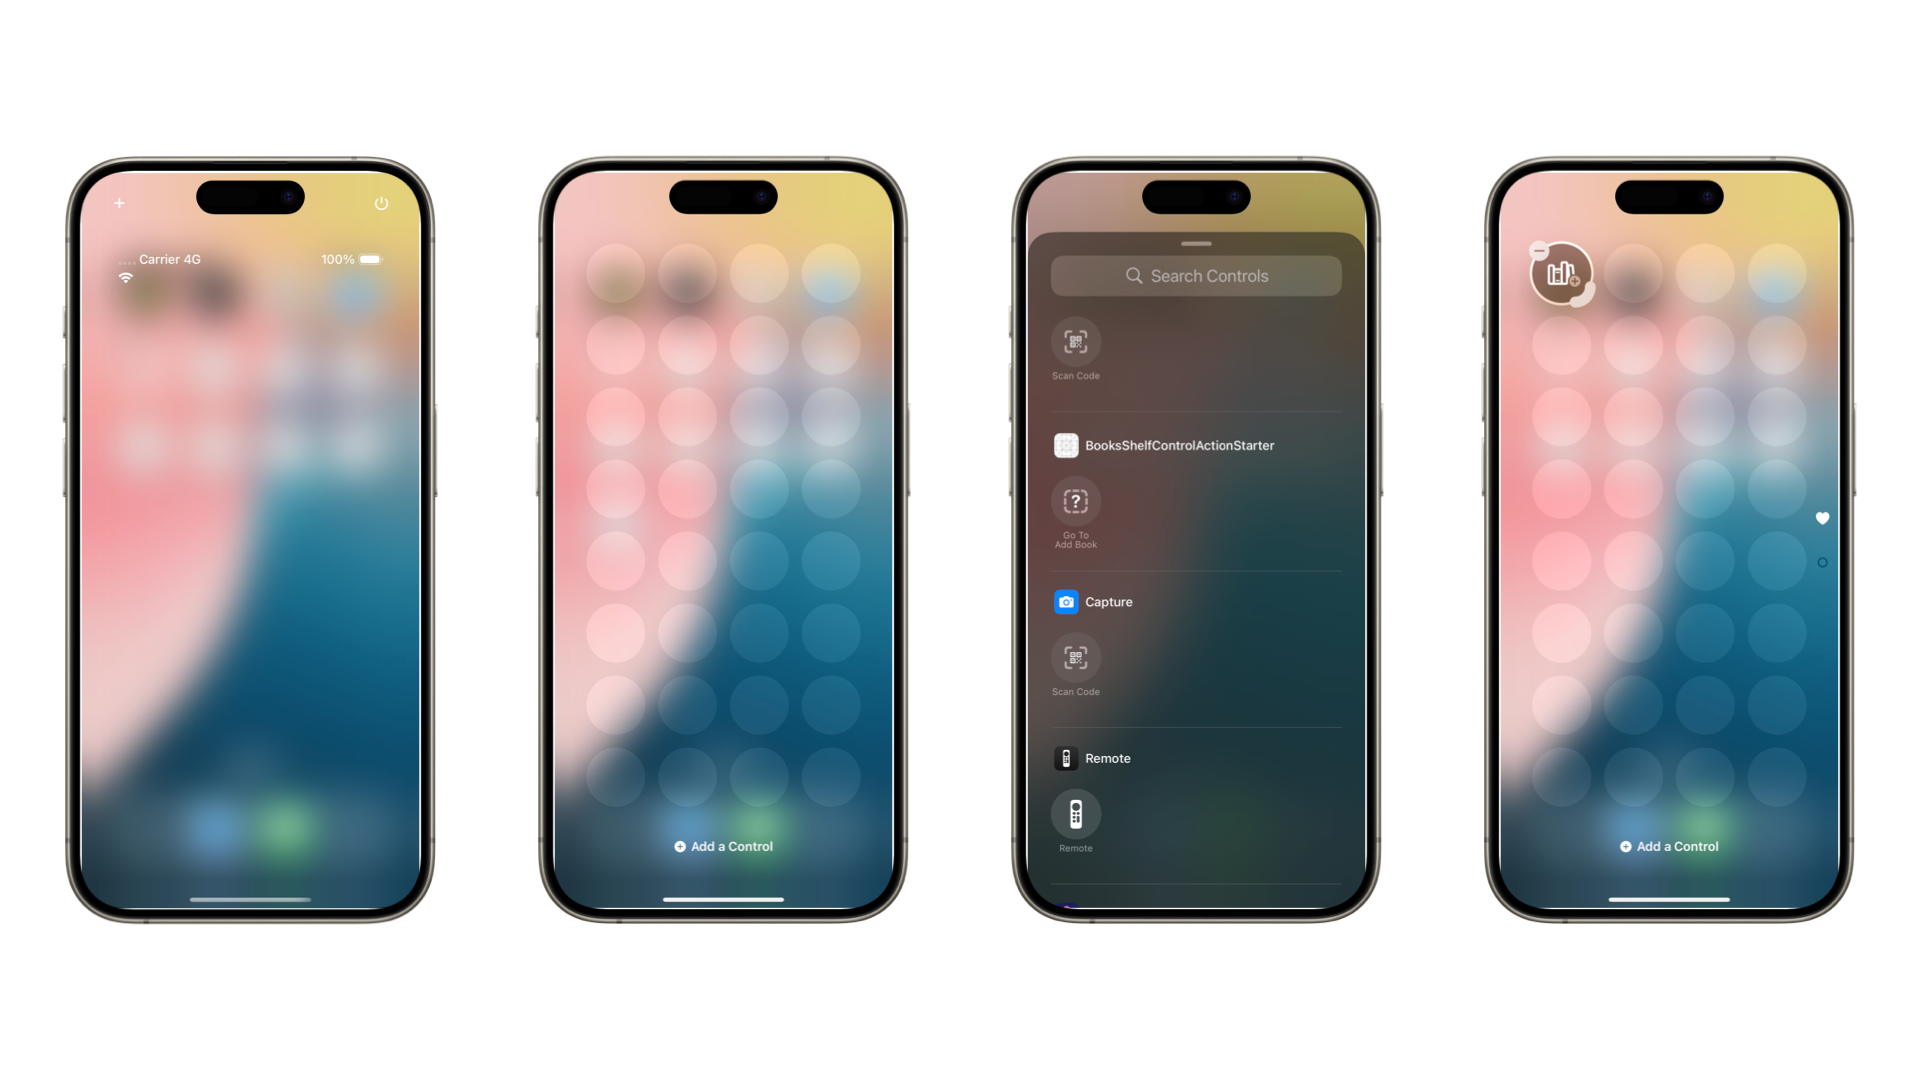
- Tap the plus button on the up left corner of your device.
- Tap on Add Control.
- You will be prompted with a list of possible actions to be chosen: tap on the one you have just created.
- You will see the control action you just created.
- And, when opening the control center it will show up there.
Tap on it, and you will be redirect to the view that allows to add a new book to your shelf.
To recap, we have explored how to create an action to be used in a control, how to expose it to the control widget set of actions, and how to finally connect the action to a new control.
This is the final project.
By defining an intent - linking it with dependencies -and connecting it to a widget extension, we enabled quick user access to specific in-app functionality. This approach highlights how developers can extend their app's usability by offering control actions - simple, tappable shortcuts that perform key tasks without needing to open the full app.
Whether for triggering a view, starting a task, or performing background logic, control actions improves user interaction and enhance overall app accessibility.