Introduction to RealityView
Explore RealityKit starting from RealityView and how to use it in your visionOS apps


RealityView is a new SwiftUI view for 3D models and effects and grants more control over the scene. This SwiftUI view is exclusively available for visionOS, making it an essential feature for any developer looking to leverage the full capabilities of Apple’s newest operating system.
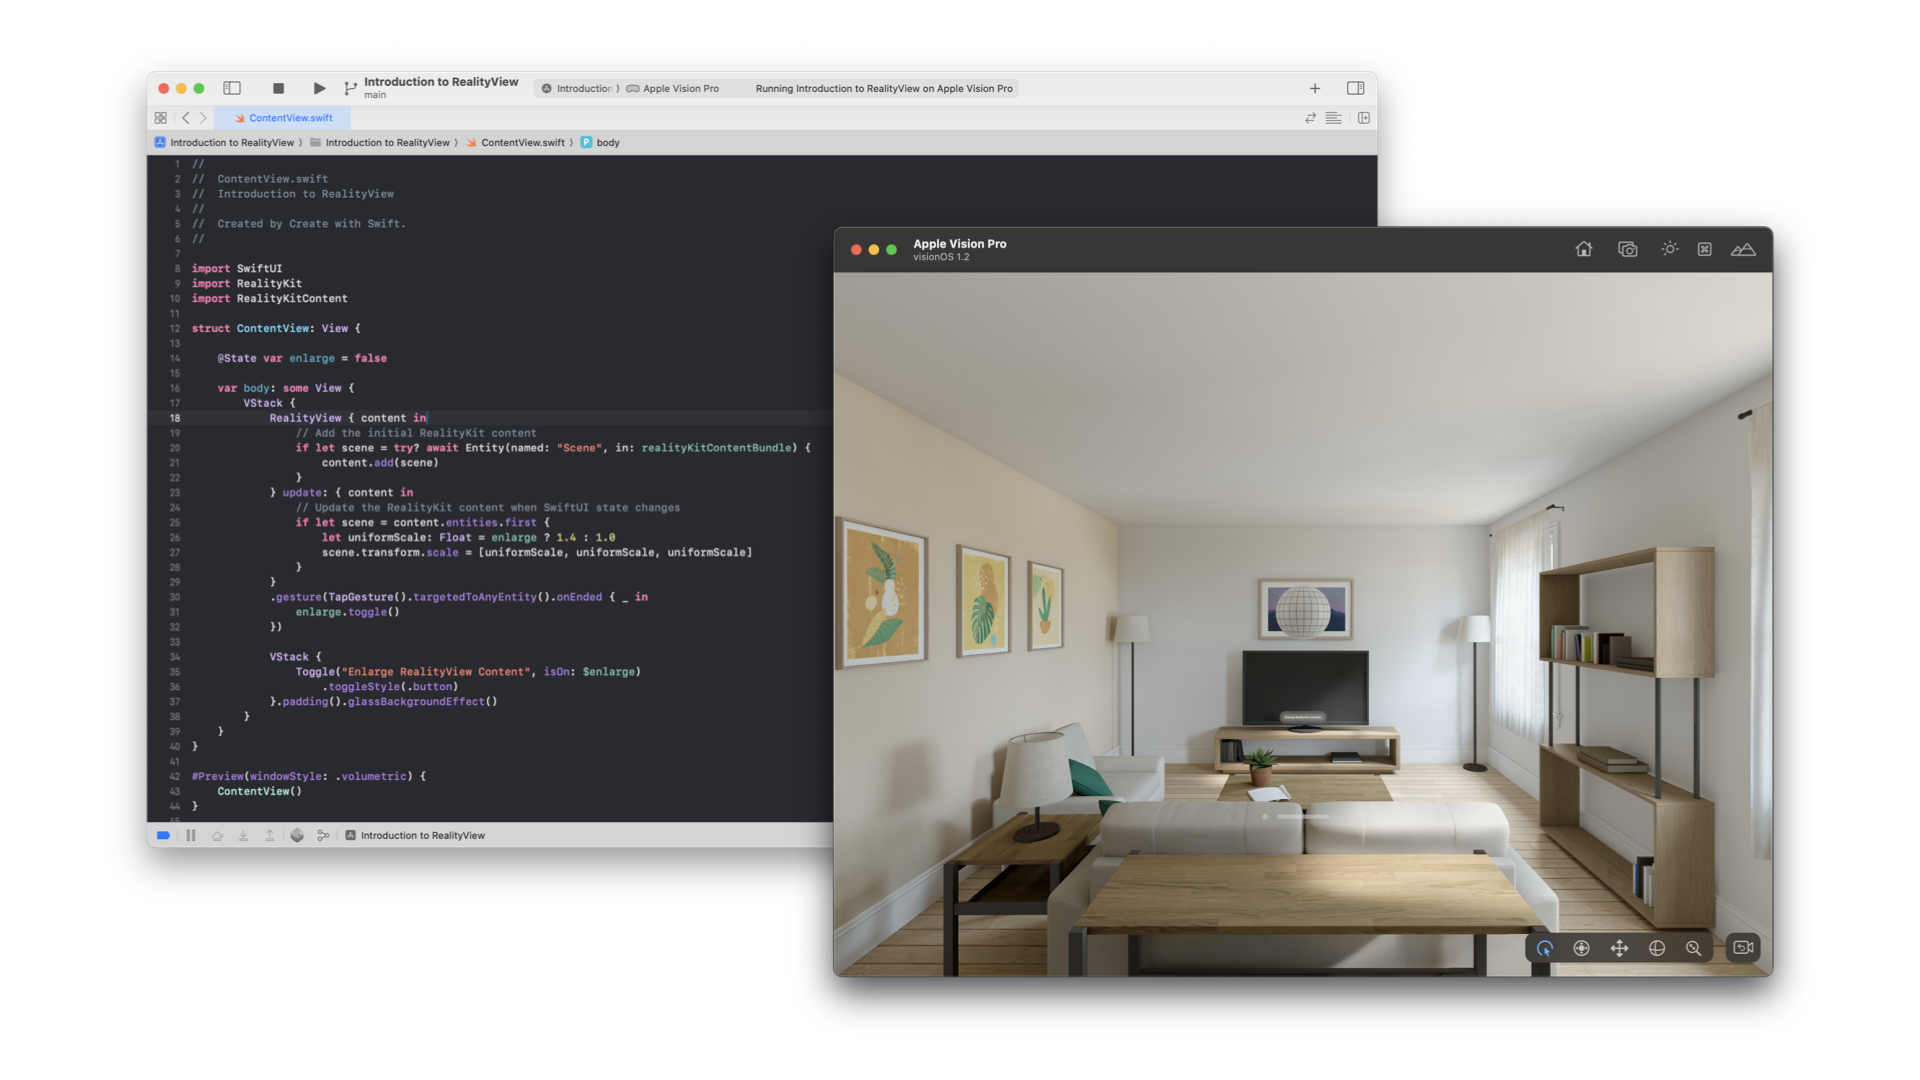
If you create a new visionOS project by selecting Volume as Initial Scene, you will see that the ContentView uses a RealityView.
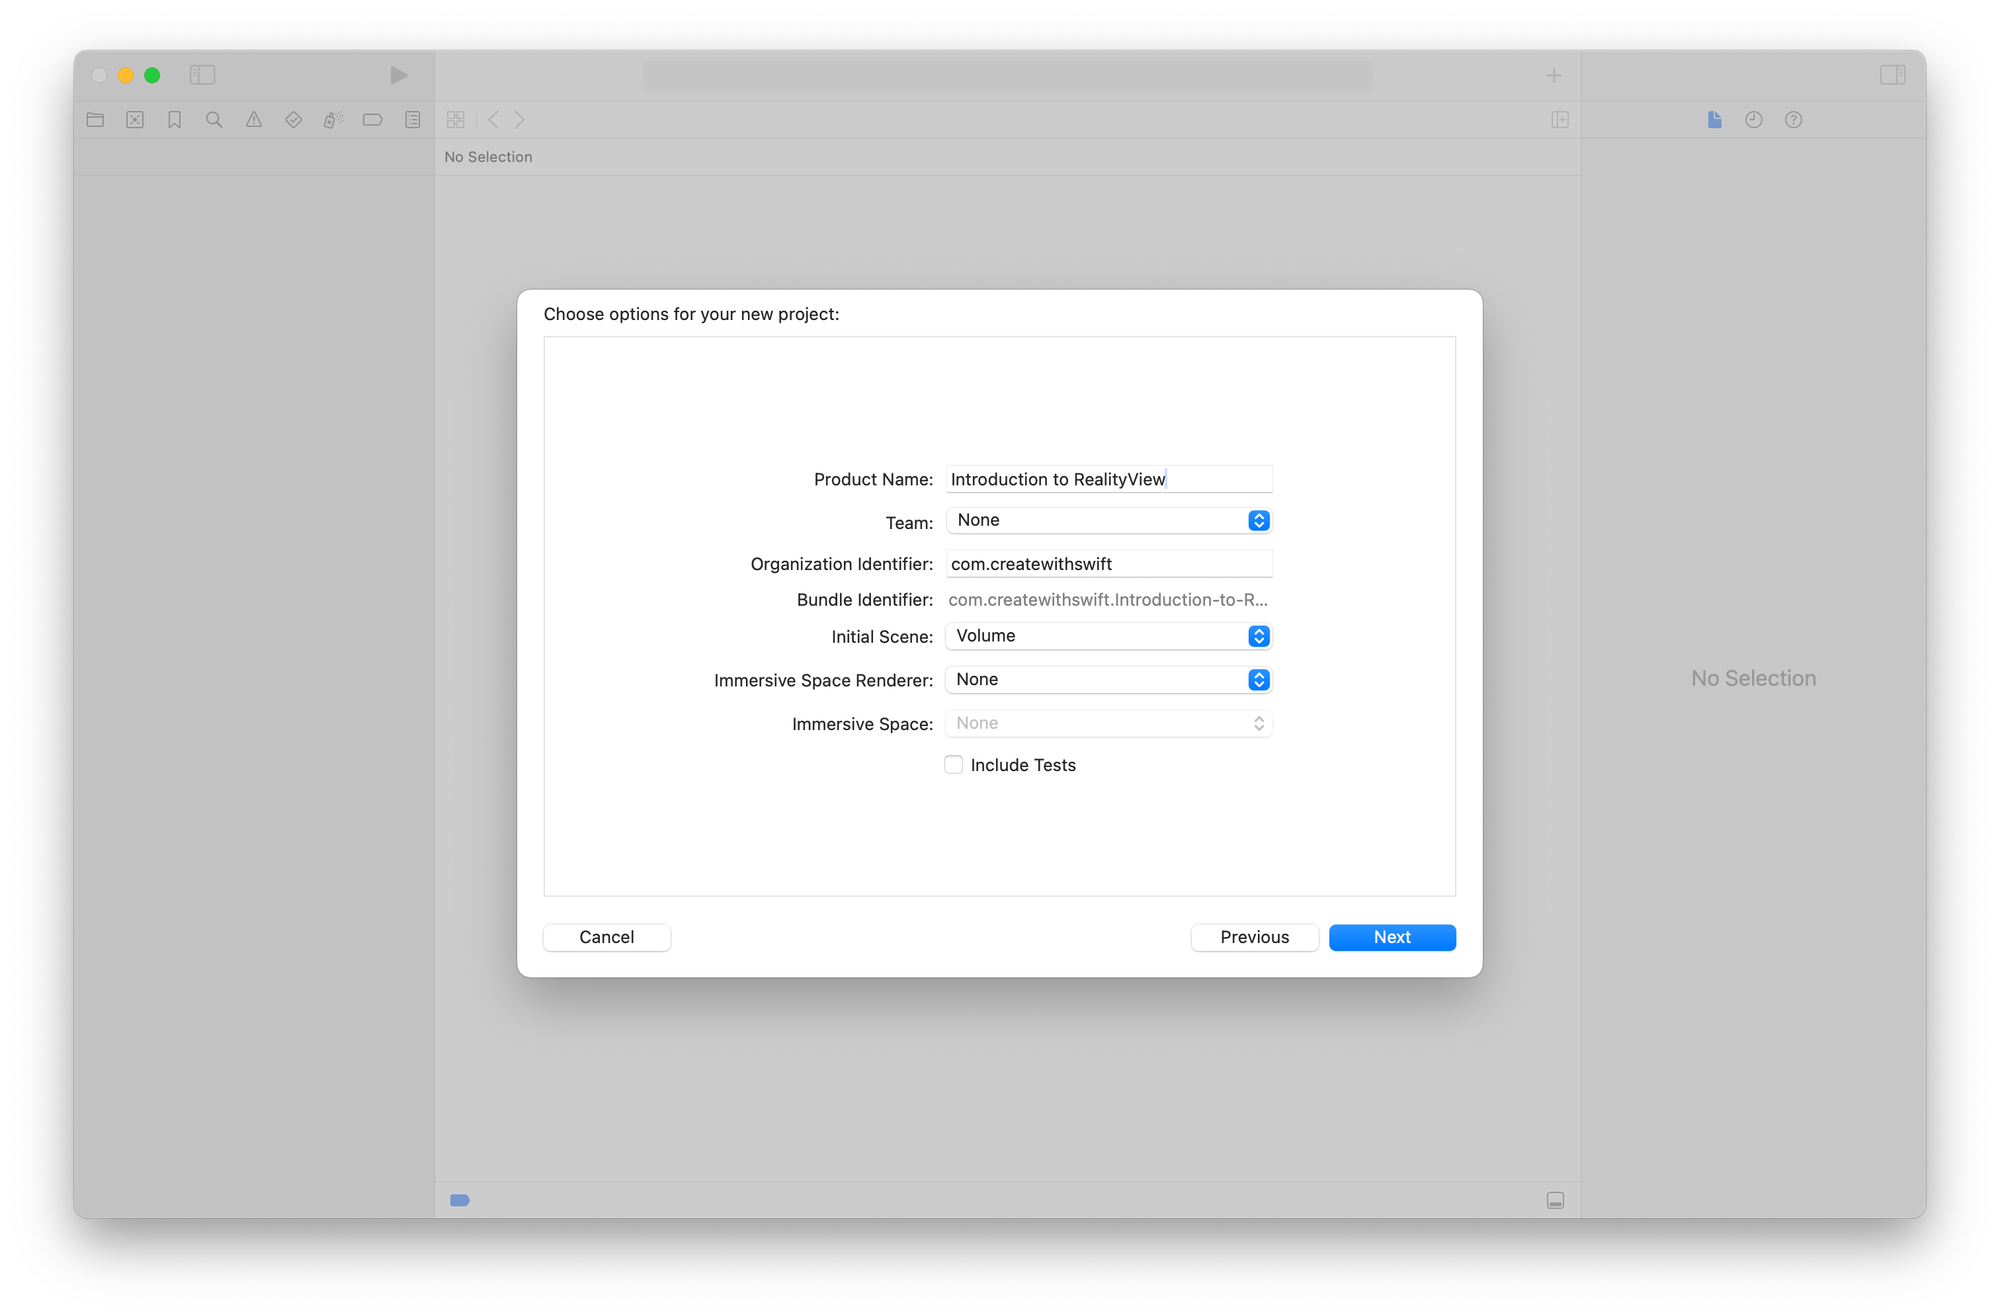
The ContentView code in the Xcode project template highlights some of the features and advantages of using a RealityView.
To start off, let's clarify some of the technical terms. In the code, two additional libraries are imported - one for RealityKit and the other for RealityKitContent. Let's take a closer look at these imports so that you can make the most of them in your development work.
RealityKit is a 3D framework that provides powerful simulation and rendering capabilities for creating augmented reality (AR) and visionOS apps. It is designed to work seamlessly with ARKit, enabling virtual objects to be integrated seamlessly into the real world. RealityKit supports app development for iOS, macOS, and tvOS.
When you create a visionOS project in Xcode, it comes with a default Reality Composer Pro project named RealityKitContent within the Packages folder. This project is essentially a Swift package that comprises of images, 3D models, audio and video files, and other assets that you can add to your project. Your source code goes into the Sources directory within this package, while the assets you add to your project are stored in the RealityKitContent.rkassets bundle. Additionally, the package contains a file called Package.realitycomposerpro, which is the actual Reality Composer Pro project.
That said, RealityView essentially is a SwiftUI view that contains RealityKit Entities. This is where the main difference with Model3D lies, another view used to show 3D content in visionOS. To use RealityView and understand its potential you must explore more the RealityKit Entity-Component system.
I you want to explore more about Model3D check out this article:
Entities and Components
A scene usually contains a collection of entities to use as a building block.
Entities are the fundamental unit of RealityKit. They are the objects that can be placed into a RealityView and scenes in general, whether they are visible or not. For instance, 3D models, lights, or invisible items like anchors or sound emitters are all entities.
For example, imagine you are creating an augmented reality experience for a virtual zoo. You could develop a scene featuring a lion, which includes its detailed 3D model prowling around. Add to this some dynamic particle effects to mimic dust kicking up from its paws as it moves, and layer in audio components for the lion’s roars and ambient sounds of the savannah. Your app could then seamlessly load and display these combined assets to bring the scene to life in a user's real-world environment.
Entities are empty components' containers. Add components to entities to let them store additional state relevant to a specific type of functionality. Entities themselves contain relatively few properties: Nearly all entity state is stored on an entity’s components.
RealityKit has predefined components that you can use to add commonly needed attributes, properties, or behaviours to your entities.
RealityKit provides different entity types to represent objects. For example, a ModelEntity represents a 3D model imported from a .usdz or .reality file. These pre-defined entities are essentially Entity instances with specific components added to them. Adding a ModelComponent to an Entity gives it the same functionality as a ModelEntity.
Another example, the visual appearance of an entity with materials is specified by the ModelComponent or the scale, rotation, and translation defined in the Transform component, which is already added to every entity. Another example that will be used later in the article is the InputTargetComponent which as you may imagine add the possibility to interact with entities.
You can find all the components in the Apple Developer Documentation:

Display 3D models in the RealityView
Creating a RealityView in SwiftUI with RealityKit involves setting up and configuring the initial content, providing a placeholder view, optionally updating the content in response to state changes, and defining attachment views.
The initializer described here is one of the possible initializers available for creating a RealityView.
All possible parameters are:
- make: A closure to set up and configure the initial content asynchronously.
- placeholder: A view displayed while the initial content is being loaded.
- update: An optional closure to update the content in response to state changes.
- attachments: To add views into your RealityKit content.
We will use a .usdz 3D model file, a single, self-contained file format that includes all the necessary information to display a 3D object or scene without any external dependencies.
Let’s start by using the make closure only. The make parameter is a closure that you use to set up and configure the initial content of your RealityView. This closure is asynchronous to allow loading of any initial state required for displaying your RealityView, such as a ModelEntity loaded from disk.
struct ContentView: View {
    var body: some View {
        RealityView { content in
            if let model = try? await ModelEntity(named: "GlassCube") {
                content.add(model)
            }
        }
    }
}
While the make closure is still evaluating, the placeholder view will be displayed instead. The placeholder parameter is a view that is displayed while your RealityView's make closure is being evaluated. For example, you could use a ProgressView as a loading indicator. This provides a visual cue to the user that content is being loaded.
struct ContentView: View {
    var body: some View {
        RealityView { content in
            if let model = try? await ModelEntity(named: "GlassCube") {
                content.add(model)
            }
        } placeholder: {
            ProgressView()
        }
    }
}
In the code above ModelEntity represents a 3D model referencing a .usdz file in our main app bundle. ModelEntity is a pre-made entity that RealityKit provides us to represent objects. It is an instance of Entity with some ModelComponent added to it.
One of the already available compontents is the Transform component. We can use it to change the position of the entities in the same RealityView.
struct ContentView: View {
    var body: some View {
        RealityView { content in
            if let glassCube = try? await ModelEntity(named: "GlassCube") {
                content.add(glassCube)
                glassCube.position = [0,-0.2,0]
            }
        } placeholder: {
            ProgressView()
        }
    }
}
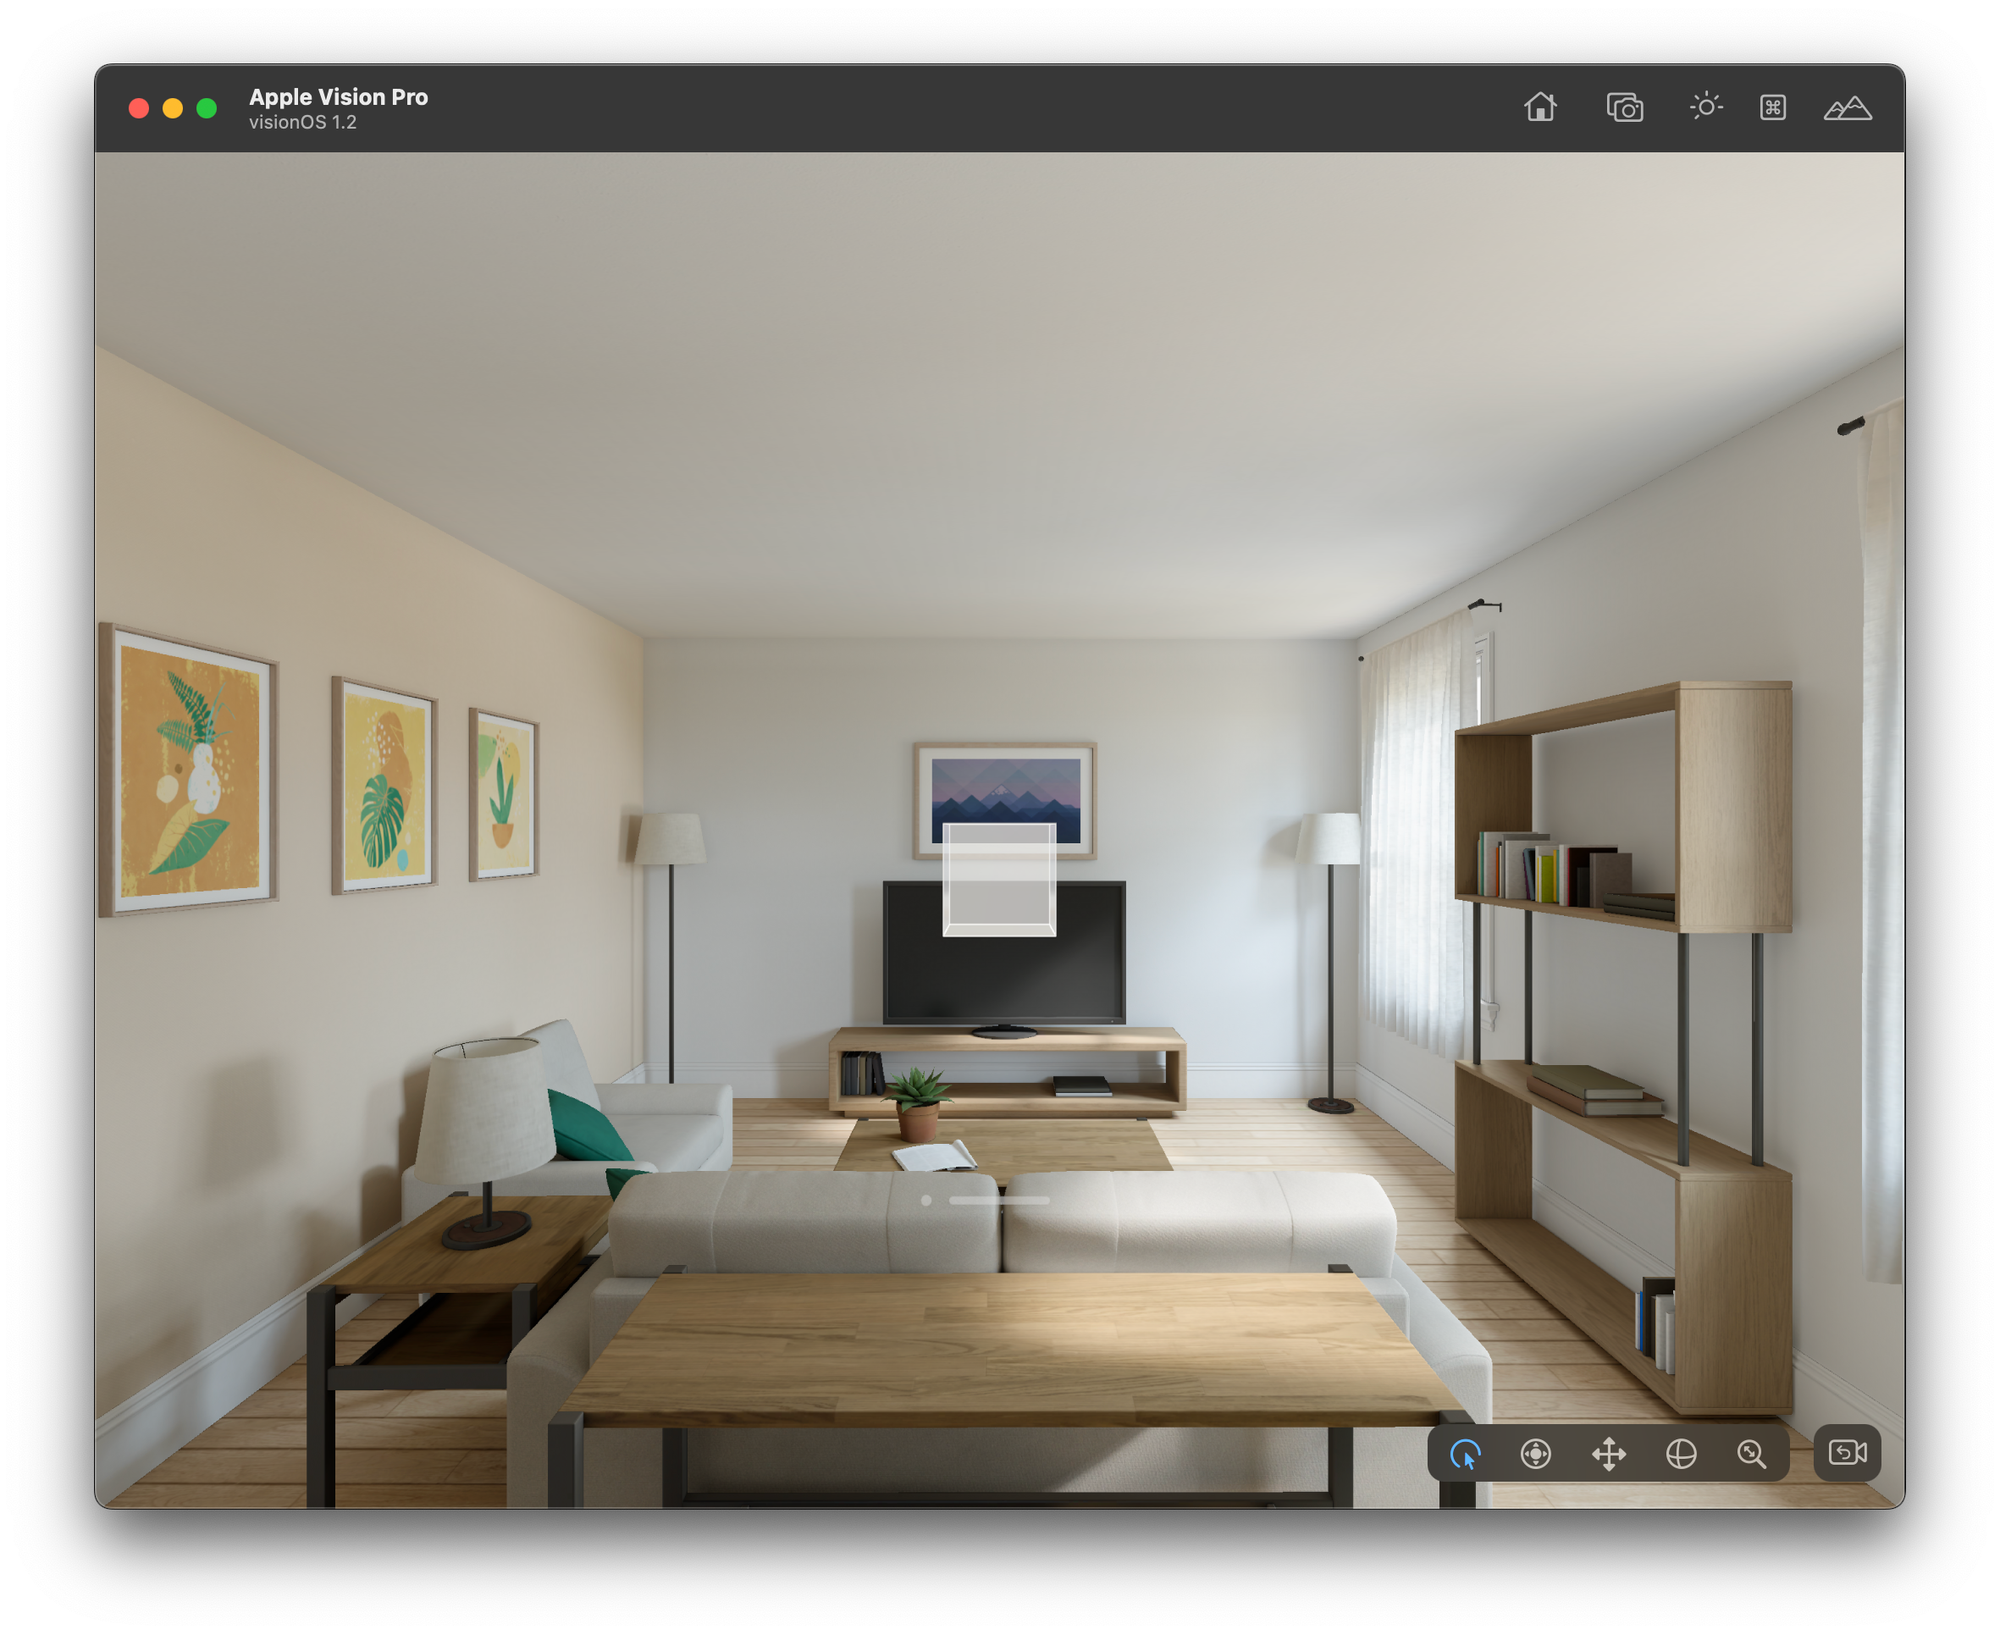
RealityView has a different unit and y-axis orientation compared to SwiftUI. The unit is 1 meter and the y-axis points upwards.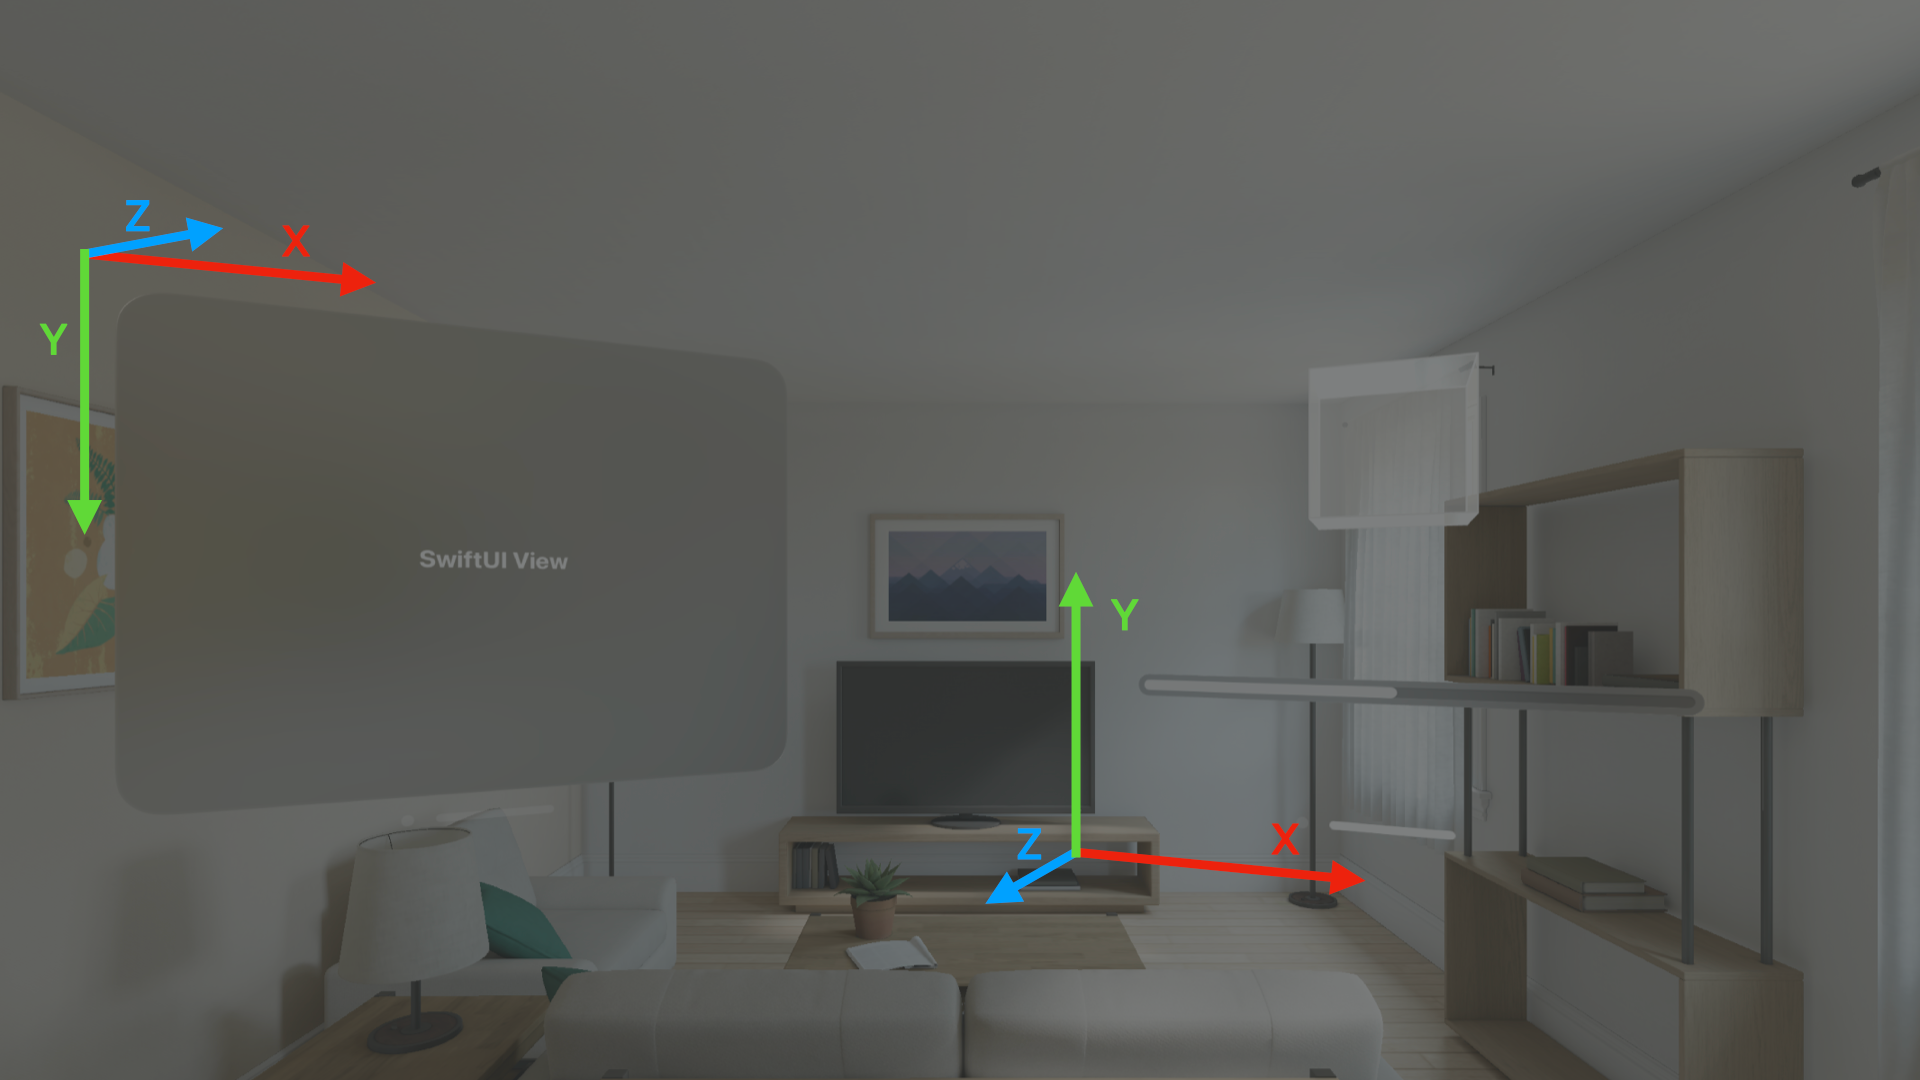
If you add multiple entities to the RealityView, they will be placed at the origin, requiring you to adjust their position manually.
If you want to know more about RealityView Attachments and learn how to display SwiftUI views in a RealityView you can check the dedicated article:
Updating Entities when view states change
Entities in RealityViews can be updated using the update closures when SwiftUI states in your view change. The update parameter is an optional closure that you can use to update your RealityView's content in response to changes in your view's state.
struct ContentView: View {

    @State private var scale: Float = 1.0

    var body: some View {
        VStack(spacing: 18) {
            RealityView { content in
                if let glassCube = try? await ModelEntity(named: "GlassCube") {
                    content.add(glassCube)
                    glassCube.position = [0,-0.2,0]
                }
            } update: { content in
                if let glassCube = content.entities.first {
                    glassCube.transform.scale = [scale, scale, scale]
                }
            } placeholder: {
                ProgressView()
            }

        Slider(value: $scale, in: 0.0...2.0)
            .padding()
            .glassBackgroundEffect()
        }
    }
}
When the Slider changes the value of the scale state variable. This will trigger the reality update closure, in which we scale the entity through the transform component.

Adding Entity Components
Let’s see how you can add components to your entities to enable user interaction. We can do it thought code or using Reality Composer Pro.
Adding Components programmatically
We want to add a tap gesture that will scale back the cube to its original size. We will need to add in this order an InputTargetComponent, a collision shape and a TapGesture that will reset the scale.
struct ContentView: View {

    @State private var scale: Float = 1.0

    var body: some View {
        VStack(spacing: 18) {
            RealityView { content in
                if let glassCube = try? await ModelEntity(named: "GlassCube") {
                    content.add(glassCube)
                    glassCube.position = [0,-0.2,0]
                    // 1.
                    glassCube.components.set(InputTargetComponent())
                    // 2.
                    glassCube.generateCollisionShapes(recursive: false)
                }
            } update: { content in
                if let glassCube = content.entities.first {
                    glassCube.transform.scale = [scale, scale, scale]

                }
            } placeholder: {
                ProgressView()
            }
            // 3.
            .gesture(TapGesture().targetedToAnyEntity().onEnded { _ in
		        // 4.
                scale = 1.0
            })

            Slider(value: $scale, in: 0.0...2.0)
                .padding()
                .glassBackgroundEffect()
        }
    }
}
Let’s analyze the code step by step:
glassCube.components.set(InputTargetComponent())attaches theInputTargetComponentto theGlassCubeEntity in the RealityView. TheInputTargetComponentis a Component used in RealityKit to enable interaction with entities in a 3D scene. It allows the entity to become a target for various input events such as touches or gestures..generateCollisionShapes(recursive: false)defines the physical boundaries of an entity for the purpose of detecting collisions or intersections with other entities or input events in a 3D scene. They are essential for enabling physical interactions and precise hit testing. Therecursiveparameter indicates whether to generate collision shapes for the entity’s children as well.TapGestureis the usual gesture recognizer in SwiftUI that detects tap gestures on views. When used with RealityKit entities, it enables the detection of tap gestures on 3D objects. The.targetedToAnyEntity()makes the gesture target any entity in ourRealityView. When the gesture ends (i.e., when the tap is detected), it resets thescalestate variable to1.0.

Adding Components using Reality Composer Pro
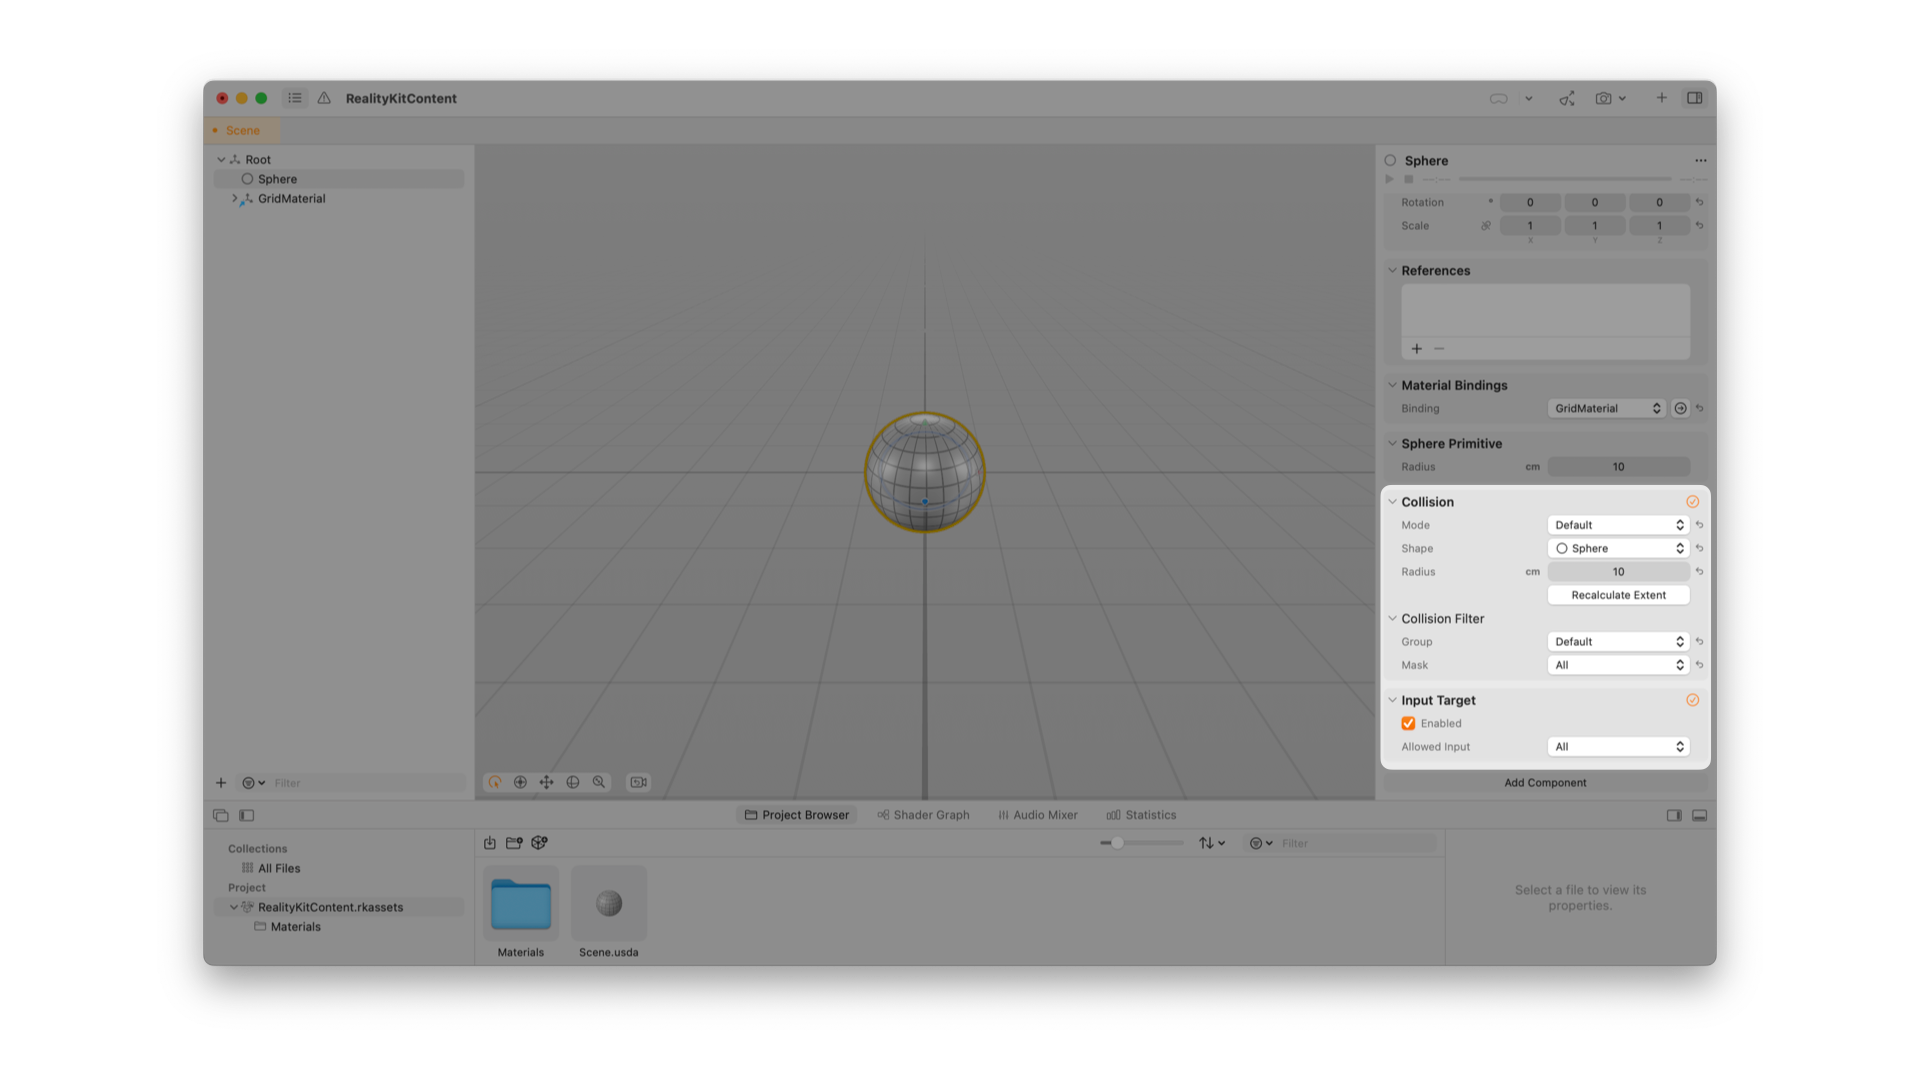
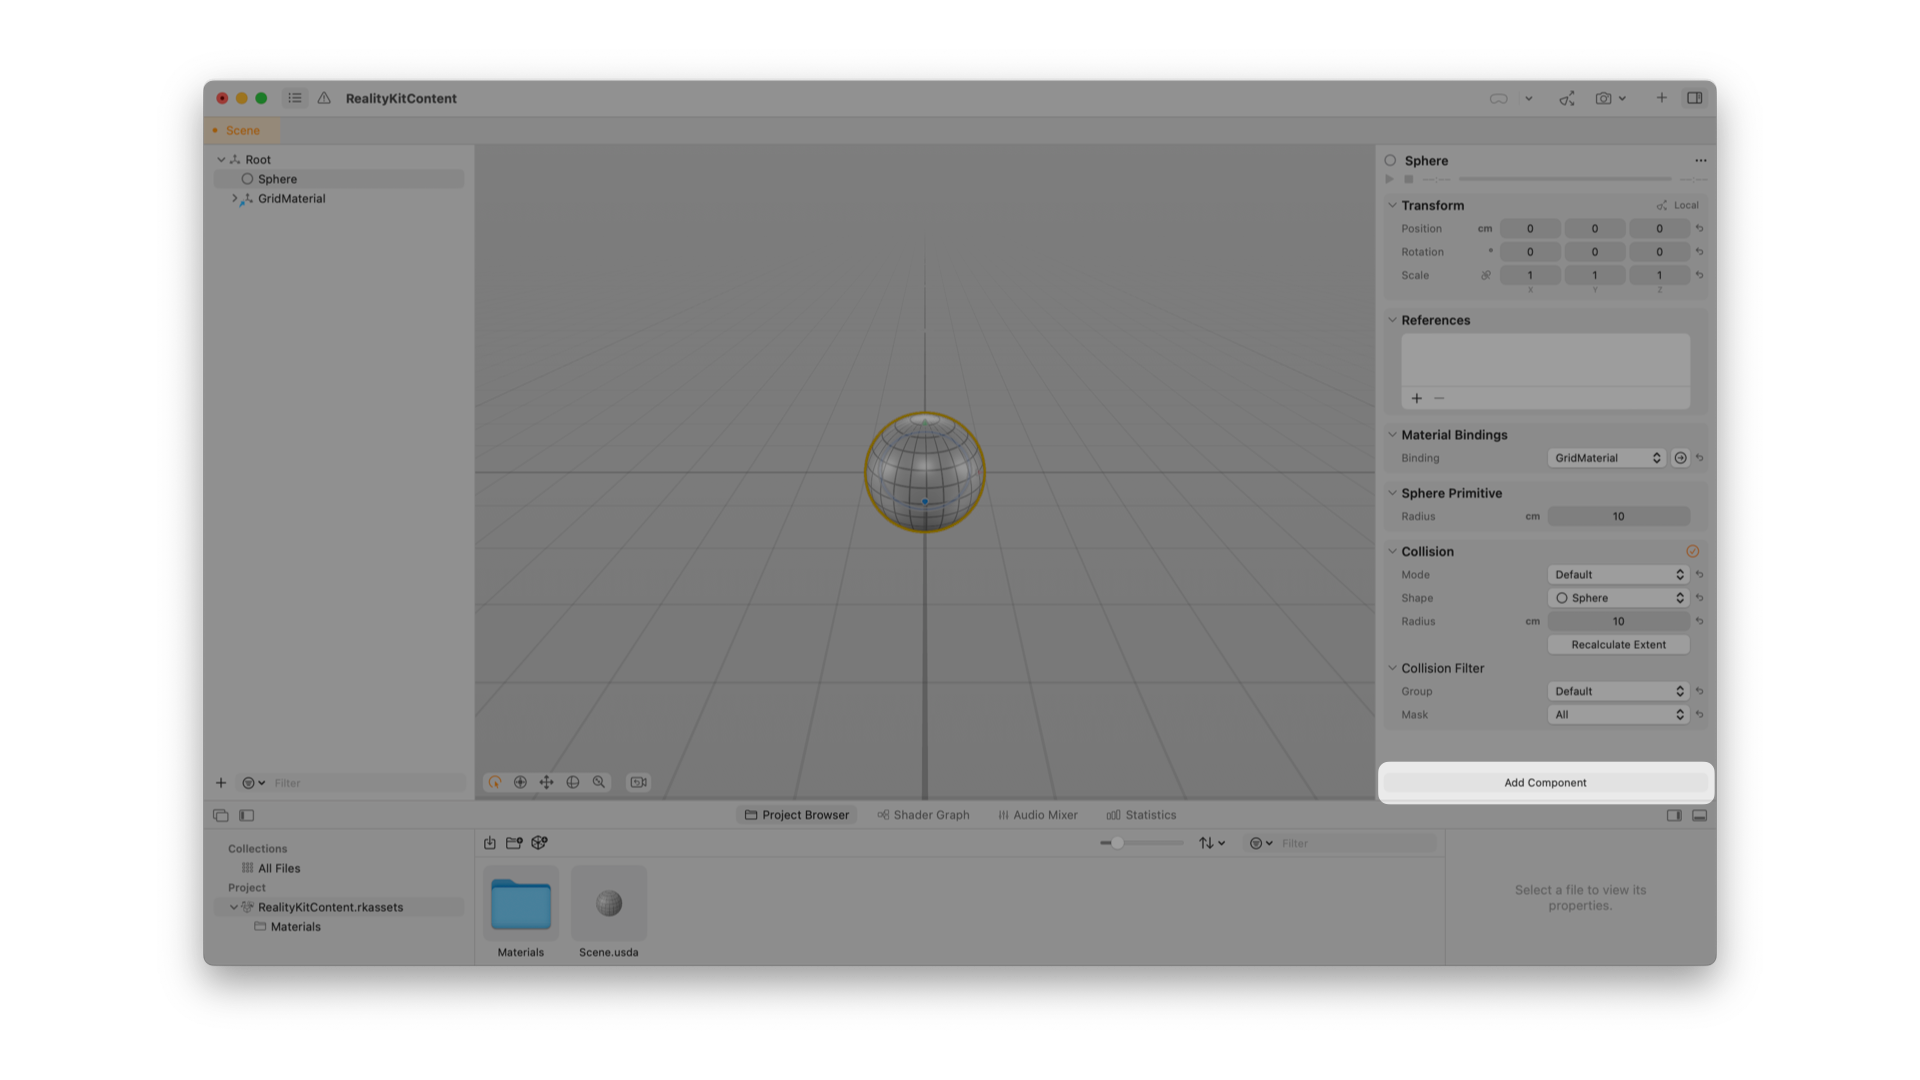
You can add components also with Reality Composer Pro, a new developer tool available in Xcode that lets you create, edit, and preview 3D content. You can launch Reality Composer Pro directly by choosing Xcode > Open Developer Tool > Reality Composer Pro.

Every new visionOS project created contains a default Reality Composer Pro project named RealityKitContent as a Swift Package. The RealityKitContent package can include images, 3D models, and other assets like audio and video files.
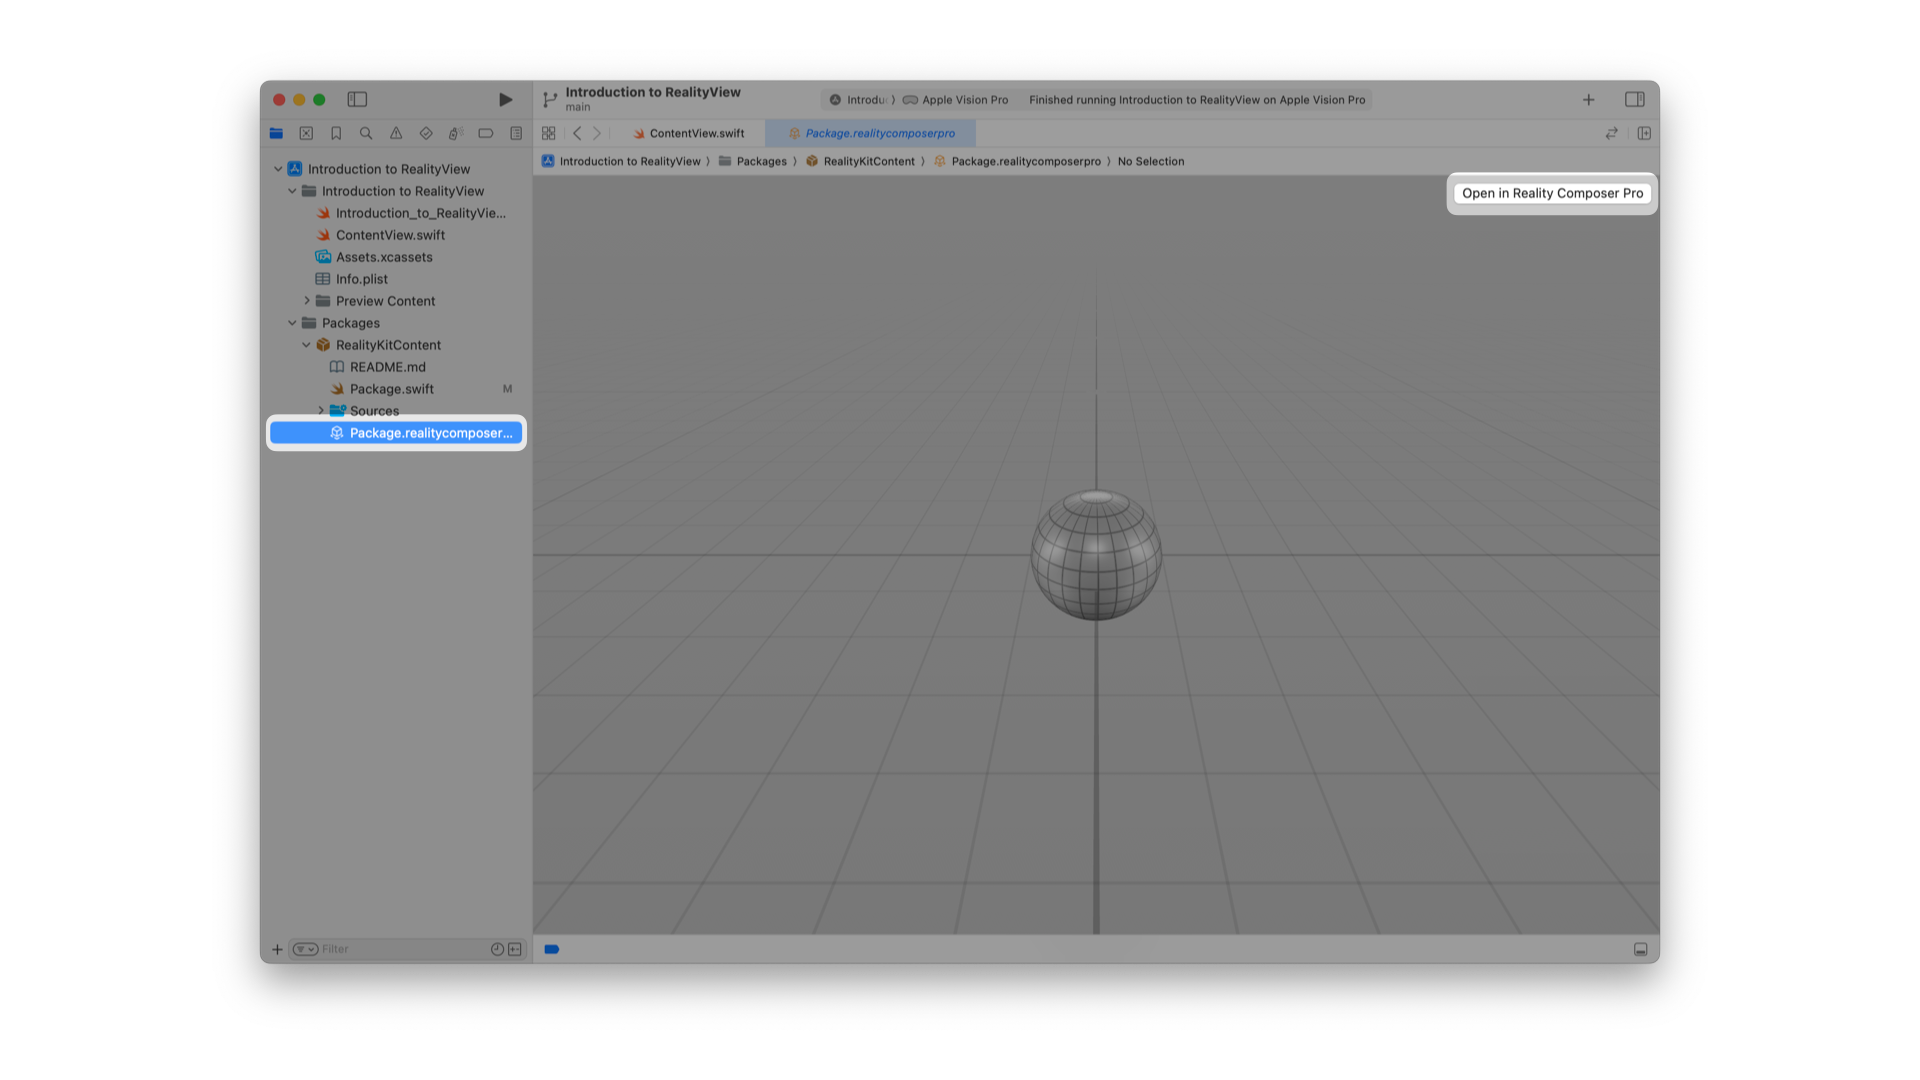
If you open the project in Reality Composer Pro by clicking on Open in Reality Composer Pro on the top right you can see that the default model created also has the InputTarget and the Collision components.

Conclusion
In the article, we have explored one of the two different views provided by RealityKit to load and display 3D models in our app, RealityView.
Differently from Model3D, a RealityView gives you more control over the content and unleash the full potential of RealityKit. For interactions with the content or displaying attachments and even more features, such as anchor, plane tracking, hand tracking, RealityView is the way to go.