
Providing access to premium features with StoreKit 2
Learn how to build a tiered subscription system and gate premium features in a SwiftUI app using StoreKit 2.

Subscriptions are a common way to unlock premium functionality in an app while keeping the core experience available to everyone. When you add tiers, you can offer different levels of access, like an Individual plan and a Family plan, and let users choose the one that fits their needs.
In this tutorial, you’ll build a tiered subscription system for a simple PhotoEditor app. You’ll create a subscription group with four subscription products, wire them into the app, and show how StoreKit selects the highest available tier. You’ll also learn how to set up the StoreKit configuration file and mirror the same products in App Store Connect.
The goal of the tutorial is to guide you through creating, configuring, and testing tiered subscriptions using StoreKit 2. By the end, your app will be able to display a subscription store, show the current tier, and let users manage their subscription from inside the app.
Before We Start
To follow this tutorial successfully, a basic familiarity with Xcode and SwiftUI is helpful, although no prior StoreKit knowledge is required.
First, create a new project called “PhotoEditor”. Now add a new folder called “Store”. This is where all your purchase-related files will live. Apple provides StoreKit to handle In-App Purchases and subscriptions. For StoreKit to know about your products during development, you need a StoreKit configuration file.
No additional assets are required for this tutorial.
Step 1 – Create the StoreKit Configuration File
Choose “New File from Template”, then search for “StoreKit” in the top-right search bar. Name the file “PhotoEditor.storekit”. Make sure not to select “Sync this file with an app in App Store Connect”. You don’t need this for local testing.
Click the “+” button in the bottom-left corner and select “Add Subscription Group”. Set the Reference Name to “PhotoEditor Plus”.
Now add four auto-renewable subscriptions to the same group:
- PhotoEditor Plus Individual Monthly
- PhotoEditor Plus Individual Yearly
- PhotoEditor Plus Family Monthly
- PhotoEditor Plus Family Yearly
For the Product ID, use your app’s bundle identifier and append the following suffixes:
.Plus.Individual.Monthly.Plus.Individual.Yearly.Plus.Family.Monthly.Plus.Family.Yearly
Set the subscription group display name to “PhotoEditor+” and use “Export as many pictures as you want” as the description. For each subscription, set a matching display name like “Monthly (Individual)” or “Annual (Family)” and reuse the same description.
Now configure Apple’s subscription tier system. Every subscription in a group has a “Subscription Level” (also called level of service). The lower the number, the higher the tier. Apple uses this order to determine upgrades and downgrades, to calculate proration, and to decide which entitlement should be active when multiple subscriptions overlap.
In this app, Family is the higher tier and Individual is the lower tier. Set the Family subscriptions to level 1 and the Individual subscriptions to level 2. Both durations (monthly and yearly) of the same tier should share the same level so StoreKit treats them as “same tier, different billing period” instead of a higher or lower plan. This tier mapping is what allows the app code to pick the highest active pass when status updates arrive.
Step 2 – Define the Pass Identifiers
Create a PassIdentifiers model and store it in the environment so the identifiers are available anywhere in the app.
import SwiftUI

struct PassIdentifiers: Sendable {
    // 1
    var group: String
    // 2
    var individualMonthly: String
    var individualYearly: String
    // 3
    var familyMonthly: String
    var familyYearly: String
}

extension EnvironmentValues {
    // 4
    private enum PassIDsKey: EnvironmentKey {
        static var defaultValue = PassIdentifiers(
            group: "4C765C93",
            individualMonthly: "<bundle-id>.Plus.Individual.Monthly",
            individualYearly: "<bundle-id>.Plus.Individual.Yearly",
            familyMonthly: "<bundle-id>.Plus.Family.Monthly",
            familyYearly: "<bundle-id>.Plus.Family.Yearly"
        )
    }

    // 5
    var passIDs: PassIdentifiers {
        get { self[PassIDsKey.self] }
        set { self[PassIDsKey.self] = newValue }
    }
}
- The subscription group identifier is used by
SubscriptionStoreView. - Individual subscription product identifiers with your bundle identifier prefix.
- Family subscription product identifiers with your bundle identifier prefix.
- The environment key stores the identifiers in one place.
passIDsmakes the identifiers available throughout the app.
Replace <bundle-id> with your own app bundle identifier in each Product ID.
Step 3 – Model the Tier System
Create a PassStatus enum to represent tiers and a PassBillingPeriod enum for monthly and yearly plans. We map product IDs to the correct tier so we can interpret StoreKit status updates.
import StoreKit
import SwiftUI

enum PassStatus: Comparable, Hashable {
    // 1
    case notSubscribed
    case individual
    case family

    // 2
    init(levelOfService: Int) {
        self =
            switch levelOfService {
            case 1: .family
            case 2: .individual
            default: .notSubscribed
            }
    }

    // 3
    init?(productID: Product.ID, ids: PassIdentifiers) {
        switch productID {
        case ids.individualMonthly, ids.individualYearly:
            self = .individual
        case ids.familyMonthly, ids.familyYearly:
            self = .family
        default:
            return nil
        }
    }
}

enum PassBillingPeriod: Hashable, Sendable {
    case monthly
    case yearly

    // 4
    init?(productID: Product.ID, ids: PassIdentifiers) {
        switch productID {
        case ids.individualMonthly, ids.familyMonthly: self = .monthly
        case ids.individualYearly, ids.familyYearly: self = .yearly
        default: return nil
        }
    }
}
- The three states the app needs to understand.
- Subscription tier numbers (level of service) match the StoreKit configuration: level 1 is Family, level 2 is Individual.
- Each product ID maps to a tier.
- Each product ID maps to a billing period.
This tier system is what allows the app to show the “highest” subscription a user has. If the user is subscribed to multiple products (for example during upgrades), we treat Family as the higher tier.
Step 4 – Process Subscription Status and Transactions
Next, create a small helper class that calculates the current tier from StoreKit subscription statuses, finishes transactions, and listens for updates.
import StoreKit
import SwiftUI

final class PhotoEditorBrain {
    static let shared = PhotoEditorBrain()

    // 1
    private var updatesTask: Task<Void, Never>?

    // 2
    func process(
        transaction veriFicationResult: VerificationResult<StoreKit.Transaction>
    ) async {
        switch veriFicationResult {
        case .verified(let transaction):
            await transaction.finish()
        case .unverified:
            break
        }
    }

    // 3
    func status(
        for statuses: [Product.SubscriptionInfo.Status],
        ids: PassIdentifiers
    ) -> (
        current: PassStatus,
        currentPeriod: PassBillingPeriod?,
        renewsTo: PassStatus?,
        renewsToPeriod: PassBillingPeriod?
    ) {
        let subscribed = statuses.filter { $0.state == .subscribed }
        guard
            let effective = subscribed.max(by: { lhs, rhs in
                let lhsTier =
                    PassStatus(
                        productID: lhs.transaction.unsafePayloadValue.productID,
                        ids: ids
                    ) ?? .notSubscribed
                let rhsTier =
                    PassStatus(
                        productID: rhs.transaction.unsafePayloadValue.productID,
                        ids: ids
                    ) ?? .notSubscribed
                return lhsTier < rhsTier
            })
        else {
            return (.notSubscribed, nil, nil, nil)
        }

        // 4
        let currentProductID: Product.ID
        switch effective.transaction {
        case .verified(let t):
            currentProductID = t.productID
        case .unverified:
            return (.notSubscribed, nil, nil, nil)
        }

        let currentTier =
            PassStatus(productID: currentProductID, ids: ids) ?? .notSubscribed
        let currentPeriod = PassBillingPeriod(
            productID: currentProductID,
            ids: ids
        )

        // 5
        var renewTier: PassStatus? = nil
        var renewPeriod: PassBillingPeriod? = nil

        if case .verified(let renewalInfo) = effective.renewalInfo,
            renewalInfo.willAutoRenew,
            let nextID = renewalInfo.autoRenewPreference
        {
            renewTier = PassStatus(productID: nextID, ids: ids)
            renewPeriod = PassBillingPeriod(productID: nextID, ids: ids)
        }

        return (currentTier, currentPeriod, renewTier, renewPeriod)
    }

    // 6
    func checkForUnfinishedTransactions() async {
        for await transaction in StoreKit.Transaction.unfinished {
            Task {
                await self.process(transaction: transaction)
            }
        }
    }

    // 7
    func observeTransactionUpdates() {
        self.updatesTask = Task { [weak self] in
            for await update in Transaction.updates {
                guard let self else { break }
                await self.process(transaction: update)
            }
        }
    }
}
- Keep a task reference for transaction updates so the observer stays alive for the lifetime of the app.
- Every verified transaction must be finished. Otherwise StoreKit can deliver it again.
- Filter to subscribed statuses and pick the highest tier. This ensures Family wins over Individual if multiple statuses overlap during upgrades.
- Only verified transactions are trusted as entitlements. If verification fails, we treat it as not subscribed.
- Read renewal info to detect the next tier and billing period. This is how the UI can say “Renews to Family — Yearly” even if the current plan is different.
- Handle unfinished transactions on launch to avoid missing entitlements after a crash or network interruption.
- Listen to real-time updates so the UI refreshes immediately when the user purchases, upgrades, downgrades, or cancels.
Step 5 – Attach the Store Logic to Your App
Create a view modifier that attaches StoreKit status tasks and runs the transaction observers. Then use it in the app entry point.
import SwiftUI

struct PhotoEditorStoreViewModifier: ViewModifier {
    func body(content: Content) -> some View {
        content
            // 1
            .subscriptionPassStatusTask()
            .task {
                // 2
                PhotoEditorBrain.shared.observeTransactionUpdates()
                await PhotoEditorBrain.shared.checkForUnfinishedTransactions()
            }
    }
}

extension View {
    // 3
    func photoEditorStore() -> some View {
        modifier(PhotoEditorStoreViewModifier())
    }
}
- Subscribes to StoreKit status updates.
- Starts transaction observers and completes unfinished transactions.
- Adds a single modifier you apply to the app root so every screen inherits the same live subscription state.
Now apply it in PhotoEditorApp.swift:
import SwiftUI

@main
struct PhotoEditorApp: App {
    var body: some Scene {
        WindowGroup {
            ContentView()
                // 1
                .photoEditorStore()
        }
    }
}
- This ensures StoreKit status updates are active as soon as the app launches.
Step 6 – Build the Store Sheet and Status UI
Create the subscription store view and show it from the main content view. The content view also shows the current tier and where the subscription renews.
import SwiftUI
import StoreKit

struct PhotoEditorStoreView: View {
    // 1
    @Environment(\.passIDs.group) private var passGroupID
    @Environment(\.dismiss) private var dismiss
    @Environment(\.passStatus) private var passStatus
    @Environment(\.passStatusIsLoading) private var passStatusIsLoading

    var body: some View {
        // 2
        SubscriptionStoreView(groupID: passGroupID) {
            VStack(spacing: 8) {
                Text("PhotoEditor+")
                    .font(.largeTitle.bold())
                Text("Unlock premium filters, batch export, and pro tools.")
                    .font(.title3)
                    .multilineTextAlignment(.center)
            }
            .padding(.top, 24)
            .padding(.horizontal)
        }
        #if os(iOS)
        // 3
        .storeButton(.visible, for: .redeemCode)
        #endif
        .onChange(of: passStatus) { _, newValue in
            if !passStatusIsLoading, newValue != .notSubscribed {
                // 4
                dismiss()
            }
        }
    }
}
- Read the subscription group ID and current status from the environment.
SubscriptionStoreViewshows all subscription options in the group.- Shows the system button to redeem Promo Codes.
- Close the sheet when the user becomes subscribed.
Now build the main screen:
import SwiftUI

struct ContentView: View {
    // 1
    @State private var presentingStoreSheet = false
    @State private var presentingManagePassSheet = false

    @Environment(\.passIDs.group) private var passGroupID

    @Environment(\.passStatus) private var passStatus
    @Environment(\.passBillingPeriod) private var passBillingPeriod

    @Environment(\.passRenewsTo) private var passRenewsTo
    @Environment(\.passRenewsToBillingPeriod) private var passRenewsToBillingPeriod

    @Environment(\.passStatusIsLoading) private var passStatusIsLoading

    var body: some View {
        VStack(spacing: 12) {
            // 2
            if passStatusIsLoading {
                Text("Checking subscription…")
            } else {
                Text("Current: \(passStatus.description)\(periodSuffix(passBillingPeriod))")

                Text("Renews to: \(renewsLine)")
                    .font(.footnote)
                    .foregroundStyle(.secondary)
            }

            // 3
            if passStatus == .notSubscribed {
                Button("Subscribe to PhotoEditor+") {
                    presentingStoreSheet = true
                }
                .buttonStyle(.borderedProminent)
            } else {
                Button("Manage subscription") {
                    presentingManagePassSheet = true
                }
                .buttonStyle(.borderedProminent)
            }
        }
        .sheet(isPresented: $presentingStoreSheet) {
            PhotoEditorStoreView()
        }
        // 4
        .manageSubscriptionsSheet(
            isPresented: $presentingManagePassSheet,
            subscriptionGroupID: passGroupID
        )
        .onChange(of: passStatus) { _, newValue in
            if newValue != .notSubscribed {
                presentingStoreSheet = false
            }
        }
    }

    // 5
    private var renewsLine: String {
        guard let tier = passRenewsTo else { return "–" }
        return " \(tier.description)\(periodSuffix(passRenewsToBillingPeriod))"
    }

    private func periodSuffix(_ period: PassBillingPeriod?) -> String {
        guard let period else { return "" }
        return " — \(period.description)"
    }
}
- Store state for the subscription sheet and the manage-subscription sheet.
- Show the current tier and the renewal tier while StoreKit loads.
- Present the subscription store or the manage screen based on status.
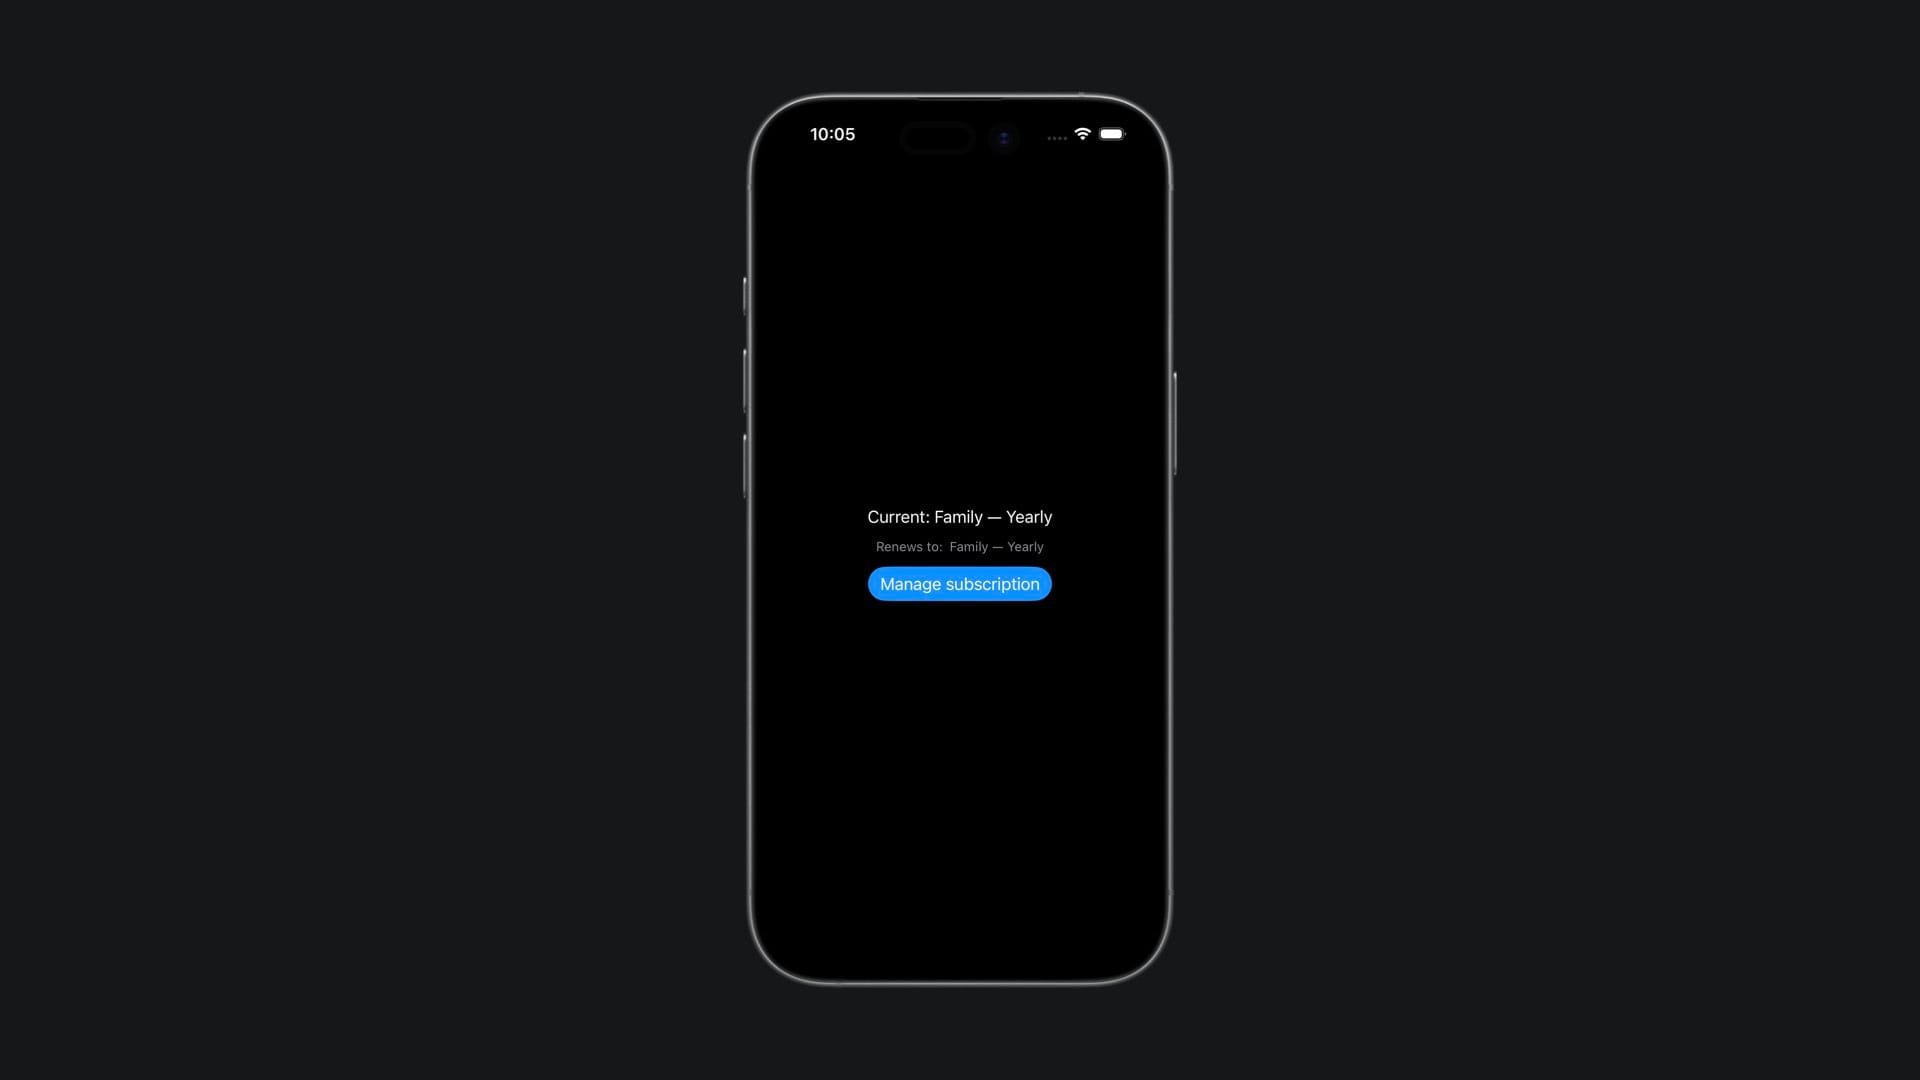
manageSubscriptionsSheetopens the system manage-subscriptions view so users get a clear view of their current plan, billing details, and an easy way to switch plans or cancel without leaving the app.- Show the renewal tier and billing period when available.
Step 7 – Connect the StoreKit Configuration File
When the preview canvas finishes re-rendering, you’ll likely see placeholder content. This happens because the app is trying to load subscriptions from App Store Connect, where they don’t exist yet.
Tap on PhotoEditor in the top bar and select “Edit Scheme”. Under “Options”, select your PhotoEditor.storekit file as the StoreKit configuration. Once selected, the subscription store should show the four subscription options with their names, descriptions, and prices.
Step 8 – Test Subscriptions on Device
Run the app on a device and open the store sheet. You’ll see the subscription options for Individual and Family plans. Select a plan and complete a purchase to activate it.

After purchase, the main screen will update to show the active tier, and the sheet will dismiss automatically.
To reset and test different tiers, open Xcode’s “Debug” menu, select “StoreKit”, then “Manage Transactions”. From there you can expire or revoke a subscription.

Step 9 – Create the Subscriptions in App Store Connect
Once you’re done testing locally, it’s time to create the real subscriptions in App Store Connect.
Open App Store Connect, navigate to your app, and go to the “Subscriptions” section.
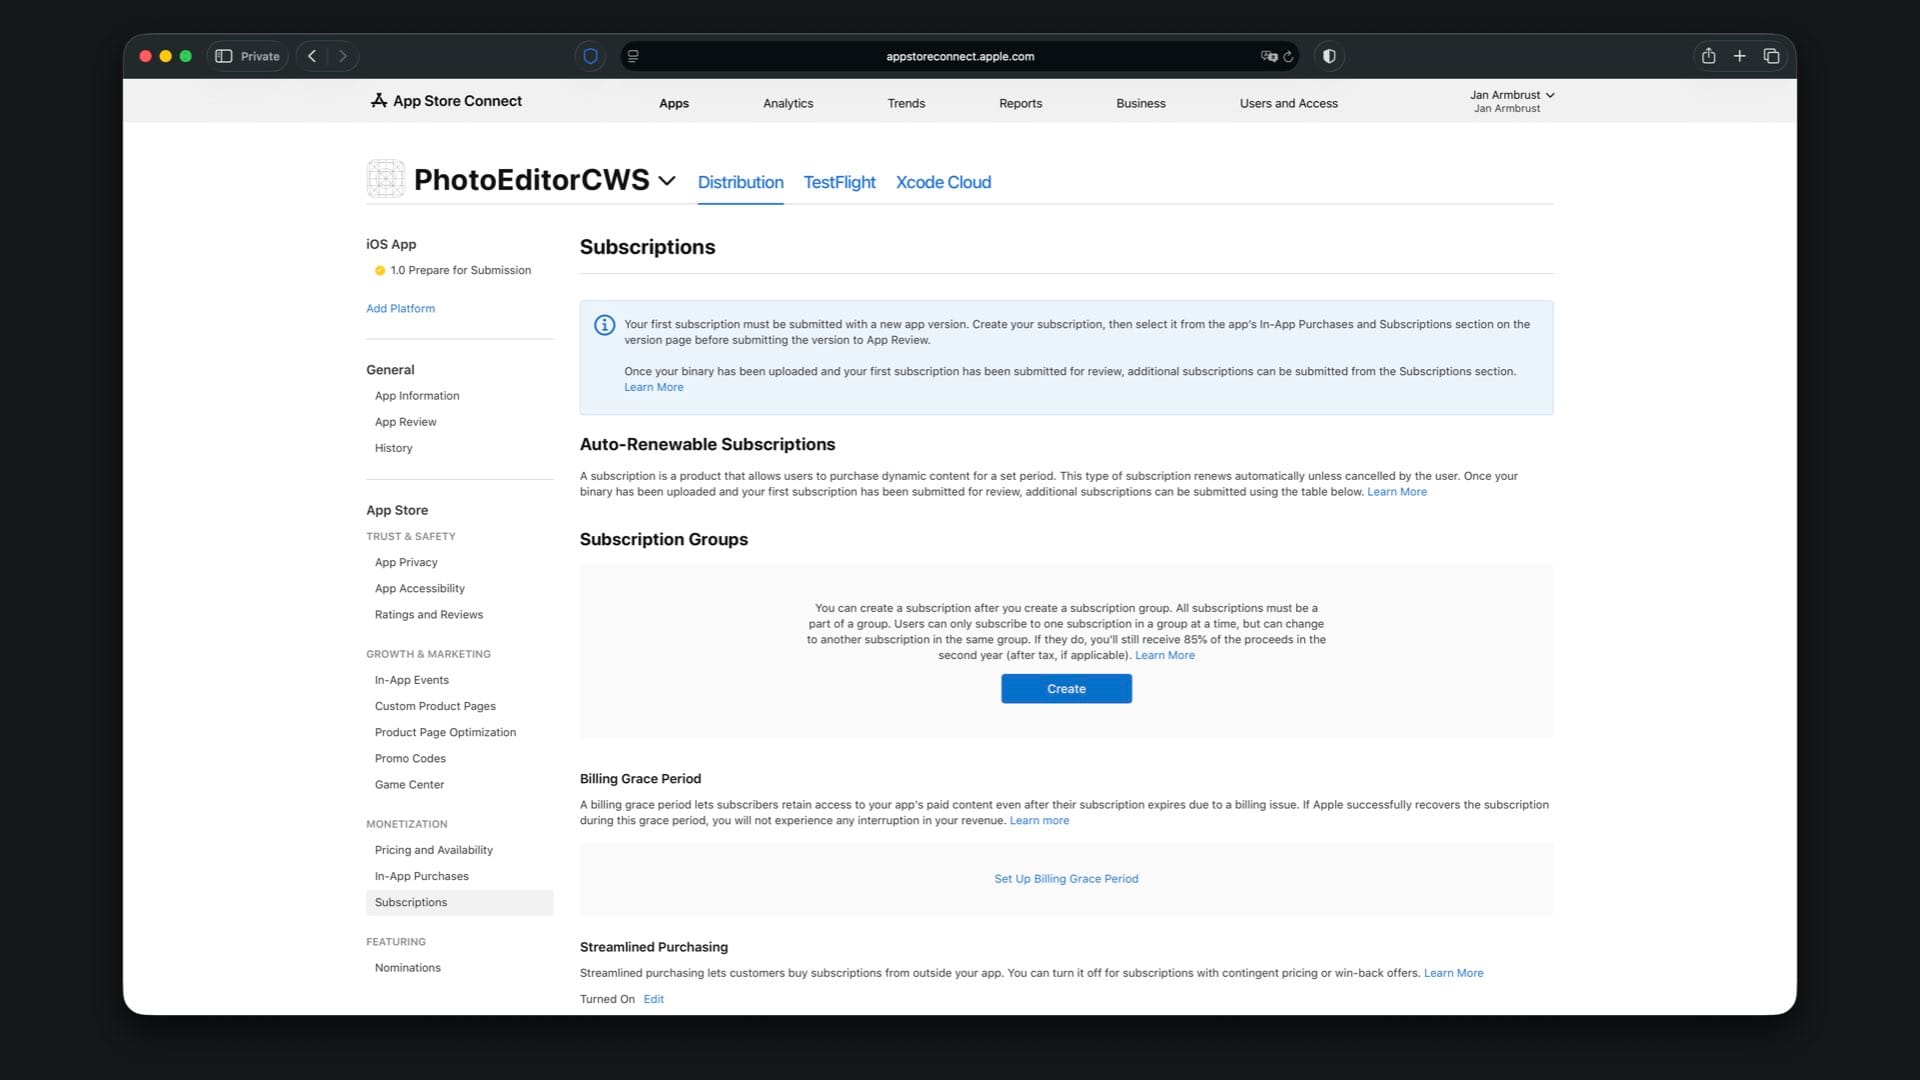
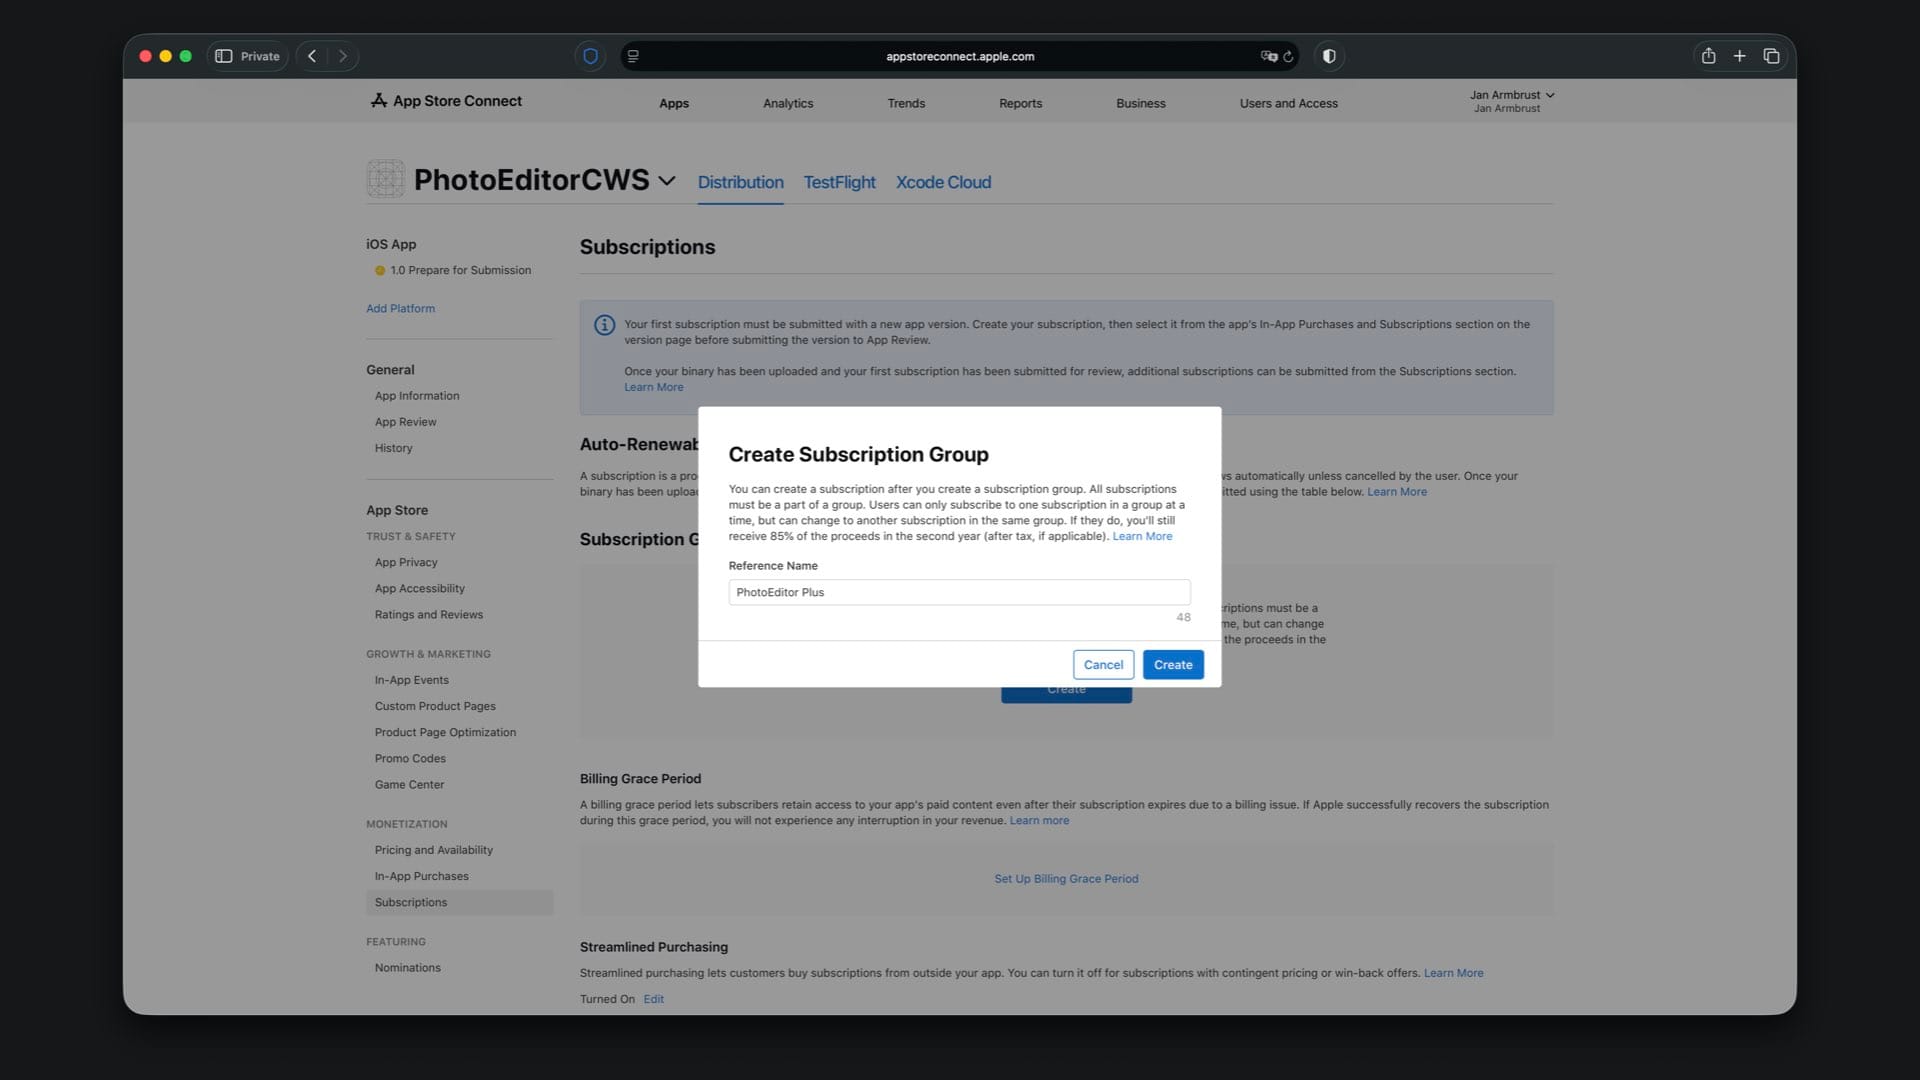
Here you first need to create a subscription group. Tap the “Create” button under “Subscription Groups” and give the group the same reference name you used in the local StoreKit configuration file, which is “PhotoEditor Plus”.
After creating the subscription group, you’ll land on the subscription group detail page. This is where all subscriptions belonging to this group are managed.
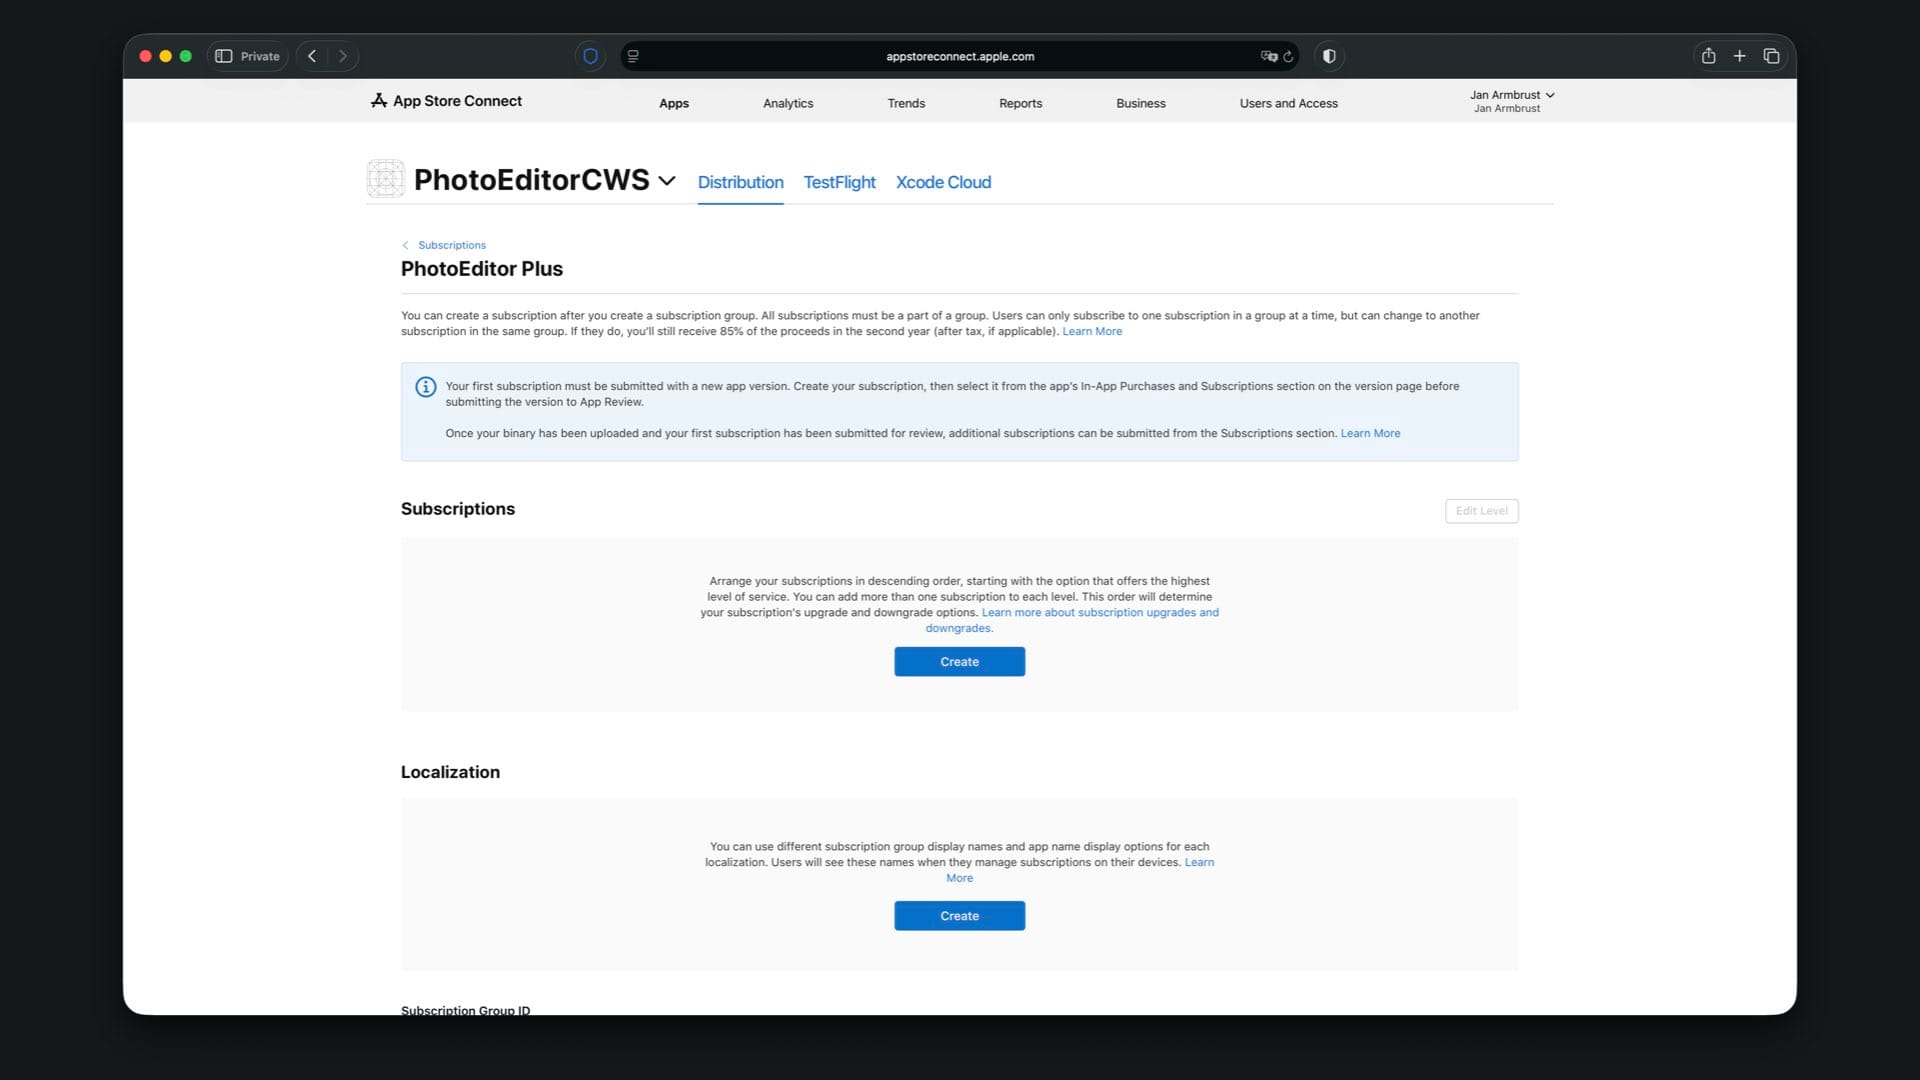
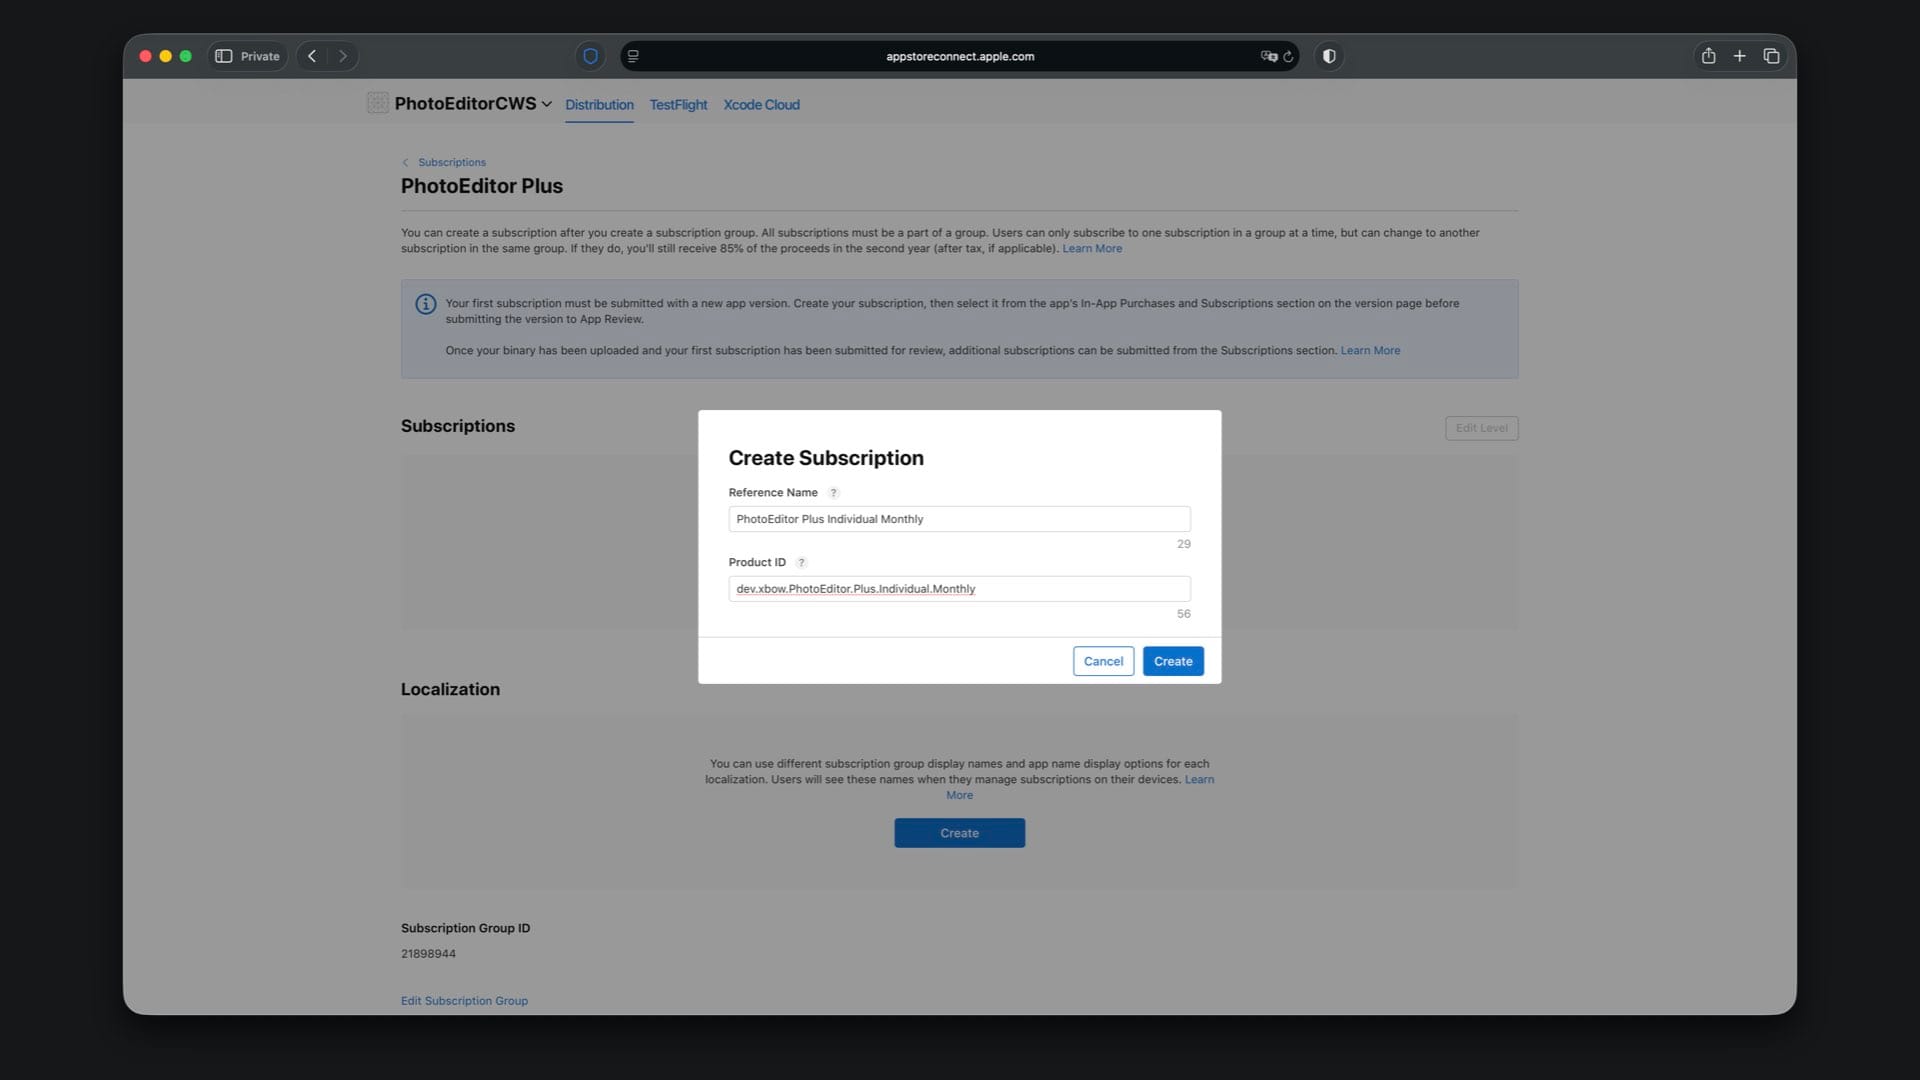
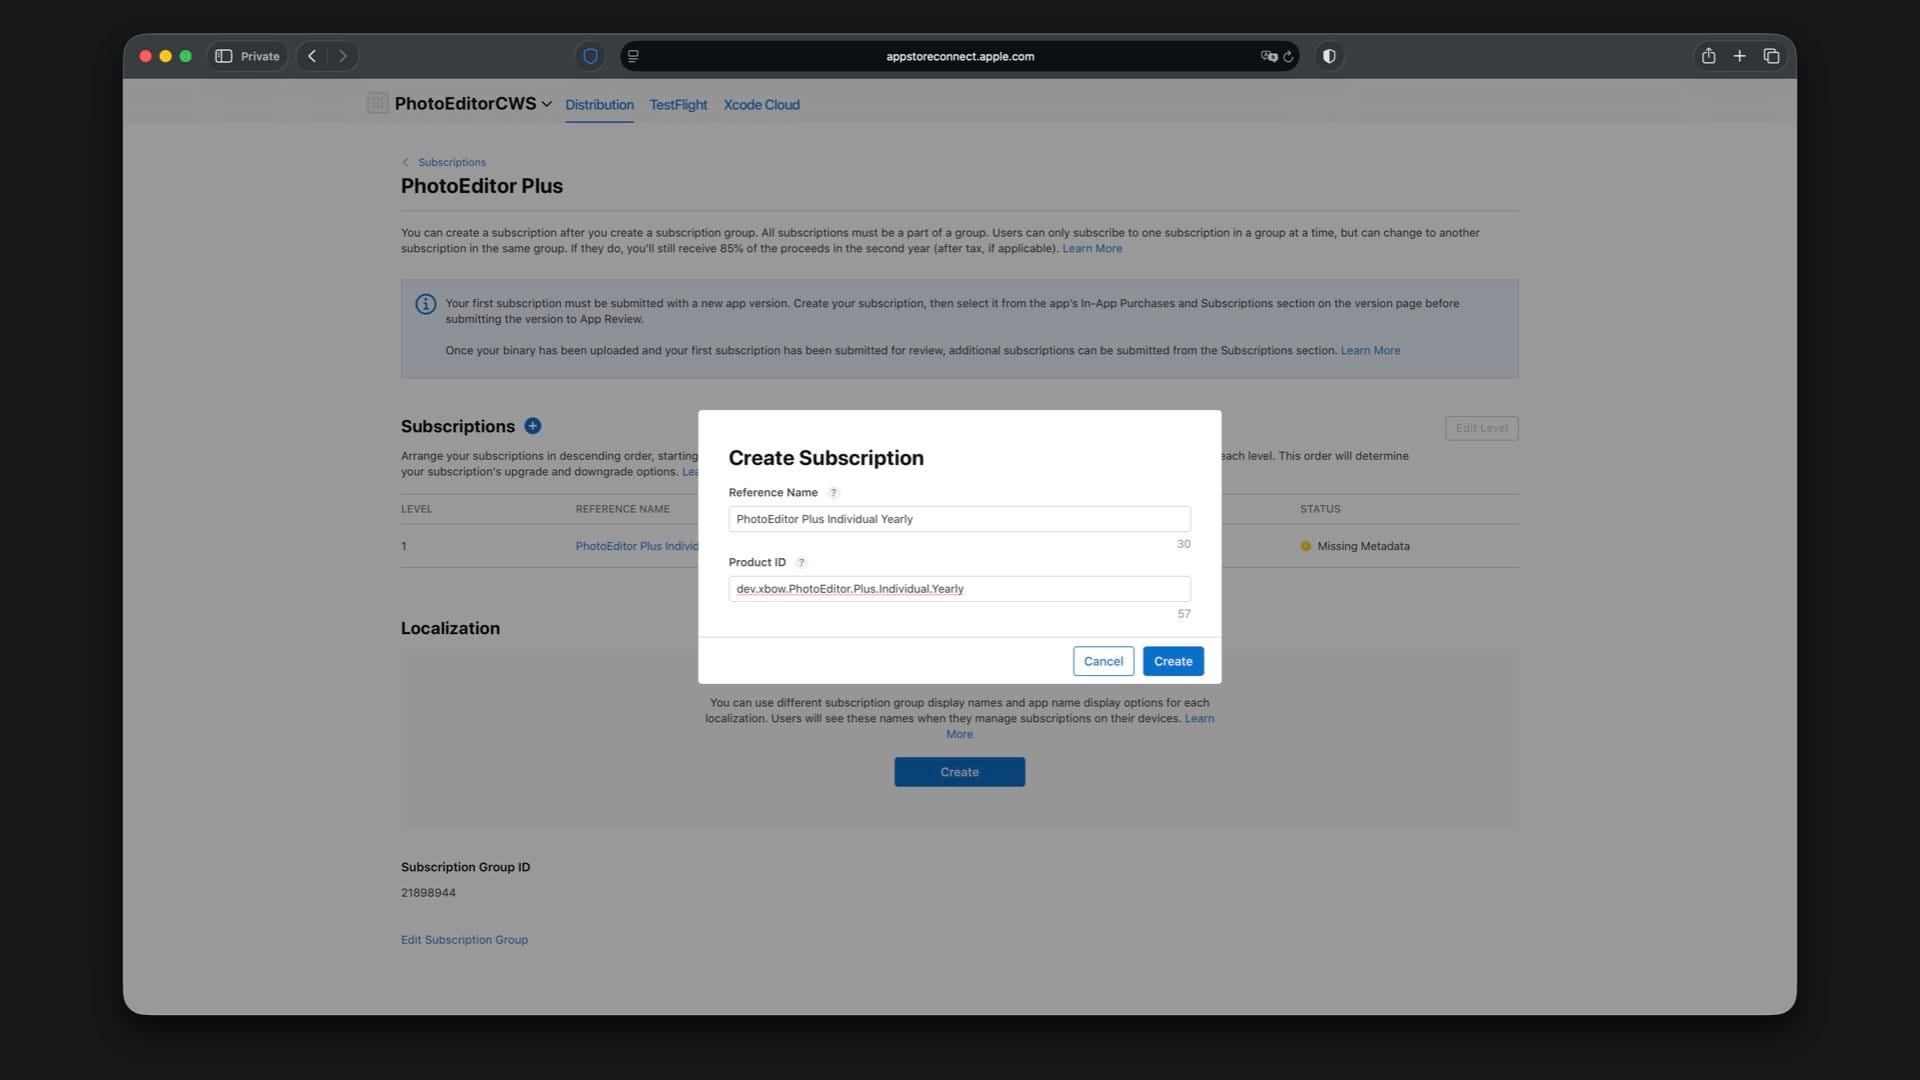
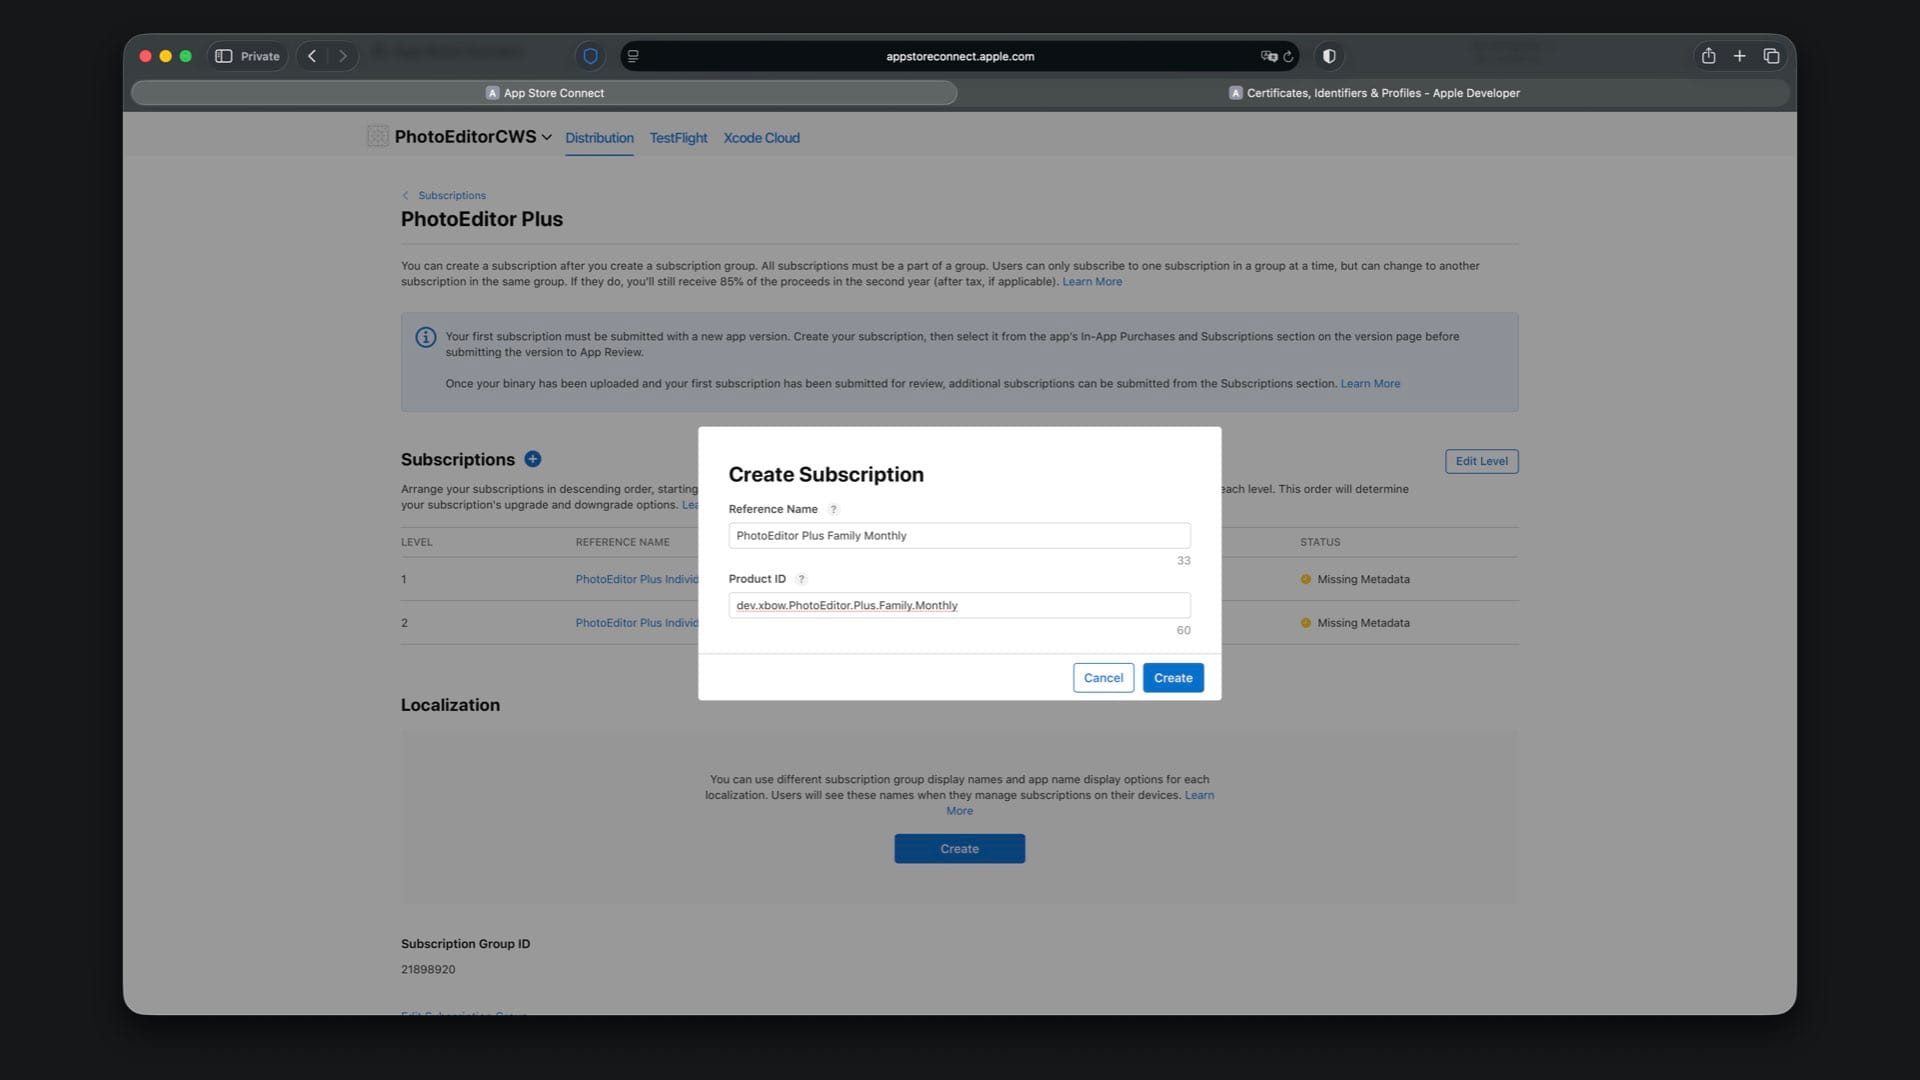
Now create your first subscription inside the group. Tap “Create” and choose the reference name “PhotoEditor Plus Individual Monthly”. For the Product ID, use your app’s bundle identifier and append .Plus.Individual.Monthly.
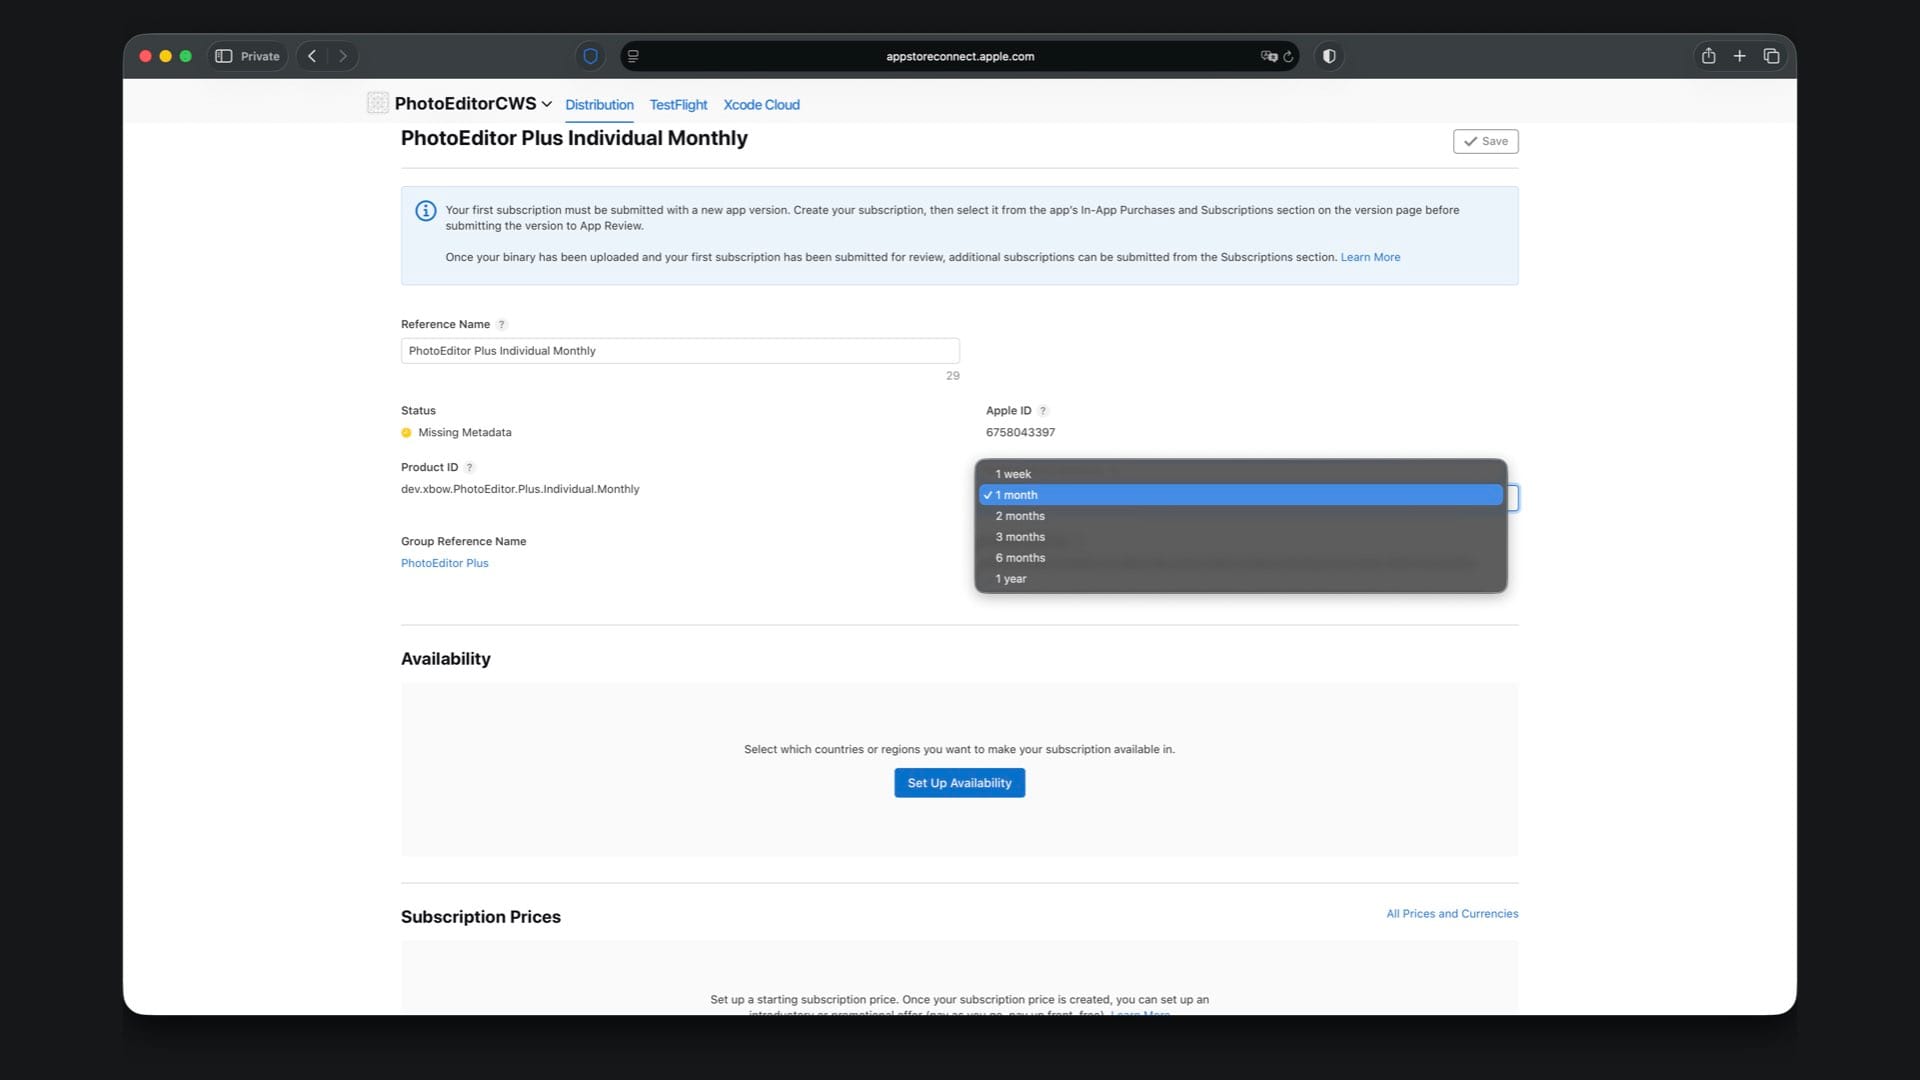
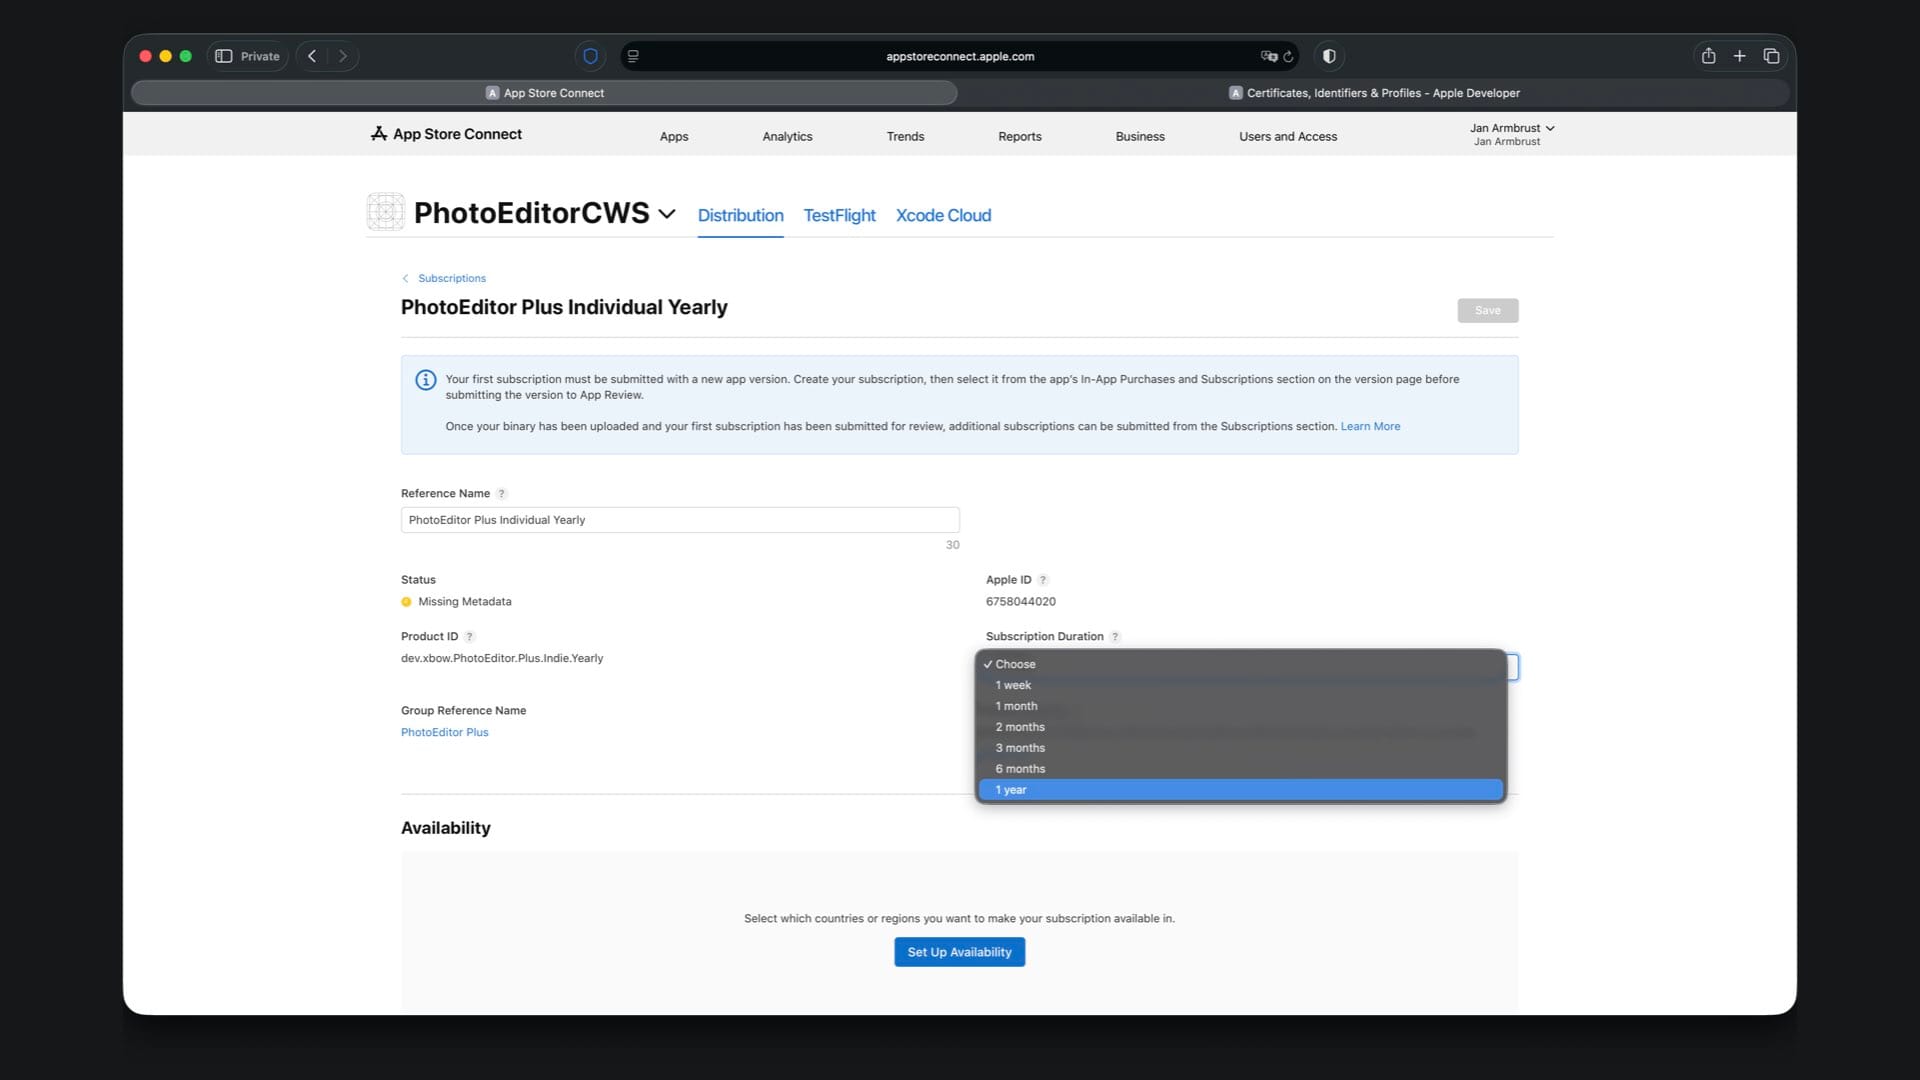
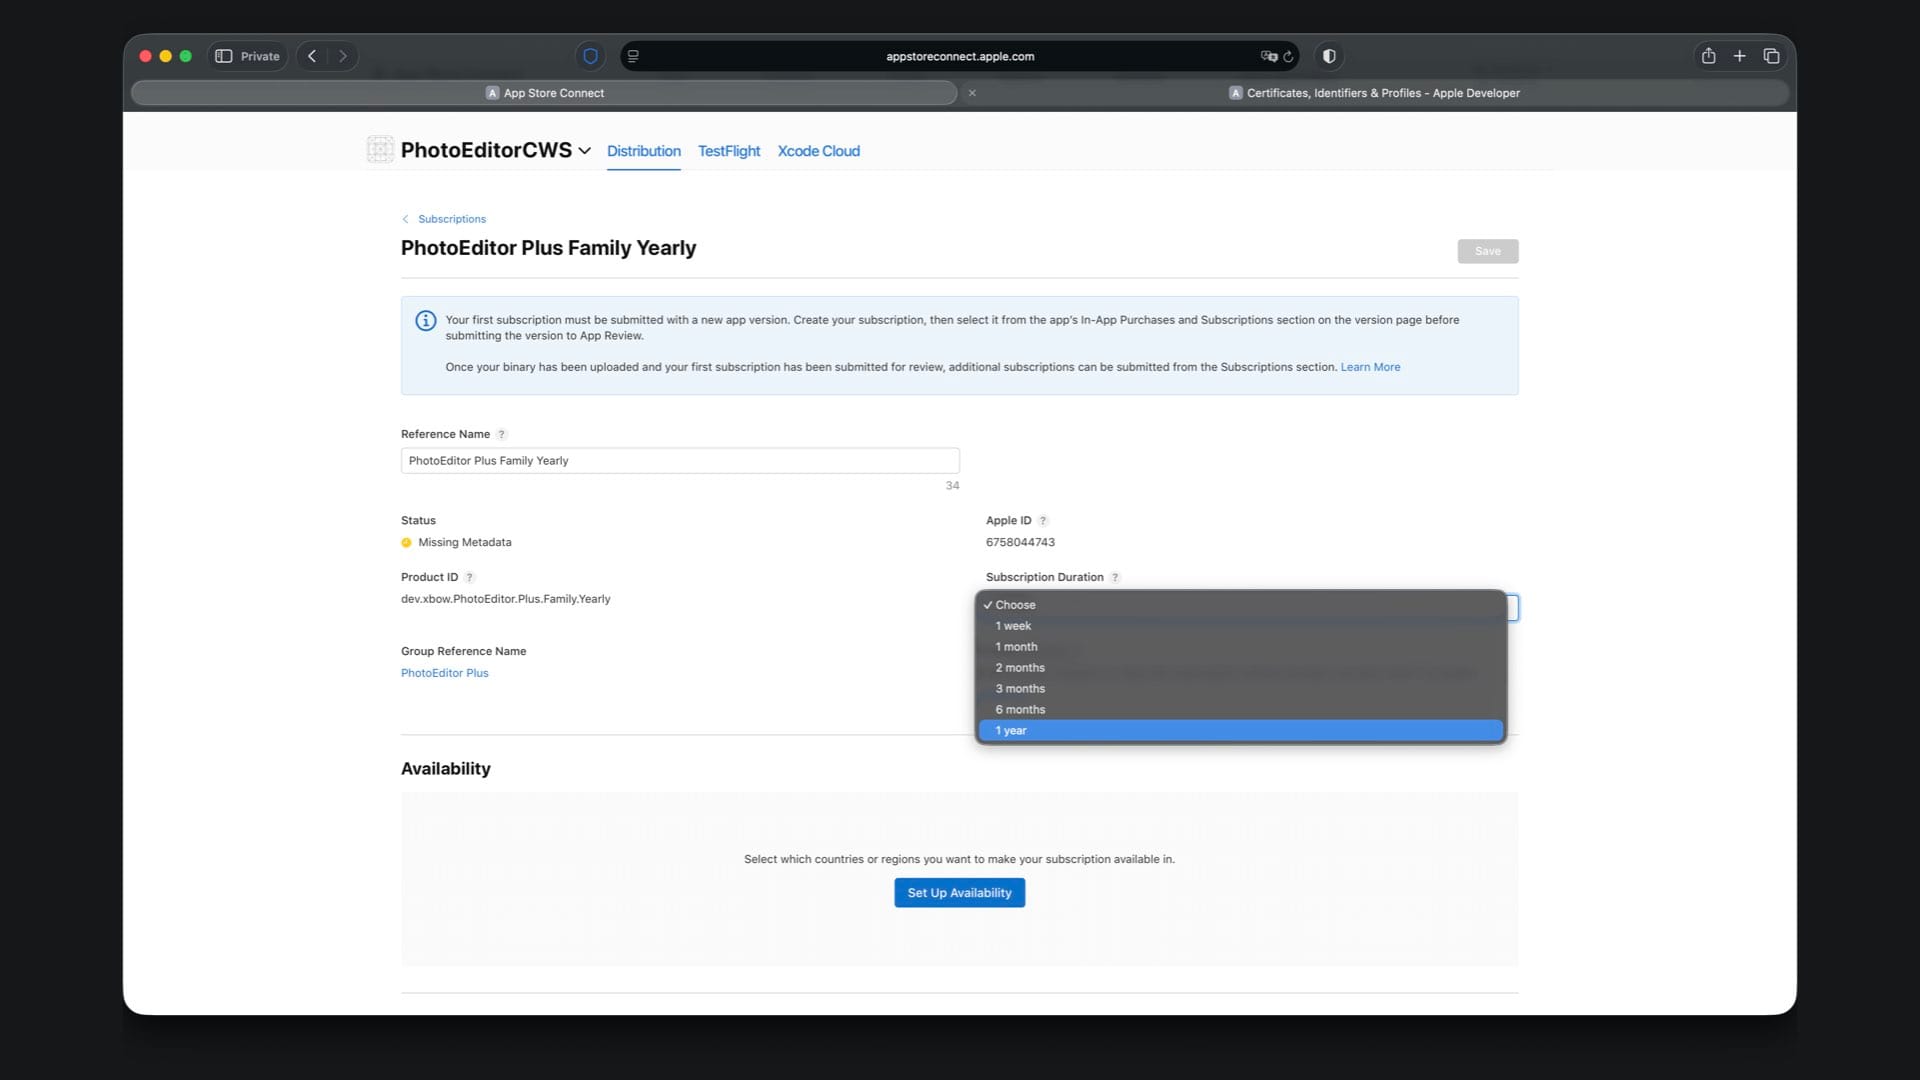
After creating the subscription, you’ll be taken to its detail page. Here you first need to choose the subscription duration. Select “1 month” for the monthly subscription.
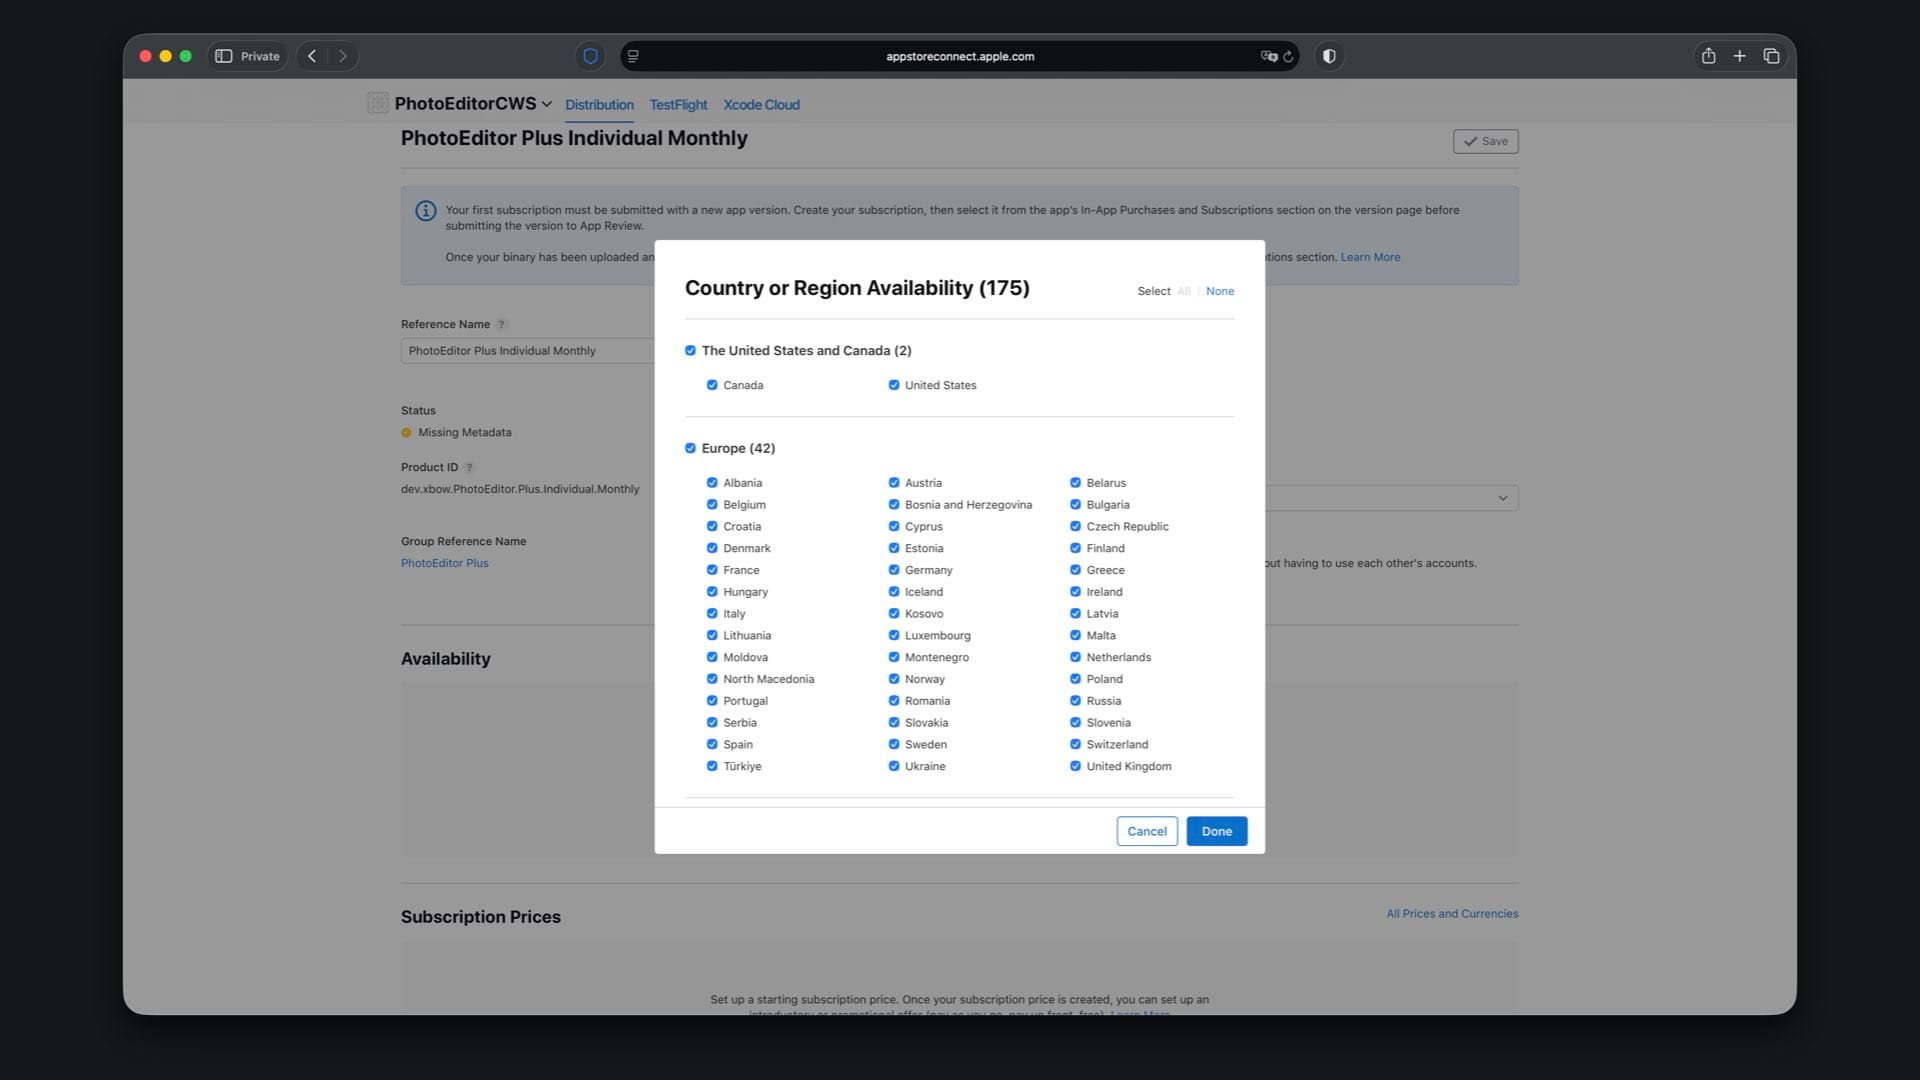
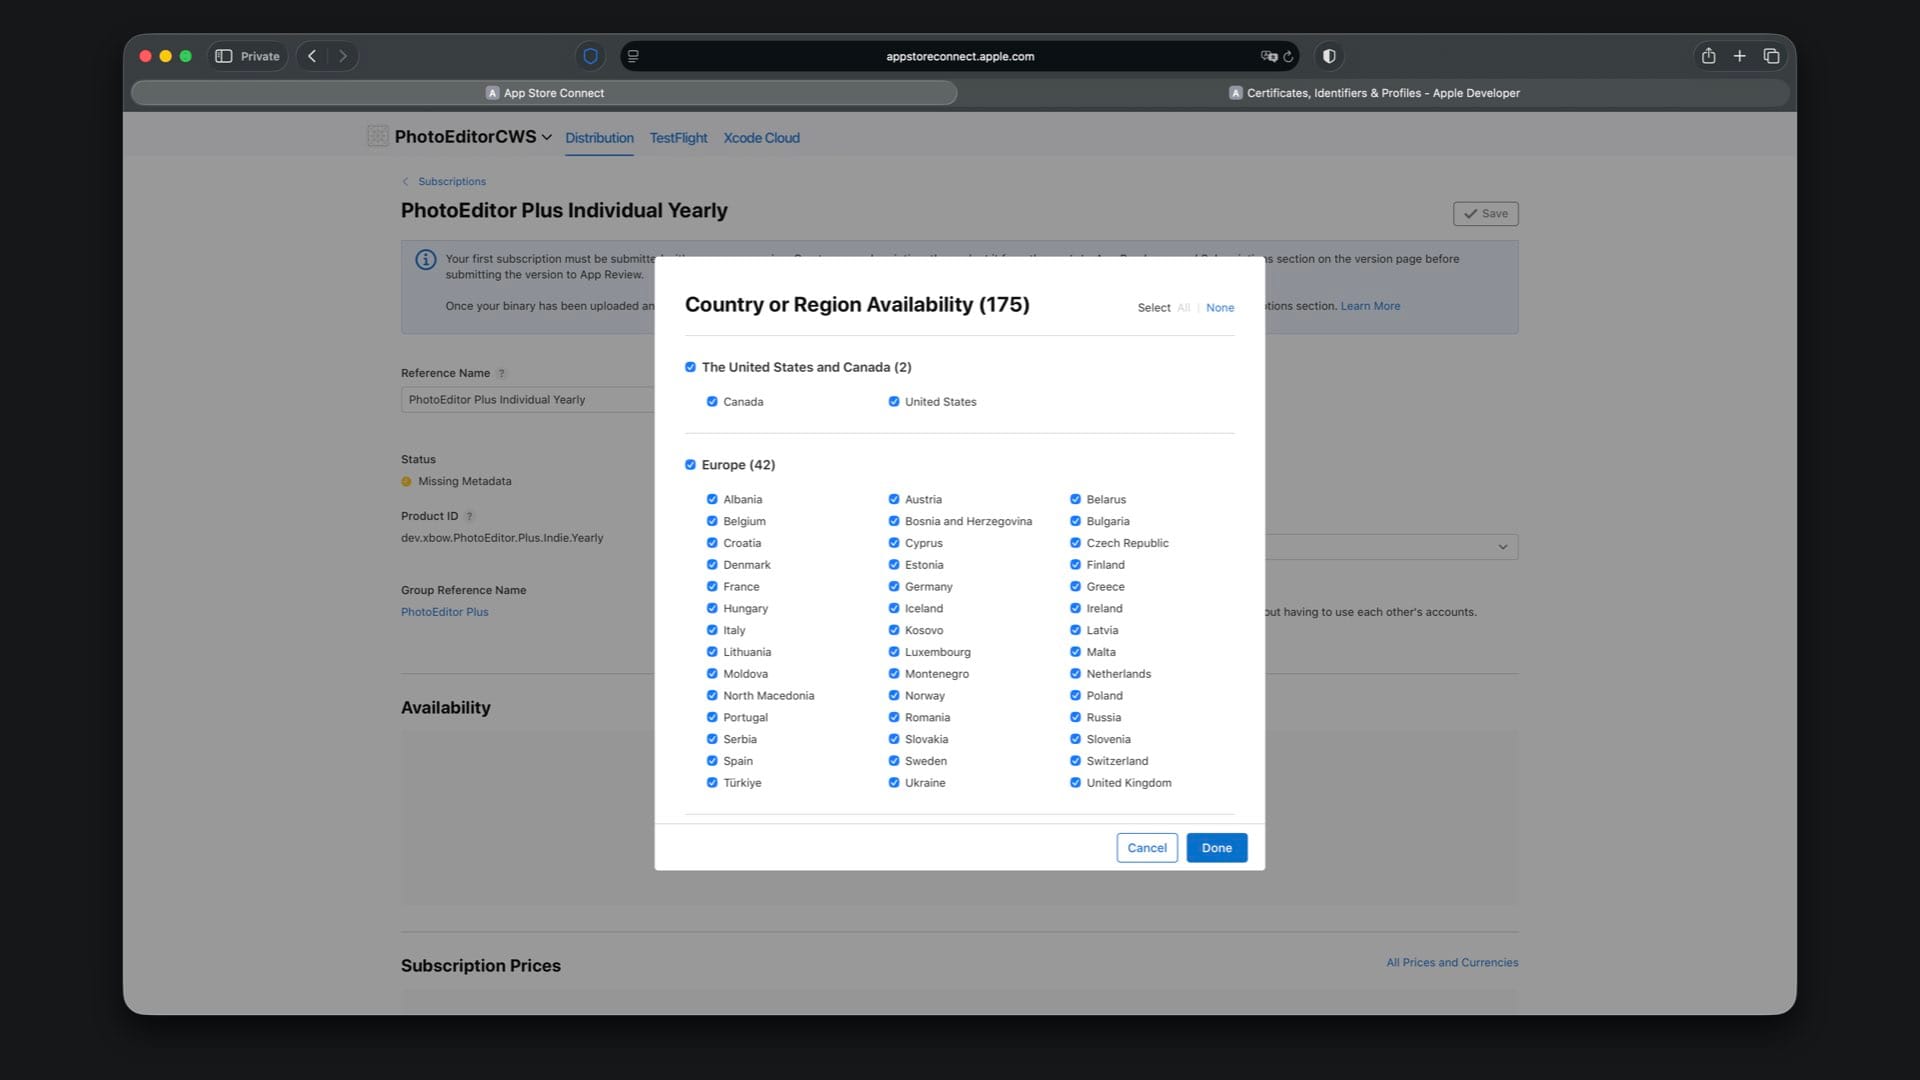
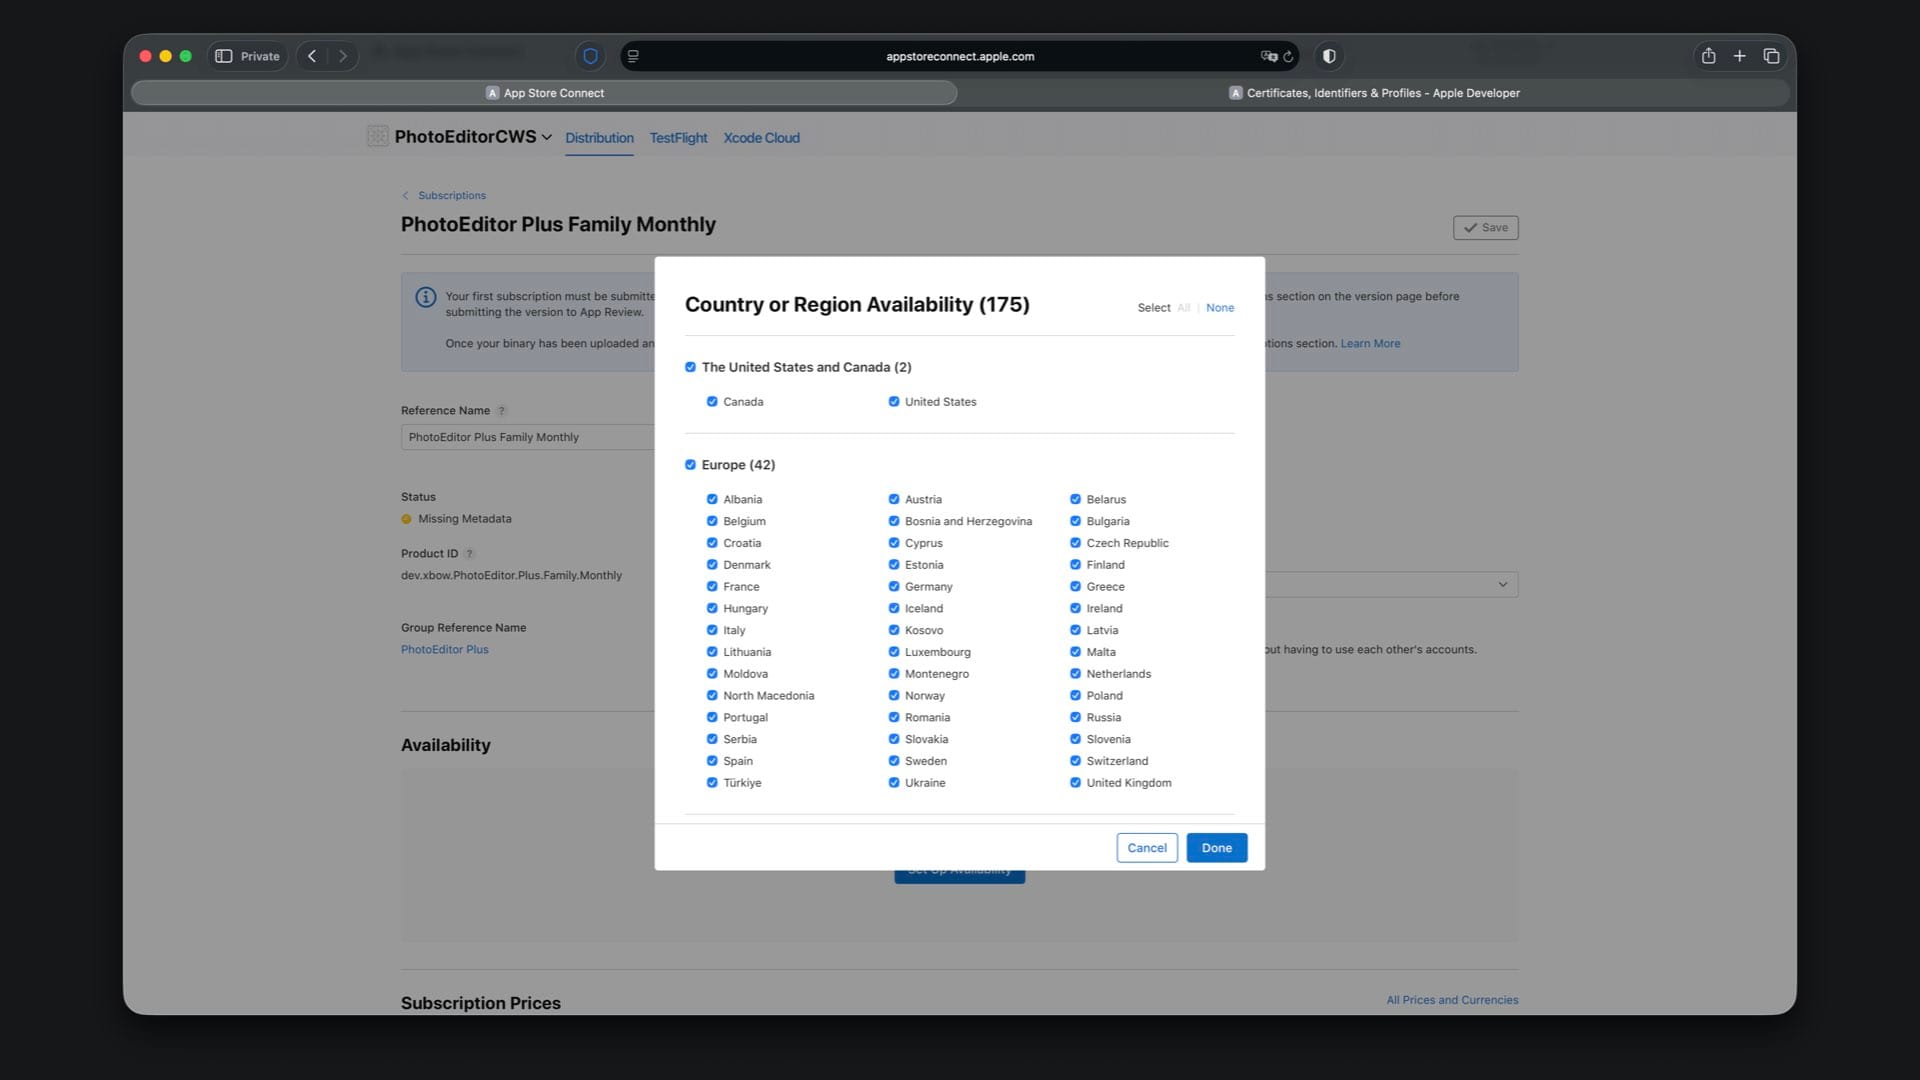
In the “Availability” section, choose the countries or regions where your subscription should be available. You can keep the default selection to make it available in all countries and regions.
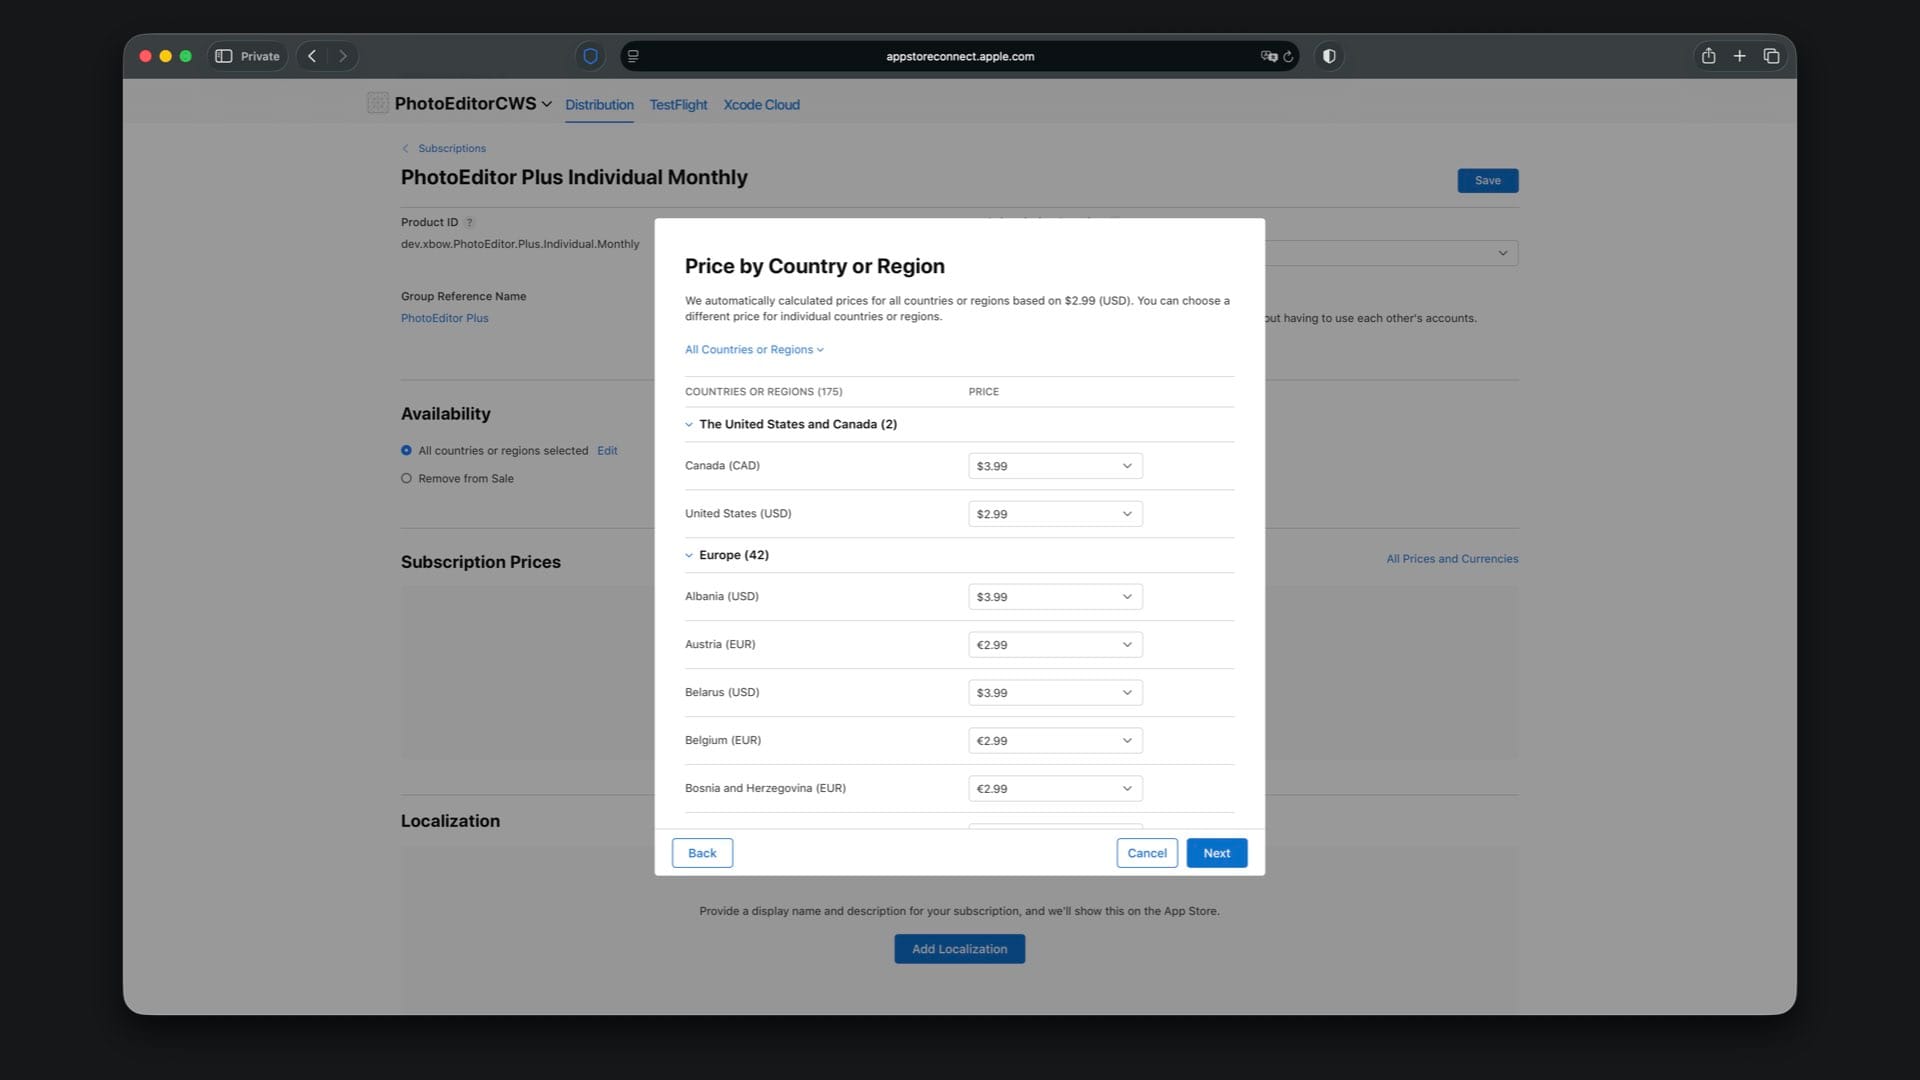
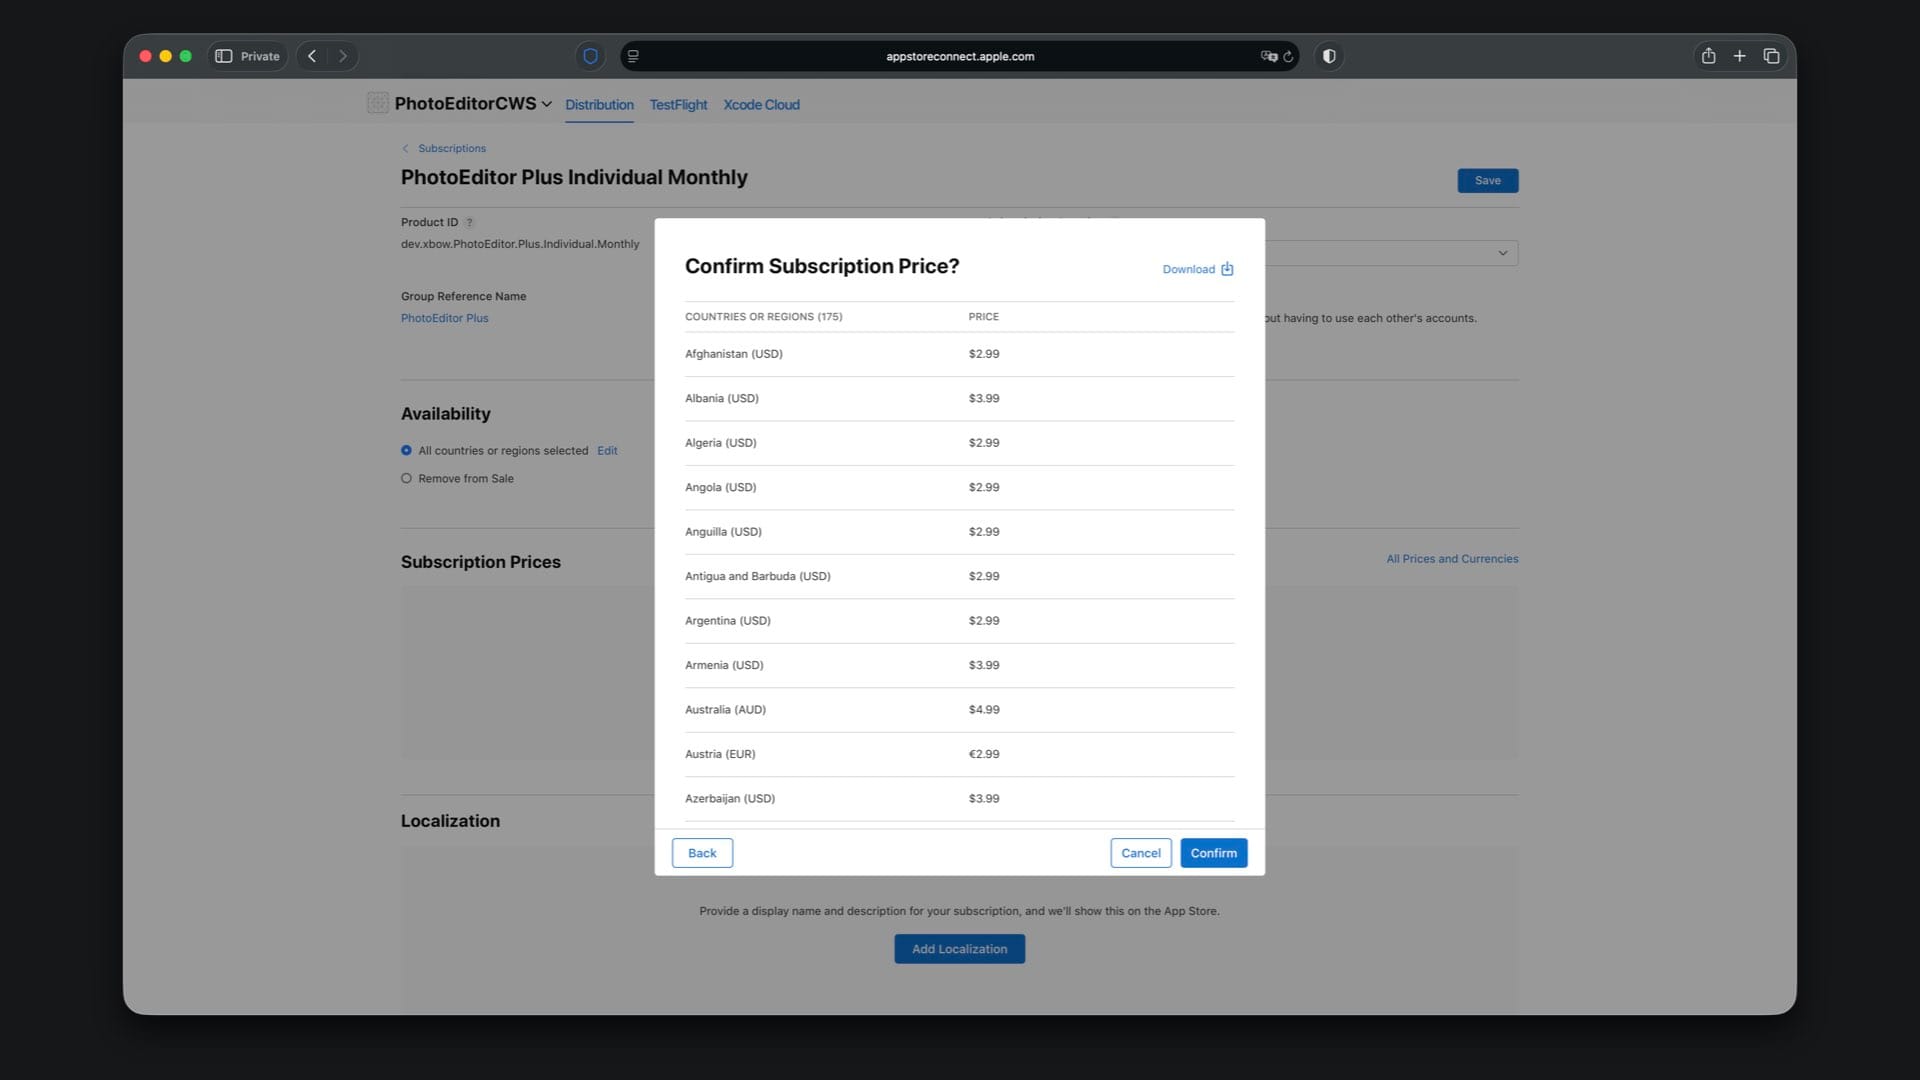
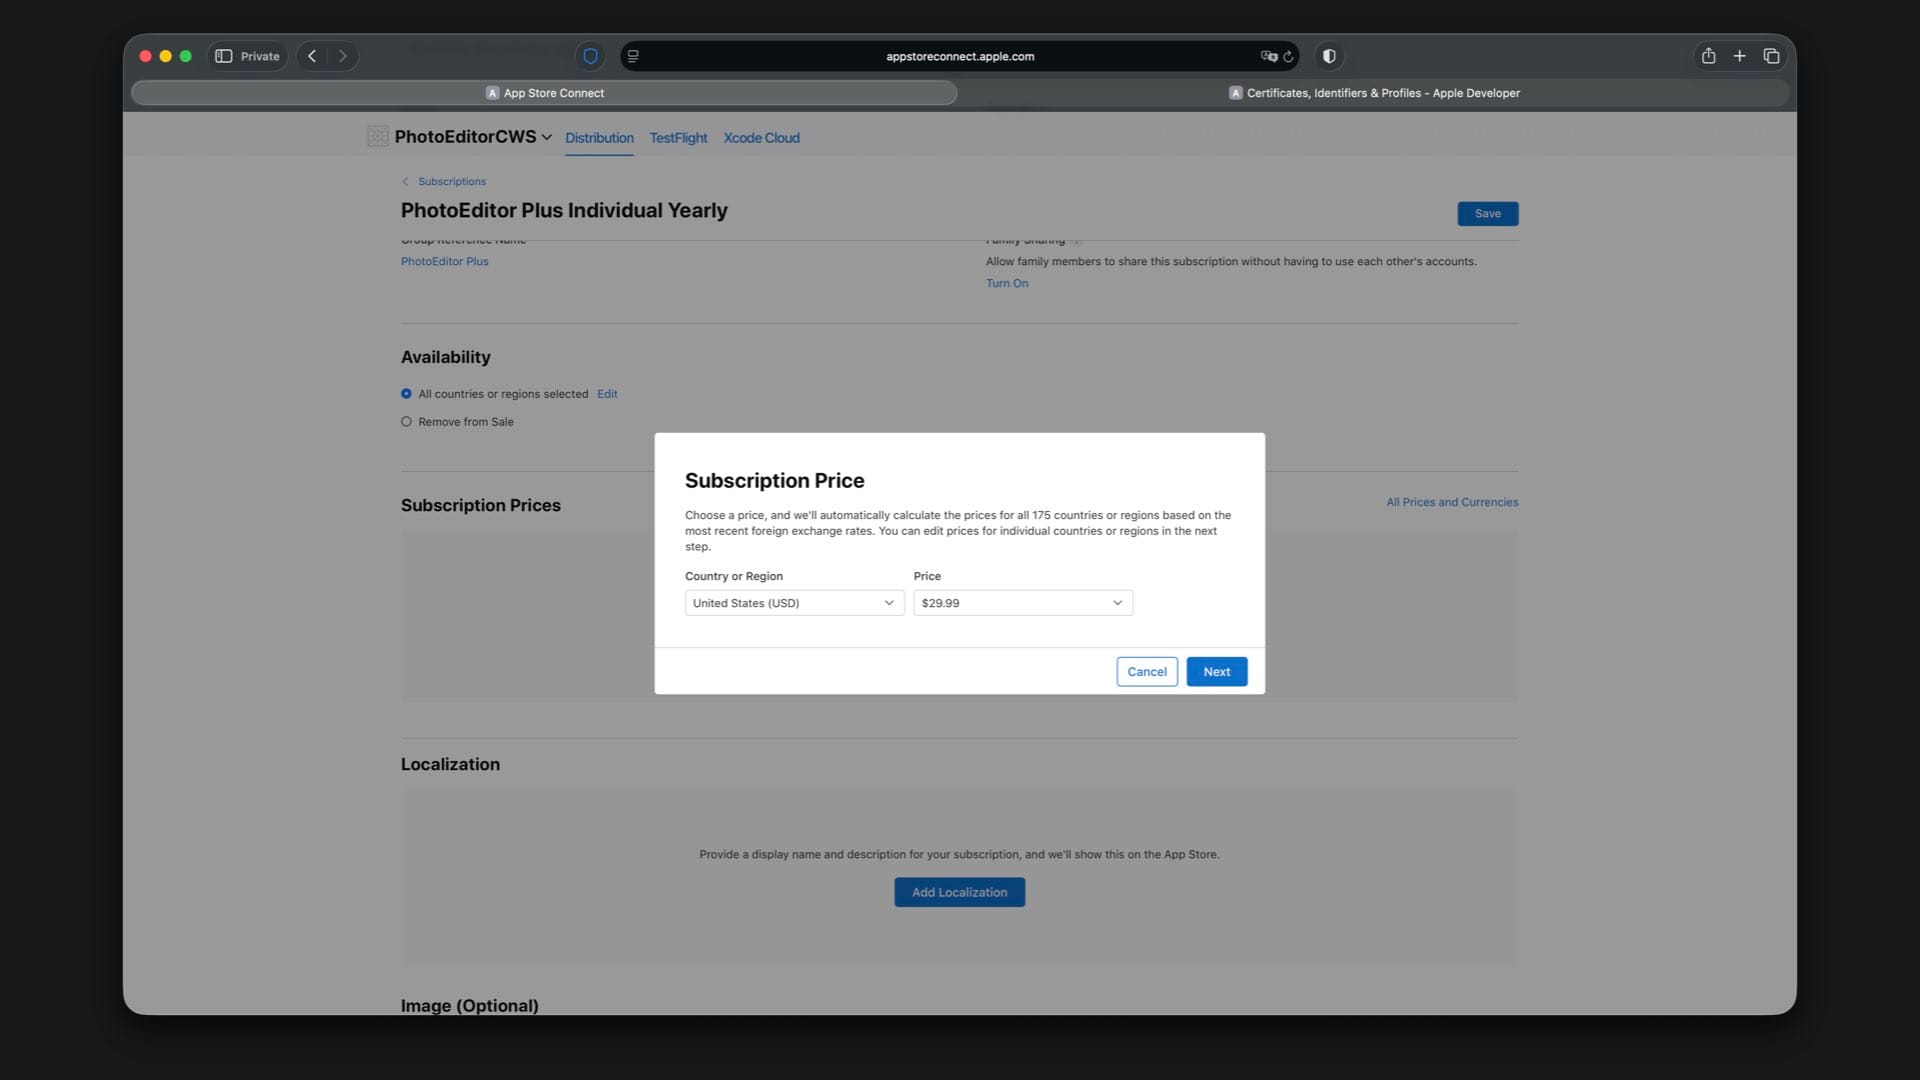
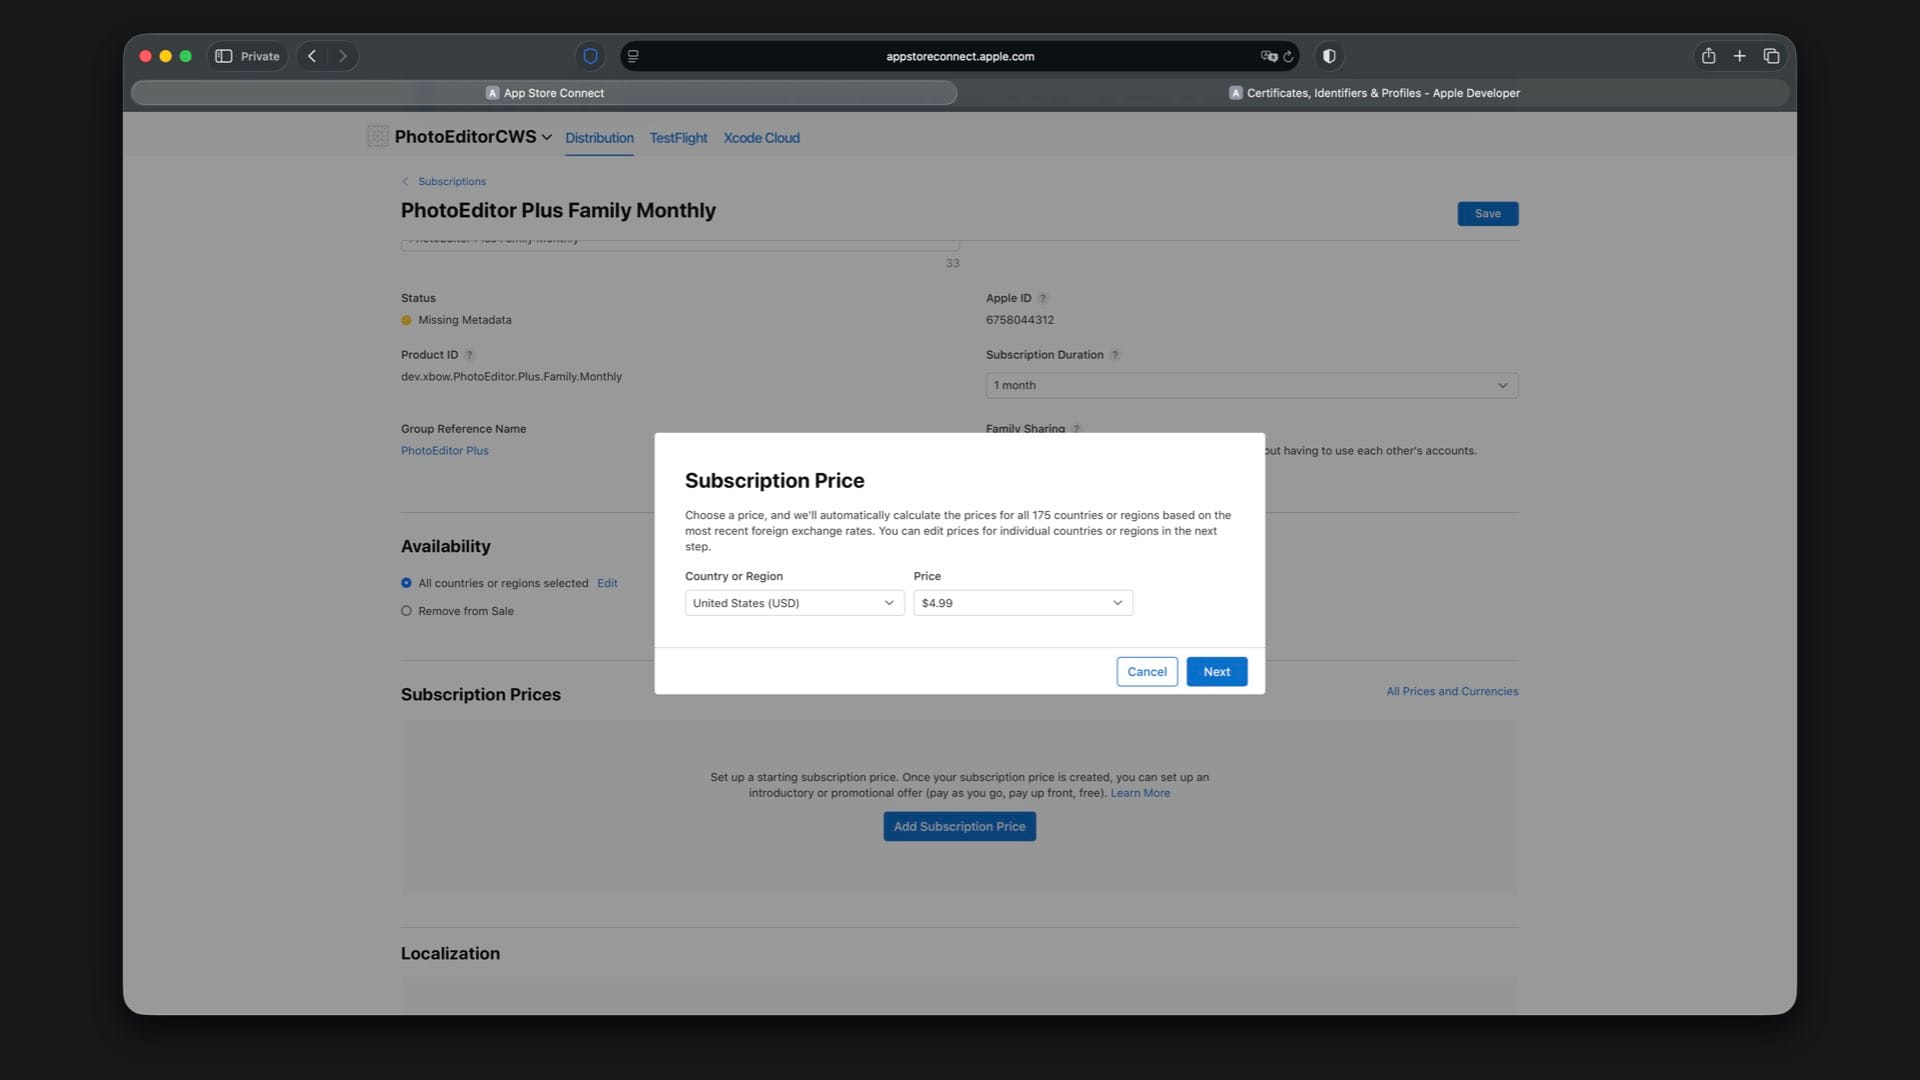
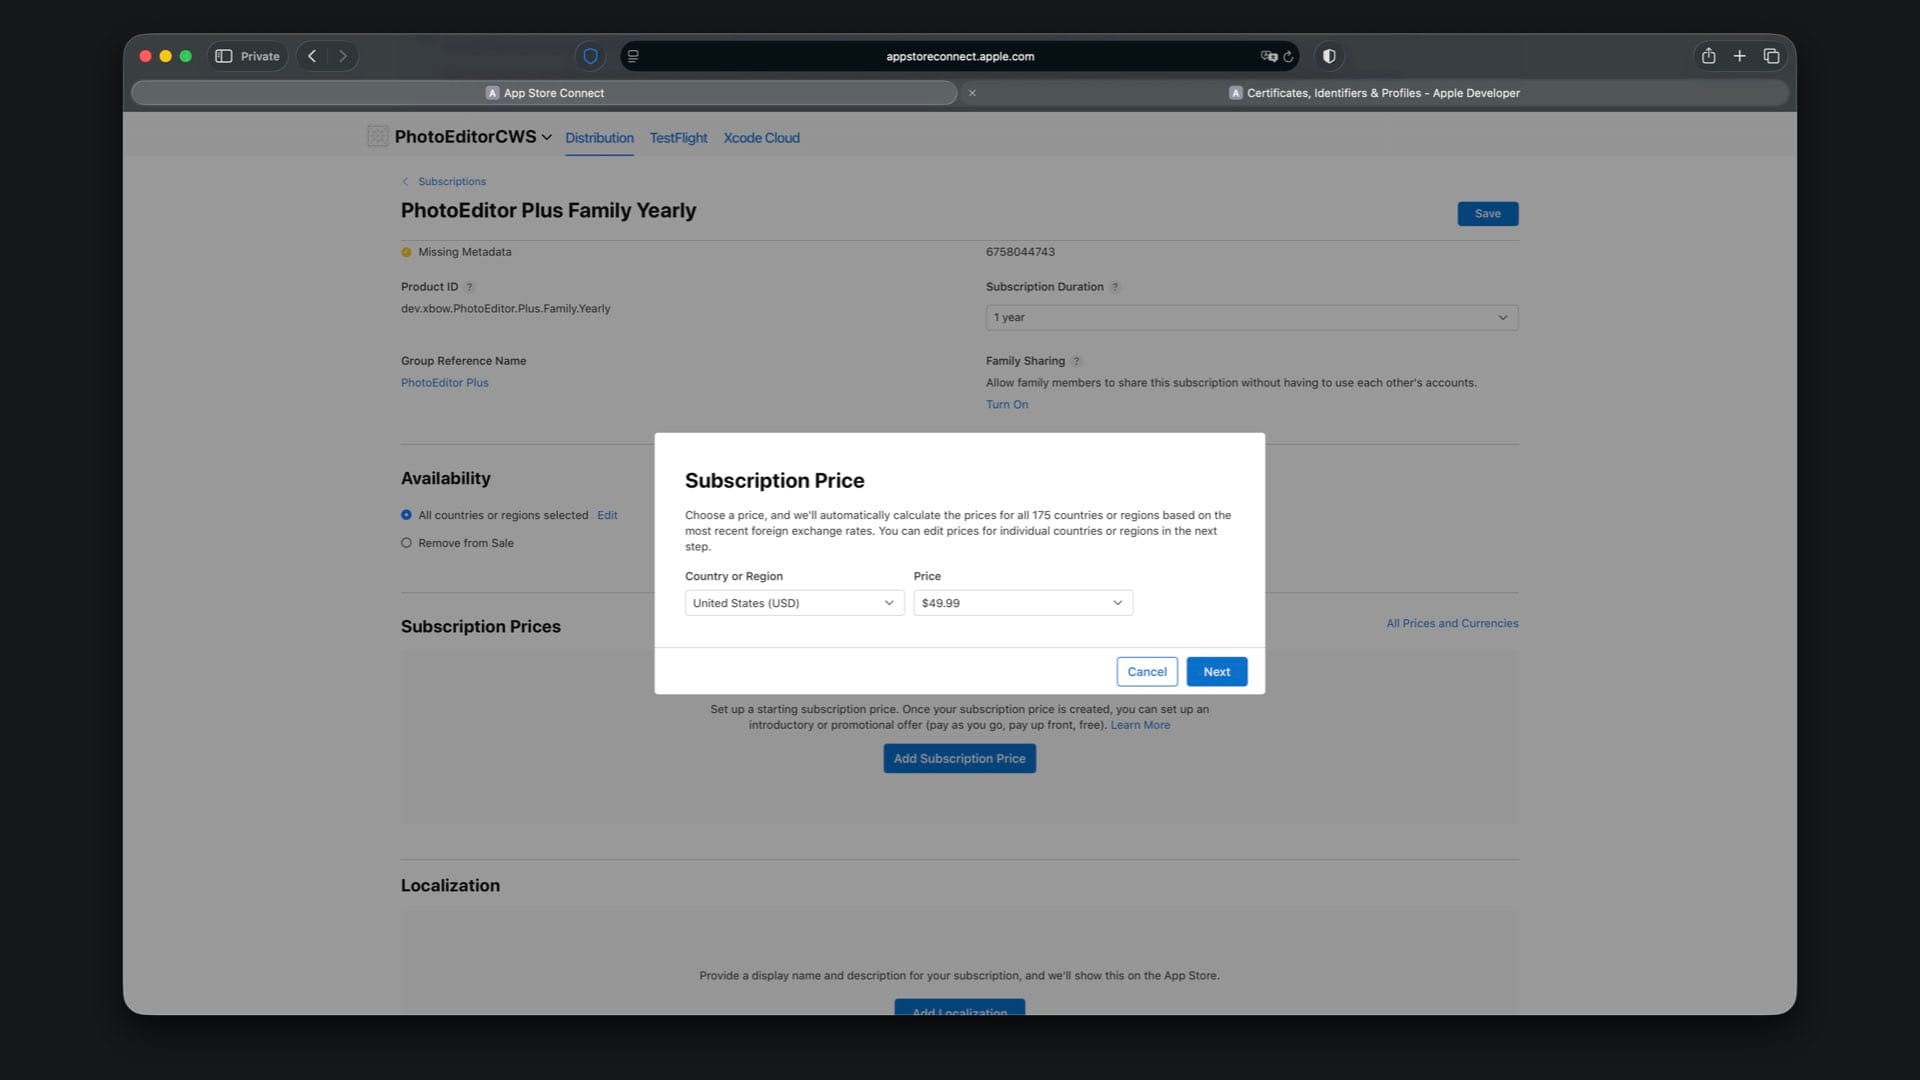
Next, configure the subscription price. In the first step of the pricing flow, choose a base price in USD, for example $2.99 for the Individual Monthly plan.

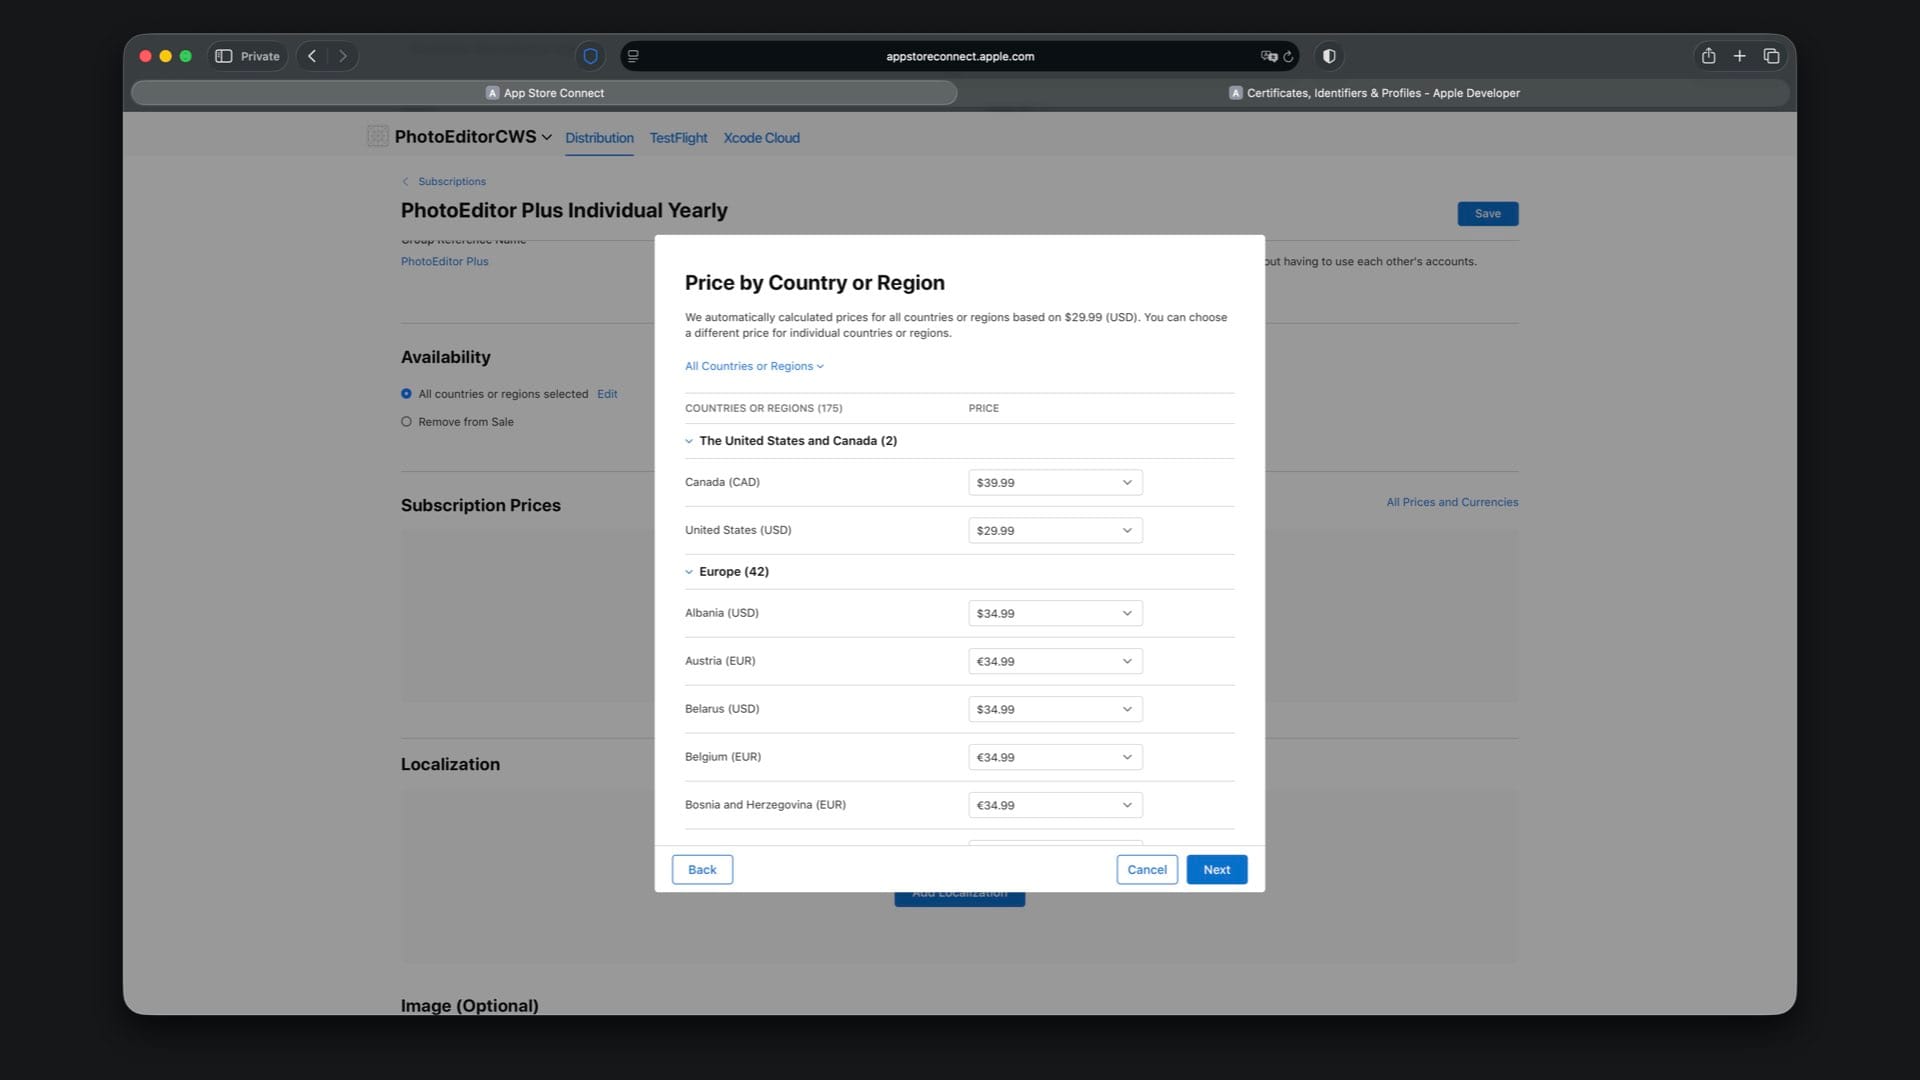
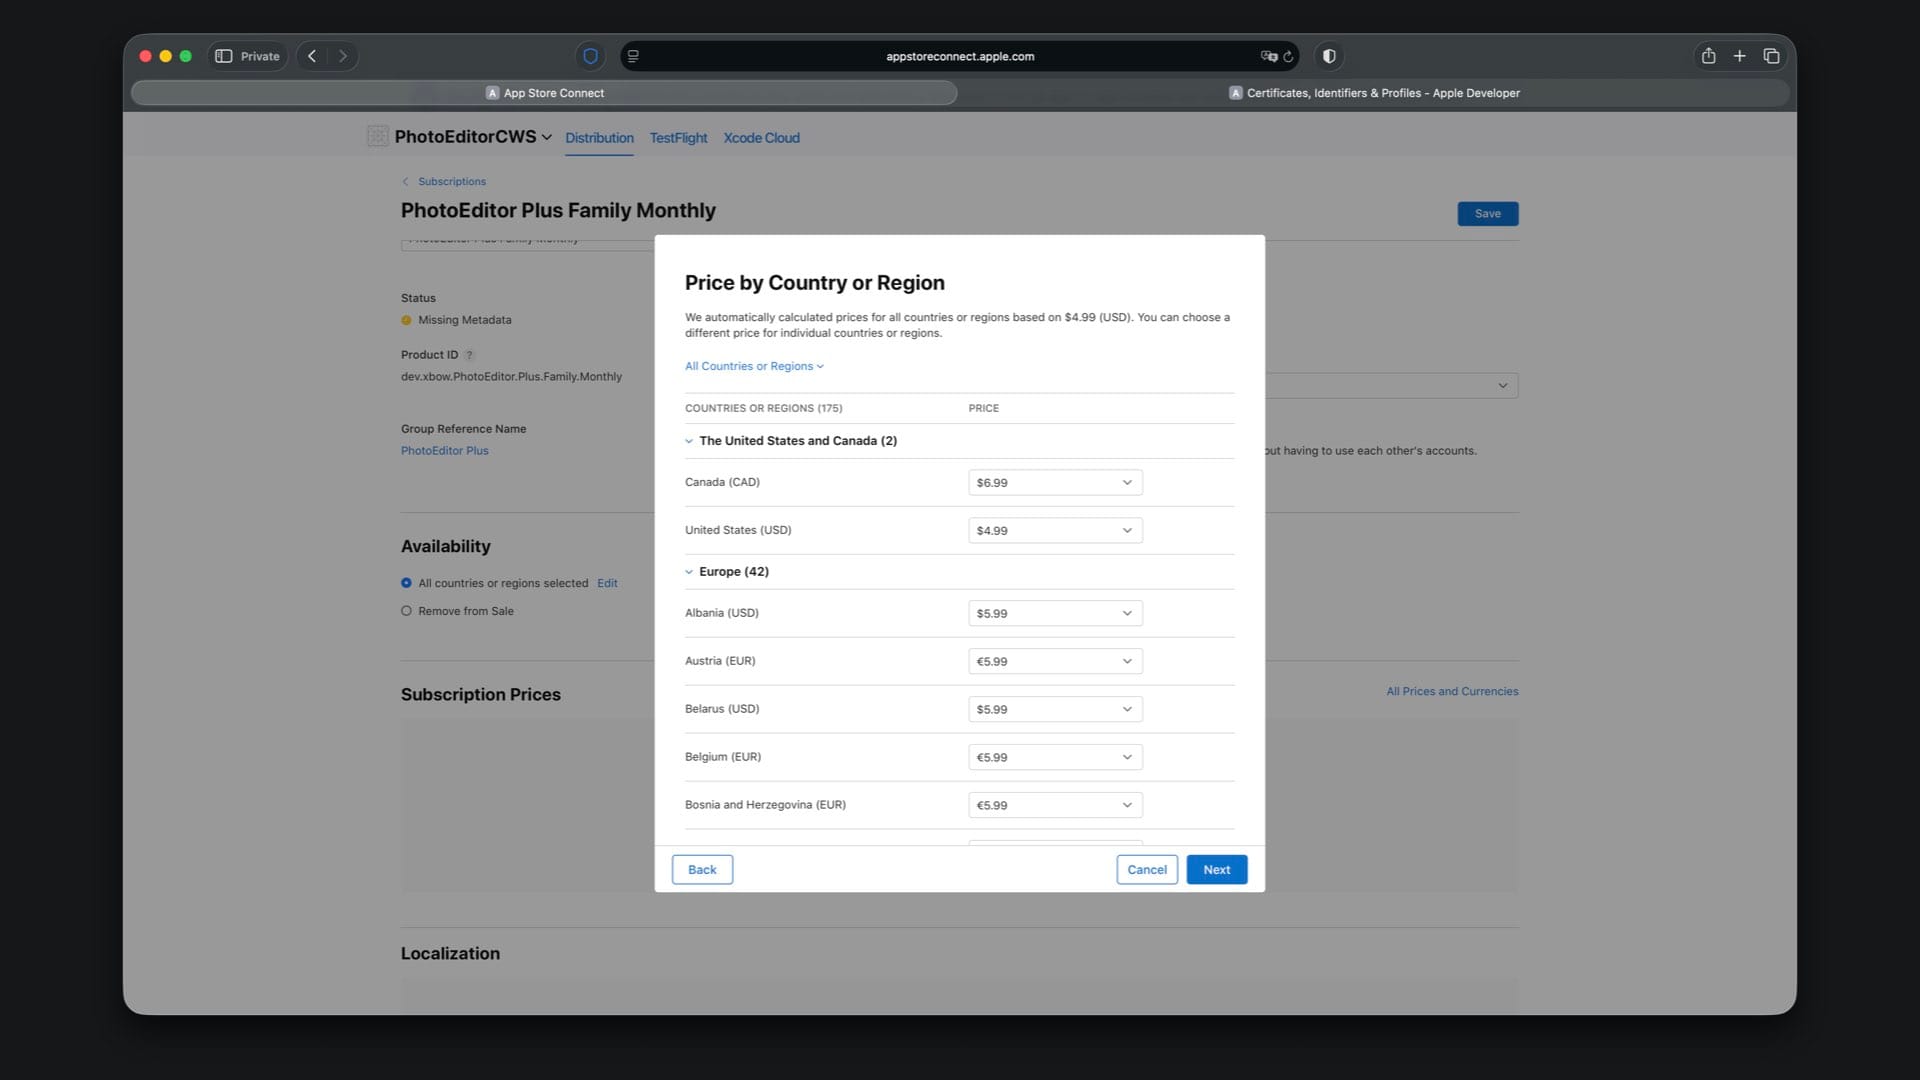
In the second step, you can review or adjust the automatically generated regional prices. If you don’t need custom pricing per country, you can keep the suggested values.
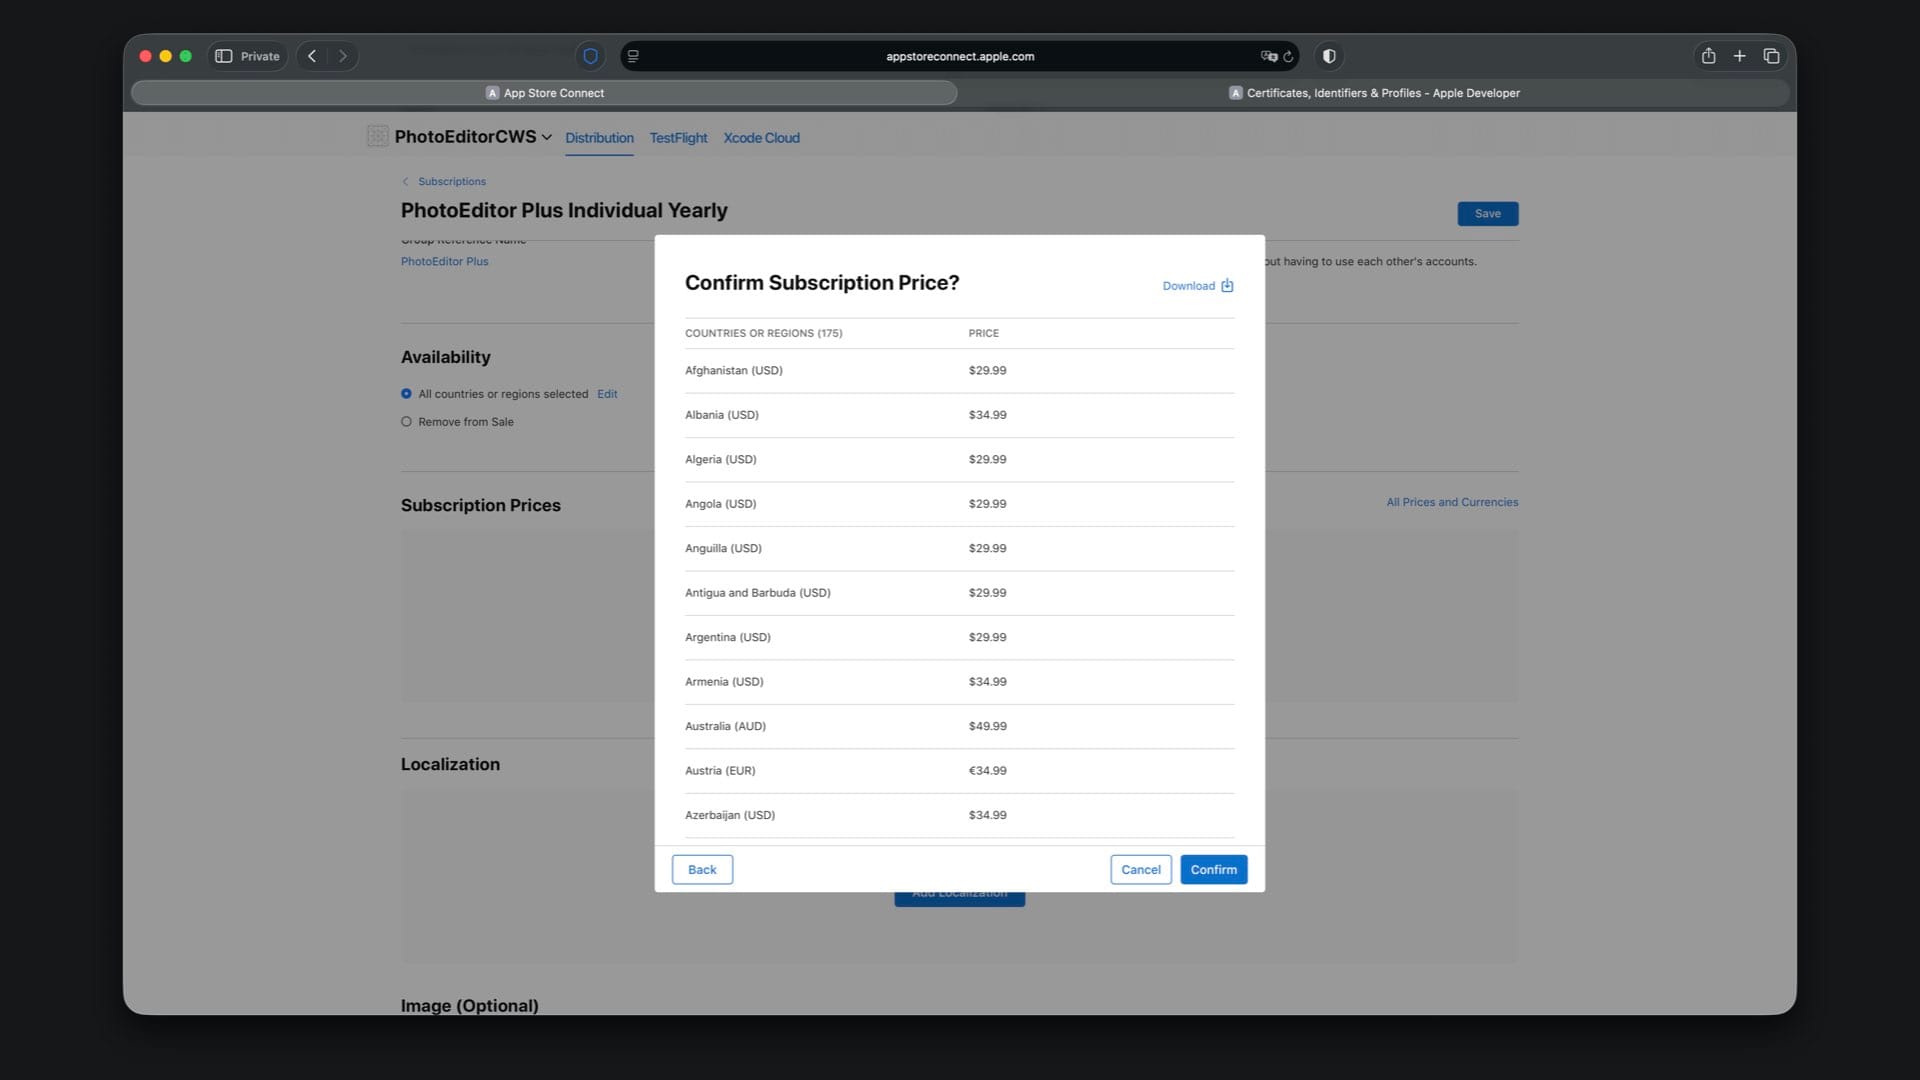
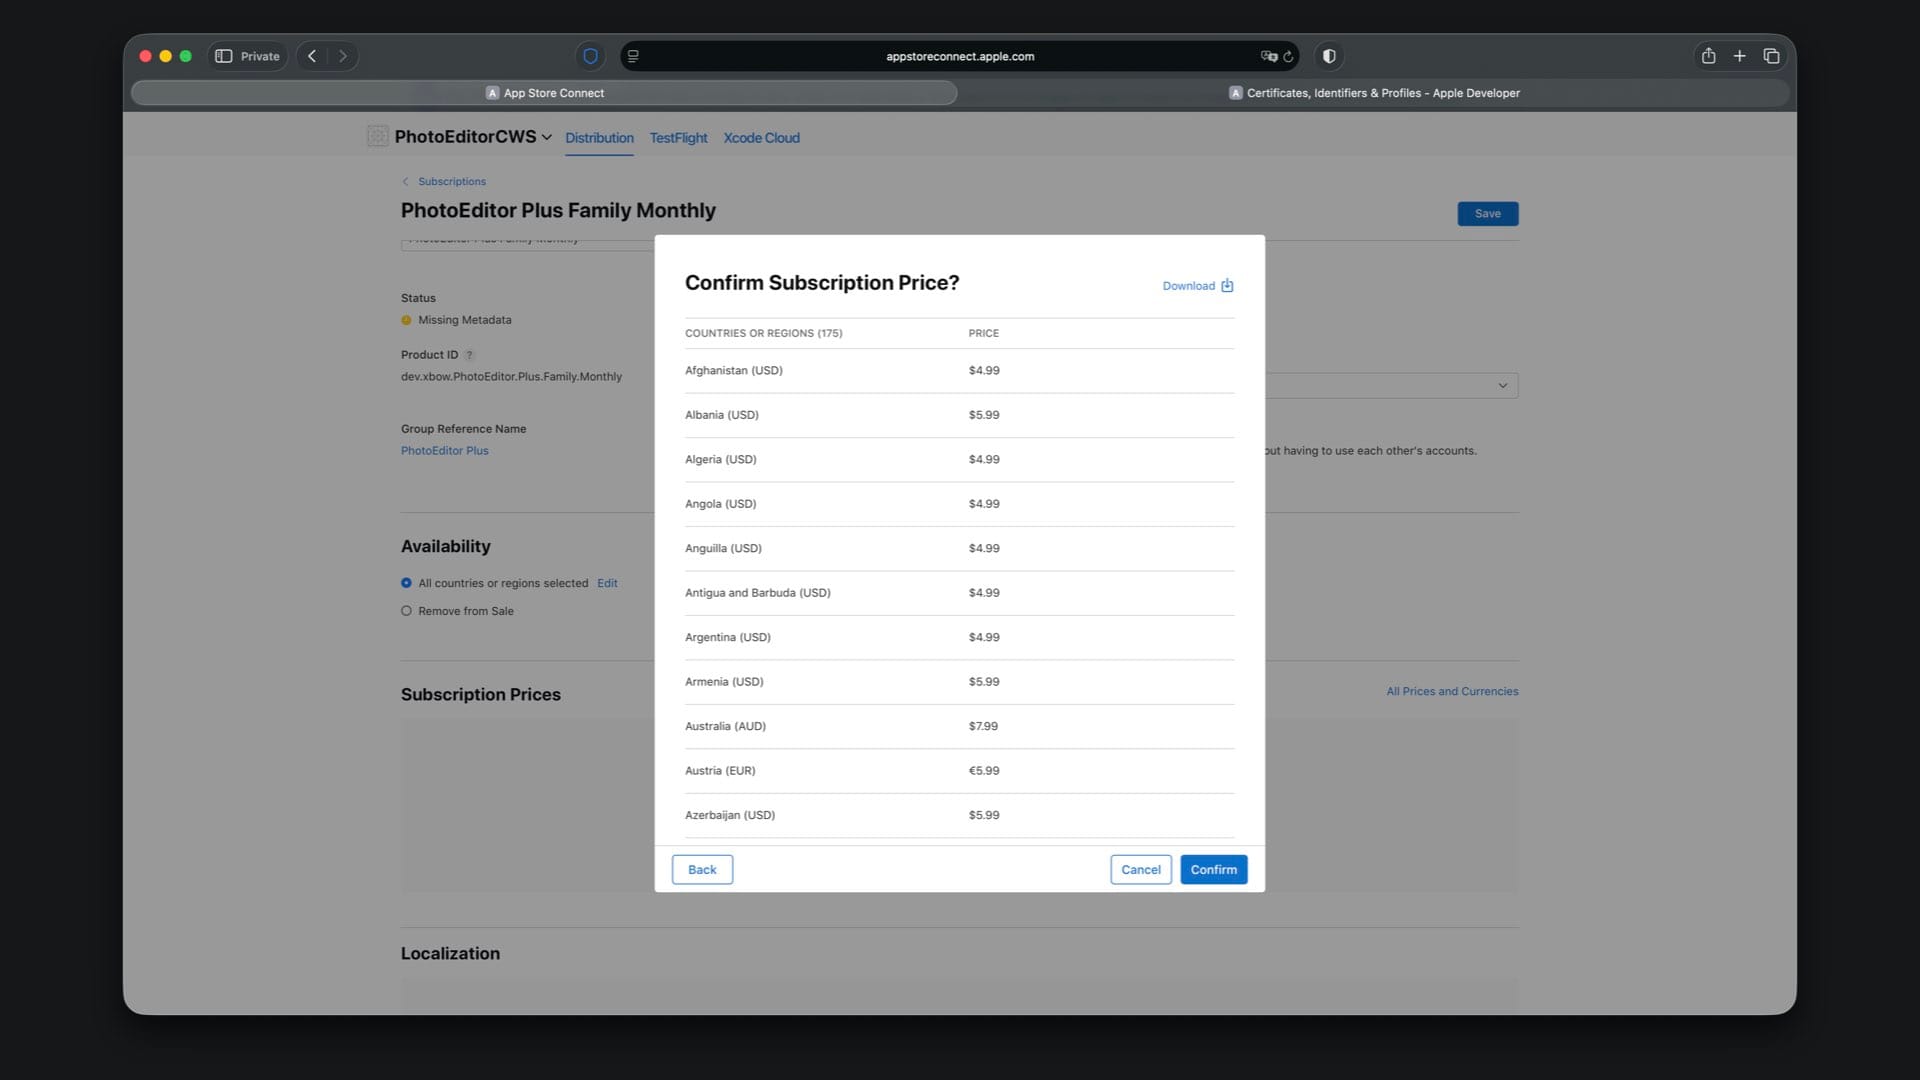
The final step of the pricing flow shows an overview of all selected prices. Tap “Confirm” to create the subscription price.
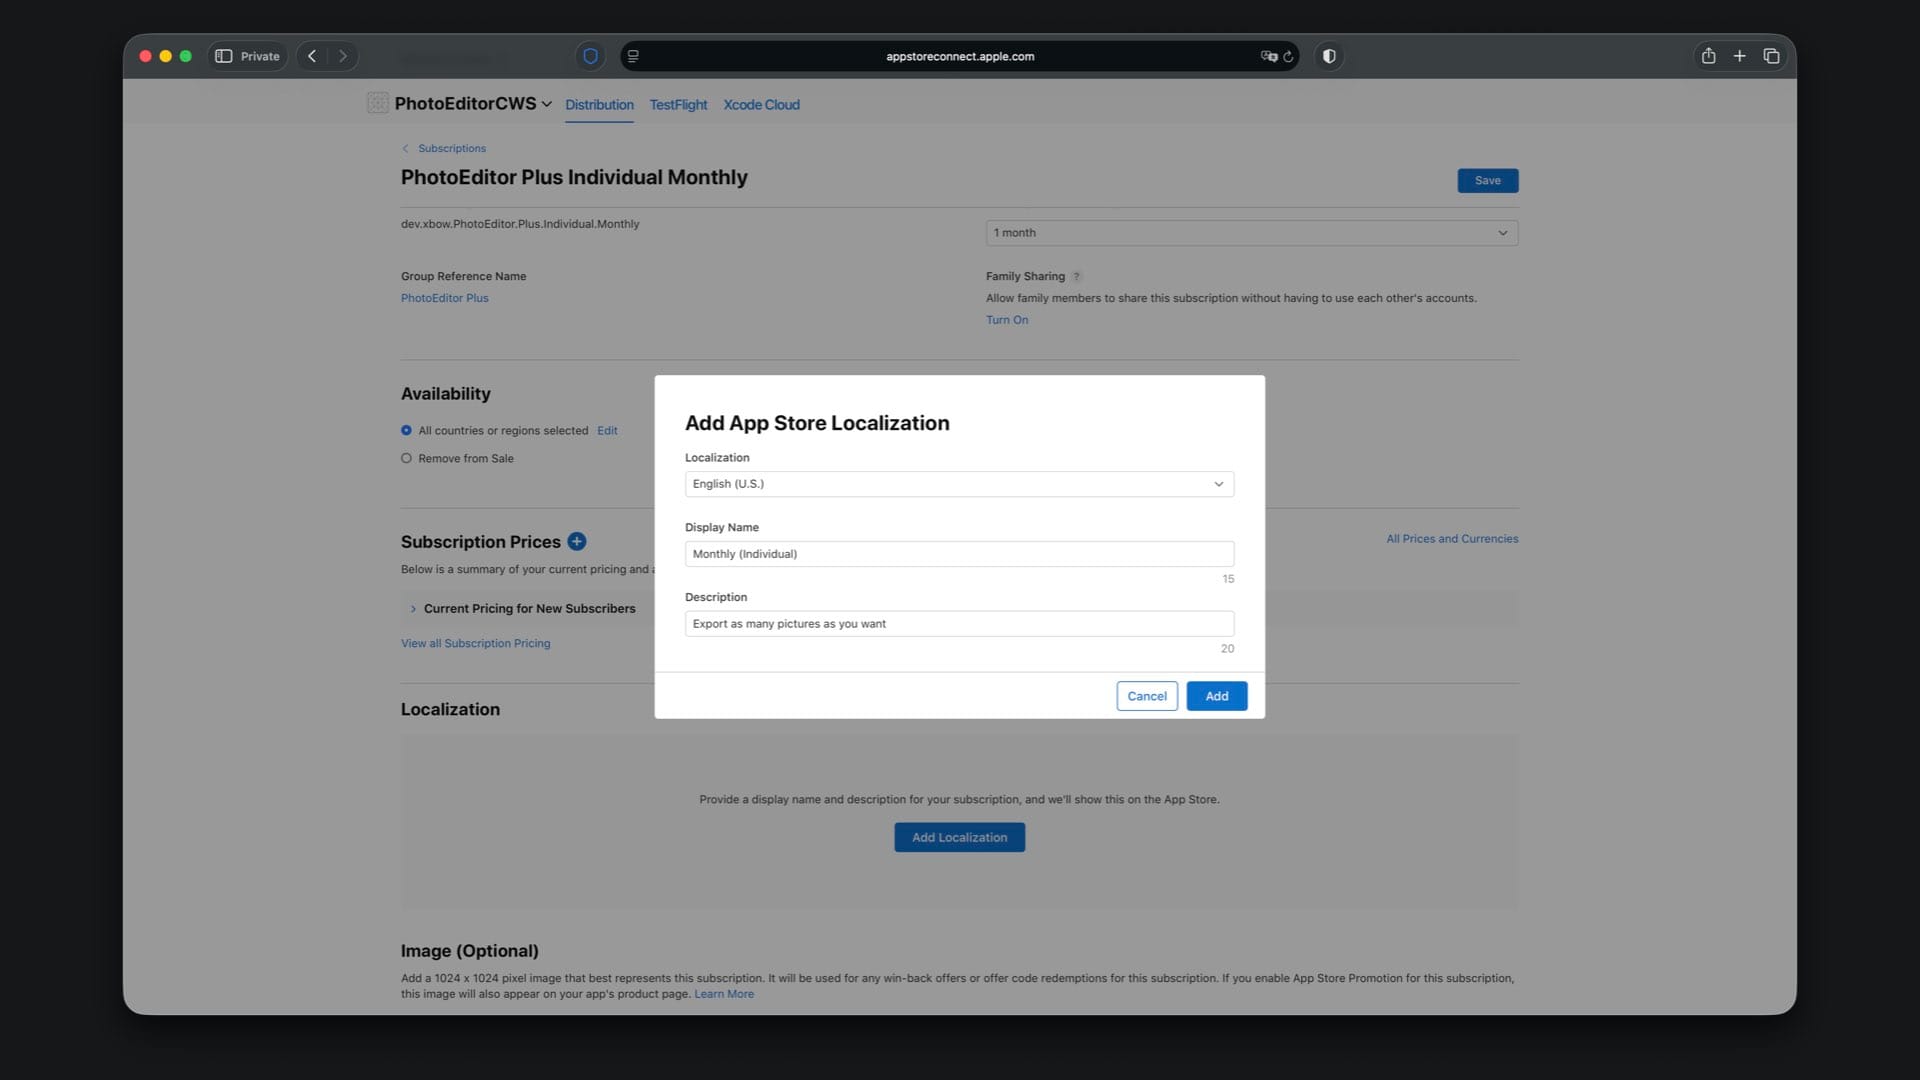
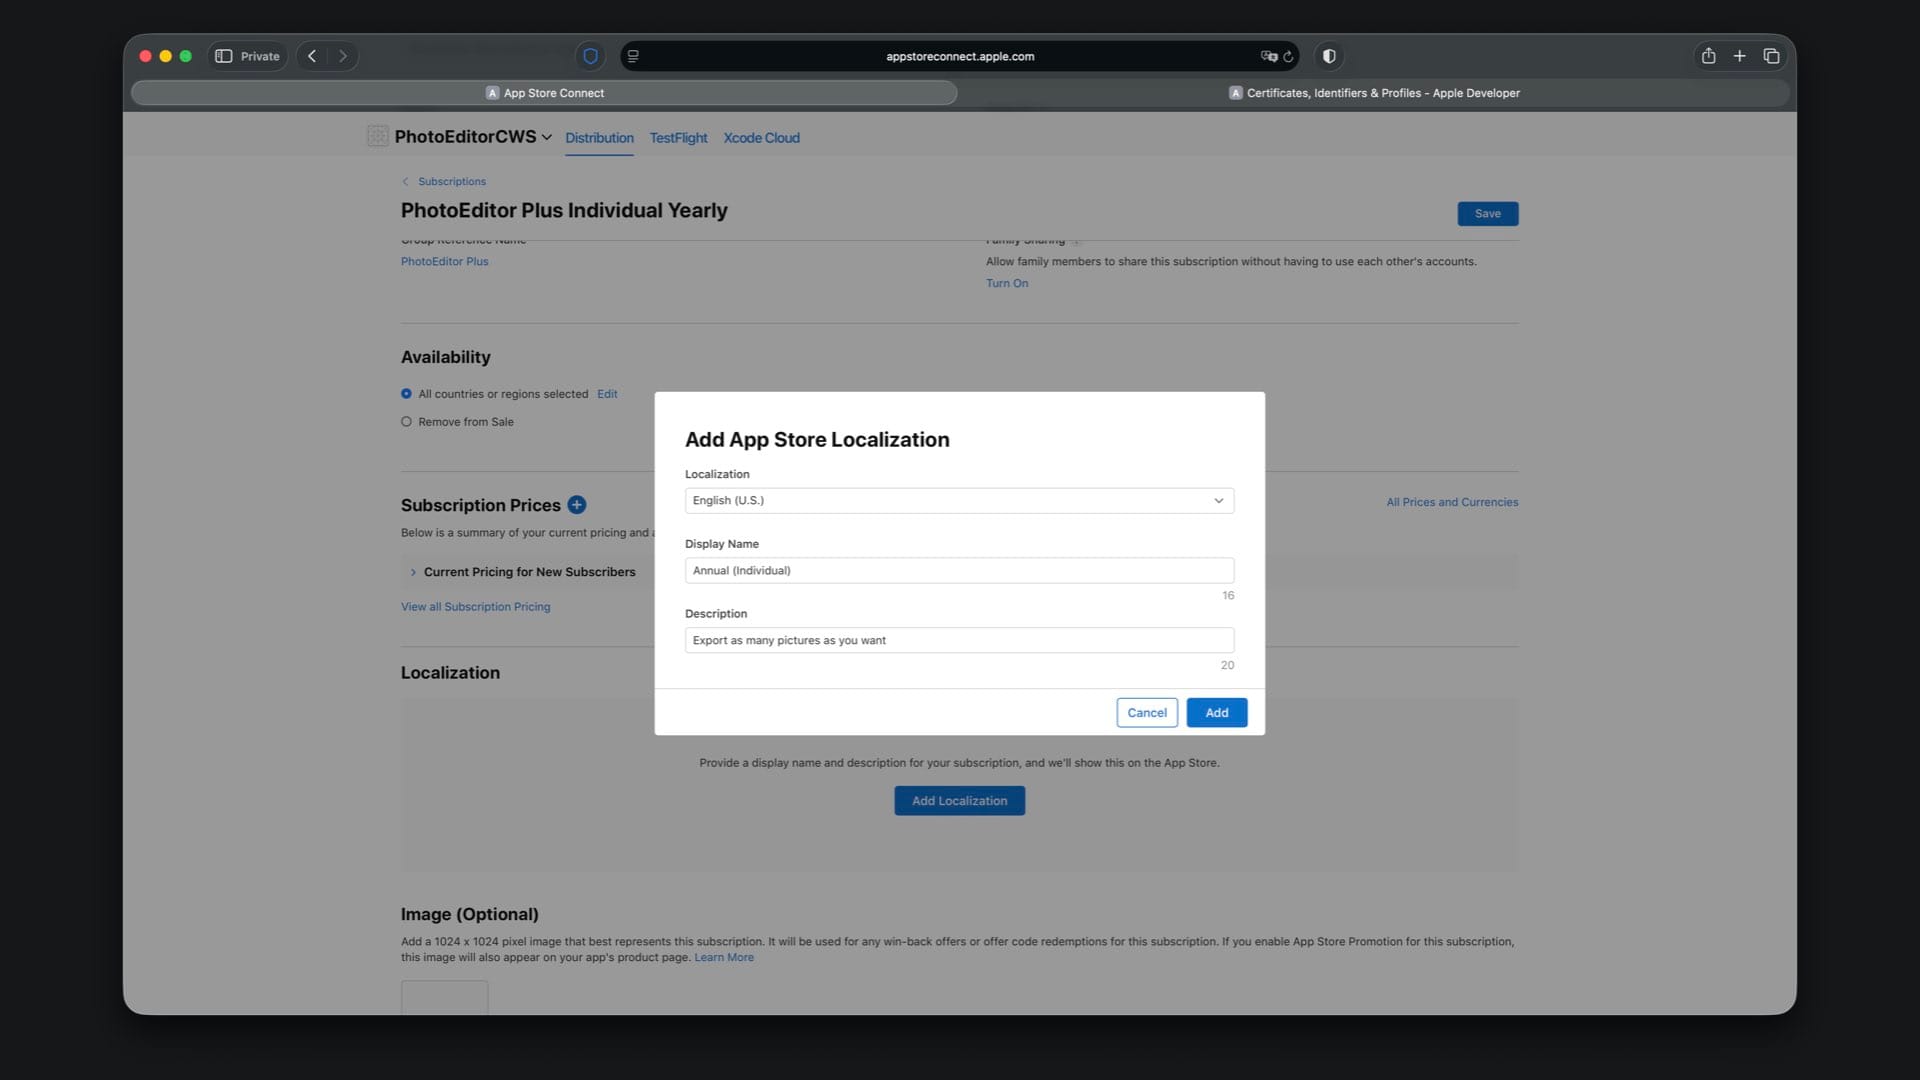
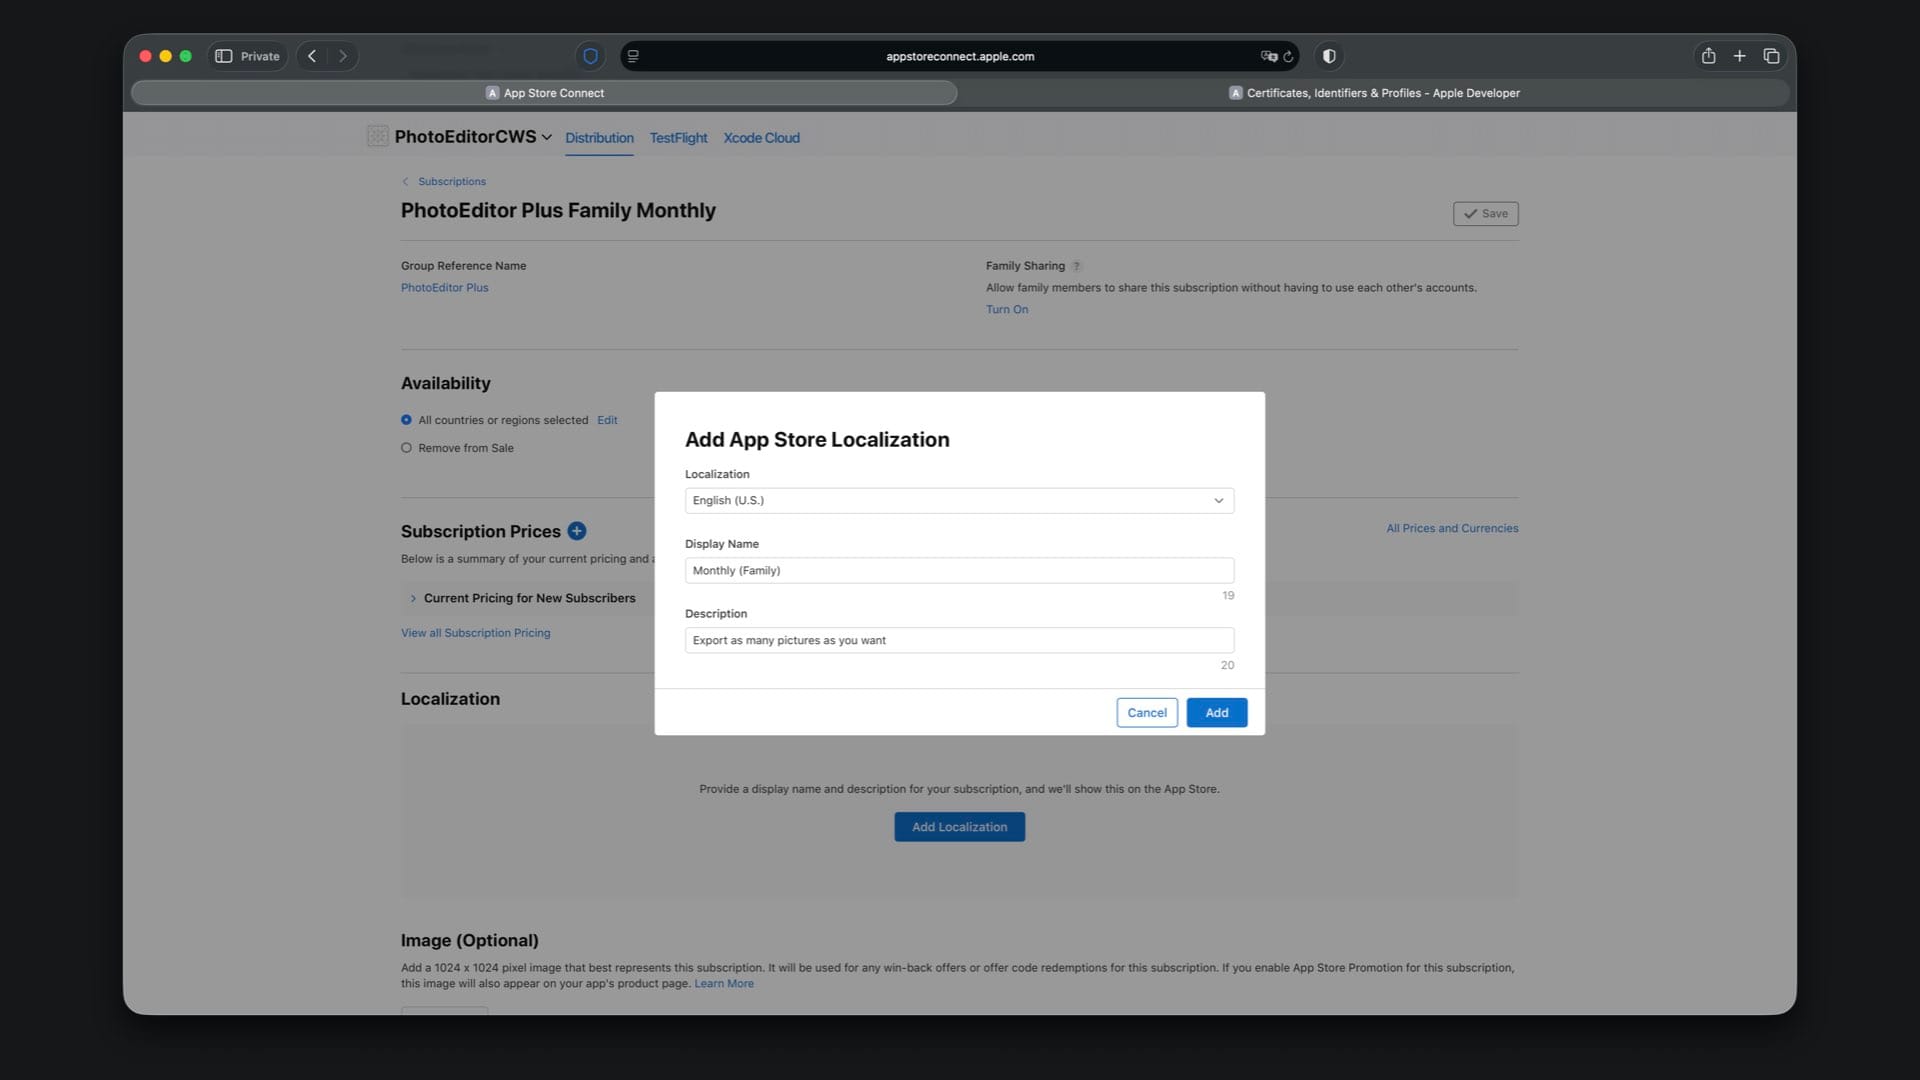
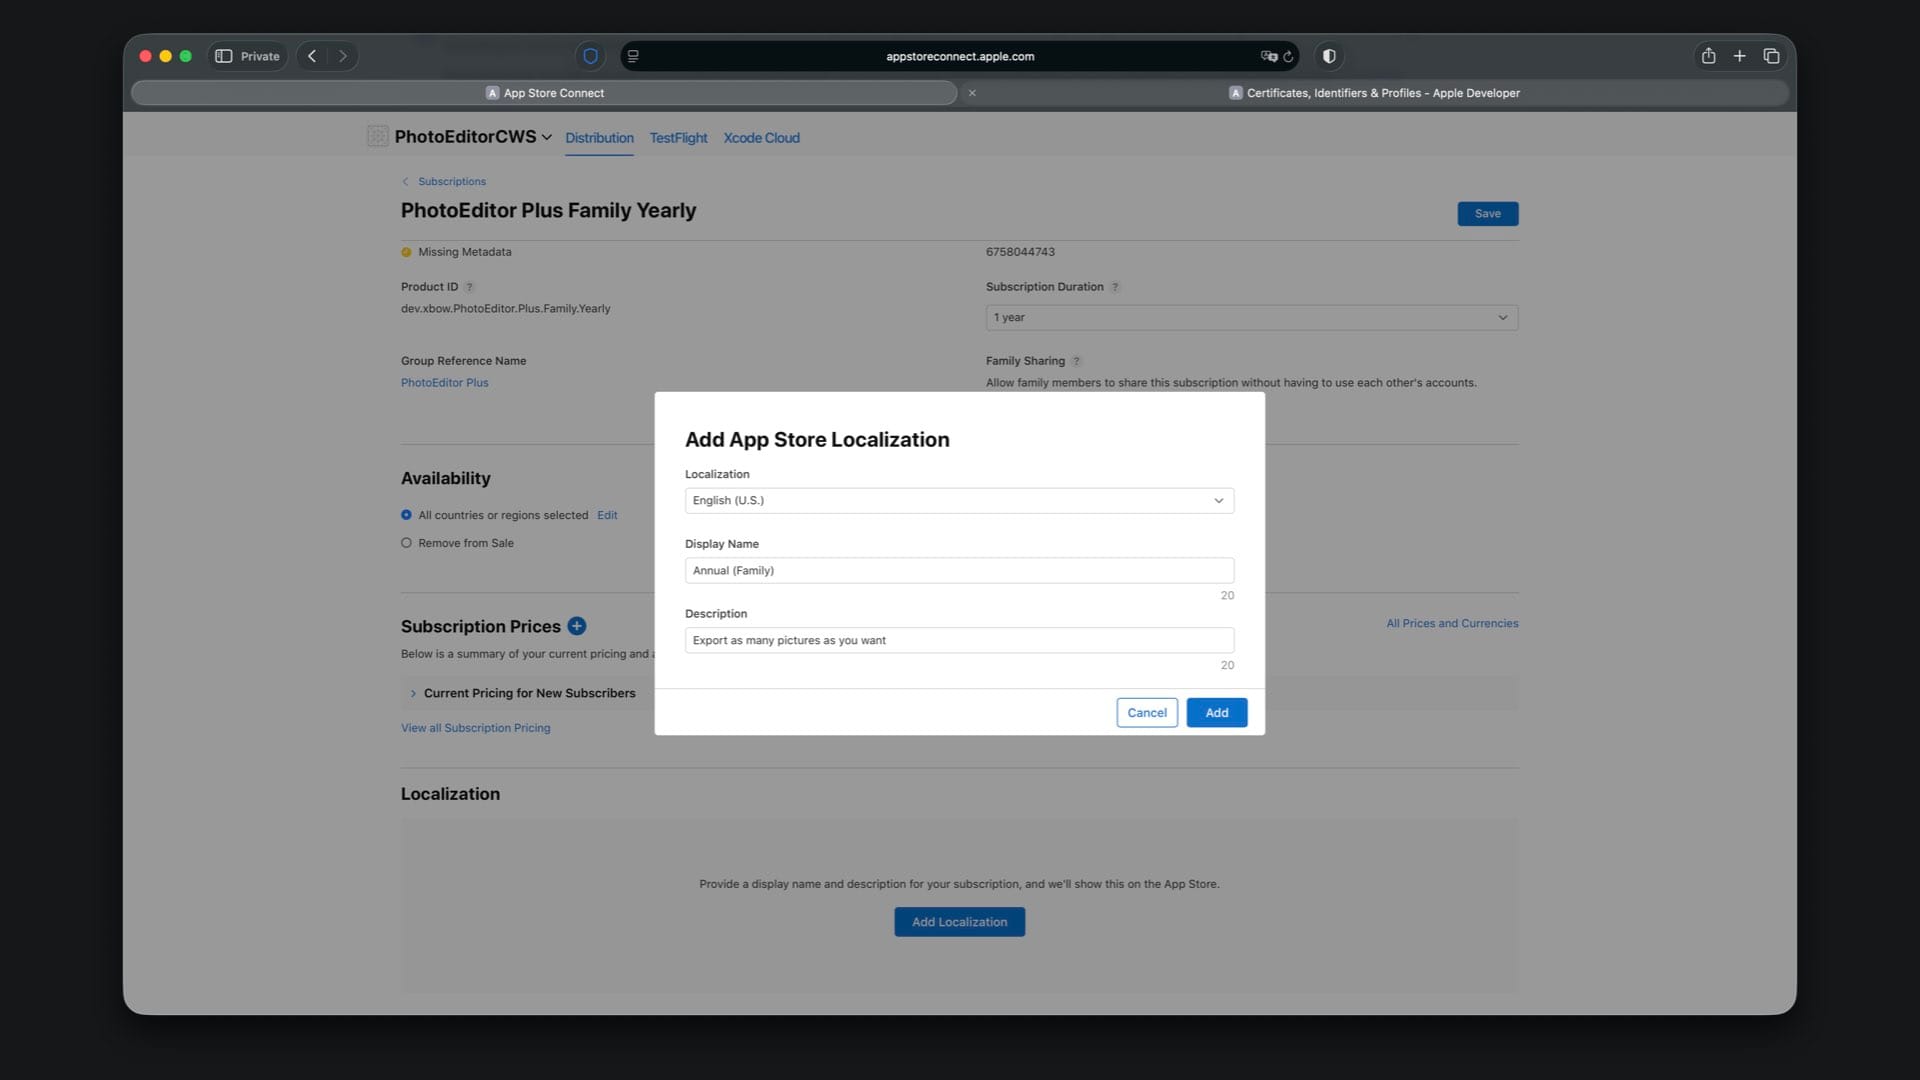
The last step is creating the App Store localization that is shown to users when they view or purchase the subscription. Here you can copy and paste the display name and description from your local StoreKit configuration file, which are “Monthly (Individual)” and “Export as many pictures as you want”.
Now repeat the same flow for the remaining three subscriptions. The screens are the same as the ones shown above.
Create “PhotoEditor Plus Individual Yearly” with Product ID suffix .Plus.Individual.Yearly and select a one year duration.
Choose availability, then set the price to match your StoreKit file, for example $29.99 for Individual Yearly.
For localization, use “Annual (Individual)” and “Export as many pictures as you want”.
Create “PhotoEditor Plus Family Monthly” with Product ID suffix .Plus.Family.Monthly and select a one month duration.

Choose availability, then set the price to match your StoreKit file, for example $4.99 for Family Monthly.
For localization, use “Monthly (Family)” and “Export as many pictures as you want”.
Create “PhotoEditor Plus Family Yearly” with Product ID suffix .Plus.Family.Yearly and select a one year duration.

Choose availability, then set the price to match your StoreKit file, for example $49.99 for Family Yearly.


For localization, use “Annual (Family)” and “Export as many pictures as you want”.
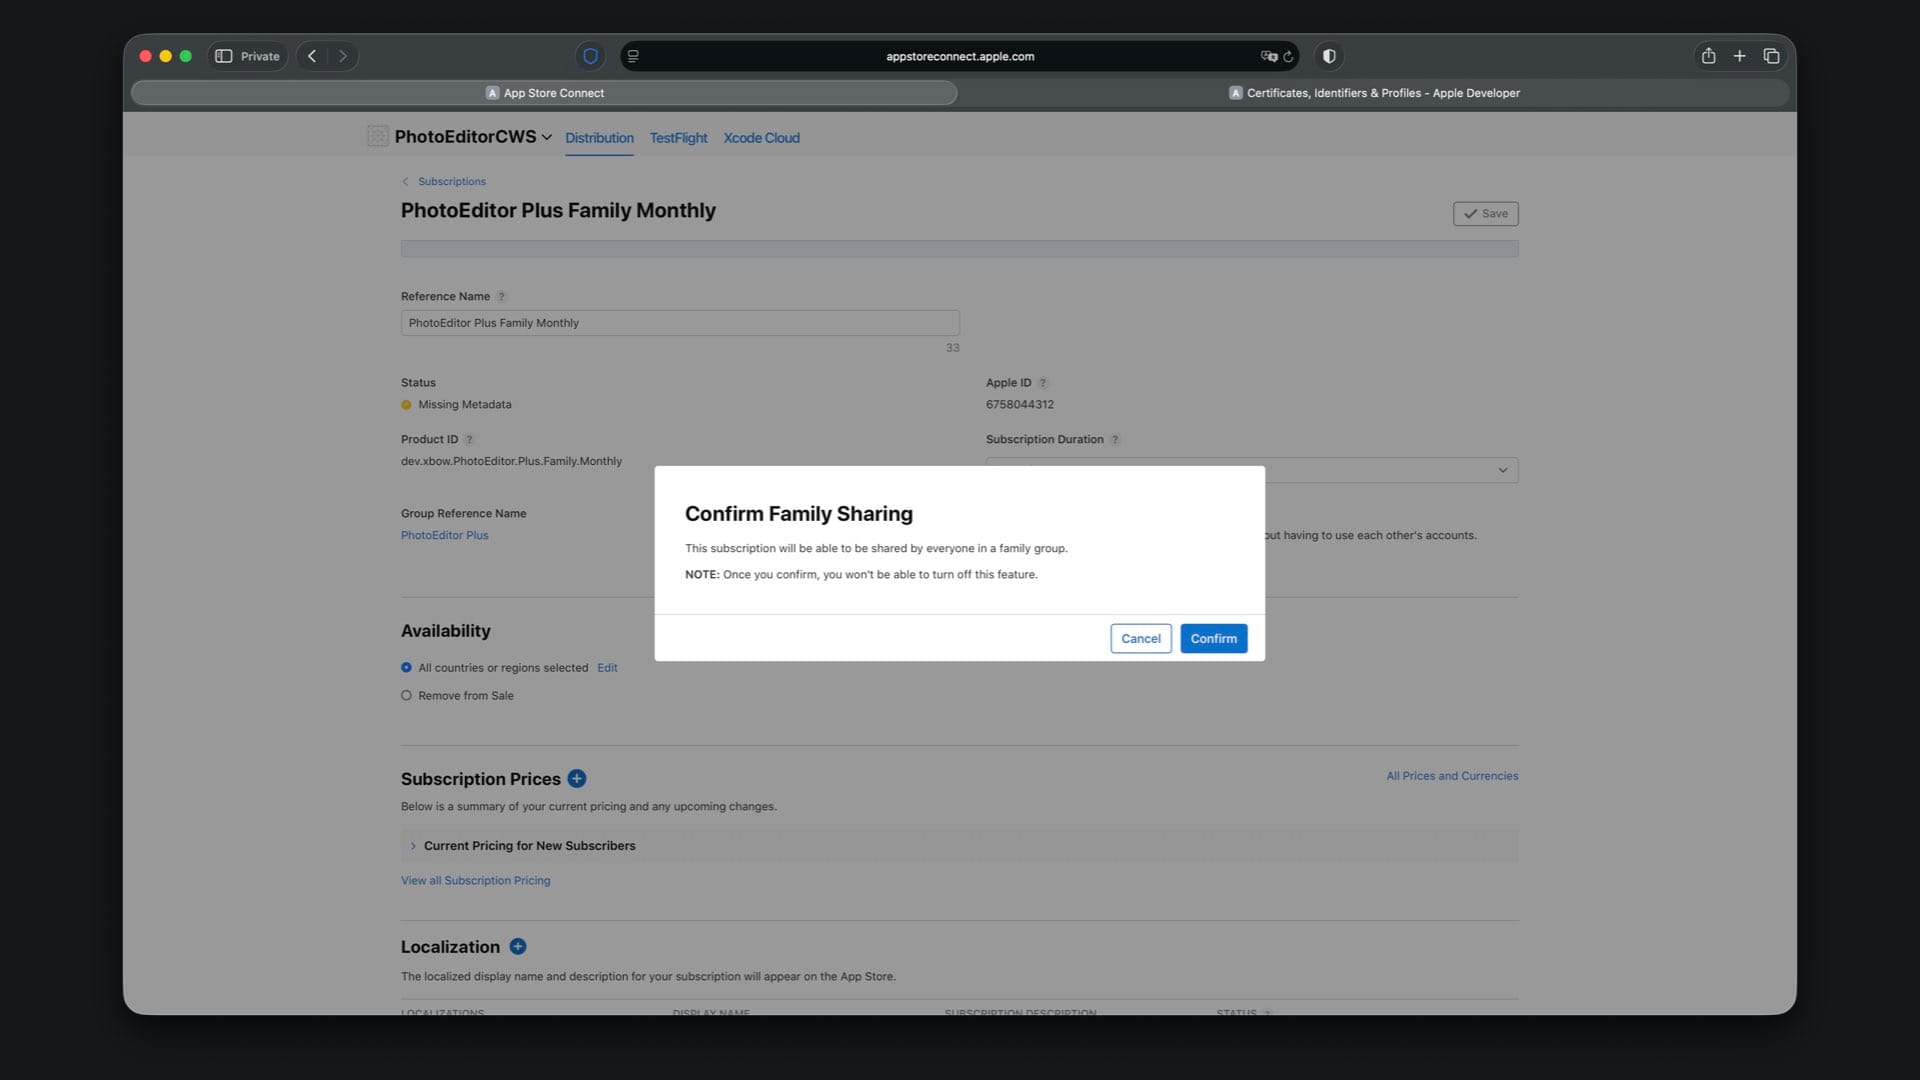
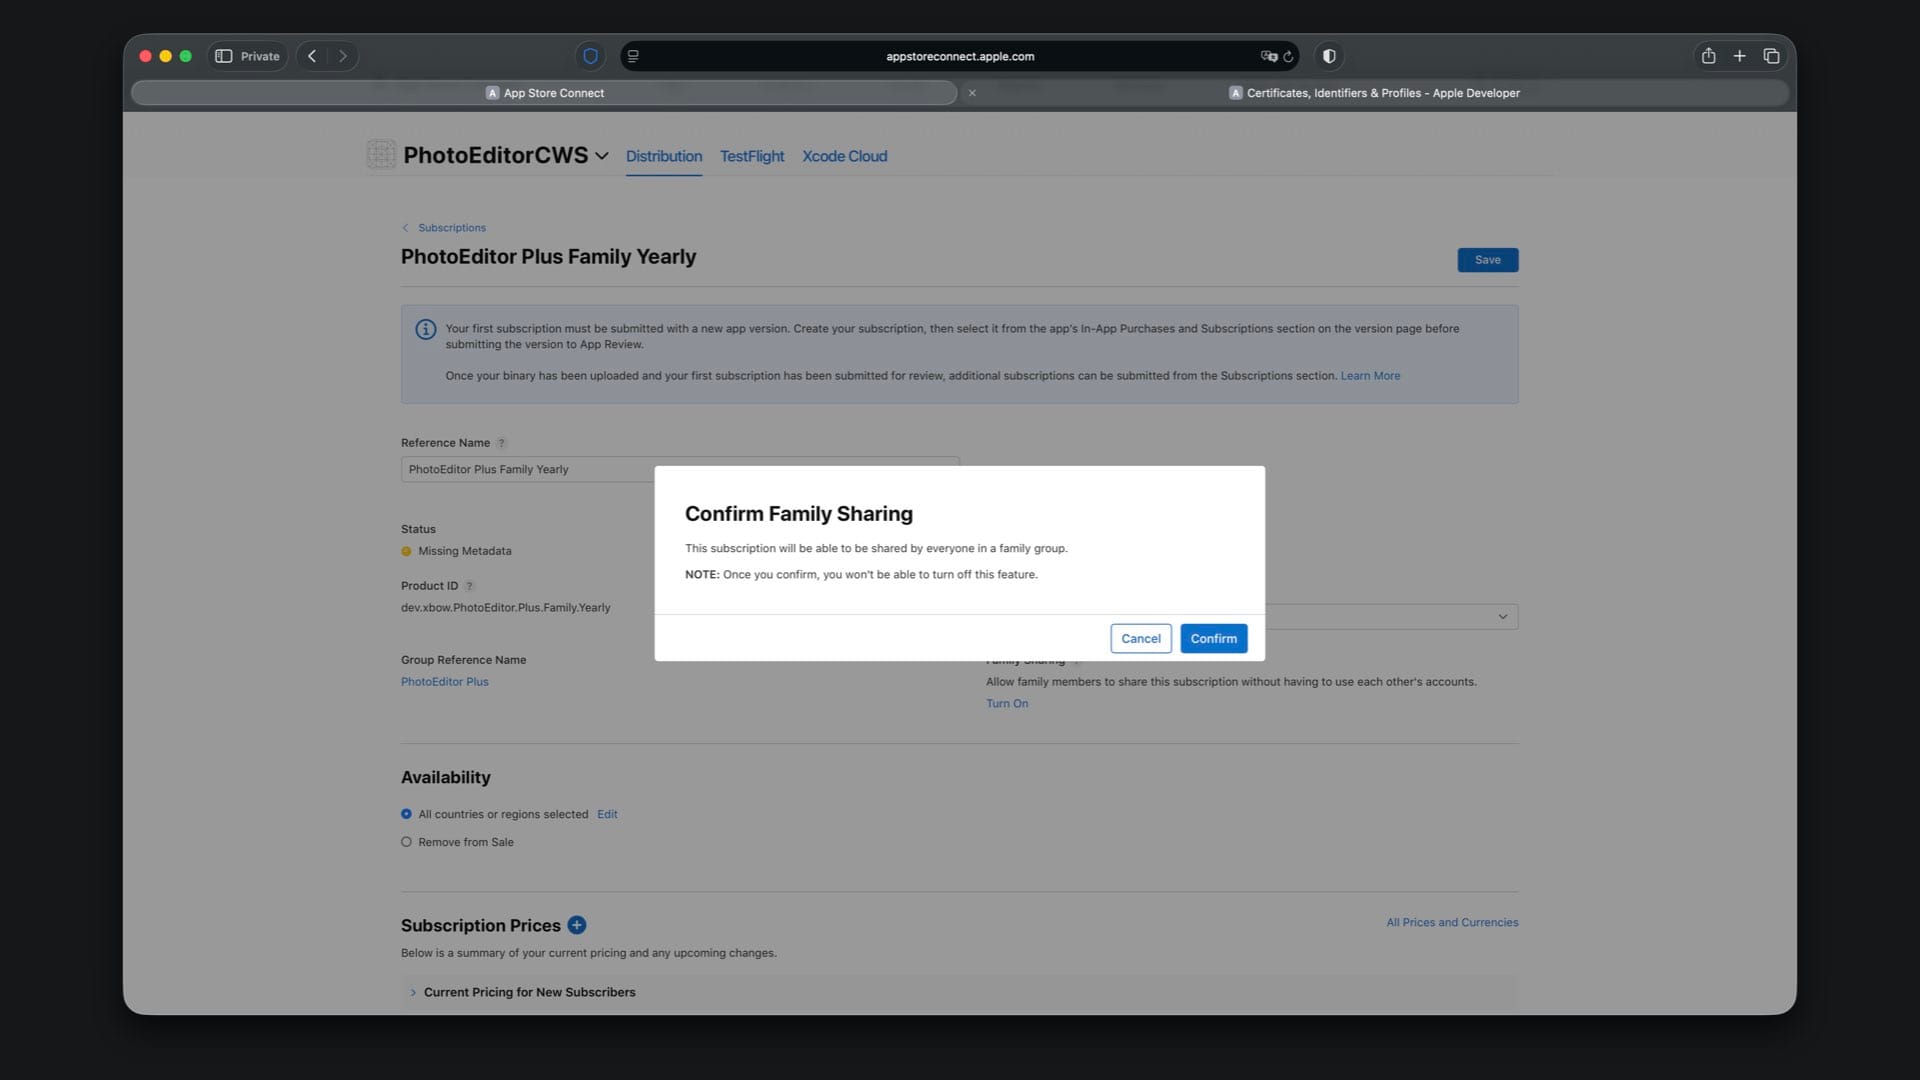
Turn on family sharing for this subscription too.
Set the subscription levels so Family is above Individual. In App Store Connect, this is the “Subscription Level” order within the group. It should match the StoreKit configuration, with “PhotoEditor Plus Family Yearly” and “PhotoEditor Plus Family Monthly” as level 1 and “PhotoEditor Plus Individual Yearly” and “PhotoEditor Plus Individual Monthly” as level 2. This is what makes upgrades and downgrades behave correctly.

Step 10 – Switch Back to App Store Connect Products
To use products from App Store Connect, tap on PhotoEditor in the top bar, select “Edit Scheme”, and change the StoreKit configuration to “None”. Archive and upload a build, then test the subscriptions via TestFlight. As with local tests, purchases are not charged during TestFlight testing.
Final Result
And that’s it. You now have a tiered subscription system with Individual and Family passes, powered by StoreKit 2. The app shows the current tier, presents a subscription store, and lets users manage their subscription, while the StoreKit configuration and App Store Connect setup stay in sync.
With this foundation in place, you can tie premium features to the active tier and expand the offering with additional plans over time.
If you want to see a more advanced SwiftUI app built by Apple, check out the Backyard Birds sample. It showcases deeper concepts and patterns that build on what you learned here, and it can be helpful to explore as you refine your own subscription based experience.
Where to Go Next?
Here are helpful resources to continue learning about StoreKit and monetization:
- Apple StoreKit 2 documentation
- WWDC videos on In-App Purchases
- Backyard Birds sample by Apple
These resources can help you explore advanced subscription configurations, offers, and other monetization strategies.