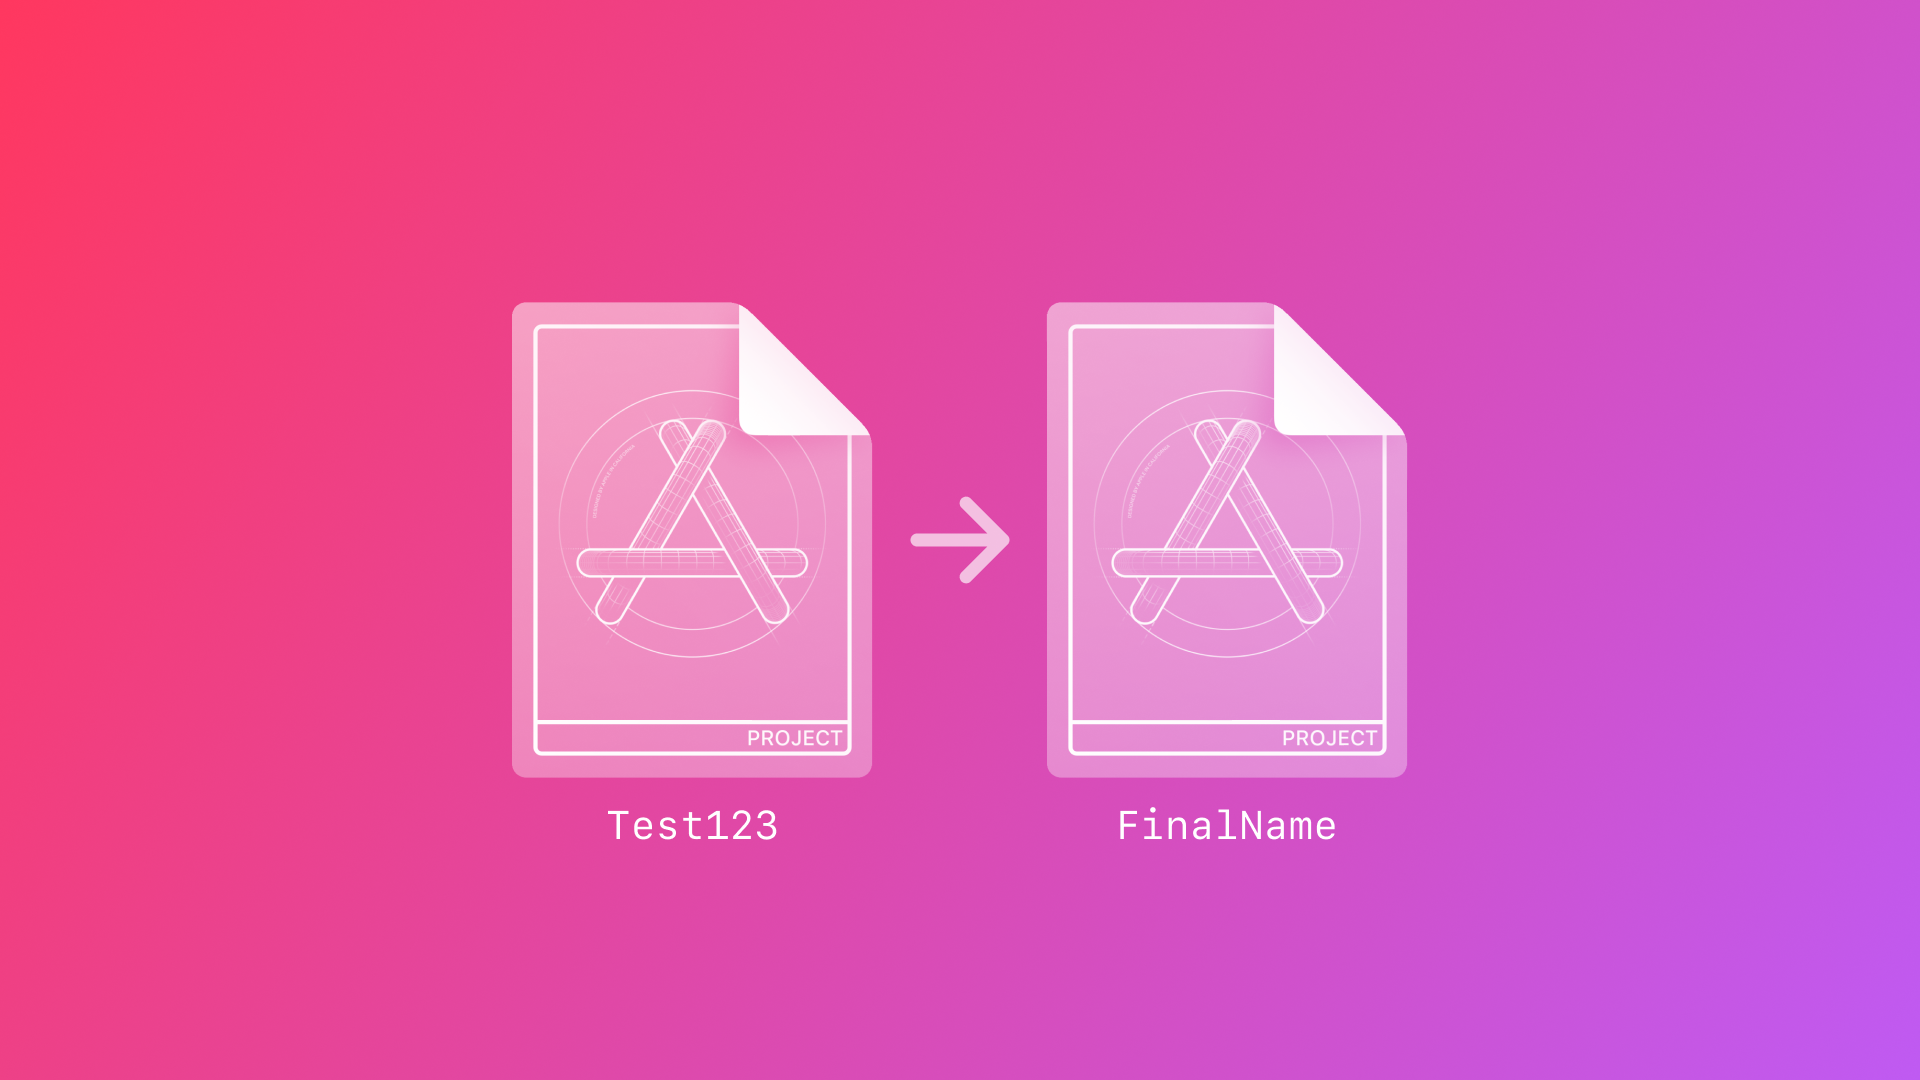
Safely Renaming Your Xcode Project
Learn how to safely rename your Xcode project by updating file references, build settings, and bundle identifiers avoiding errors or inconsistencies.

It always begins like this (or at least for me): a new idea, a quick prototype, or simply experimenting with a new framework. You quickly type a random project name like TestApp, FrameworkTest, UtilityApp or the worst one: test123. But eventually, your casual project grows into something significant, and/or the perfect app name finally comes along halfway through development.
But changing a project’s name in Xcode isn’t as simple as updating the display name. A mismatched name across your files, folders, bundle identifiers, and entitlements can create chaos.
If you’re as meticulous as me and prefer a clean, consistent, and professional codebase, this guide will walk you through the steps to safely and correctly rename your Xcode project.
This tutorial has been tested with Xcode versions up to 26.
Quick Summary Checklist
Before we dive into it, here’s a concise overview of the steps involved:
- Rename the project within Xcode.
- Delete and recreate Schemes.
- Update your project’s targets informations (Display Name, Bundle Identifier).
- Adjust paths and references in Build Settings.
- Rename your project’s main folder in Xcode.
- Update associated files and folders (Entitlements, Info.plist).
- Rename your project’s root folder in Finder.
- Update additional targets (app extensions, widgets, etc.).
- Verify and regenerate provisioning profiles (if needed).
- Clean, build, and thoroughly test your app.
If you want to test it first, you can download a demo project here, which you can use instead of testing it in your actual project.
Step 1: Renaming the Project in Xcode
- Open your project in Xcode.
- Select the project’s root in the Project Navigator.
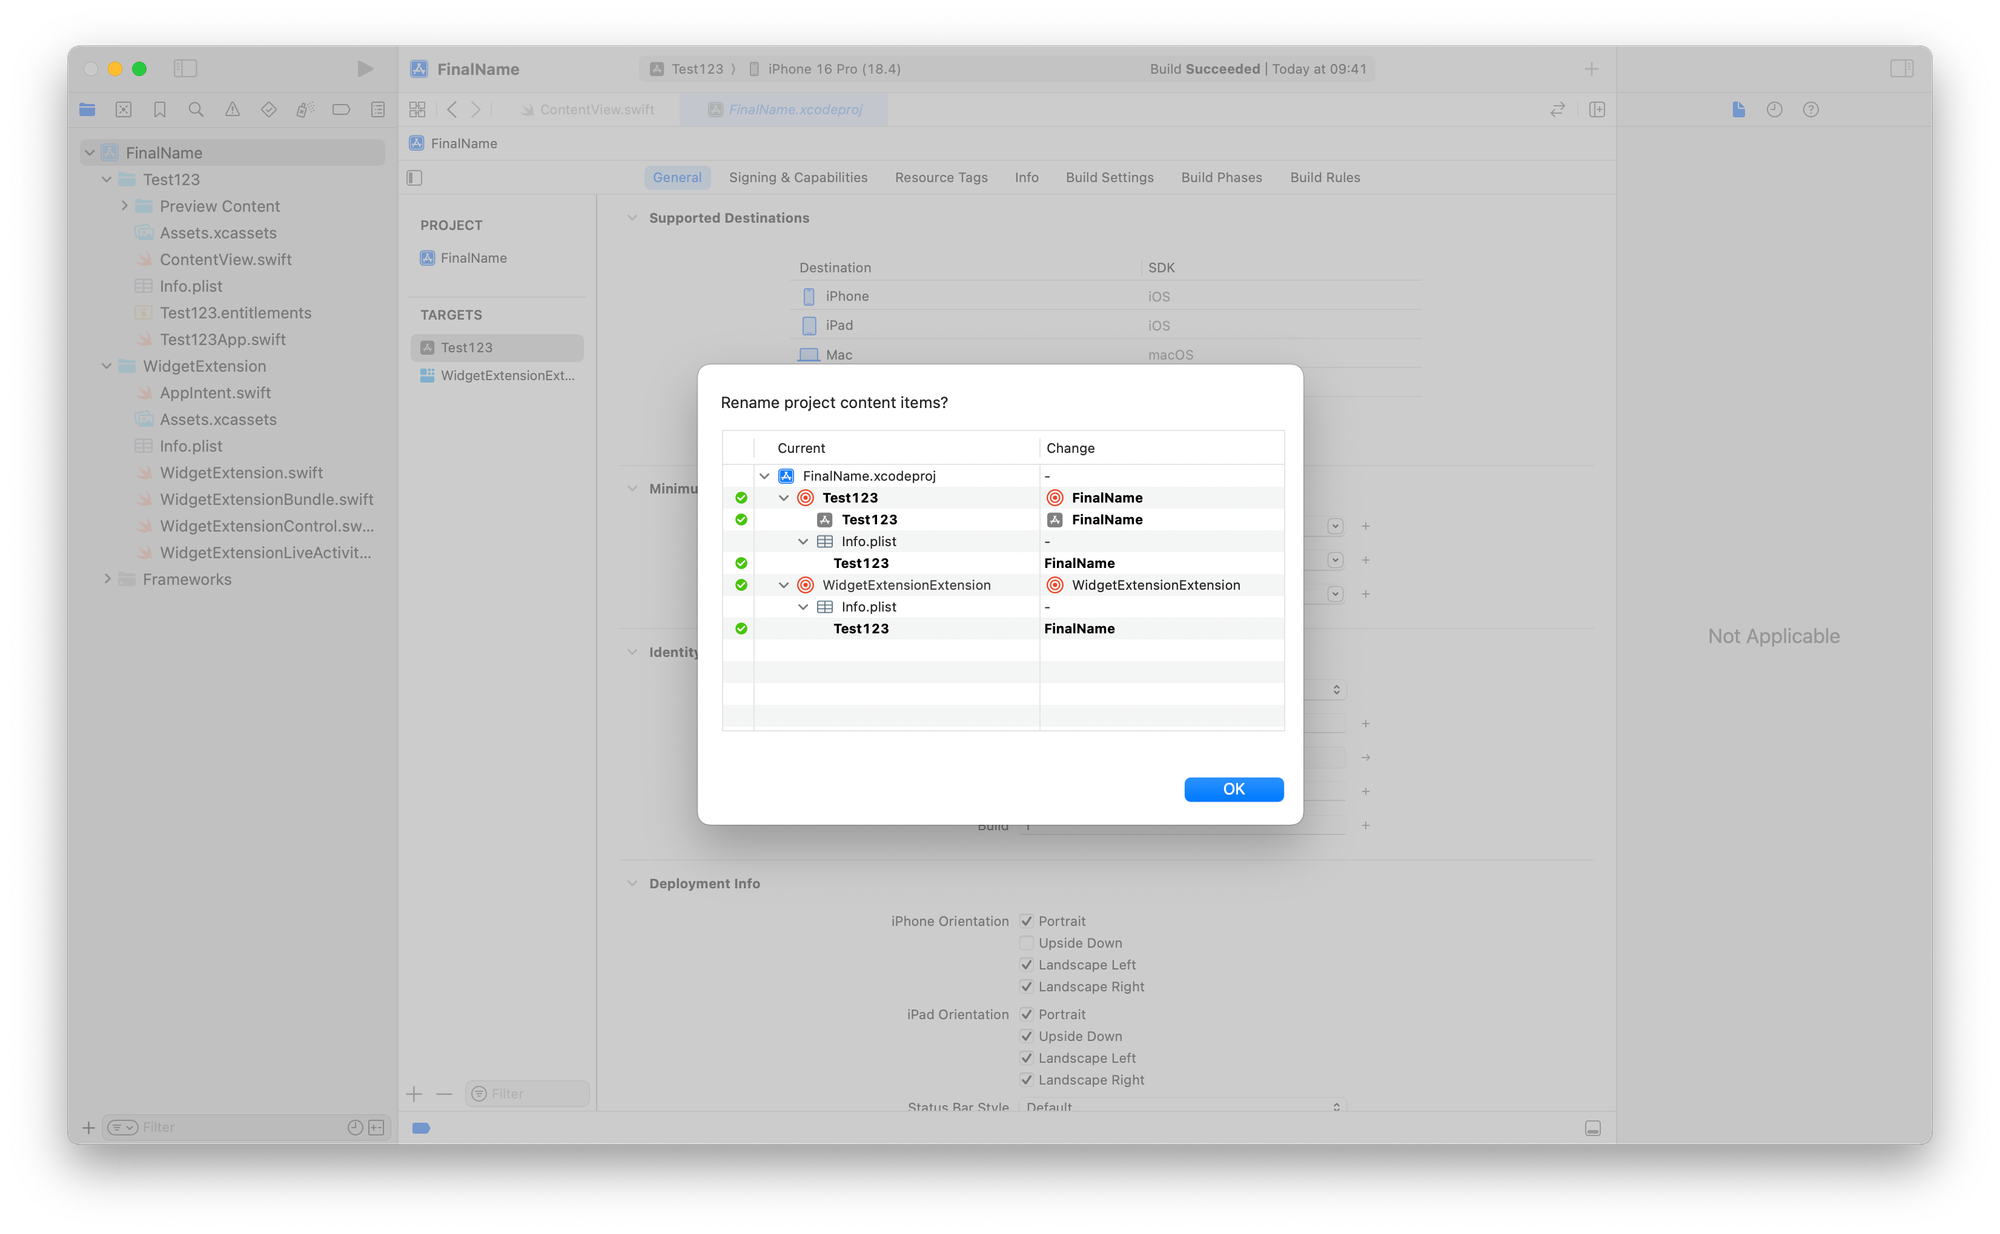
- In the Inspector panel on the right, under Identity and Type enter your new project name and press Enter.
- Xcode will prompt to rename associated schemes and targets:
- Ensure these are checked.

- Click Rename.
Step 2: Rename the schemes
- Click on the Schemes in the top center
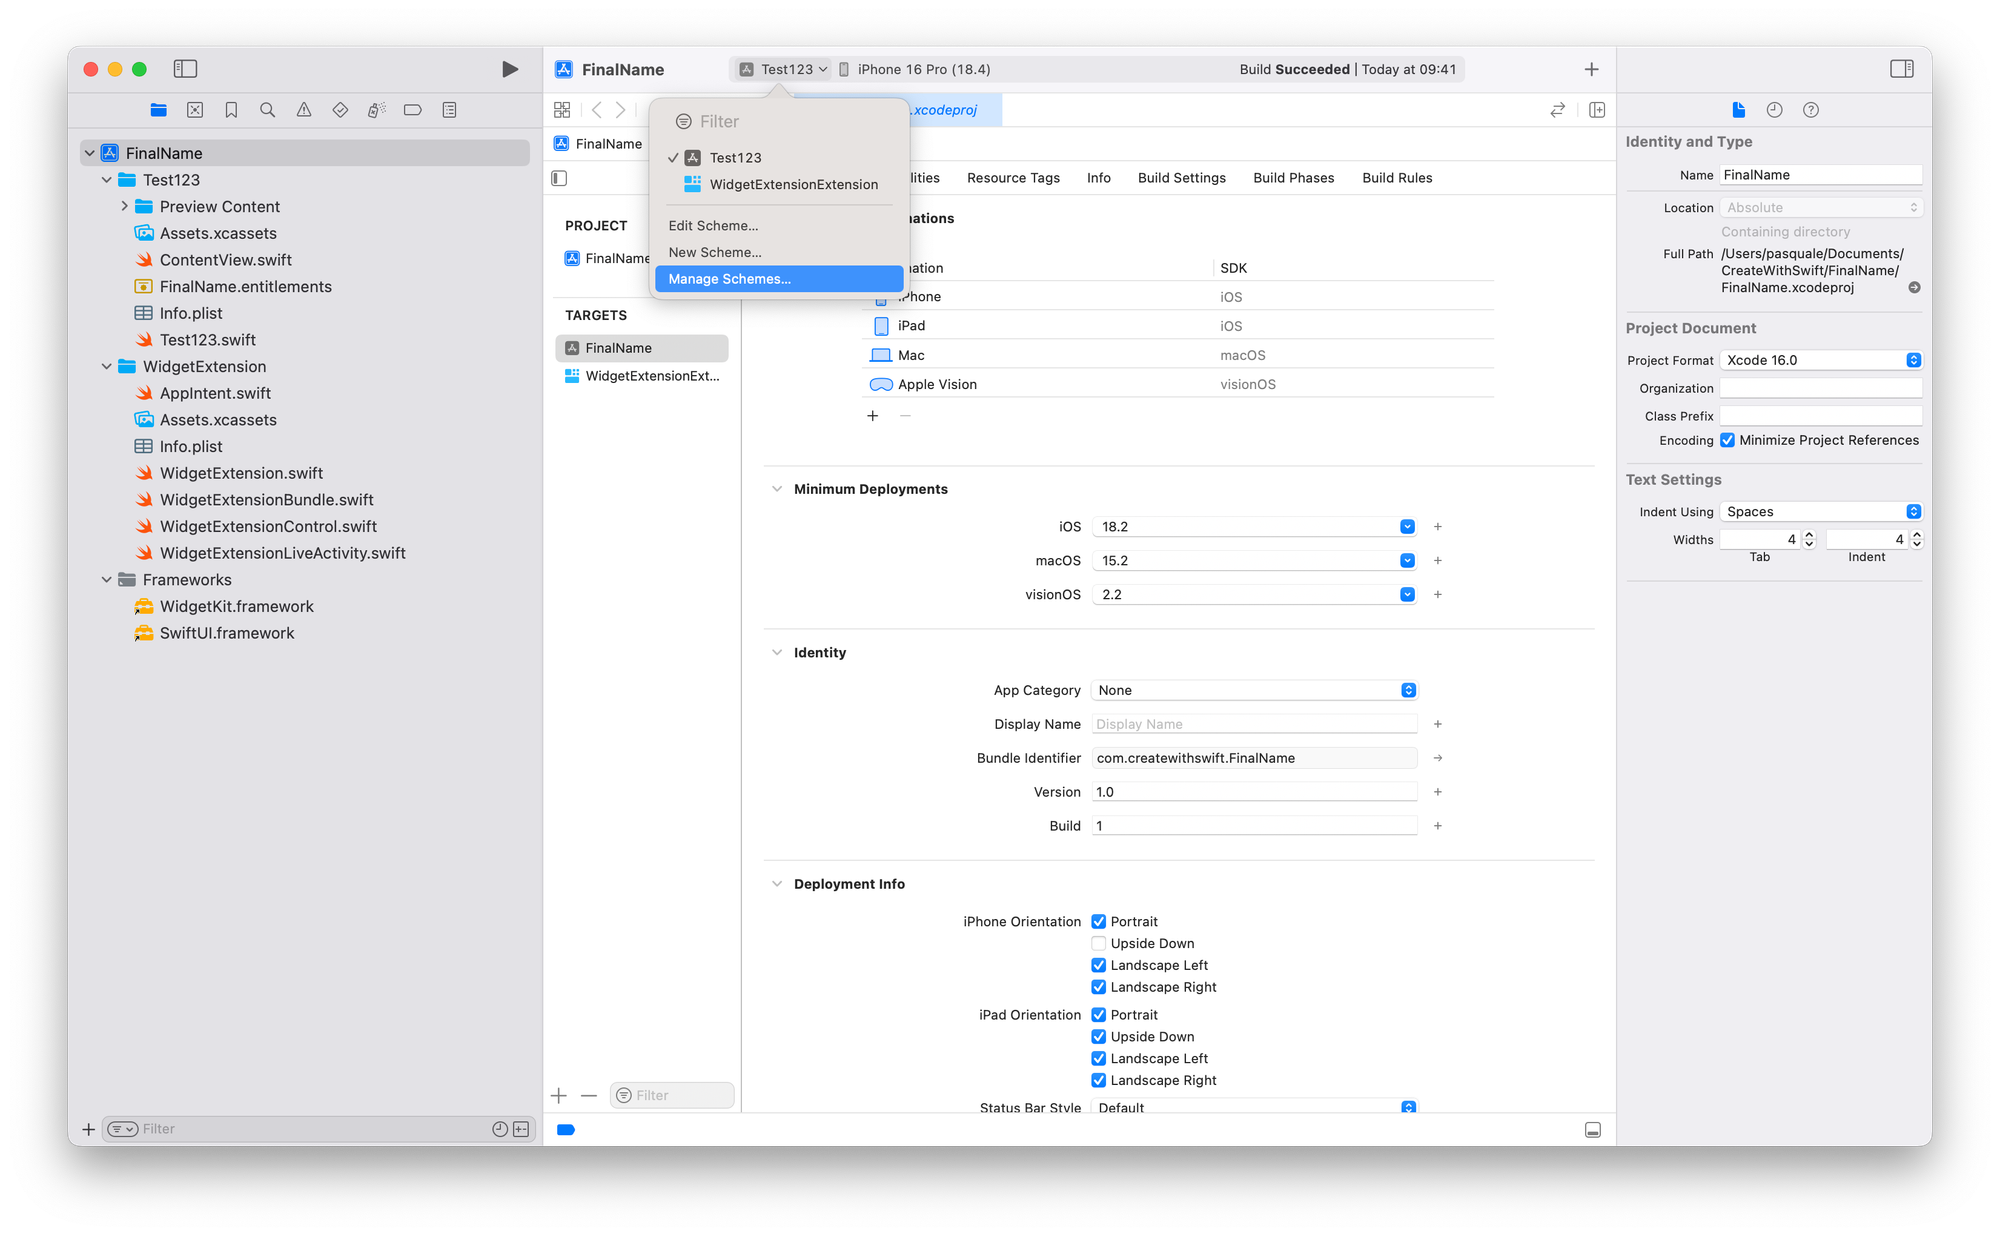
- Click on Manage Schemes

- Delete the Schemes by selecting the desired scheme and then clicking the minus button ("-") in the bottom left corner, and then clicking Delete.
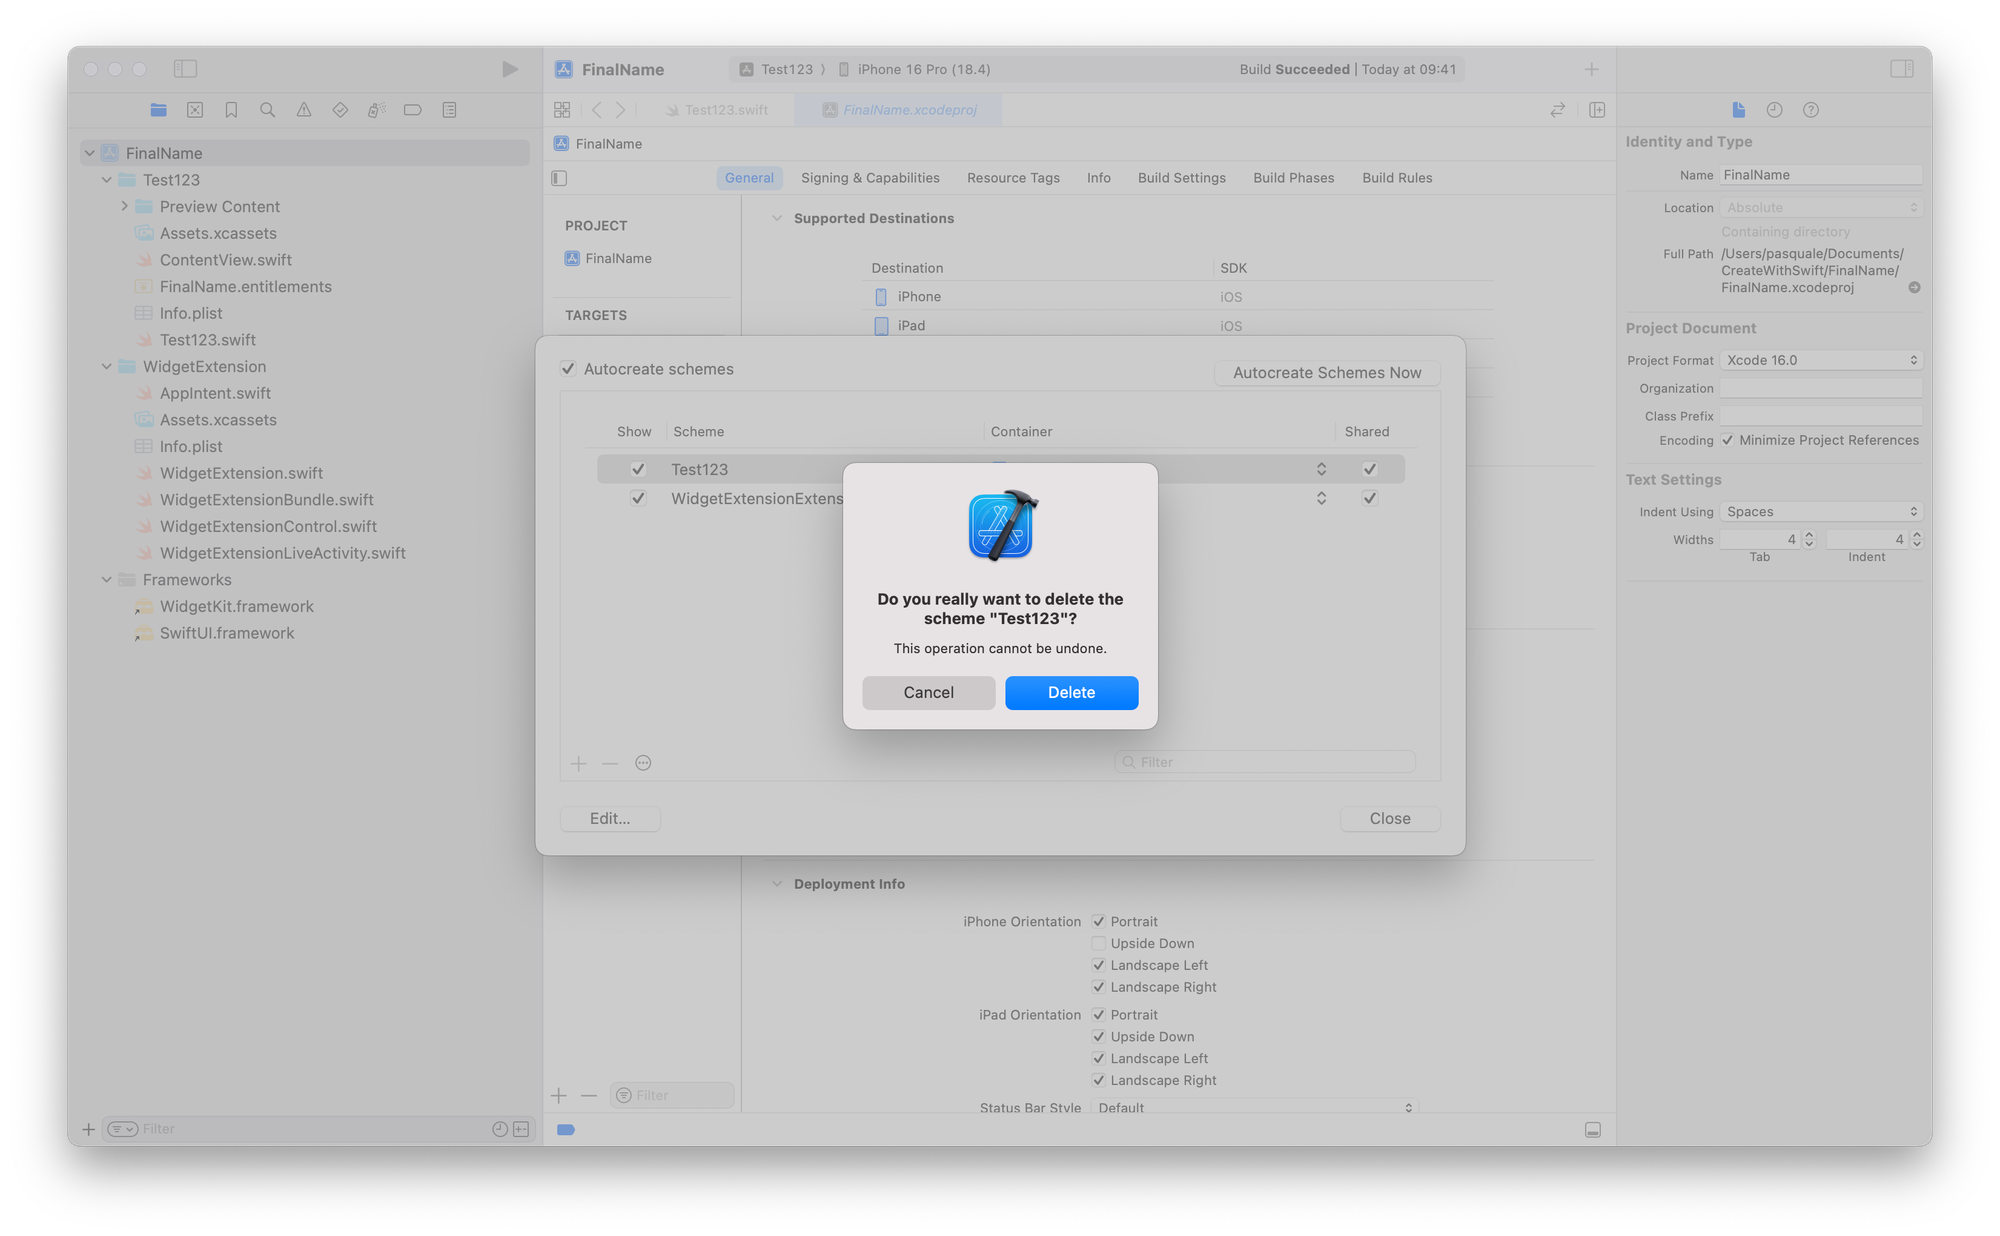
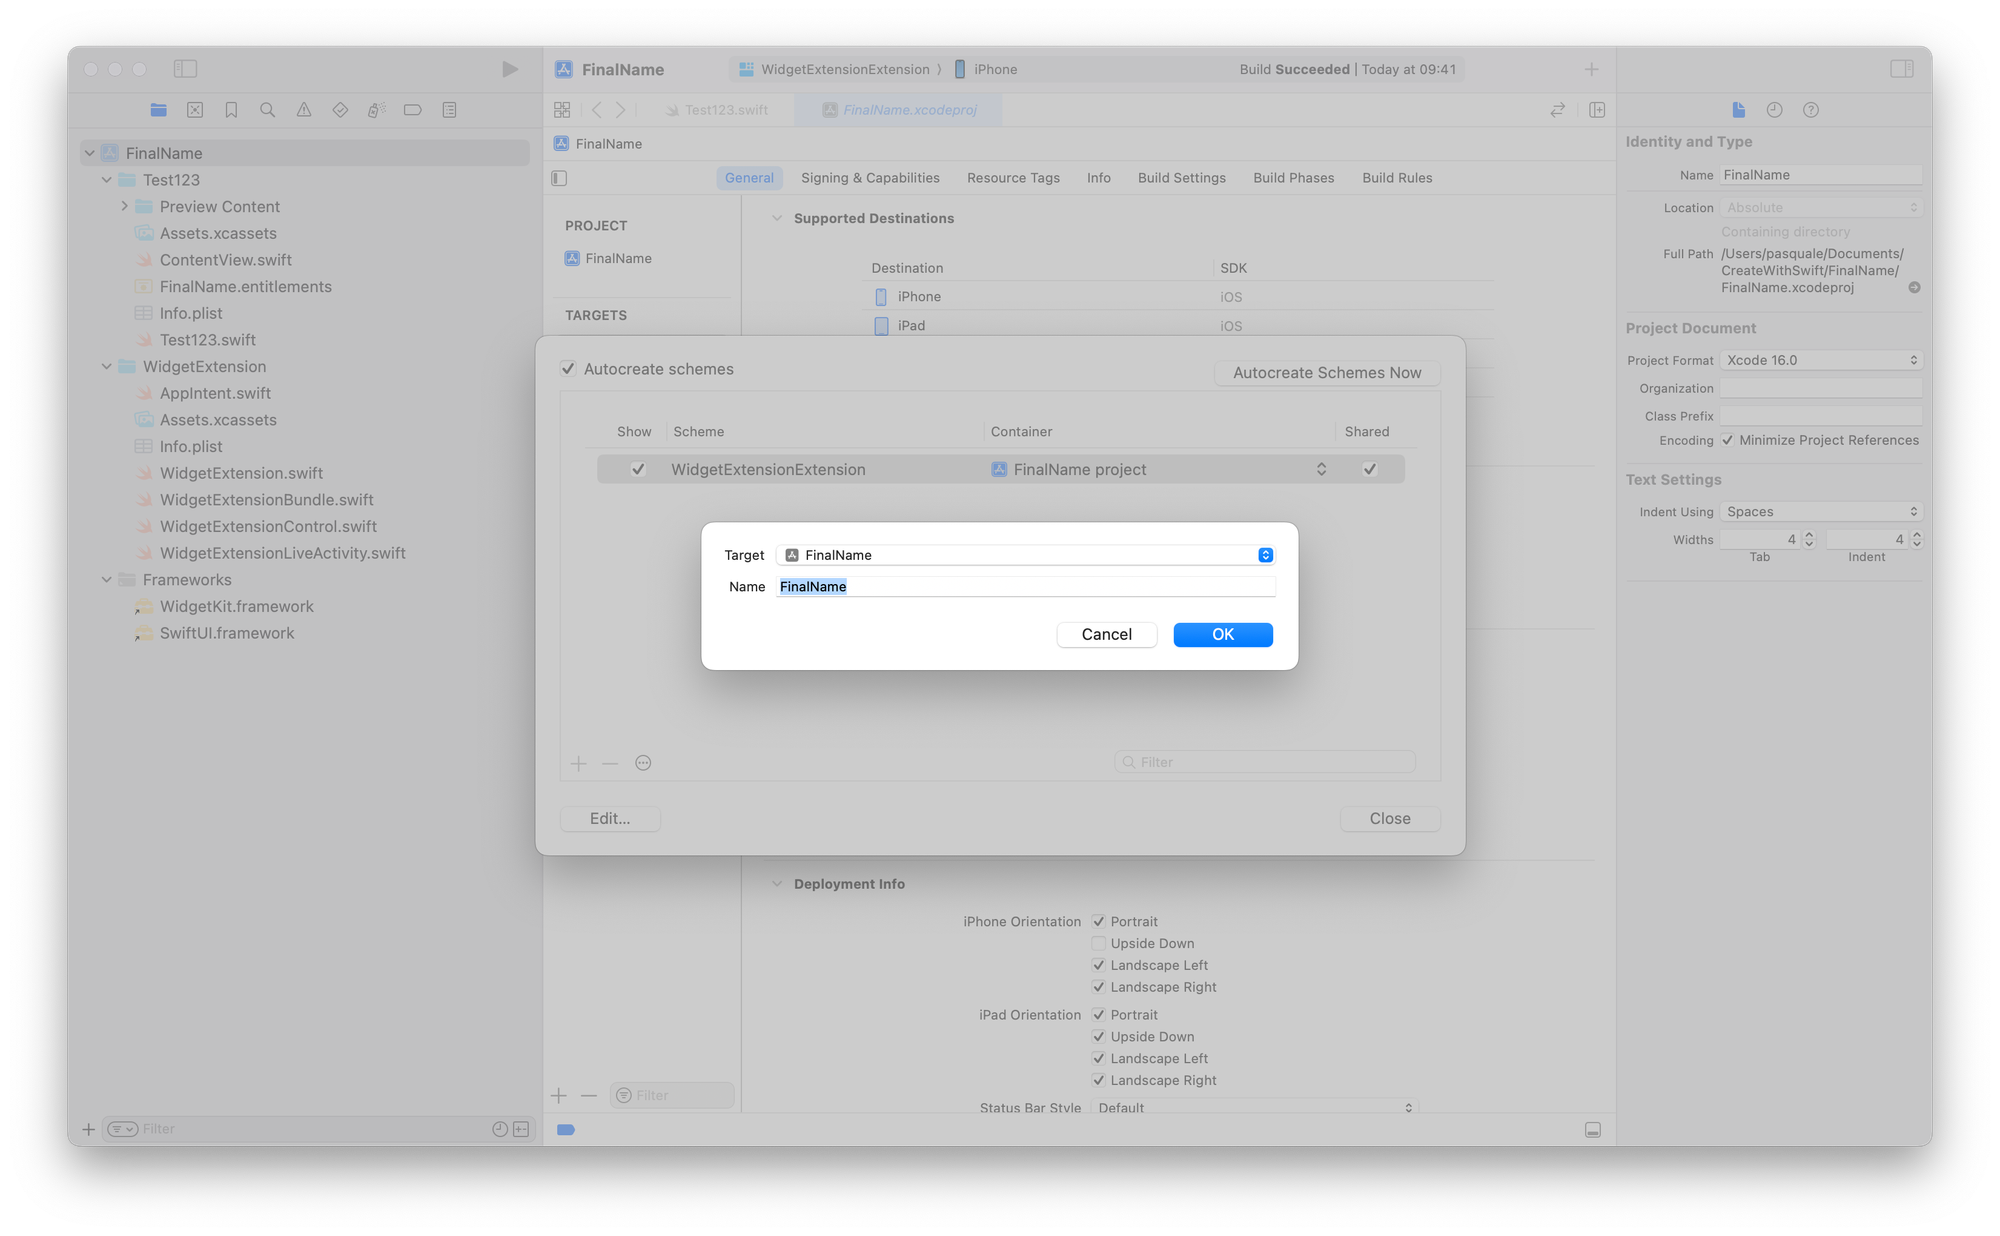
- Add new schemes by clicking the plus button ("+") and then confirming with OK.
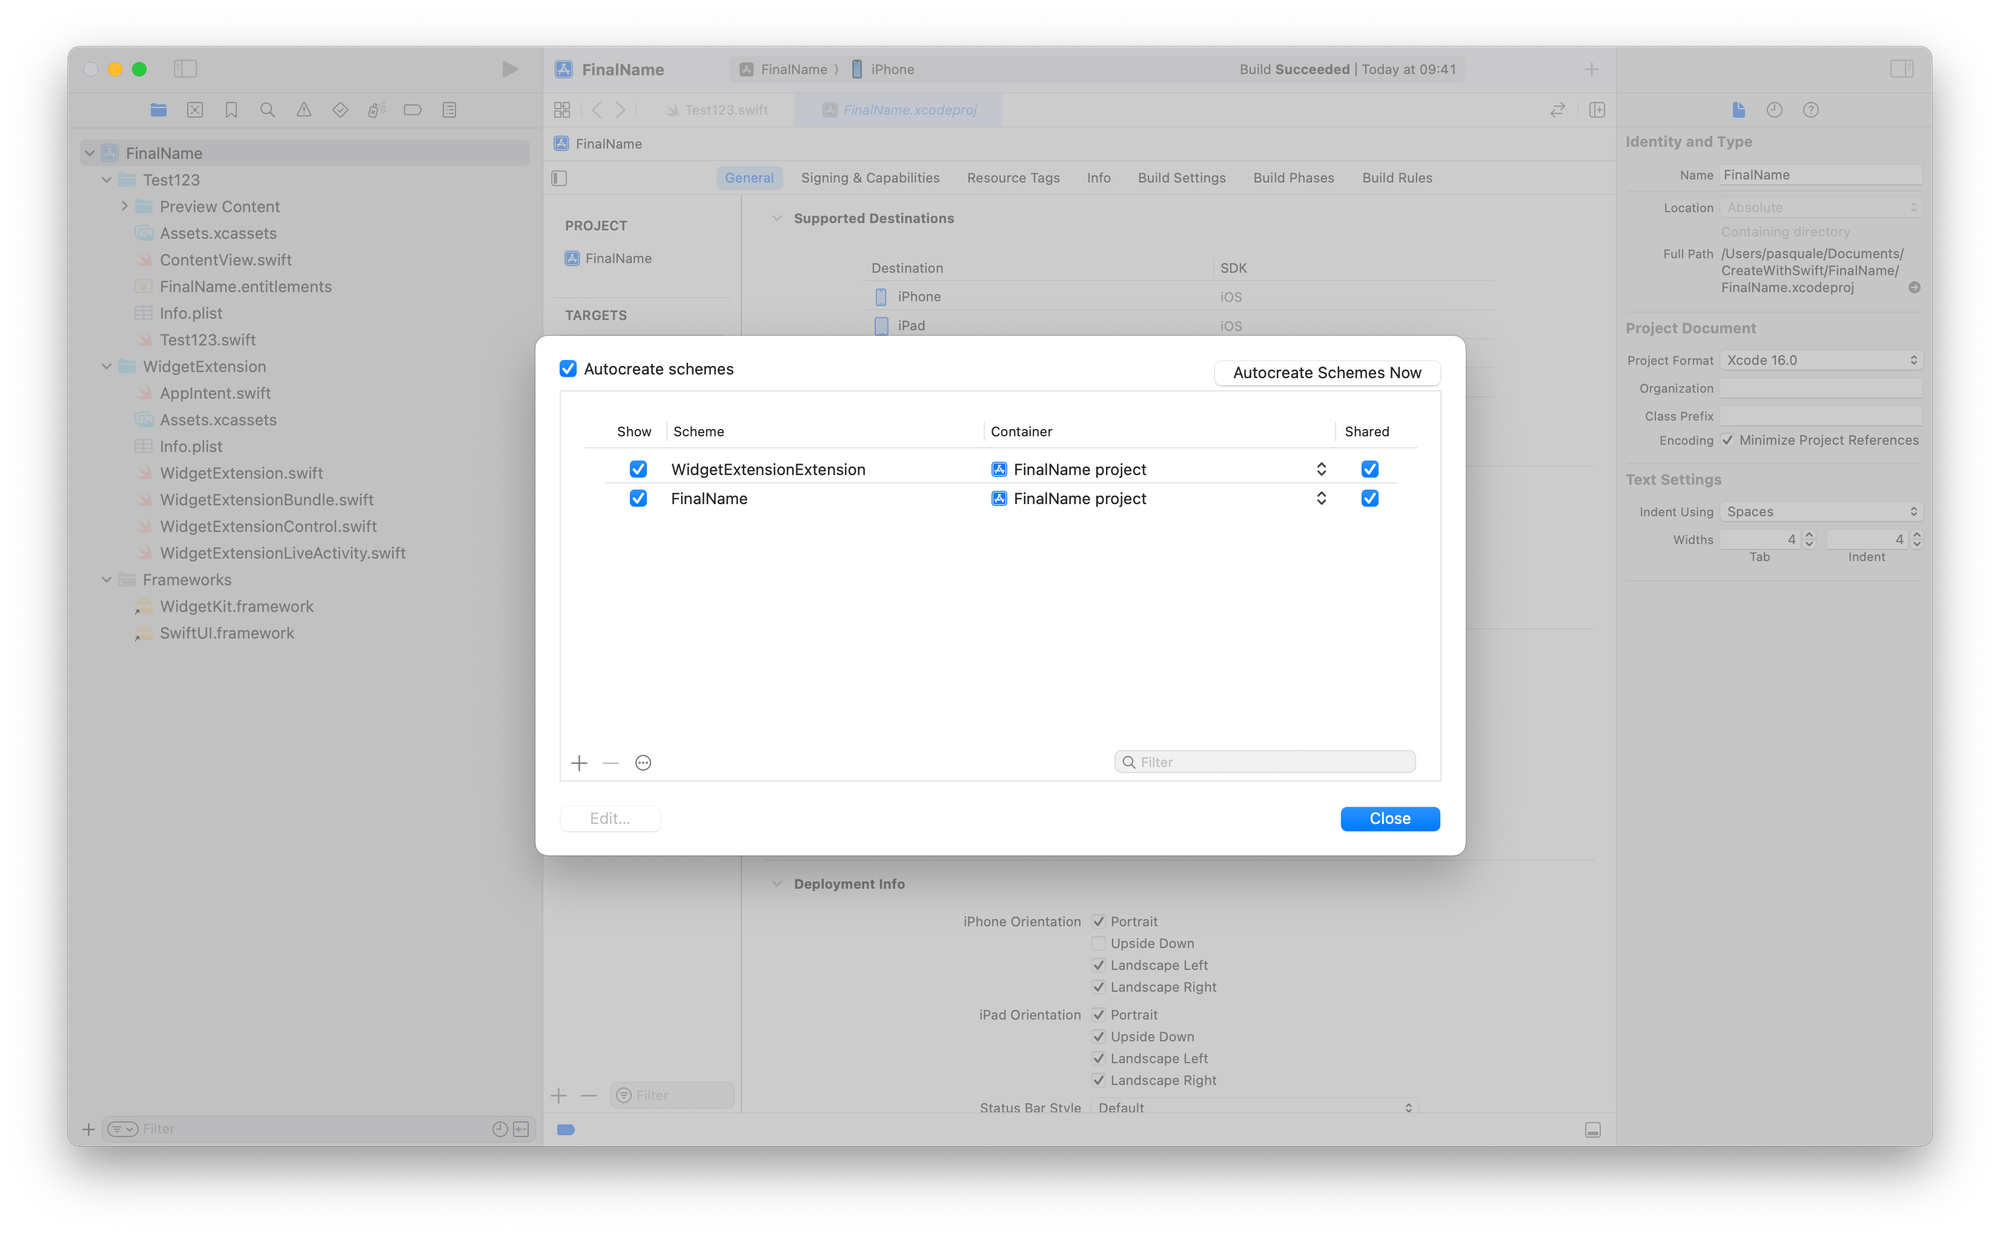
- You can sort the schemes by dragging and dropping them into the desired order.

- Close the Manage Schemes window by clicking the Close button. Make sure to select the desired scheme in the top center right after.
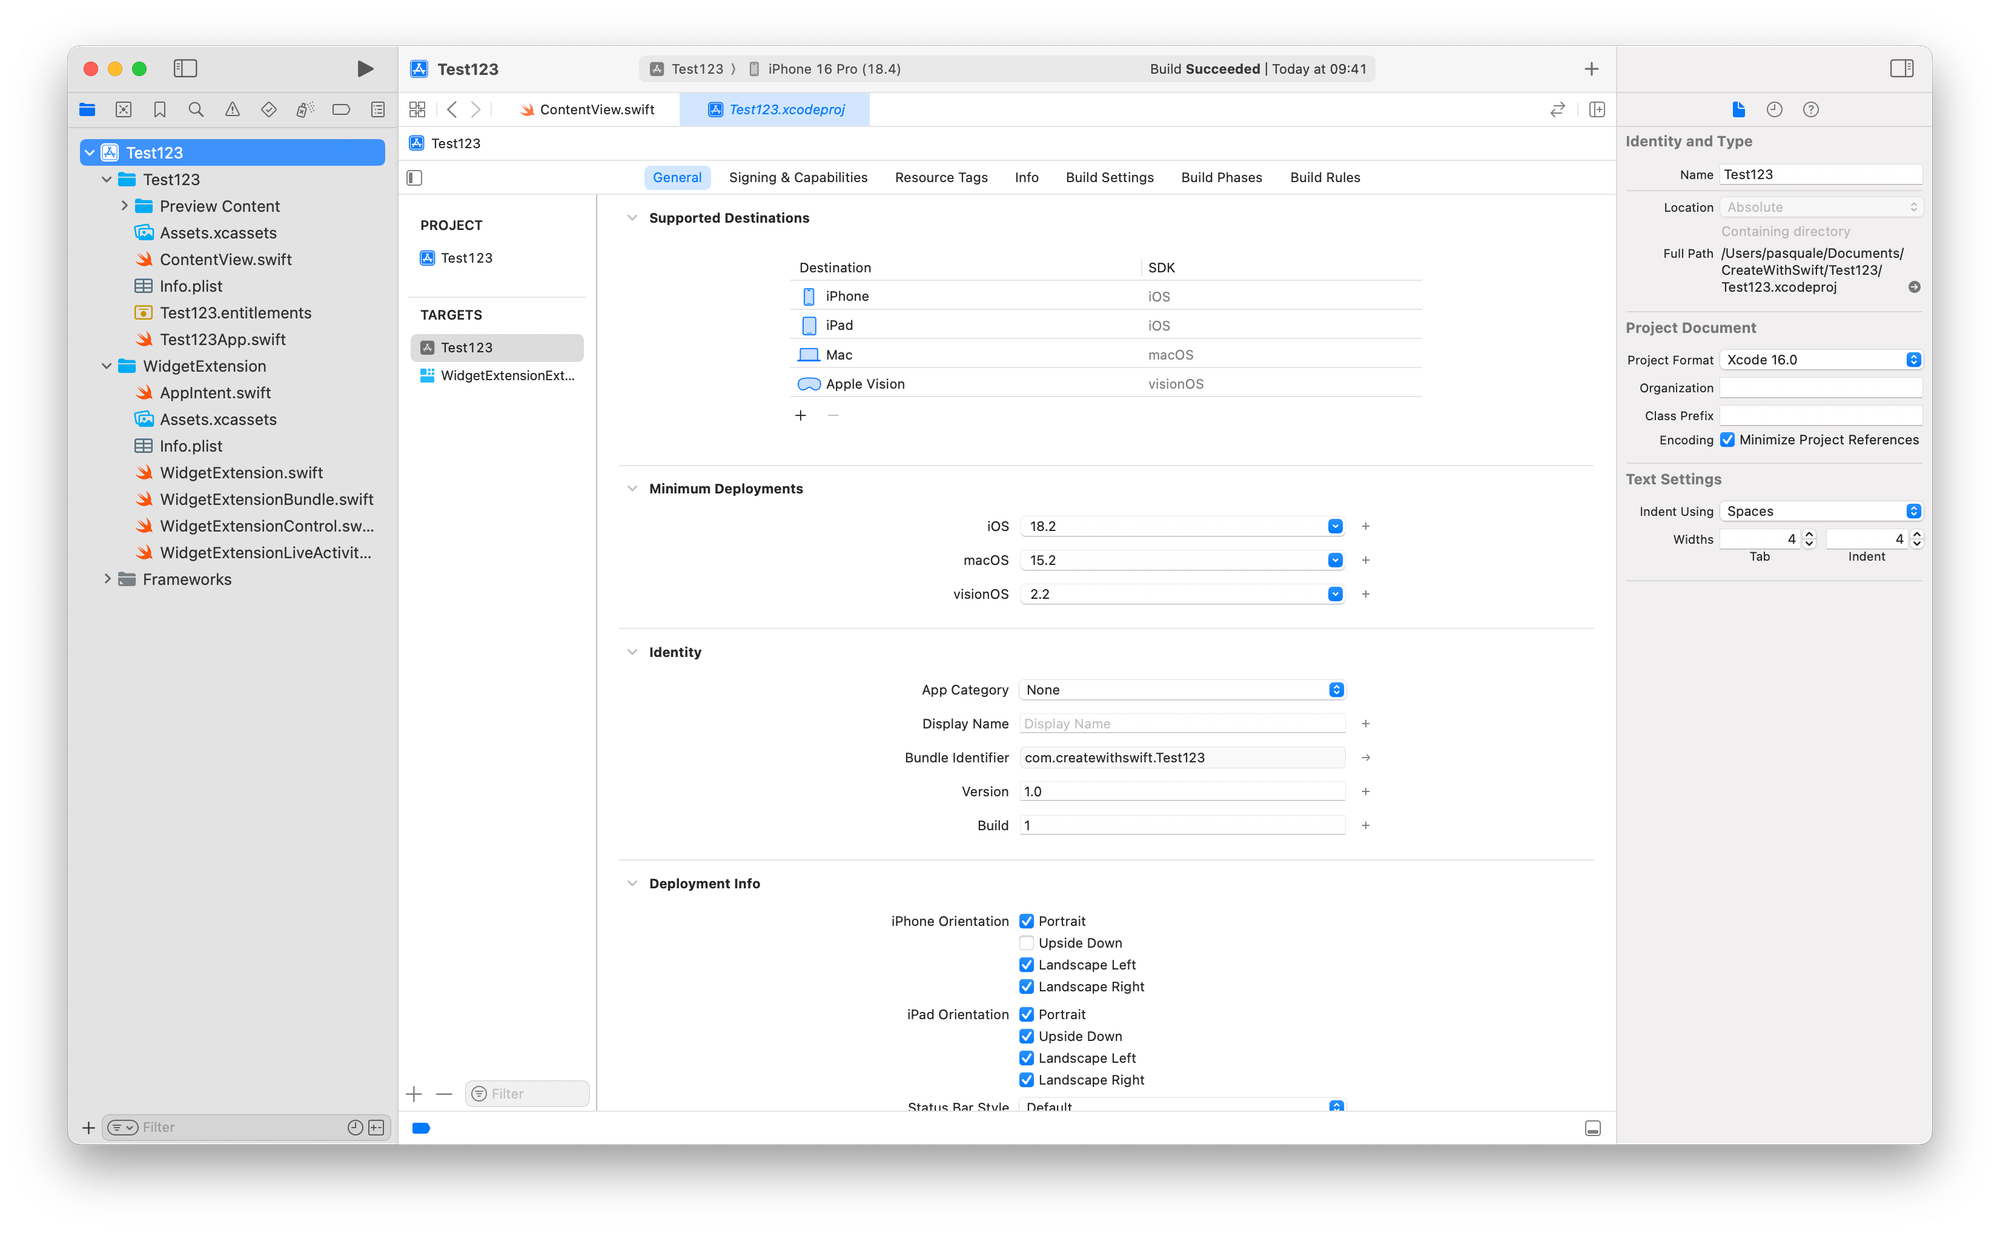
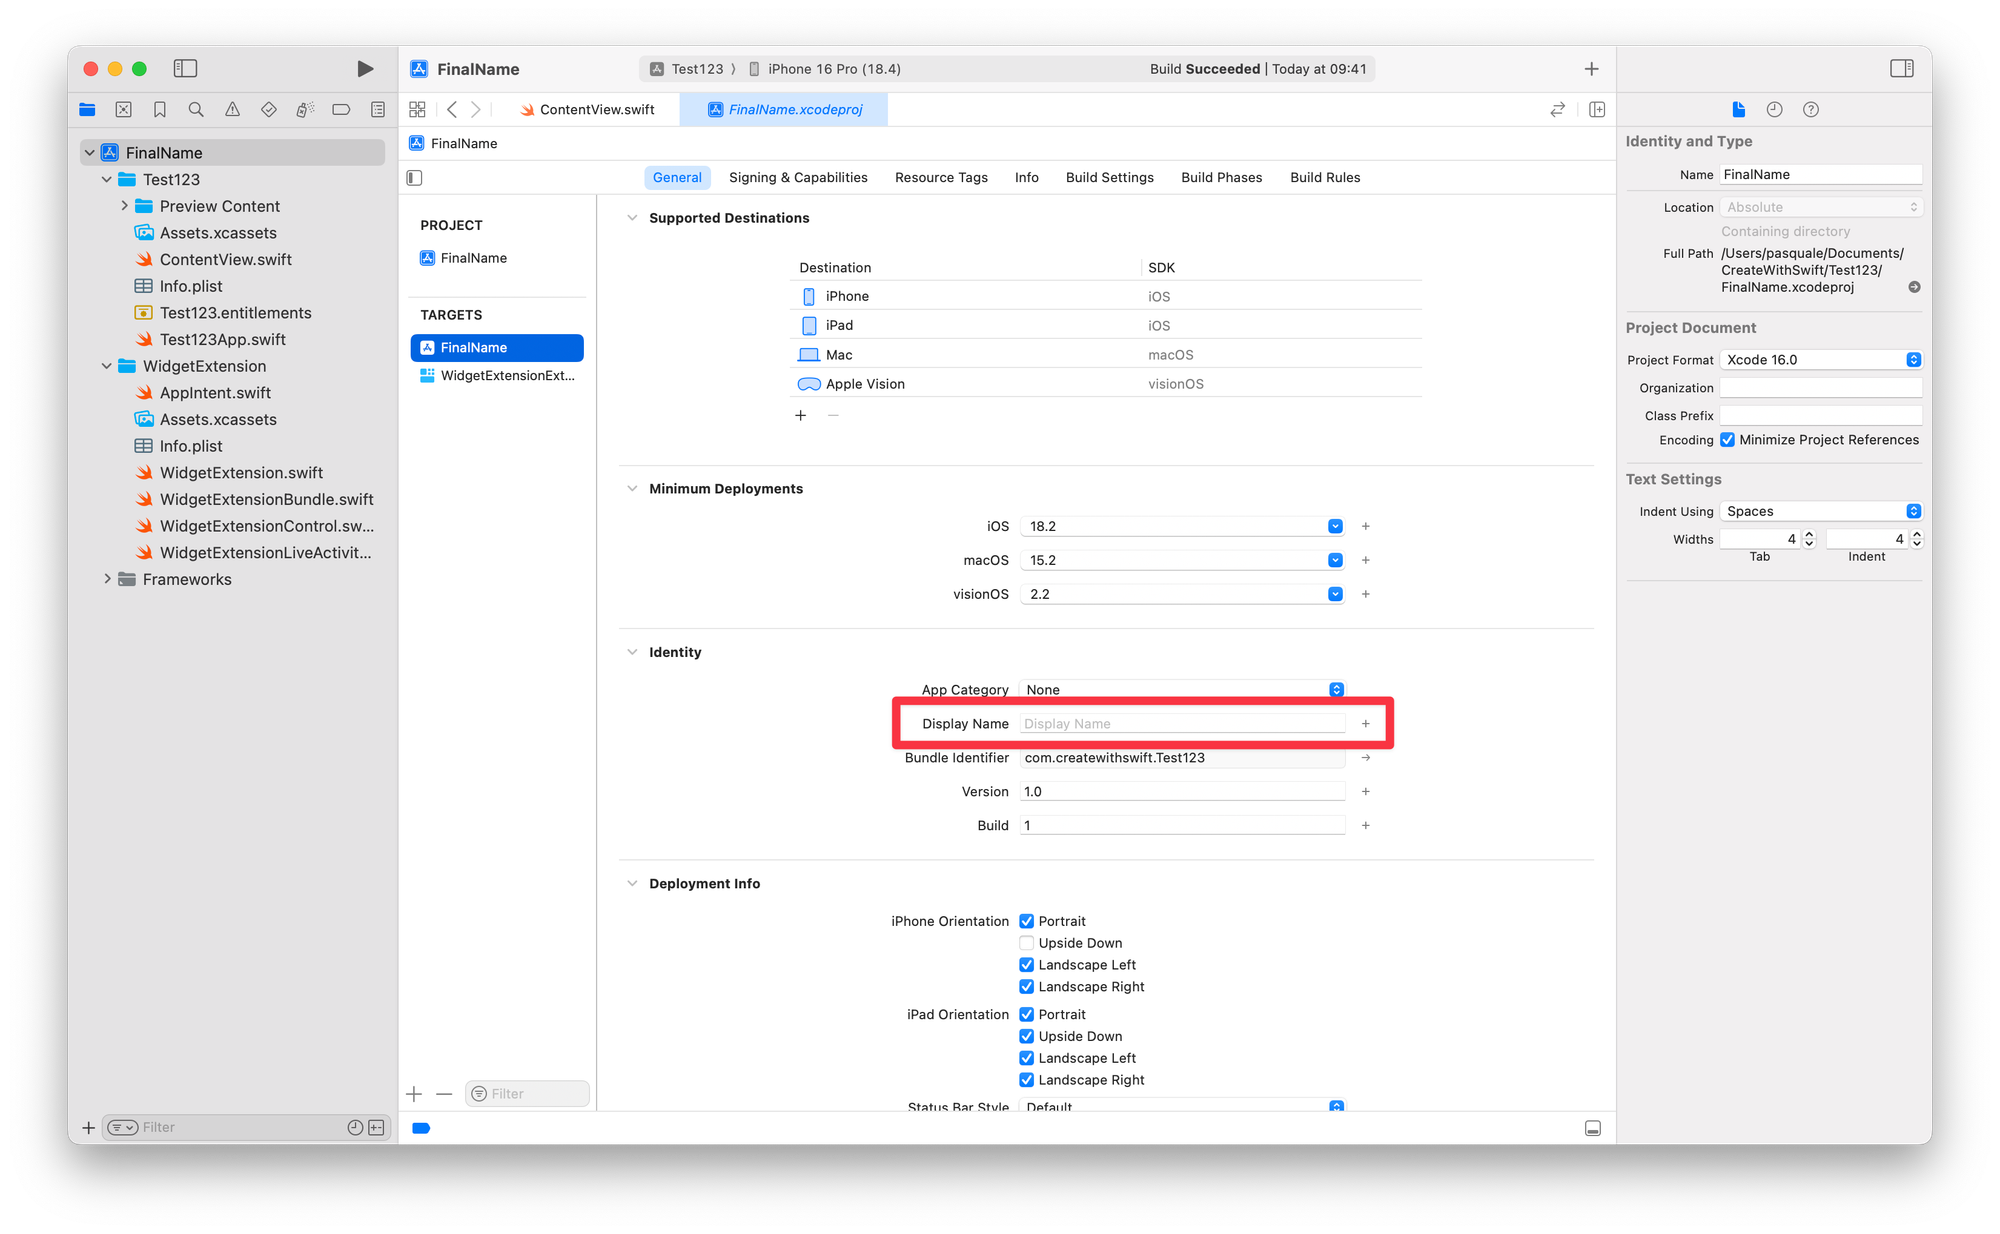
Step 3: Update the Target's information
Always with the project file selected, click on the Targets:
- Under General, check the Display Name (the visible app name on the home screen), if you changed it already, or leave it empty if you never did.
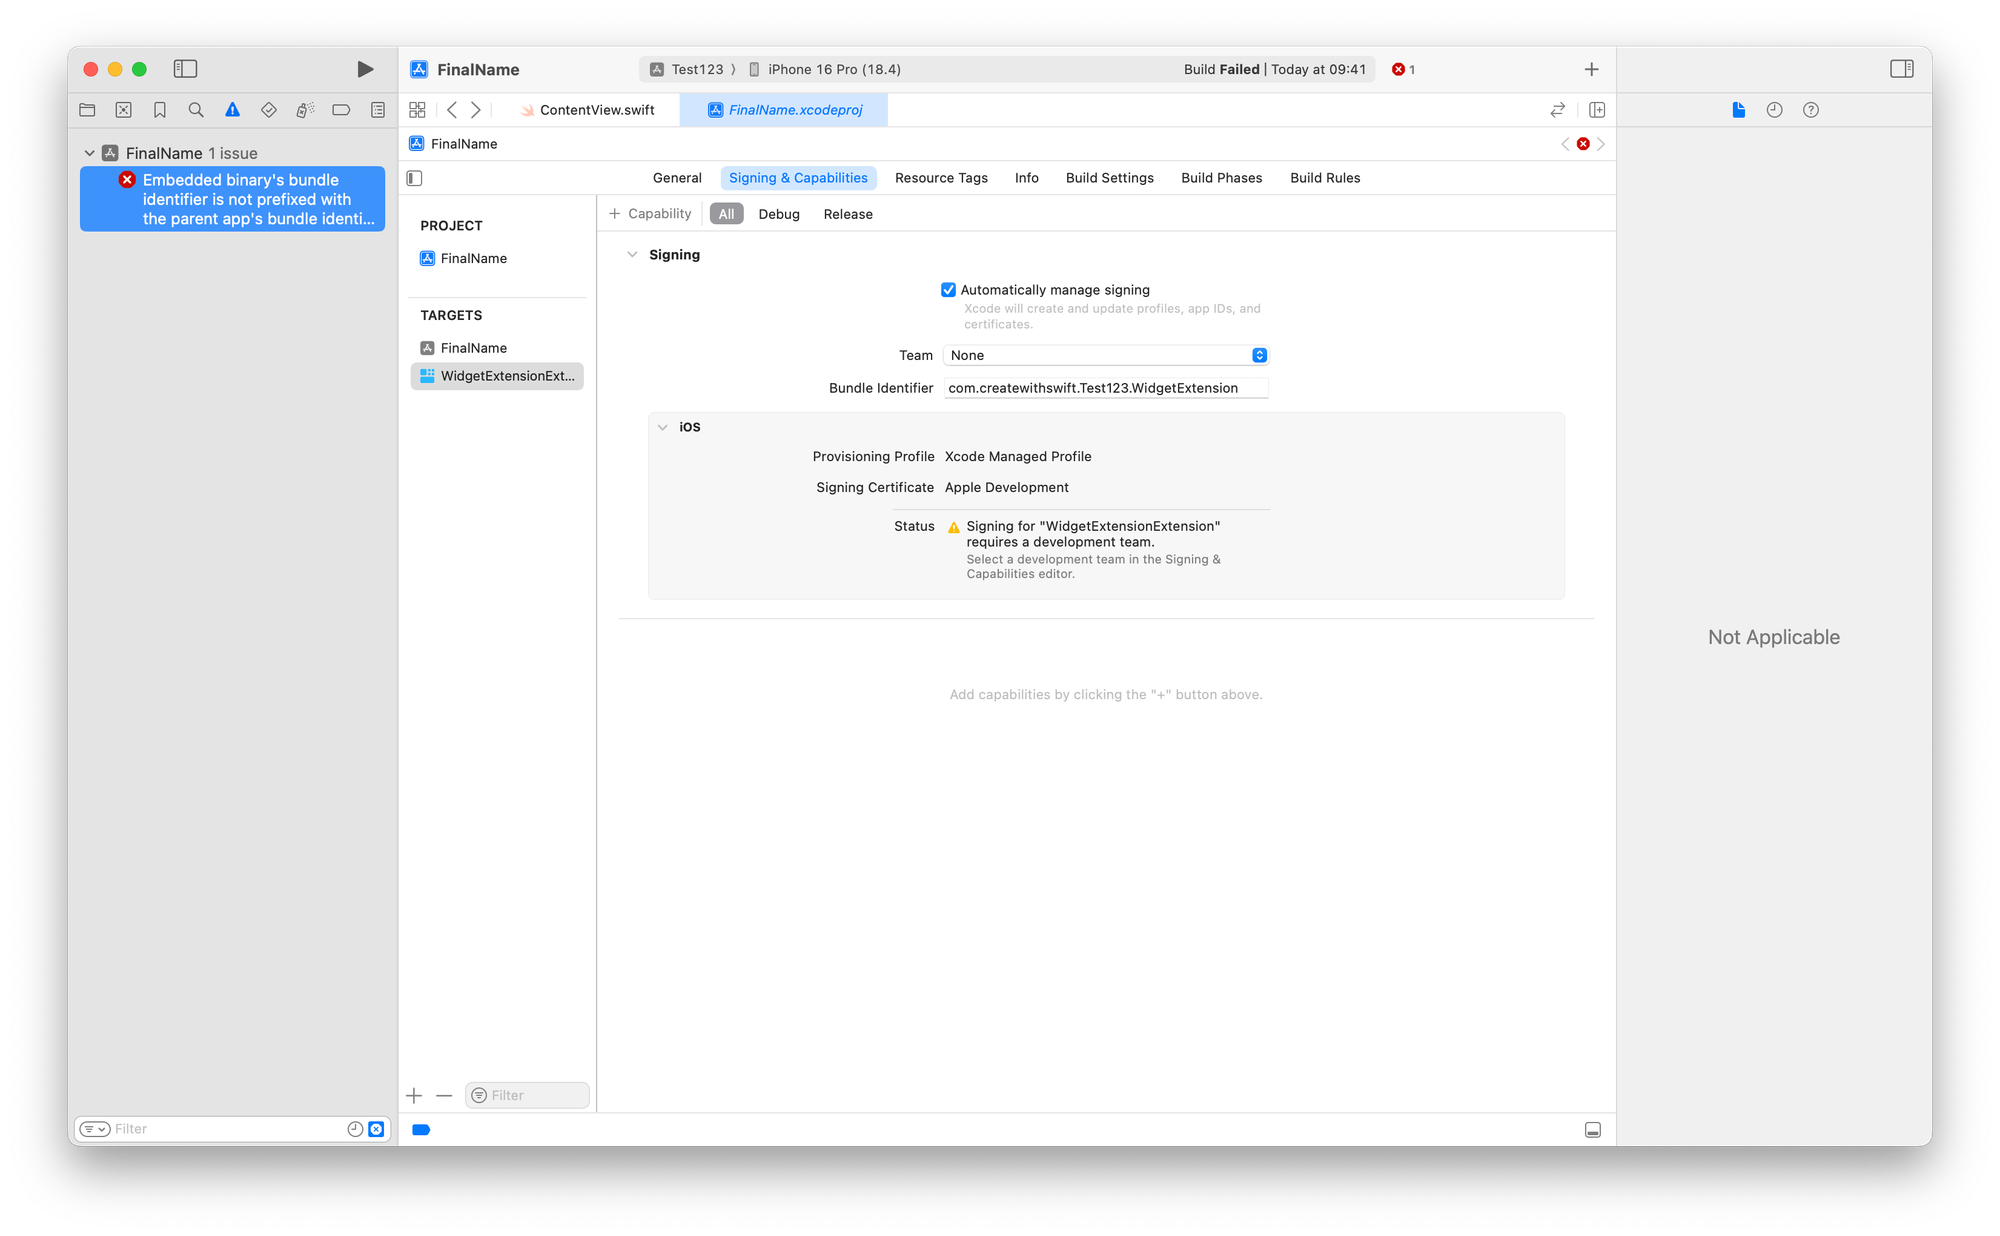
- Under Signing & Capabilities: In the Signing section, update the Bundle Identifier (e.g.: com.yourcompany.NewProjectName).
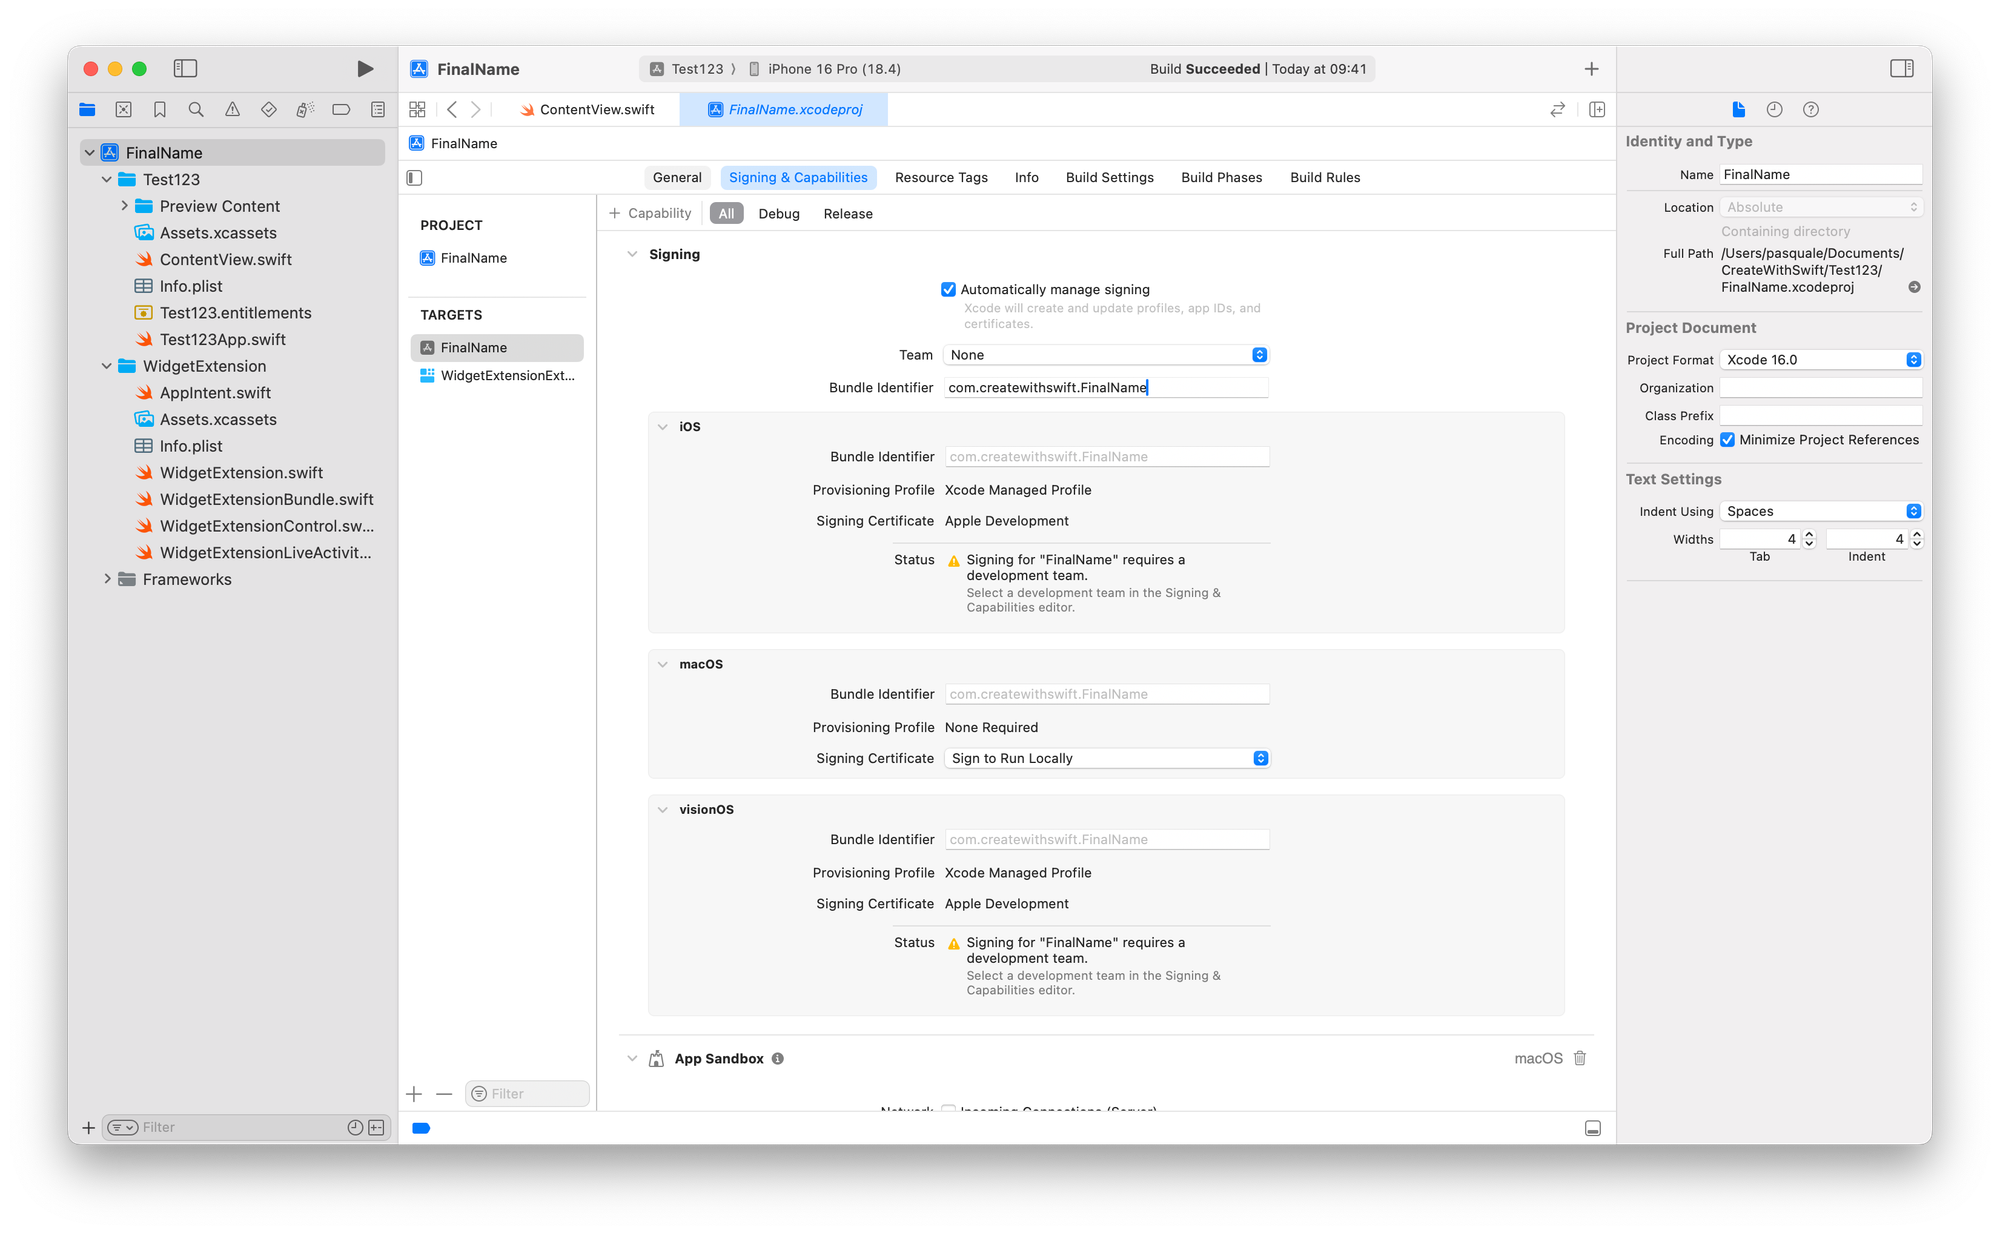
- Do the same for all the other targets, otherwise, you will get a build error.

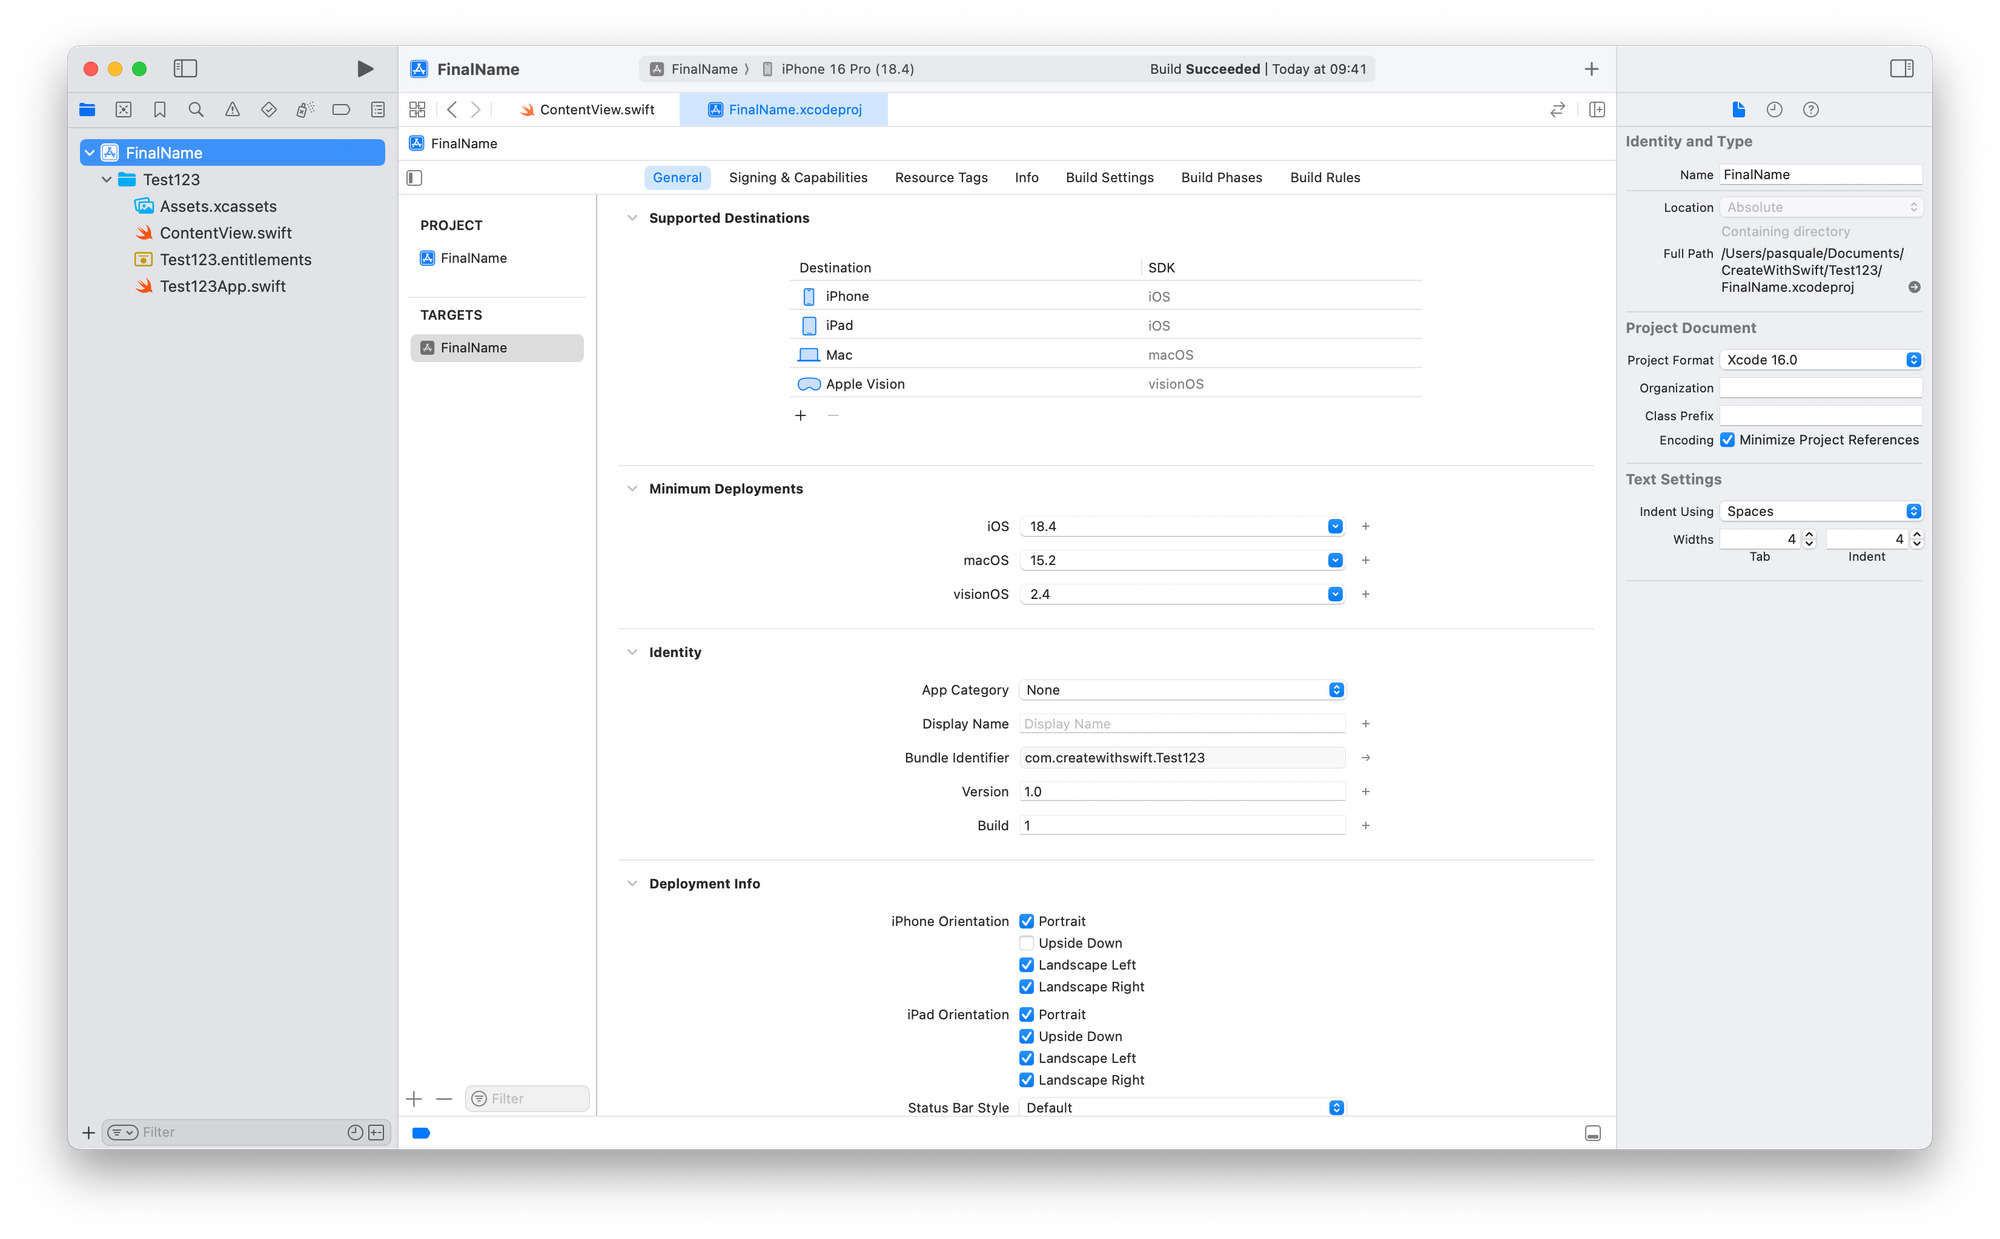
Step 4: Edit the Build Settings
- With the project file selected in the Navigator, on the Right, under Build Settings

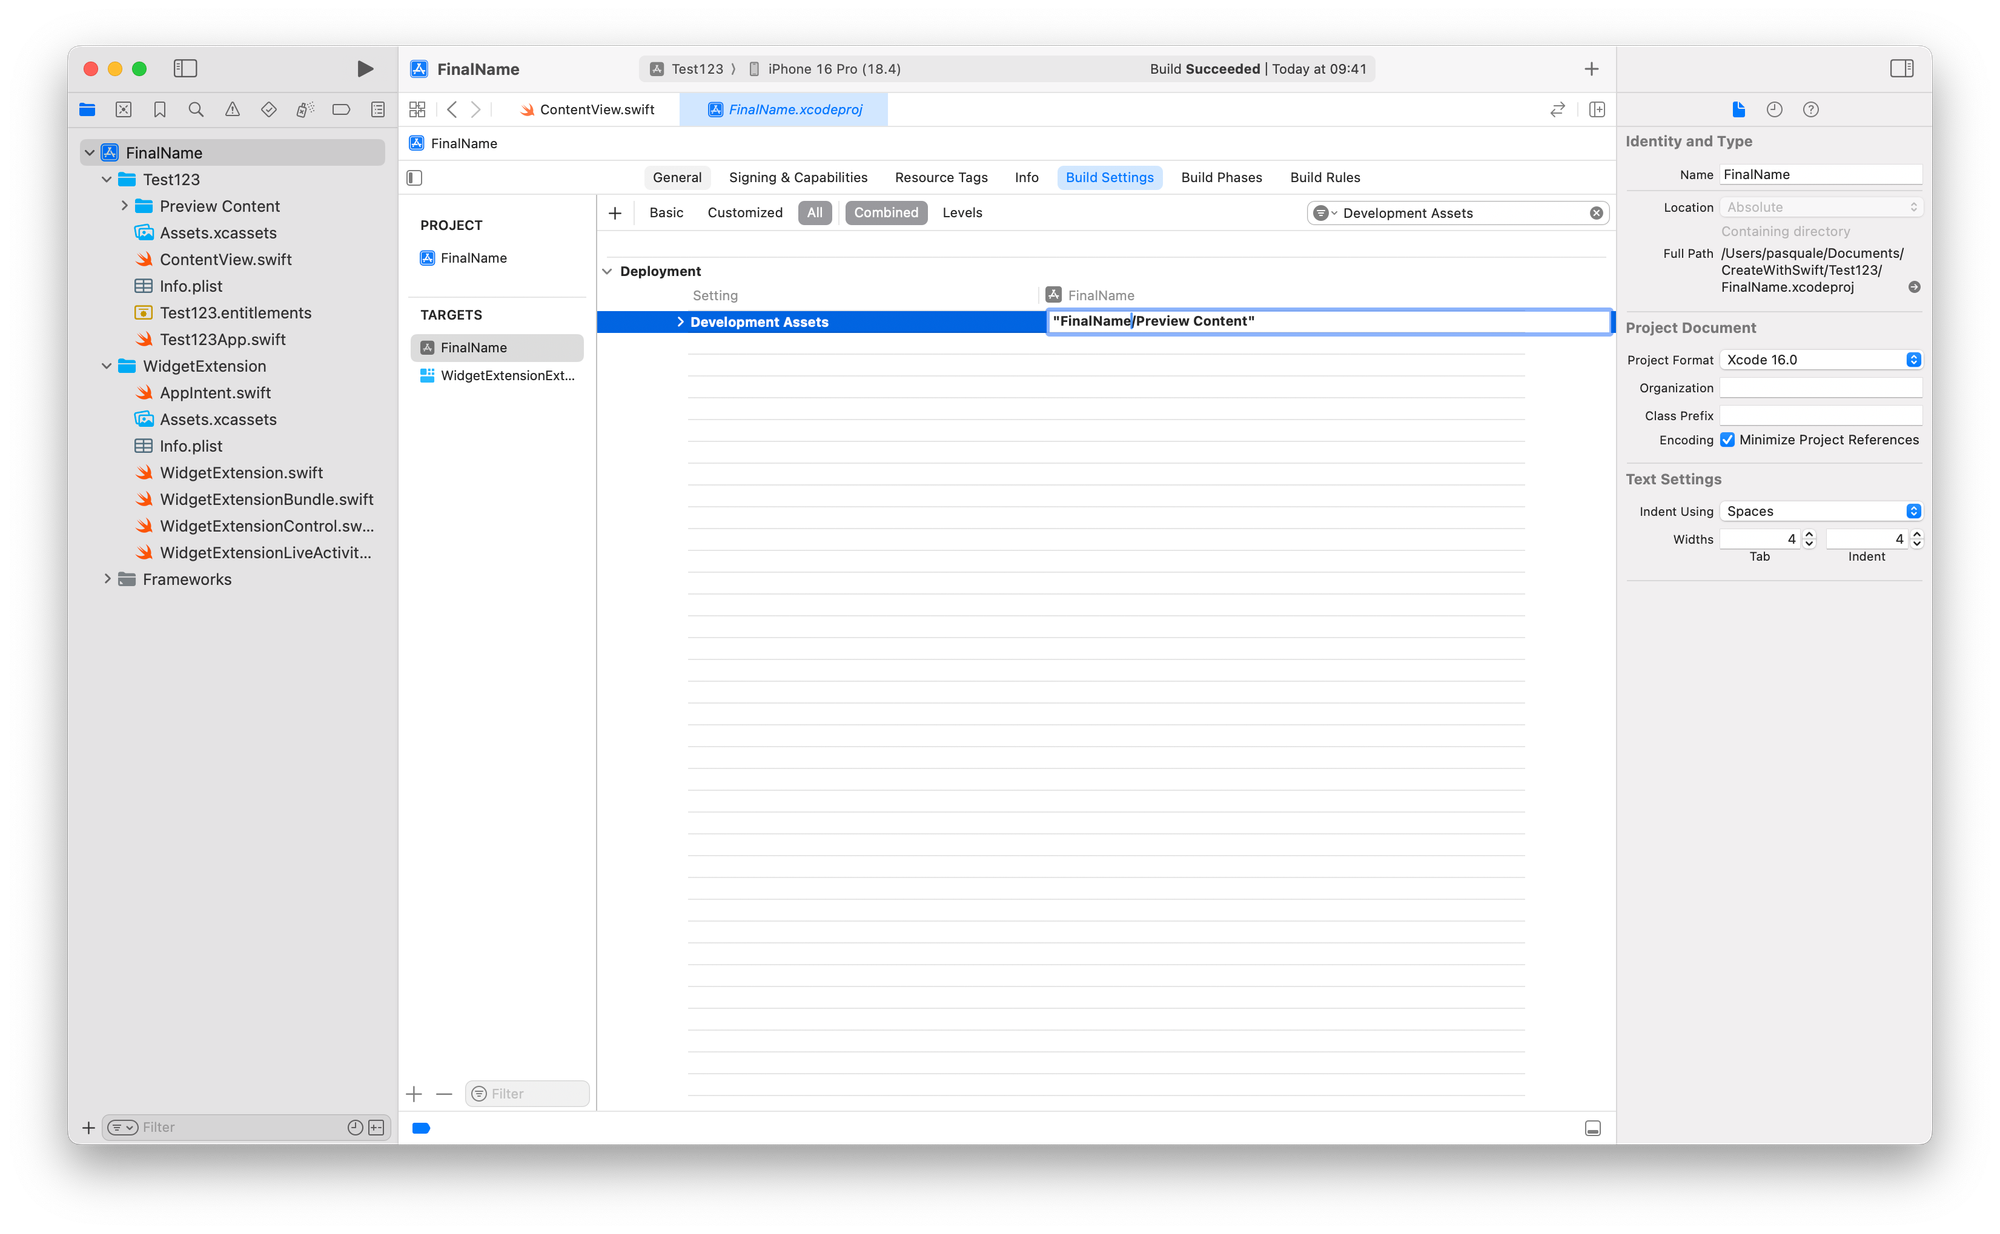
Step 4.1: Edit the Preview content location (If you have it)
- Look for Development Assets
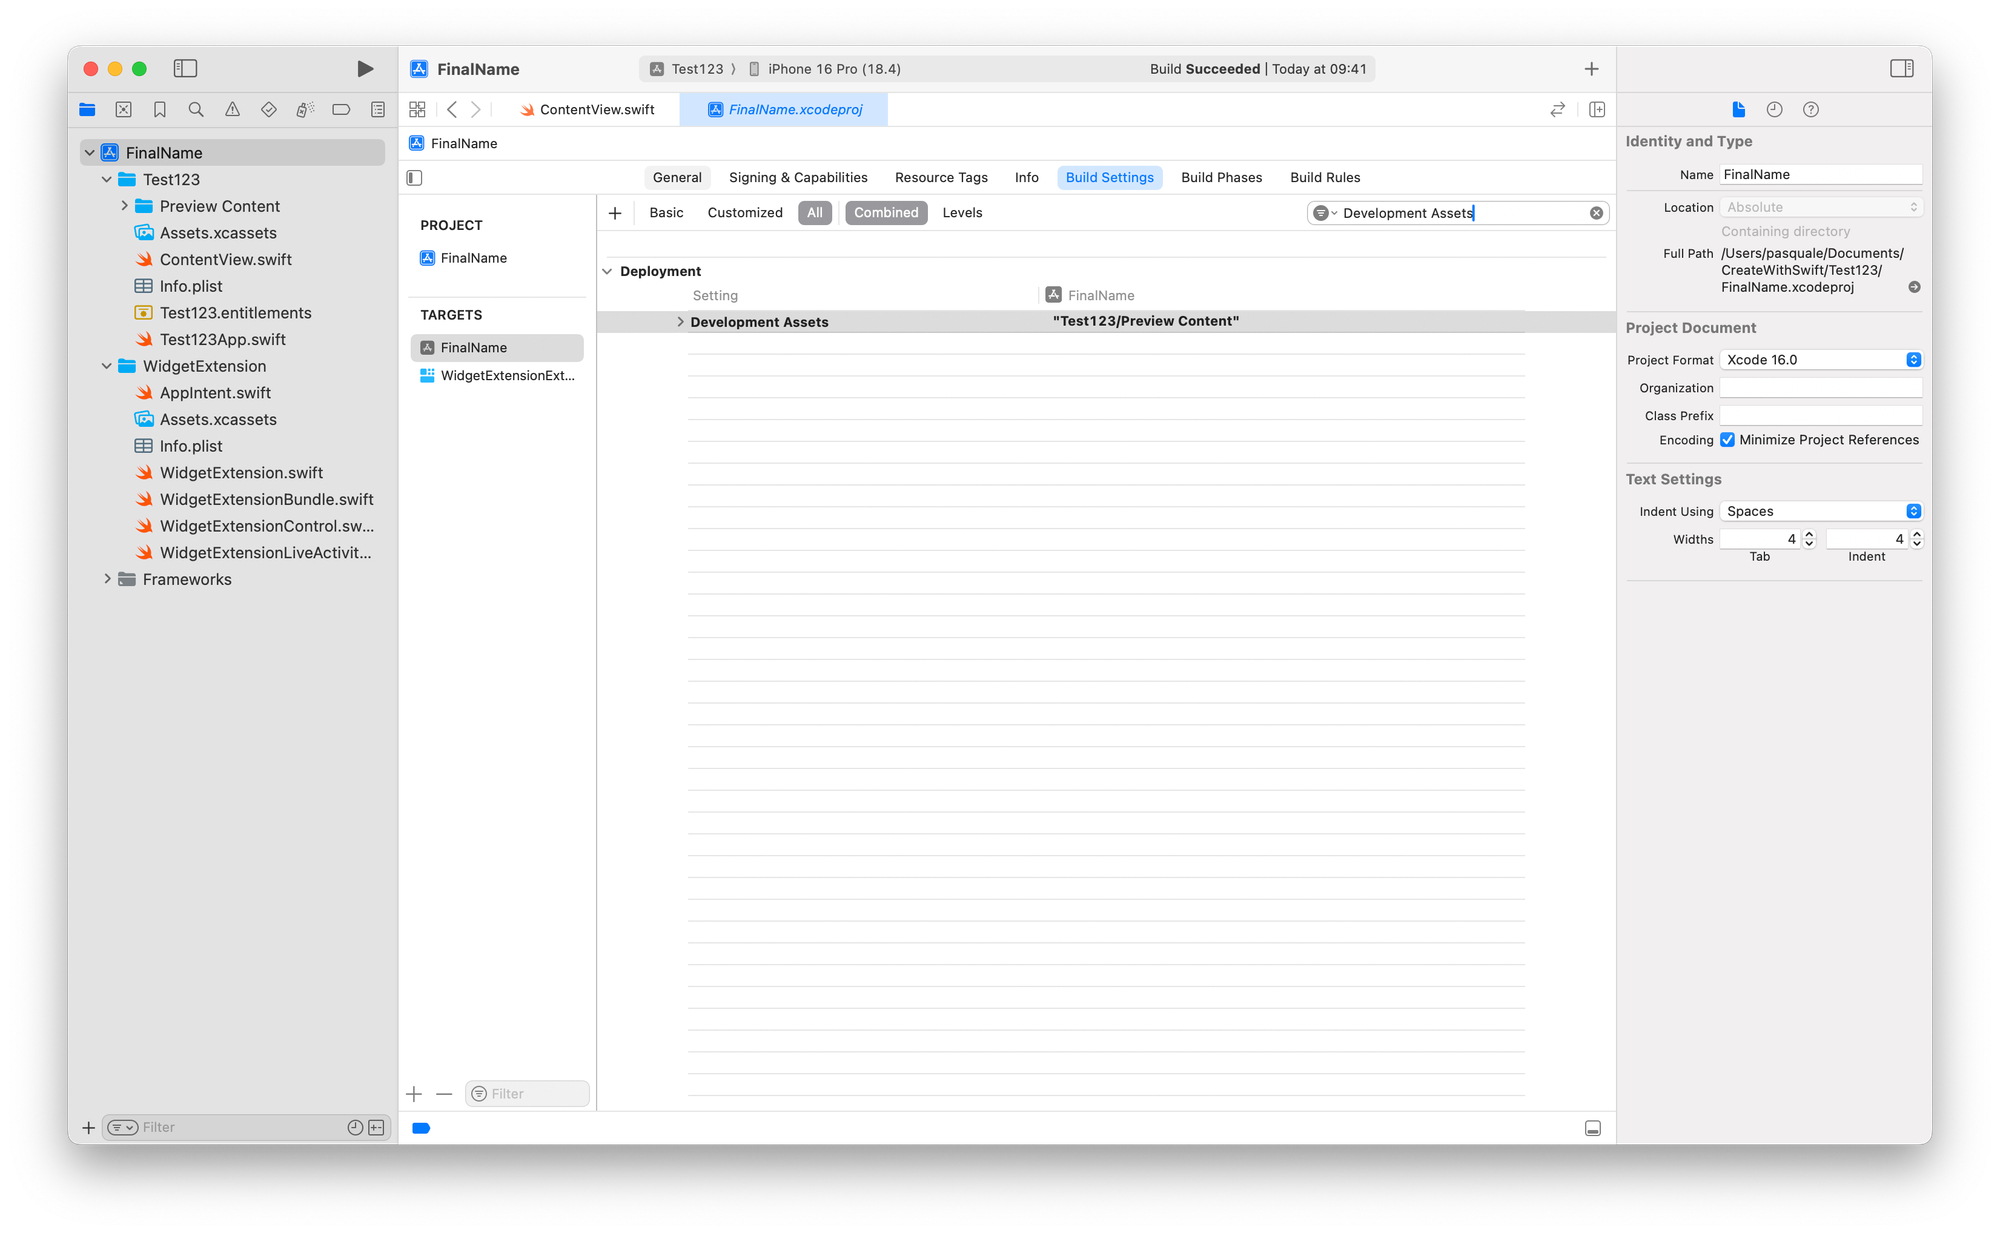
- Edit the value in “FinalName/Preview Content”
Step 4.2: Edit the Entitlements info (If you have it)
If you use specific capabilities (like iCloud, Push Notifications, or App Sandbox in macOS targets):
- Look for Code Signing Entitlements
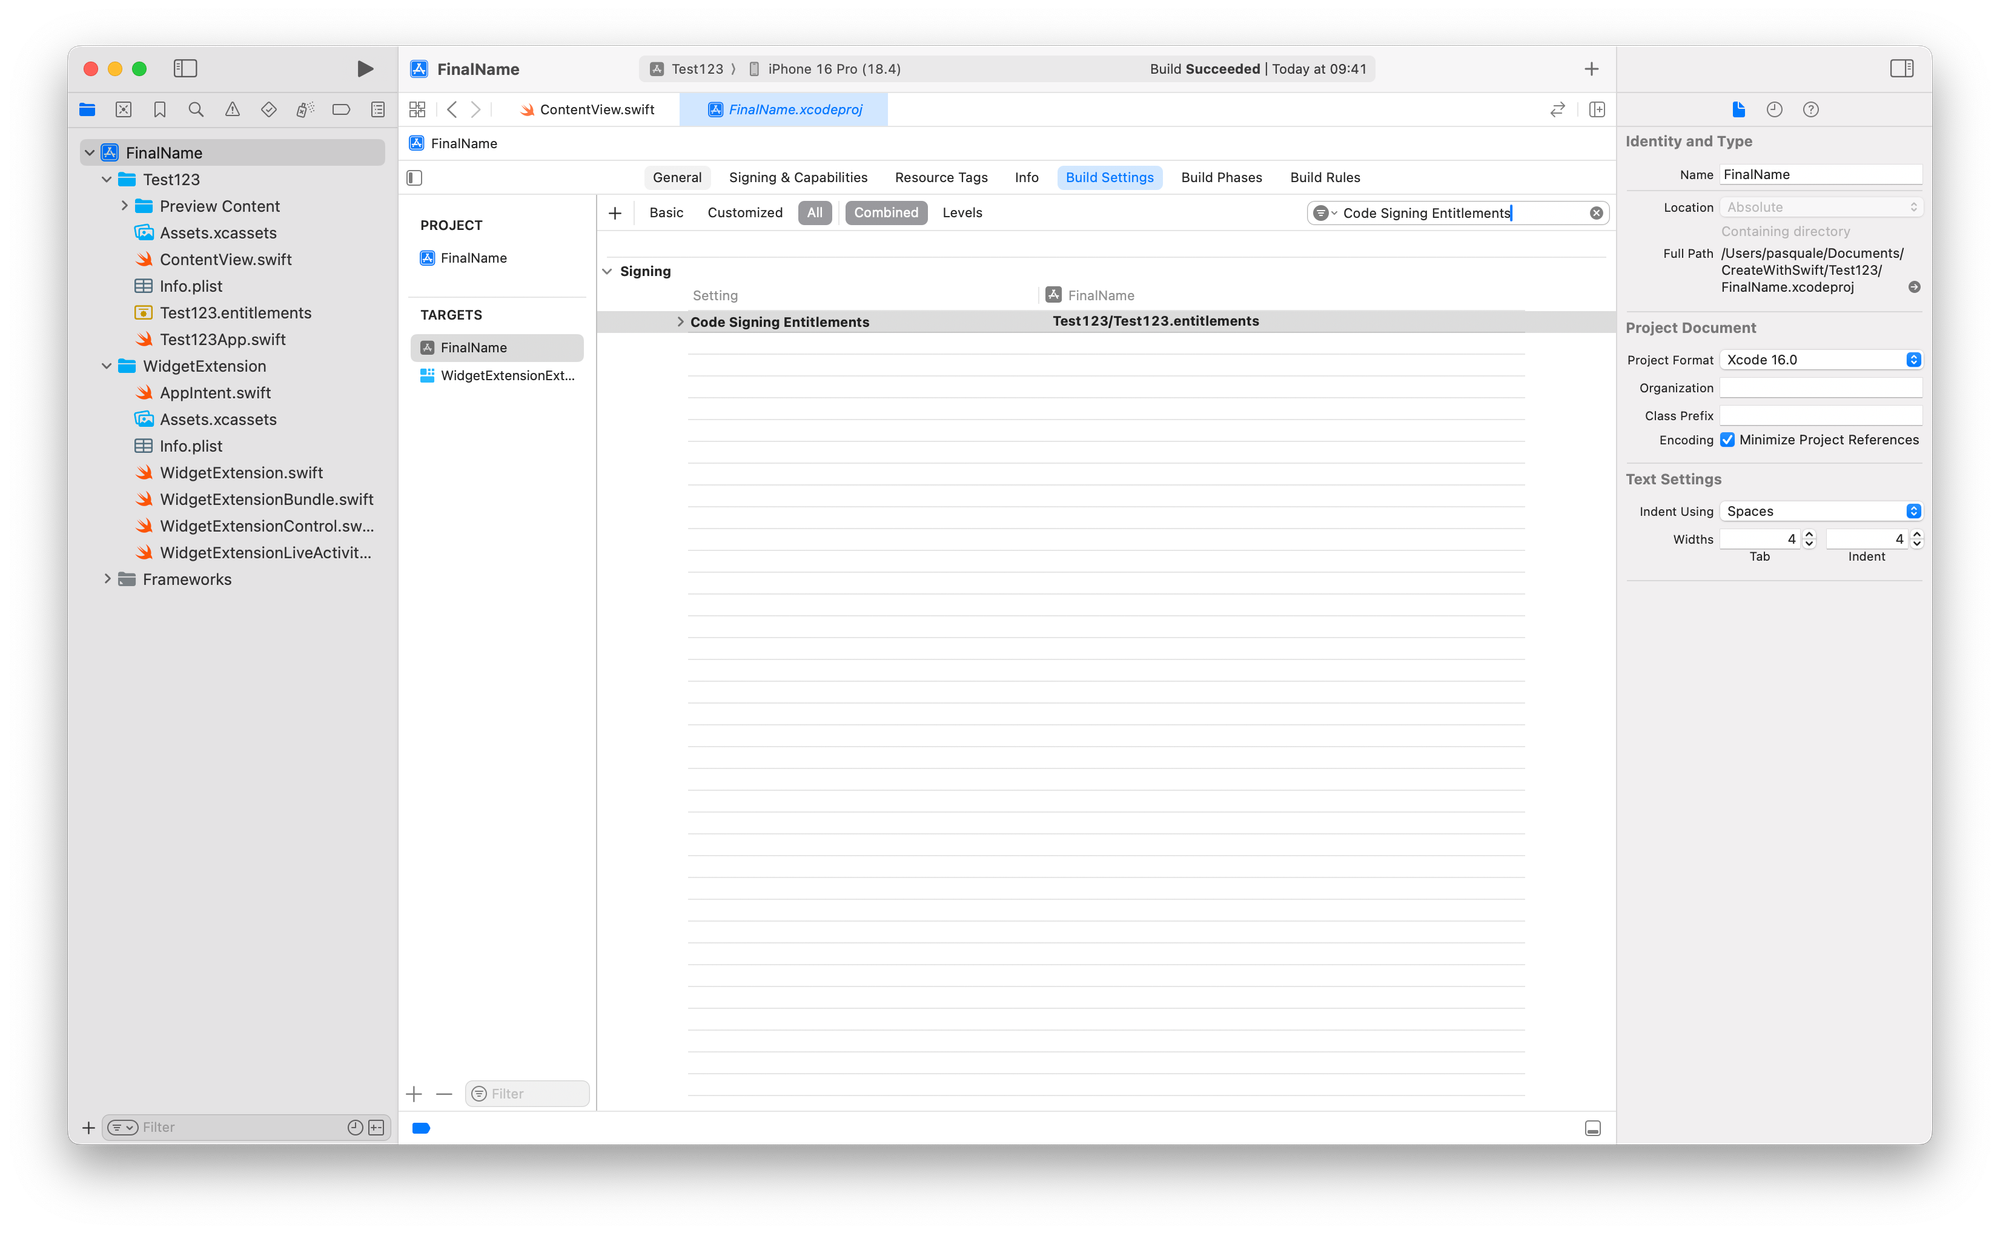
- Edit the value in FinalFolderName/FinalName.entitlements

- Ensure your entitlements file (NewProjectName.entitlements) is correctly named.
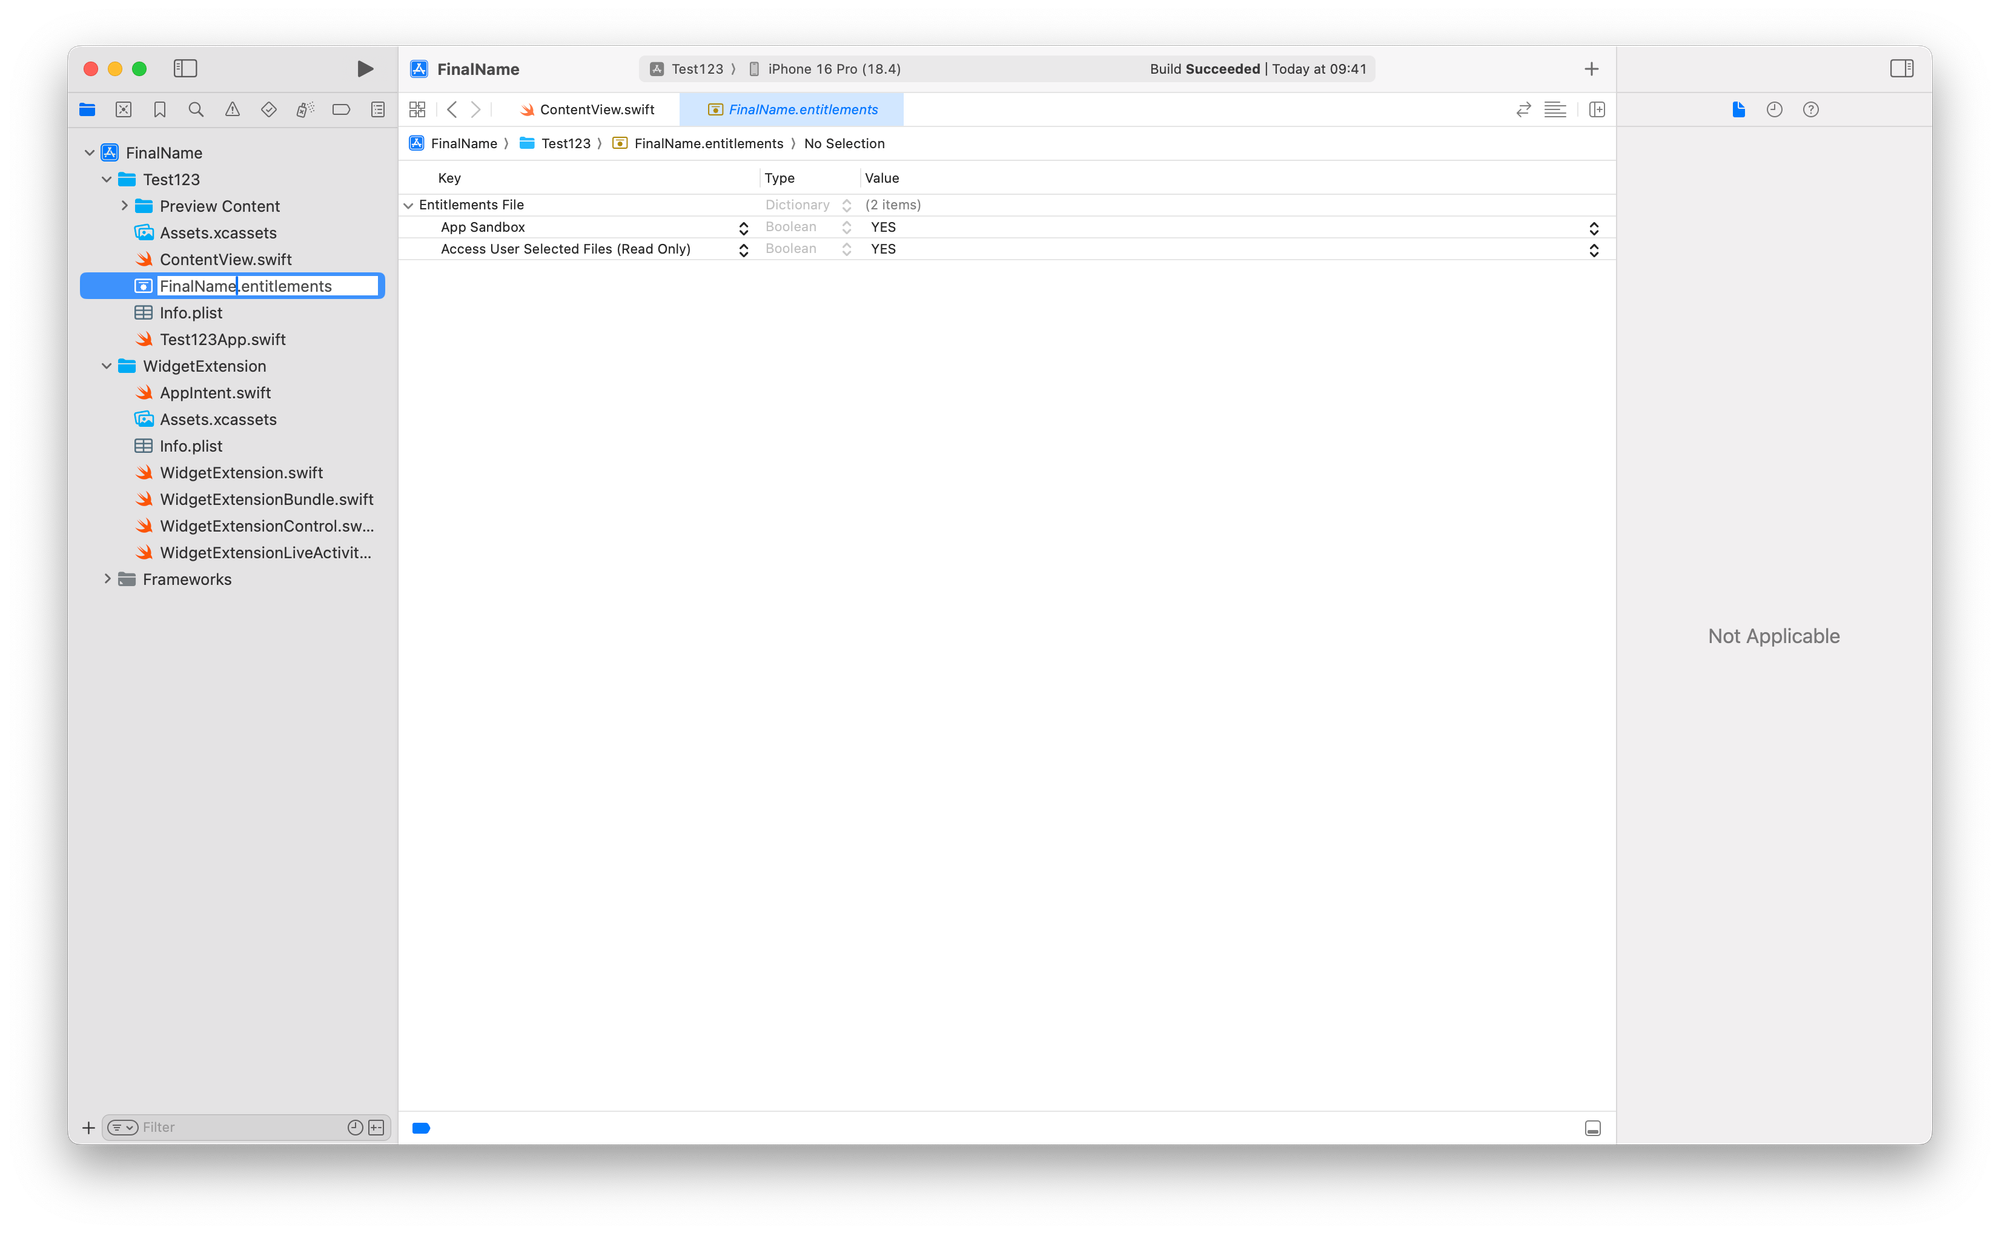
- Go back to Build Settings:
- Select the project file and then Build Settings at the top

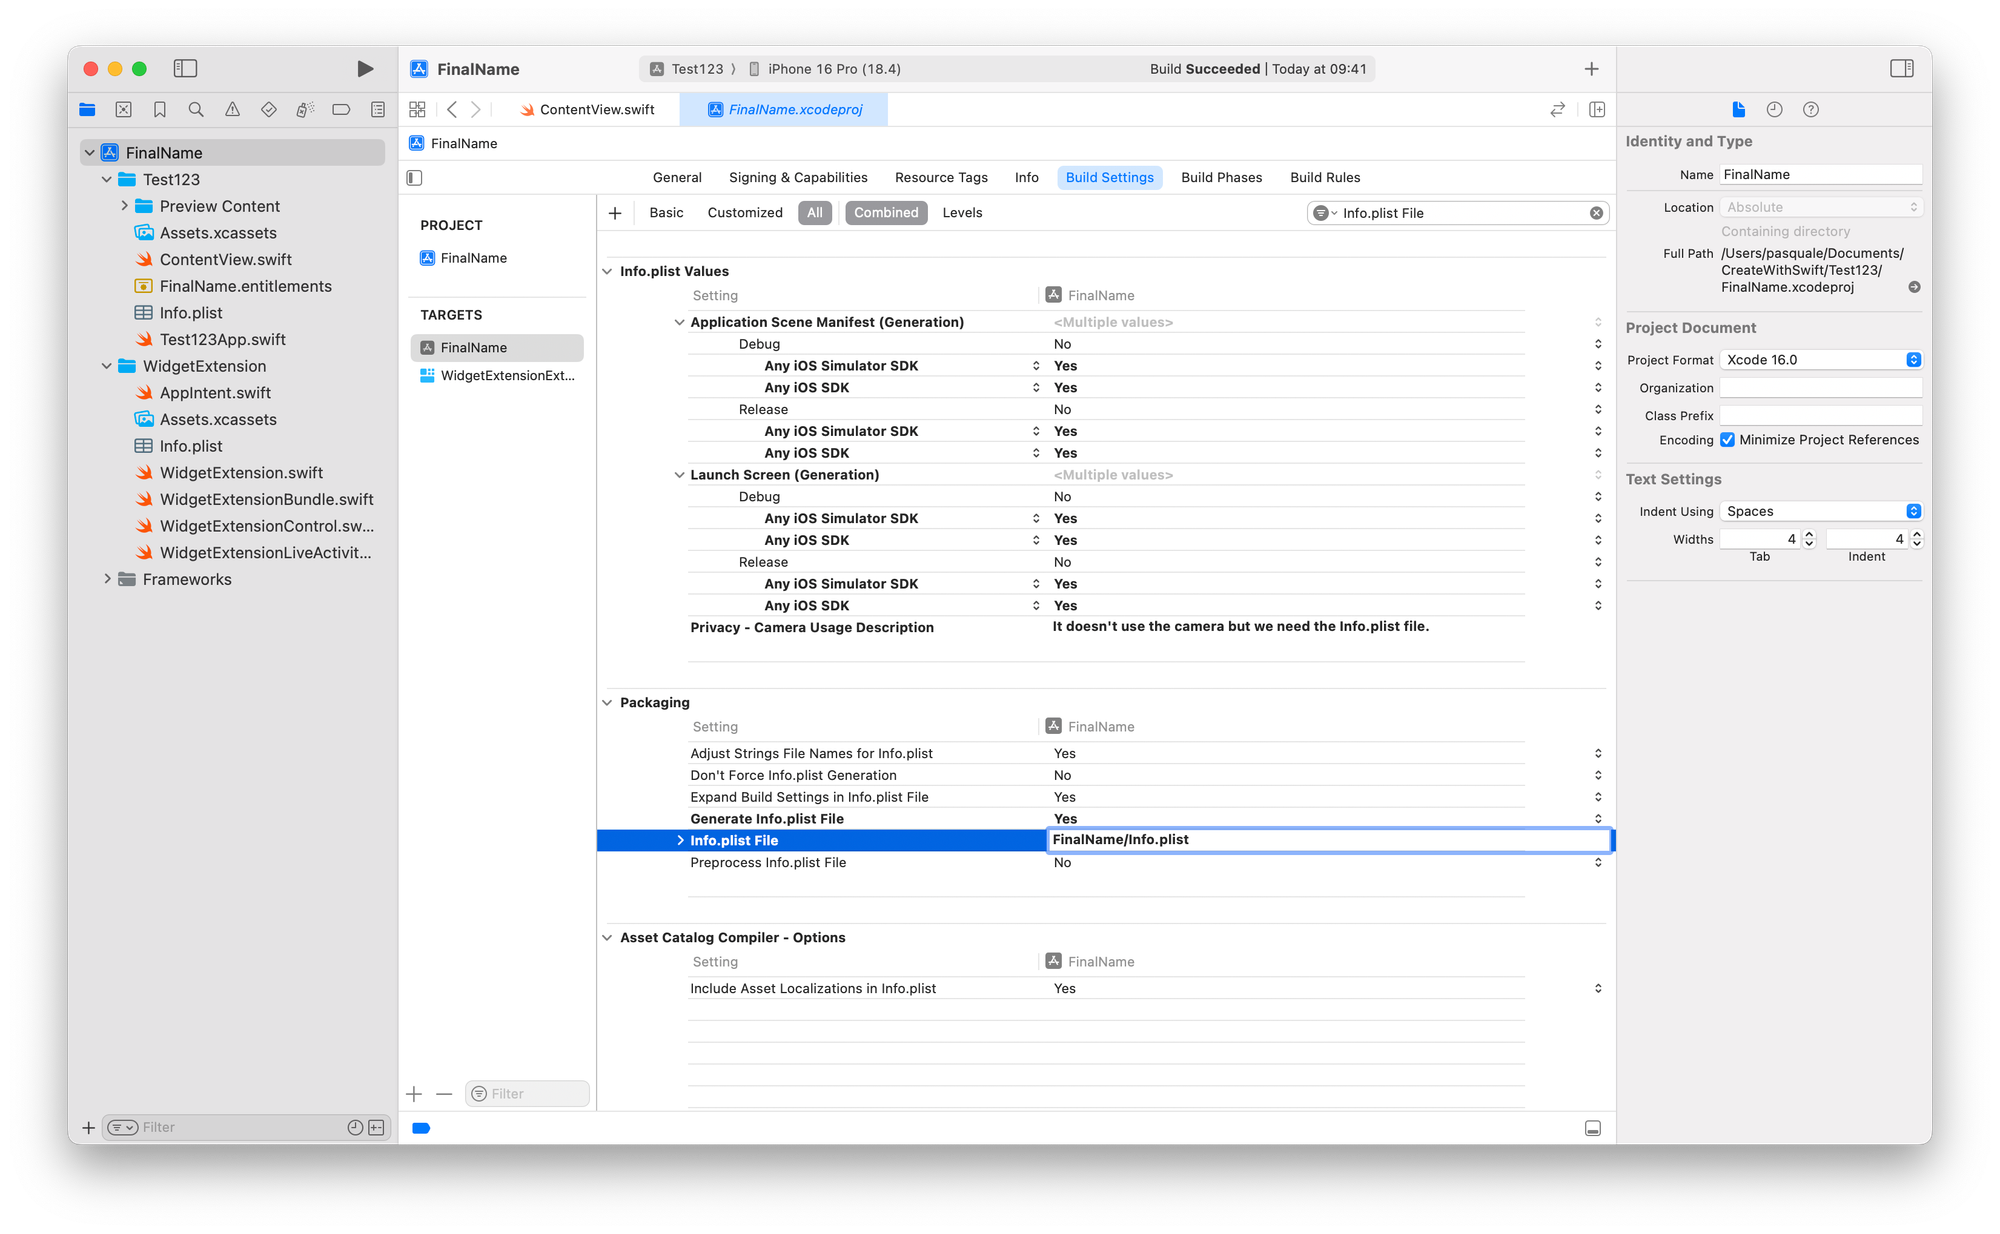
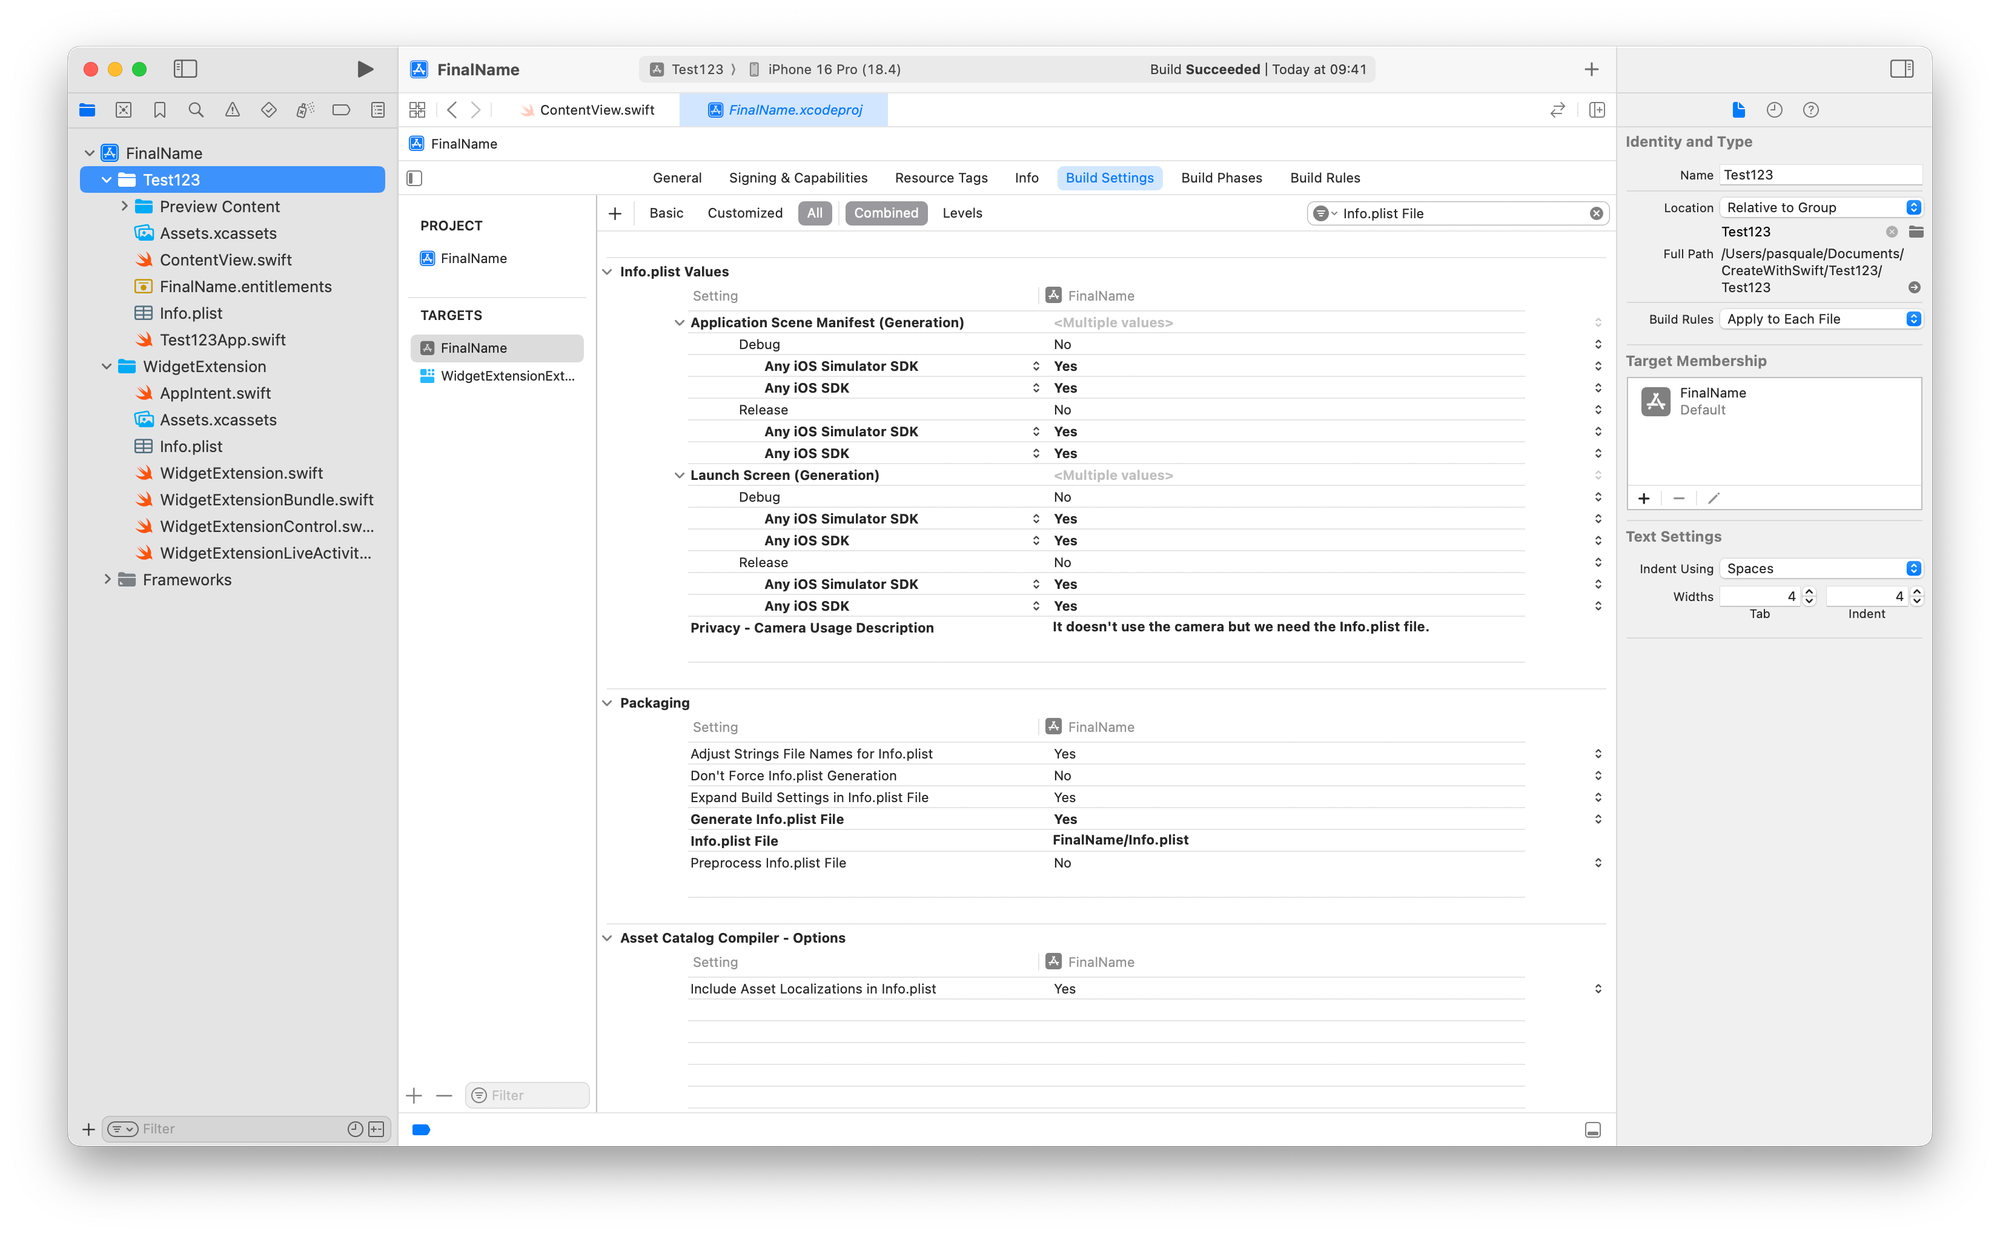
Step 4.3: Update .plist location
- Look for Info.plist file
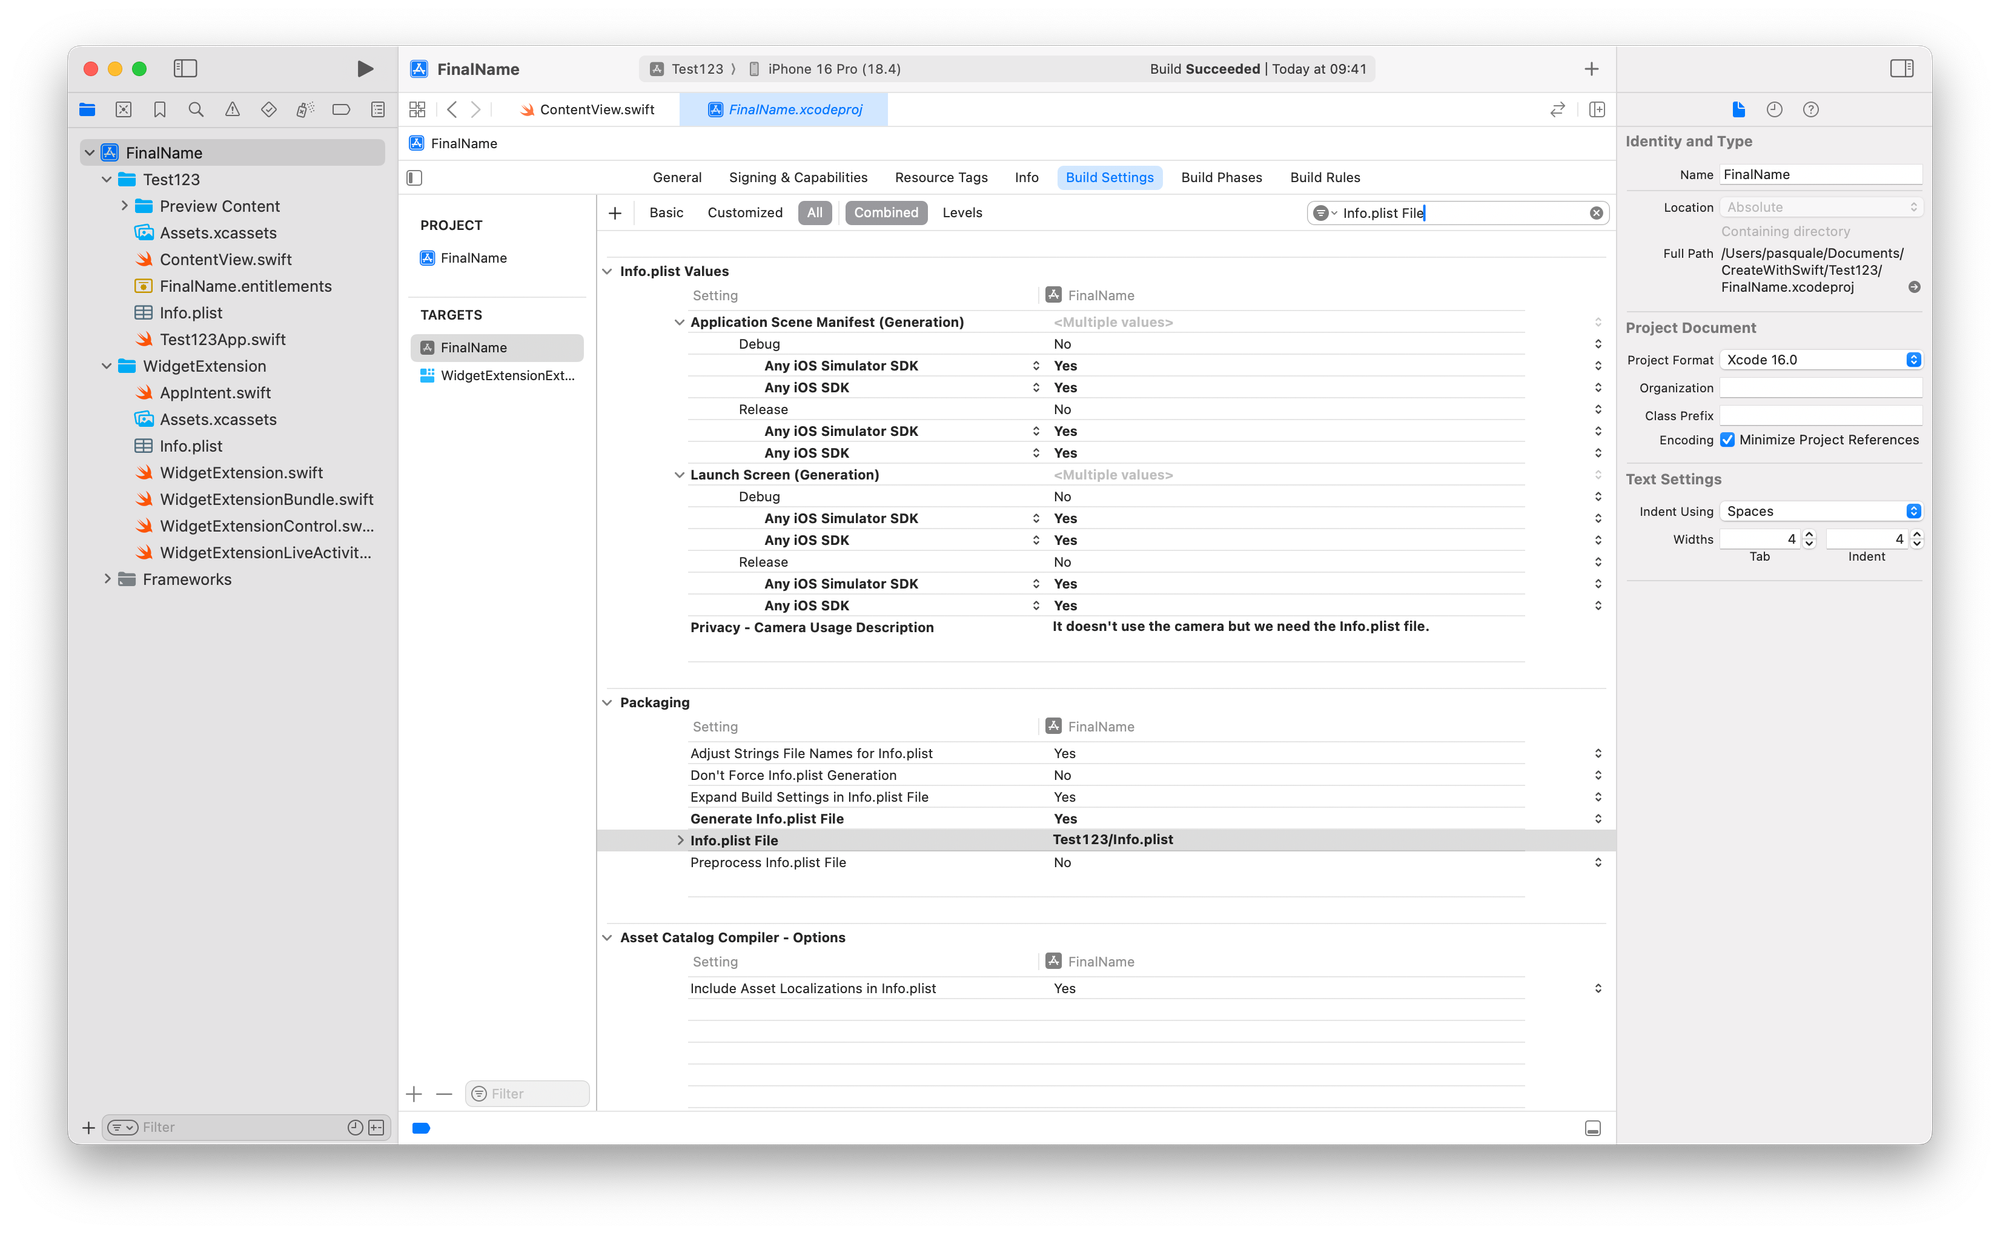
- If the value is empty, move to Step 5.
- If it is not empty, edit the value in FinalName/Info.plist
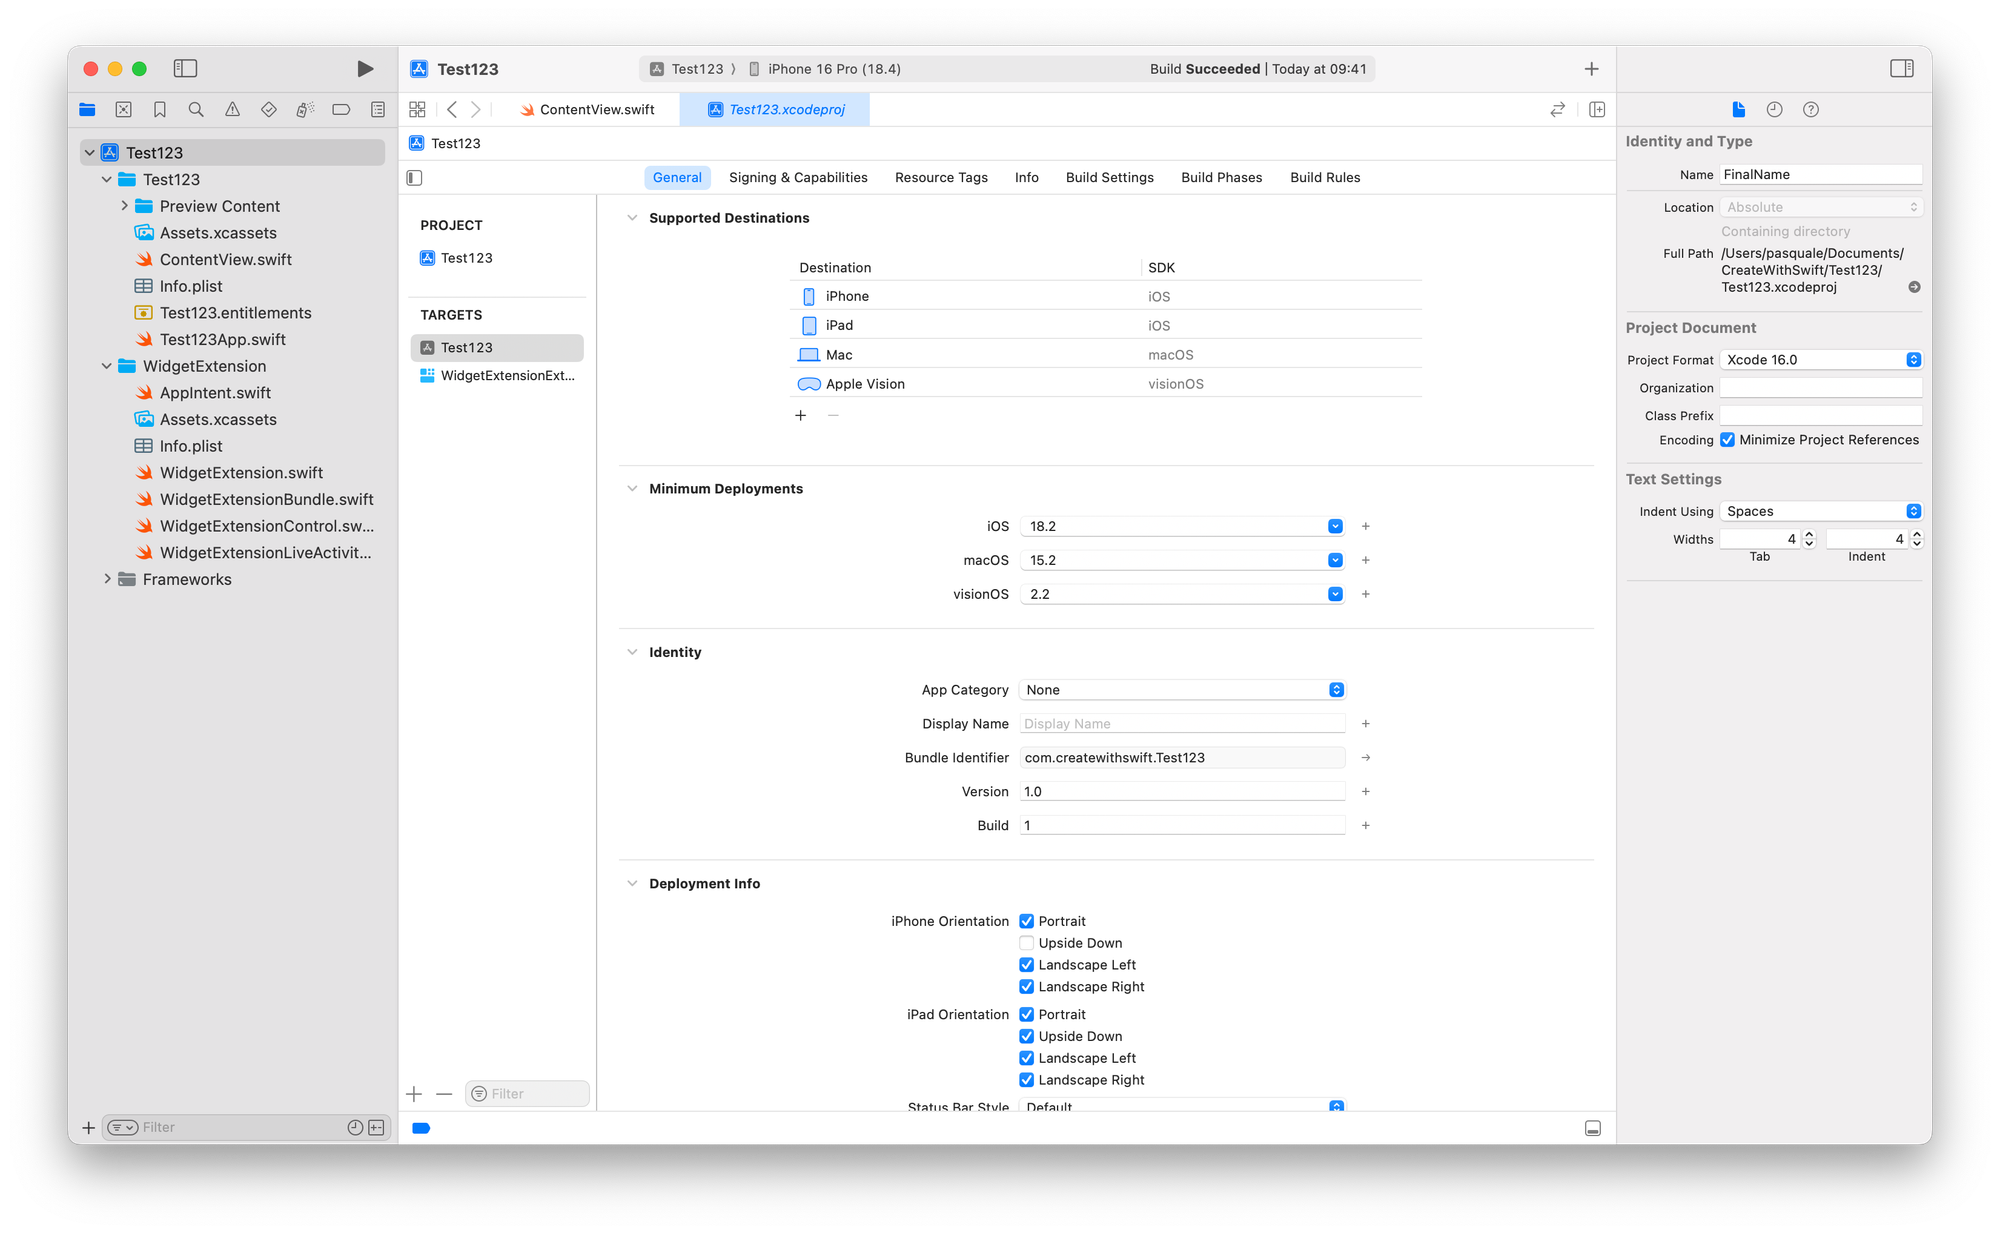
Step 5: Rename the actual Project Folder
Xcode doesn’t rename the project folder itself.
- Select the project folder from the Navigator on the left.
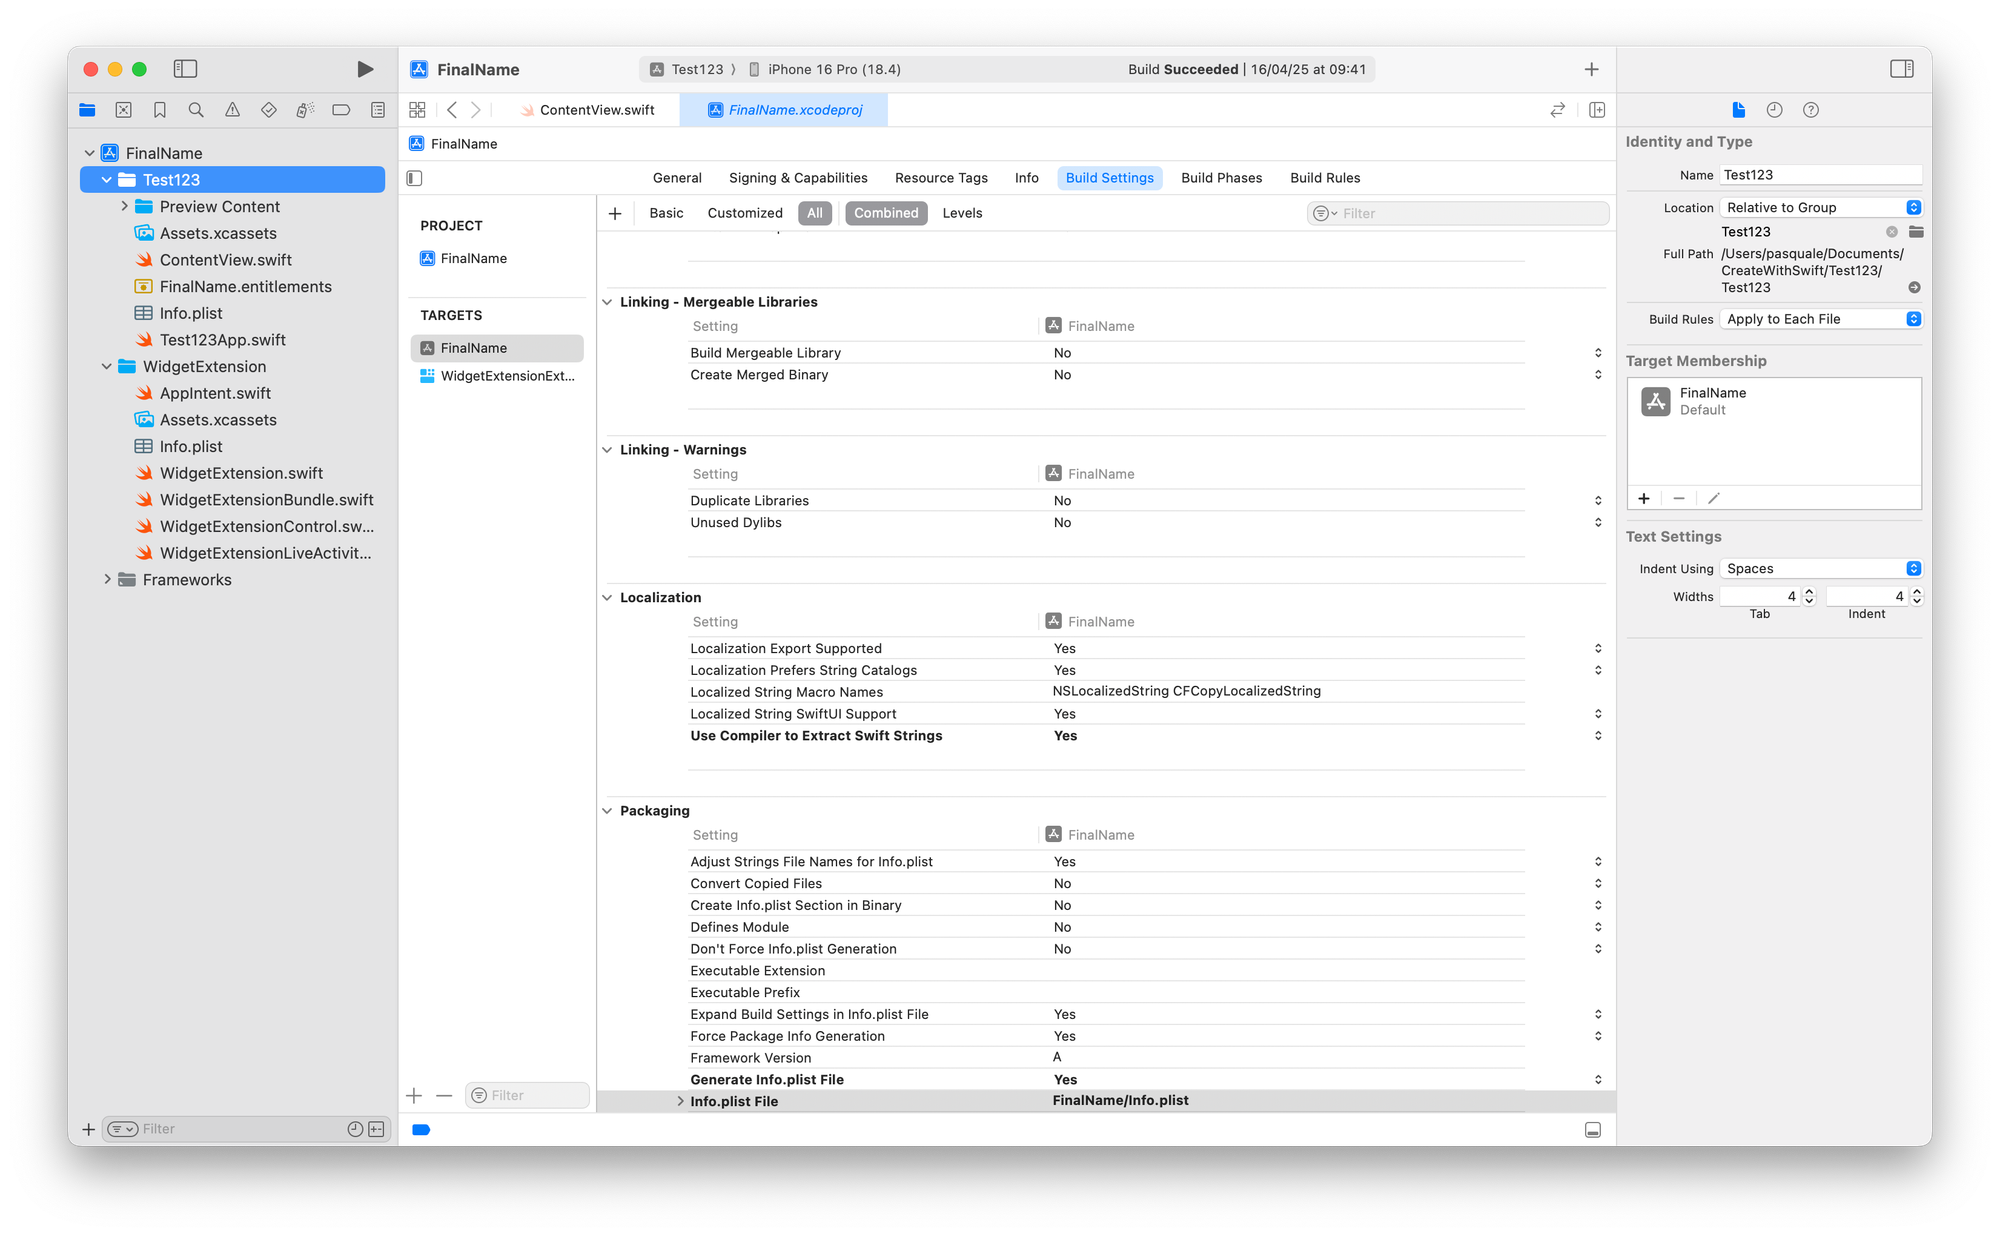
- In the Inspector on the right, under Identity and Type, enter your new project name and press Enter.
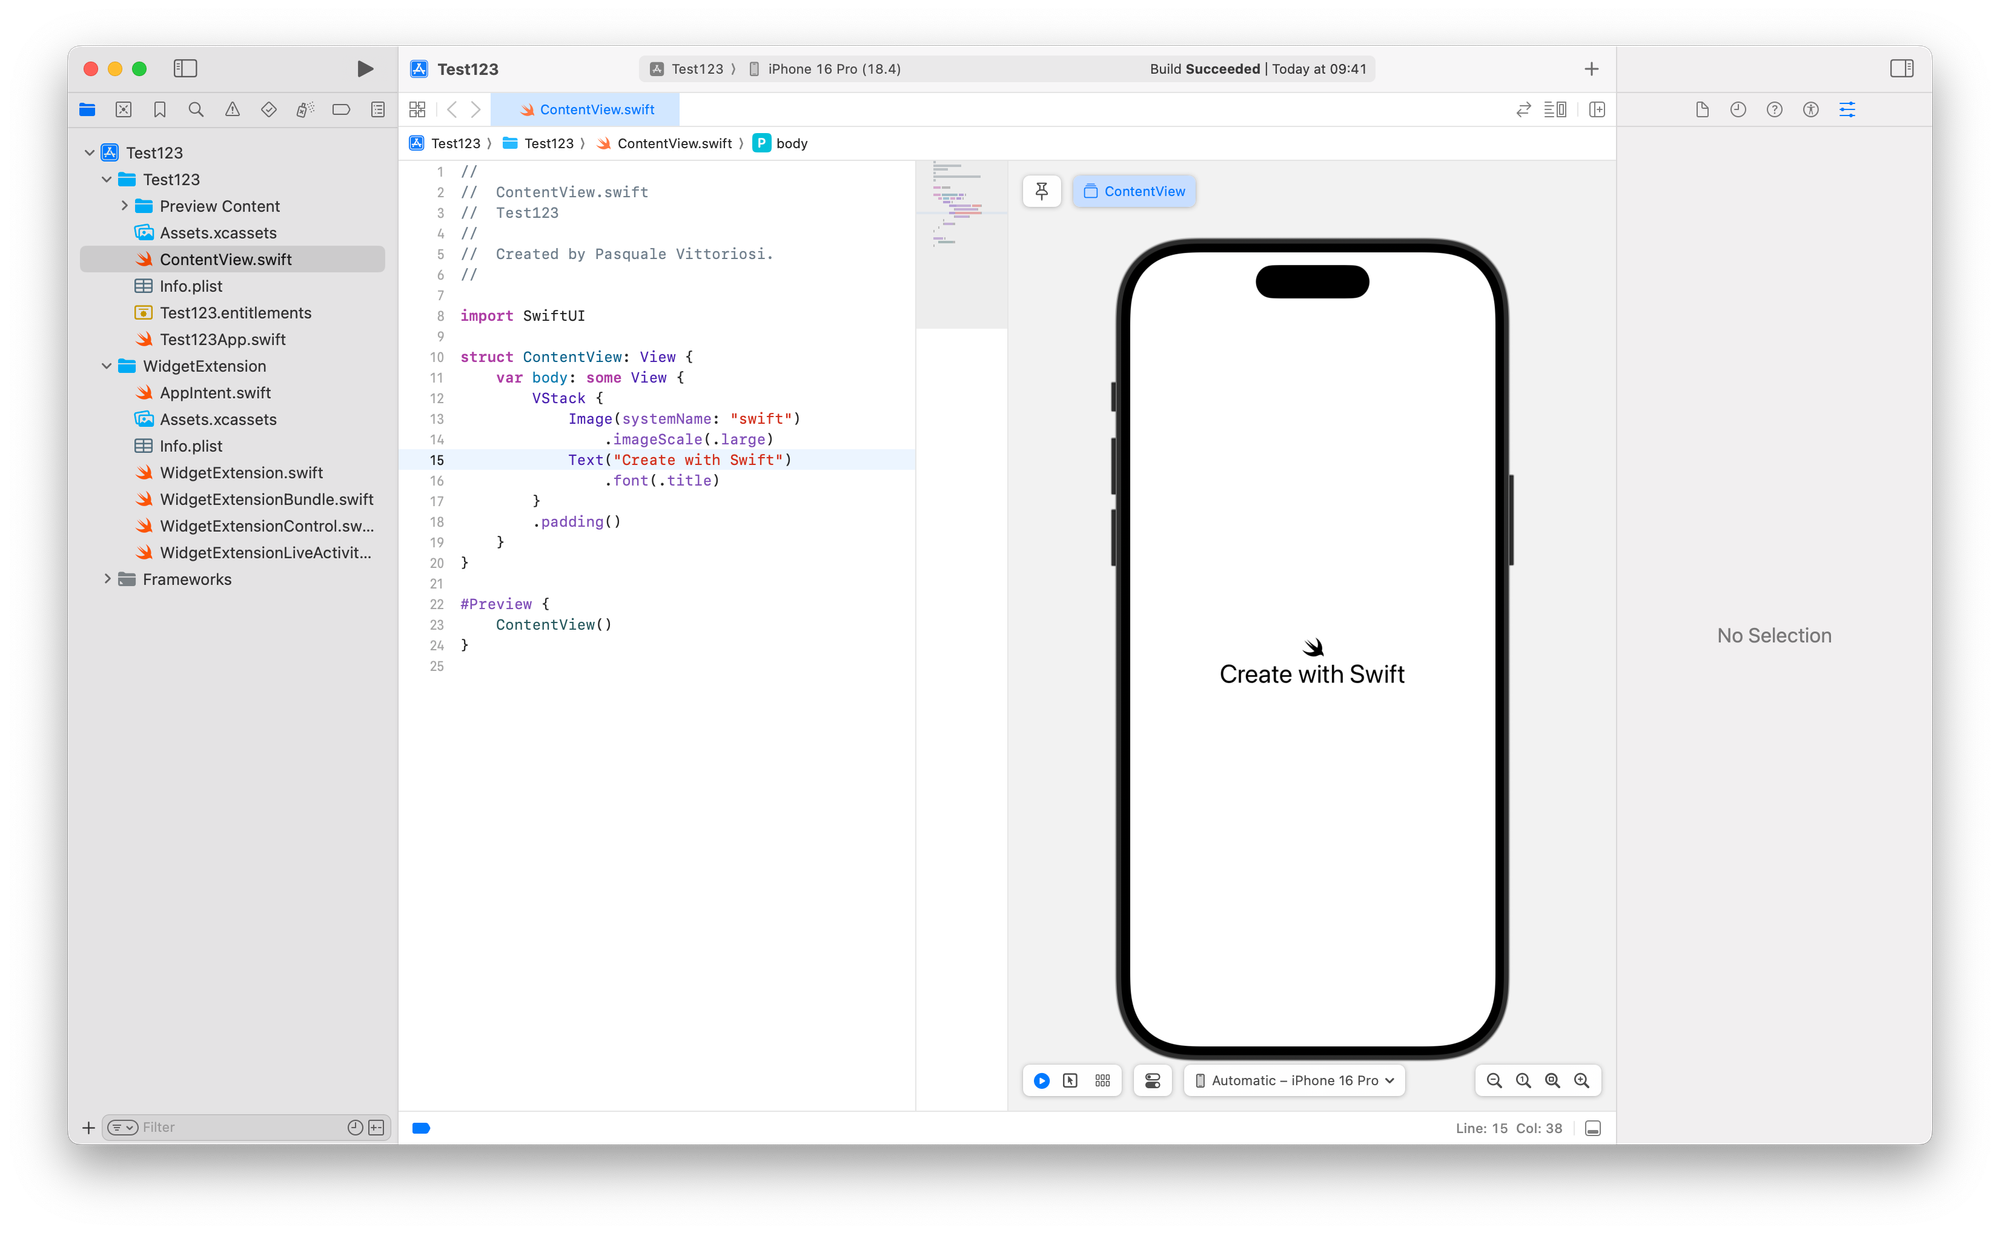
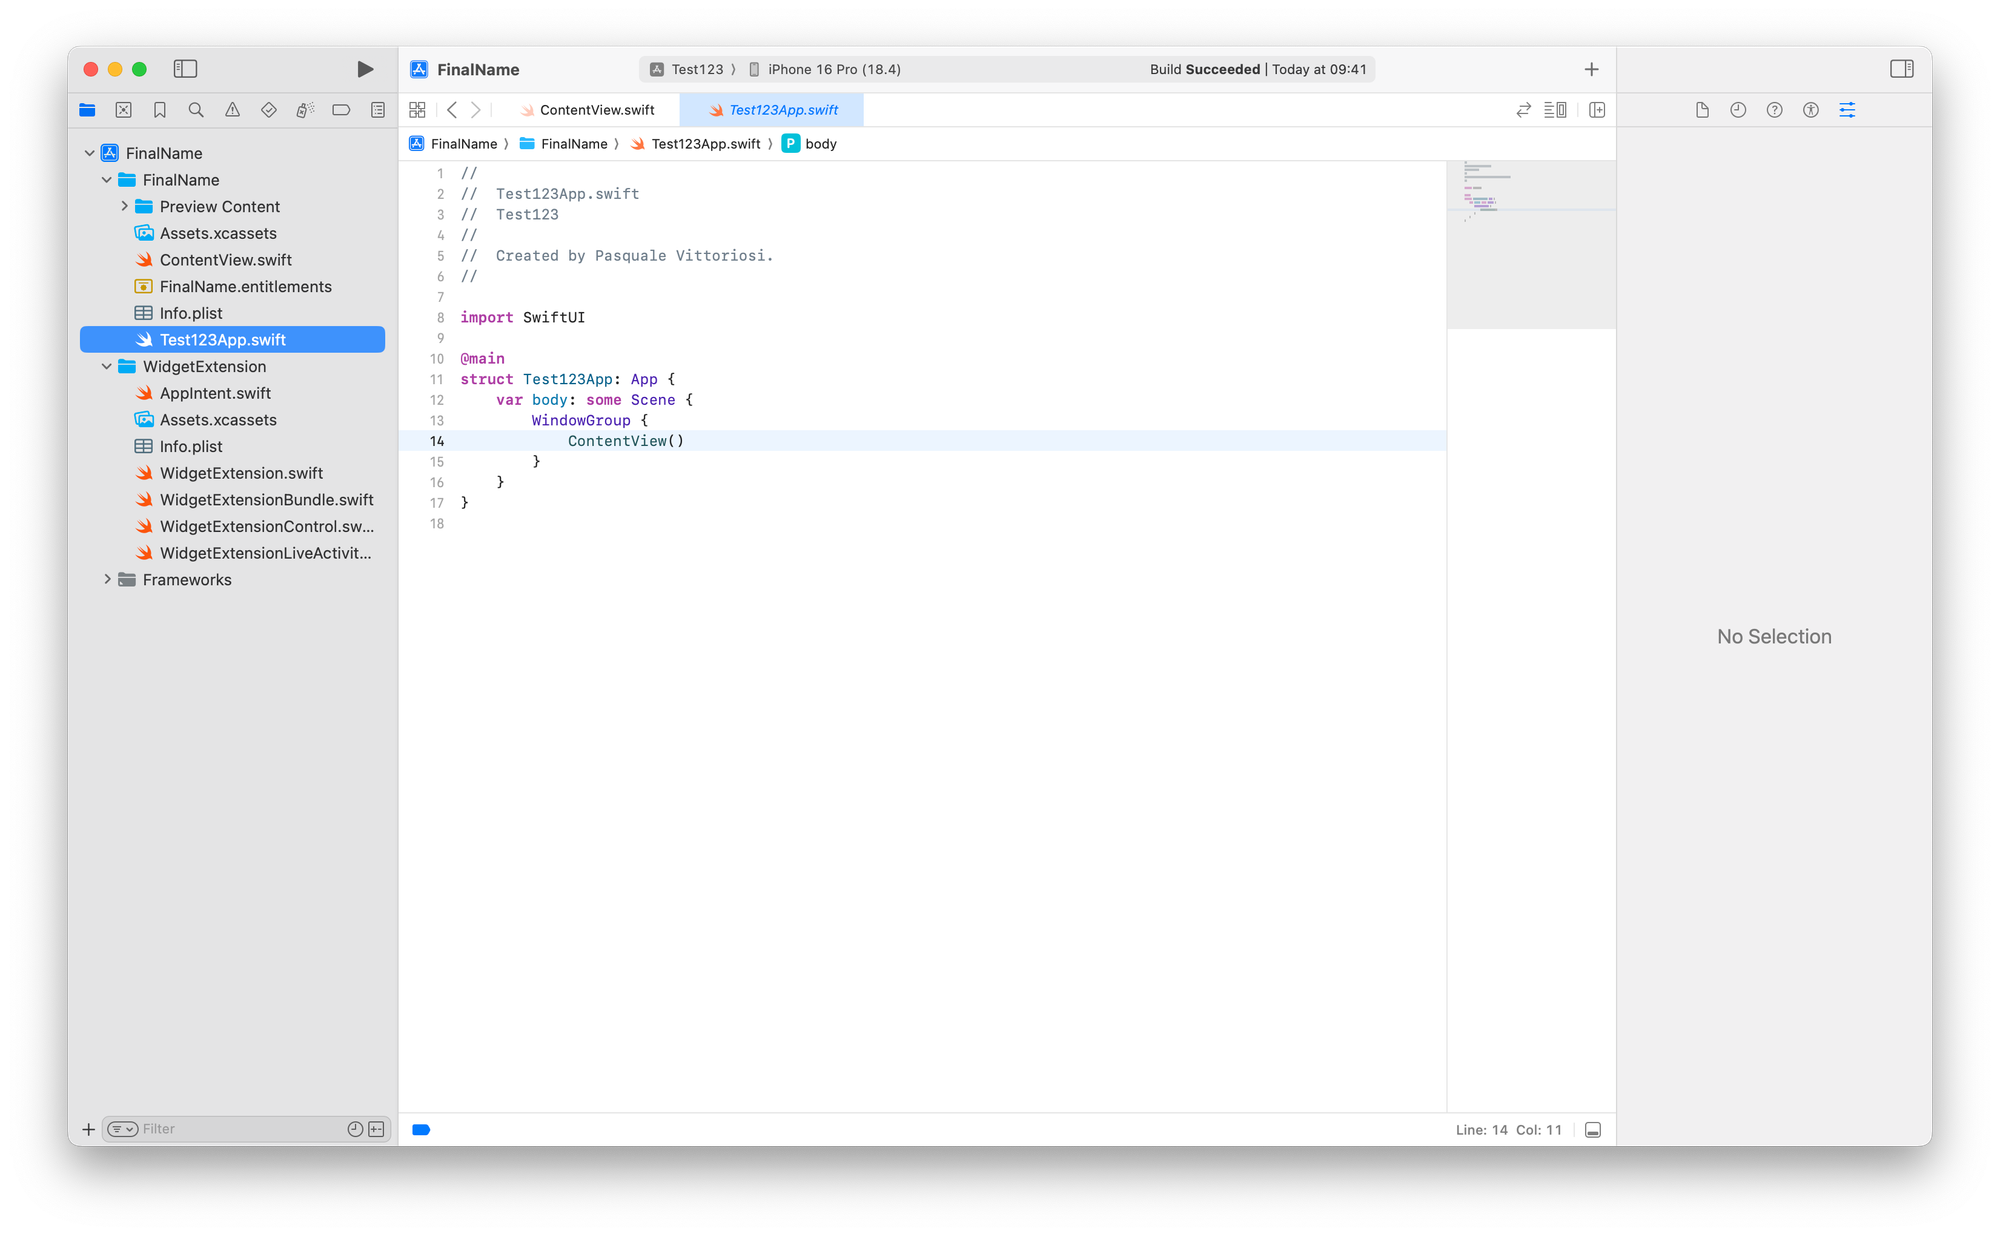
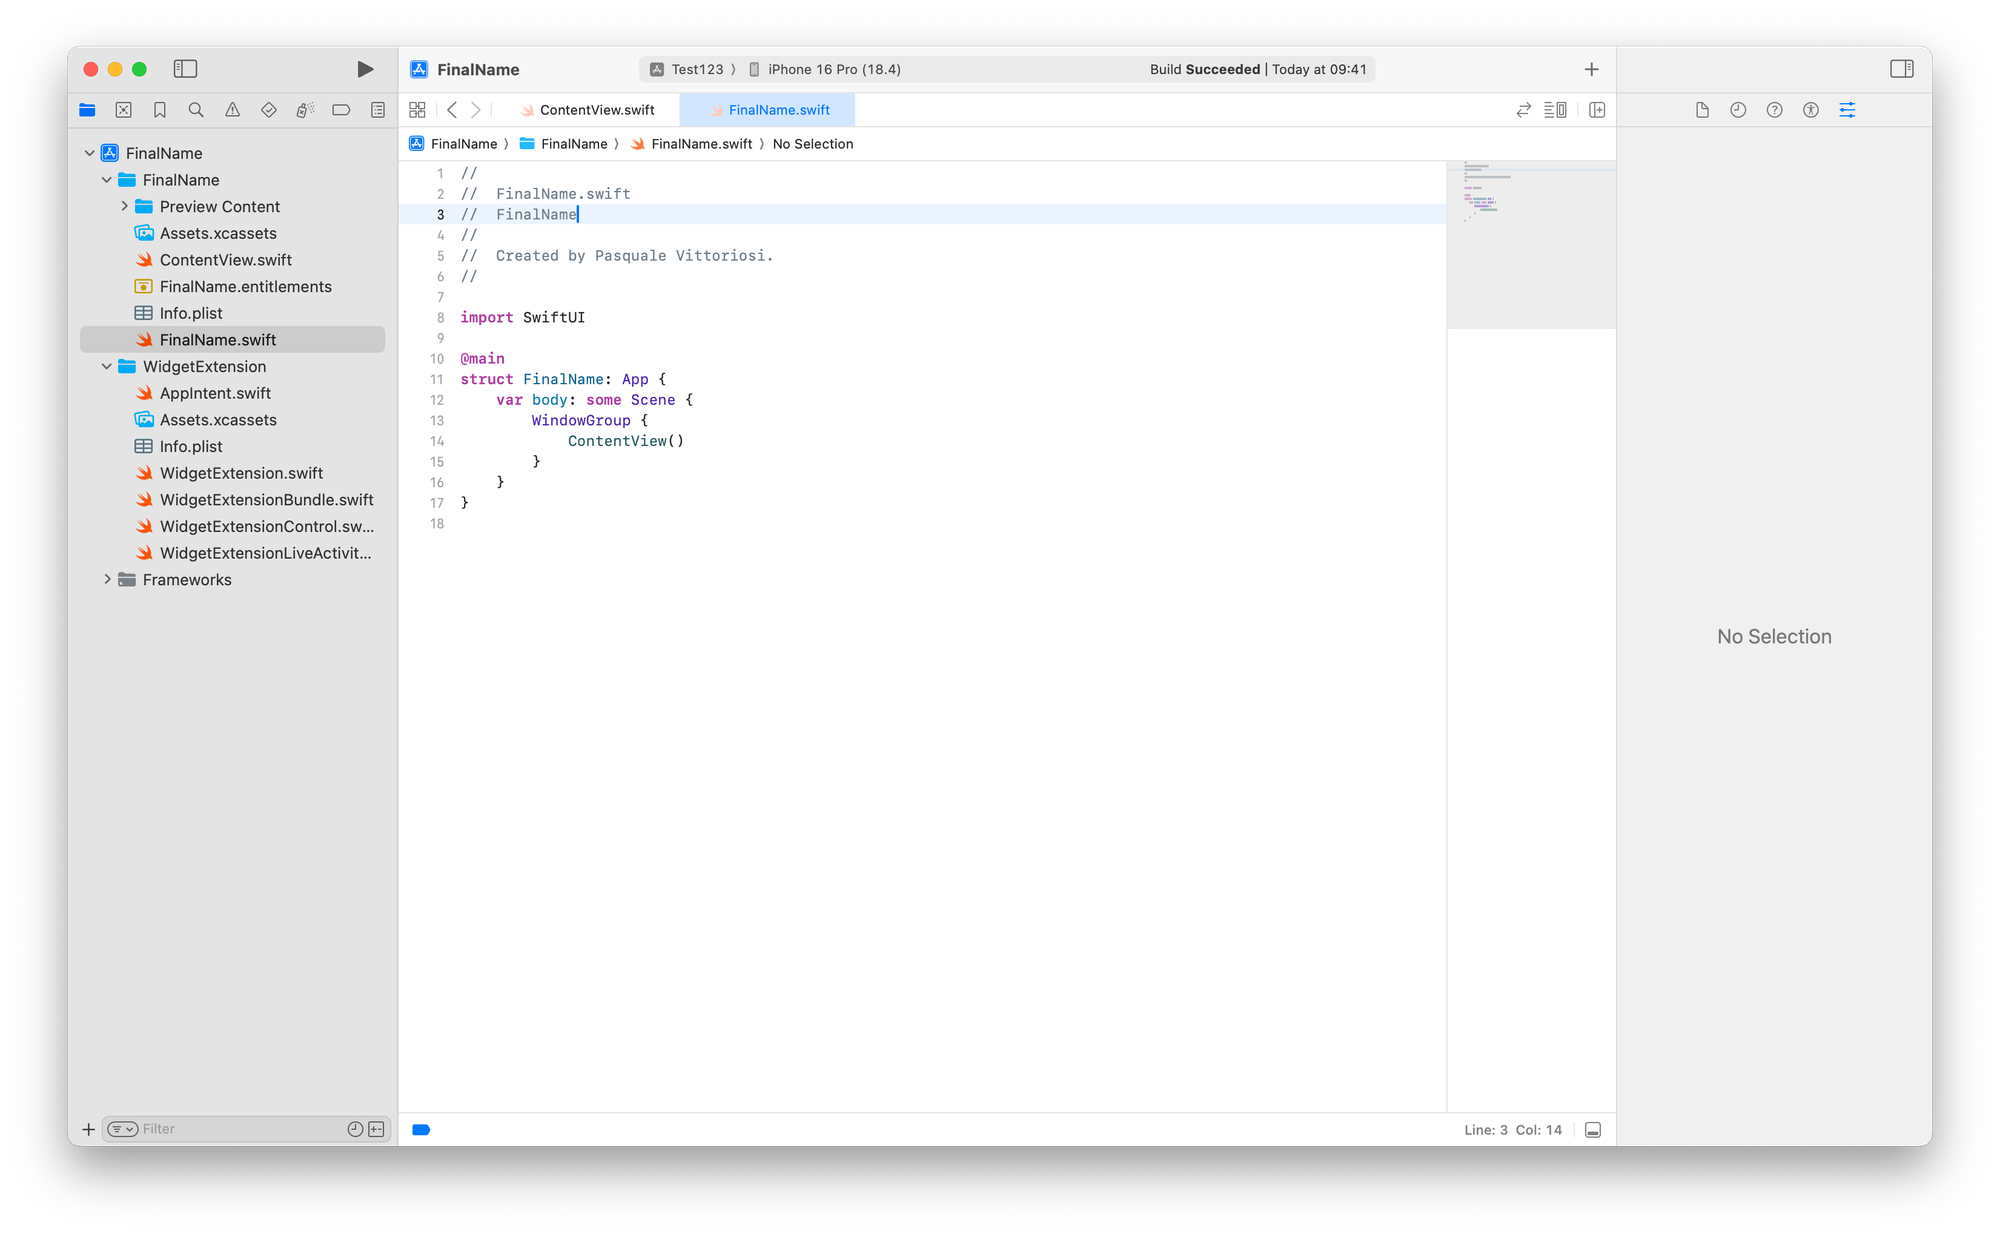
Step 6 - Edit the app file
- Select the main app file, the one with the original name (in this case, Test123.swift)
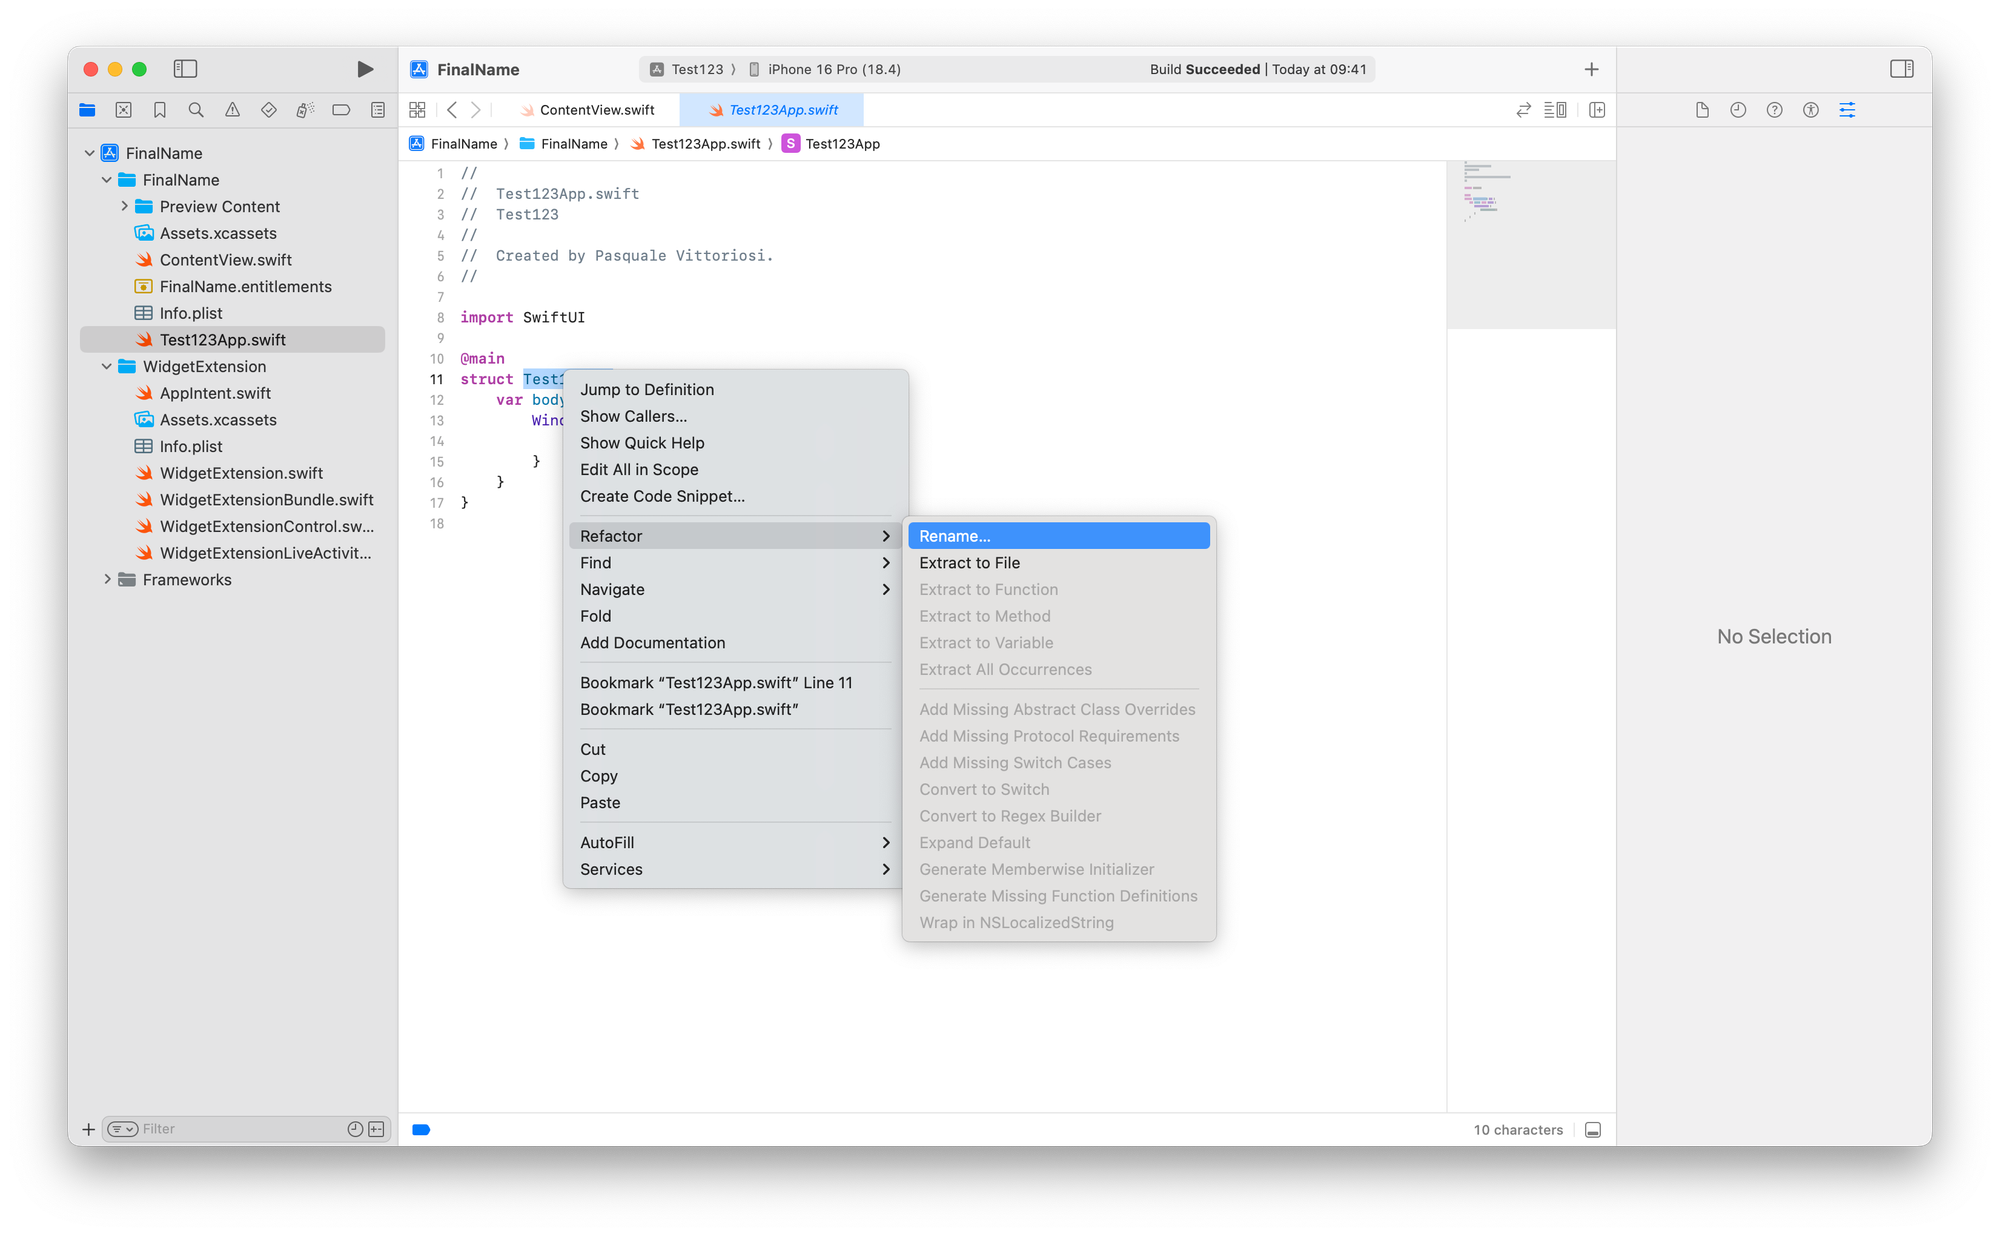
- Right-click on the struct name and select Refactor -> Rename. This will also ensure that the actual name of the file will be changed.
- Enter the new name and press Enter or Rename
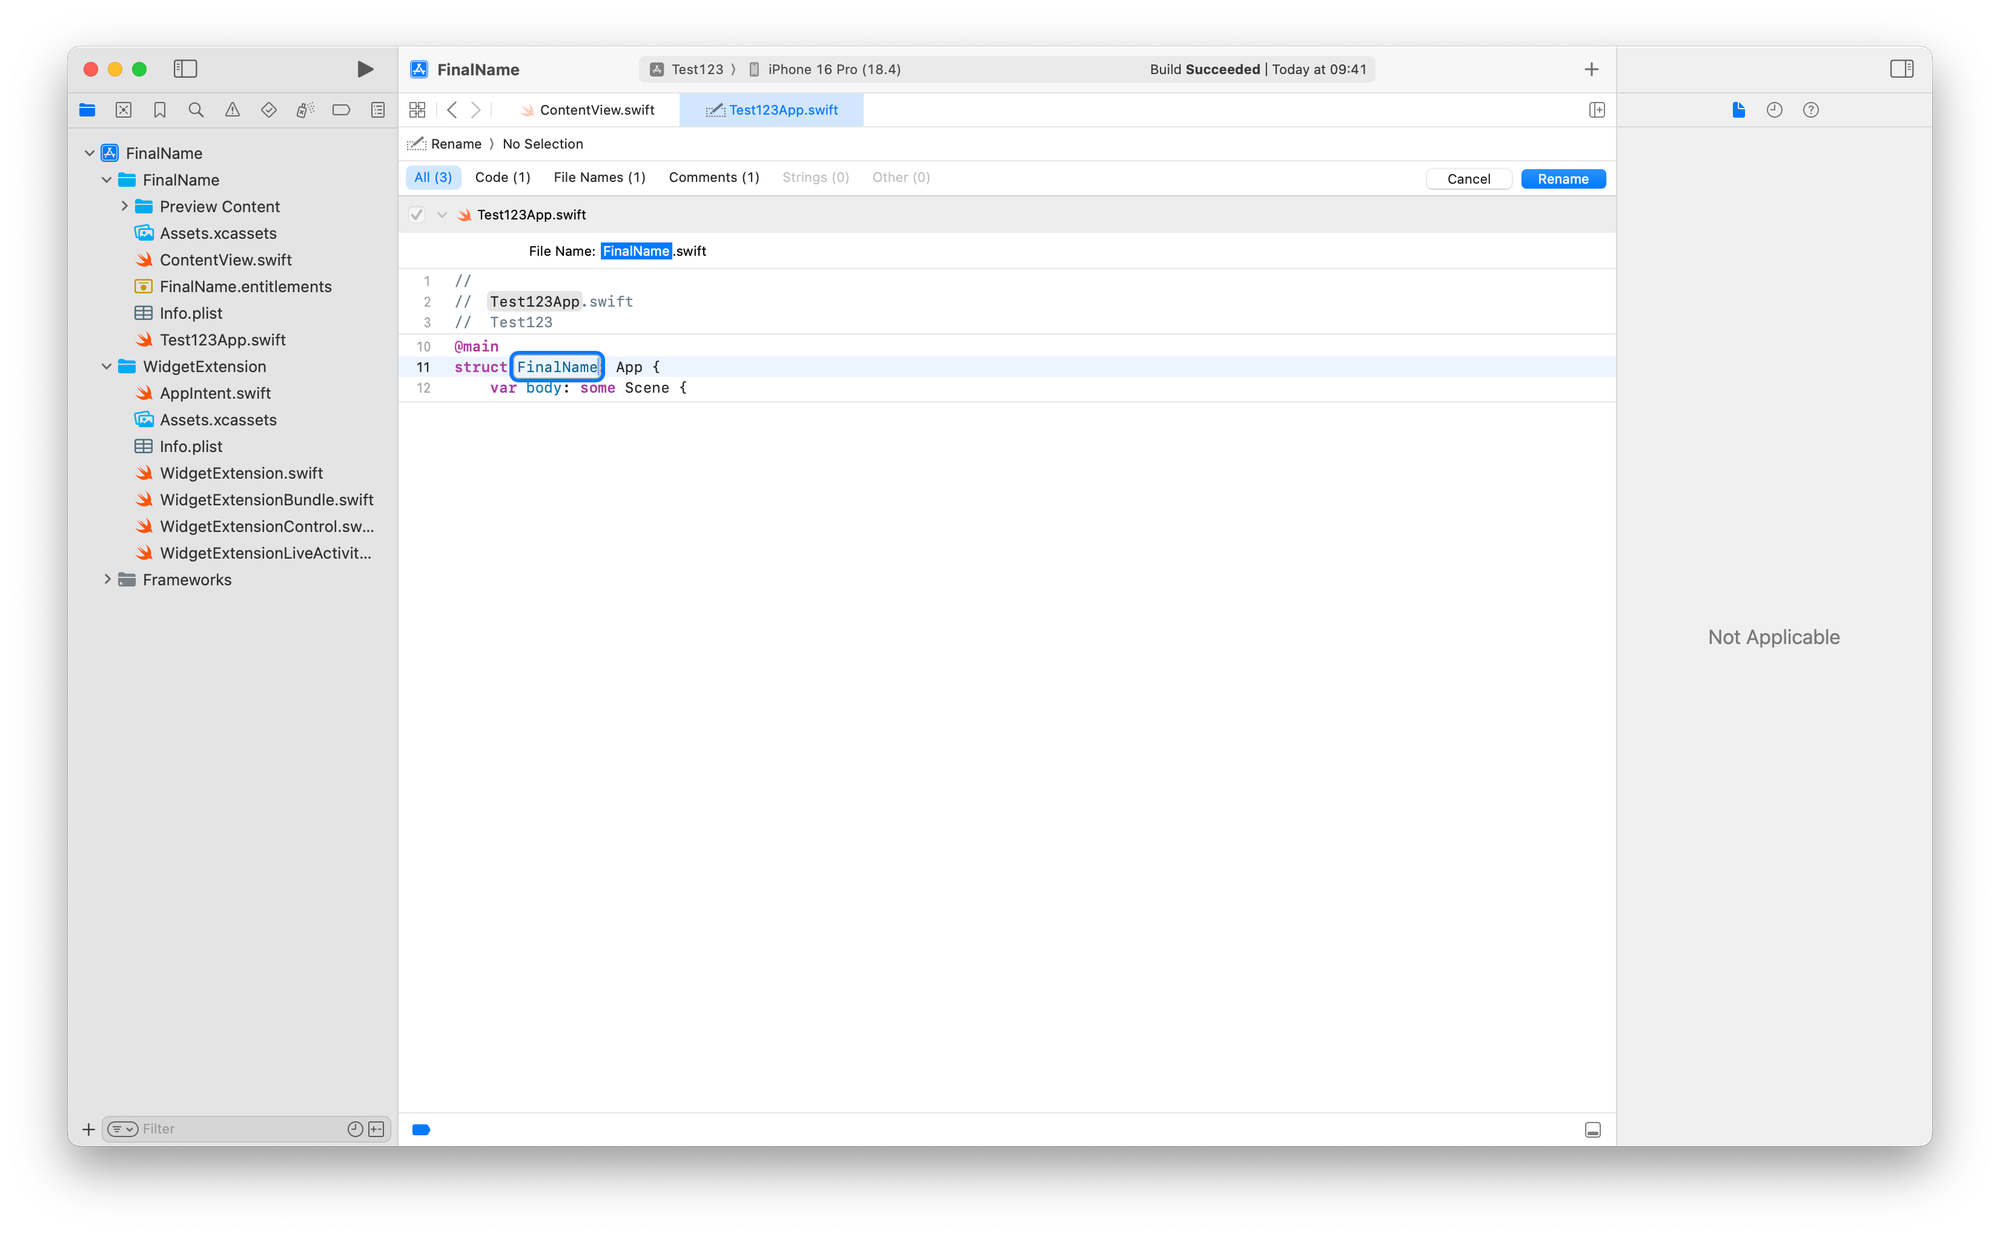
- If you really want to be precise, edit also the comments! 🤪
Step 7: Rename the root Project Folder
Xcode will not automatically rename the root folder where all the project files and the project folder are.
- Close your Xcode project.
- If you didn’t close the Xcode project, you should see an alert message
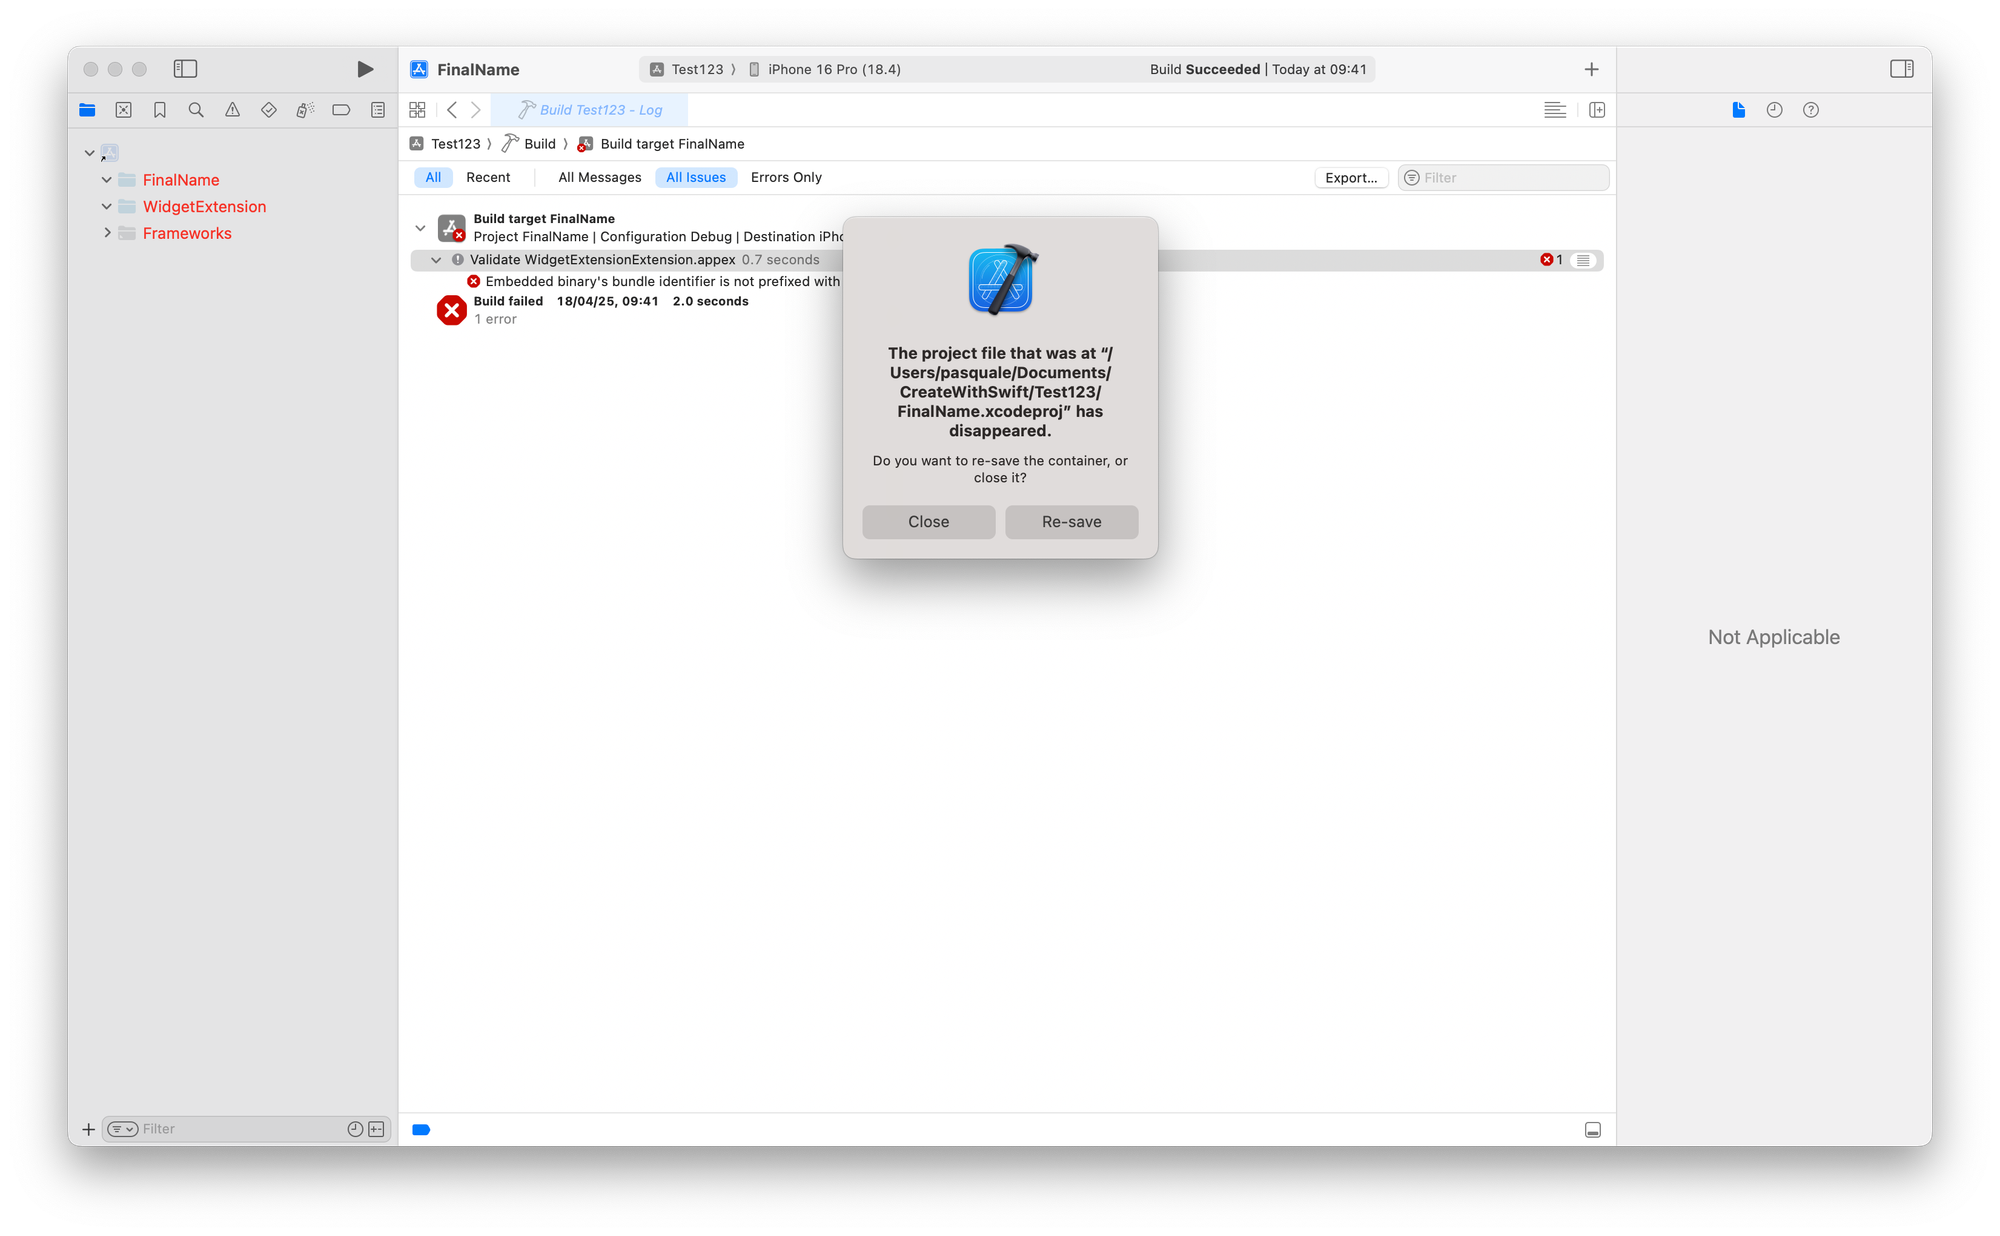
- Click Close and OK to dismiss all the alerts. Wait until the Xcode project closes, or if it doesn’t close it immediately after all the alerts have been dismissed, then move on to the next step.
- Open the Finder App and navigate to your project’s root directory.
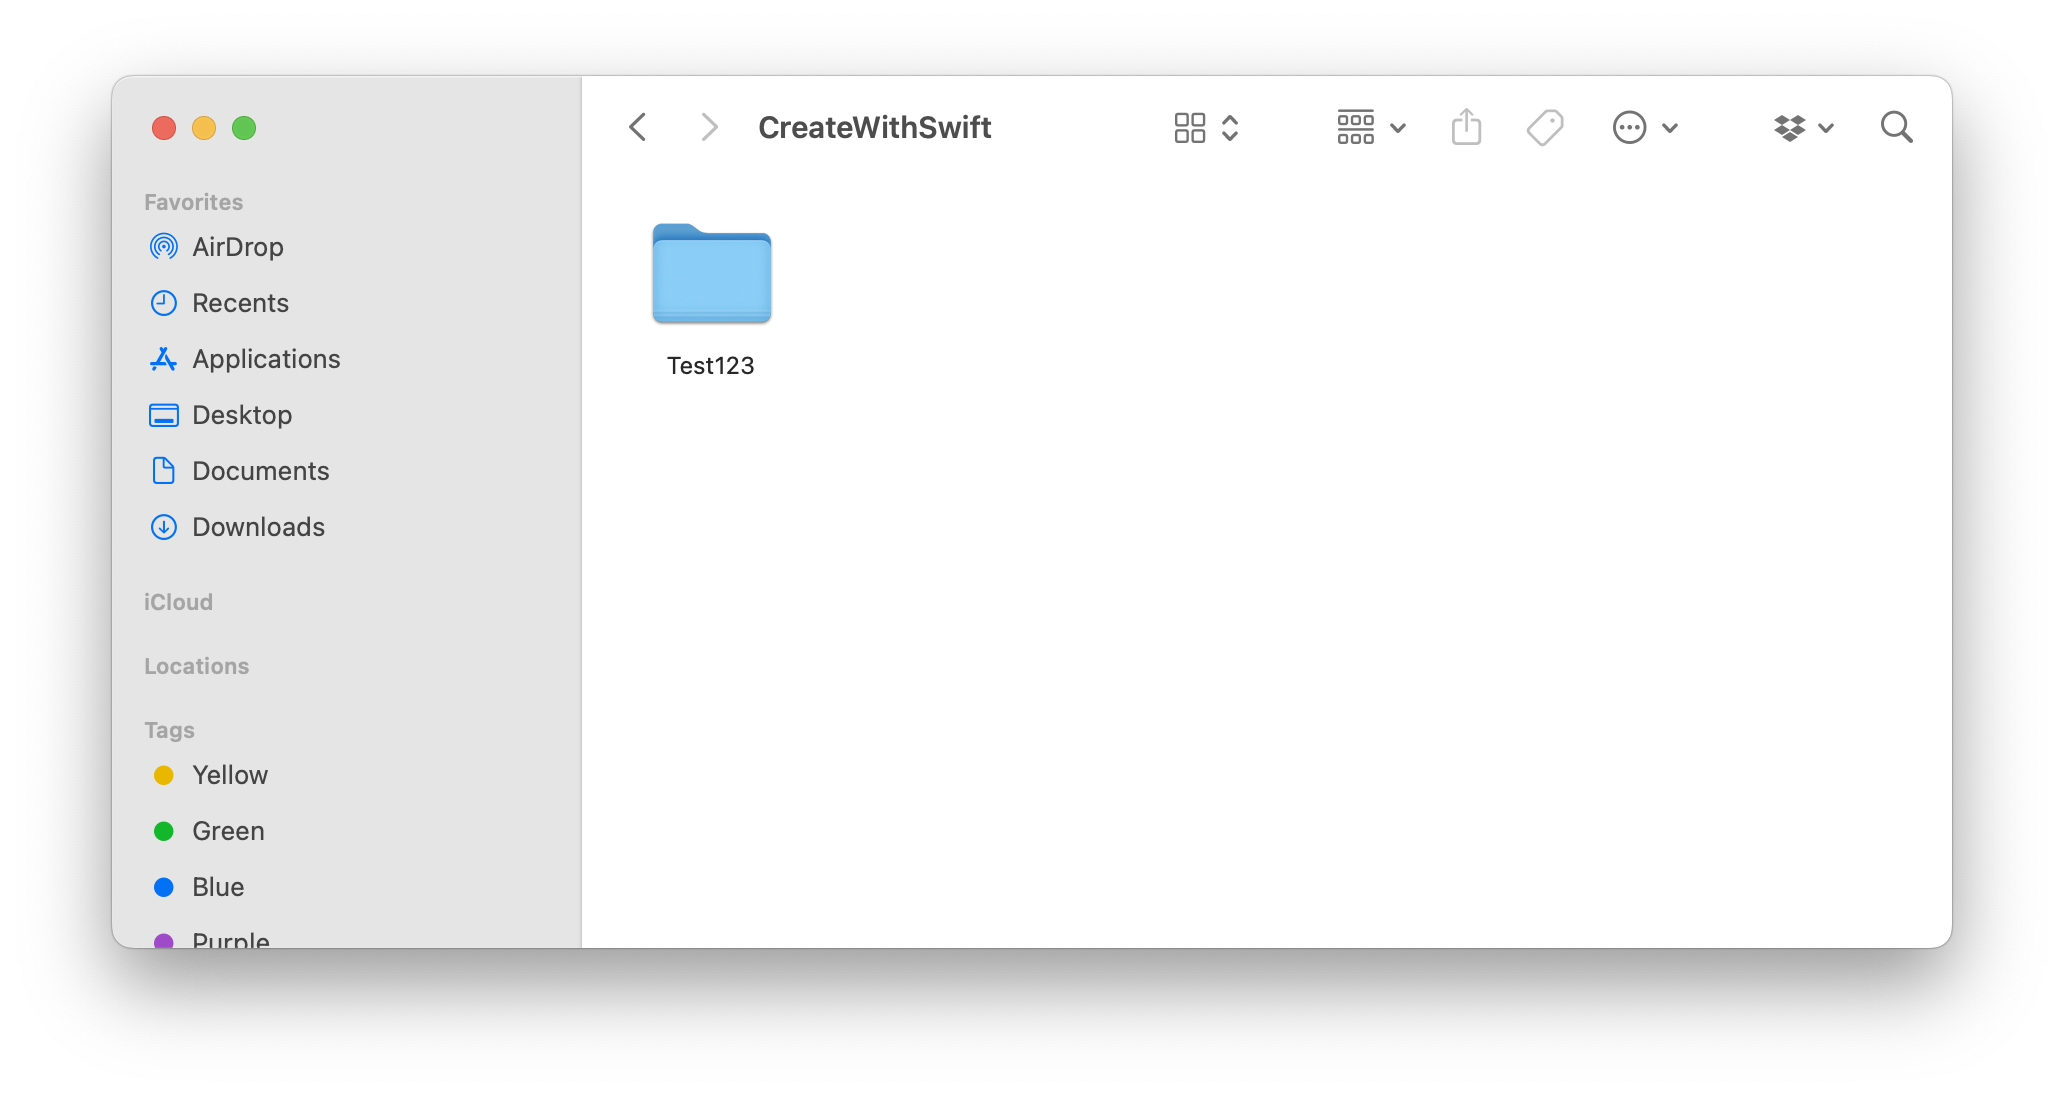
- Rename this root folder manually to match the new project name.
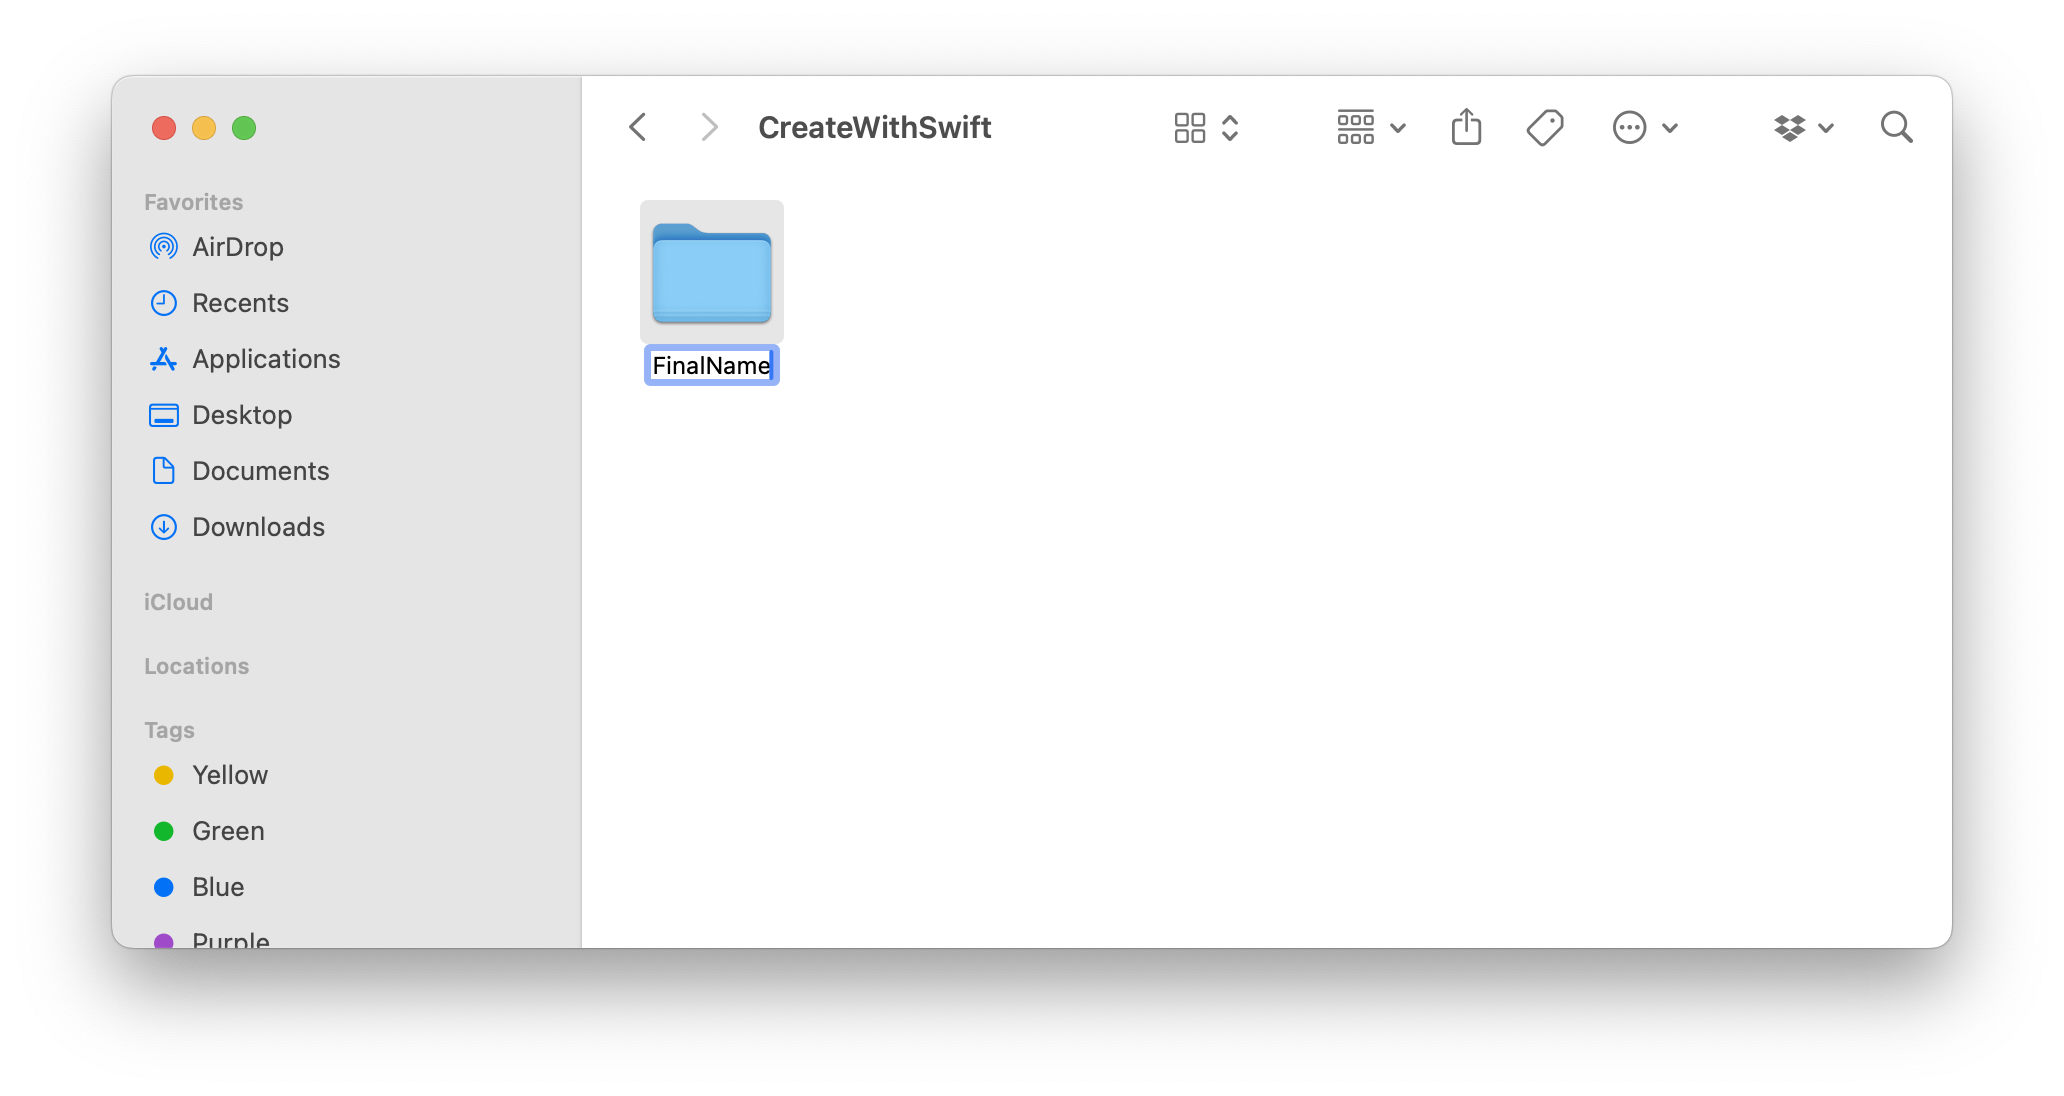
- After renaming, reopen your project by double-clicking the .xcodeproj file within the renamed folder.
Step 8: Clean, Build, and Test thoroughly
- Reopen the Xcode project
- Clean your project (Cmd + Shift + K).
- Build (Cmd + B) and Run (Cmd + R) the app on simulators and physical devices.
- Ensure all functionalities, capabilities, and extensions are working correctly.
For macOS apps:
- Double-check App Sandbox settings.
- Verify helper apps or extensions.
For iOS apps:
- Regenerate Provisioning Profiles and App IDs in the Apple Developer Portal if you changed the bundle identifier.
And there you have it! A beautifully and consistently named project!
Conclusion
Renaming an Xcode project can be straightforward and risk-free, provided you follow these careful steps and precautions. Always maintain a clean, consistent naming structure; your future self (and your teammates) will thank you!