
Supporting Dynamic Type and Larger Text in your app to enhance Accessibility
Understand how to prepare your application to support Dynamic Type.


iOS offers a range of vision accessibility features that can help users with visual impairments to use their devices more effectively. One such feature is the Larger Text and, in general, Dynamic Type, which allows users to customize text size to their preferences.
The Dynamic Type feature allows users to choose the size of textual content displayed on the screen. It helps users who need larger text for better readability. It also accommodates those who can read smaller text, allowing more information to appear on the screen. Apps that support Dynamic Type also provide a more consistent reading experience. - Apple’s Developer Documentation
Dynamic Type was first introduced in iOS 7 as a part of their ongoing commitment to accessibility. It has evolved over the years, with each iOS version bringing enhancements to make the feature more versatile. Users can adjust their preferred text size in the Text Size section of their devices' Display & Brightness settings.
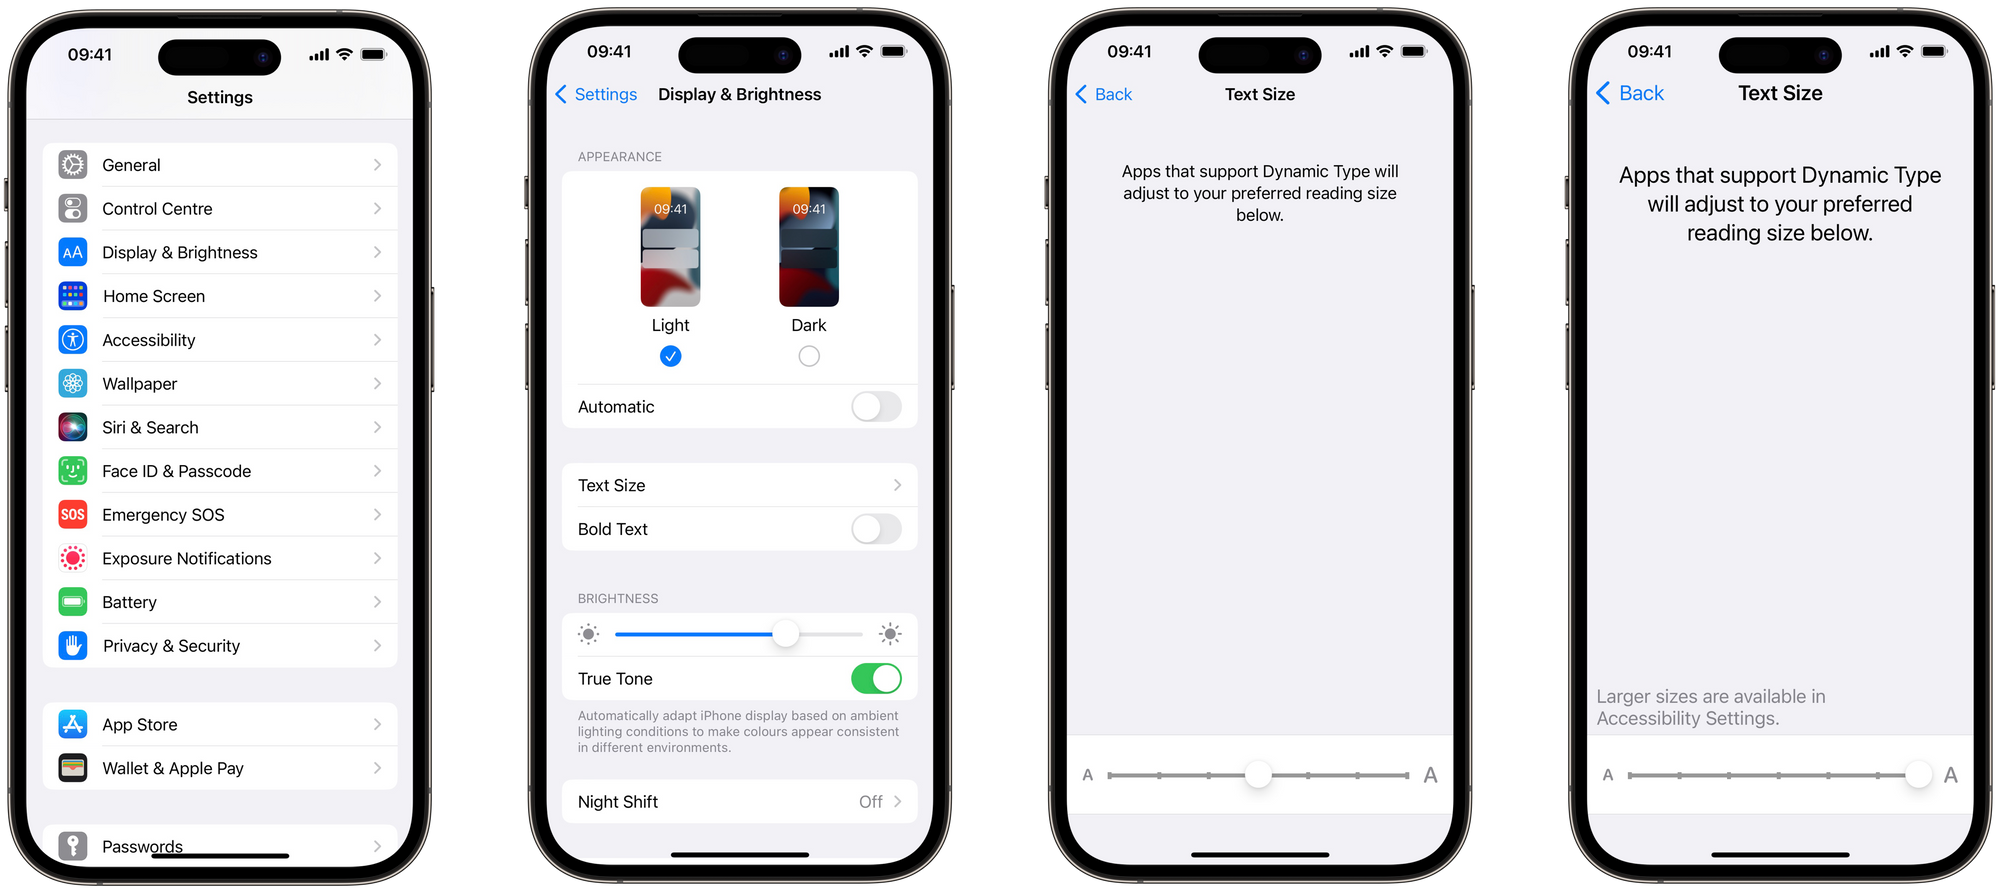
The available text sizes the user can choose from are:
xSmall, Small, Medium, Large, xLarge, xxLarge, xxxLarge

In the Accessibility settings, users can further customize their experience by setting a Larger Accessibility Size for those with visual impairments.
This feature enlarges text even more to enhance readability.
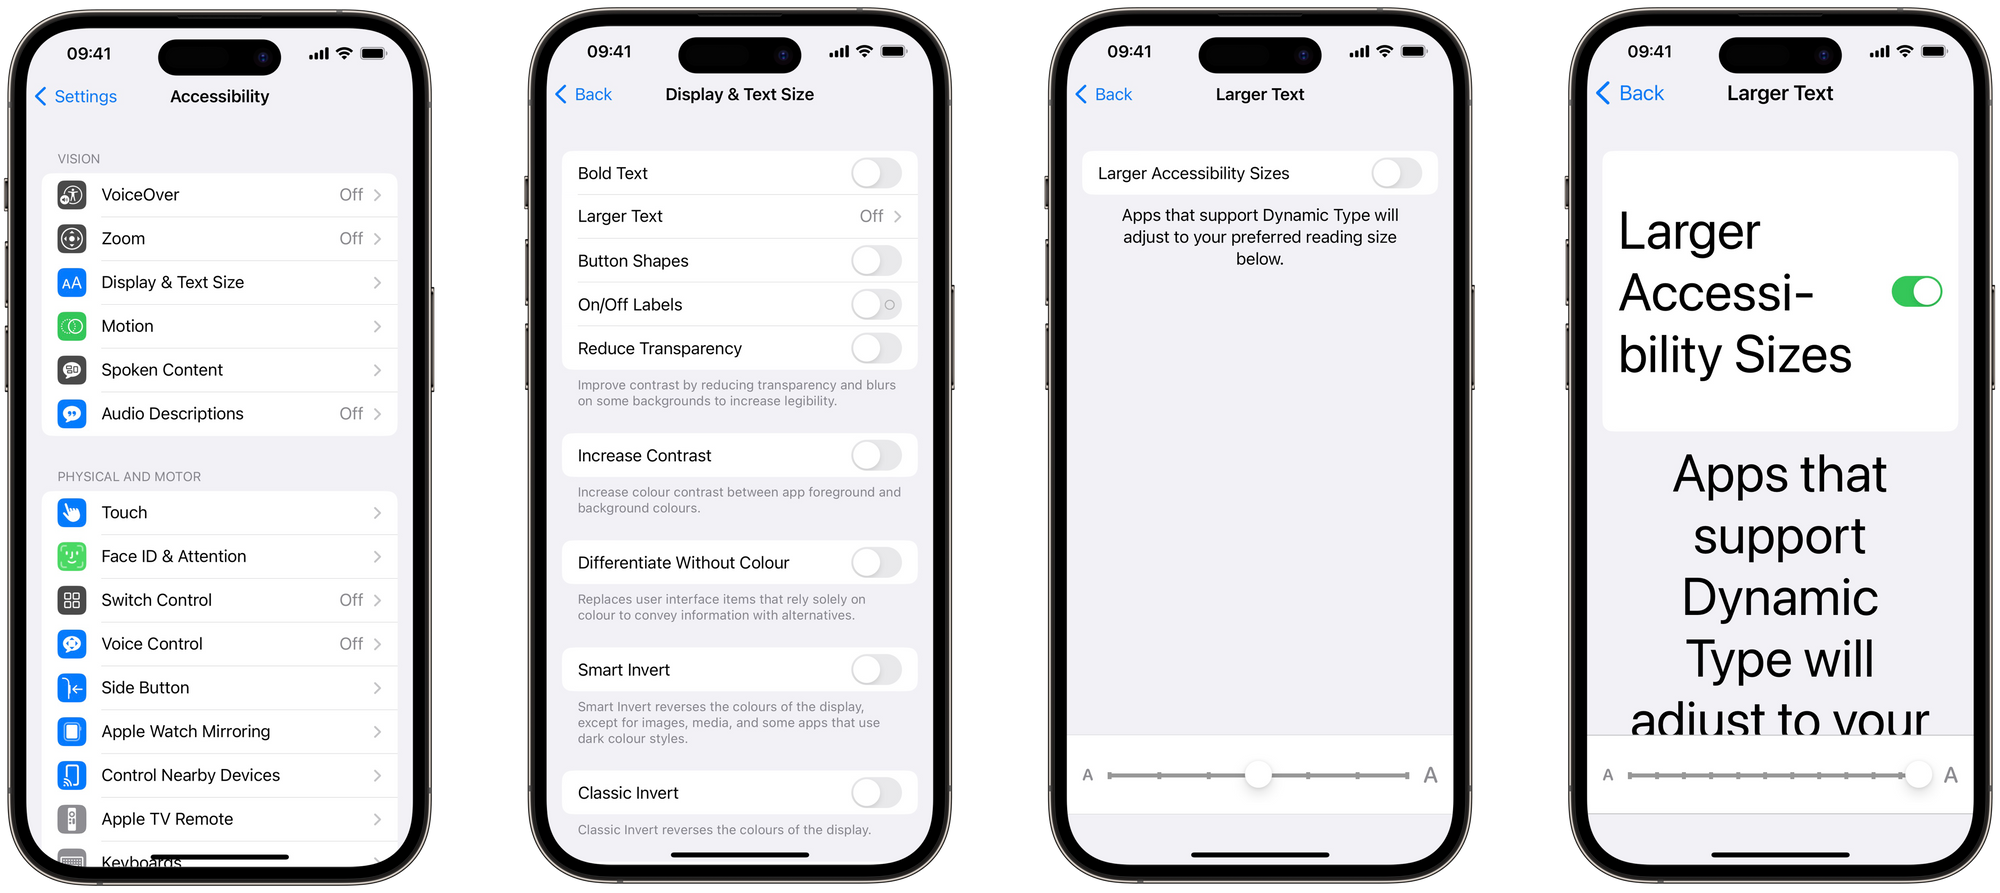
The available text sizes the user can choose from are:
xSmall, Small, Medium, Large, xLarge, xxLarge, xxxLarge, AX1, AX2, AX3, AX4, AX5

In this article, we will explore how to support Dynamic Type in both UIKit and SwiftUI to create more inclusive and user-friendly apps. Supporting Dynamic Type demonstrates not only your commitment to accessibility but also to user-centric design, enhancing users’ satisfaction.

How to support Dynamic Type
If you’re using the text styles for system fonts provided by SwiftUI and UIKit, Dynamic Type is supported by default and also for larger accessibility type sizes.
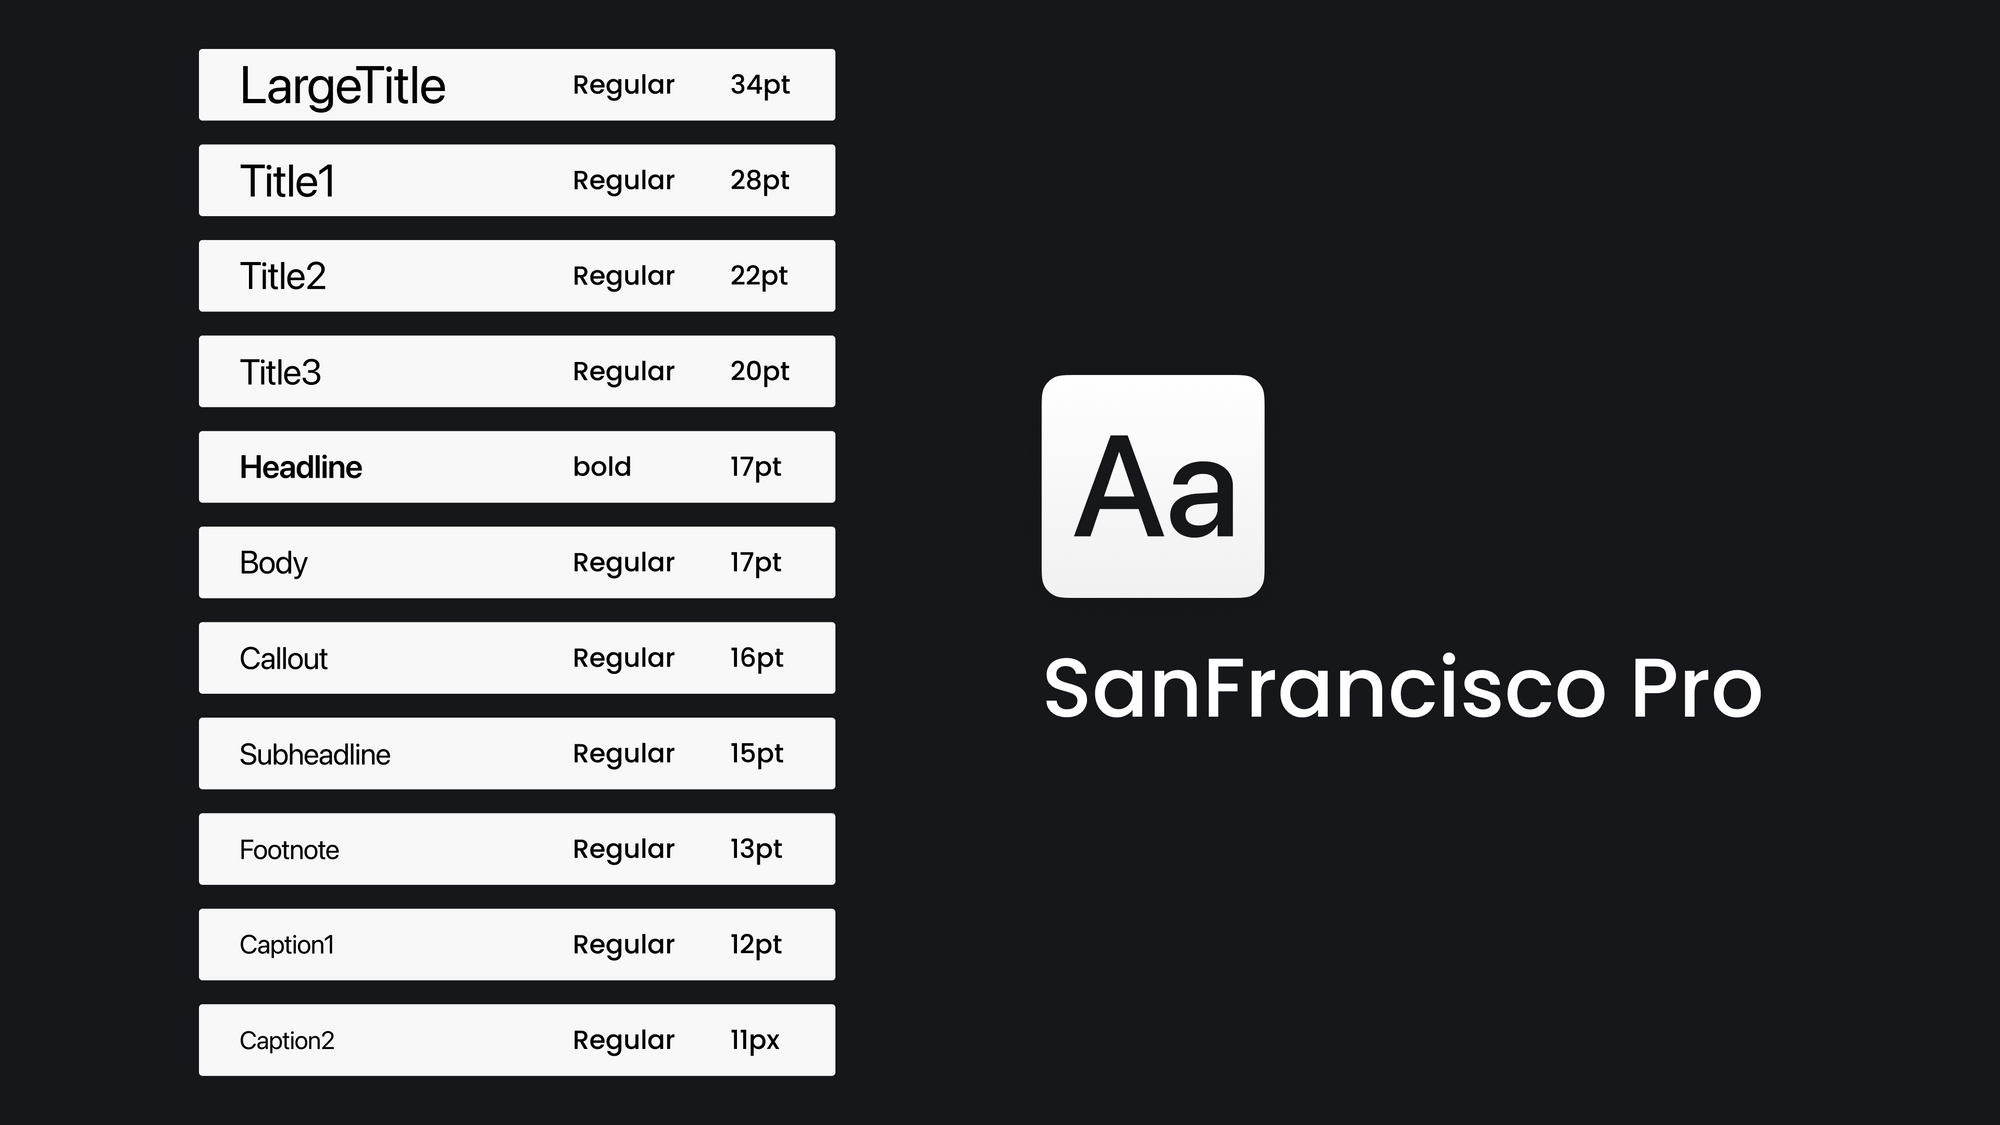
The text style defines how text is utilized, such as whether it serves as a headline, body content, or title, and ensures consistent sizing across all apps using it. There are eleven different text styles:
- Large Title
- Title
- Title 2
- Title 3
- Headline
- Subheadline
- Body
- Callout
- Caption 1
- Caption 2
- Footnote
There are also two more Text Styles in SwiftUI that are currently in beta:
By using the system's predefined Text Styles, the default font, San Francisco, will be used and it will consider the chosen text style's default size. Then this size will be adjusted according to the user's selected text size preference, resulting in the final font size used for rendering the text on the screen.
The Human Interface Guidelines provide details on how text styles adapt according to every dynamic type size.

Now, let's explore how to support Dynamic Type in UIKit and SwiftUI.
Supporting Dynamic Type in UIKit
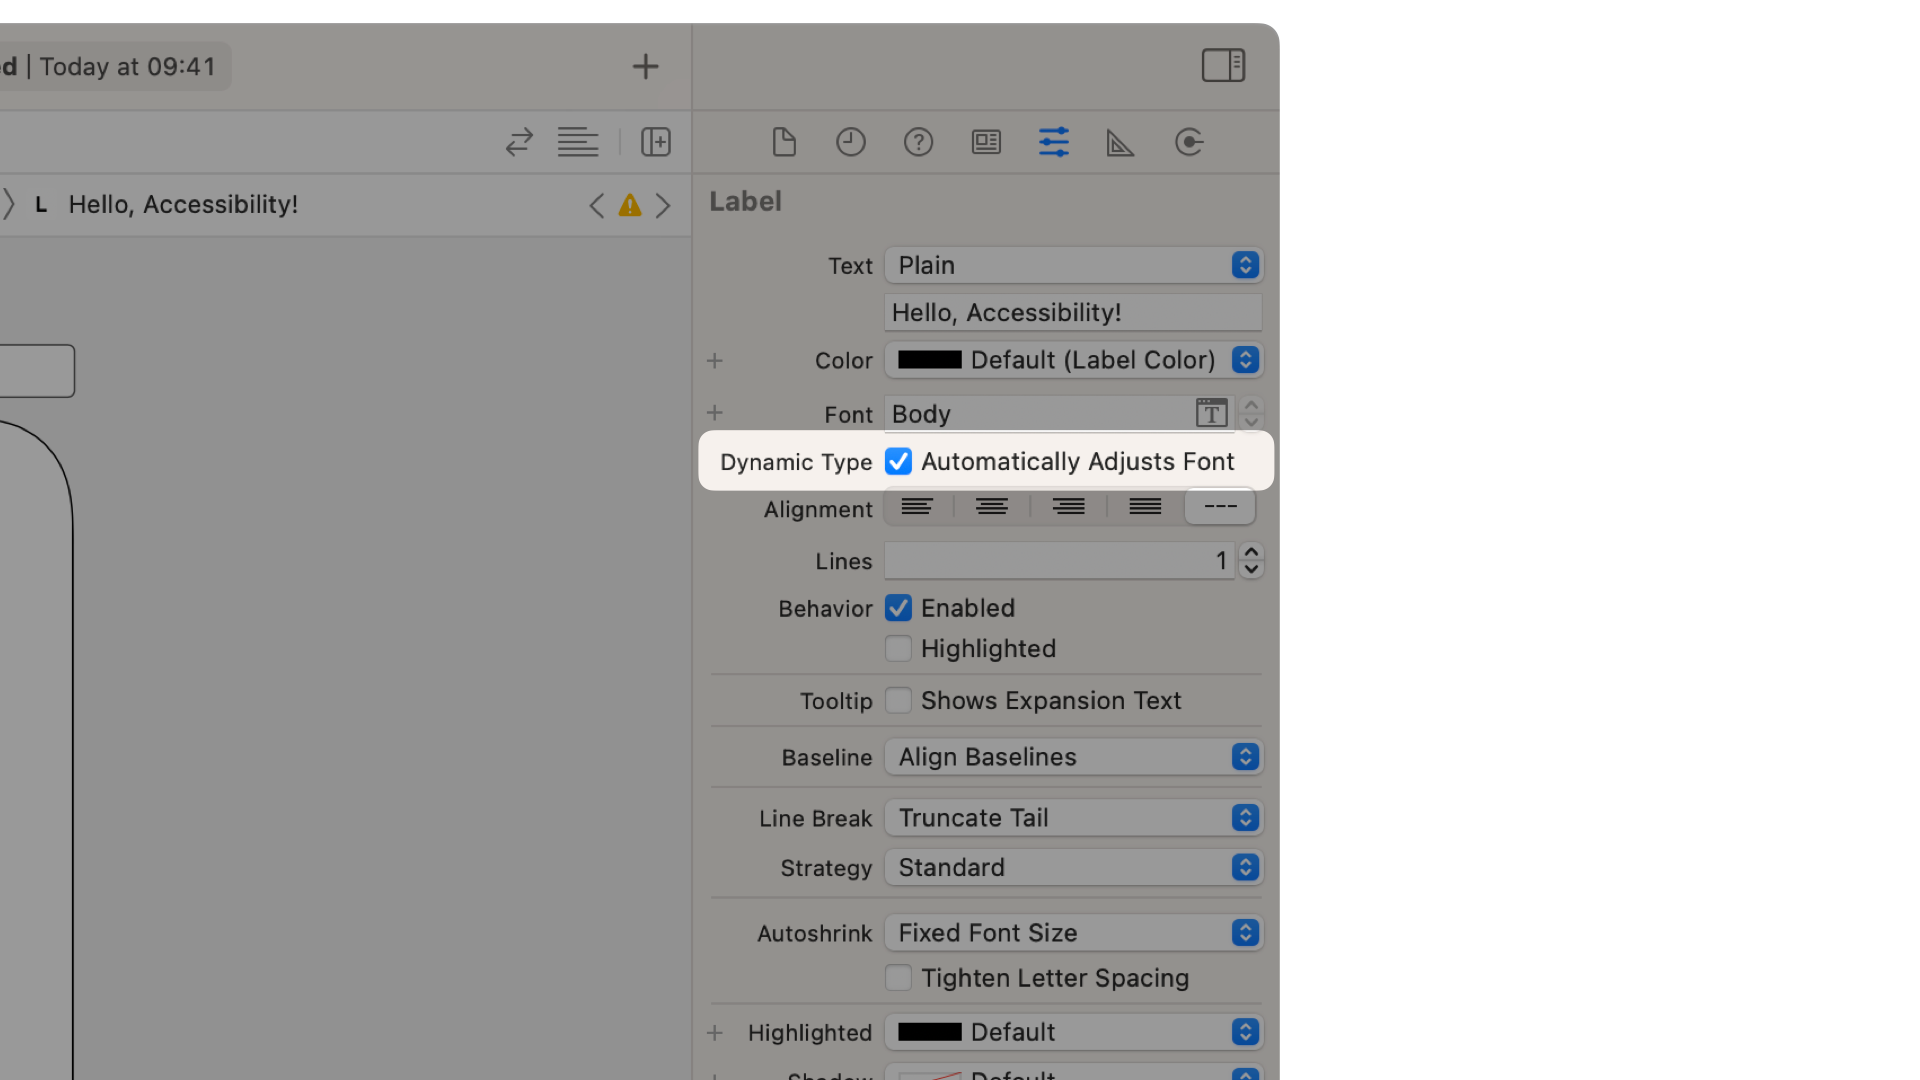
If you are using Storyboard files, you can set the text style in the label properties in the Attributes Inspector.
The text will adapt to the user’s preferred text sizes but the app must be relaunched to see changes. To ensure that text dynamically adjusts to user-preferred text size changes without requiring an app relaunch, enable the Automatically Adjust Font option.
Without storyboards, the same can be achieved using the preferredFont(forTextStyle:) method and the adjustsFontForContentSizeCategory property.
//Apply a Text Style to a label

label.font = UIFont.preferredFont(forTextStyle: .body)

//Set the Automatically Adjust Font property

label.adjustsFontForContentSizeCategory = true
Apply a Text Style to a label in UIKit
Supporting Dynamic Type in SwiftUI
SwiftUI inherently supports Dynamic Type without any extra effort from developers. This is related to the fact that every text already has a Text Style assigned by default that fits most of the cases. However, it’s good practice to select the appropriate text styles among the provided ones.
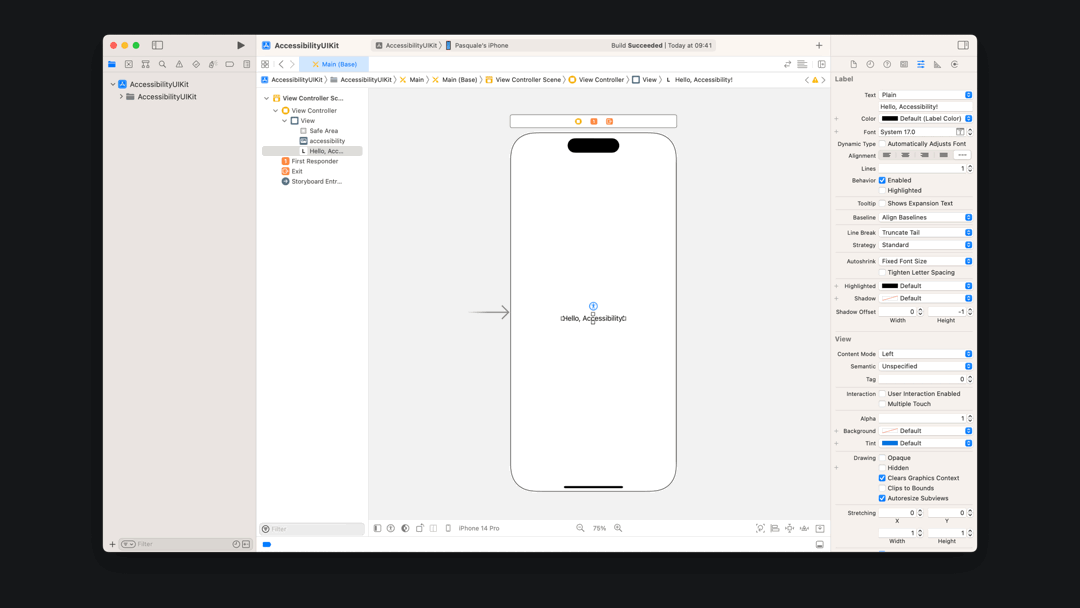
You can set the text style in the Font properties of any text representation in the Attributes Inspector.
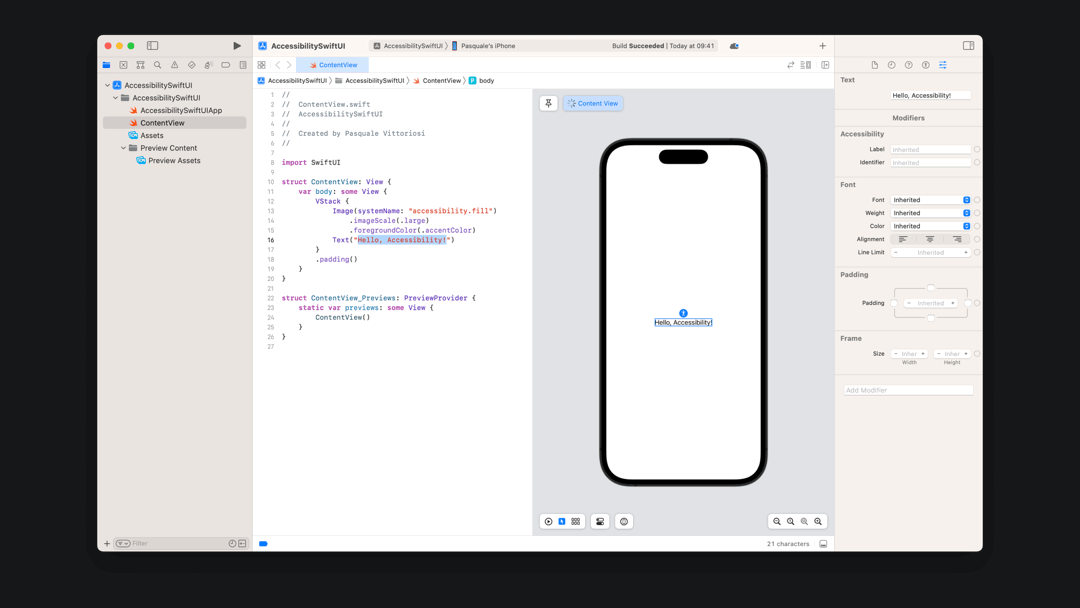
This will automatically add the font(_:) view modifier to the text view that is used to apply a specific font to all of the text in a view and pass the predefined body font with the related Text Style.
//Apply a Text Style to a text

Text("Hello, Accessibility!")
  .font(.body)
Apply a Text Style to a text in SwiftUI
.body text style assigned to it.Custom Fonts
Using a custom font with dynamic type has always been possible but from the developer side, it wasn't super simple. Over time it has become more accessible.
Supporting Dynamic Type with custom fonts in UIKit
In UIKit, if you want to ensure that they adapt to Dynamic Type settings you need to set this up programmatically. The settings made in the Interface Builder in the Storyboard won't automatically adjust custom fonts for Dynamic Type. You can use a custom font for a specific text style by creating a scaled instance of the font using UIFontMetrics, introduced in iOS 11. This allows your custom font to scale effectively with different text sizes.
//Custom font that will scale according to different text sizes

if let customFont = UIFont(name: "Custom Font", size: UIFont.labelFontSize) {
    label.font = UIFontMetrics.default.scaledFont(for: customFont)
    label.adjustsFontForContentSizeCategory = true
}
Custom font that will scale according to different text sizes in UIKit
Or you can scale your font as a specific Text Style would:
//Custom font that will scale relative to the title Text Style

if let customFont = UIFont(name: "Custom Font", size: UIFont.labelFontSize) {
    label.font = UIFontMetrics(forTextStyle: .title).scaledFont(for: customFont)
    label.adjustsFontForContentSizeCategory = true
}
Custom font that will scale relative to the title Text Style in UIKit
You'll need to define and apply the appropriate font metrics for each text style to every label or UI element in your view to ensure that they respond to changes in text size preferences.
Supporting Dynamic Type with custom fonts in SwiftUI
The custom font used with the custom(_:size:) method will automatically scale relative to the body text style with no further effort from developers.
//Custom font that will scale relative to the body Text Style

Text("Hello, Accessibility!")
    .font(Font.custom("Custom Font", size: 18))
Custom font that will scale relative to the body Text Style in SwiftUI
Alternatively, you may specify what the text style scales relative to with the custom(_:size:relativeTo:) method available since iOS 14.
//Custom font that will scale relative to the specified Text Style

Text("Hello, Accessibility!")
    .font(Font.custom("Custom Font", size: 36, relativeTo: .heading))
Custom font that will scale relative to the specified Text Style in SwiftUI
DynamicTypeSize in SwiftUI
When writing an app, you might need to read a device setting to adjust the view or its behaviours to match the user preferences. In SwiftUI, we can use the @Environment property wrapper to read and observe values of the environment that the frameworks create for your app, such as current device locale (device language), colour scheme (Light or Dark Mode), enabled accessibility options, and many other predefined values, which are available in the EnvironmentValues structure.
To check the user-preferred text size, we can read the DynamicTypeSize value.
This allows us to make decisions that will best fit our users’ preferences. An example could be that with large text sizes, you add scrolling to your user interface.
//Embed a view in a ScrollView if xxLarge Dynamic Type size is preferred

struct AccessibleView: View {

    @Environment(\\.dynamicTypeSize) private var dynamicTypeSize

    var body: some View {
        if dynamicTypeSize >= .xxLarge {
            ScrollView {
                ContentView()
            }
        } else {
            ContentView()
        }
    }
}
Embed a view in a ScrollView if xxLarge Dynamic Type size is preferred in SwiftUI
Environmental values allow us to make decisions that will best fit our users’ preferences. Don't use the DynamicTypeSize environment value to limit the text size of your user interface, even if it is possible. Read the accessibility preferences of your users with the intention of providing a better user experience to them.
DynamicTypeSize was introduced in iOS 15 replacing the now deprecated ContentSizeCategoryHow to test Dynamic Type
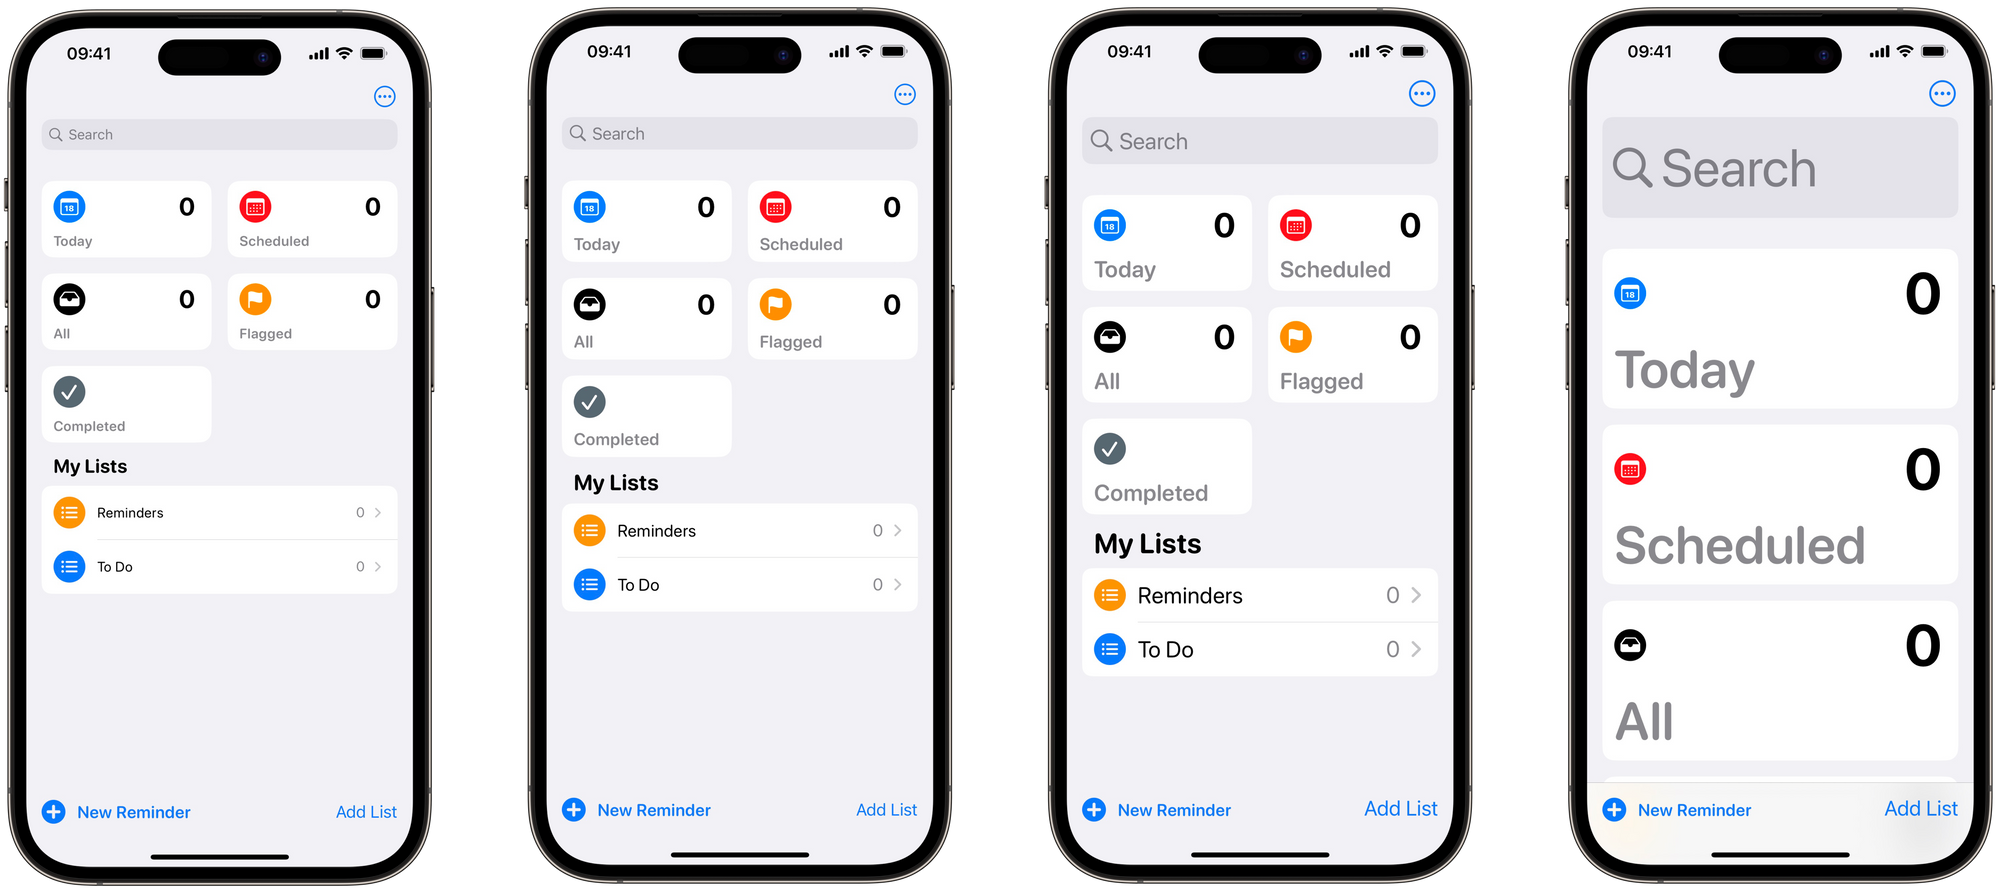
You can test how your app’s layout adapts to the different dynamic type sizes with the Accessibility Inspector. In the Settings tab, you can turn on common accessibility options such as Dynamic Type to evaluate the effects on your app quickly and easily or in the Audit Tab, you can run an audit of your app and receive suggestions on how to fix possible issues, also related to Dynamic Type.
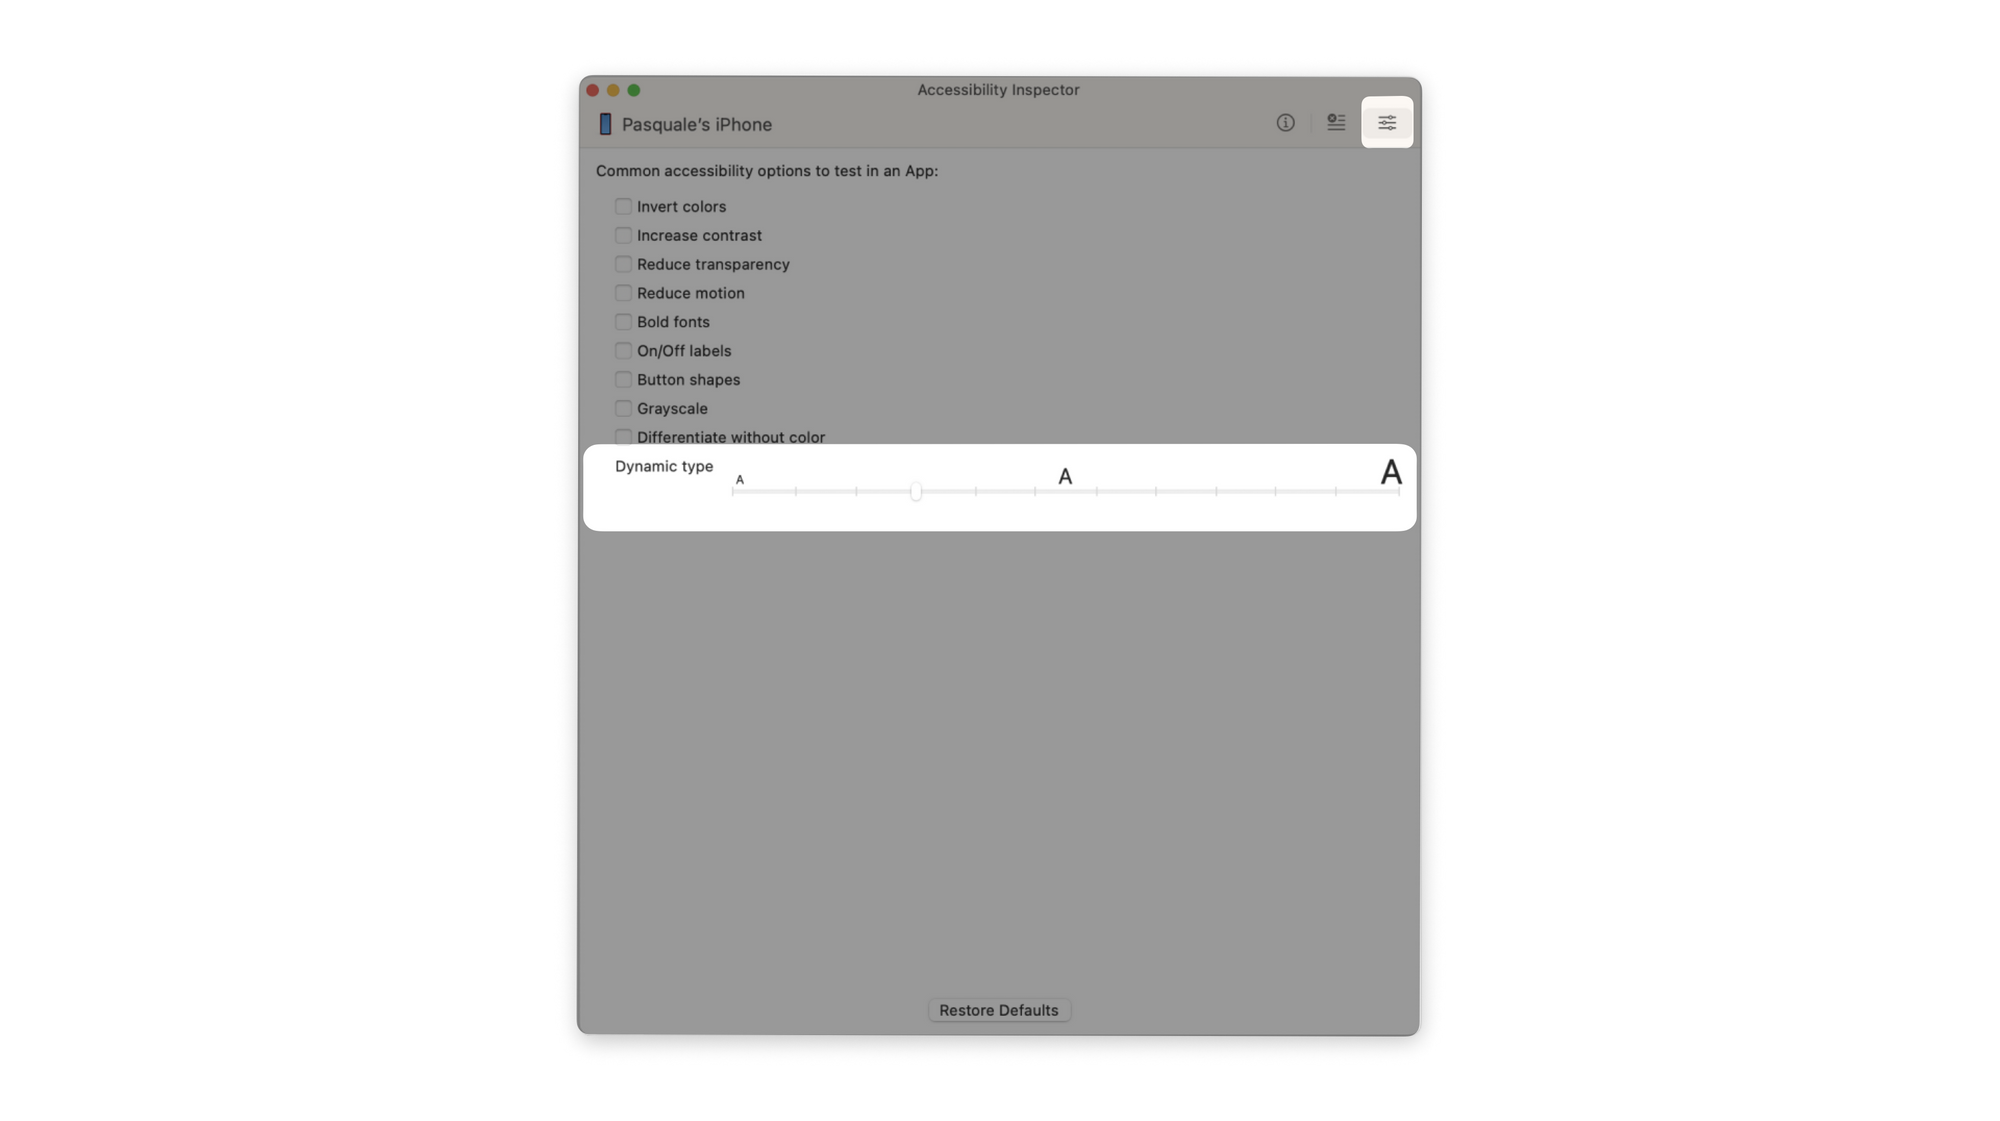
It is also really useful to test how the layout adapts to all text sizes directly while developing in Xcode.
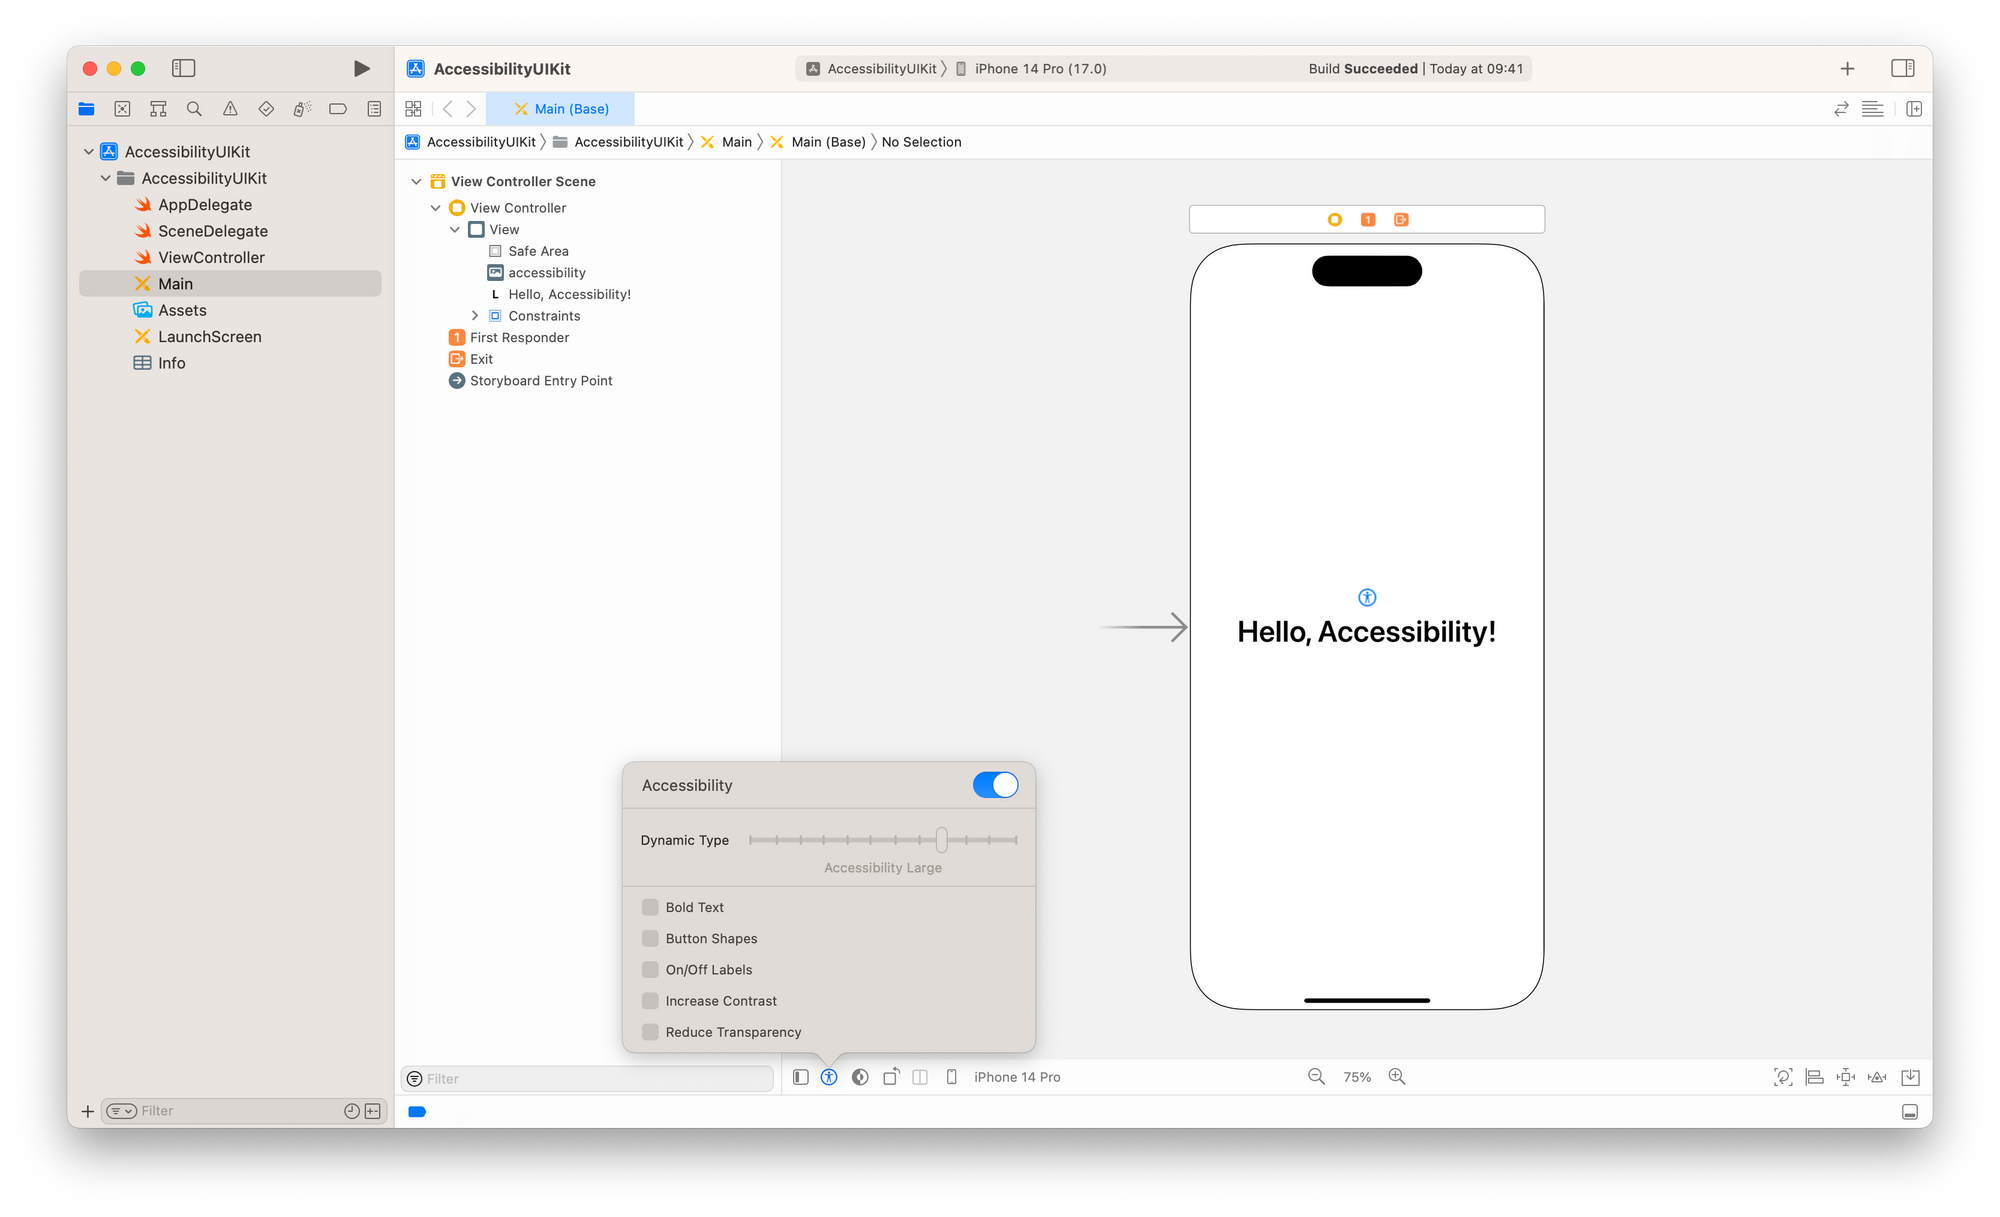
Testing in UIKit
You can change the Type Size by clicking the accessibility icon at the bottom left of the Storyboard in the Canvas Button Bar.
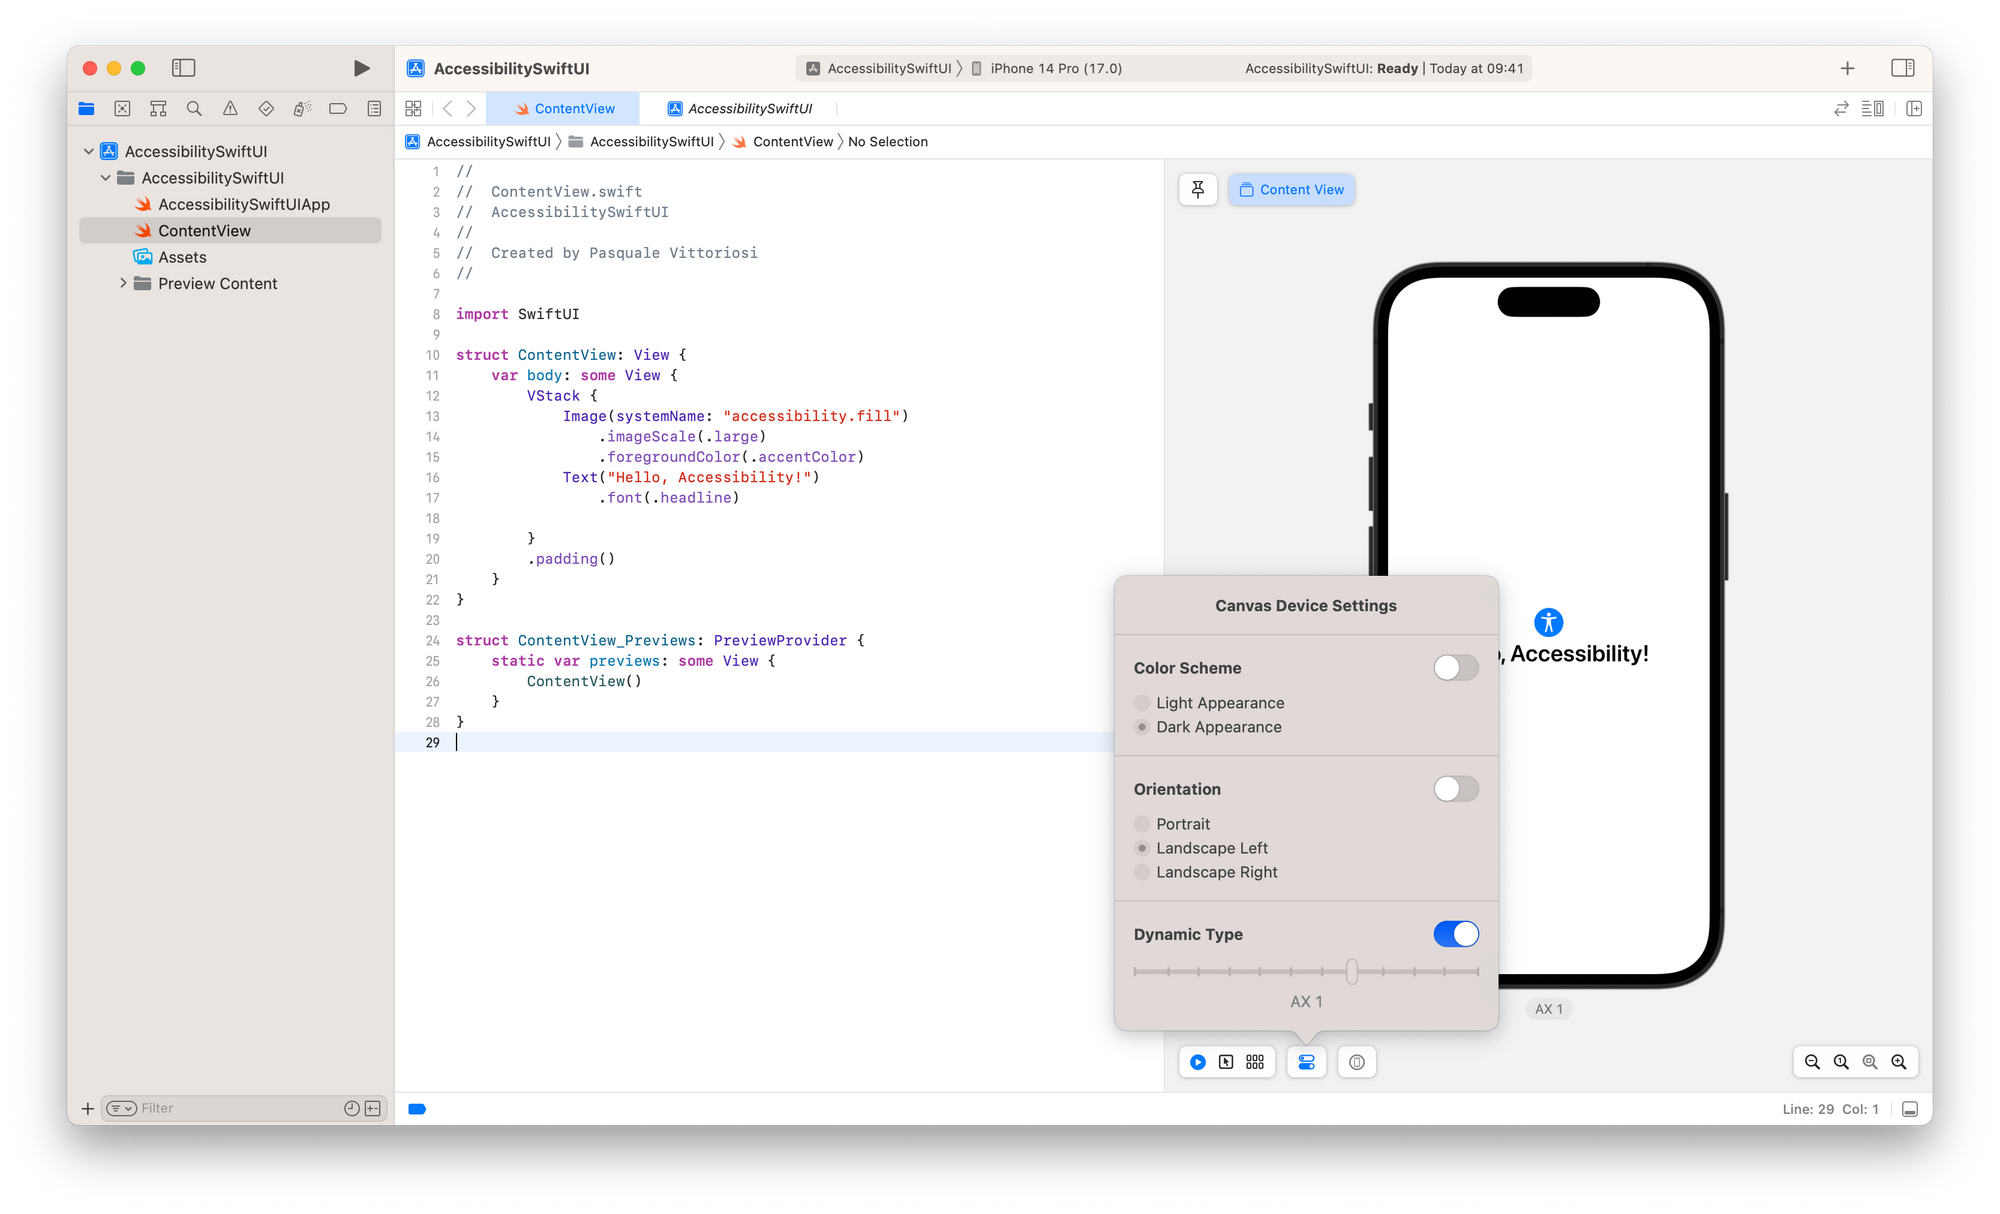
Testing in SwiftUI
You can change the Type Size in the Canvas Device Settings.
You can also use the Variants menu to show multiple variations of the preview, in this case, one for every dynamic type size.
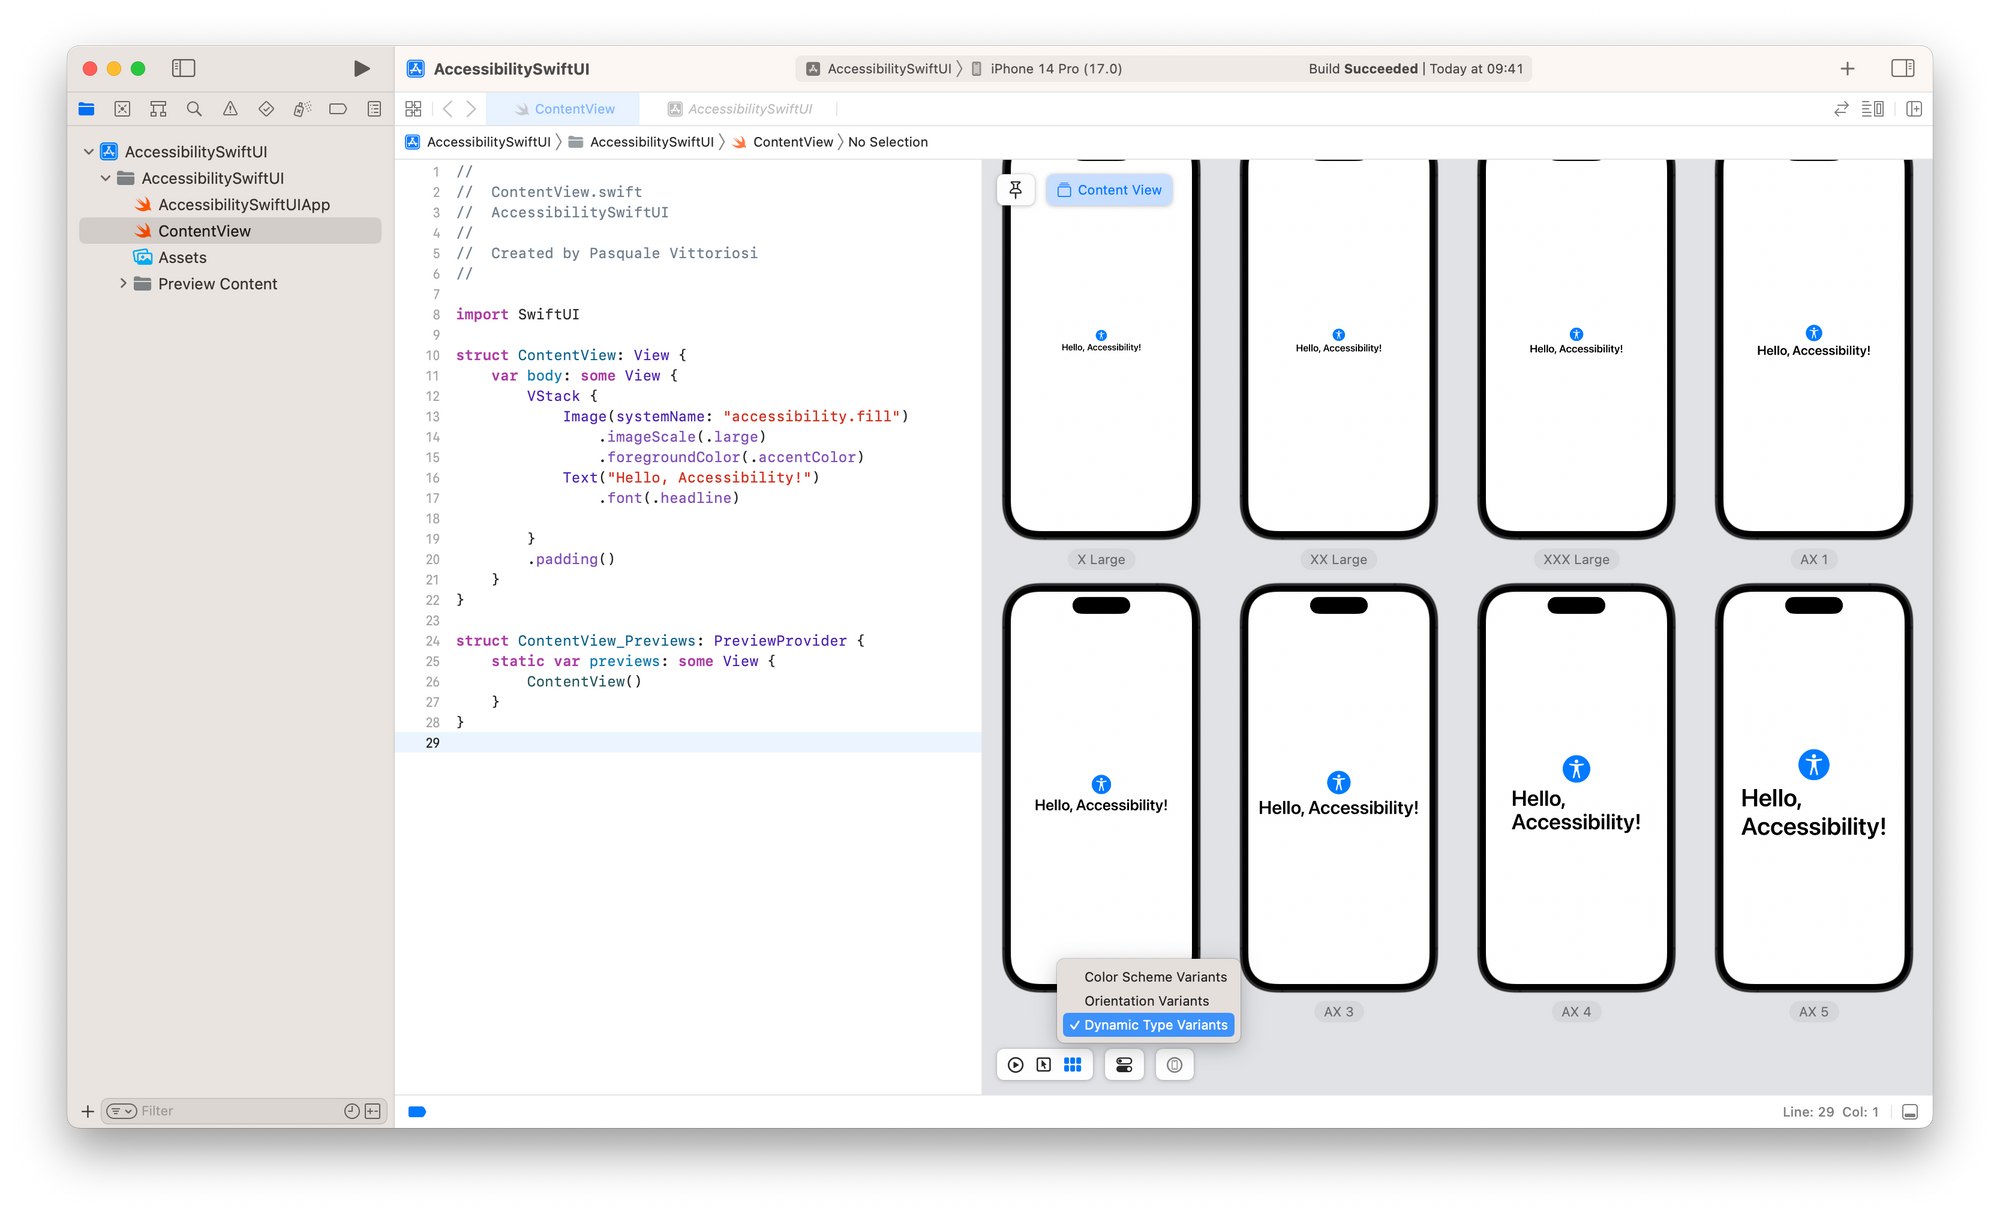
In fact, they will scale according to user preferences.
Considerations
With the introduction of Dynamic Type, there are a few considerations and things we should always keep in mind when supporting the feature:
- Avoid using fixed sizes, where possible, to respect user preferences
- Avoid using line limits and in any case (both if you are using line limits or not) specify truncation mode.
- Test that the layout adapts to all dynamic type sizes
- Consider that sometimes you need to make sure all the content is seen not just based on screen size, but also based on type size
Conclusion
Dynamic Type is a feature introduced in iOS 7 that allows users to customize text size to their preferences. Thanks to the various updates supporting Dynamic Type requires minimum effort for developers but it plays a pivotal role in making apps more accessible for users with visual impairments and also empowers users to tailor their app experiences.