Taking First Steps into Metal Shaders
Learn the basics of Metal with SwiftUI to take your first steps on using shaders in your app UI.

Have you ever wondered how some of the more complex and visually rich animations you see in applications every day are rendered? Many of these effects rely on Metal, Apple’s low-level graphics and compute technology that provides direct access to the GPU (Graphics Processing Unit). While most Swift and SwiftUI code runs on the CPU and is related to application logic and layout, rendering is a different kind of task: every frame shown on screen is made up of millions of pixels that must be calculated repeatedly and efficiently. The GPU is built specifically for this type of highly parallel work, and Metal is the framework that allows developers to take advantage of it.
Metal consists of a Swift-accessible API used to set up and schedule GPU operations, and the Metal Shading Language (MSL), a C-based language used to write shaders, small programs that run directly on the GPU. Shaders define how geometry is positioned and transformed, while fragment (or pixel) shaders run to compute colors, textures, lighting, and visual effects. From the GPU’s point of view, rendering is a continuous process of transforming data into pixels, frame after frame.
Unlike SwiftUI’s view-driven animation model, Metal operates at the pixel level. This makes it possible to create effects and animations driven by time, mathematical functions and data rather than changes in the view hierarchy. Working with Metal, therefore, requires a shift in perspective, from views and modifiers to pixels, parallel execution, and frame-based rendering, but it also enables a much higher degree of visual control.
Understanding Shaders
Before diving into code, let's understand what a shader actually is. A shader is simply a function that runs once for every pixel on the screen. So a 300x300 pixel view will call its shader function 90,000 times, once for each pixel. The GPU is specifically designed to run these calculations in parallel, which is why it can handle this enormous workload smoothly at 60 frames per second.
Think of it this way: in SwiftUI, code says "make this rectangle blue" and SwiftUI then figures out how to color all those pixels. With Metal shaders, you're writing the code that colors each individual pixel. You're working at a much lower level, but with that comes much more control and creative potential.
The Metal and SwiftUI Connection
The workflow for using Metal shaders in SwiftUI is surprisingly straightforward once you understand it:
- Create a .metal file in your Xcode project with your shader functions;
- Build your project and Xcode automatically generates a
ShaderLibraryclass; - Import Metal in your SwiftUI file with
import Metal; - Apply the shader to a SwiftUI view using modifiers like
.colorEffect()or.layerEffect().
Let's see this in action with the simplest possible shader.
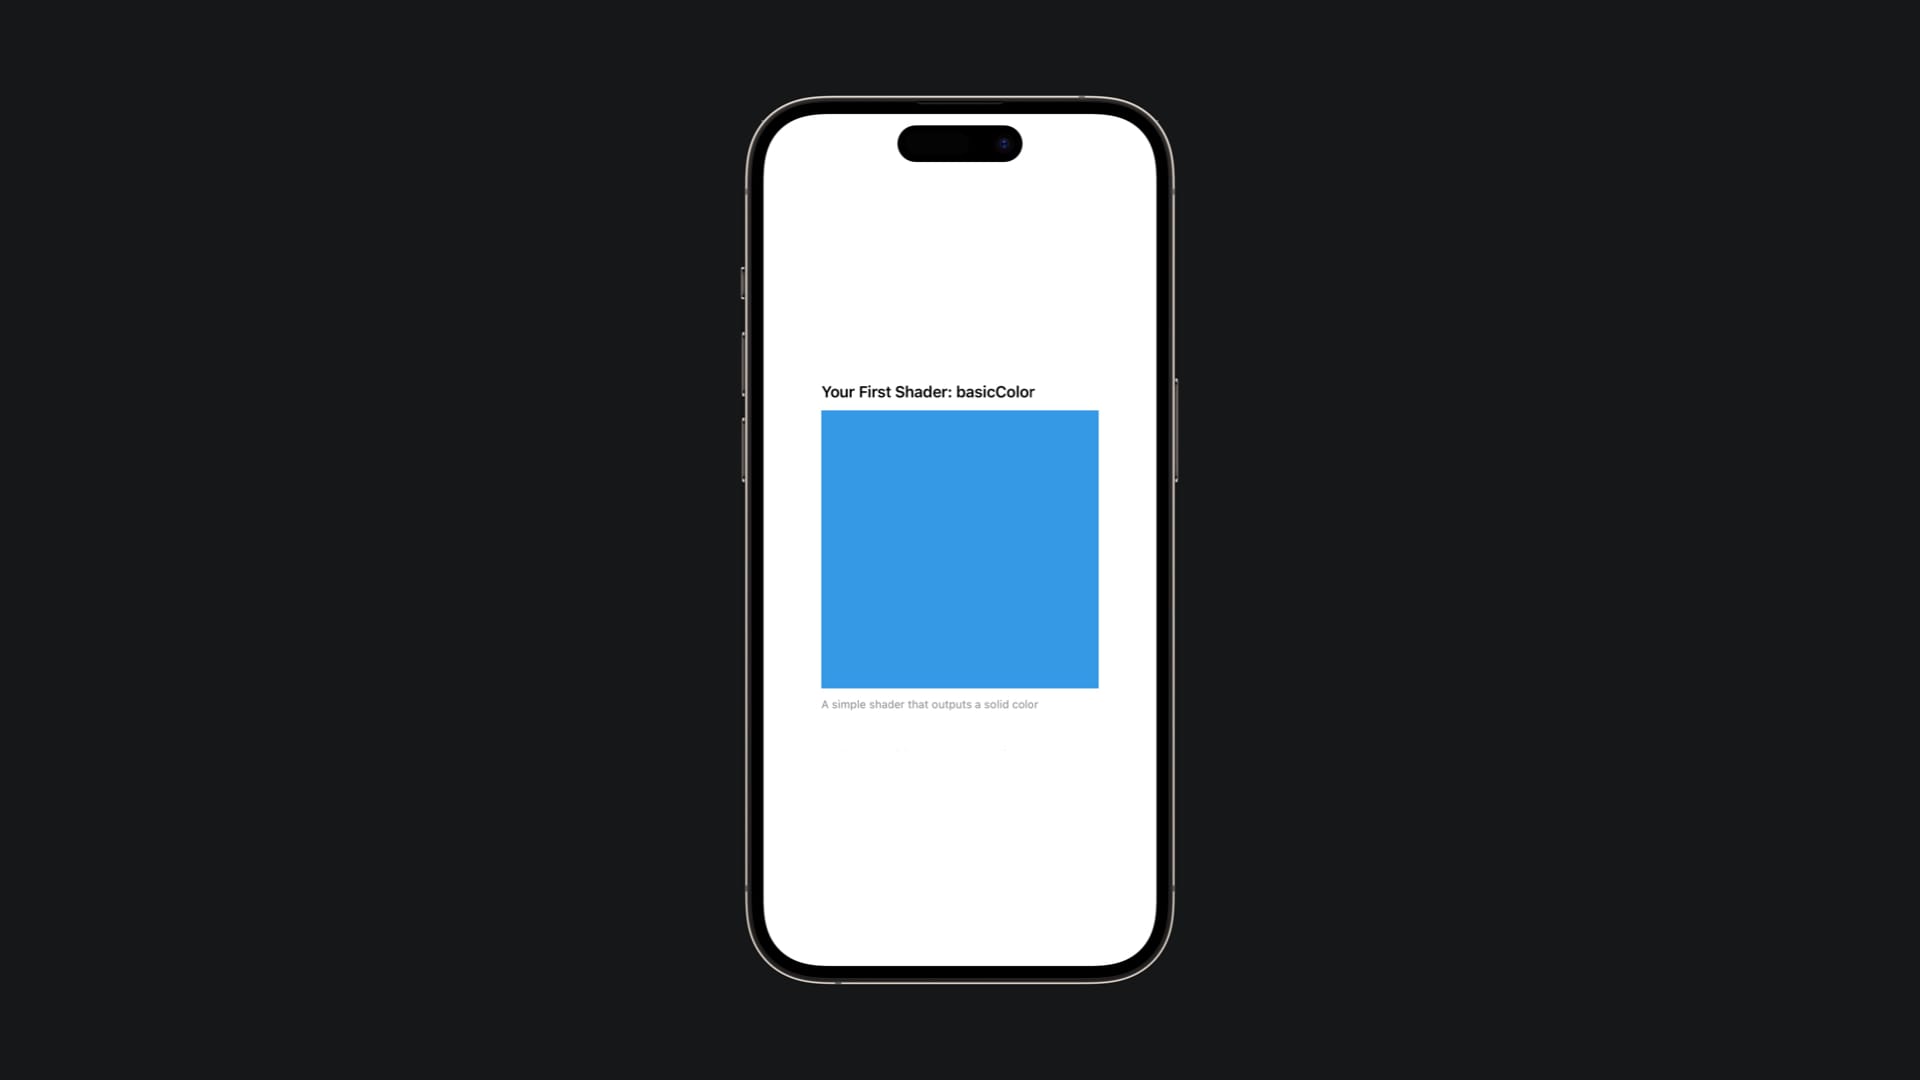
Your First Shader: basicColor
Here's the complete code for your first shader.
#include <metal_stdlib>
#include <SwiftUI/SwiftUI.h>
using namespace metal;

[[ stitchable ]] half4 basicColor(float2 position, half4 currentColor) {
    return half4(0.2, 0.6, 0.9, 1.0);
}
It might seem intimidating at first, but let's break this code down to understand each part.
The Headers
#include <metal_stdlib>
#include <SwiftUI/SwiftUI.h>
using namespace metal;
These are required headers that give us access to Metal's standard library and SwiftUI integration. Think of them like import SwiftUI in Swift, you need them at the top of every shader file.
The Stitchable Attribute
[[ stitchable ]]
This special attribute tells SwiftUI that this function can be used as a shader. It marks the function so that SwiftUI knows to call it for every pixel when rendering your view.
The Function Signature
half4 basicColor(float2 position, half4 currentColor)
Let's break this down:
half4: This is the return type. It's a 4-component vector representing RGBA color (Red, Green, Blue, Alpha). Thehalftype is a 16-bit floating point number, it's perfect for colors because it provides sufficient precision while being fast on the GPU.basicColor: This is just the function name. You can name it anything you want.float2 position: This parameter is automatically provided by SwiftUI. It contains the x and y coordinates of the pixel being rendered. For example, if you're rendering a 400x400 view, position might be (200, 200) for the center pixel or (0, 0) for the top-left corner.half4 currentColor: This is also automatically provided by SwiftUI. It contains the existing color at this pixel position before your shader runs. This lets you modify or blend with the existing color.
The Function Body
return half4(0.2, 0.6, 0.9, 1.0);
This is where usually the magic happens. In this case, the body of the function is kept very simple, seen that it returns just a color with:
- Red: 0.2 (20% intensity)
- Green: 0.6 (60% intensity)
- Blue: 0.9 (90% intensity)
- Alpha: 1.0 (fully opaque)
This combination creates a nice cyan/blue color. Notice that both position and currentColor are completely ignored. This shader doesn't care where the pixel is or what color it was before, it just makes everything the same blue color.
Using it in SwiftUI
Now let's see how to use this shader in SwiftUI. When you build your project, Xcode automatically scans all .metal files, finds every function marked with [[ stitchable ]] and generates a ShaderLibrary class for you. For each shader function you write, like our basicColor, Xcode creates a corresponding function in ShaderLibrary that you can call from Swift, like ShaderLibrary.basicColor(). You don't need to write any bridging code, it's completely automatic.
import SwiftUI
import Metal

struct BasicColorShaderView: View {
    var body: some View {
        Rectangle()
            .colorEffect(ShaderLibrary.basicColor())
            .frame(width: 300, height: 300)
    }
}
Here's what's happening:
- We create a
Rectangle()to act as our canvas; - We apply the shader using
.colorEffect(ShaderLibrary.basicColor()); - We set the size to 300x300 pixels.
When this view renders, SwiftUI calls your basicColor shader function 90,000 times (once for each pixel), and each time it returns that same blue color. The result? A solid blue rectangle.
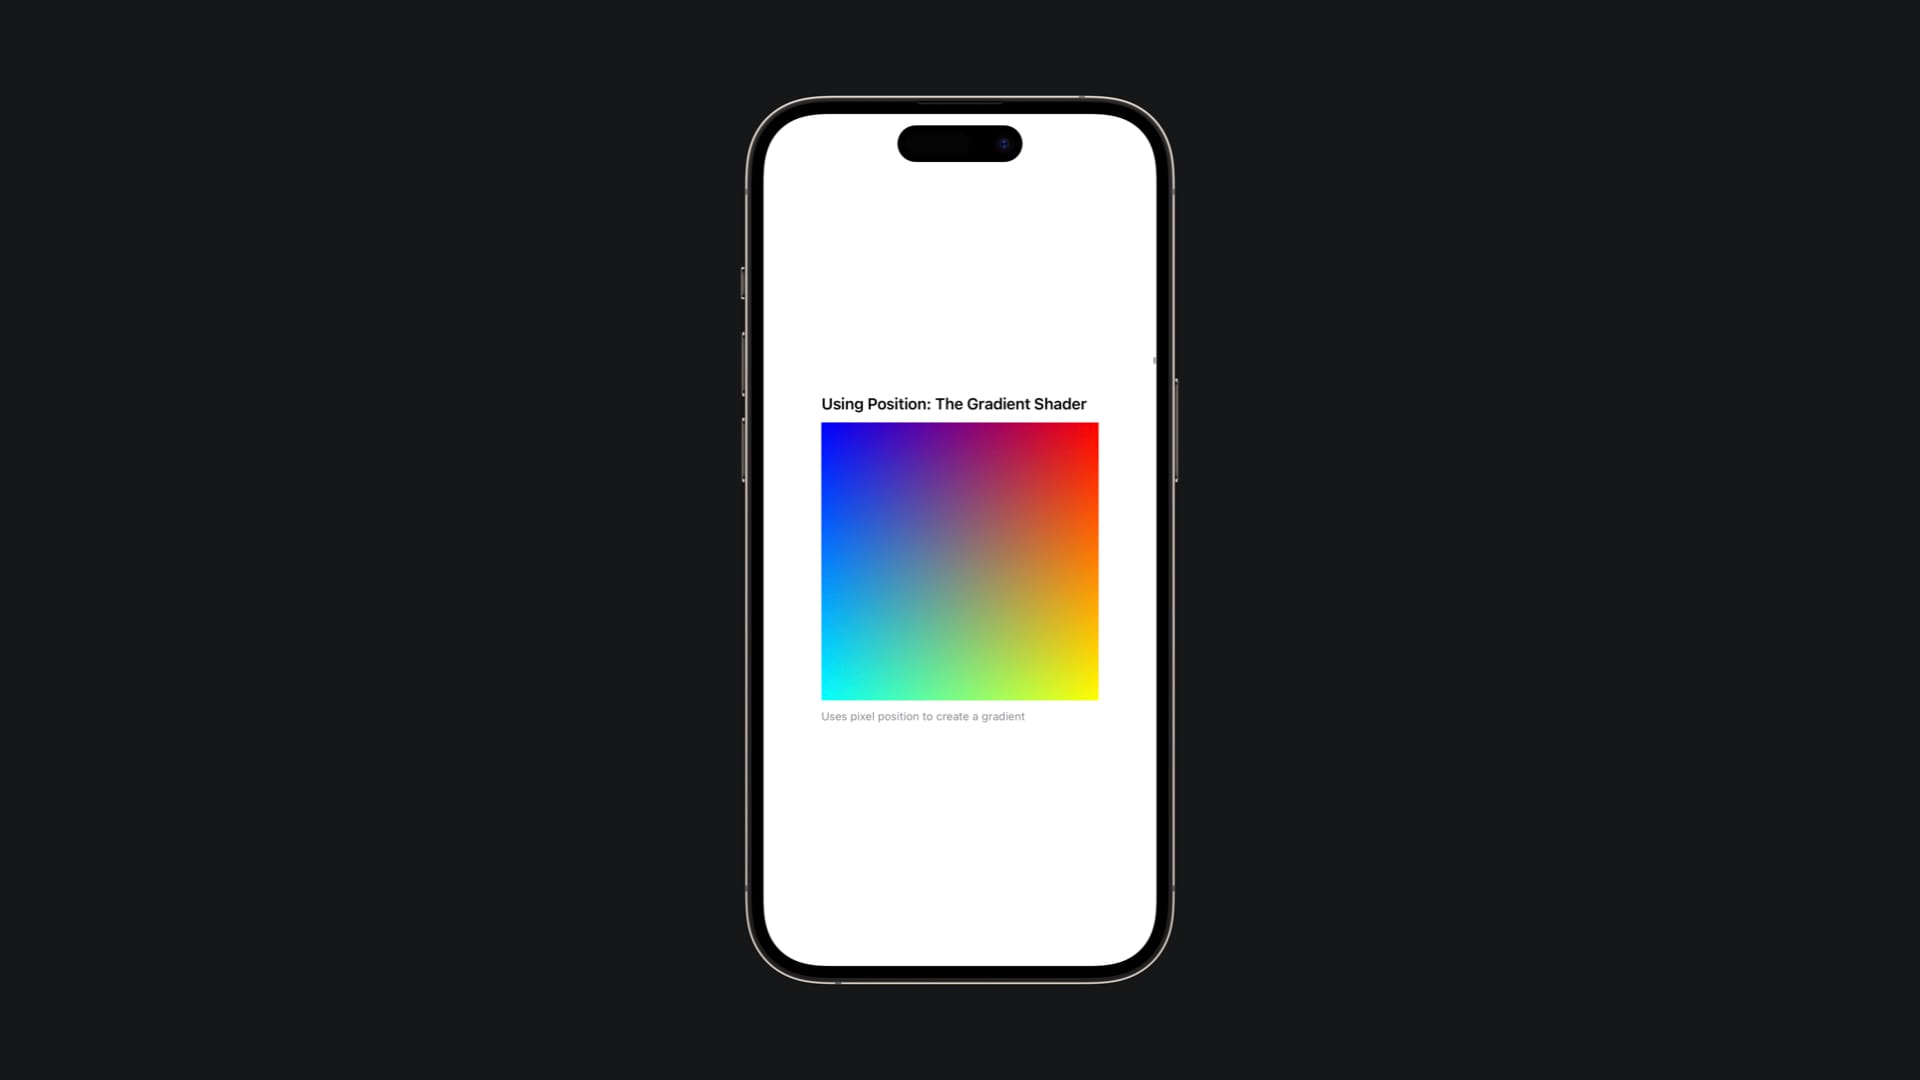
position or currentColor to the shader. SwiftUI provides these automatically. The ShaderLibrary.basicColor() call creates a Shader object that SwiftUI knows how to execute.Using Position: The Gradient Shader
Going beyond the basics, let's now create something more interesting, such as a gradient that changes color based on where each pixel is located.
#include <metal_stdlib>
#include <SwiftUI/SwiftUI.h>
using namespace metal;

[[ stitchable ]] half4 gradient(float2 position, half4 currentColor) {
    float normalizedX = position.x / 300.0;
    float normalizedY = position.y / 300.0;

    half r = half(normalizedX);
    half g = half(normalizedY);
    half b = half(1.0 - normalizedX);

    return half4(r, g, b, 1.0);
}
This is how this shader will look like, once it will be implemented in SwiftUI:
And now, let's break it down.
Understanding Normalization
The first concept to understand is normalization. The position parameter gives us absolute pixel coordinates, for instance, for a 300x300 view, x ranges from 0 to 300, and y ranges from 0 to 300. But color values need to be between 0 and 1. So we normalize by dividing by the width:
float normalizedX = position.x / 300.0;
This converts the 0-300 range into a 0-1 range:
- Left edge (x=0):
0 / 300 = 0.0 - Center (x=150):
150 / 300 = 0.5 - Right edge (x=300):
300 / 300 = 1.0
Creating the Gradient
Now we can use these normalized values directly as color components:
half r = half(normalizedX);This creates a horizontal gradient for red:
- At the left edge (normalizedX = 0.0): no red
- At the center (normalizedX = 0.5): medium red
- At the right edge (normalizedX = 1.0): full red
Similarly, for green, we use the vertical position:
half g = half(normalizedY);For blue, we do something interesting, we use the inverse:
half b = half(1.0 - normalizedX);The 1.0 - normalizedX expression creates a reverse gradient:
- At the left edge:
1.0 - 0.0 = 1.0(full blue) - At the center:
1.0 - 0.5 = 0.5(medium blue) - At the right edge:
1.0 - 1.0 = 0.0(no blue)
The result is a beautiful gradient that transitions from blue on the left to red on the right, with green increasing from top to bottom.
Using it in SwiftUI
import SwiftUI
import Metal

struct GradientShaderView: View {
    var body: some View {
        Rectangle()
            .colorEffect(ShaderLibrary.gradient())
            .frame(width: 300, height: 300)
    }
}
Notice that the SwiftUI code is almost identical to our first example. We just changed which shader function we're calling. SwiftUI still automatically provides the position and currentColor parameters.
And that's just the beginning! Metal shaders open up a new dimension of visual possibilities in SwiftUI by letting you work directly at the pixel level. The examples shown above demonstrate the fundamentals, from simple solid colors to dynamic gradients, but shaders can do so much more: animated effects driven by time, complex mathematical patterns, image distortions, and interactive visuals that respond to user input. The beauty of shaders is that small changes can produce dramatically different results, so dive in and enjoy the experimentation!
Other resources