Understanding spatial layout in visionOS 26
Learn how to customize the alignment and spatial arrangement of UI elements within the environment using the new APIs introduced in visionOS 26.

With the introduction of visionOS, Apple made significant changes to how the layout is managed within spatial experiences, bringing the experience closer to what happens in SwiftUI for 2D interfaces, where developers are more used to containers than the RealityKit layout systems.
These new changes not only make it easier to arrange items in the environment to create more complex spatial layouts, but are also flexible enough to be used with SwiftUI Views.
In this article, we will explore the new basic layout arrangement using the VStackLayout and HStackLayout combined with the new depthAlignment(_:) method. Moreover, we will see how developers stack multiple volumes with tons of new options using the new SpatialContainer.
Basic Spatial layout
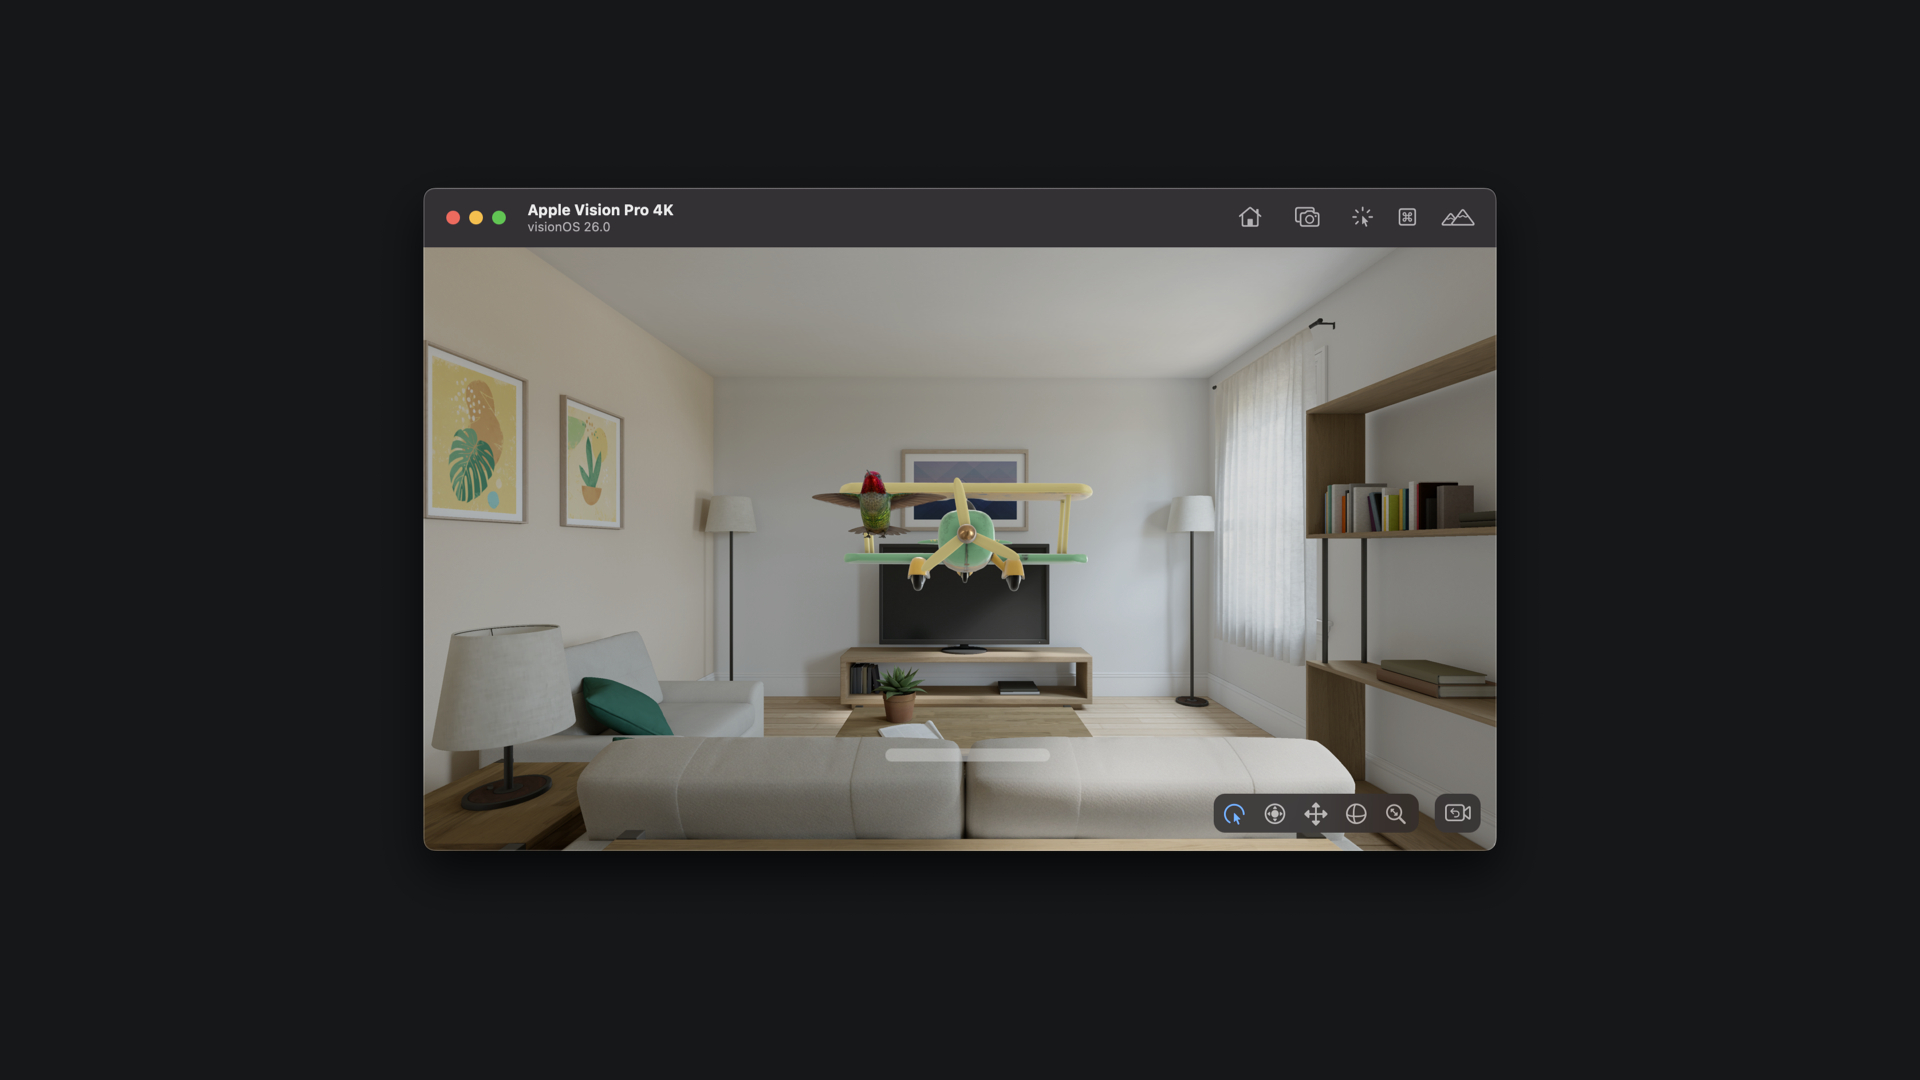
When using the Model3D view with SwiftUI views, they are automatically aligned to the back of the volumes, resulting in less visibility and probably not the result that we were imagining while prototyping our spatial experience.
Consider also that the way a model is displayed within a Model3D view that takes up the same space as the model’s dimensions or within a RealityView container that by default occupies all available space can significantly impact the model’s spatial representation.
By using the VStackLayout container, we can leverage its conformance to the layout protocol to specify the desired layout type using the newly introduced depthAlignment(_:) method, allowing us to determine the depth alignment of the items within the container.
import SwiftUI
import RealityKit
import RealityKitContent
struct ContentView: View {
@State private var enlarge = false
var body: some View {
VStackLayout().depthAlignment(.front) {
Model3D(named: "plane")
Text("Hello")
}
}
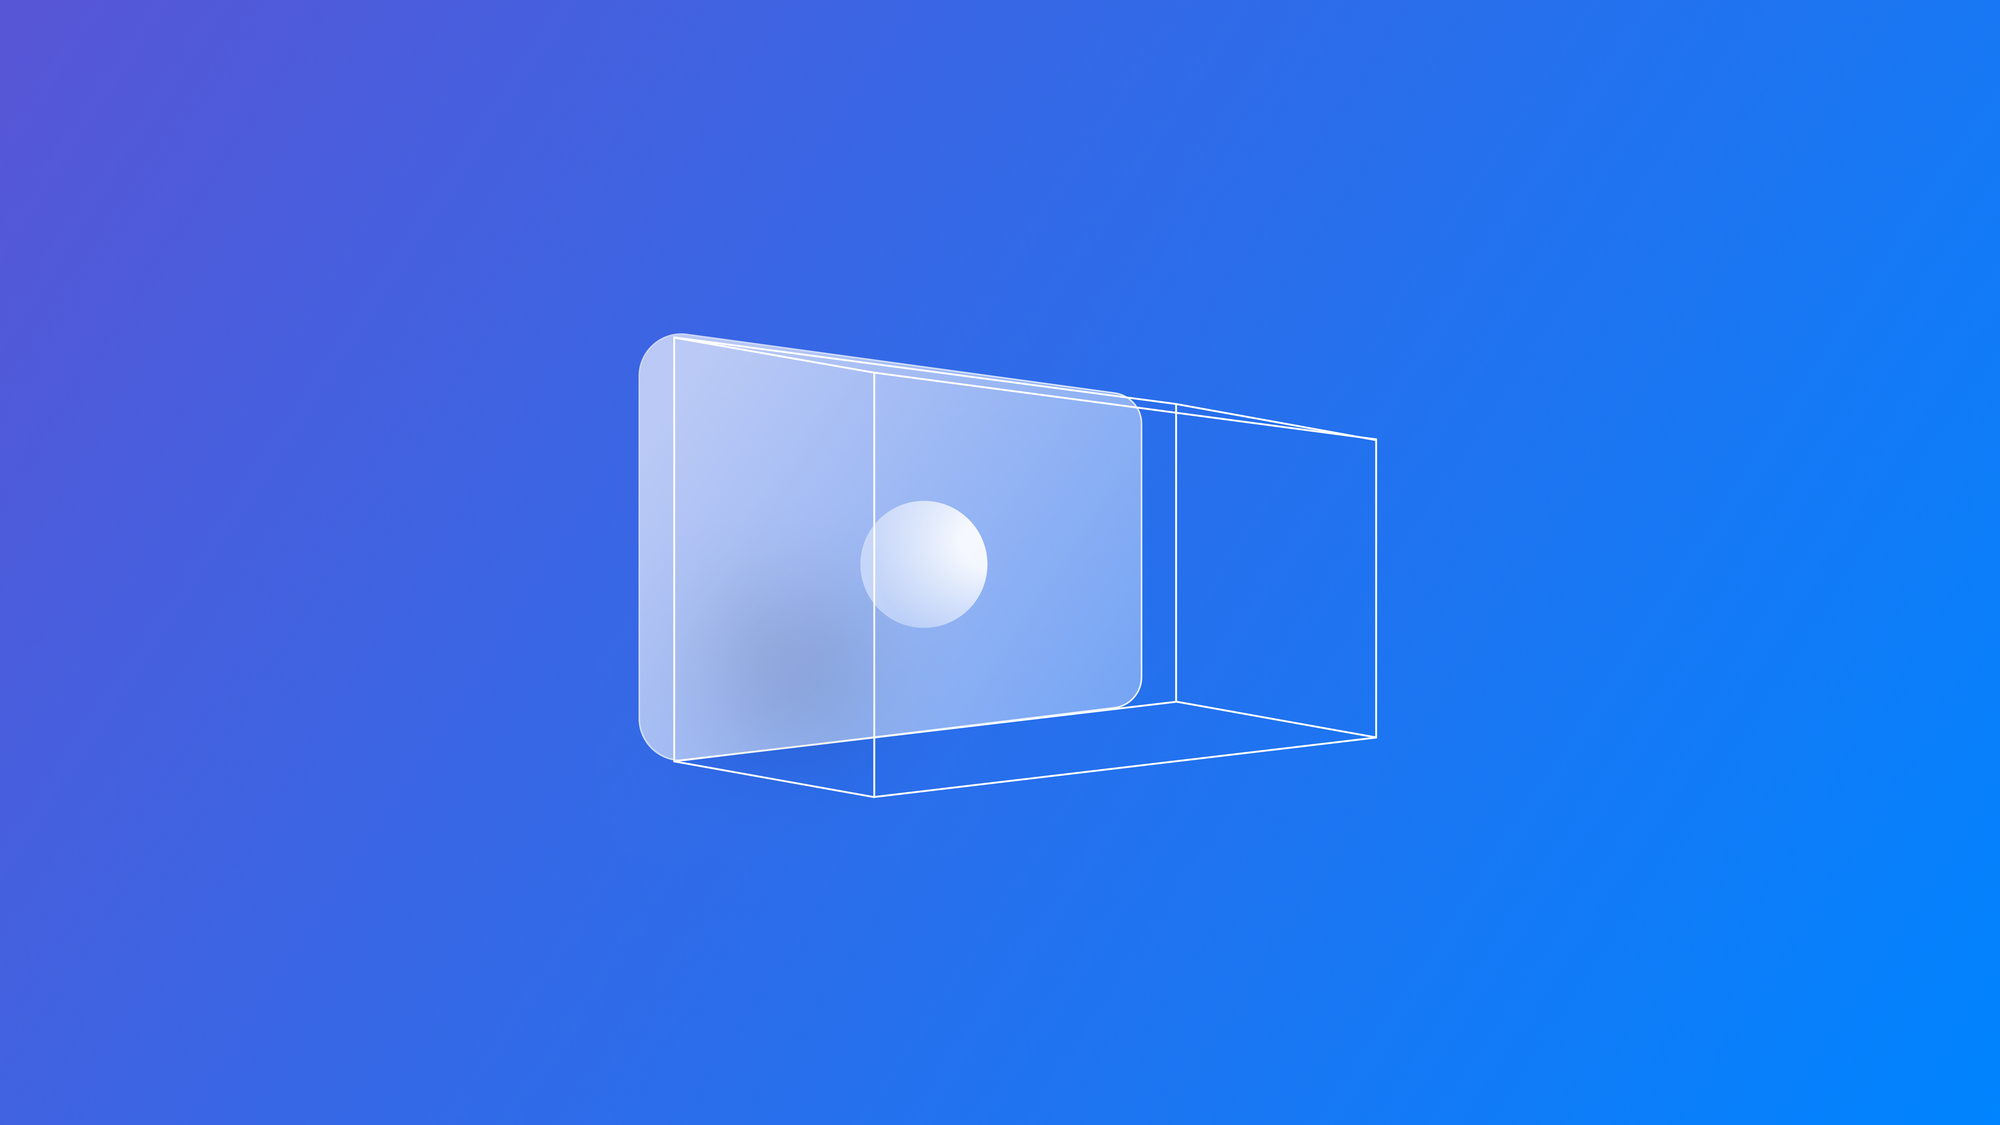
}In the example above, we used the VStackLayout applying the depthAlignment(_:) method passing the front parameter of type DepthAlignment. We have three different option for depth alignment:
- back: aligns the volume at the back of the container
- center: aligns the volume at the back of the container
- front: aligns the volume at the front of the container
Define a custom DepthAlignment value
Our volumes may be differently aligned in space to create specific effects. In this case, we can define on our own a value that acts as a default value for depth alignment by creating a structure that conforms to the DepthAlignmentID protocol and then create a static value as an extension of the DepthAlignment type:
struct FirstThirdAlignment: DepthAlignmentID {
    static func defaultValue(in context: ViewDimensions3D) -> CGFloat {
        context[DepthAlignment.center]
    }
}

extension DepthAlignment {
    static let depthPodium = DepthAlignment(FirstThirdAlignment.self)
}
In the example above, we defined center as the default value for depth alignment, so when applied to a container, every element will be placed accordingly. Then we can use this value applied to a container to make it effective.
Additionally we can also override the type of alignment by applying the alignmentGuide(_:computeValue:) modifier to a Model3D view as in the example below:
import SwiftUI
import RealityKit
import RealityKitContent
struct ContentView: View {
@State private var enlarge = false
var body: some View {
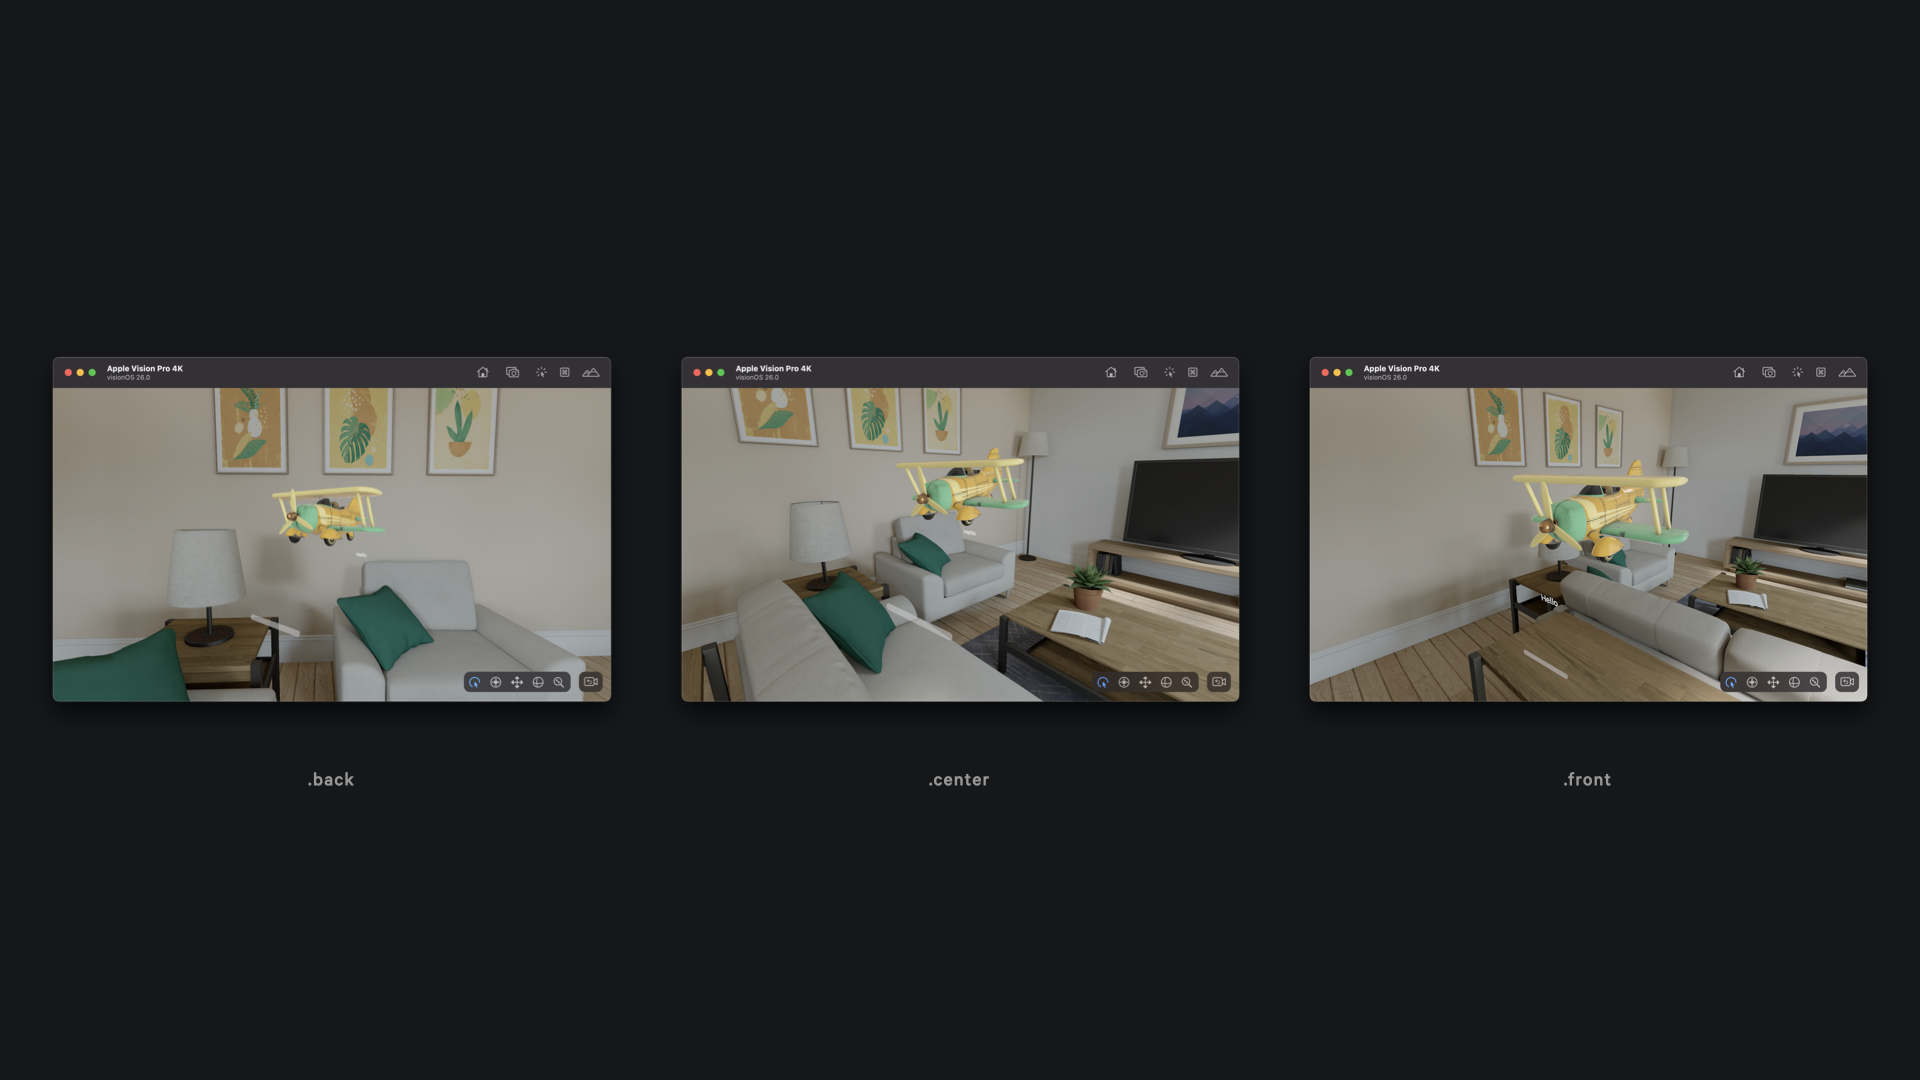
HStackLayout().depthAlignment(.depthPodium) {
Model3D(named: "plane")
Model3D(named: "plane")
.alignmentGuide(.depthPodium) {
$0[DepthAlignment.front]
}
Model3D(named: "plane")
.alignmentGuide(.depthPodium) {
$0[DepthAlignment.back]
}
}
}
}In this case, we are creating an offset effect among all the models in the environment just by overriding the default depth value within the container.
Spatial container with alignment and spatial overlay
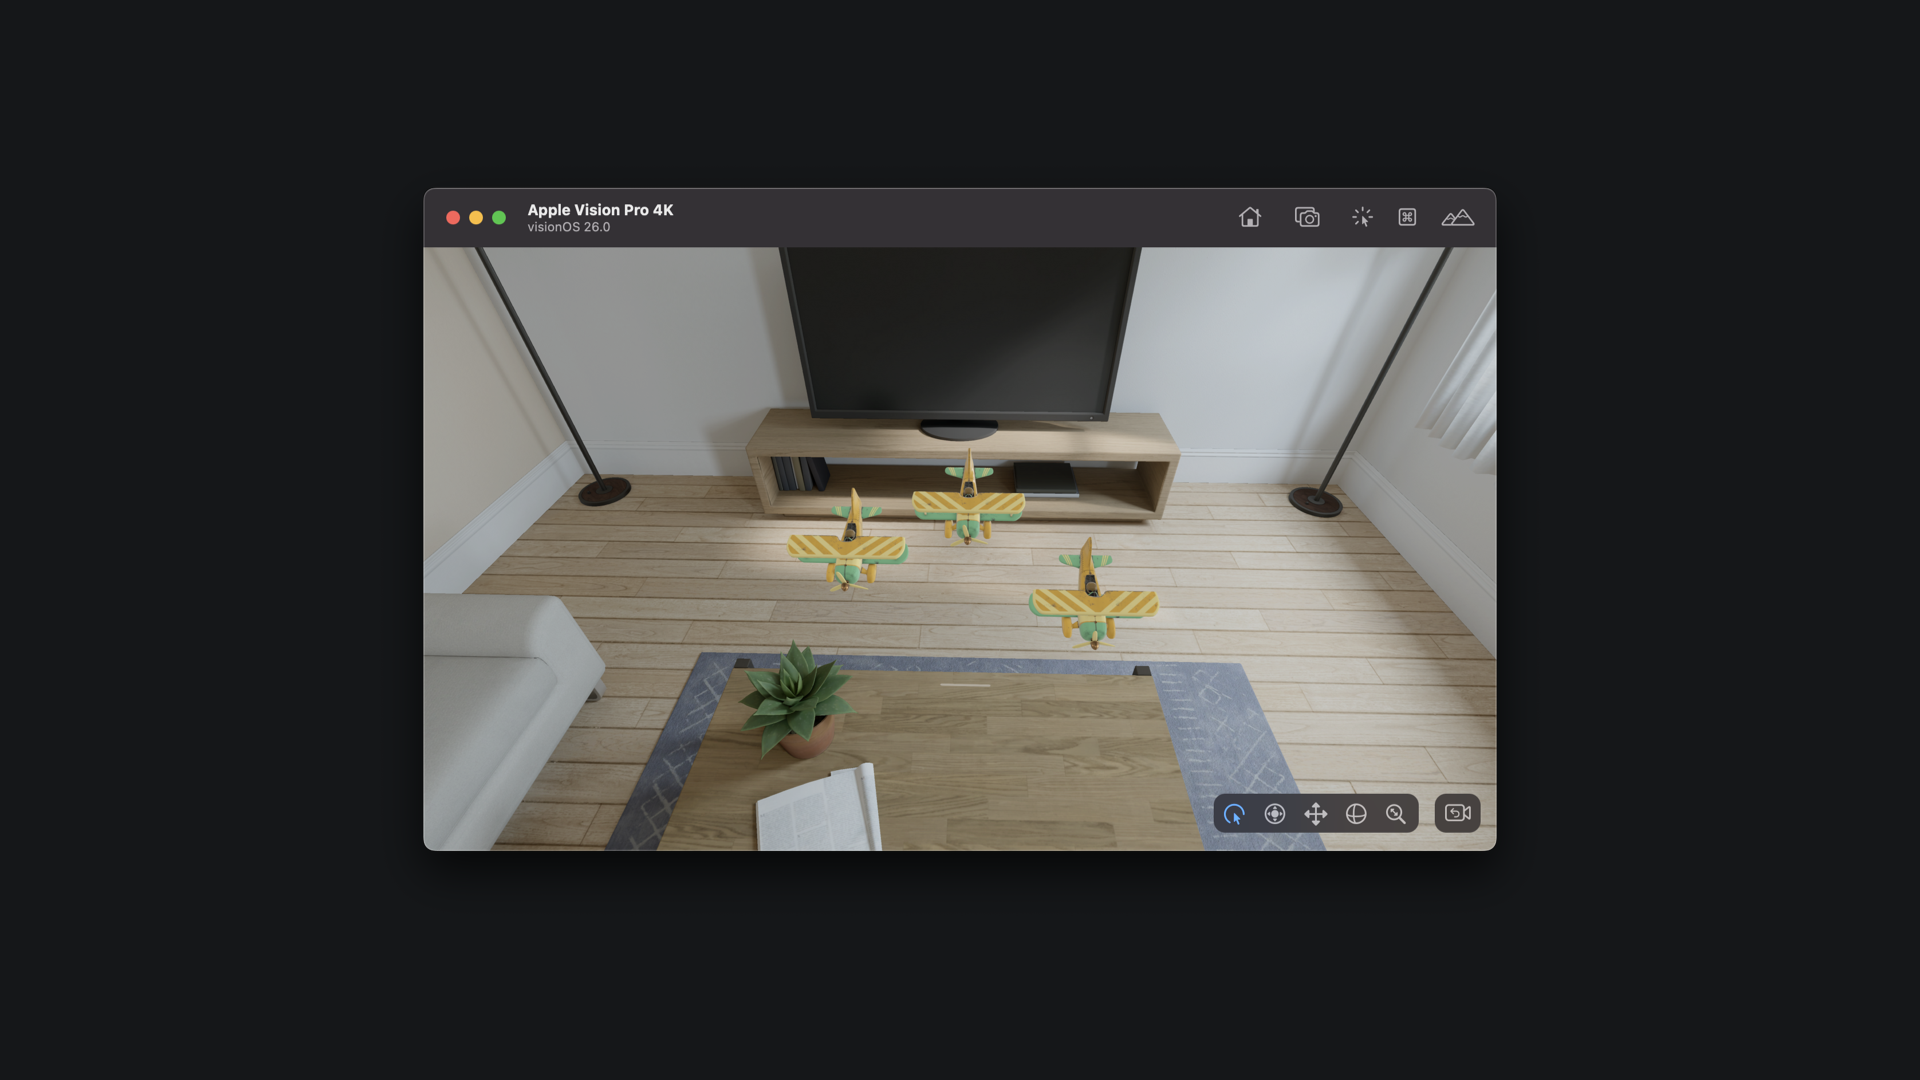
Another possibility to have a deeper control of how volumes are positioned in the space is using the SpatialContainer component, which allows us to align overlapping content in 3D space, providing a parameter of Alignment3D type to specify the alignment in all three axes.
import SwiftUI
import RealityKit
import RealityKitContent

struct ContentView: View {

    var body: some View {

        SpatialContainer(alignment: .topLeadingFront){

            Model3D(named: "plane")

            Model3D(named: "bird")
                .padding(-36)

        }

        .padding(36)
    }
}