Using an Object Detection Machine Learning Model in Swift Playgrounds
By the end of this tutorial you will be able to use an object detection Core ML model in Swift Playgrounds with the Vision framework.
When starting Xcode, use the menu bar to select File > New > Playground... or use the Shift⇧ + Option⌥ + CMD⌘ + N keyboard shortcut to create a new Playground. The following setup wizard will guide you through the steps of configuring the basic settings of the Playground.
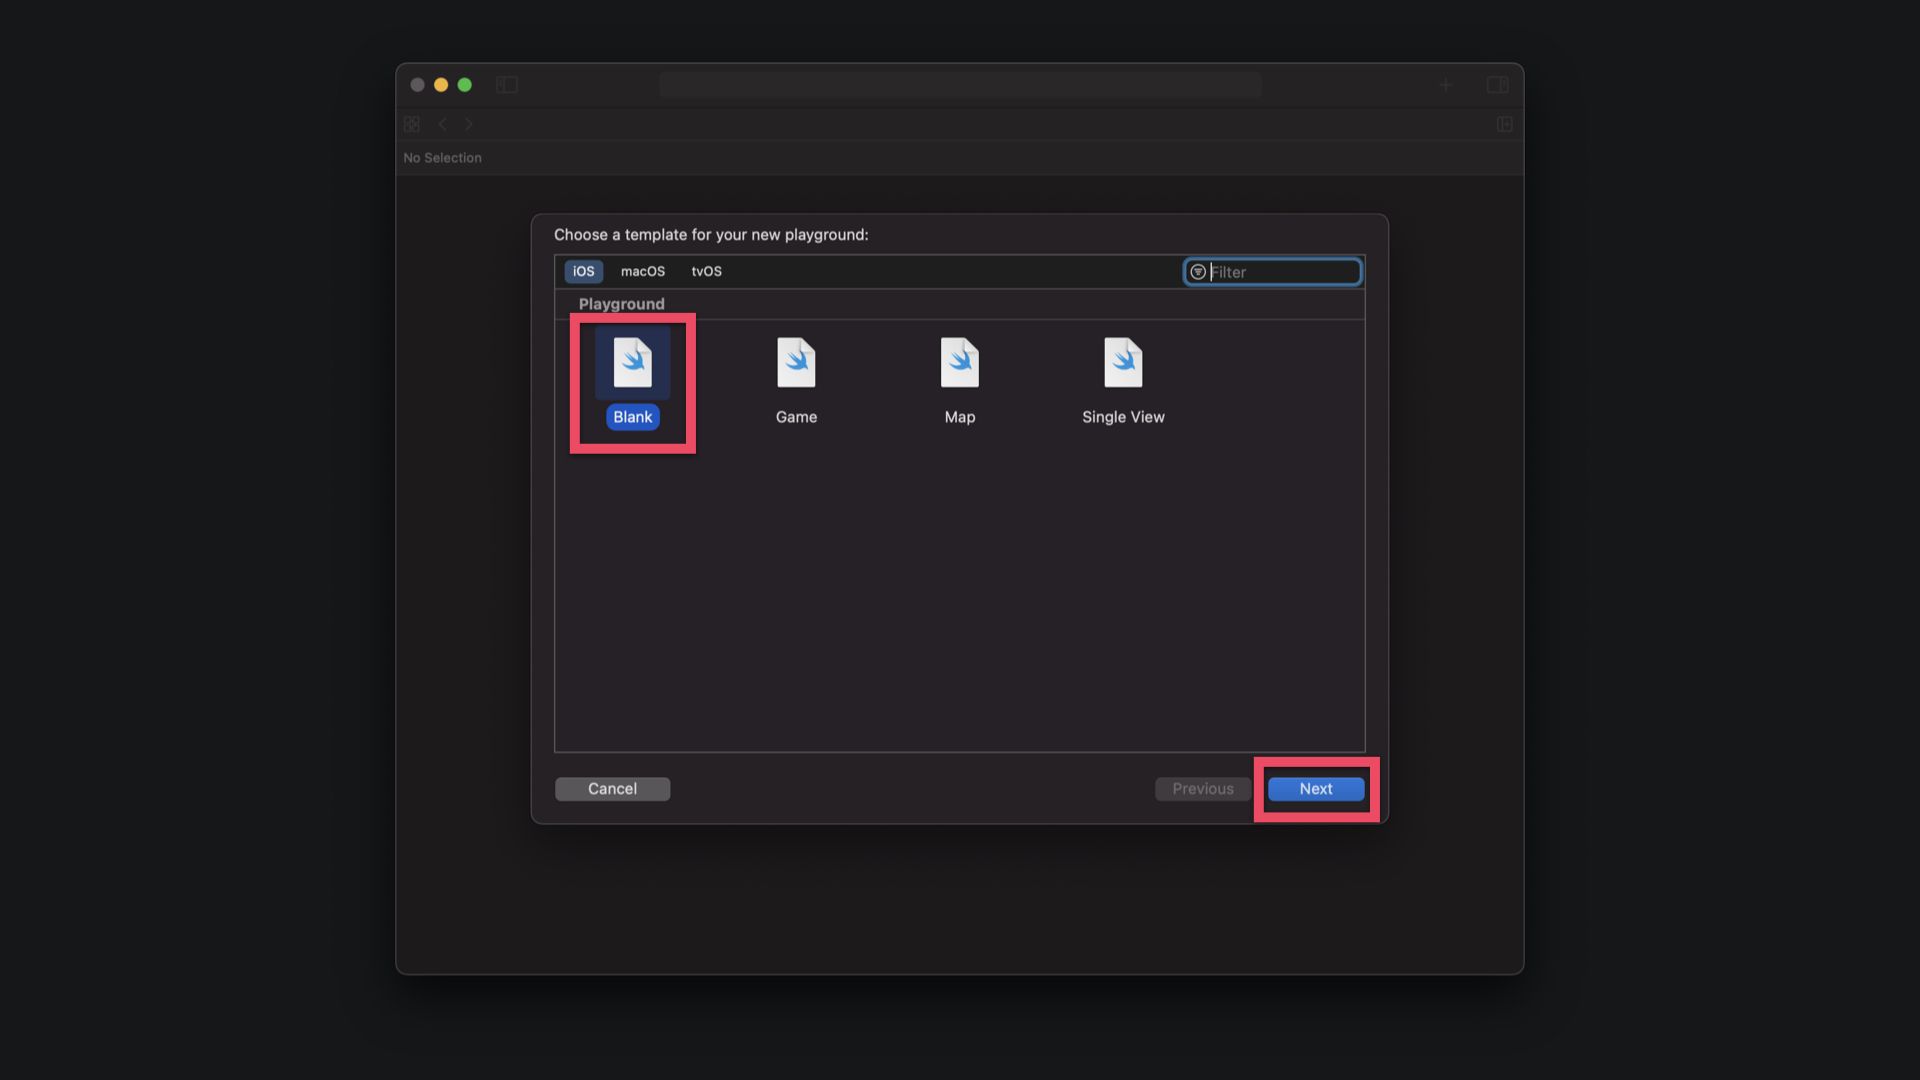
Choose "Blank" and then click "Next" on bottom right. In the following step, choose a file name to save the Playground and click "Create". Xcode will create the Playground files and open the editor.
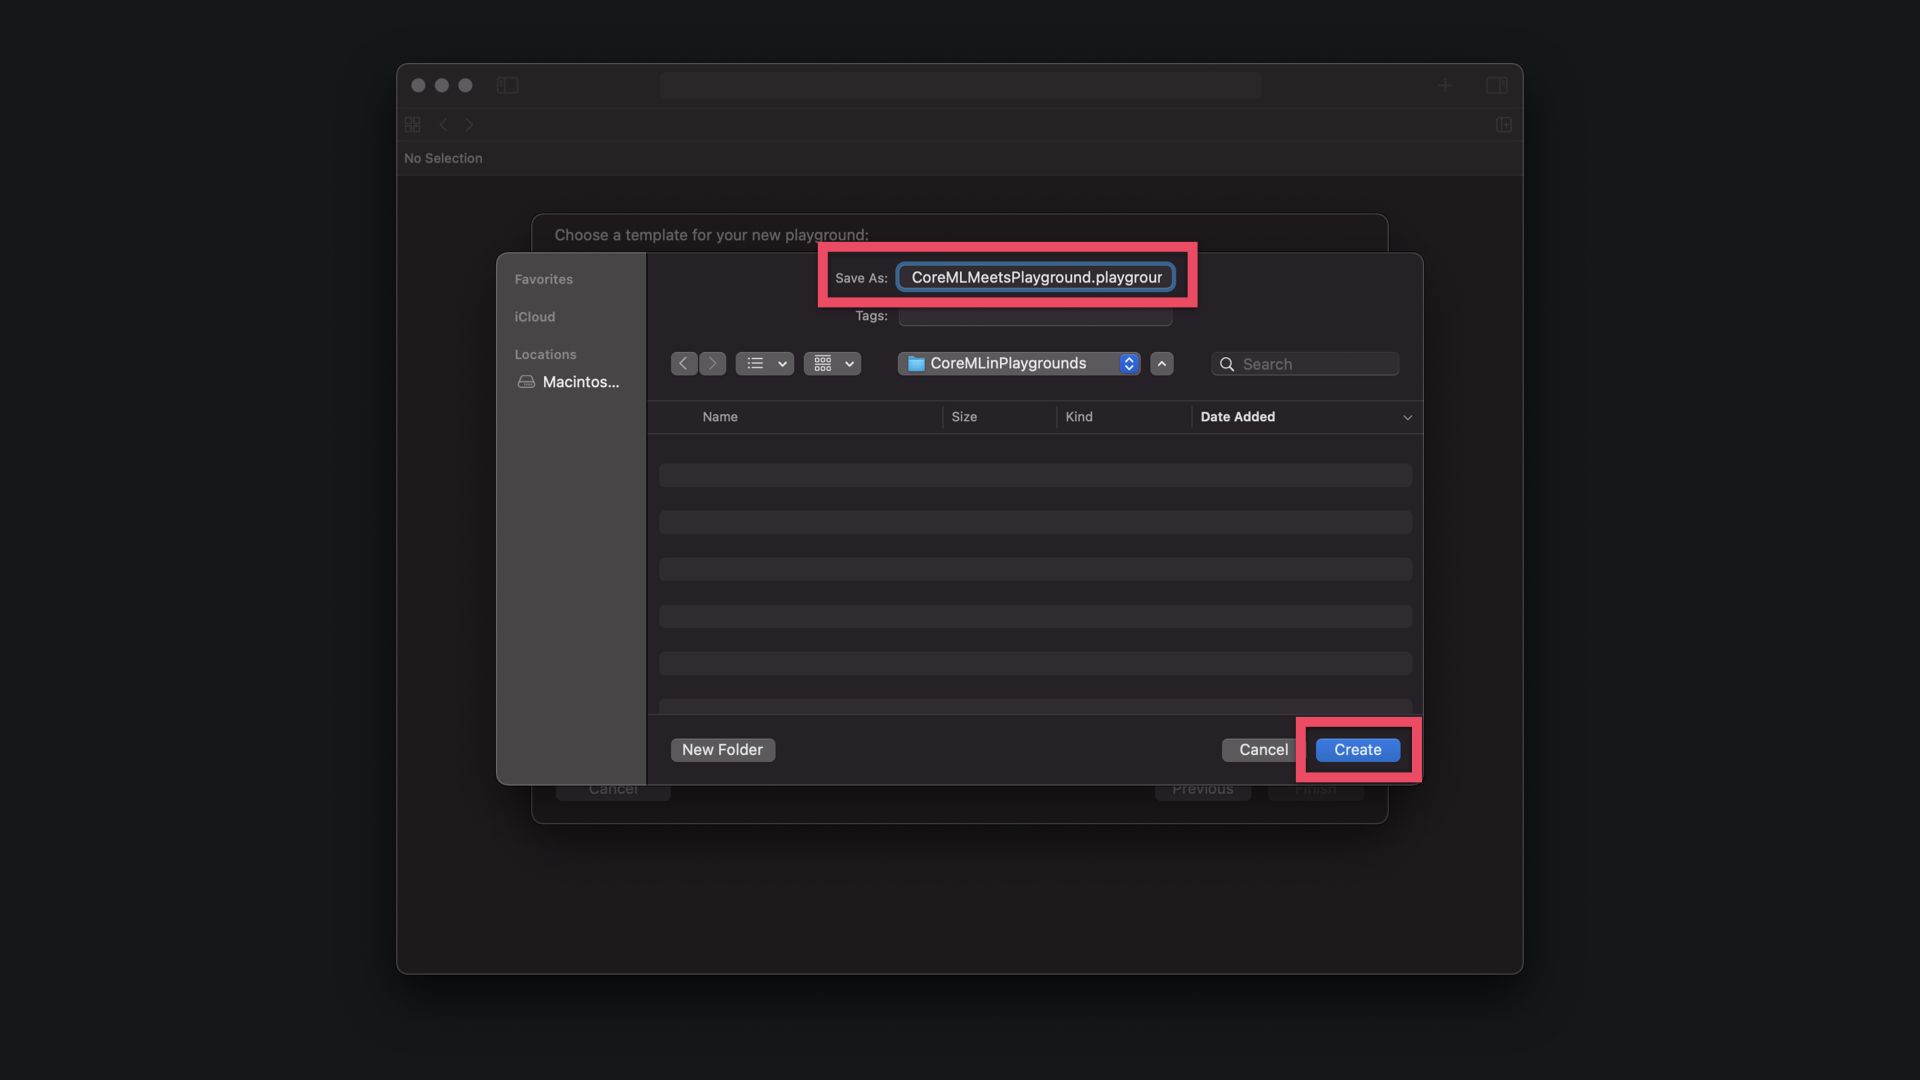
The Playground opens with a simple "Hello, playground" String in the main editor. If not open already, click on the Navigator icon to show the sidebar. The Playground has a Sources and a Resources folder in which additional files can be stored. The sources folder may contain other source code files, while the resources folder may contain any types of files, such as images, text files or in our case the machine learning model.
Now, let's see how to work with machine learning moderls in Playground.
In order to work in Playground, any machine learning model needs to be added as a compiled model binary with .mlmodelc extension, which you can find in the Derived Data folder once any app using the model has been built in Xcode.
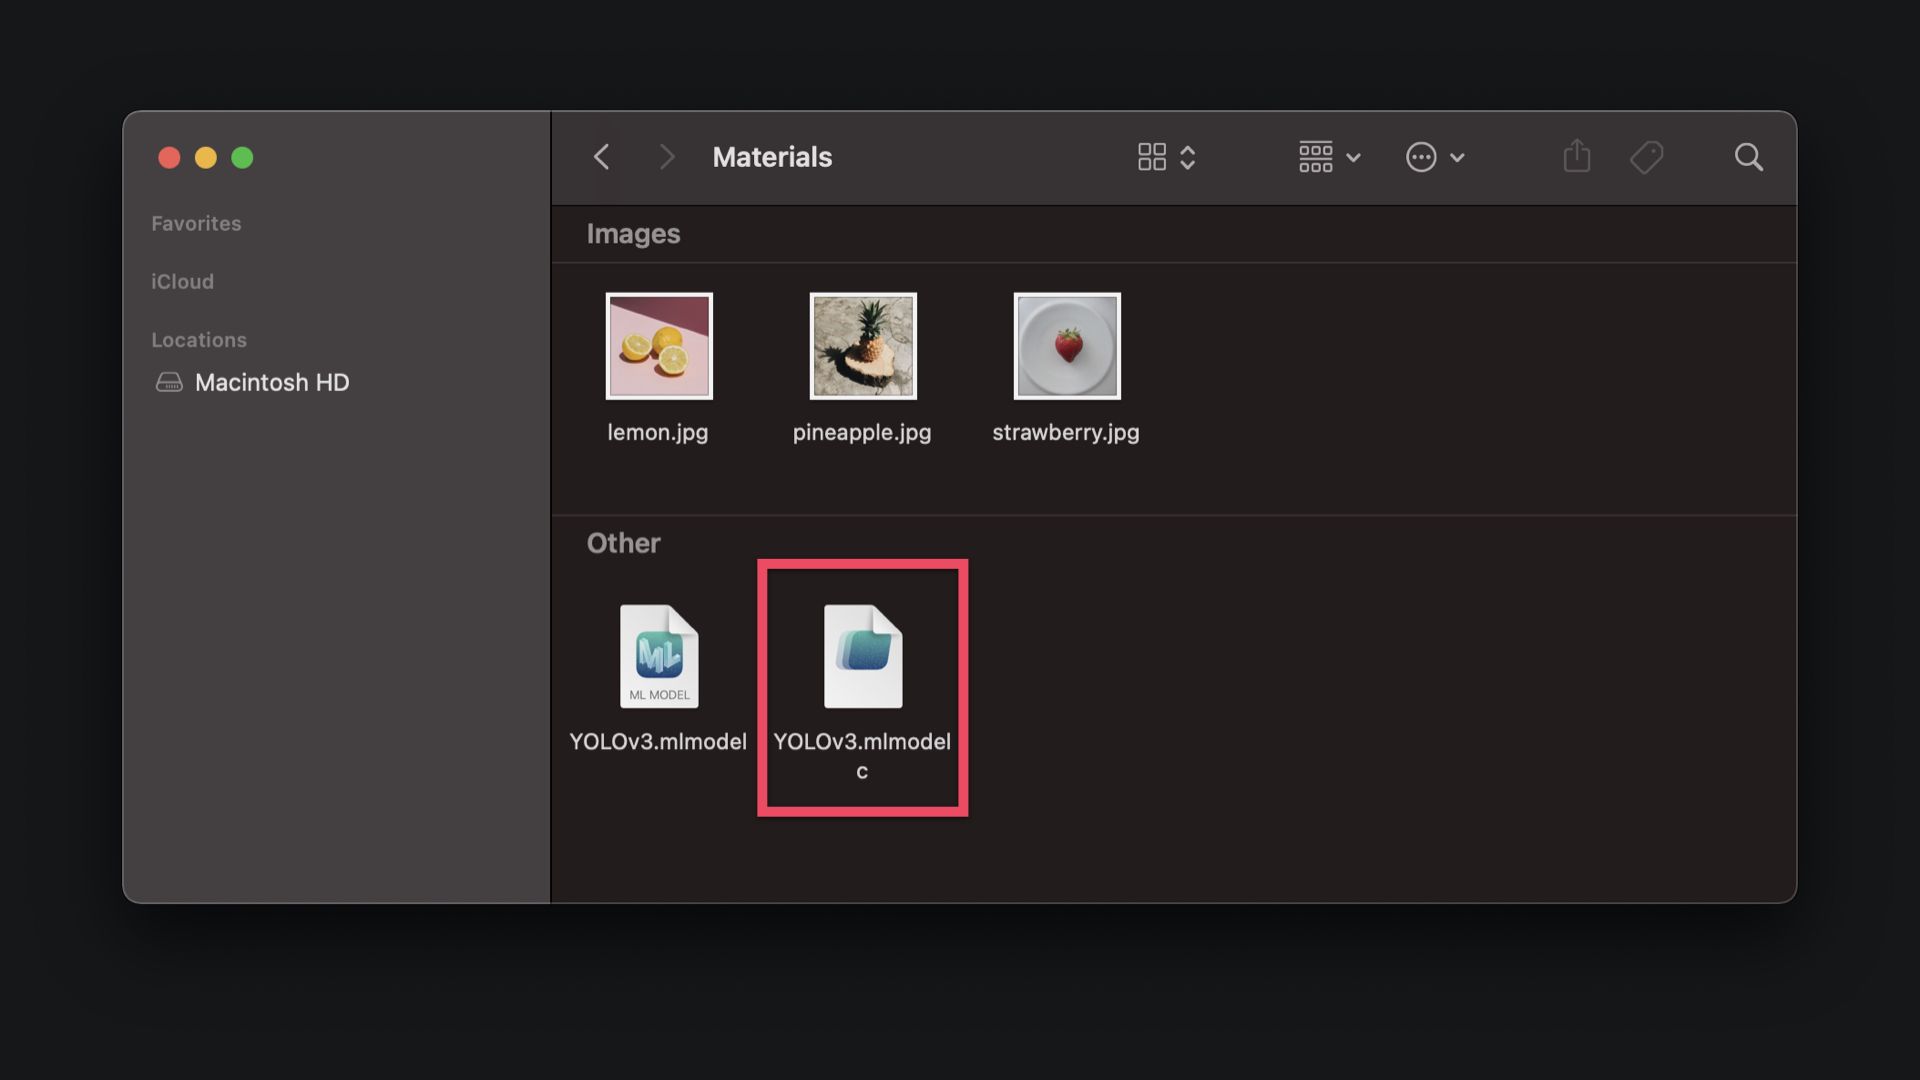
The .mlmodelc is generated automatically by Xcode when the model file with .mlmodel extension is added to any Xcode Project once the project is compiled and build.
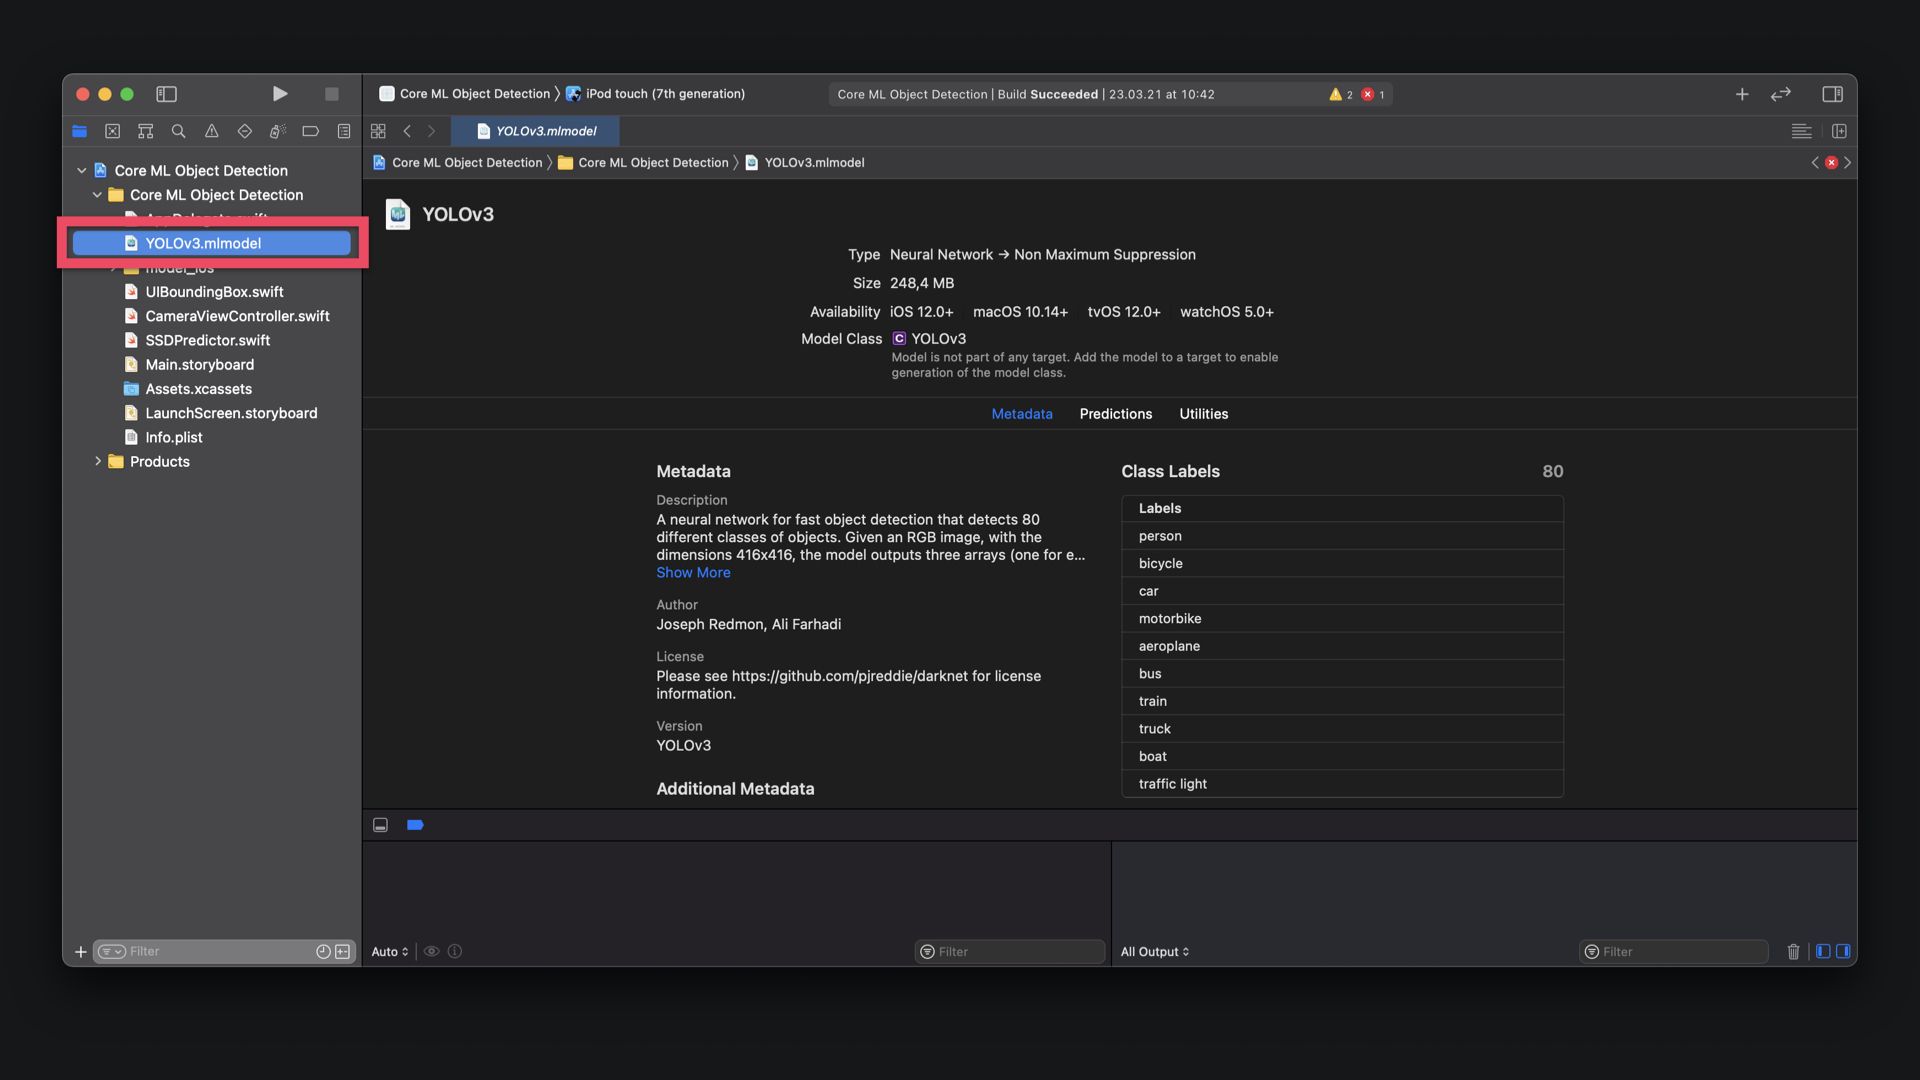
It can be found in the ~/Library/Developer/Xcode/DerivedData where all projects are build by default. Open the corresponding app’s folder and navigate to the "Build" and then "Products" folder. Inside there will be a "Debug" folder and this will contain the .app bundle. Control click on the app and select "Show Package Contents". Inside you will find a .mlmodelc file, which is the compiled binary of the model. Copy this into your Playground to use the model. In the corresponding projects folder it is located in /Build/Products/Debug-iphonesimulator/NameOfTheApp/NameOfTheMachineLearningModerl.mlmodelc.
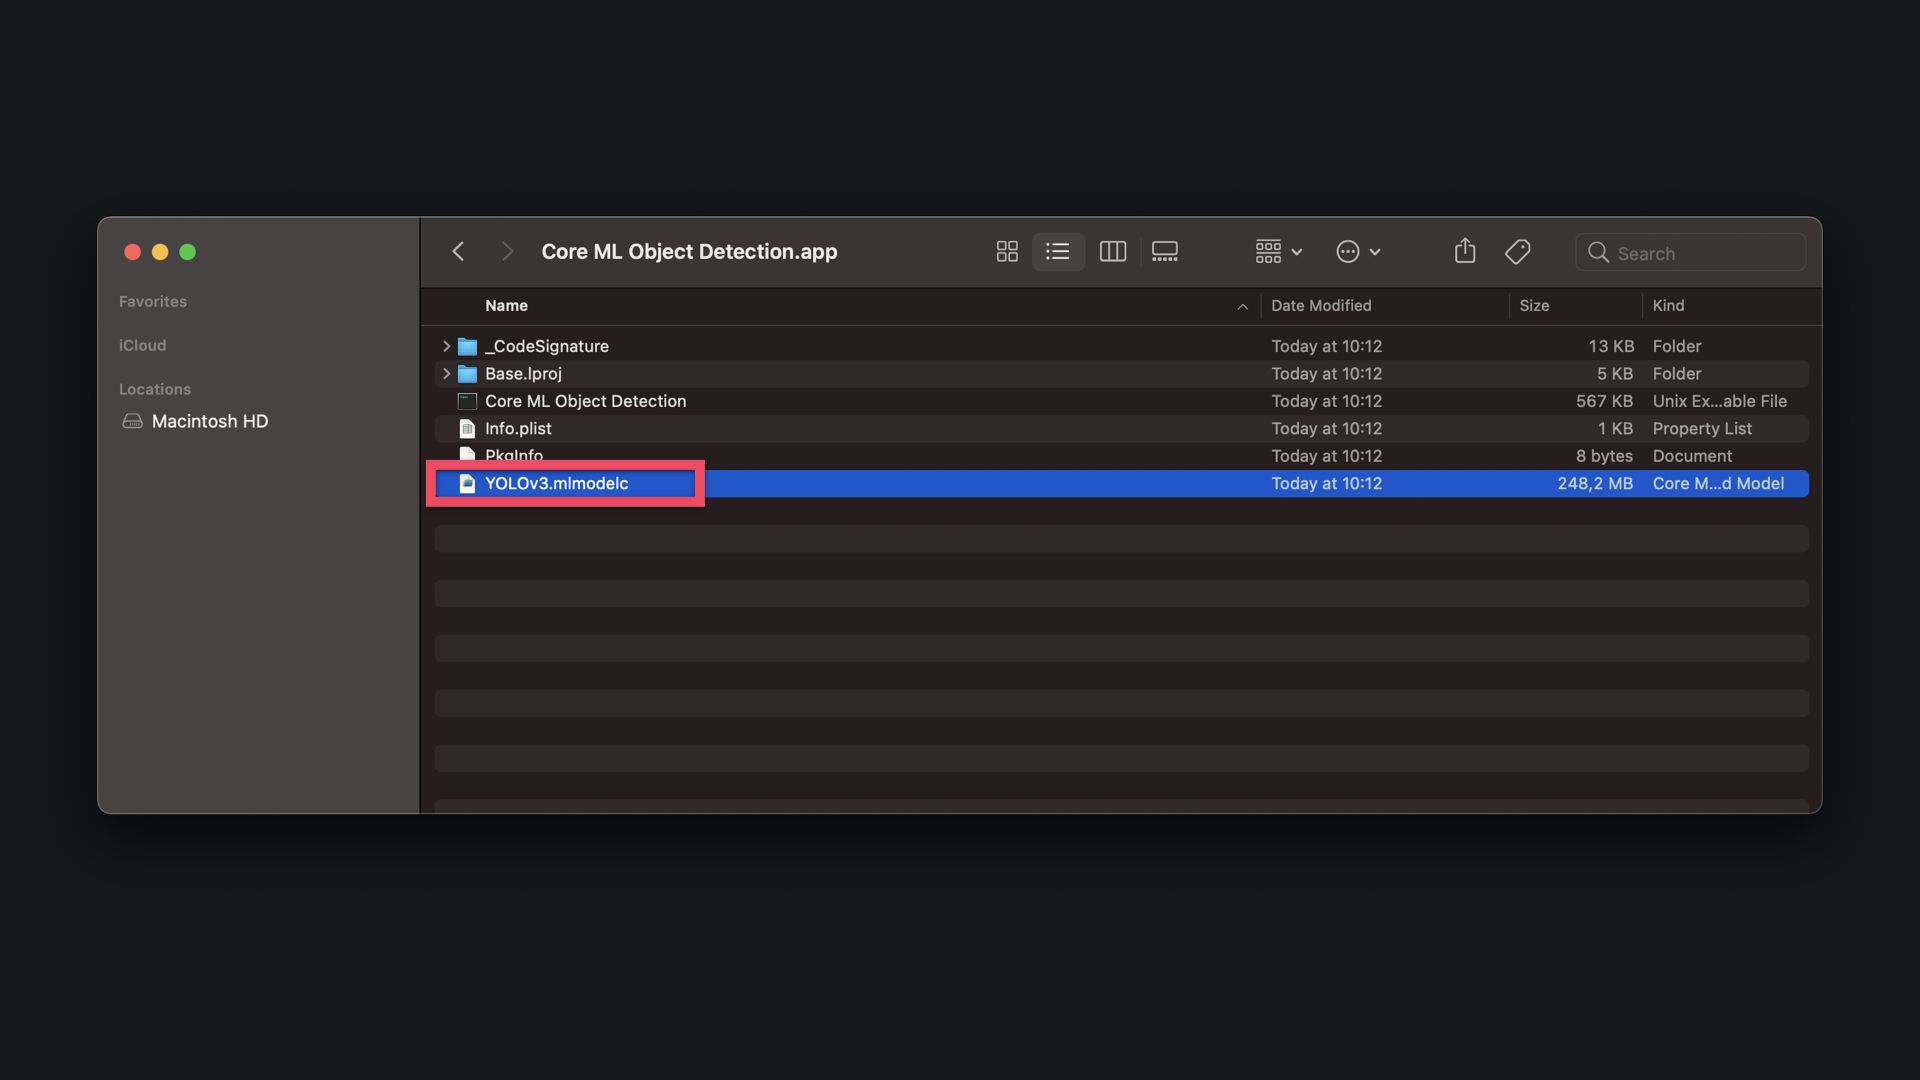
The .mlmodelc file can be added via drag and drop to the Playground's Resources folder. The tutorial is using the YOLOv3 Core ML model. It can be downloaded from the Apple Core ML website.
For you convenience, the .mlmodelc file can also be downloaded here alongside some sample images that can later be used to test the model in Playground. Add the images to the Playground's Resources folder by dragging and dropping them in it.
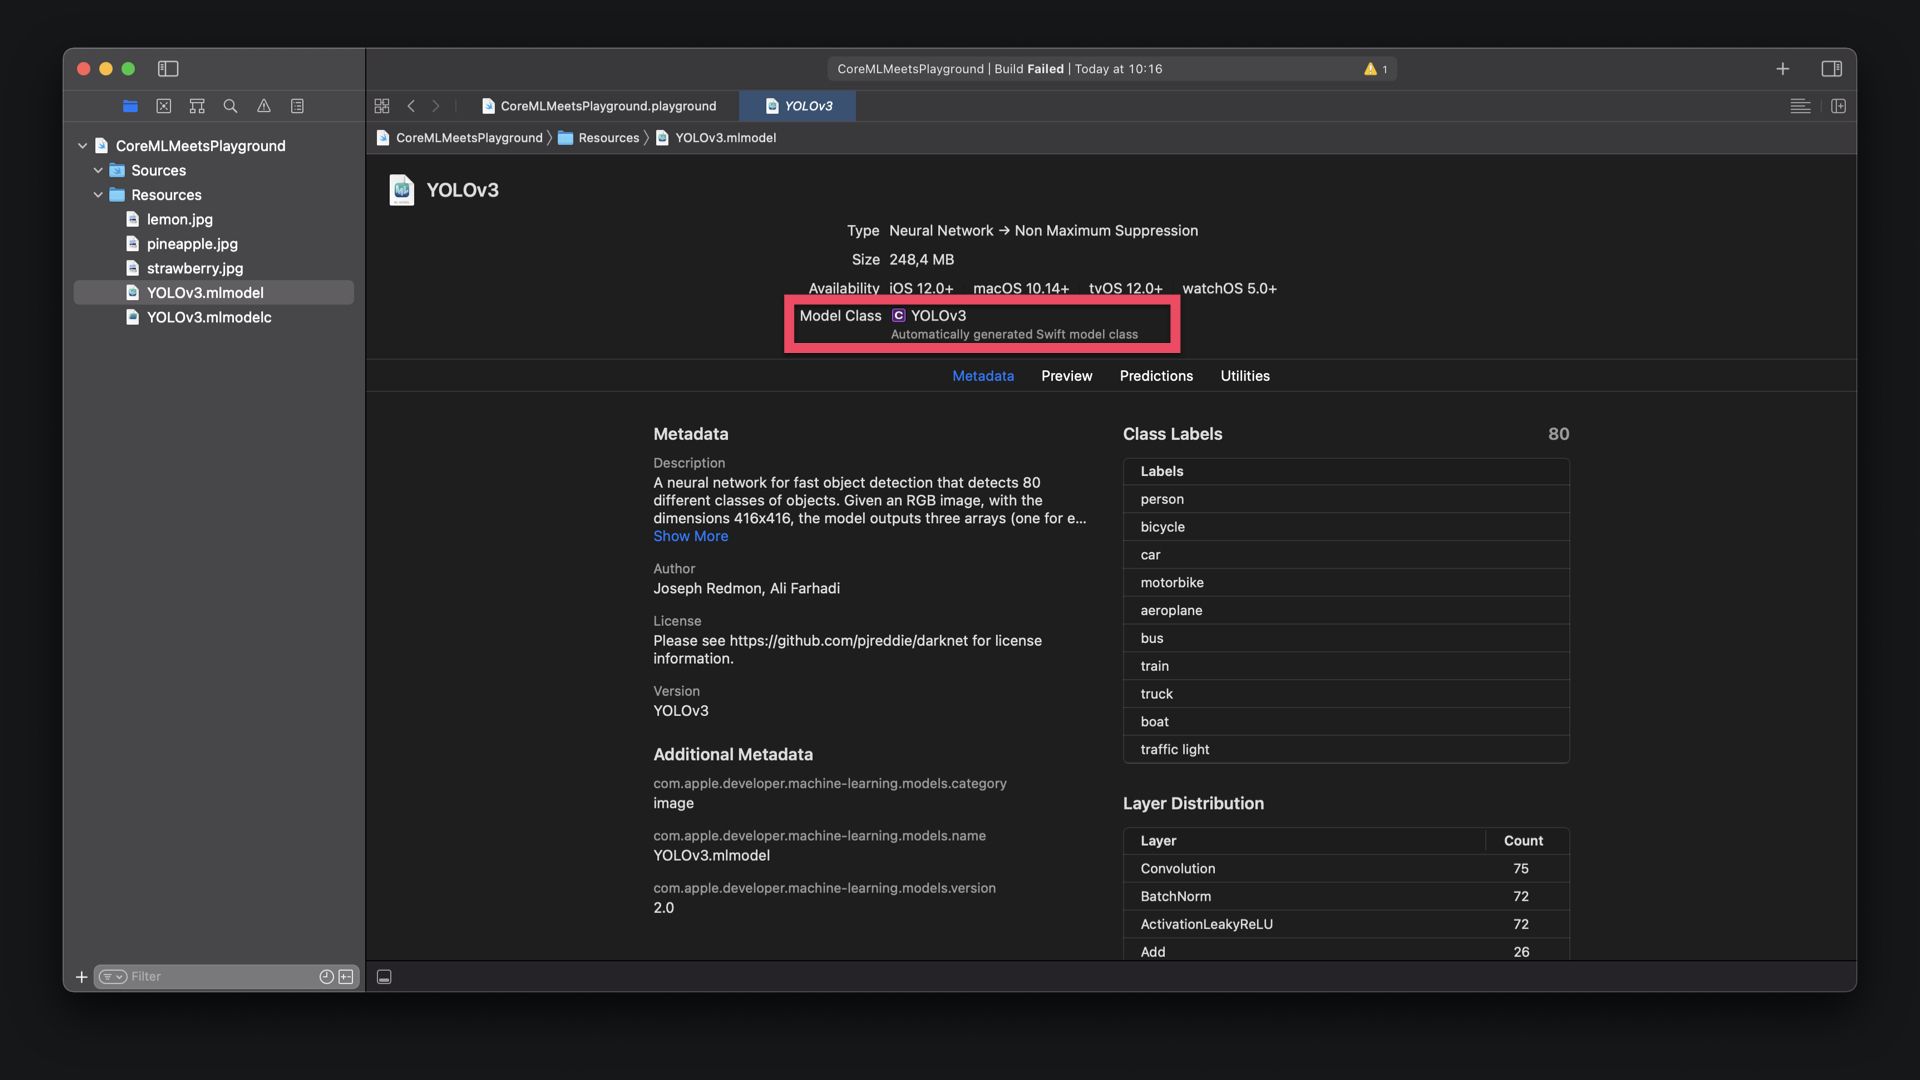
Also the Core ML .mlmodel file can be added to the Playground's Resources folder. Once added, the Model Class named YOLOv3 can be opened by double clicking on the symbol in the Metadata tab of the model. It will be opened in a new tab in the Playground.
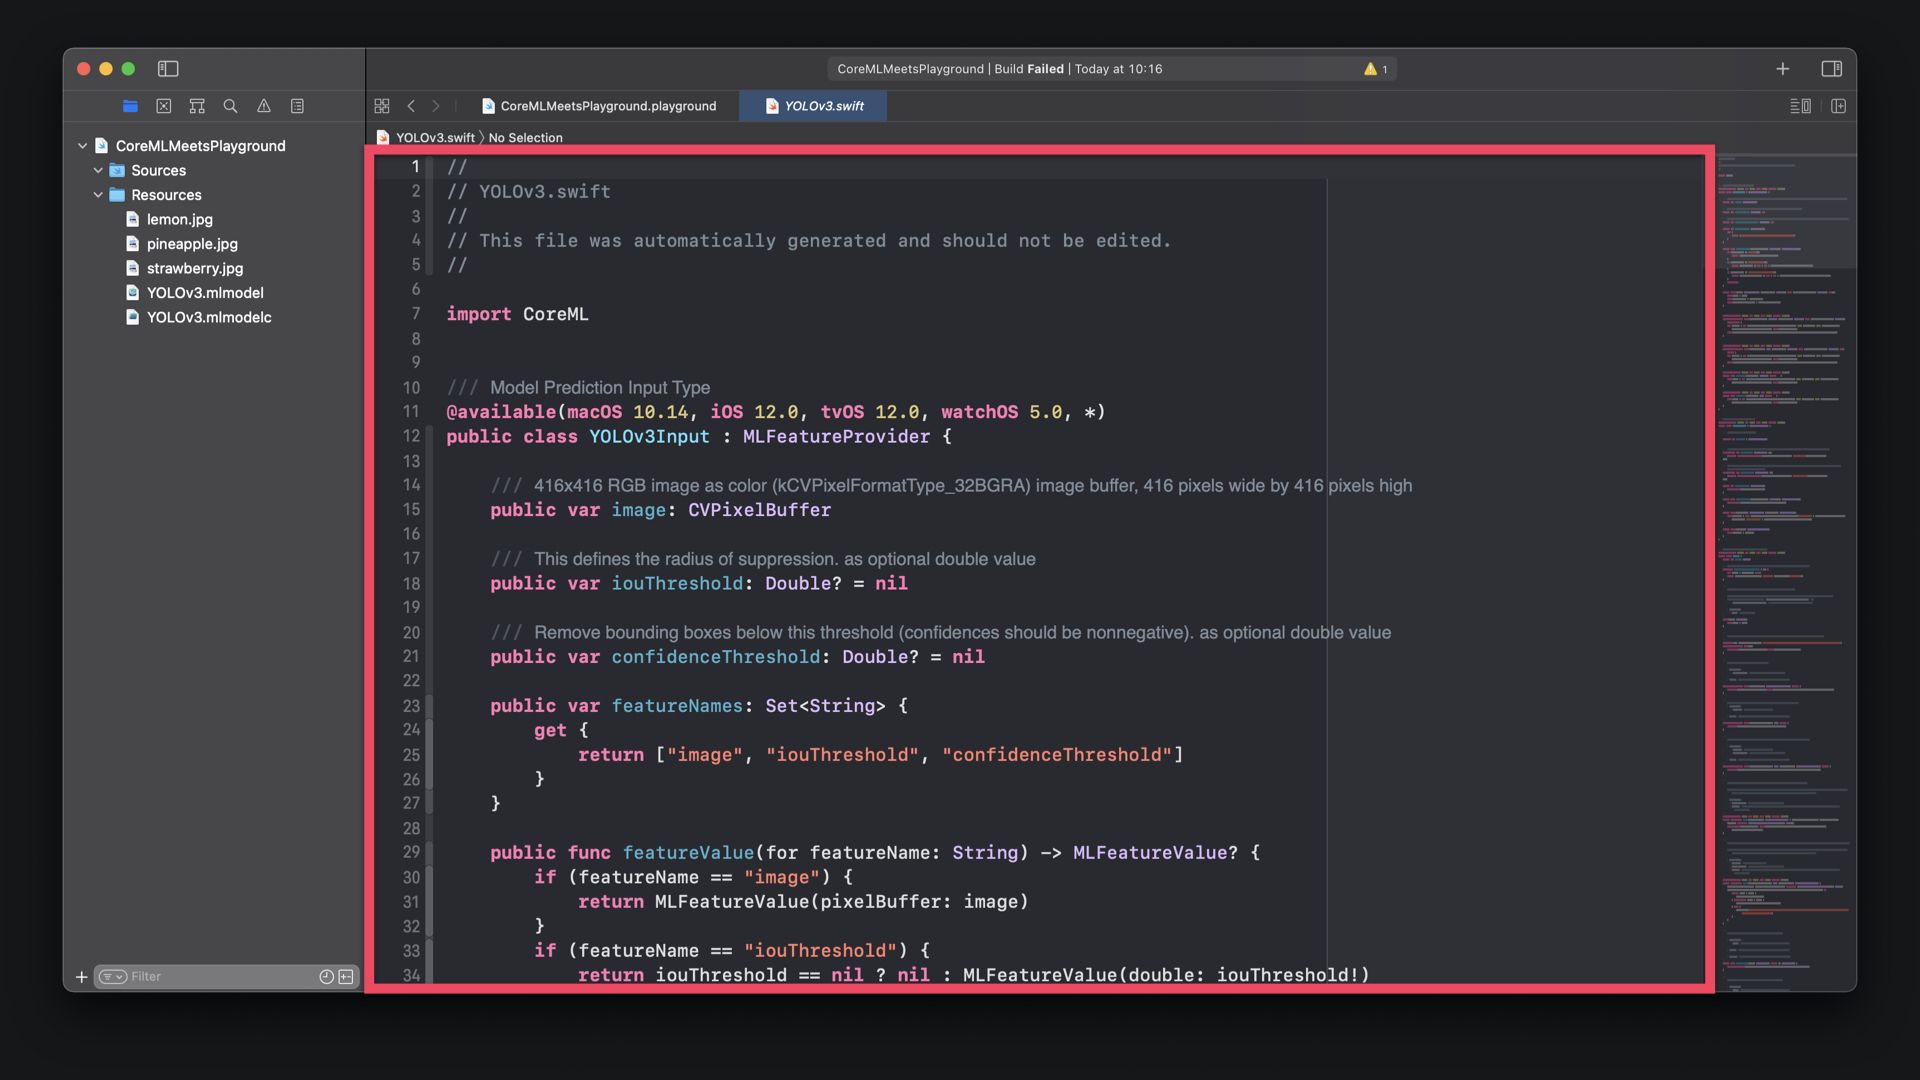
The YOLOv3.swift contains all the necessary code to use the Core ML model. For the purpose of the this tutorial it is not critical to understand the entire code of the class. To use the Core ML model in Playground, copy the entire code and then close the file.
Within the Playground go to the menu and select File > New > File or use the CMD⌘ + N keyboard shortcut to create a new source file. Use the name YOLOv3.swift and paste in the entire code from the Model Class you just copied.
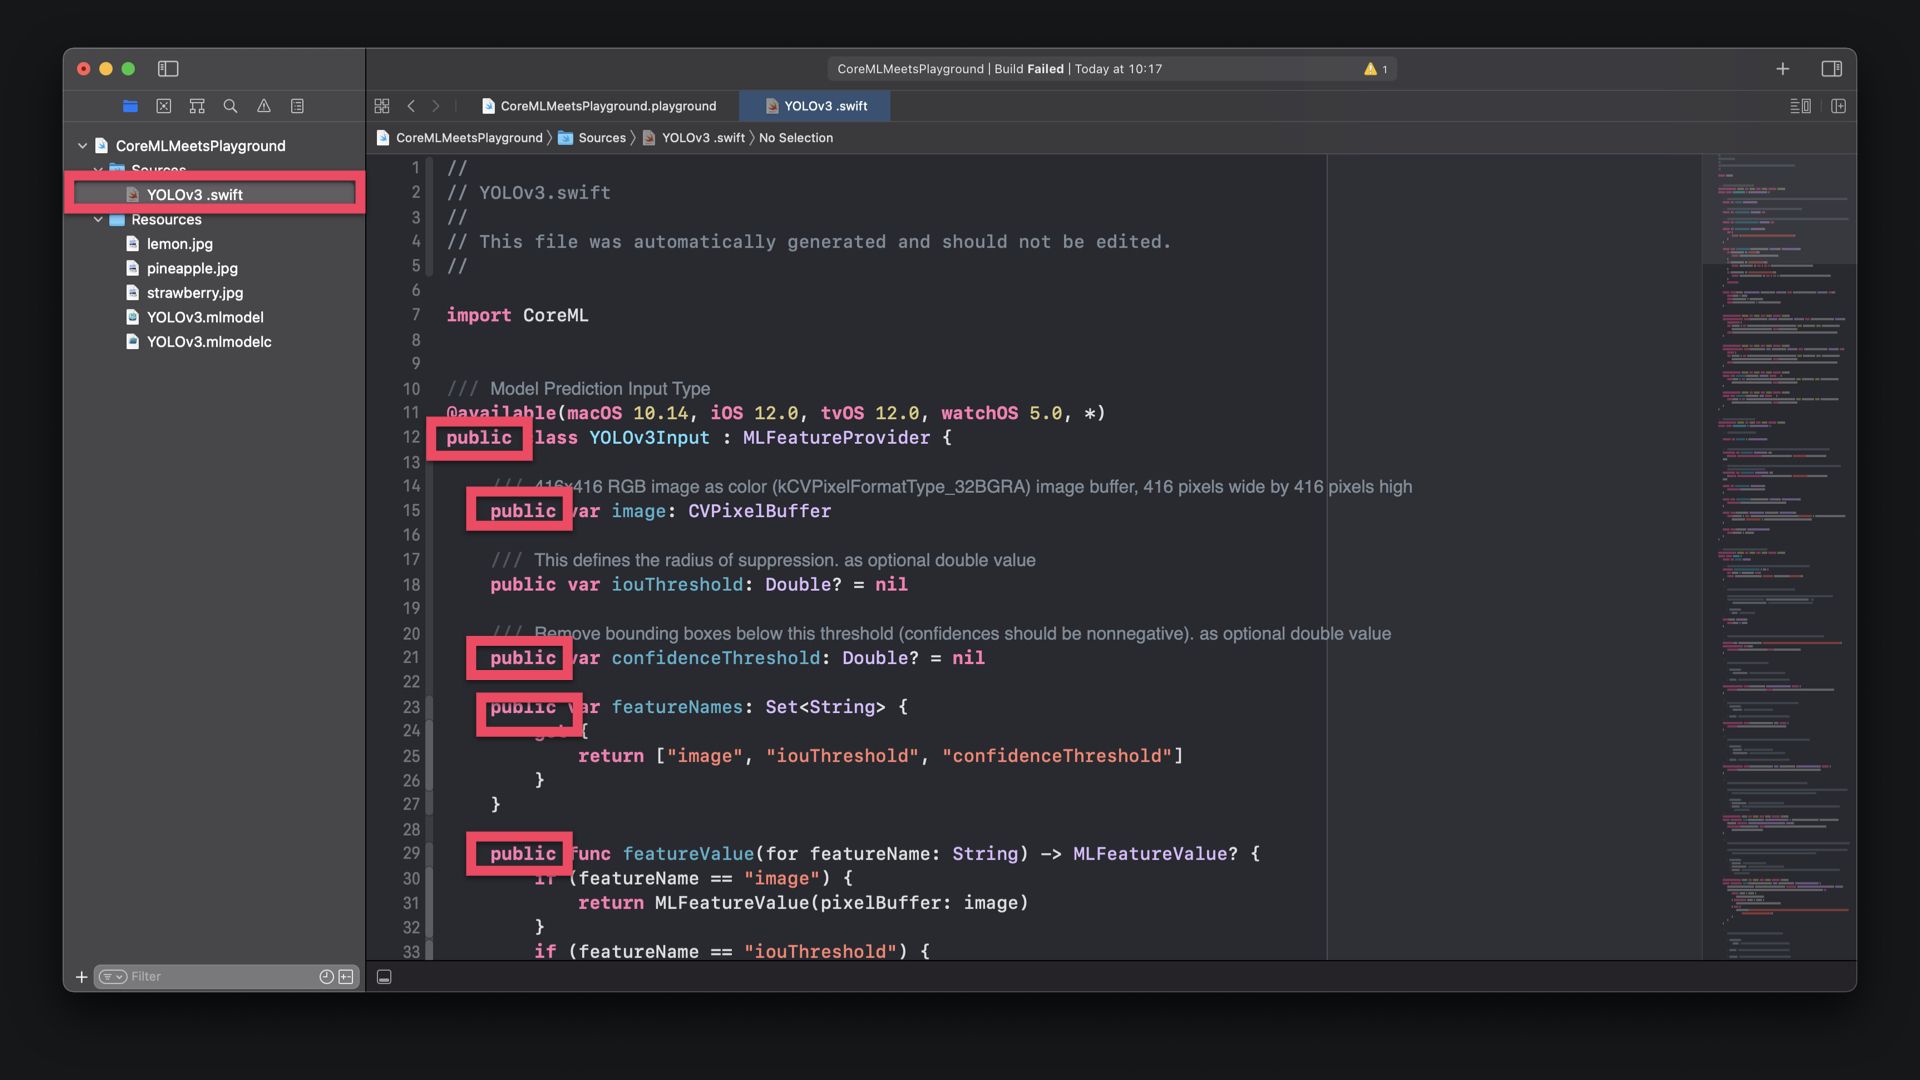
By default the Swift auto-generated stub sources have internal protection levels. All classes, their properties, functions and initialisers have to be made public for Swift Playground to access the source, as any source that is not part of a Playground page needs to have public accessibility to be usable from a Playground page.
In the main Playground page, import Core ML as well as Vision to use the frameworks within the page. As a first step, the Core ML model contain has to be prepared to create an image analysis request with the Vision framework. For this, create a container for a Core ML model used with Vision requests.
var visionModel: VNCoreMLModel = {
    do {
        let modelToBeUsed = YOLOv3().model
        return try VNCoreMLModel(for: modelToBeUsed)
    } catch {
        fatalError("⚠️ Failed to create VNCoreMLModel: \(error)")
    }
}()
Then, create an image analysis request that uses a Core ML model to process images. In this example the implementation will just list the detected objects and print them to the console.
var visionRequest: VNCoreMLRequest = {
    // 1. Create the completion handler for the analysis request
    var requestCompletionHandler: VNRequestCompletionHandler = { request, error in
        if let results = request.results as? [VNRecognizedObjectObservation] {
            /**
             * In here you do something with the request results.
             * In this example we will just list the detected objects.
             */
            let detectionConfidenceThreshold: Float = 0.99
            for result in results {
                let resultDetectionConfidence = result.labels.first?.confidence ?? 0
                if  resultDetectionConfidence >= detectionConfidenceThreshold {
                    let detectedObject = result.labels.first?.identifier ?? "Nothing"
                    let detectedObjectConfidence = result.labels.first?.confidence ?? 0
                    print("\(detectedObject) detected with \(detectedObjectConfidence) confidence")
                } else {
                    print("The result does not match the confidence threshold.")
                }
            }
        } else {
            print("Error while getting the request results.")
        }
    }

    // 2. Create the request with the model container and completion handler
    let request = VNCoreMLRequest(model: visionModel,
                                  completionHandler: requestCompletionHandler)

    // 3. Inform the Vision algorithm how to scale the input image
    request.imageCropAndScaleOption = .scaleFill

    return request
}()
Now, we can prepare image data to be used with the model. For this we have to consider the input requirements of the Core ML model. In the Predictions tab of the .mlmodel file, the input parameters for the Core ML model can be verified. In this case, the YOLOv3 model expects squared images with dimensions of 416 x 416 to execute the classification.
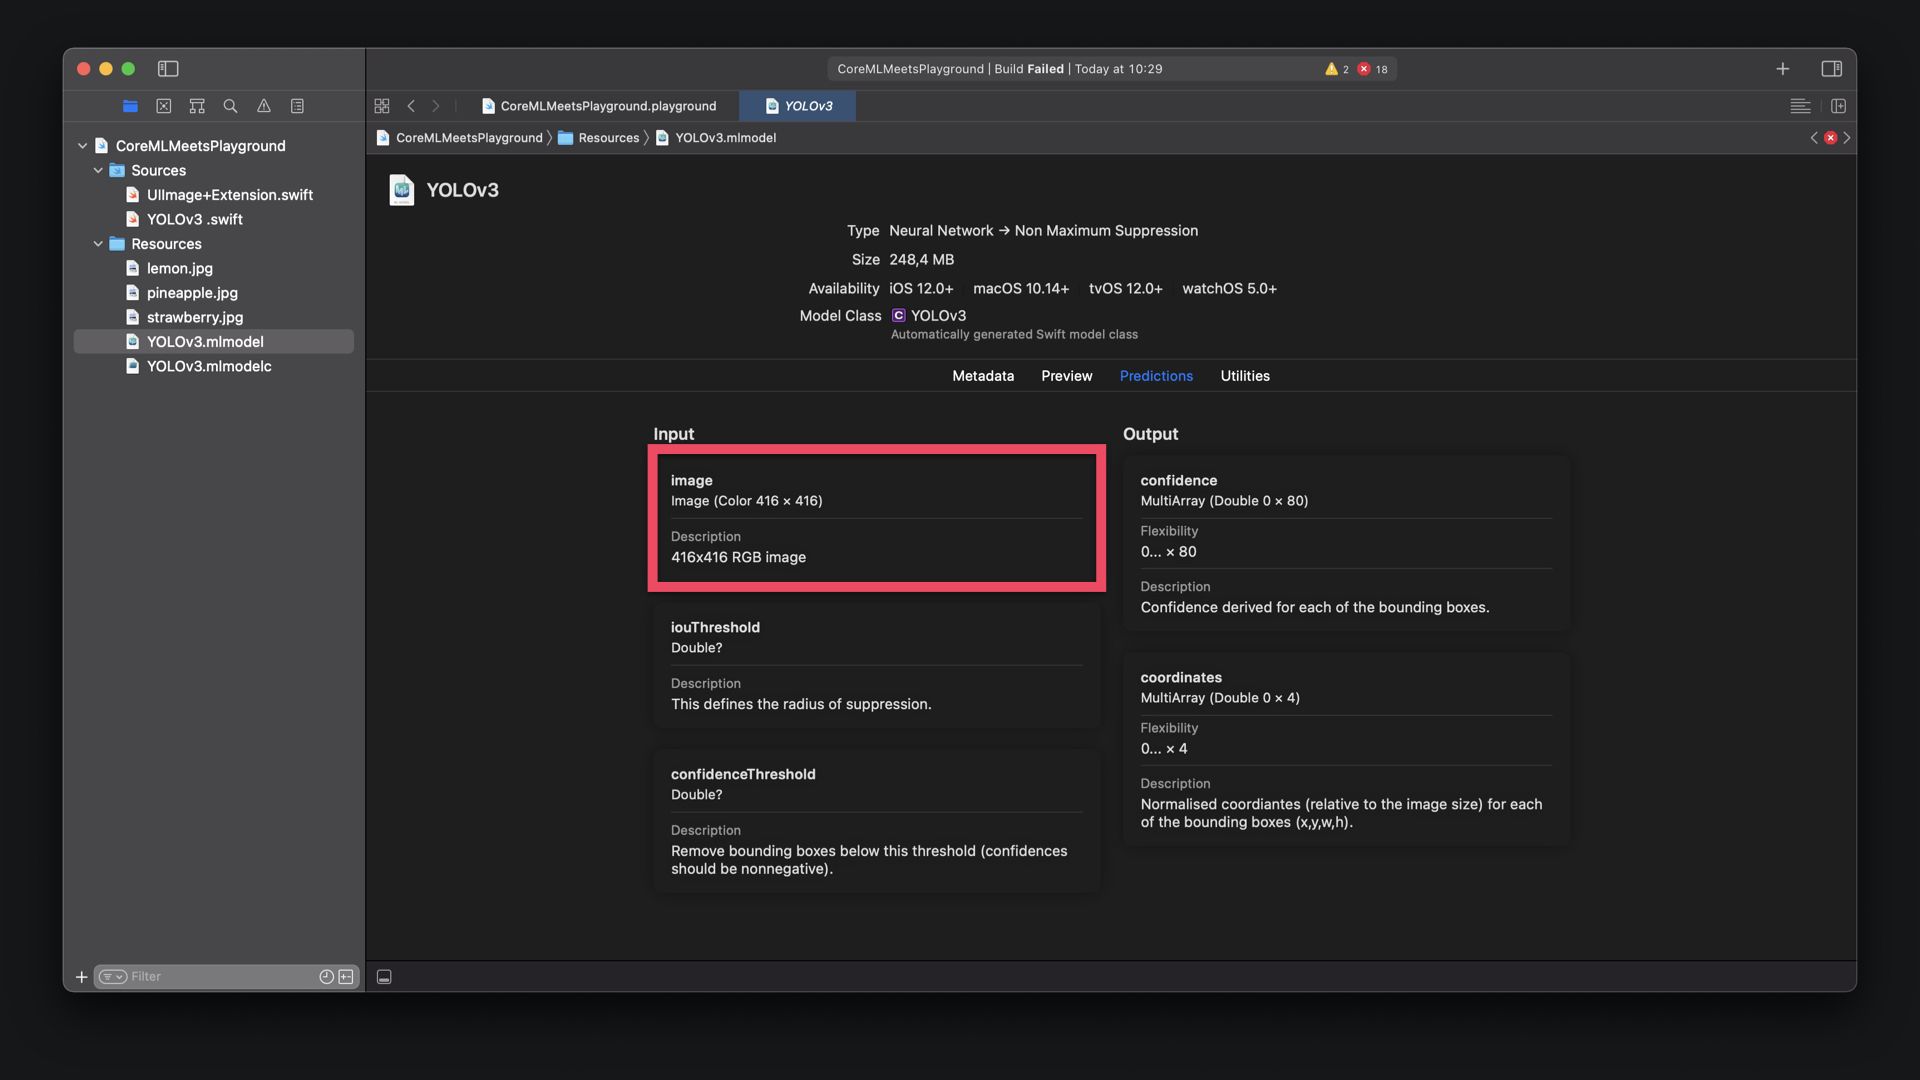
As a consequence, this means that we have to resize any image to that dimensions to be accepted. Also, the input type is not an UIImage but either a Core Image Image (CIIMage), Core Graphics Image (CGImage) or a Core Video Pixel Buffer (CVPixelBuffer). To create the CVPixelBuffer, the image has to be converted, which is not a trivial task. The easiest way to achieve these goals is adding some extensions to UIImage.
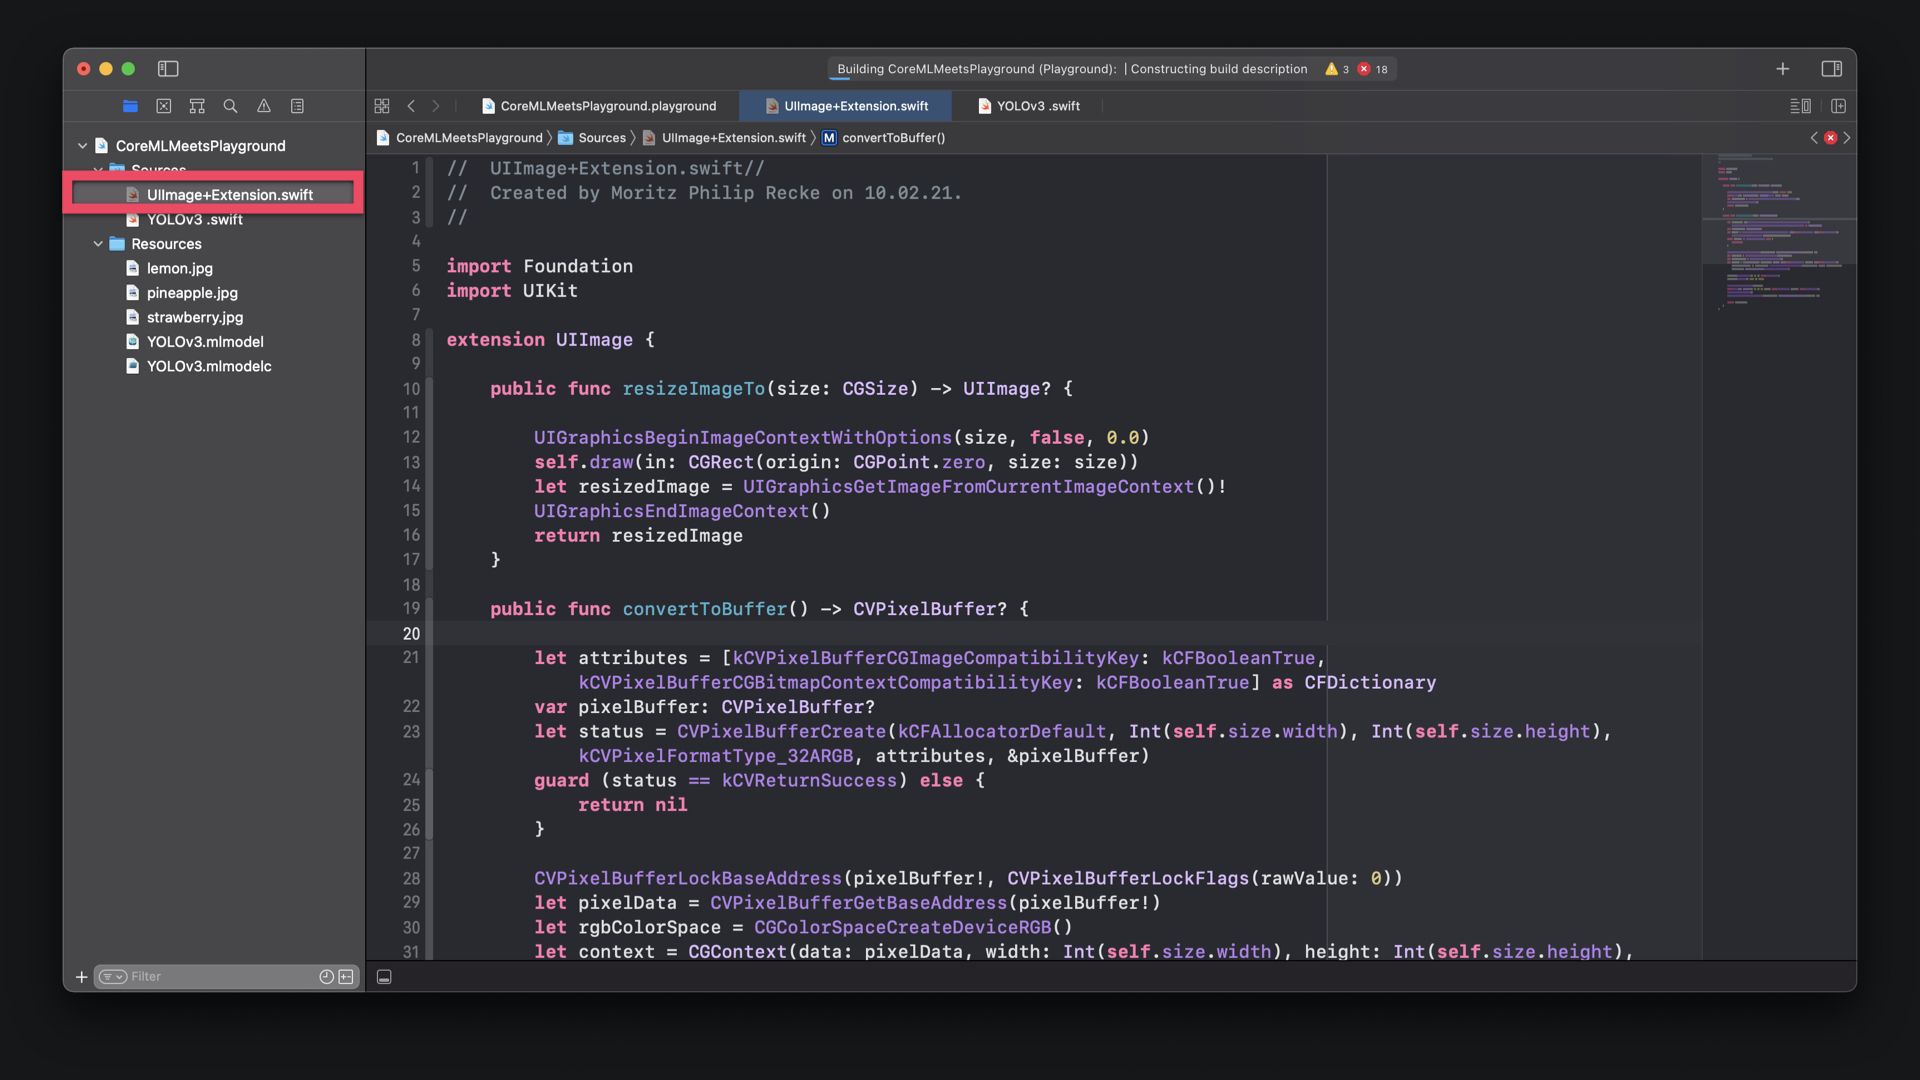
For the purpose of the tutorial, feel free to use this GitLab snippet to copy the source code for the UIImage+Extension.swift file used in this tutorial. However, for usage in Playground, the functions have to be made public to be usable within the main Playground page. Inside the UIImage+Extension.swift you can see see to the class:
resizeImageTo(): which will resize the image to a provided size and return a resizedUIImage.convertToBuffer(): which will convert theUIImageto aCVPixelBuffer.
On the main Playground page, you can now load an image from the Playground's Resources folder, resize and convert the image to be used with the Vision framework.
// 1. Load the image from the 'Resources' folder.
let newImage = UIImage(named: "lemon.jpg")

// 2. Resize the image to the required input dimension of the Core ML model
// Method from UIImage+Extension.swift
let newSize = CGSize(width: 416, height: 416)
guard let resizedImage = newImage?.resizeImageTo(size: newSize) else {
    fatalError("⚠️ The image could not be found or resized.")
}

// 3. Convert the resized image to CVPixelBuffer as it is the required input
// type of the Core ML model. Method from UIImage+Extension.swift
guard let convertedImage = resizedImage.convertToBuffer() else {
    fatalError("⚠️ The image could not be converted to CVPixelBugger")
}
Finally, you can use the CVPixelBuffer as an input to perform the analysis request created earlier to perform the object detection. The results will be printed to the console
// 1. Create the handler, which will perform requests on a single image
let handler = VNImageRequestHandler(cvPixelBuffer: convertedImage)

// 2. Performs the image analysis request on the image.
do {
    try handler.perform([visionRequest])
} catch {
    print("Failed to perform the Vision request: \(error)")
}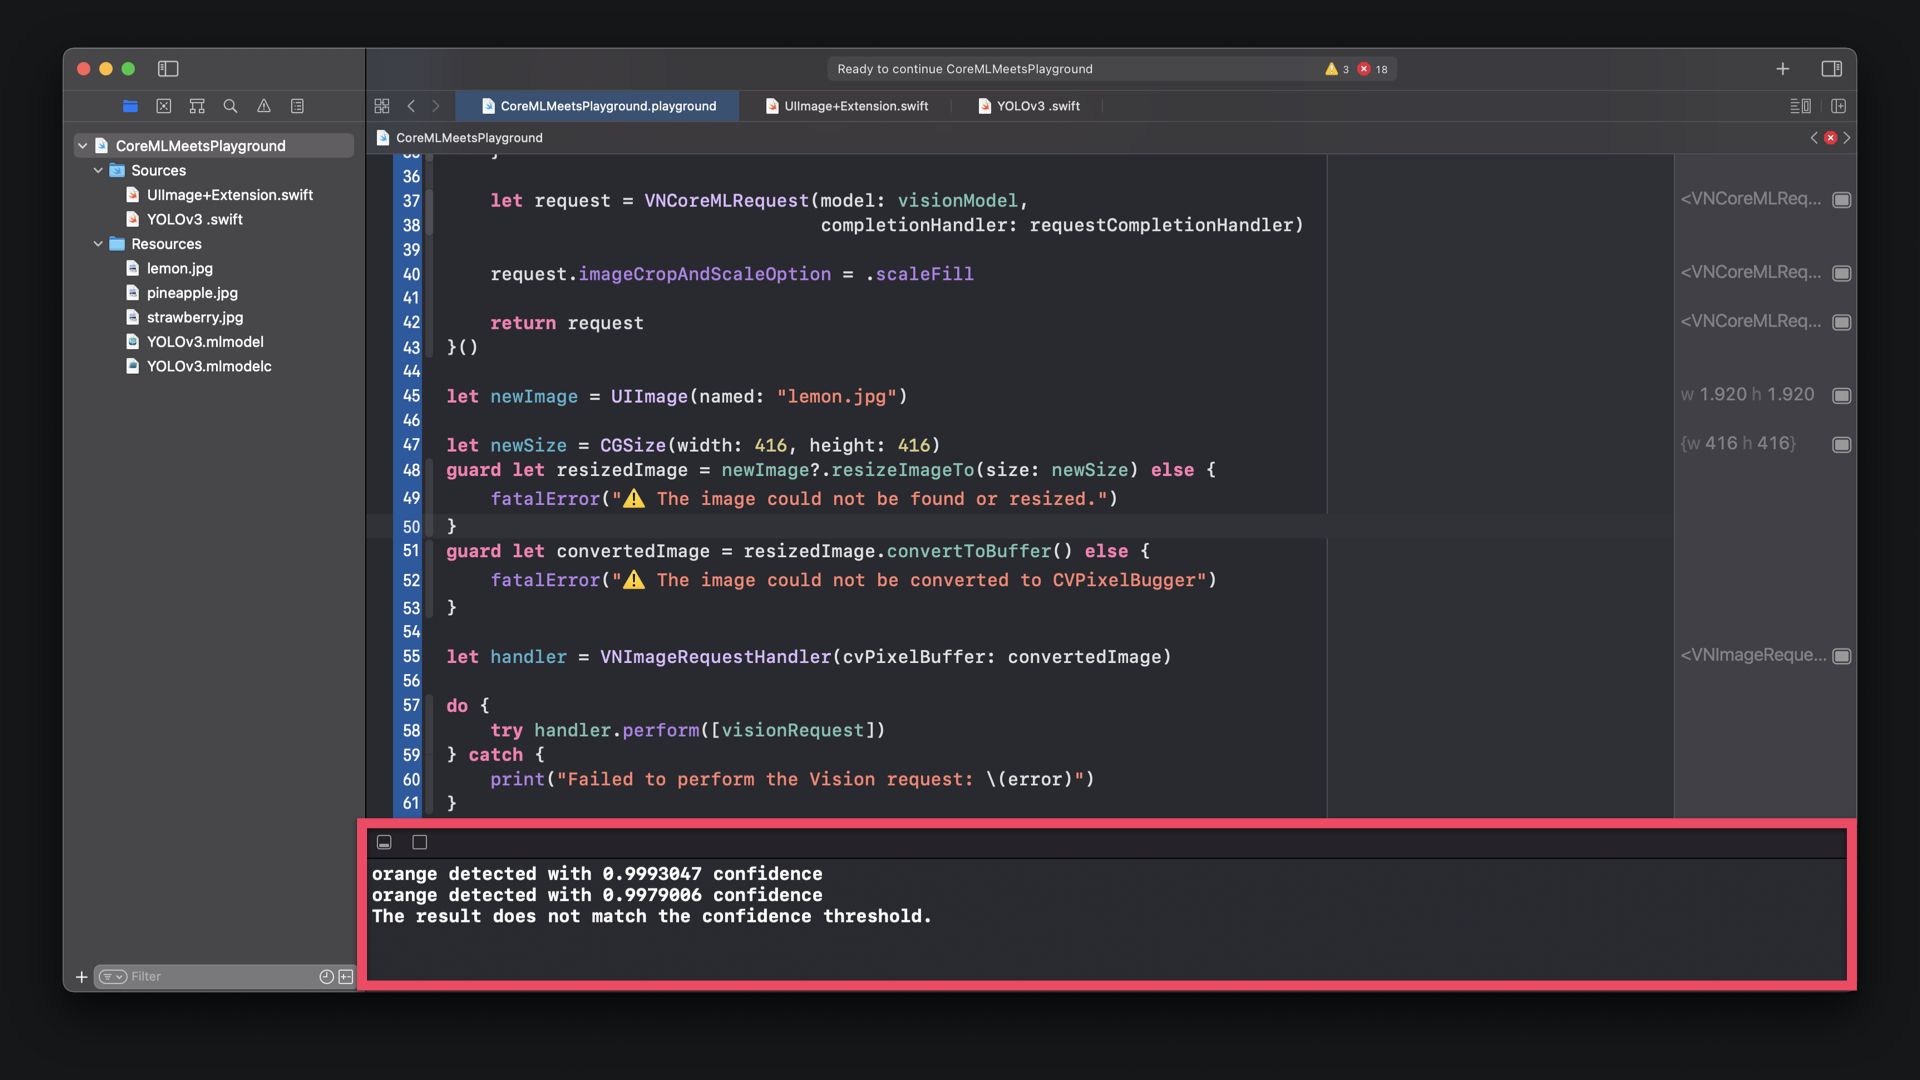
The entire code for this tutorial can be found in this Gitlab Snippet. It allows you to use both object detection as well as image classification models in Swift Playground. Similarly, this also works for other Core ML models.
This tutorial is part of a series of articles derived from the presentation Creating Machine Learning Models with Create ML presented as a one time event at the Swift Heroes 2021 Digital Conference on April 16th, 2021.
Where to go next?
If you are interested into knowing more about using Object Detection models or Core ML in general you can check other tutorials on:
- UIImage+CVPixelBuffer: Converting an UIImage to a Core Video Pixel Buffer
- Core ML Explained: Apple's Machine Learning Framework
- Use an Object Detection Machine Learning Model in an iOS App
- Use an Image Classification Machine Learning Model in Swift Playgrounds
- Use an Image Classification Machine Learning in an iOS App with SwiftUI
Recommended Content provided by Apple
For a deeper dive on the topic of creating object detection machine learning models, you can watch the videos released by Apple on WWDC:
- WWDC 2018 - Getting the Most out of Playgrounds in Xcode
- WWDC 2019 - Swift Playgrounds 3
- WWDC 2020 - Explore Packages and Projects with Xcode Playgrounds
Other Resources
If you are interested into knowing more about using machine learning models or Core ML, you can go through these resources:
- To understand how to use a custom Vision & Core ML model in Swift Playgrounds, explore Emotion recognition for cats — Custom Vision & Core ML on a Swift Playground.
- To understand how to integrate a Core ML model in your app, check out this sample code provided by Apple.
- To learn how to use Core Data in Swift Playgrounds, follow this tutorial.


