
Using MapKit JS to Embed Apple Maps in Websites
Learn how to use MapKit JS to embed Apple Maps in websites by generating an identifier, private key and JSON Web Token.

If you like Apple Maps and would like to use it not just in your apps but even on your website, this is for you. Find out how to get started with MapKit JS.
With MapKit JS you can embed interactive Apple Maps on your website, annotate points of interest, and perform searches. It is a JavaScript API that works across different platforms and operating systems.
MapKit JS requires authorization through JSON Web Tokens (JWTs) for initialization and advanced API calls. To create a JWT, you can use a key that can be configured by setting up MapKit JS in your Apple Developer Account.
Let's see how that works.
Creating a Maps identifier and a private key for MapKit JS
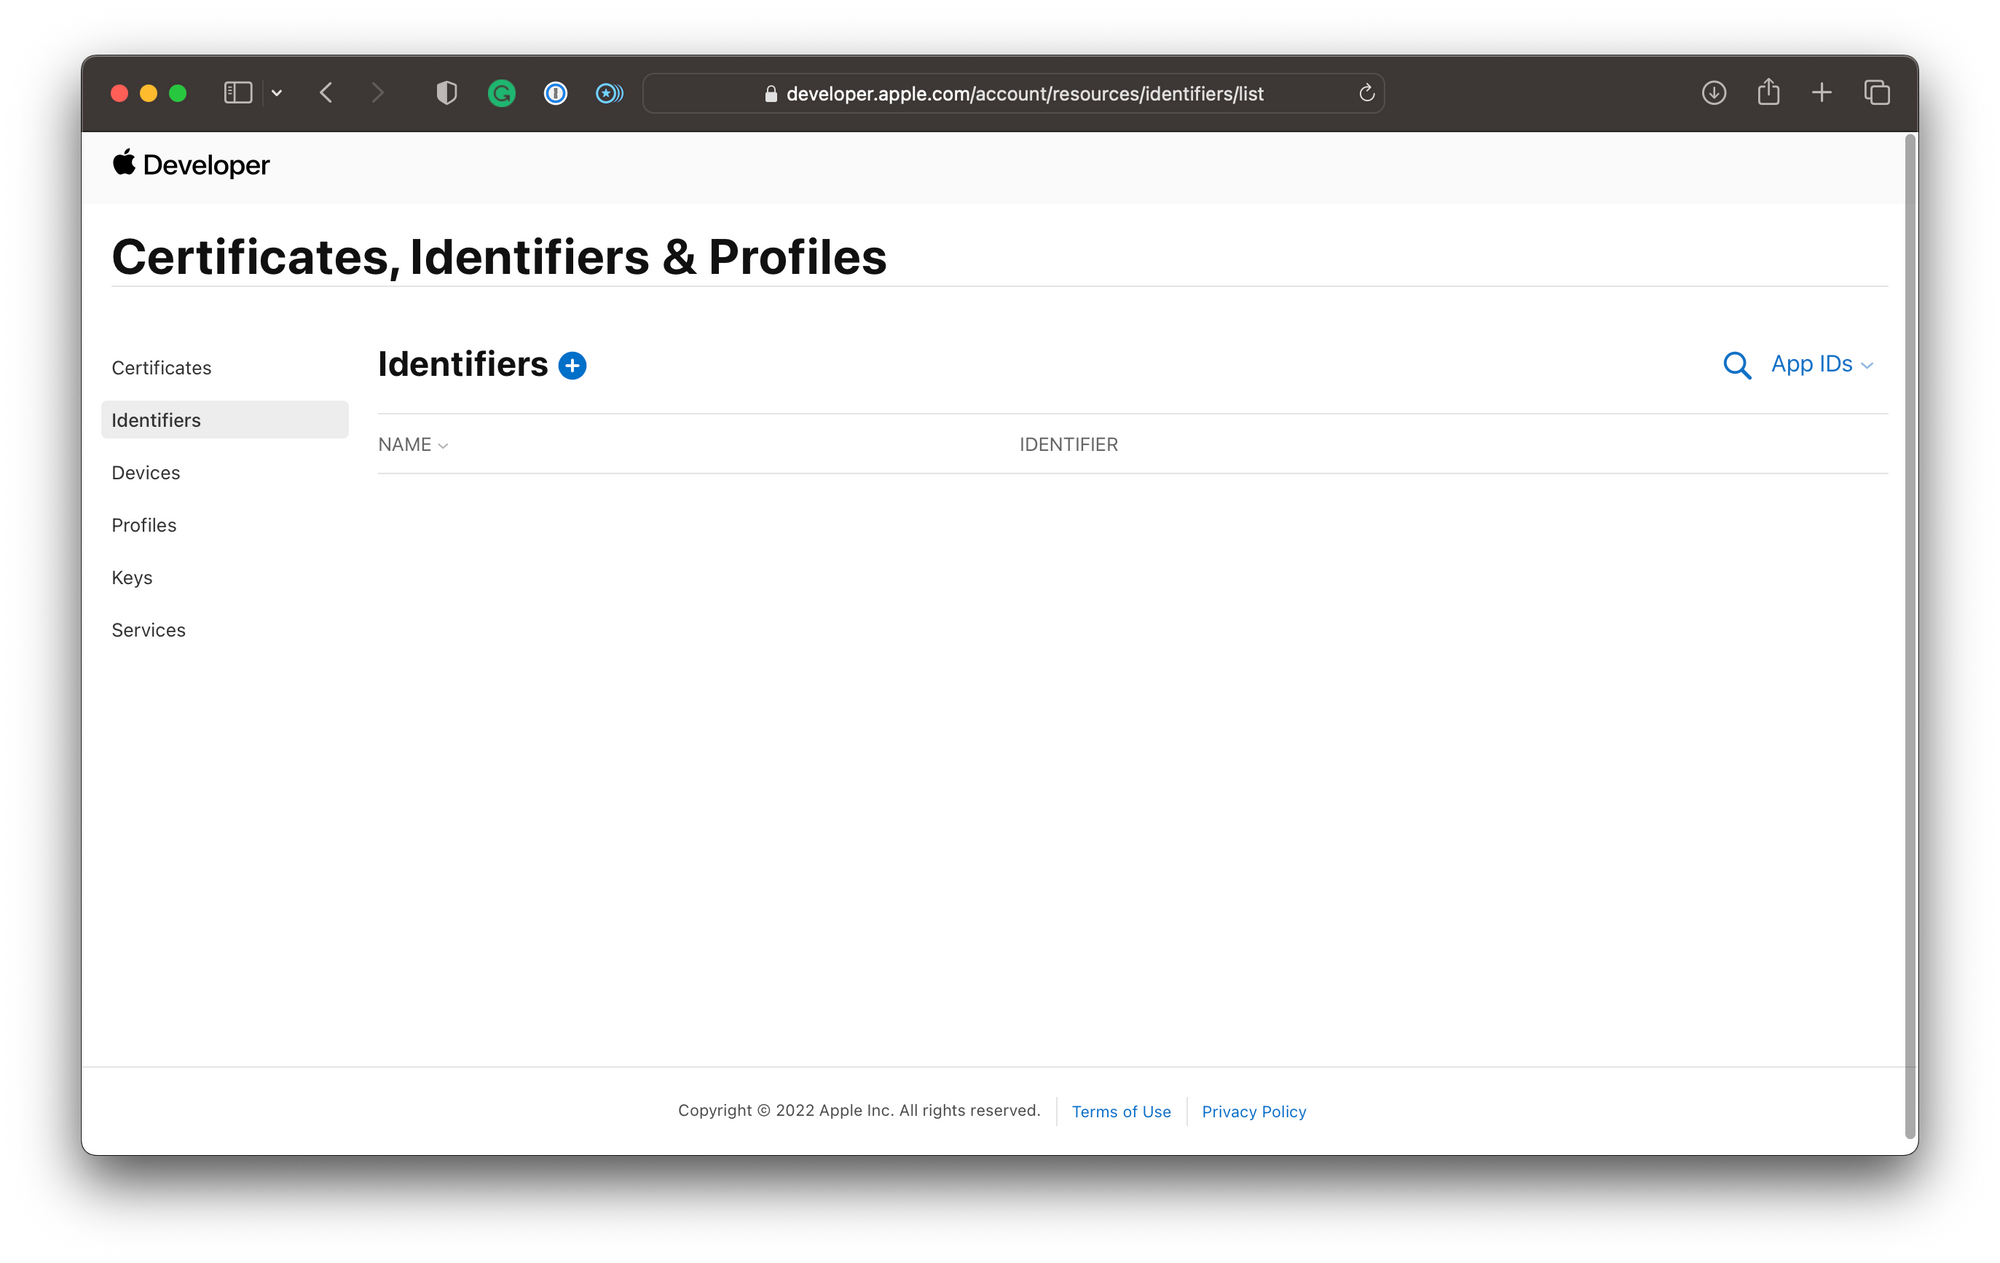
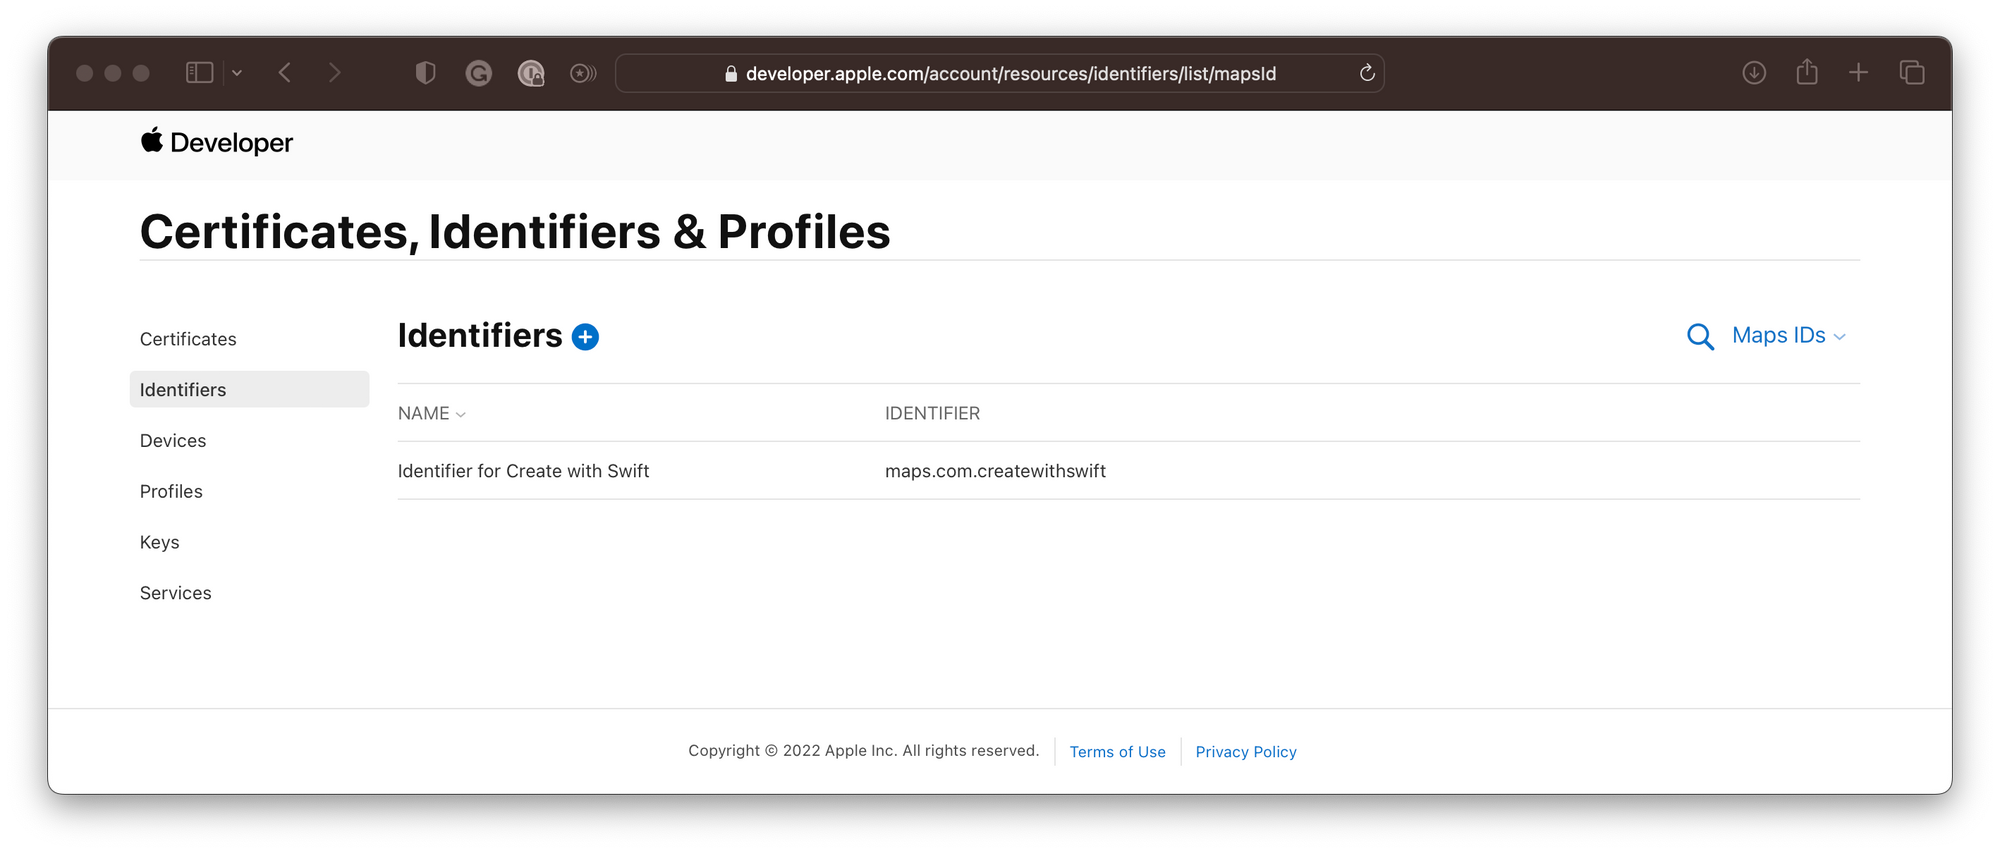
First, you have to create a Maps Identifier in your Apple Developer Account. It is a string that is used to identify a domain or environment that is calling the MapKit JS API. Inside your profile at developer.apple.com/account navigate to the Certificates, Identifiers & Profiles section and select Identifiers in the sidebar.
By clicking on the + symbol, you can start the process of creating a new identifier.
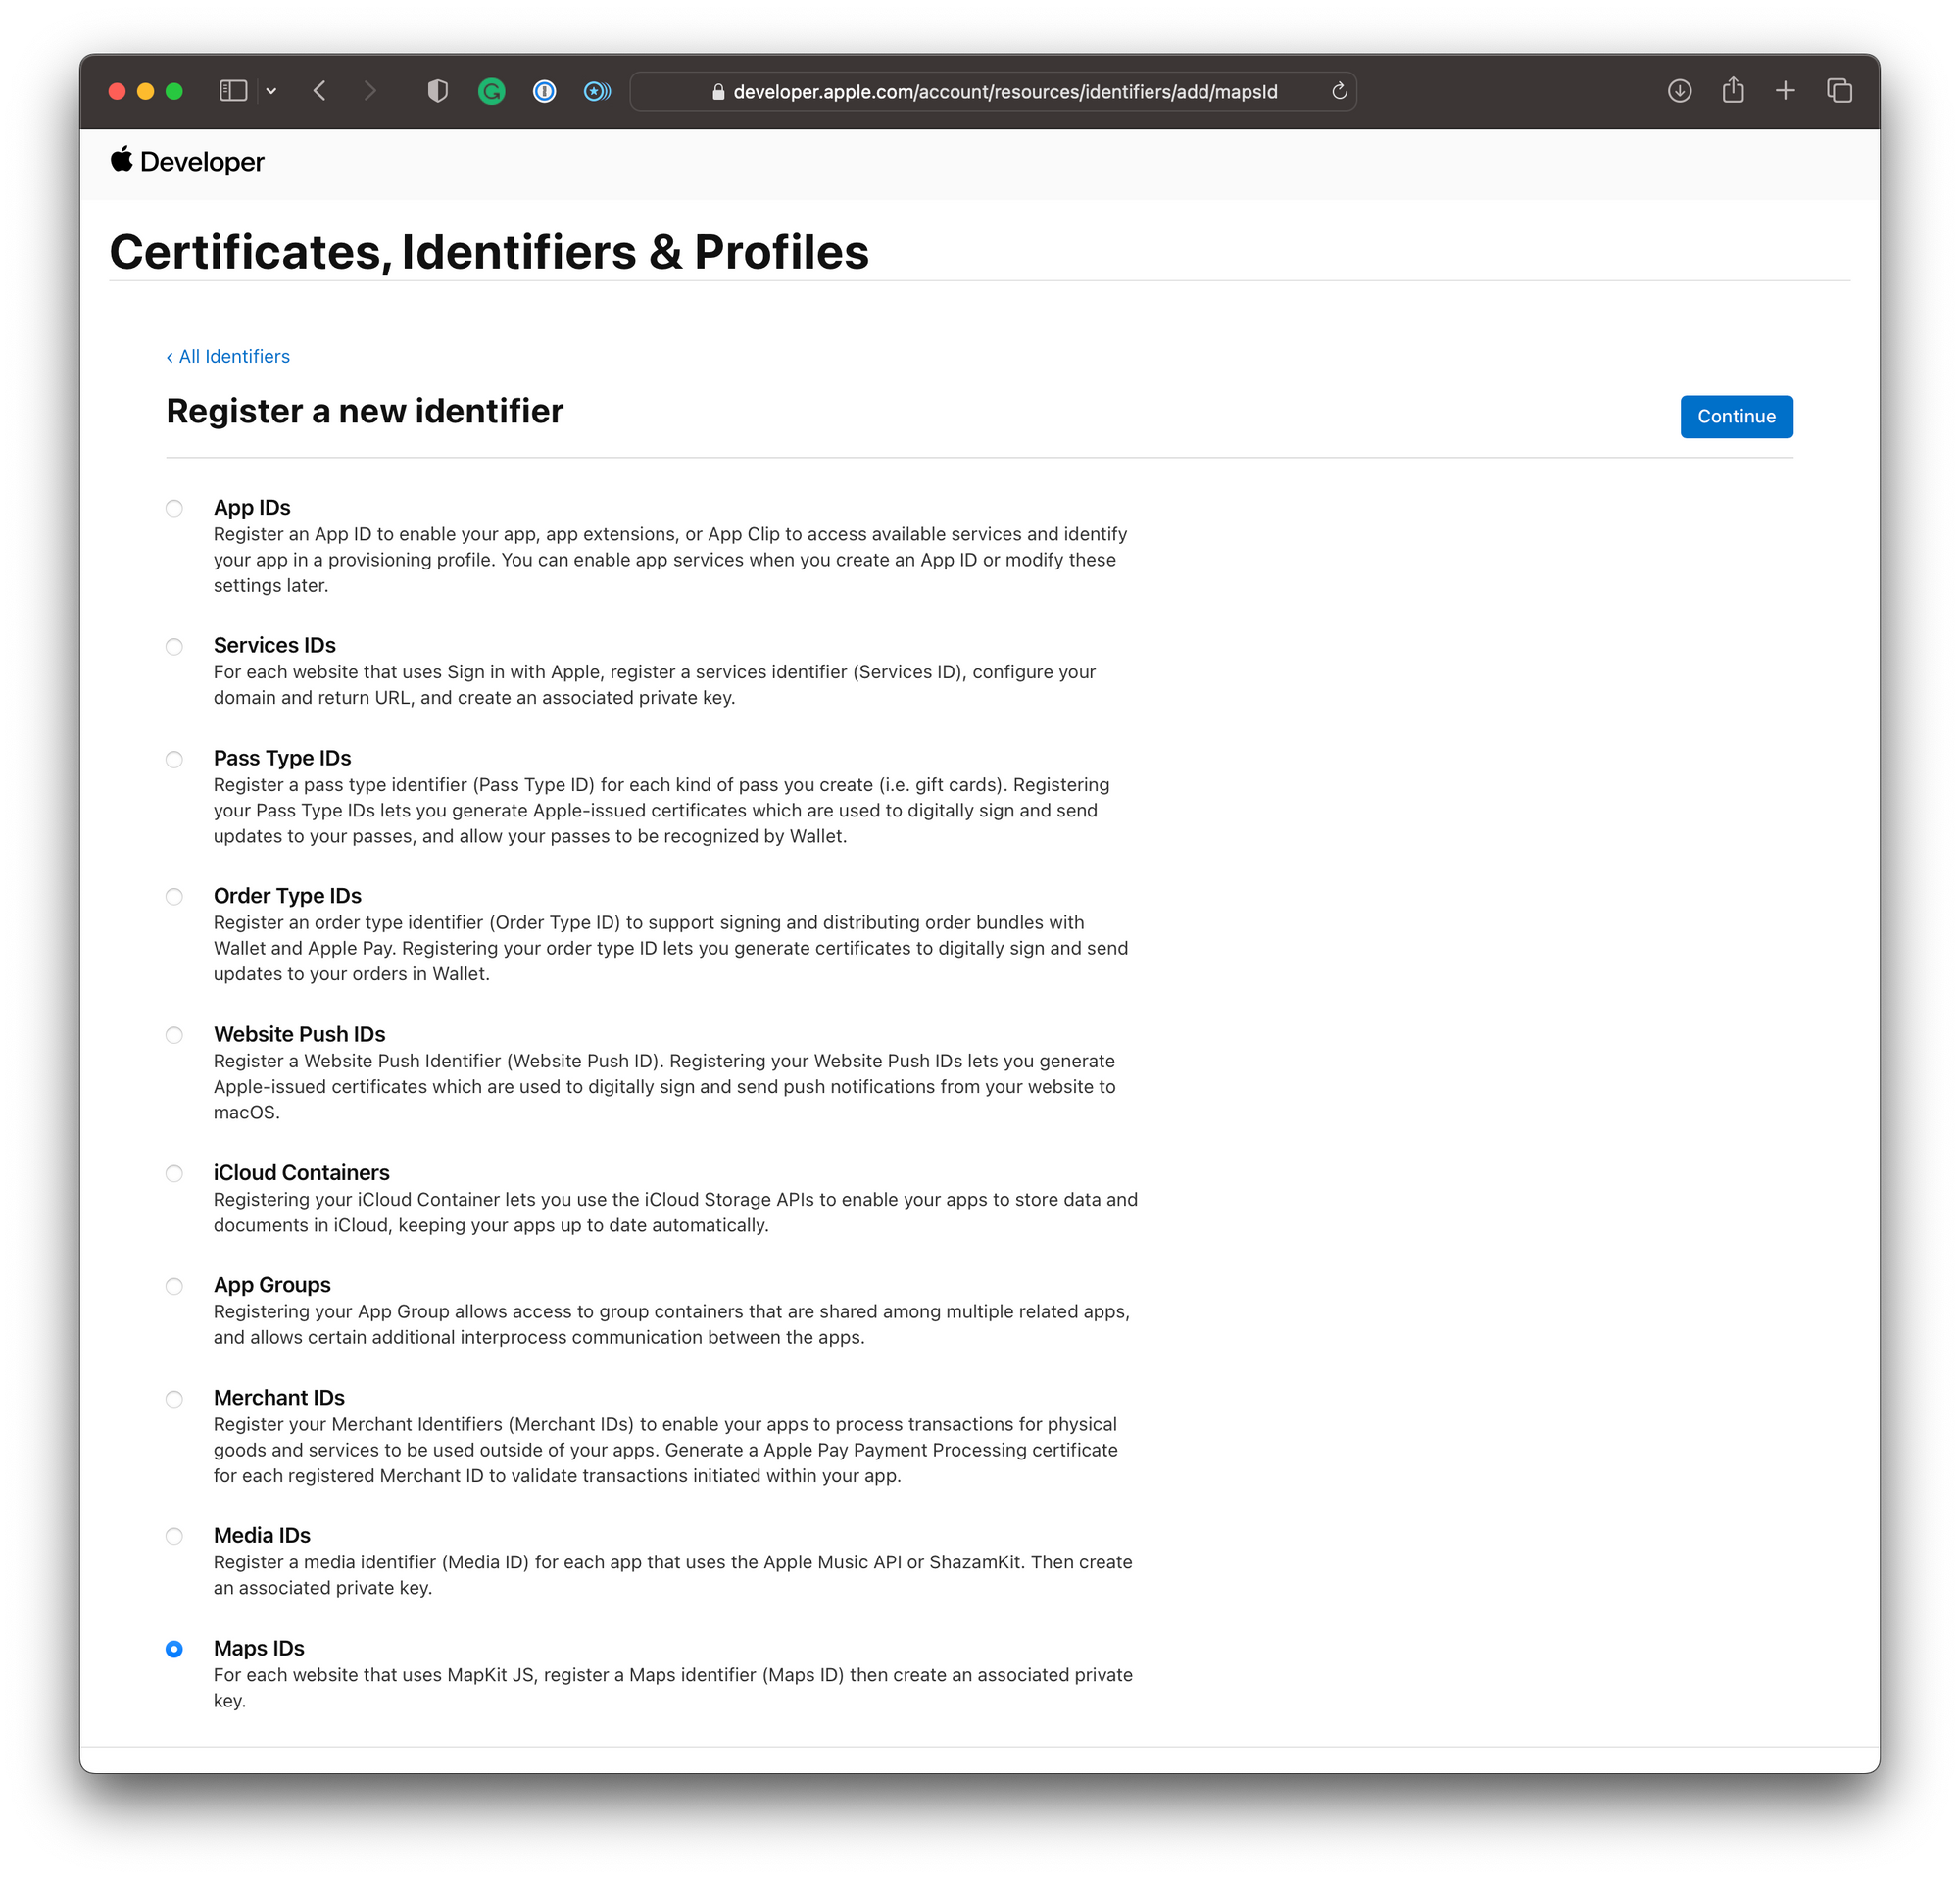
Inside the dialog to register a new identifier, select Maps IDs as the type of identifier and click continue.
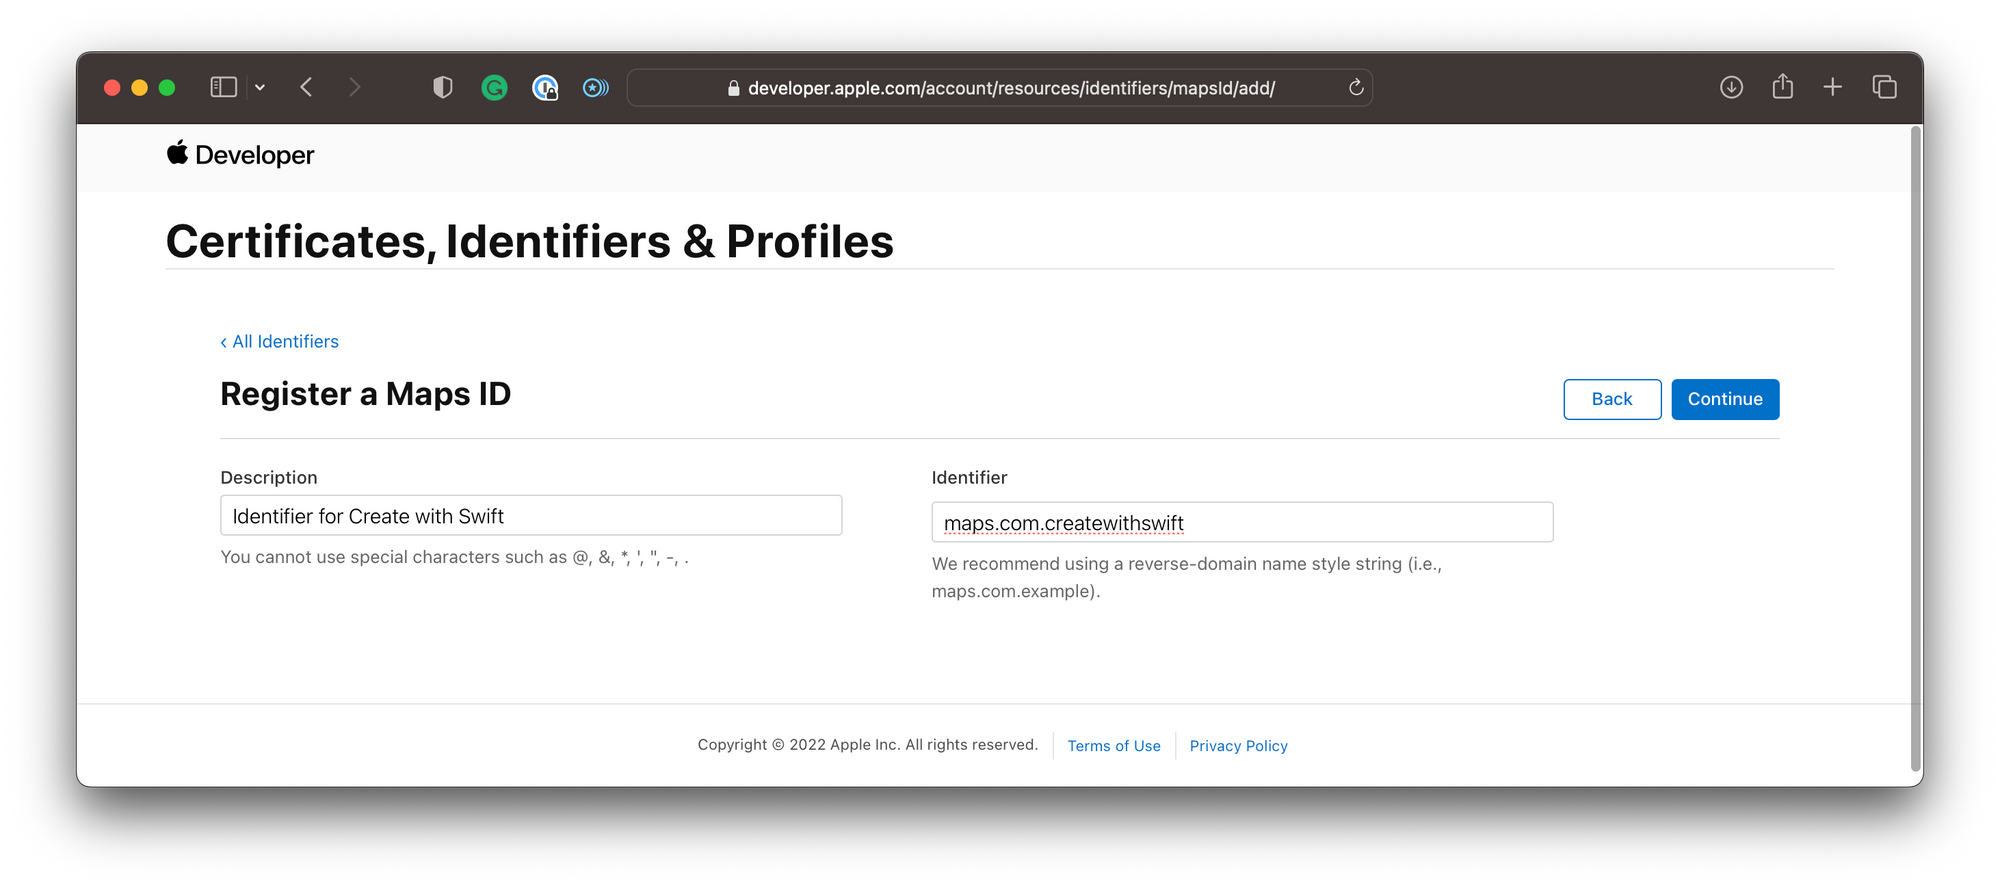
In the next step you can add a description for the identifier you are creating, which will help to distinguish among potentially many identifiers you may have in your developer account. This could be your project name, app name, team name, or whatever is meaningful to you.
Then, you have to provide an identifier for which Apple suggests a reverse-domain-style string, for example, maps.com.createwithswift. Then, click continue.
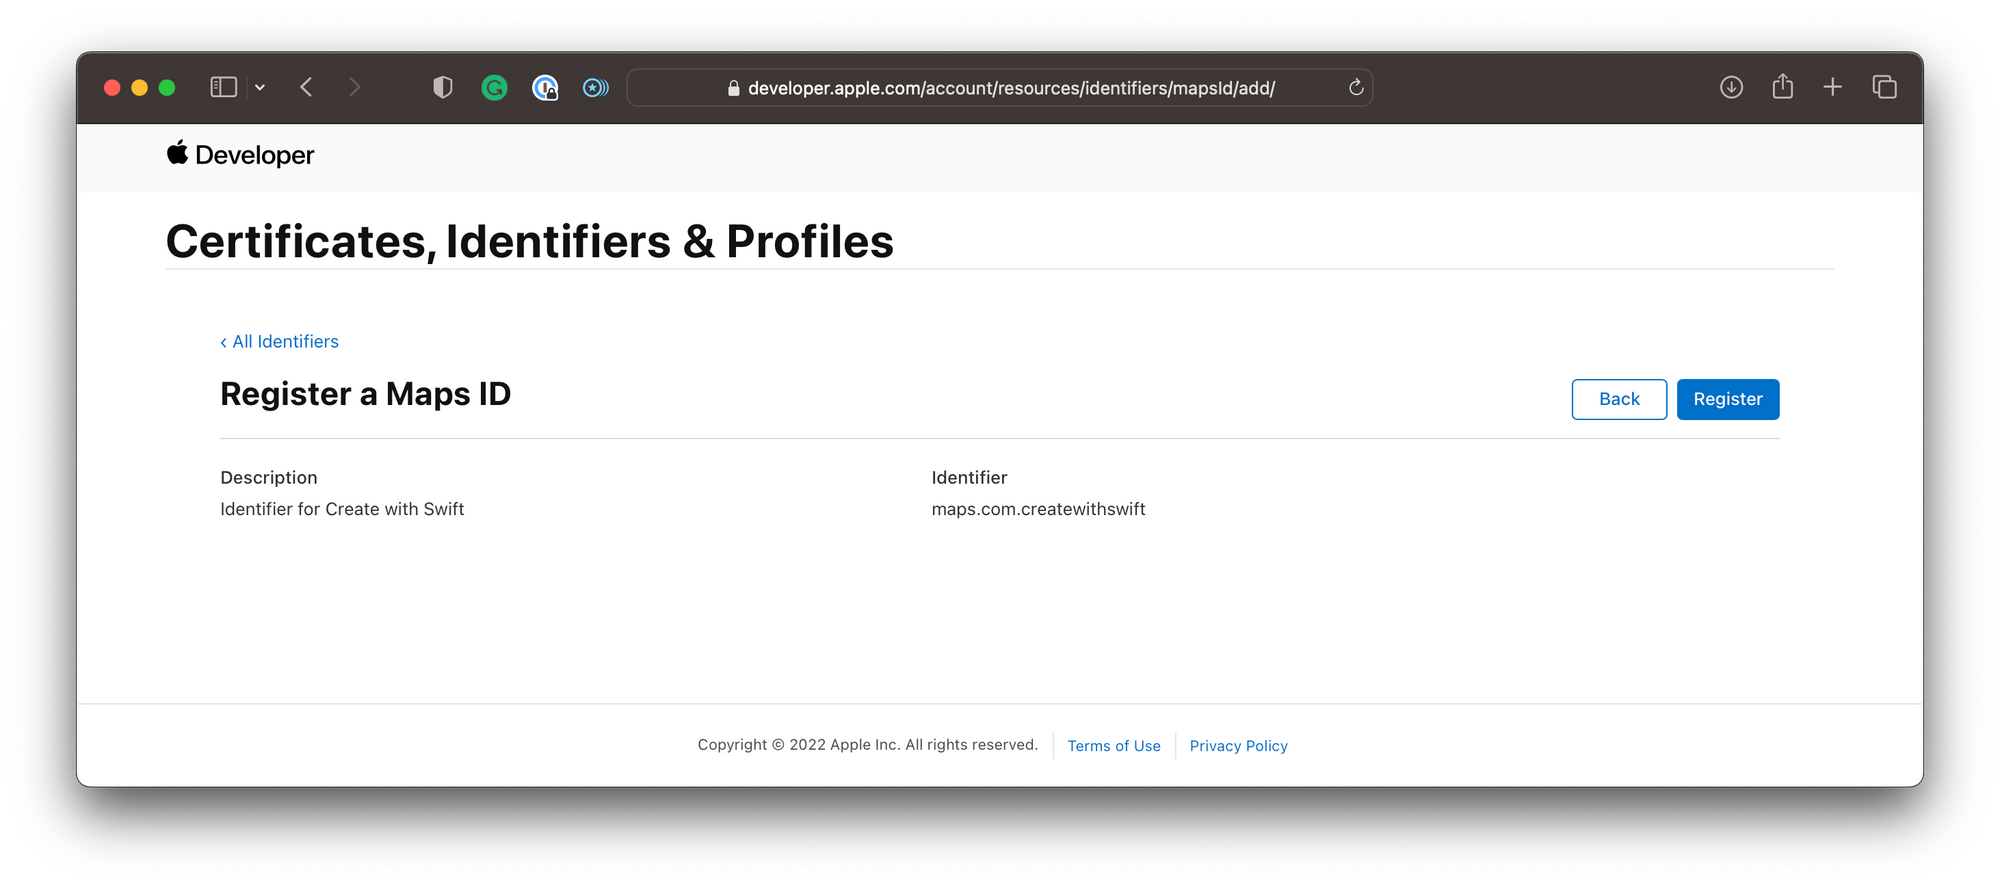
In the final step you can review the information provided and then click Register to complete the process.
After returning to the Identifiers section in the developer account your newly created identifier will be displayed in the list of identifiers. If you have multiple environments for your development project, for example, a development and a production environment, it is recommended to create separate Maps IDs and keys for each environment.
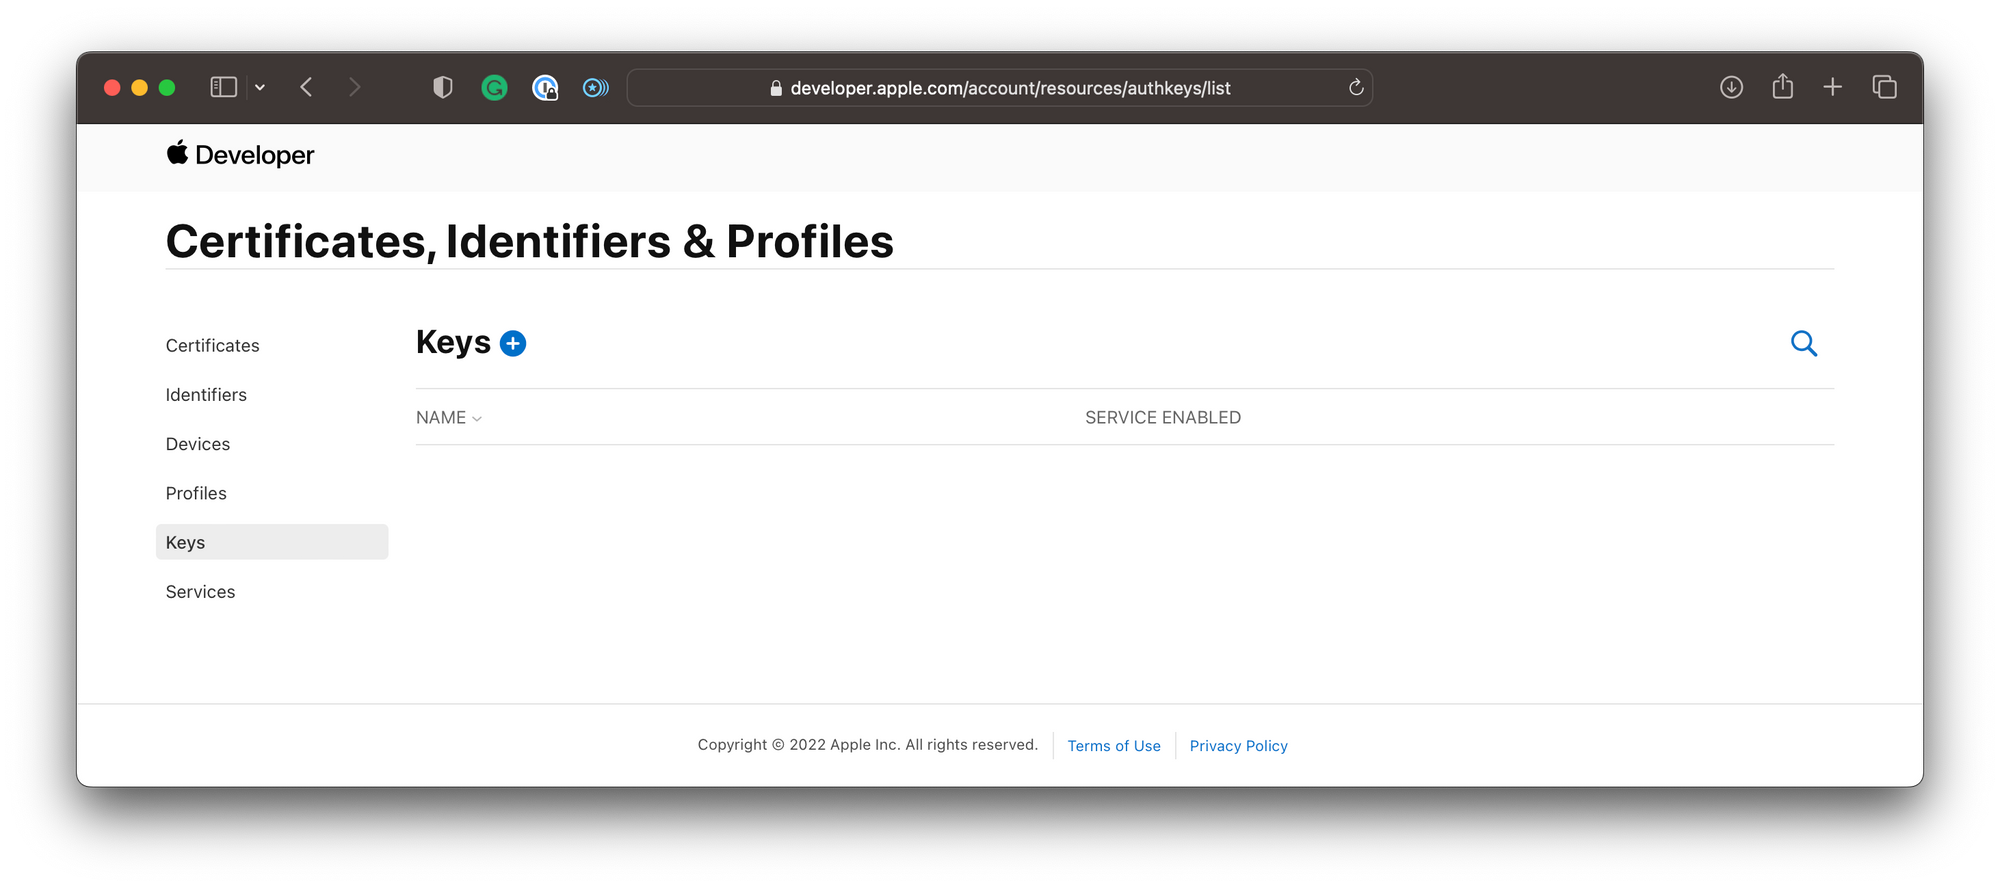
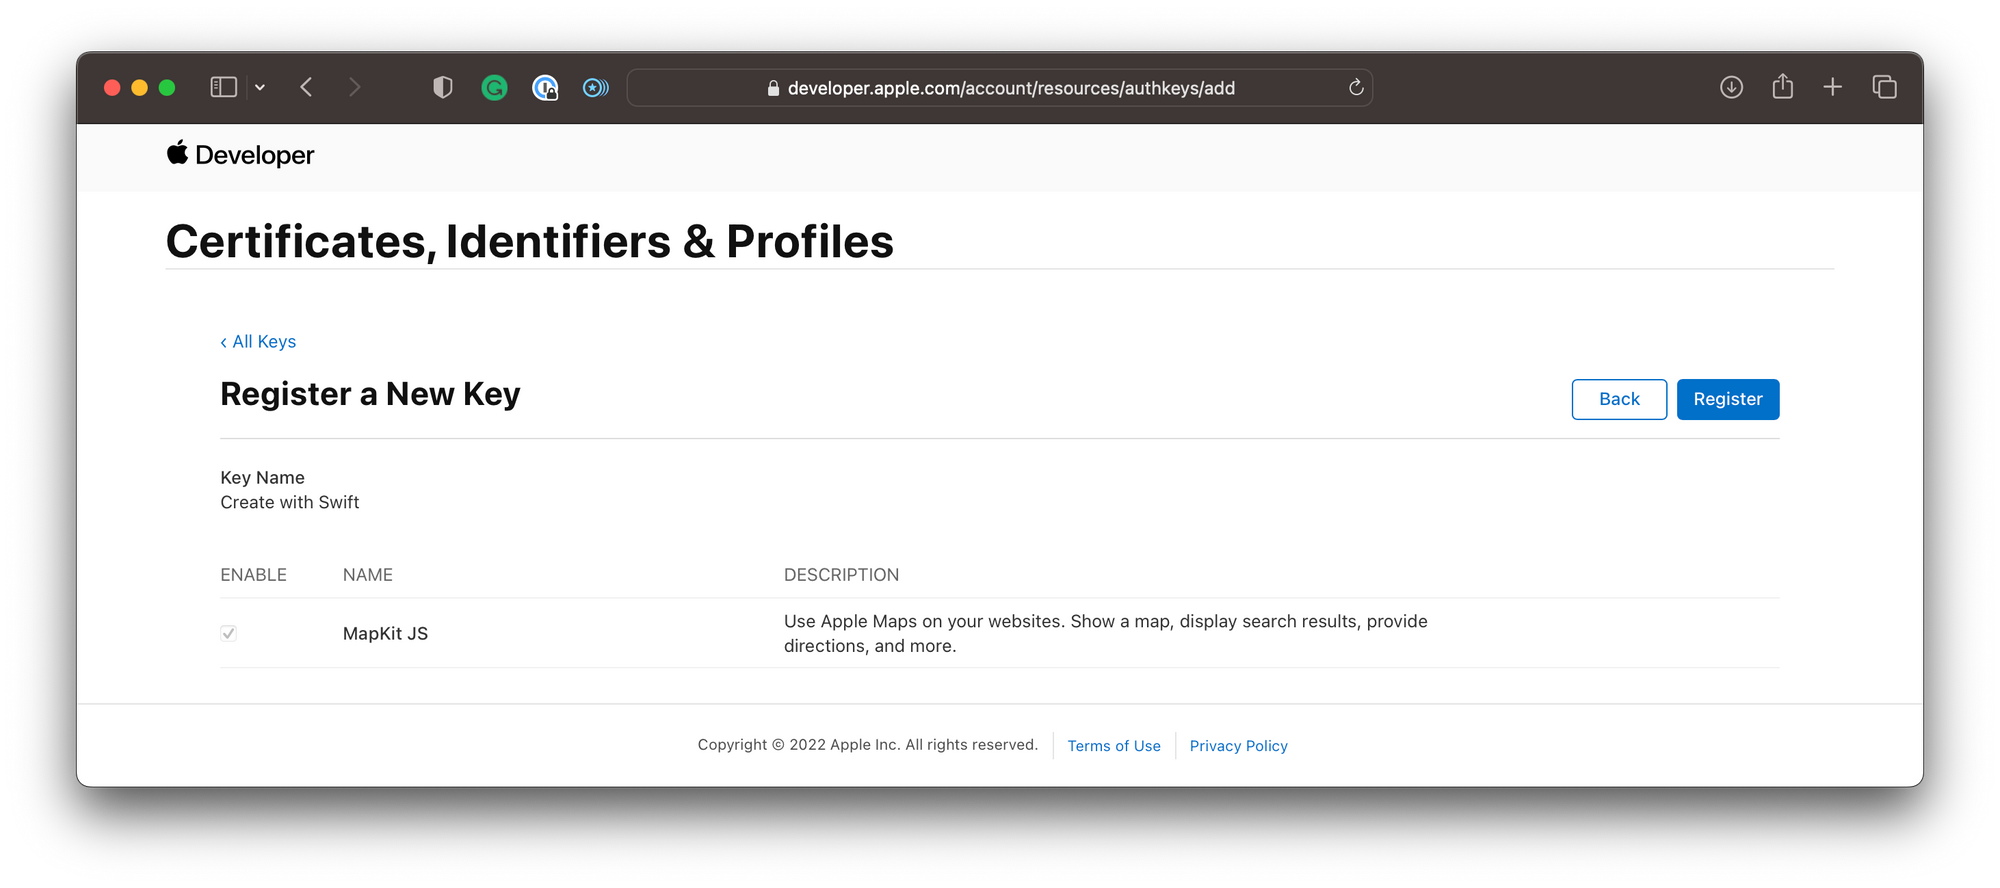
As a next step, you now have to create a new private key and link this key to the MapKit JS service and associate it with a Maps ID. Inside the Certificates, Identifiers & Profiles section, click on Keys in the sidebar, then click the + symbol to create a new key.
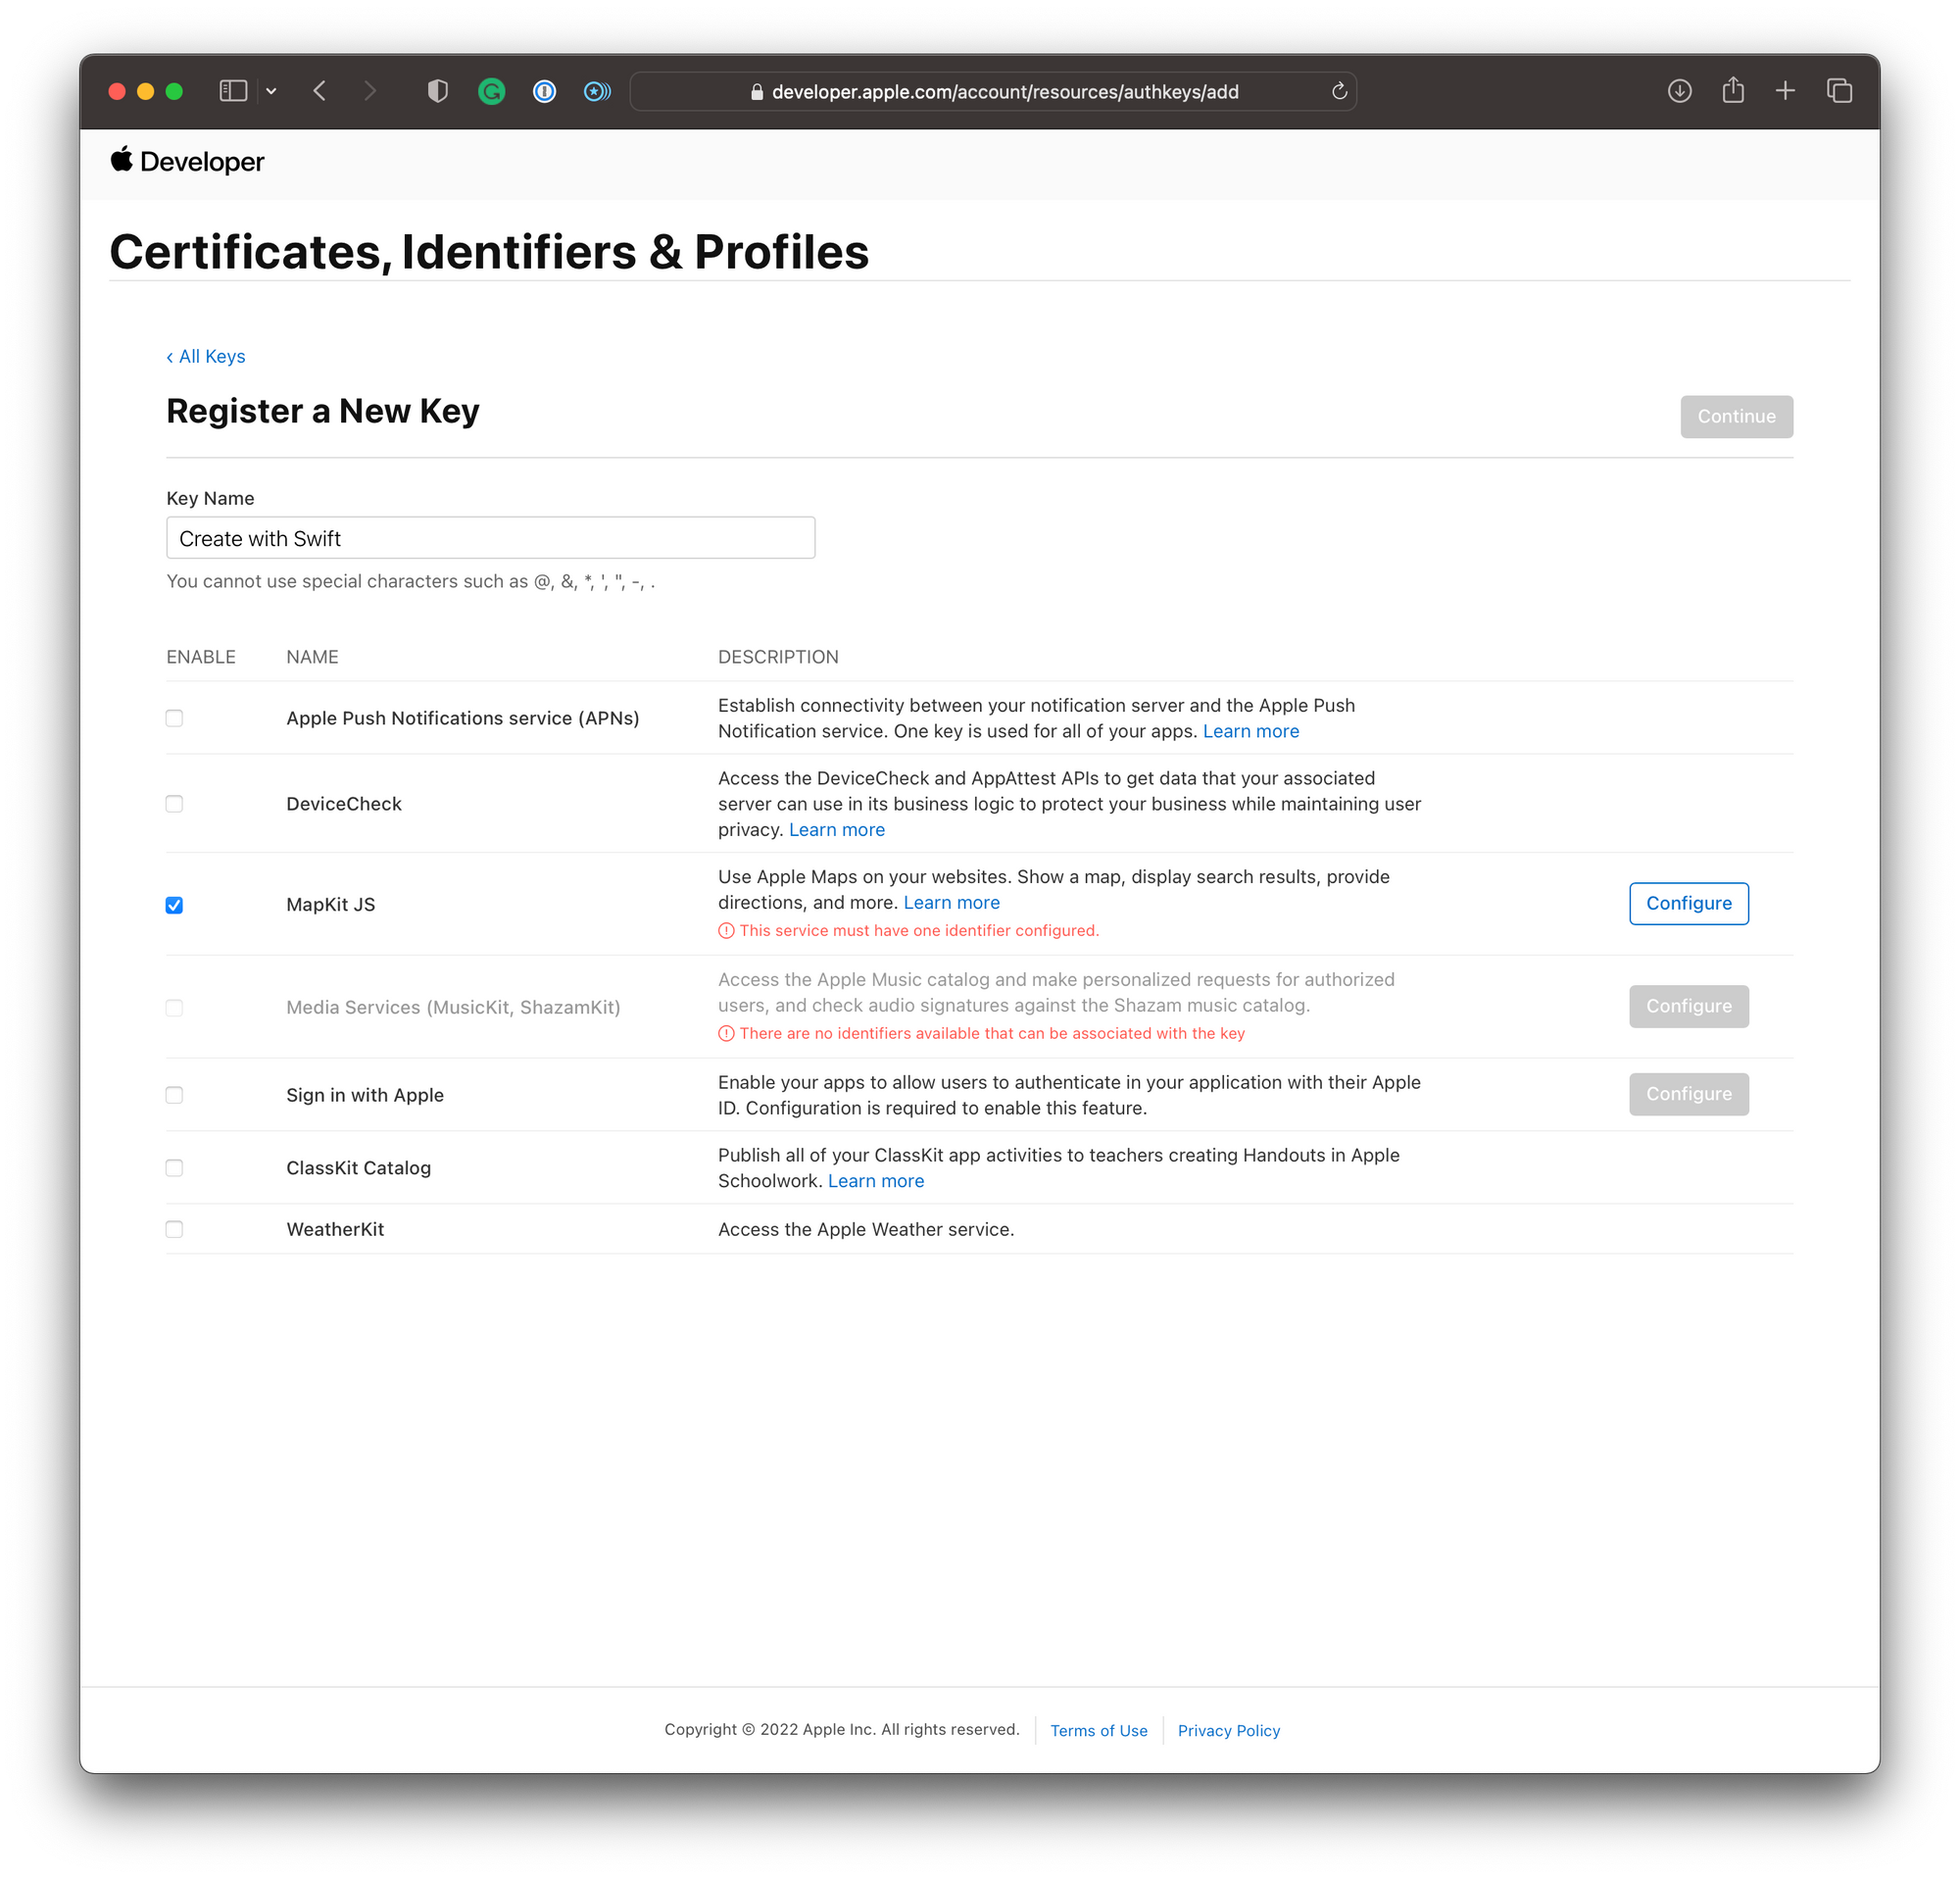
In the dialog to register a new key, select MapKit JS to create a key for usage with MapKit JS. To associate the just-created identifier with the private key, click on configure.
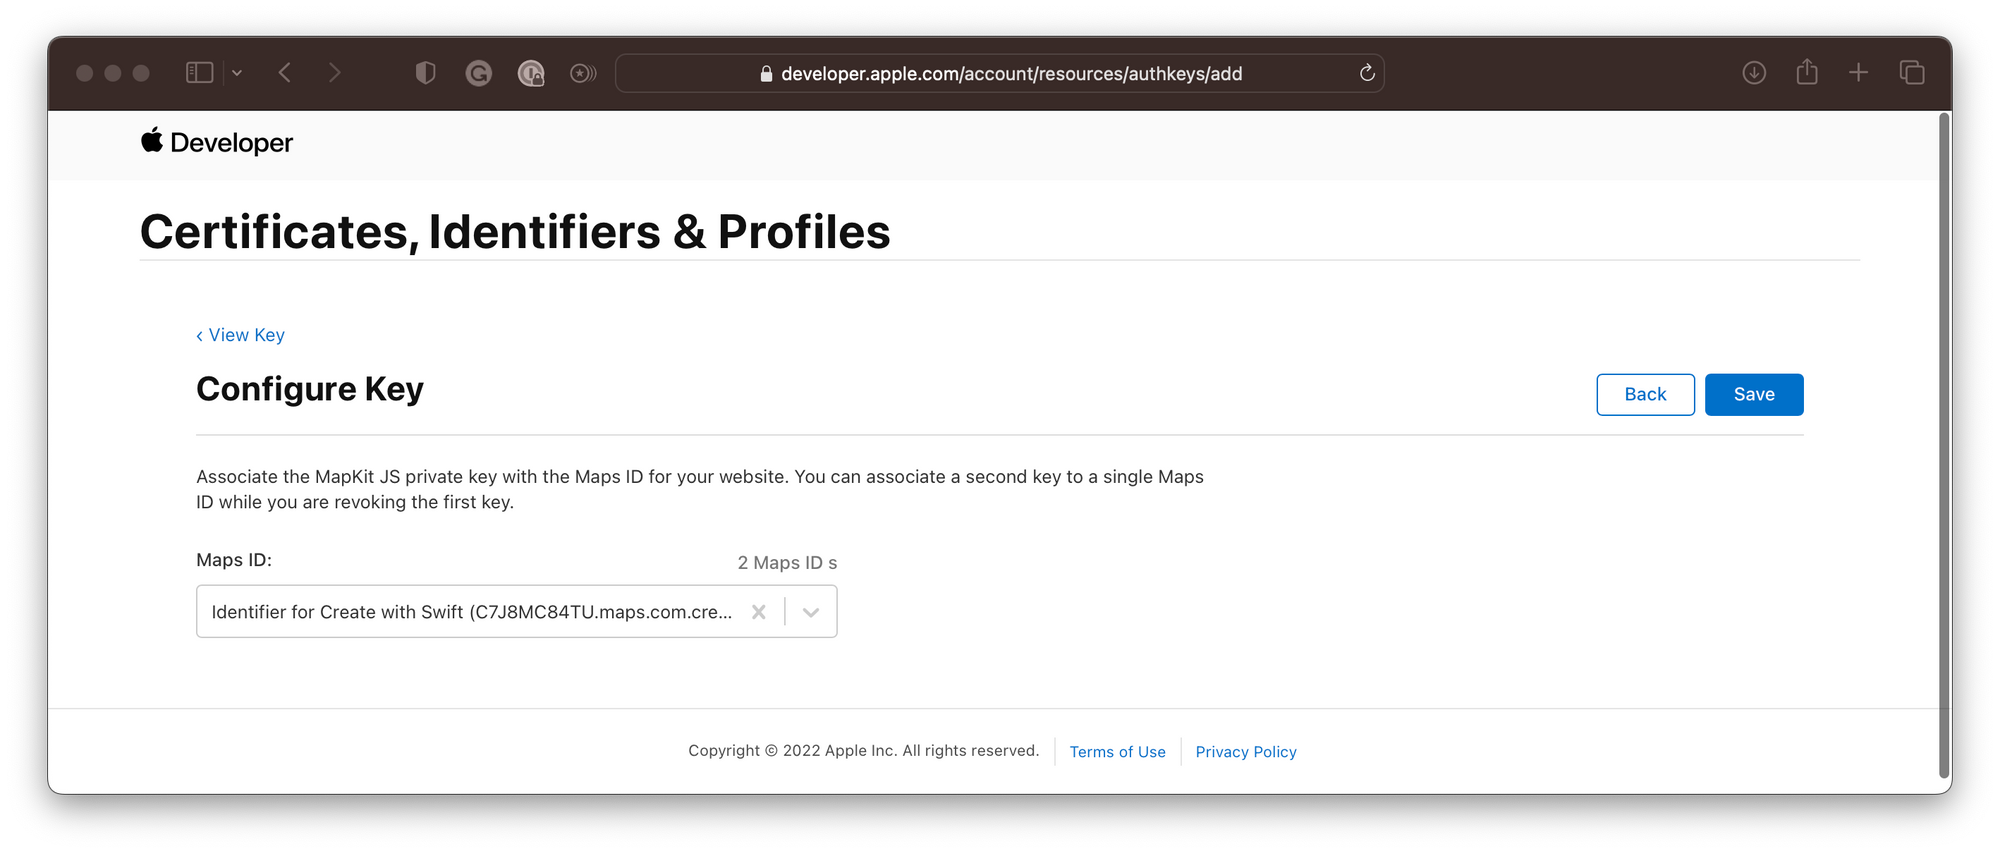
In the dialog to configure the key you can select from the Maps IDs that are available in your developer account. Here you can select the just created identifier and click save to return to the registration dialog and continue to the next step.
In the next step review the provided information and click on Register to complete the process.
In the final step, you can download the private key. It is needed in the following steps to create a JWT to use MapKit JS in websites. Make sure to store the key in a safe place and not lose it. The private key is stored as a .p8 file.
The private key is available to download a single time. If the Download button isn’t in an enabled state, you previously downloaded the key associated with this identifier.
The private key is a shared secret between you and Apple. To keep your private key secure, don’t put your private key in public facing client-side code, and don’t share the key.
Apple Developer Documentation
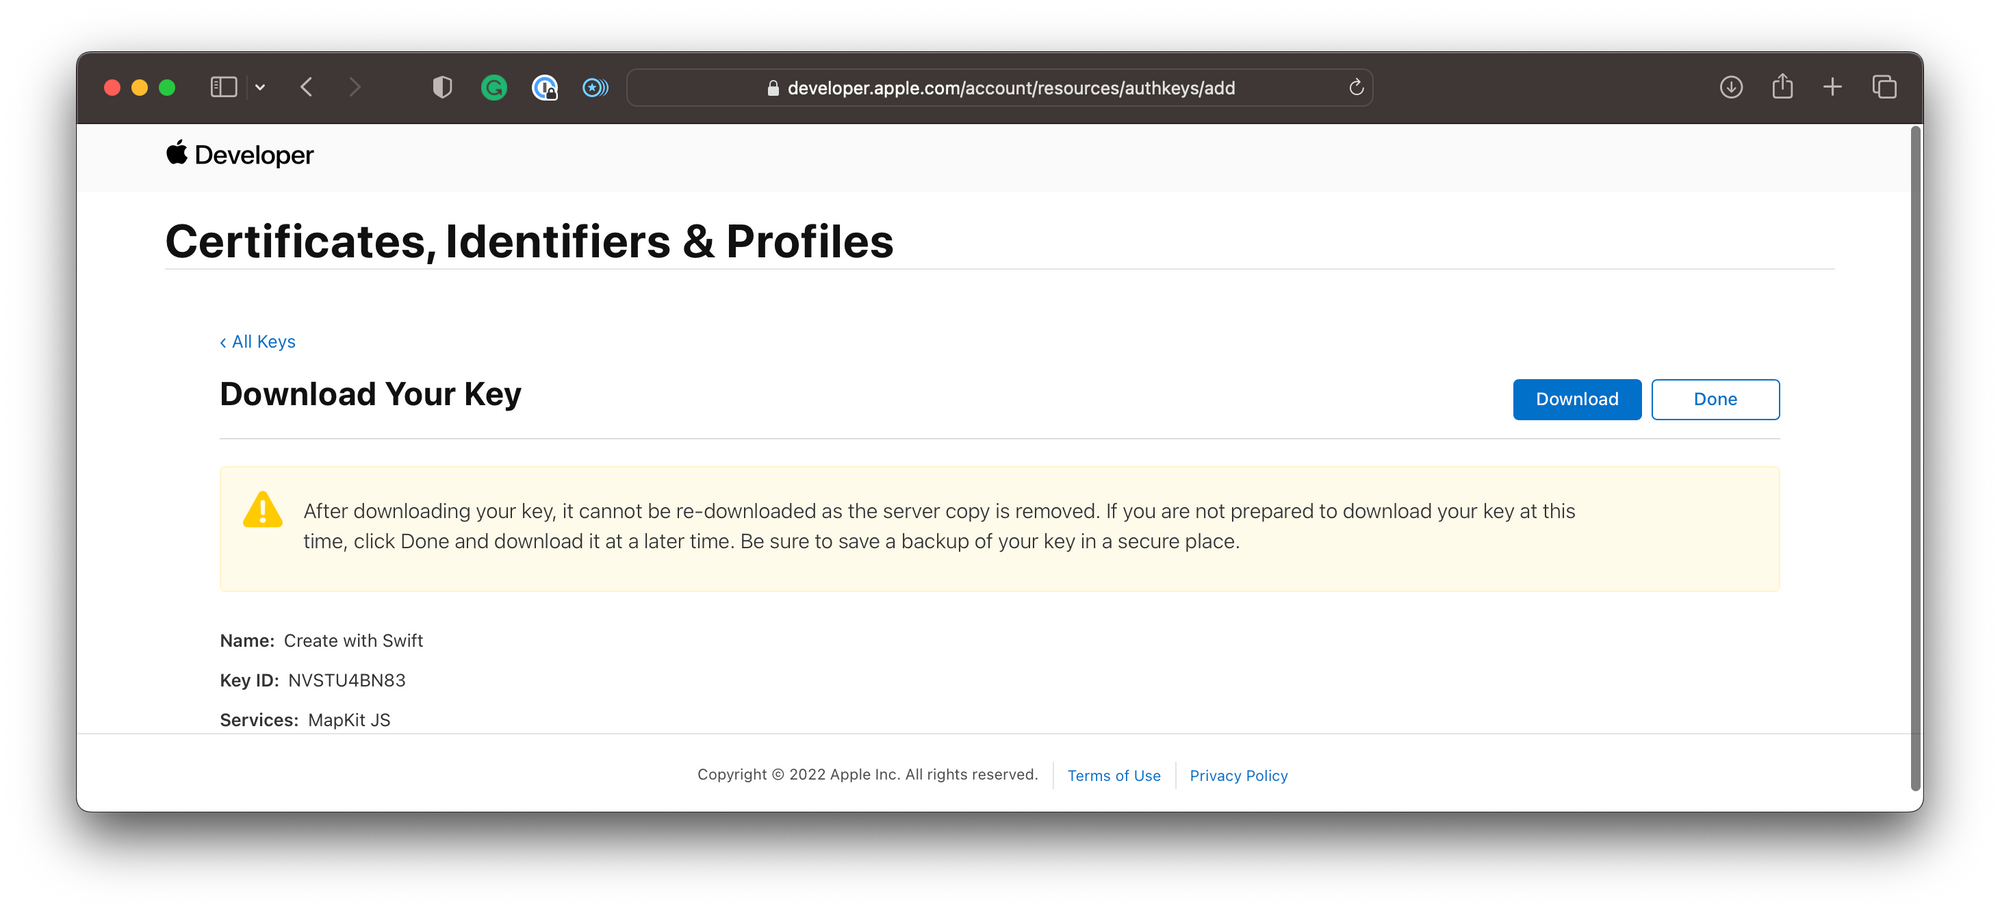
If you lose the key or no longer want to use it, you can also revoke the key. See Revoke, edit, and download keys for more information.
Creating a JWT to use MapKit JS
MapKit JS uses a signed JSON Web Token (JWT) to authenticate the initialisation of the map as well as API requests, for example, to execute search etc. You can generate a long-lived token using the private key you just created. To learn more about JWT, see the JSON Web Token (JWT) specification.
To create the JSON Web Token you can head to maps.developer.apple.com/token-maker. The MapKit JS platform also provides a usage dashboard, and the possibility to create Apple Maps Snapshots, which are images based on a MapView configuration as well as a Maps Server API Playground and a collection of sample code.
For the purpose of this tutorial, we will simply create a new token to get started.
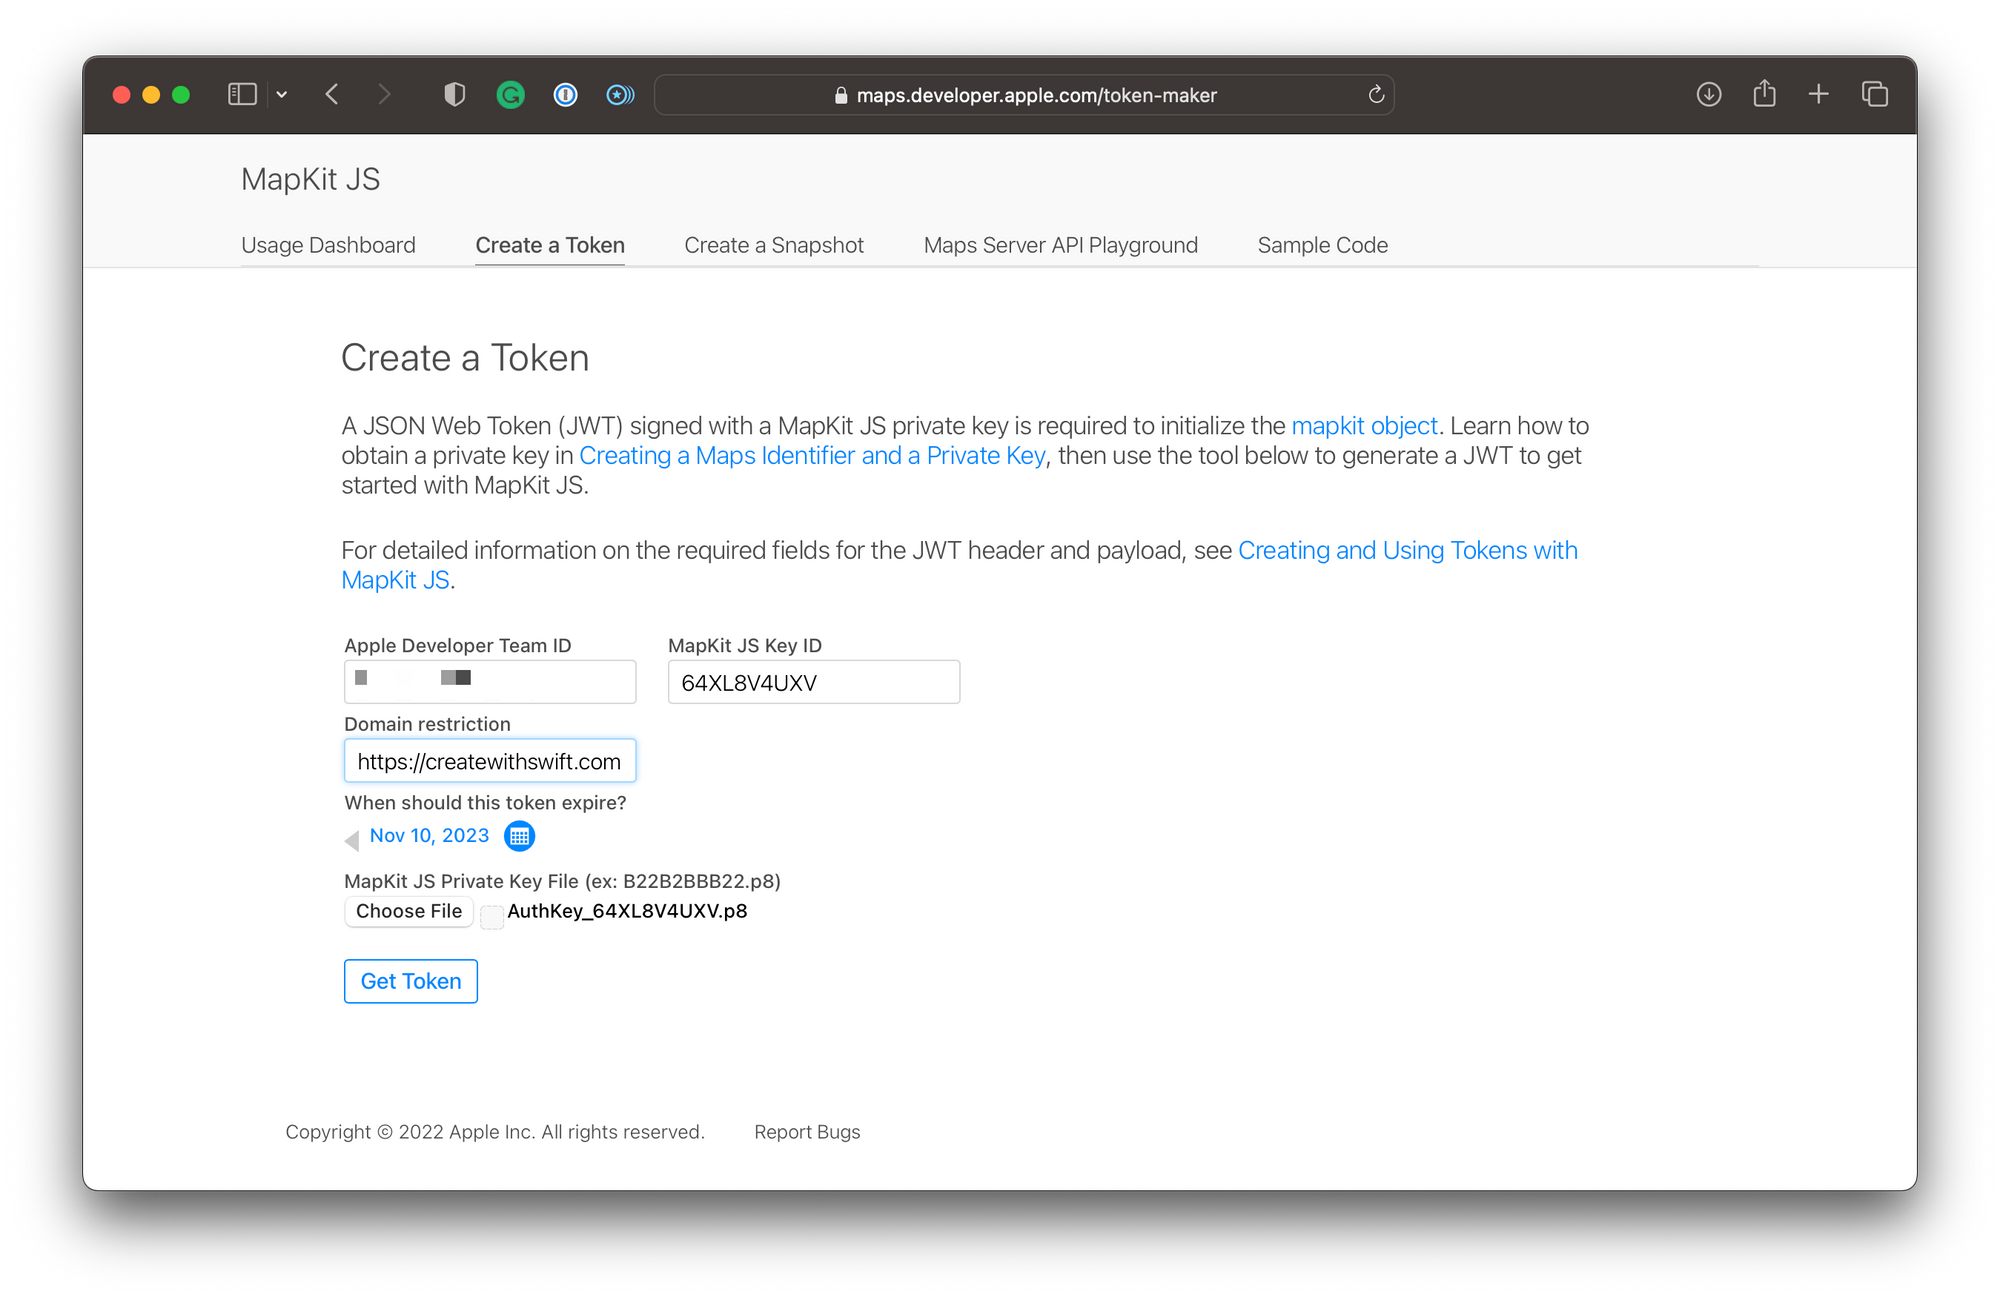
To generate the token, you have to provide the Apple Developer Team ID, which can be found in the membership details of your Apple Developer Account and the MapKit JS Key ID which can be found in the keys of the Certificates, Identifiers and Profiles section. Then you can restrict the token to a specific domain so that if it is used on any other domain, it would not work as well as an expiration date for the token. The maximum length for the validity of the token is one year. Lastly, you have to provide the MapKit JS Private Key file that you downloaded when you created the key.

After clicking on Get Token, the website generates the token as well as a MapKit JS sample code with a simple implementation for you to get started with.
<!DOCTYPE html>
<html>
<head>
<meta charset="utf-8">

<script
  src="https://cdn.apple-mapkit.com/mk/5.x.x/mapkit.core.js"
  crossorigin async
  data-callback="initMapKit"
  data-libraries="map"
  data-initial-token="eyJhbGciOiJFUzI1NiIsInR5cCI6IkpXVCIsImtpZCI6IjY0WEw4VjRVWFYifQ.eyJpc3MiOiJDN0o4TUM4NFRVIiwiaWF0IjoxNjY4MDcwMzM3LCJleHAiOjE2OTk1NzQ0MDAsIm9yaWdpbiI6Imh0dHBzOi8vbWVhbmRtb3JlLm9yZyJ9.m5WoZUiN861Pb_GGQEKgiqlHXEbrtTNQRj4lJOmeieItTWJ1FbgeNBU04stij1imA_HL_vNUr2Apk6wBPiA5AA"
></script>

<style>
#map {
    width: 100%;
    height: 600px;
}
</style>

</head>

<body>
<div id="map"></div>

<script type="module">

(async () => {
    const tokenID = "YOURTOKEN";

    if (!window.mapkit || window.mapkit.loadedLibraries.length === 0) {
        // mapkit.core.js or the libraries are not loaded yet.
        // Set up the callback and wait for it to be called.
        await new Promise(resolve => { window.initMapKit = resolve });

        // Clean up
        delete window.initMapKit;
    }

    mapkit.init({
        authorizationCallback: function(done) {
            done(tokenID);
        }
    });

    const map = new mapkit.Map("map");
})();

</script>
</body>
</html>
Example of generated HTML code to get you started with MapKit JS
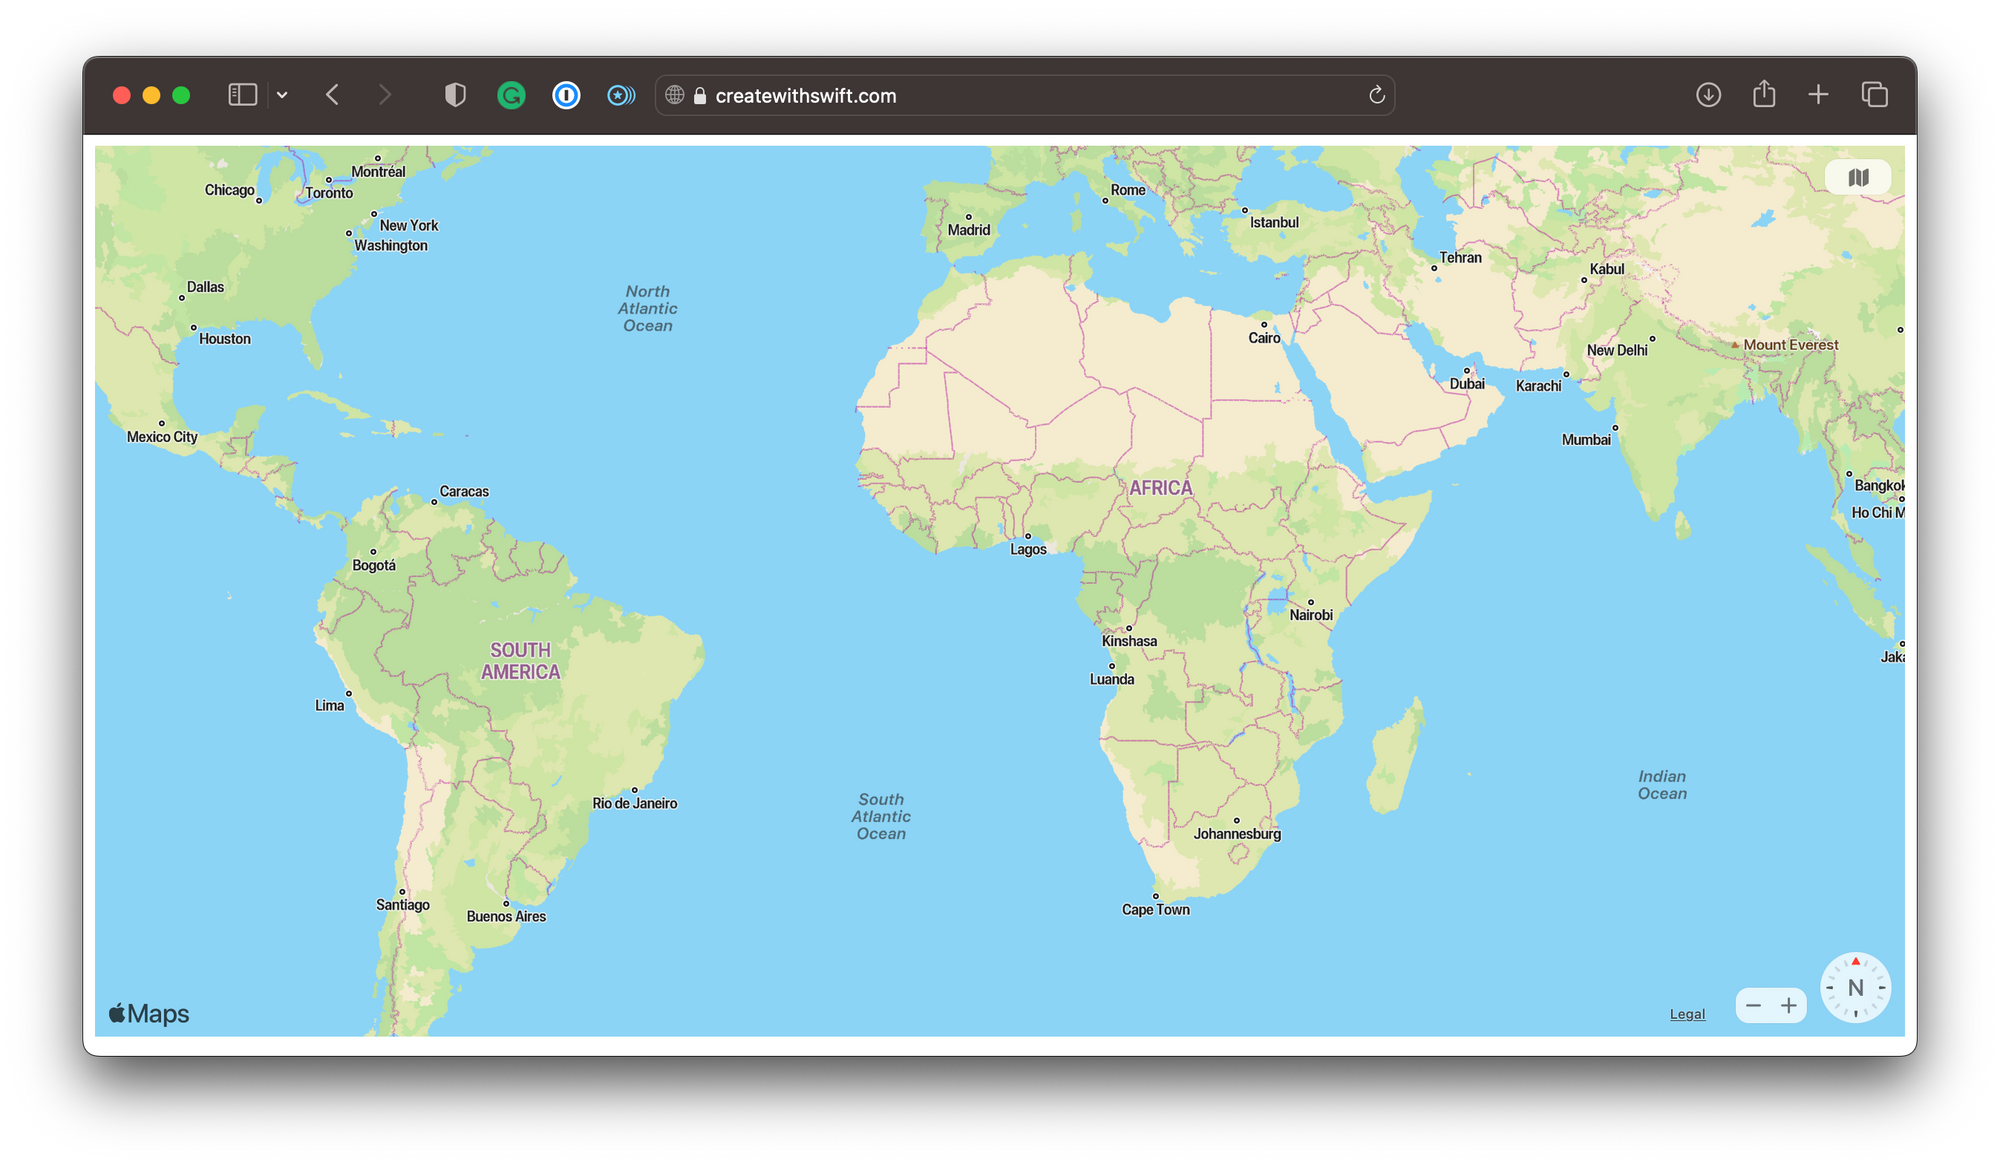
By adding the MapKit JS Code to your website HTML, you can now easily embed Apple Maps in your website. To get some ideas on how this could look, consider the Apple MapKit JS overview. In our case, we just hosted the default template HTML on createwithswift.com, which shows an interactive map of the entire world.
And that's it! Now you can start adding annotations and overlays, such as styles, circles, polylines, or polygons. Also, you can make use of geocoder and MapKit search features to display points of interest or extend your map's features with GeoJSON data.
If you want to learn more about MapKit JS and explore its extensive features, explore the Apple Developer Documentation. Beyond that, you can of course use MapKit inside your app development projects, whether you are still using UIKit or SwiftUI to build your interfaces. To get started with MapKit and SwiftUI, explore some of our articles.