
Using the LocationButton in SwiftUI for One Time Location Access
With this reference, you will be able to use the LocationButton in a SwiftUI app to conveniently access the user's location data.

At WWDC 2021 Apple introduced the LocationButton. It is part of the new CoreLocationUI framework that provides access to users' location data through a standardized and secure UI. It comes with the CLLocationButton to be used with UIKit and the LocationButton for SwiftUI.
The Button is used to simplify one-time authorization requests to access location data. The first time the button is tappen, Core Location asks the user to grant temporary access to their location data. Upon consent, the app receives a temporary CLAuthorizationStatus.authorizedWhenInUse authorization.
Not only is this a super convenient way to access location data that simplifies the implementation of Core Location Managers, but it also is very much in line with privacy by design principles. So if location access is only needed once, this is the way to go.
Let's explore a simple implementation to request temporary location access using MapKit to show the user's location on the map. For this, we have to create a simplified manager to deal with location data and the configuration of MapViews.
A simplified Location Manager
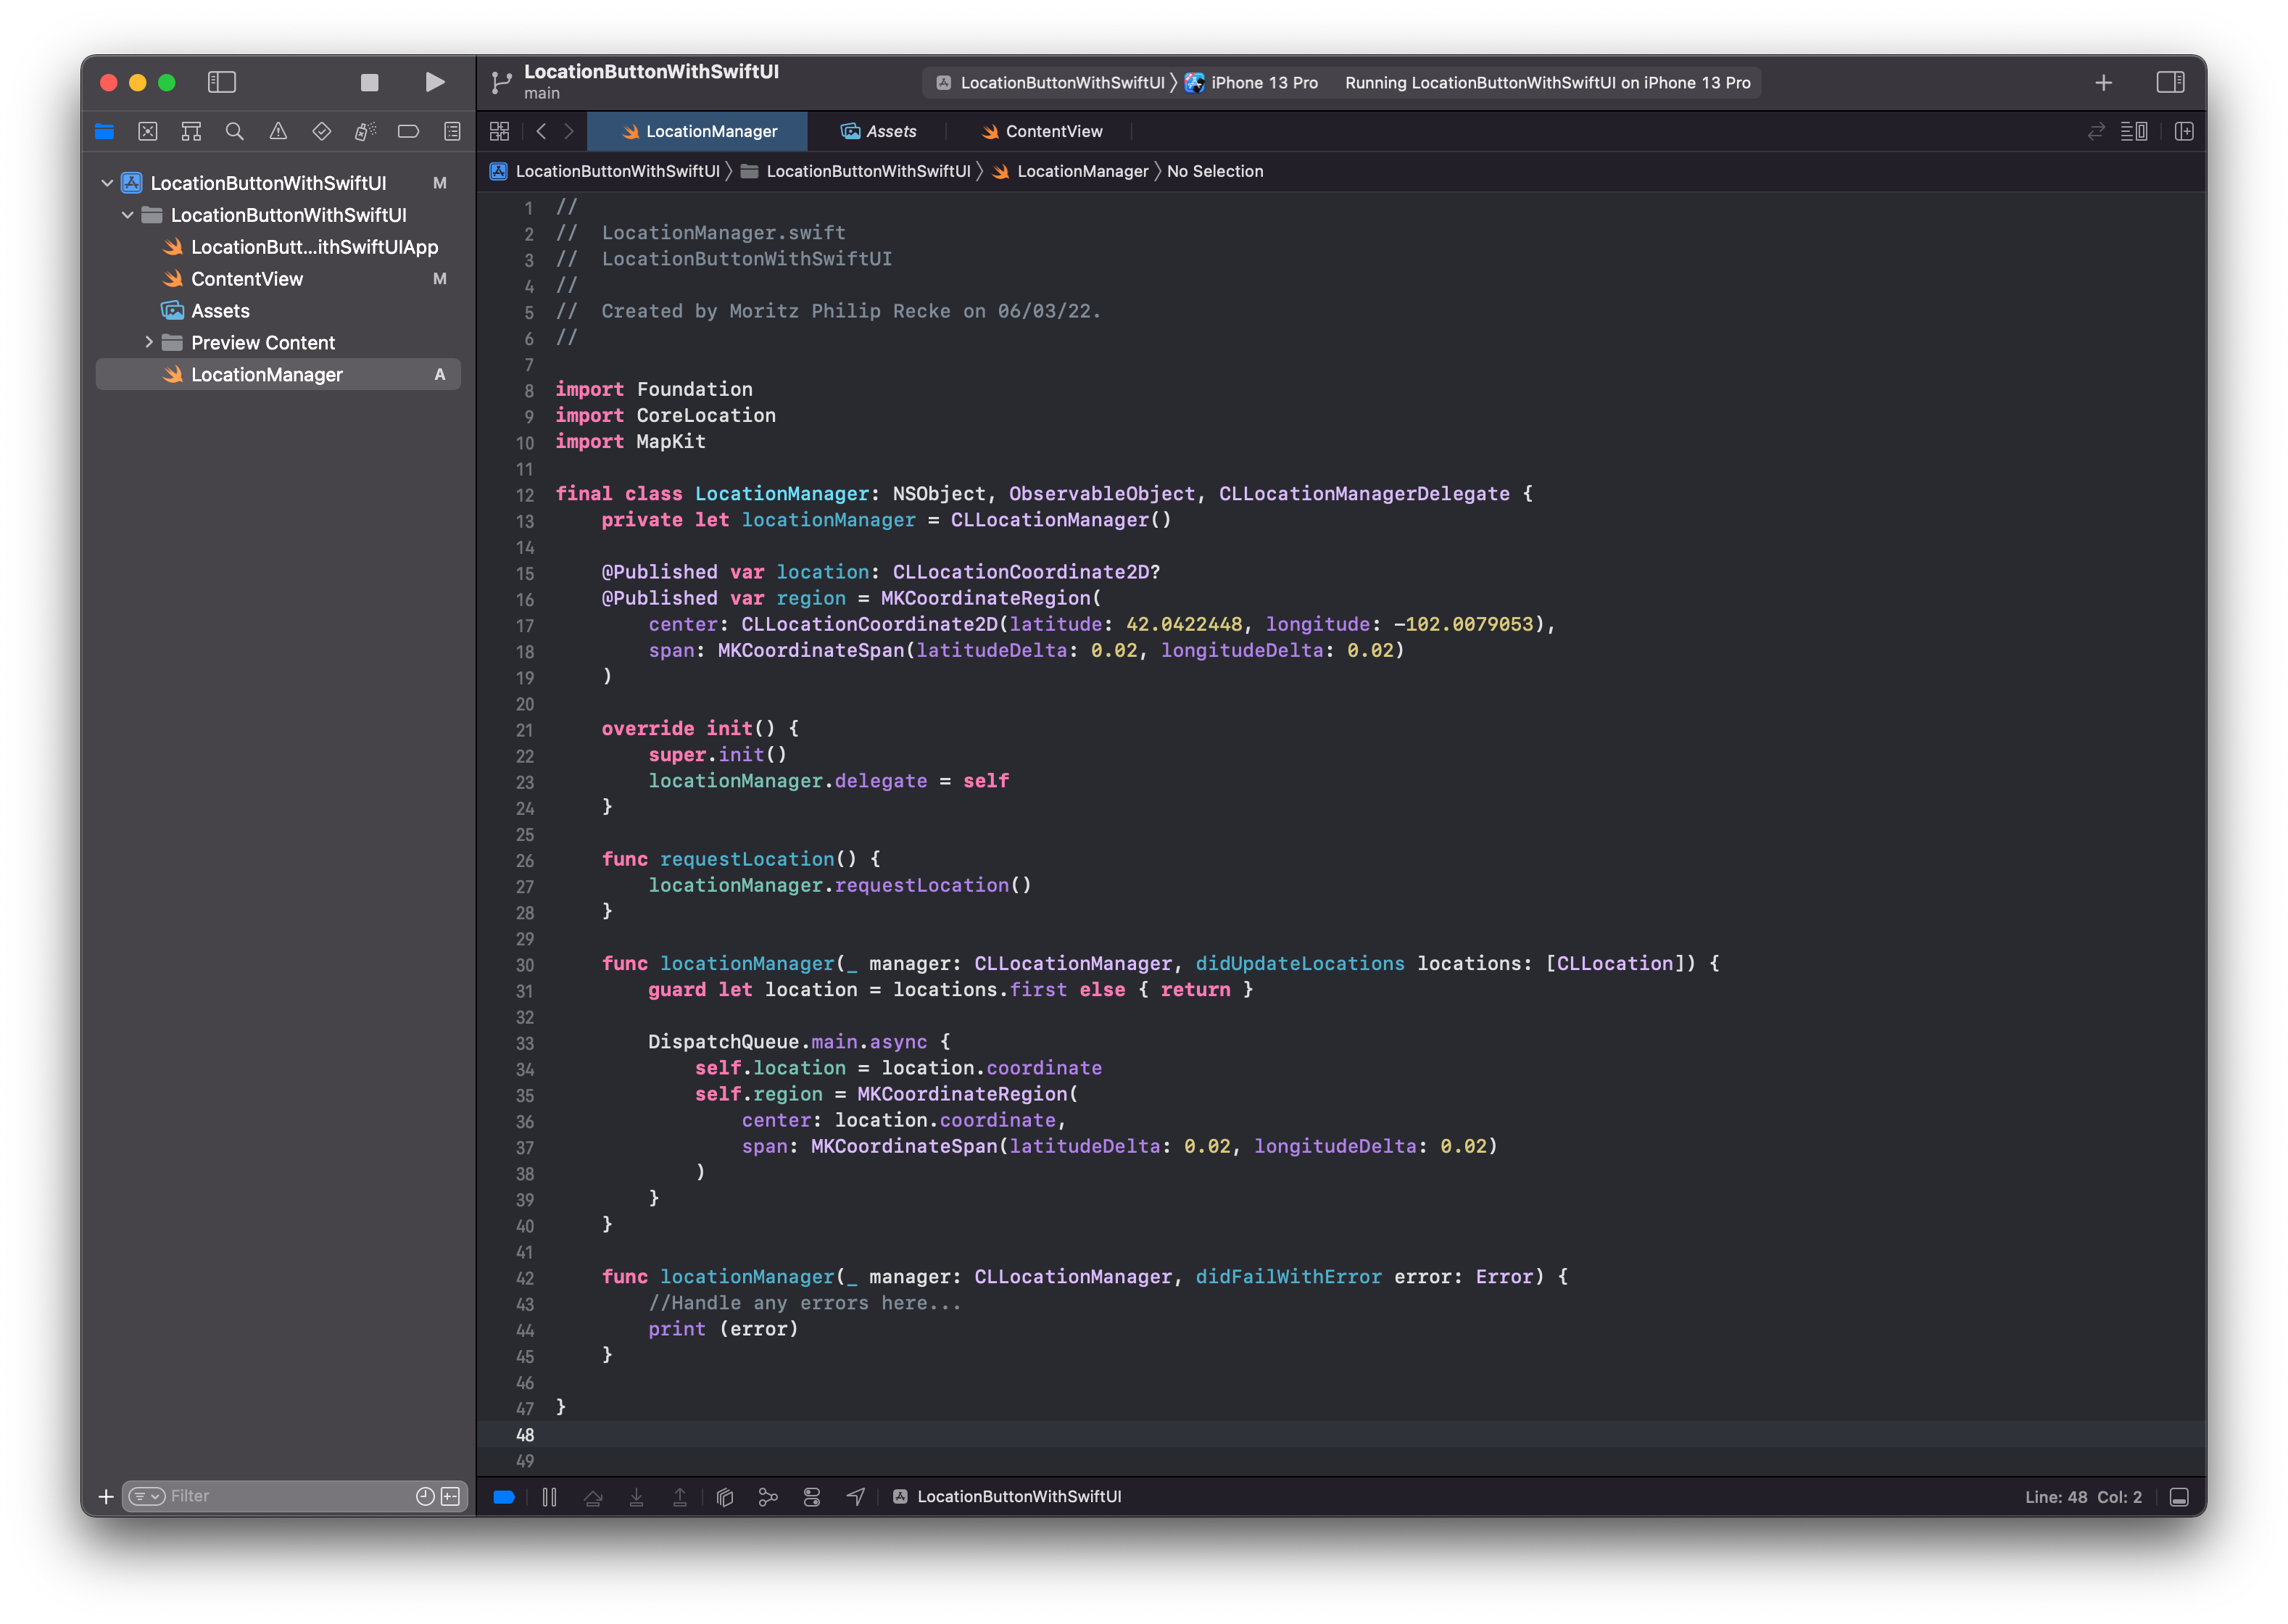
Our LocationManager comes with a CLLocationManager and two @Published properties, location and region. The region is an MKCoordinateRegion, needed for initializing a MapView with the required data to show the map. It also comes with some default values to show a map with a default configuration in the later to be created SwiftUI View. The location provides coordinates for convenient access. For an app that doesn't use MapKit, maybe even the location data alone would be sufficient.
The function requestLocation() uses the locationManager.requestLocation() function and is intended to be called when the LocationButton is tapped inside the SwiftUI View. The function locationManager(_:didUpdateLocations:) is implemented to handle any updates received from Core Location.
This is the full implementation of our example LocationManager:
import Foundation
import CoreLocation
import MapKit

final class LocationManager: NSObject, ObservableObject, CLLocationManagerDelegate {
    private let locationManager = CLLocationManager()

    @Published var location: CLLocationCoordinate2D?
    @Published var region = MKCoordinateRegion(
        center: CLLocationCoordinate2D(latitude: 42.0422448, longitude: -102.0079053),
        span: MKCoordinateSpan(latitudeDelta: 0.02, longitudeDelta: 0.02)
    )

    override init() {
        super.init()
        locationManager.delegate = self
    }

    func requestLocation() {
        locationManager.requestLocation()
    }

    func locationManager(_ manager: CLLocationManager, didUpdateLocations locations: [CLLocation]) {
        guard let location = locations.first else { return }

        DispatchQueue.main.async {
            self.location = location.coordinate
            self.region = MKCoordinateRegion(
                center: location.coordinate,
                span: MKCoordinateSpan(latitudeDelta: 0.02, longitudeDelta: 0.02)
            )
        }
    }

    func locationManager(_ manager: CLLocationManager, didFailWithError error: Error) {
        //Handle any errors here...
        print (error)
    }
}
Whenever a lew location is received, the data is assigned to the location and region properties. As these are @Published properties, this will prompt notification to anywhere where these are observed to react to the updated information.
To use these observable objects, we can "listen" to any changes with @StateObject properties inside our SwiftUI View.
MapView with LocationButton
Based on the LocationManager, we can create a SwiftUI View that uses the location manager as a @StateObject. This way, whenever the @Published properties of the manager - location and region - are updated, the View is recreated to reflect the changes.
In this example, we are using a simple Map view that is binding the region property from the location manager. Whenever the region of the location manager is updated, the map will be redrawn with the new region data.
With a ZStack we can add some elements over the Map view. First, there is a Text view that is added if the location manager has a published value for its location property. It will then display the current location's latitude and longitude.
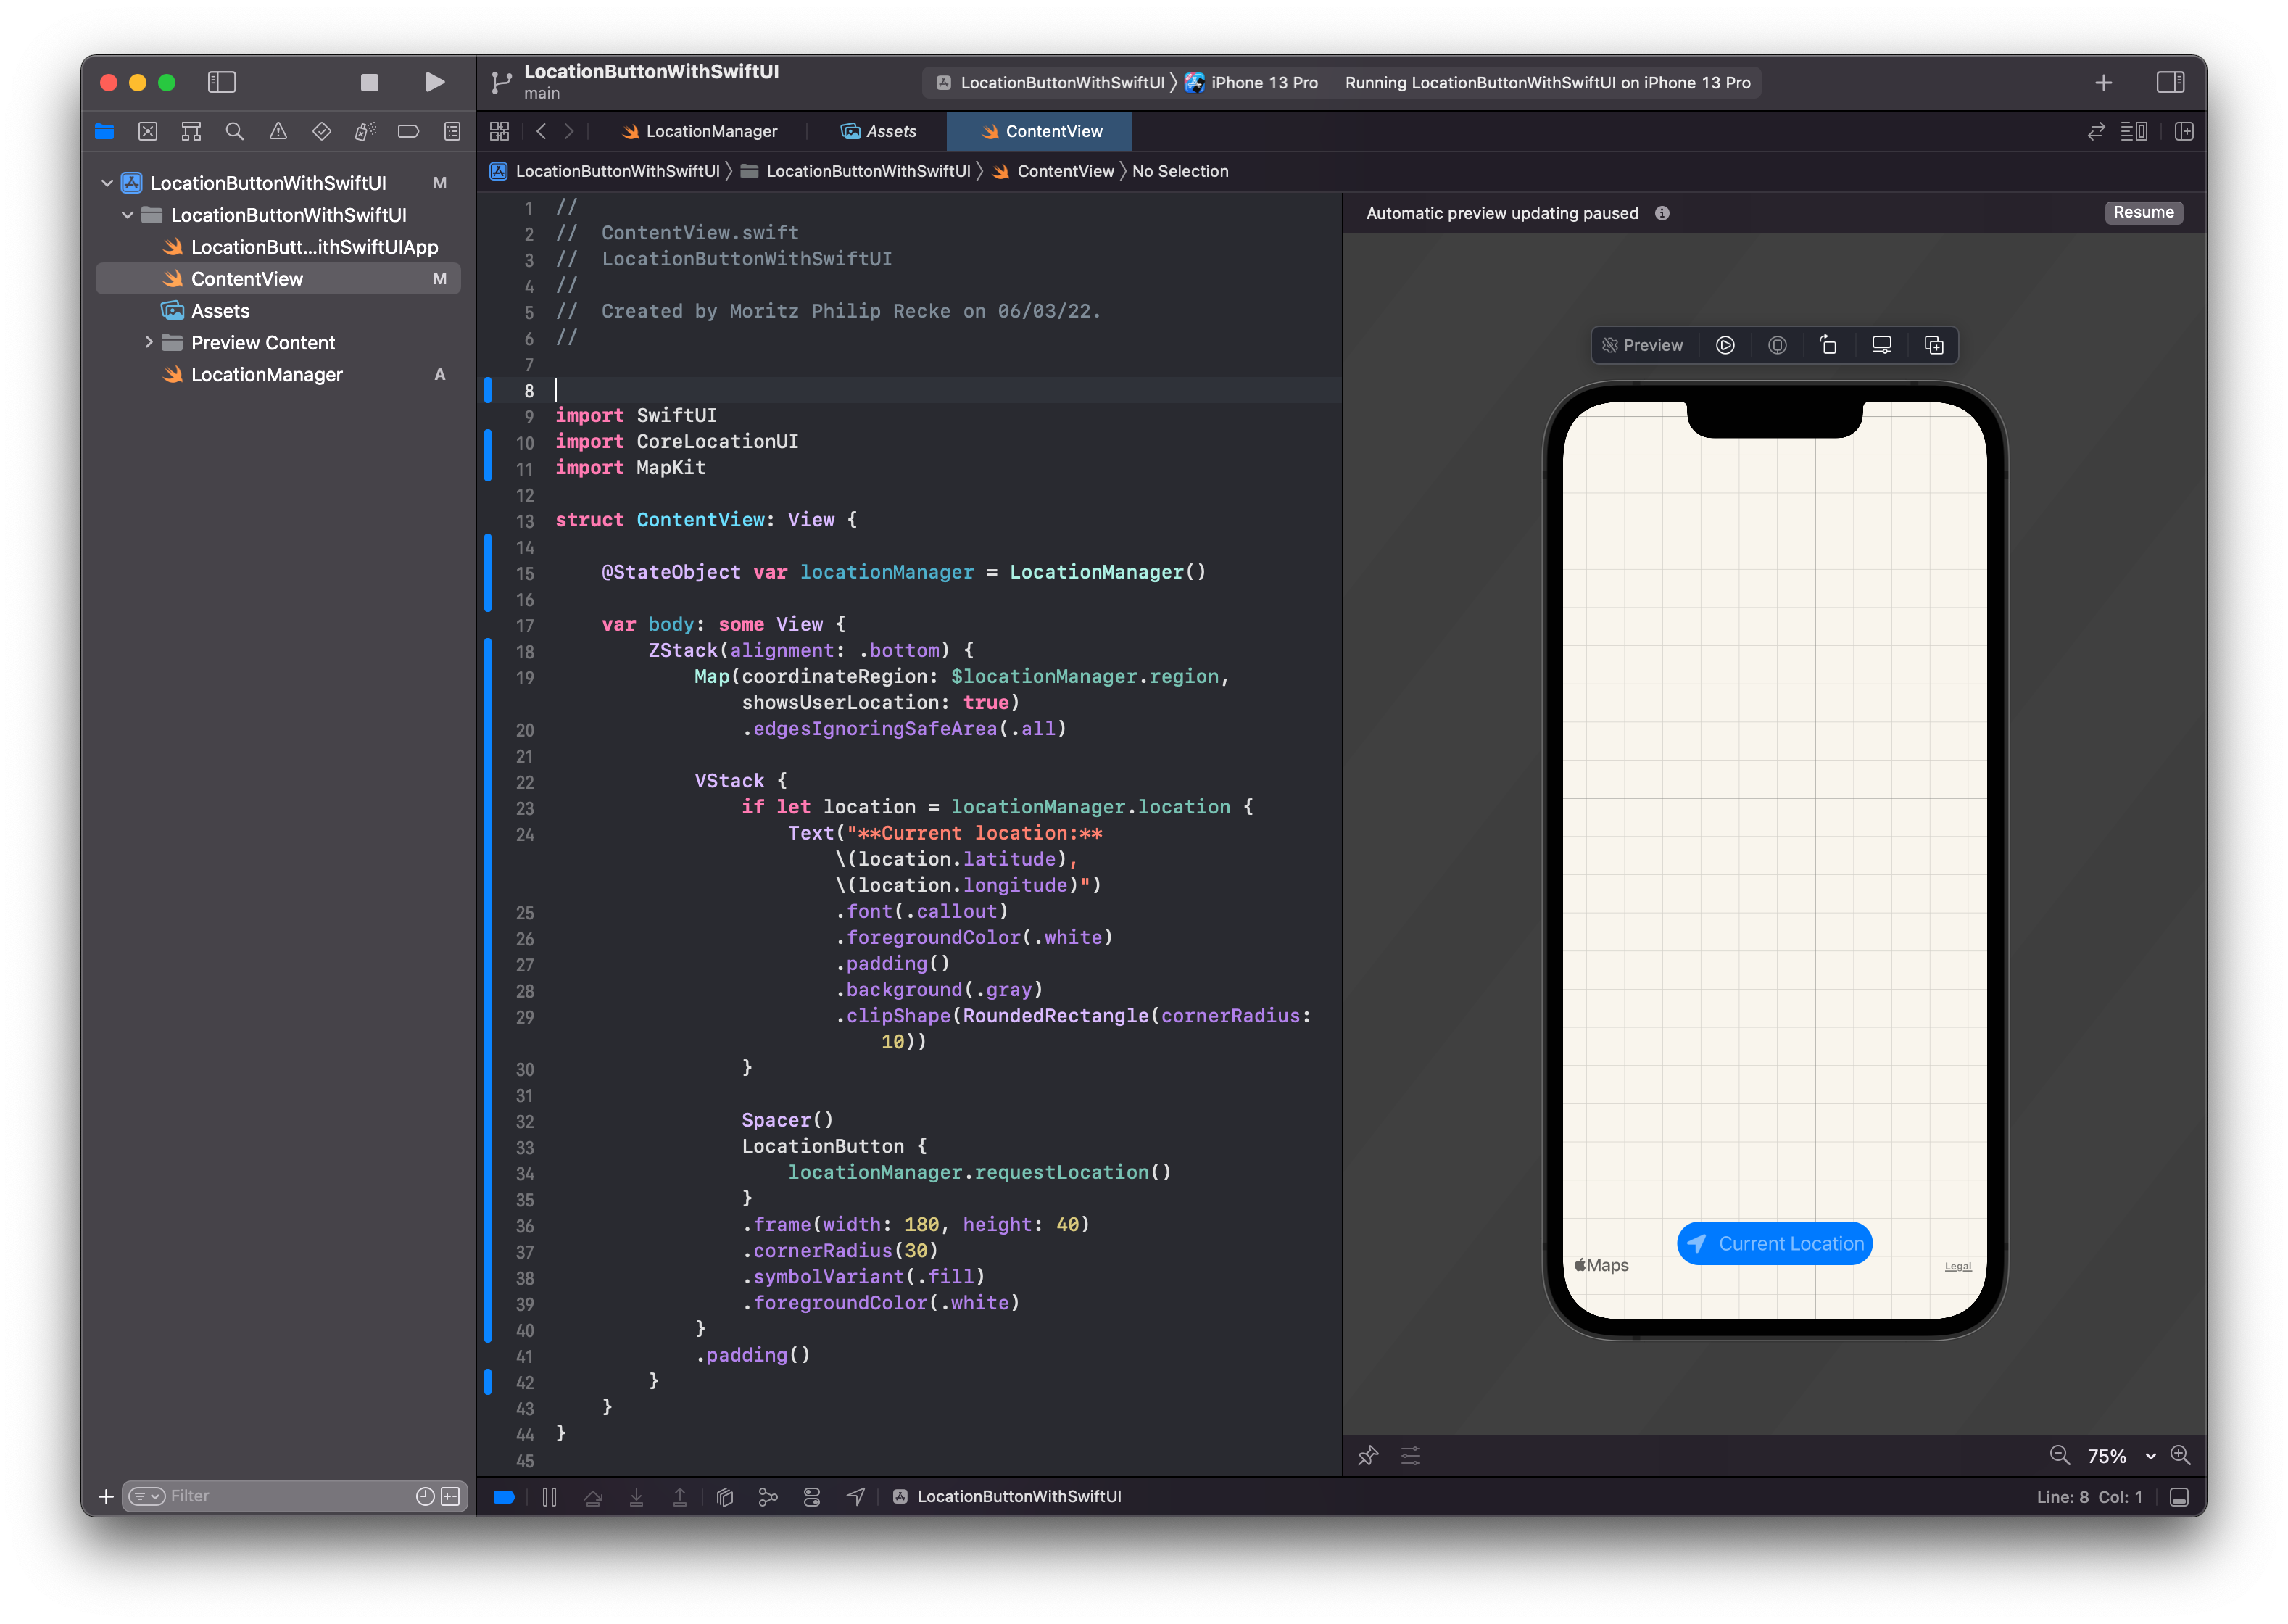
Then, for the main purpose of the tutorial, there is the LocationButton that calls the Location Manager requestLocation() function when tapped. The button is configured with rounded corners and sits nicely at the bottom of the screen due to the .bottom alignment of the ZStack and the Spacer between the optional Text view and the LocationButton.
import SwiftUI
import CoreLocationUI
import MapKit

struct ContentView: View {

    @StateObject var locationManager = LocationManager()

    var body: some View {
        ZStack(alignment: .bottom) {
            Map(coordinateRegion: $locationManager.region, showsUserLocation: true)
                .edgesIgnoringSafeArea(.all)

            VStack {
                if let location = locationManager.location {
                    Text("**Current location:** \(location.latitude), \(location.longitude)")
                        .font(.callout)
                        .foregroundColor(.white)
                        .padding()
                        .background(.gray)
                        .clipShape(RoundedRectangle(cornerRadius: 10))
                }

                Spacer()
                LocationButton {
                    locationManager.requestLocation()
                }
                .frame(width: 180, height: 40)
                .cornerRadius(30)
                .symbolVariant(.fill)
                .foregroundColor(.white)
            }
            .padding()
        }
    }
}
Implementation of the ContentView and its @StateObject or the LocationManager
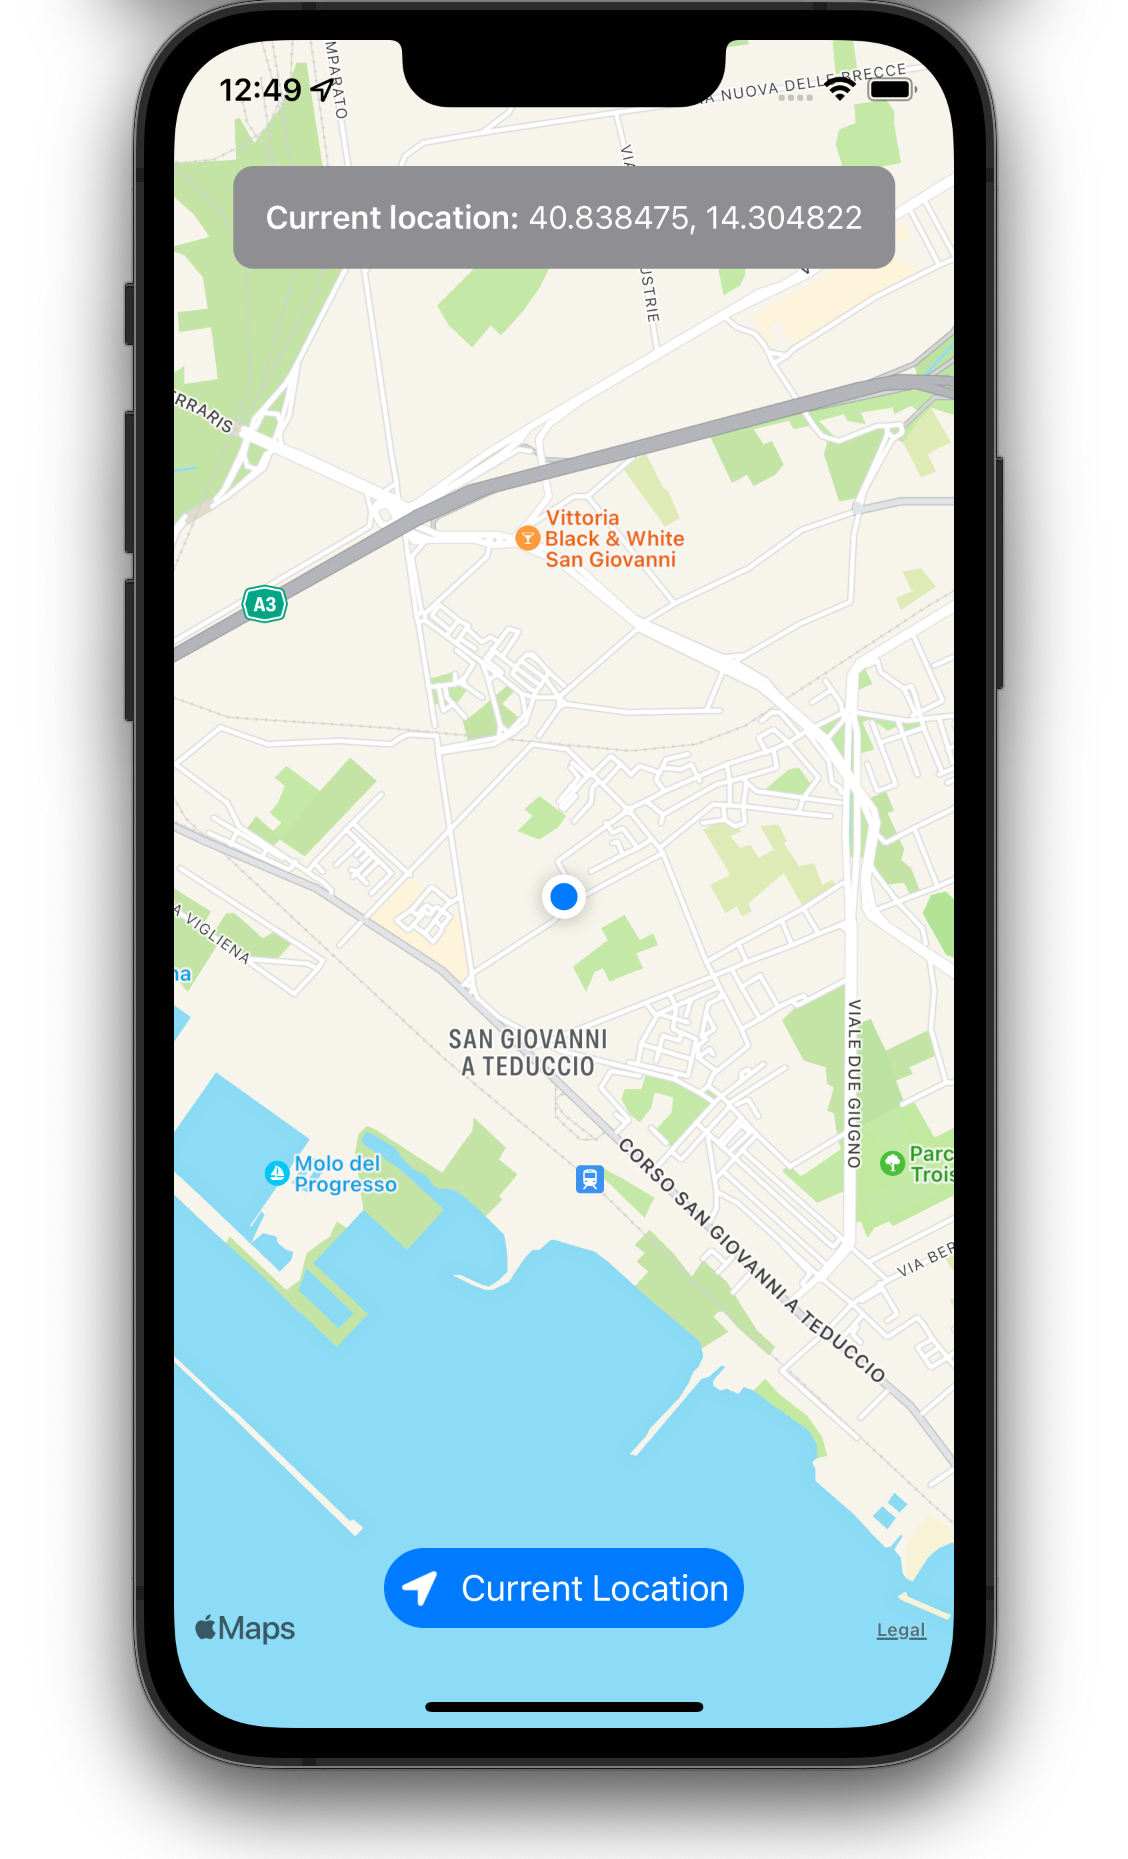
When the Location Button is tapped, the map will display the current location and the Text view appears on top, displaying the location coordinates. It is as simple as that.
The appearance of the LocationButton can also be customized in various ways. For example, it comes with .labelStyle() modifier to just show the symbol with .iconOnly. The symbol can be used as either outline or fill with the .symbolVariant modifier. Then of course, as with any other view, it can be customized in size, color, and shape as you like to match the look and feel of your application. To explore this on your own, try the sample project "Sharing Your Location to Find a Park" in the official Apple Developer Documentation.
More advanced and realistic use case scenarios might of course use the location data for more sophisticated features like searching for points of interest, acquiring any data depending on the location from third party API, etc. For anything that doesn't require real-time updates to the location data - like navigation - this is certainly a convenient and maybe even the easiest way to deal with location data.