Using TipKit on a SwiftUI app
Learn how to increase the discoverability of the features of an app using TipKit.


As developers, we often create features we're confident people will love, but enabling users to discover them can be challenging. Introduced at WWDC23, TipKit is a framework designed to display helpful tips within your app. It aims to inform users about new features, reveal hidden functionalities, or streamline task completion.

This tutorial will show how to create and show effective tips inside an application developed with SwiftUI.
Implementing tips in your app
Let’s add tips on an app that shows a list of coffee-based drinks. The key feature we'd like to highlight is the option to add selected drinks to a list of favorites. You can download the starting project on the following link:
Loading tips on the Coffee App
The first step is to configure your app to load all tips during startup. In the file that declares the application entry point, DrinkApp.swift, do the following:
import SwiftUI
/// Importing the TipKit framework
import TipKit

@main
struct DrinkApp: App {

    @State var drinkViewModel = DrinkStore()

    var body: some Scene {
        WindowGroup {
            ContentView()
                .environment(drinkViewModel)
        }
    }

    init() {
        /// Load and configure the state of all the tips of the app
        try? Tips.configure()
    }

}- Import the
TipKitframework - Using the
configure()method to load all the tips. By default, all tips persist to a default location with a display frequency ofimmediate.
Adding tips on the DrinkDetailView
Creating new tips is easy, you just need to declare a new type that conforms to the Tip protocol. It consists of implementing three properties: title, message, and image.
After defining and loading tips in the app, the next step is to specify how they should be displayed. There are two ways a tip can be presented within the app: Inline and Popover.
Adding an inline tip to the view
The best way a tip should be presented on the user interface is related to the purpose of the information. It can teach people about new features of the application, help them discover a hidden feature, or show a faster way to accomplish a task within the app.
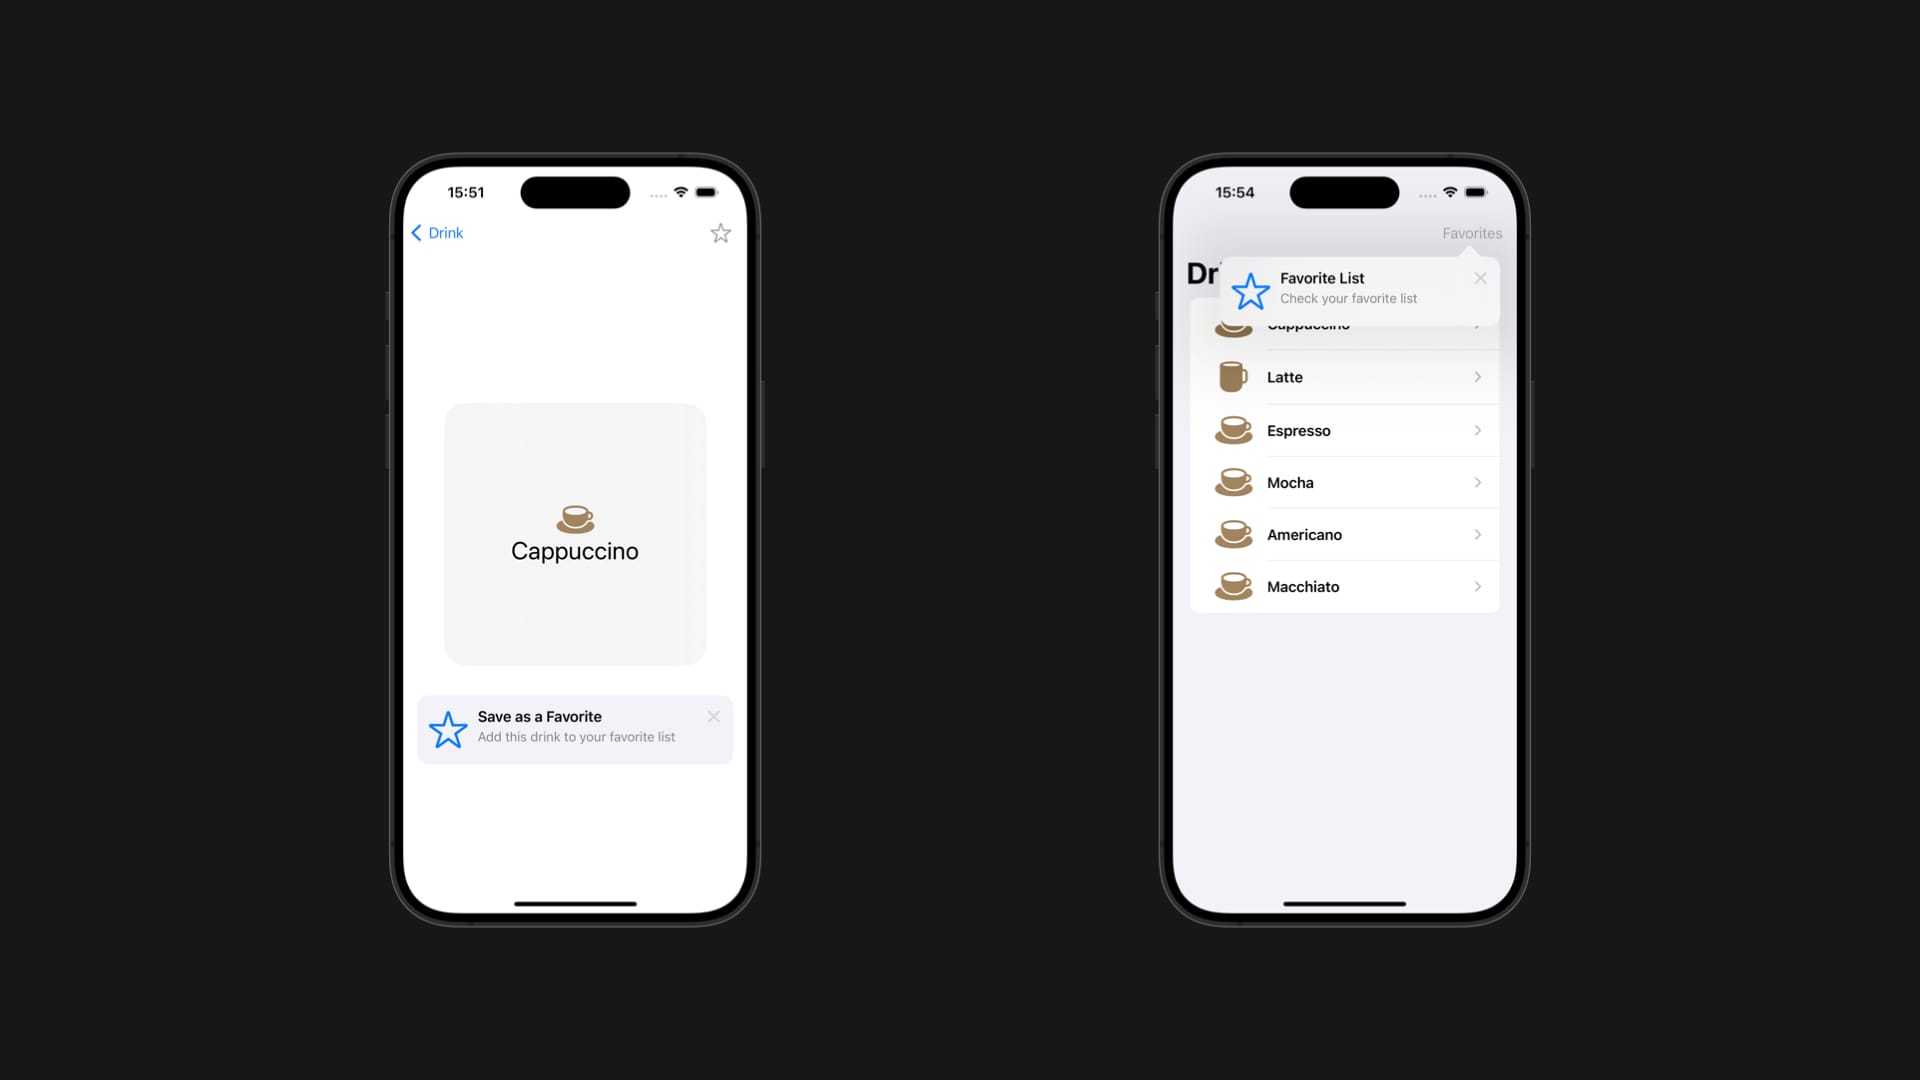
Let's add an inline tip to inform our users that they can add a drink to their list of favorites.
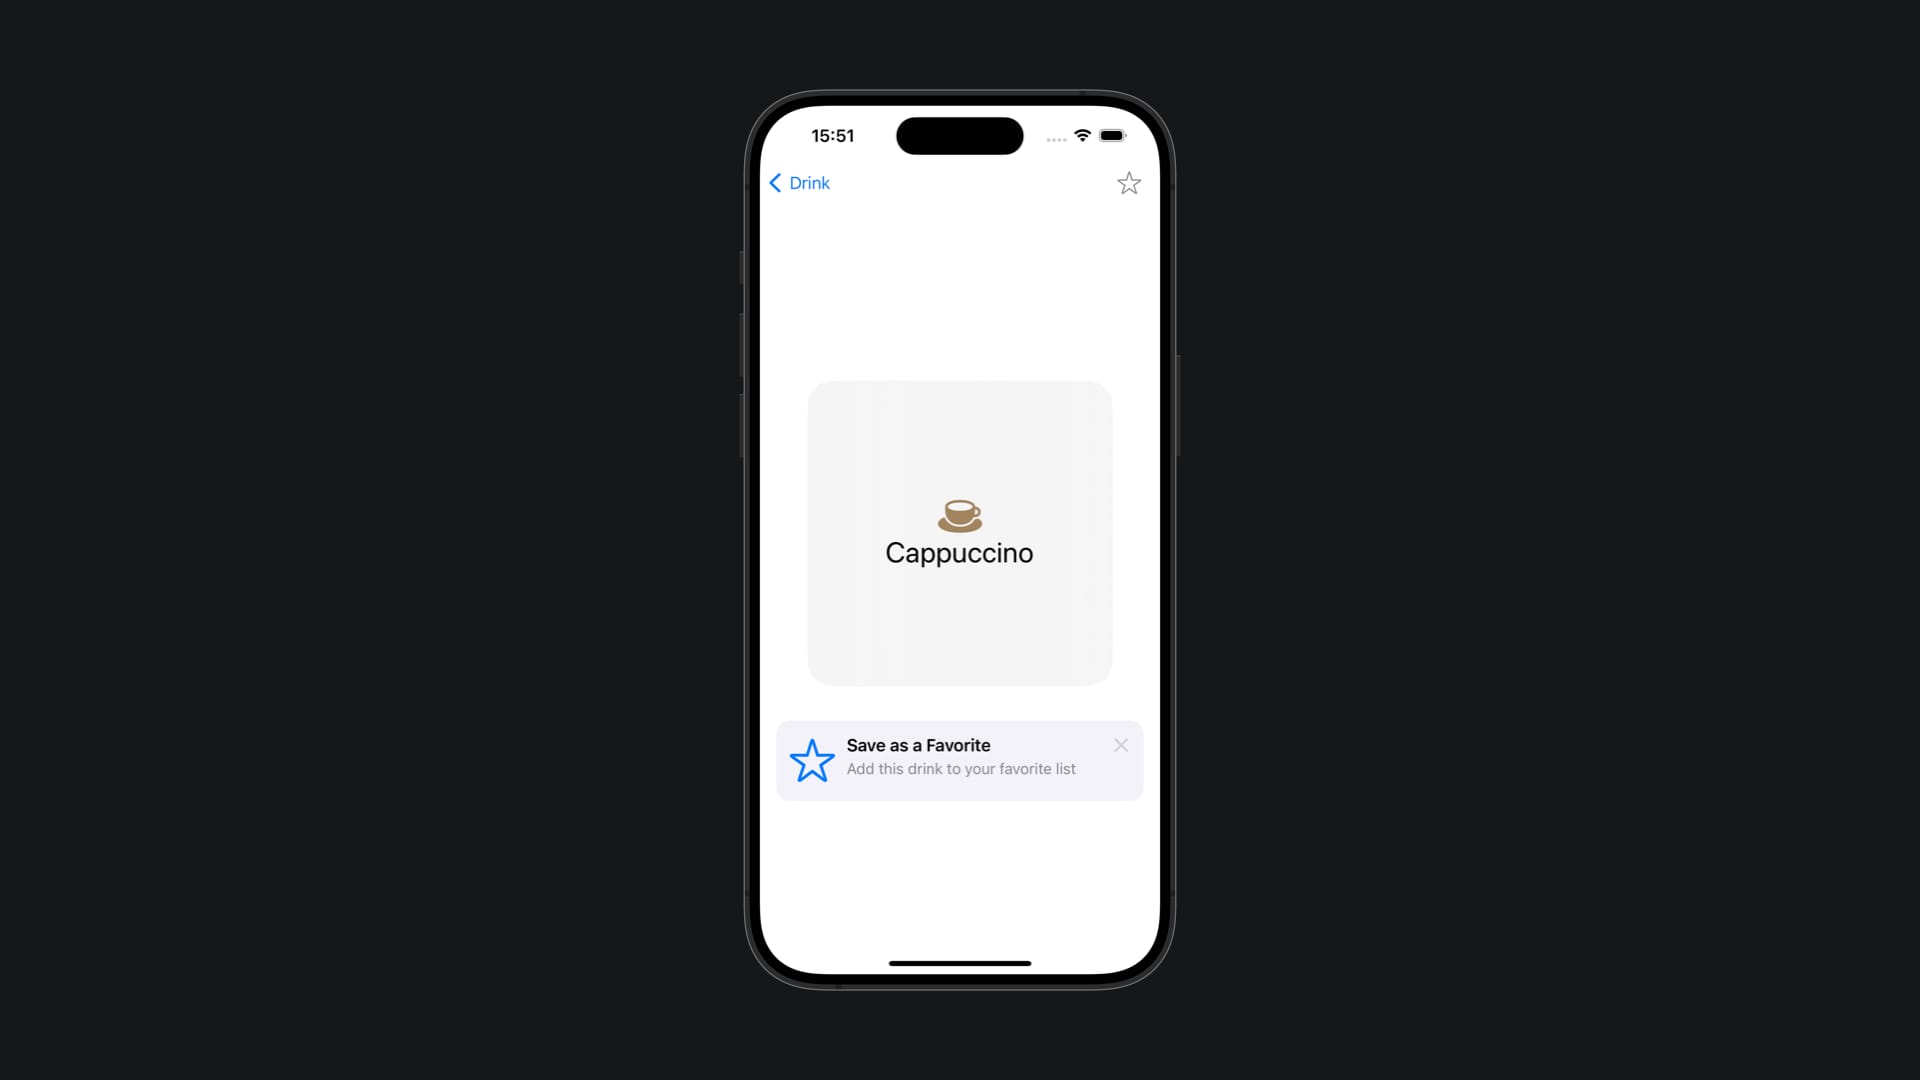
In the file Tips.swift define a new structure called AddToFavoriteTip and define the title, the message, and the image associated with it.
struct AddToFavoriteTip: Tip {
    var title: Text {
        Text("Save as a Favorite")
    }
    var message: Text? {
        Text("Add this drink to your favorite list")
    }
    var image: Image? {
        Image(systemName: "star")
    }
}
The next step is to place the tip in the DrinkDetailView.
import SwiftUI
// 1.
import TipKit

struct DrinkDetailView: View {
    @Environment(DrinkStore.self) var drinkViewModel: DrinkStore

    @State var drink: Drink
    @State var isFavorite: Bool = false

    // 2.
    let inlineFavoriteTip = AddToFavoriteTip()

    var body: some View {

        VStack {
            ZStack { ... }

            // 3.
            TipView(inlineFavoriteTip)
                .padding()
        }
        .onAppear { ... }
        .toolbar{ ... }
    }

}- Import
TipKitin theDrinkDetailView - Create a property with an instance of the
AddToFavoriteTipto be shown on the interface - Using the
TipViewto display the tip with a padding applied to it
The inline presentation dynamically adjusts the app's user interface to show the tip without obstructing any elements. It's ideal for displaying tips that appear close to the feature that we want to highlight.
Adding a popover tip on the favorites button
When a tip is directly related to an element of the interface, for example, when it provides information about a button, it's more effective to show the tip attached to it.
Let's add a popover tip to the button that adds the drink to the favorites list to highlight its functionality to the user.
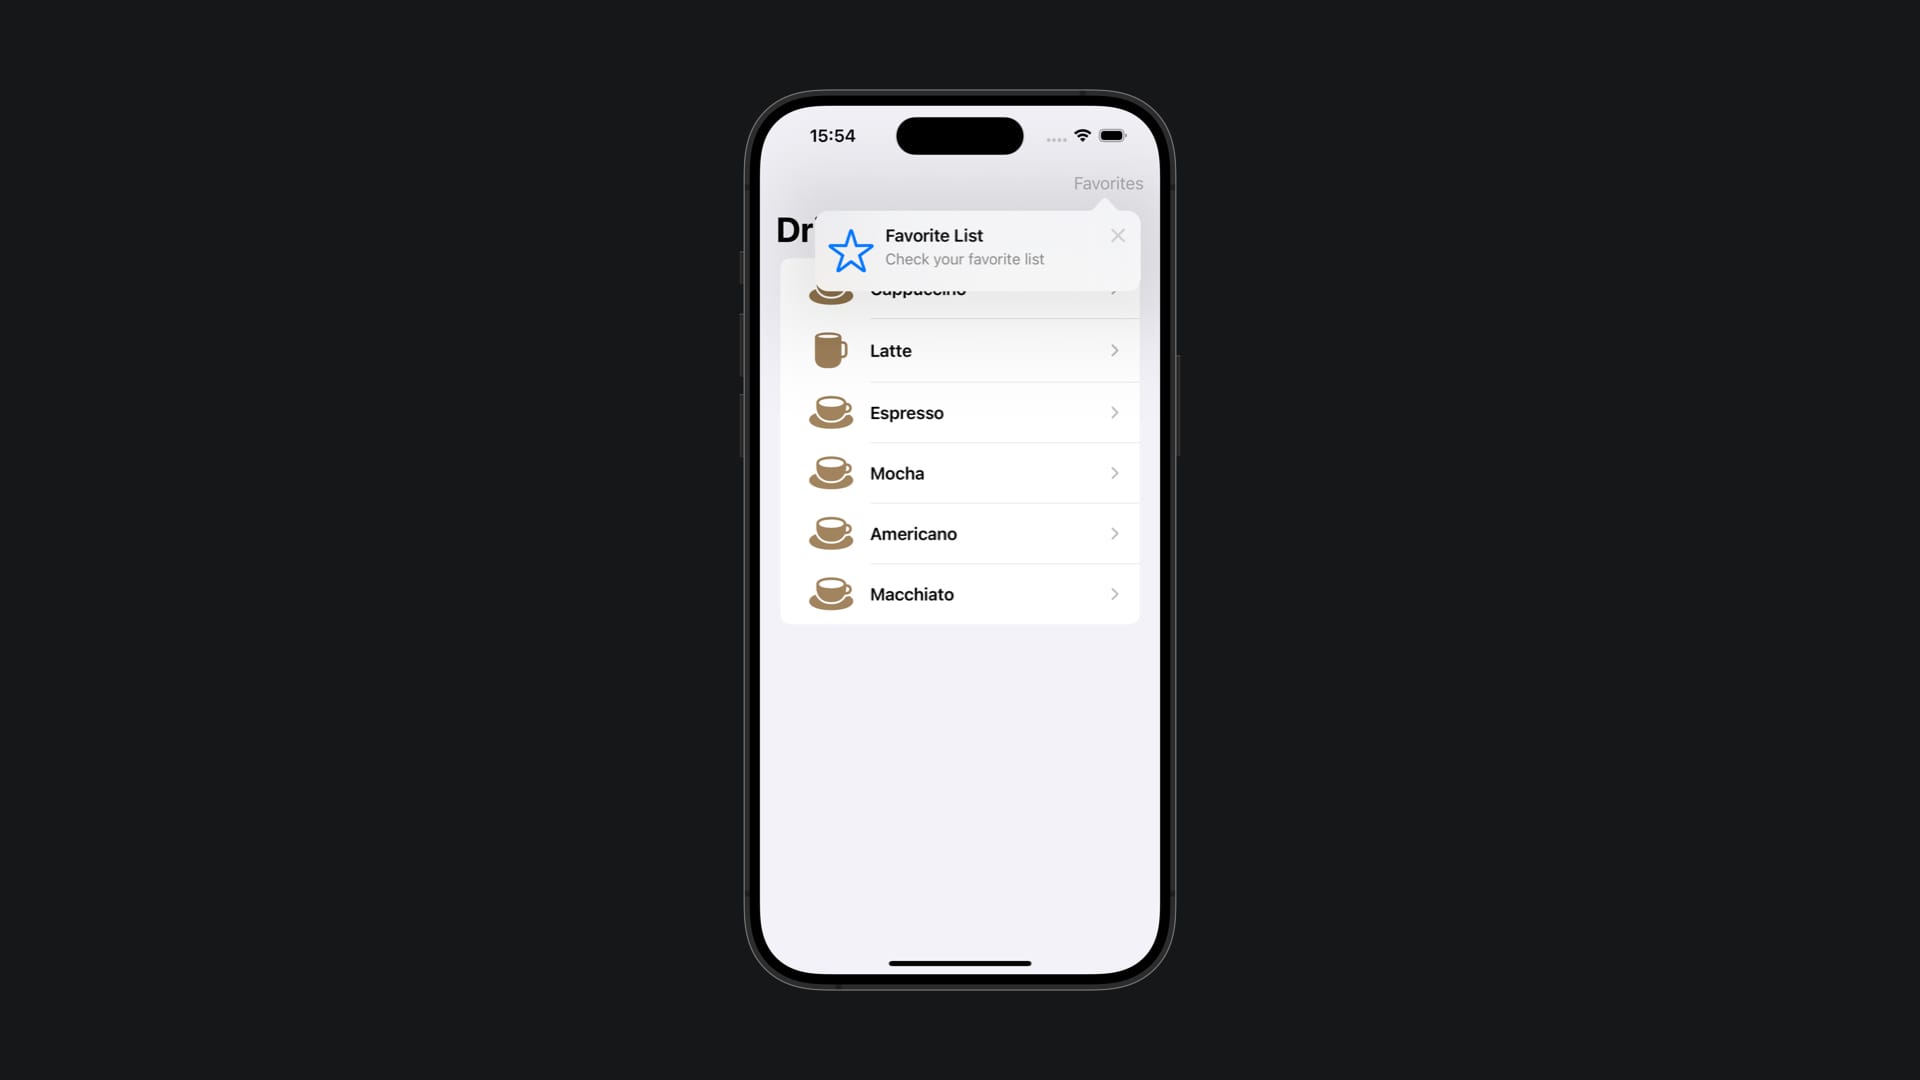
In the file Tips.swift define a new structure called ListOfFavoritesTip and define the title, the message, and the image associated with it.
struct ListOfFavoritesTip: Tip {
    var title: Text {
        Text("Favorite List")
    }
    var message: Text? {
        Text("Check your favorite list")
    }
    var image: Image? {
        Image(systemName: "star")
    }
}
The next step is to associate that tip with the button placed on the navigation bar that adds that drink to the list of favorites.
struct ContentView: View {
    @Environment(DrinkStore.self) var drinkViewModel: DrinkStore
    // 1.
    let popoverFavoritesListTip = ListOfFavoritesTip()

    var body: some View {
        NavigationStack {

            List(drinkViewModel.drinks) {
                ...
            }
            .navigationBarTitle("Drink")

            .toolbar {
                ToolbarItem(placement: .topBarTrailing) {
                    NavigationLink {
                        FavoriteDrinksView()
                    } label: {
                        Text("Favorites")
                    }
                    // 2.
                    .popoverTip(popoverFavoritesListTip)
                }
            }
        }
    }
}- Create a new instance of the tip
ListOfFavoritesTip - Using the
.popoverTip()modifier passing the tip instance
Showing the tip just once
In some scenarios, you will need to invalidate the tip so it doesn't appear too often or so it appears only once. An example may be when the user has already accessed the specific feature the tip is about.
To invalidate a tip use the invalidate(reason:) method in which you can also specify the reason why the tip needs to be invalidated.
On the DrinkDetailView we don't want the inline tip about the possibility of adding a drink to favorites to appear anymore after the user interacts with the favorite button for the first time. So let's invalidate the tip once the user taps on the button.
import SwiftUI
import TipKit

struct DrinkDetailView: View {
    @Environment(DrinkStore.self) var drinkViewModel: DrinkStore

    @State var drink: Drink
    @State var isFavorite: Bool = false

    let inlineFavoriteTip = AddToFavoriteTip()

    var body: some View {

        VStack {
            ZStack { ... }

            TipView(inlineFavoriteTip)
                .padding()
        }
        .onAppear { ... }
        .toolbar {
            ToolbarItem {
                Button {
                    drinkViewModel.updateFavoriteStatus(for: drink)
                    isFavorite.toggle()
                    // 1.
                    inlineFavoriteTip.invalidate(reason: .actionPerformed)
                } label: { ... }
            }
        }
    }

}- Invalidating the tip with the
invalidate(reason:)method.
We define the reason for the invalidation as .actionPerformed since the interaction with the button is the reason behind it. There are also other types of reasons for a tip to be invalidated like it has been displayed too much or the user simply dismissed it.
Conclusion
As you can see, it is easy to start using TipKit on your SwiftUI applications, but this is just the start of what is possible to do. The framework also provides you with tools to have greater control over when a tip should be displayed.
With TipKit you can:
- Create tips that show only after a specific interaction;
- Count the number of event occurrences to trigger a tip;
- Add actions to tips
- Test tips by overriding their configuration when initializing them
Apple provided a great article in the TipKit framework documentation showcasing examples of all those features.
Be sure to use the new framework in your future app updates to create an elegant way to help users discover and take advantage of the new features of your app.