
Creating a SwiftUI App to generate images with Dall-E through the OpenAI API
Understand how to use the OpenAI Swift Package to connect with the OpenAI API to generate images within your SwiftUI app.

OpenAI is the current hype within the field of artificial intelligence and everyone talks about ChatGPT, its conversational generative chatbot. Yet, many more capabilities are available through the OpenAI APIs, for example, the ability to generate images with Dall-E from a description in natural language.
MacPaw recently published an open-source OpenAI Swift Package that abstracts access to the OpenAI HTTP API and allows you to create apps that interface with the OpenAI capabilities easily. The library allow you to use GTP-3 through the different model families, Dalle-E and other OpenAI features. Register at openai.com/api and obtain an API key to get started.
Follow along to learn how to create images through the OpenAI API with just a few lines of code.
Using the MacPaw's OpenAI Package
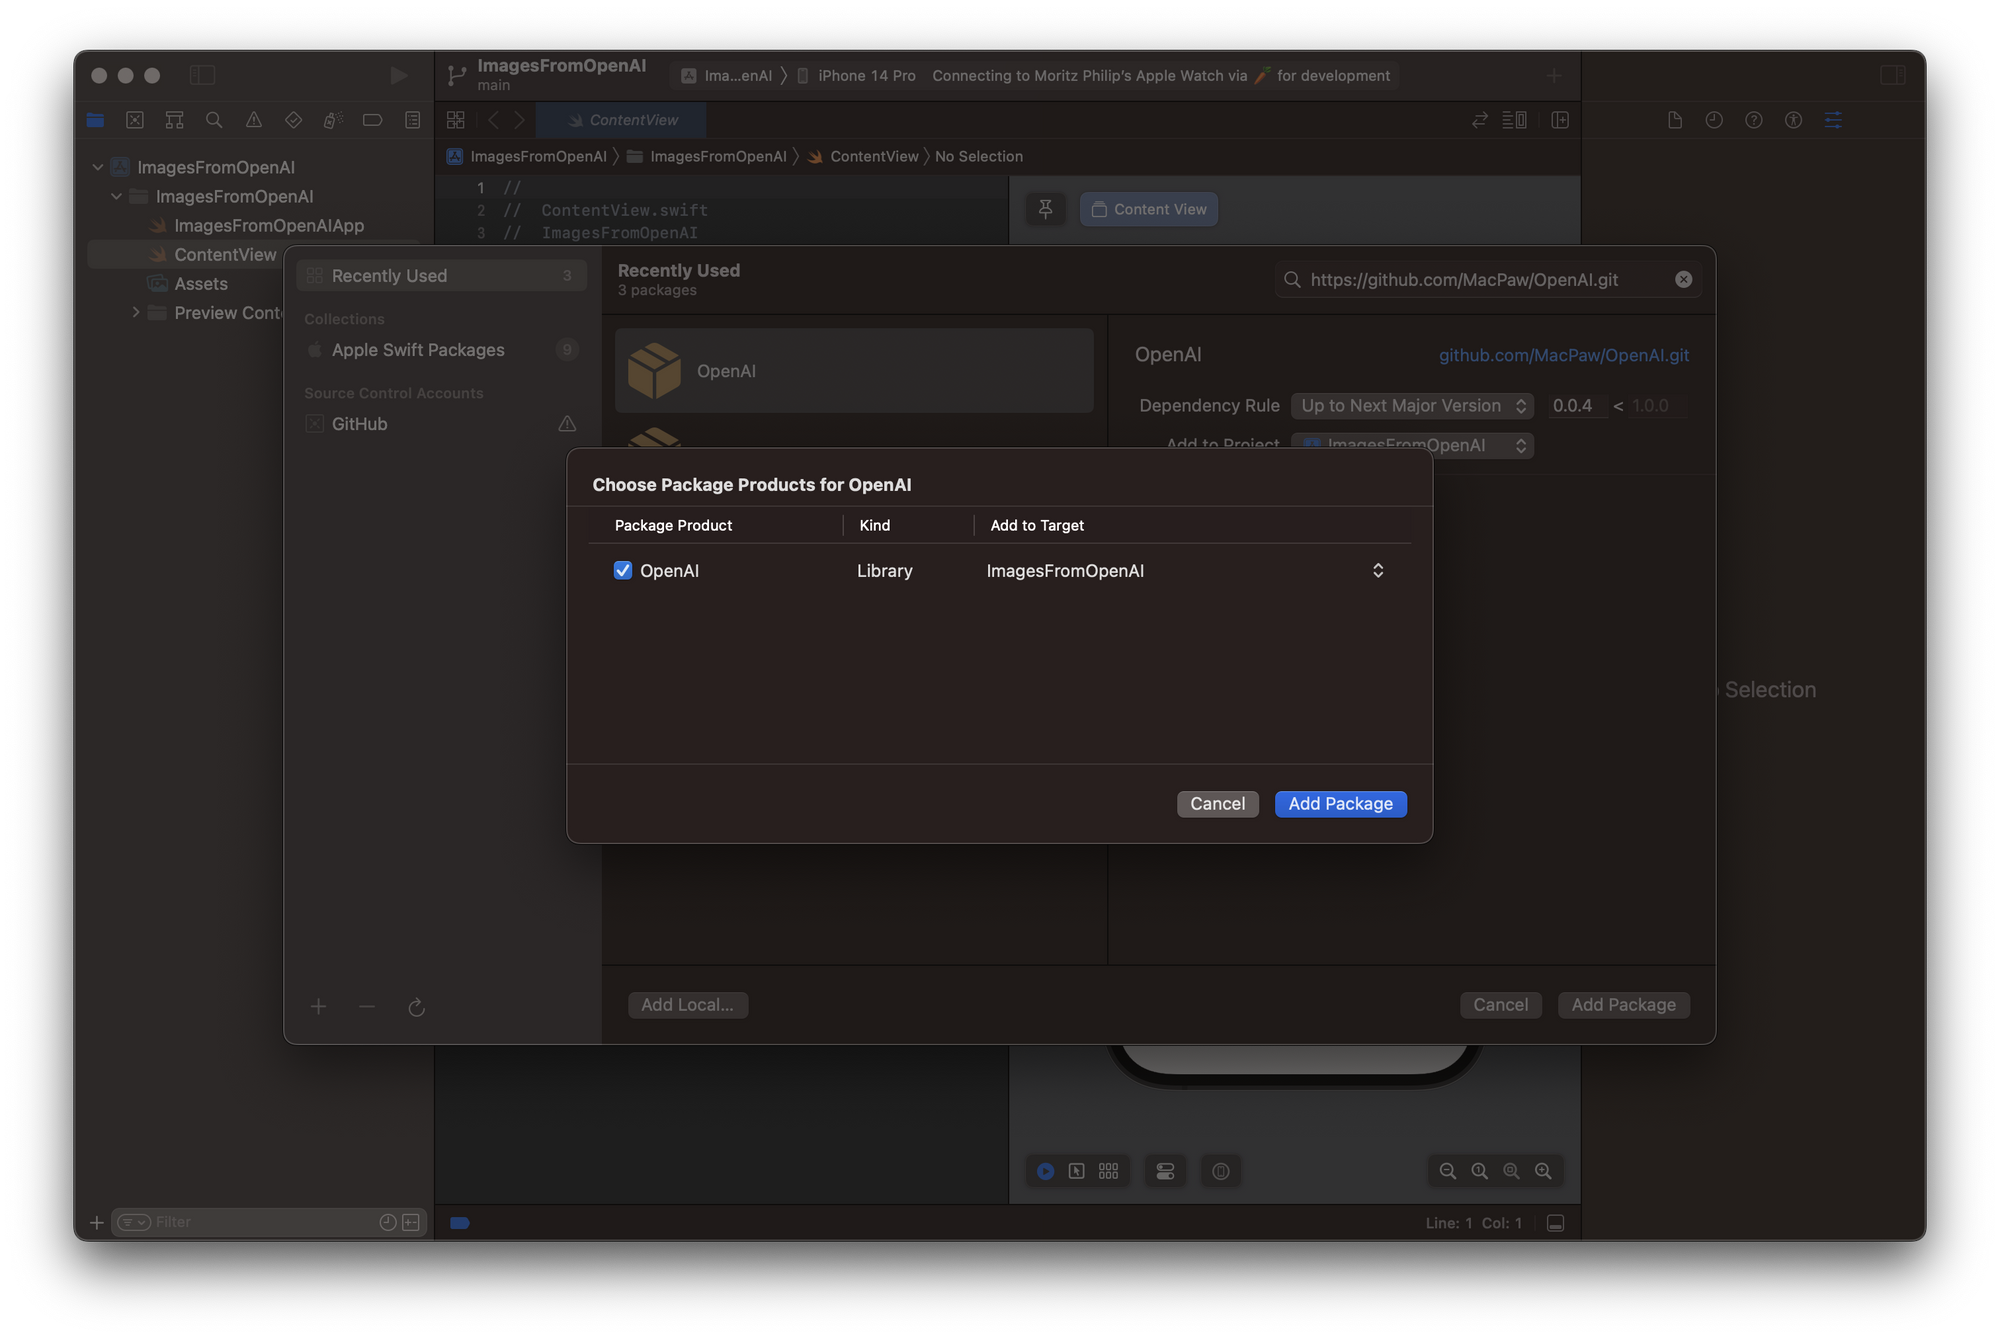
For the purpose of this example, let's create a new Xcode project and add the OpenAI Swift package as a dependency. For this, select Add Packages from the File menu and paste the package's URL https://github.com/MacPaw/OpenAI.git to the search field. Once the url has been resolved, add the OpenAI package product as a library to your project. The Swift Package Manager (SPM) handles all dependencies and automatically downloads any needed files.
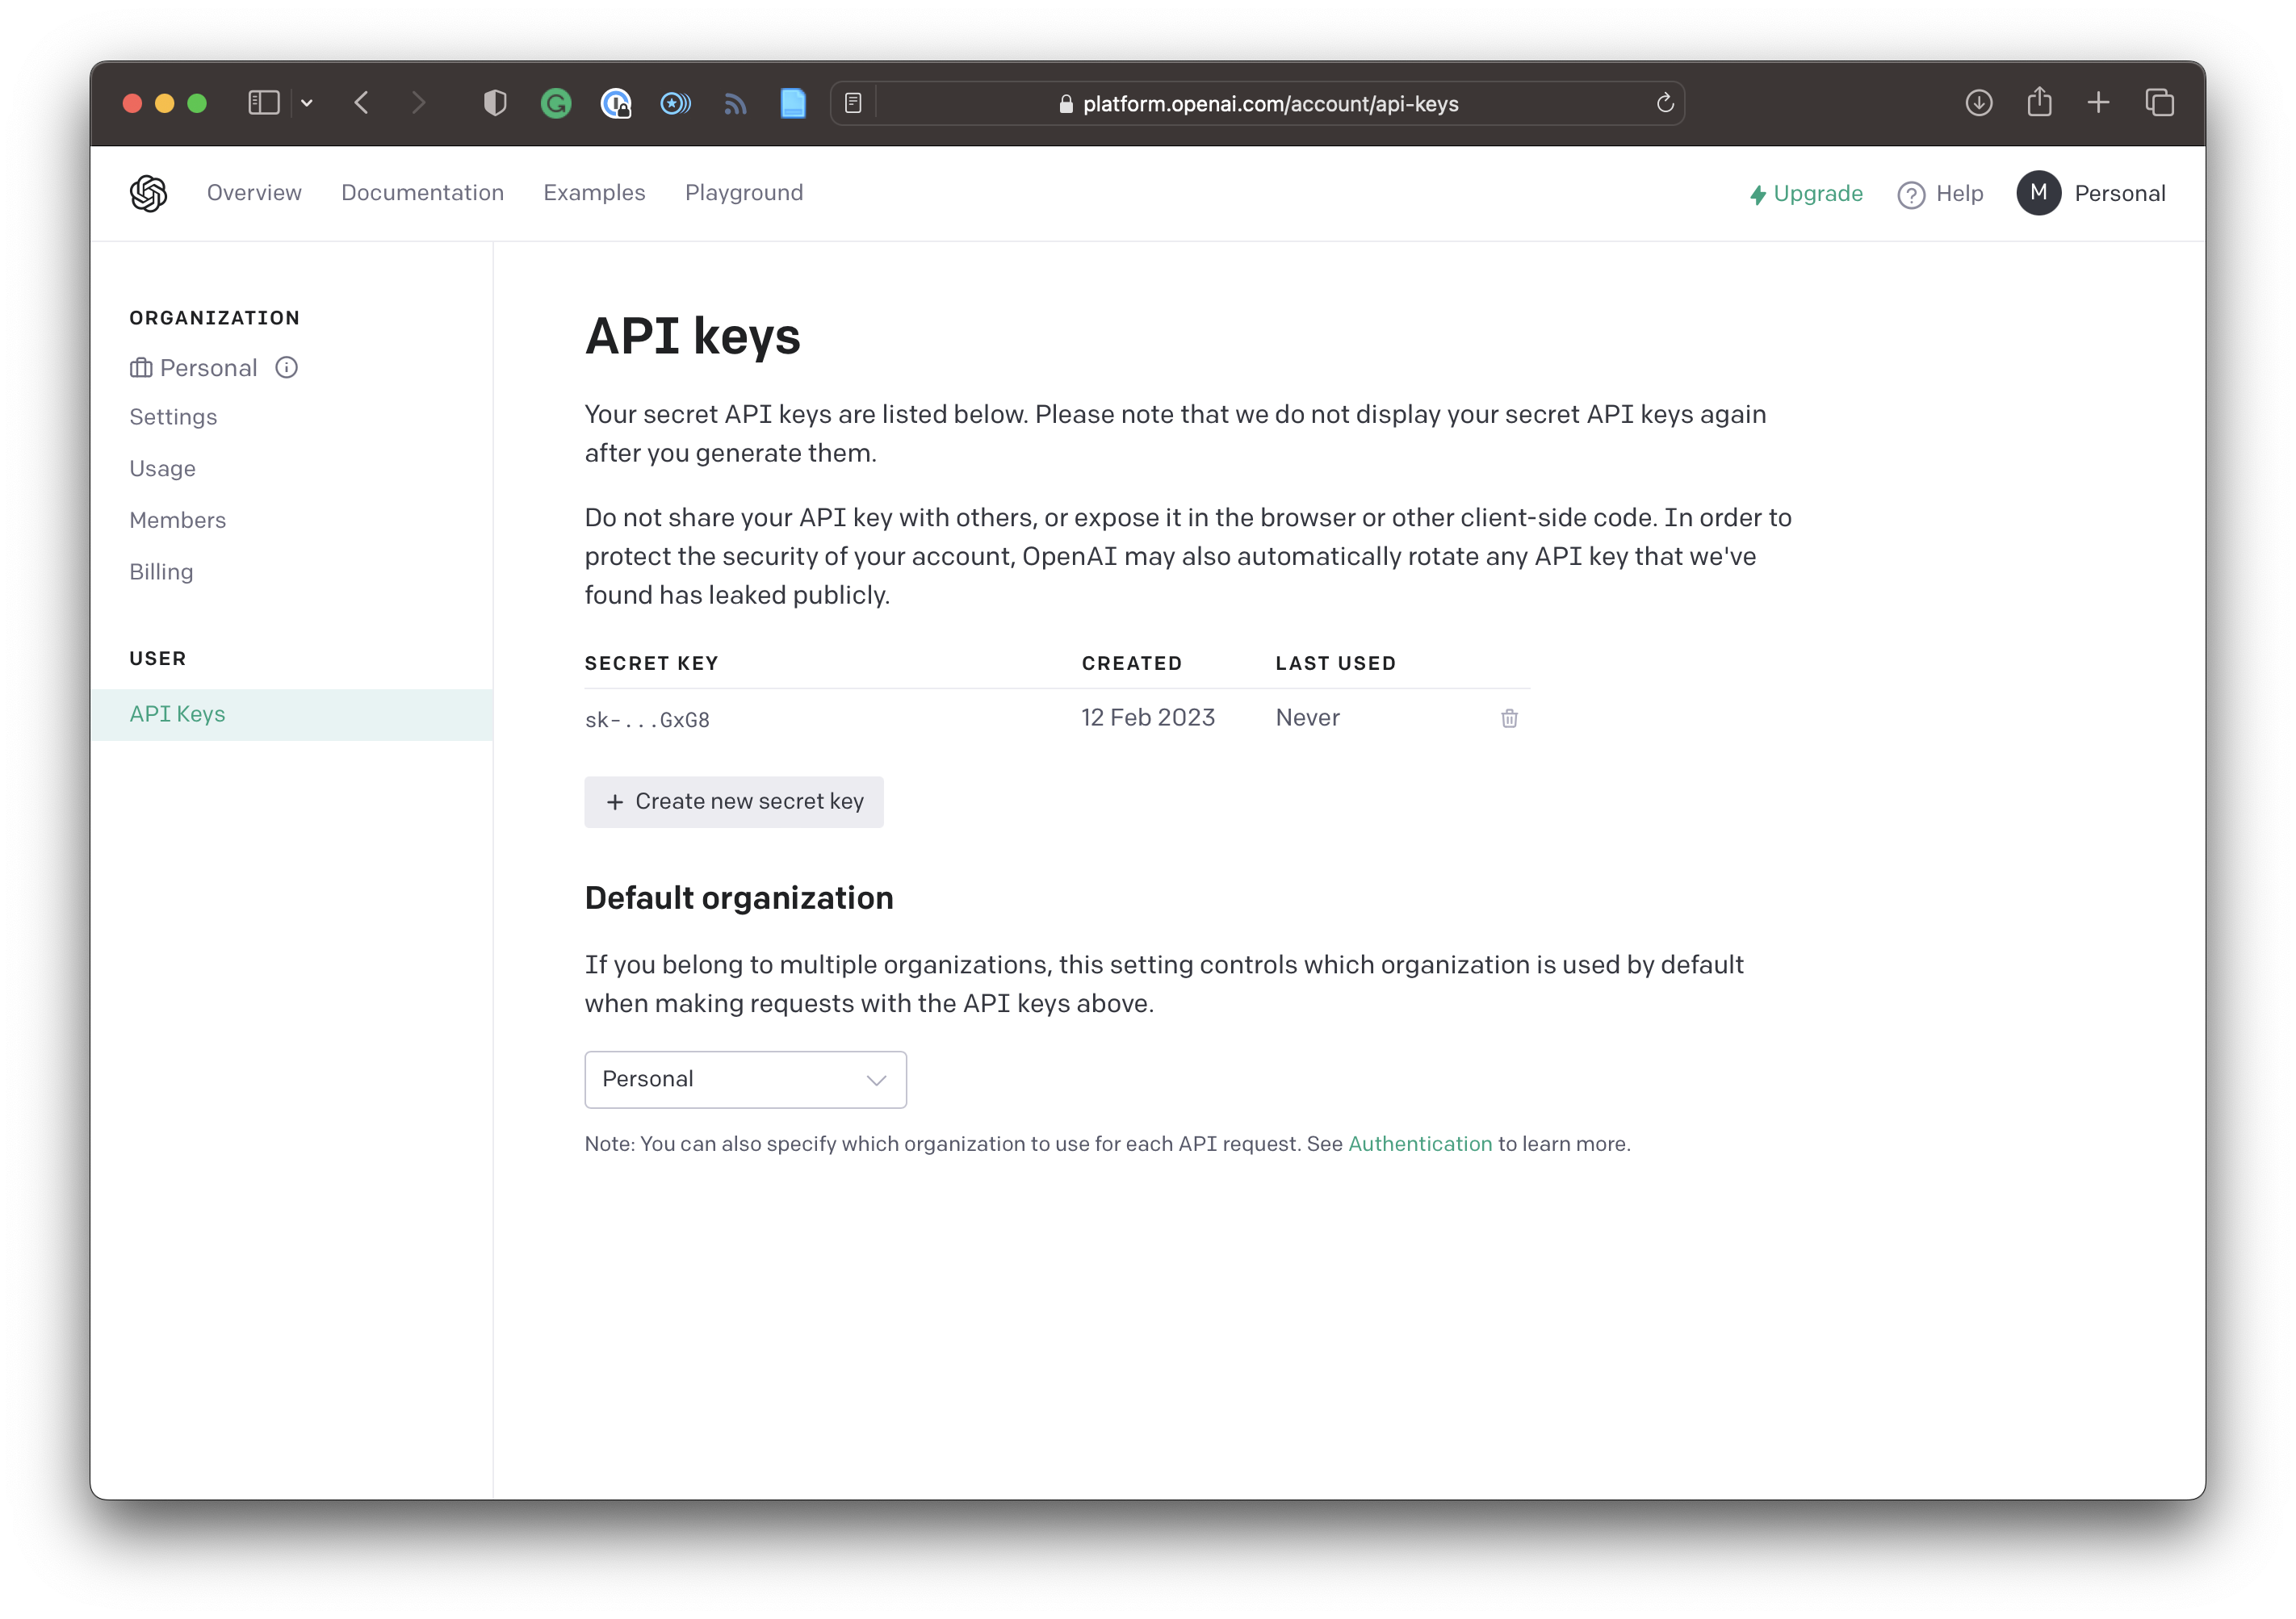
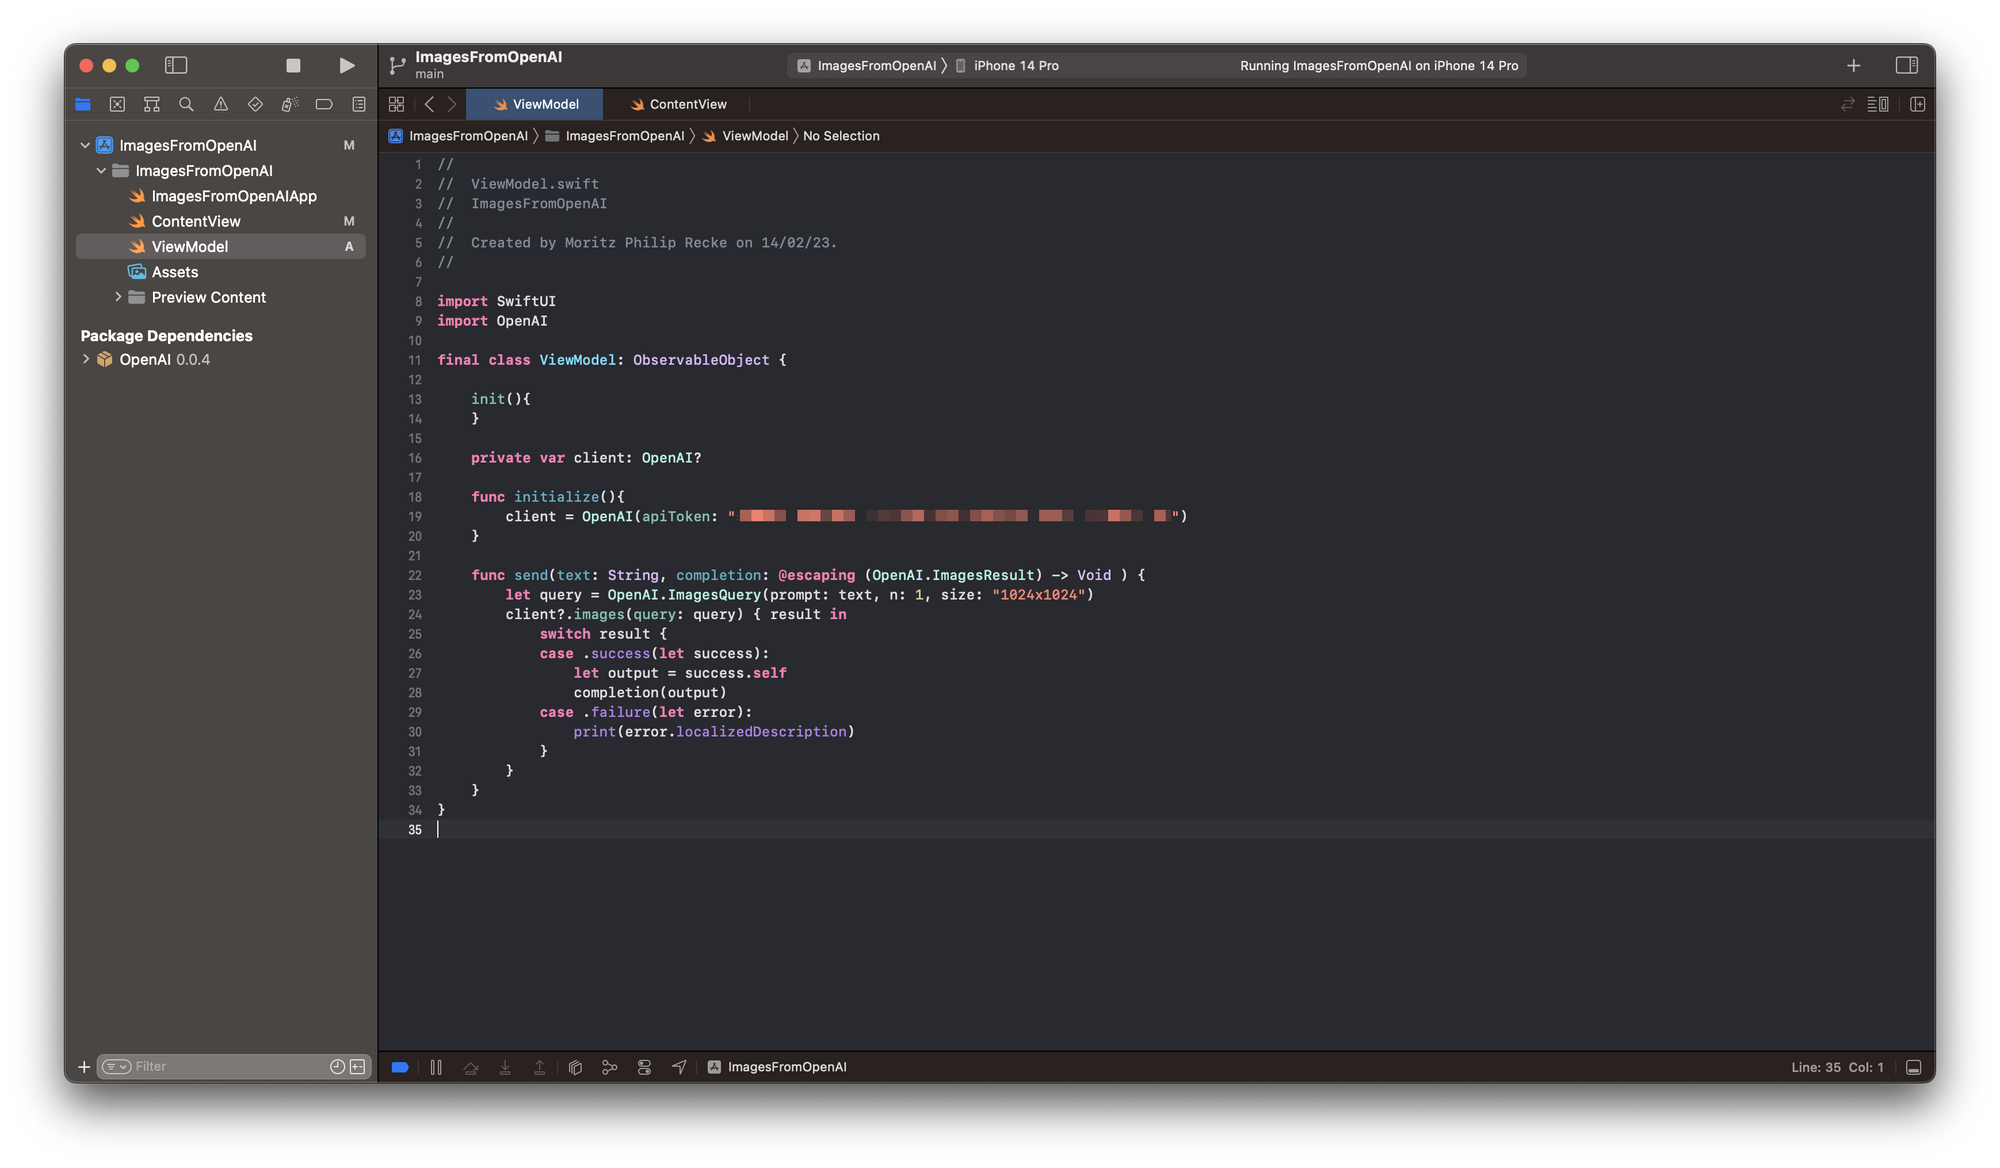
Then, let's create a ViewModel.swift file host a simple view model that manages manage the interaction with the OpenAI API through the external library. To use the package, import OpenAI. Setup the ViewModel as a final class and OberservableObject and contains an OpenAI object as a private client variable. It can be initialized with a initialize function by providing the API token from the OpenAI platform that can be generated and accessed at https://platform.openai.com/account/api-keys.
The ViewModel contains a function to send requests to the API, called send(text: String, completion: @escaping (OpenAI.ImageResult) -> Void ). It takes a String as an argument which will be used for the image generation and is an escaping function that is either returning the successful response or an error. In case the request is sucessful, the OpenAI.ImageResult contains the url to the image generated by Dalle-E.
struct ImagesResult: Codable {
    public struct URLResult: Codable {
        public let url: String
    }
    public let created: TimeInterval
    public let data: [URLResult]
}
The ViewModel code looks like this:
final class ViewModel: ObservableObject {

    init(){
    }

    private var client: OpenAI?

    func initialize(){
        client = OpenAI(apiToken: "YOUR API TOKEN")
    }

    func send(text: String, completion: @escaping (OpenAI.ImagesResult) -> Void ) {
        let query = OpenAI.ImagesQuery(prompt: text, n: 1, size: "1024x1024")
        client?.images(query: query) { result in
            switch result {
            case .success(let success):
                let output = success.self
                completion(output)
            case .failure(let error):
                print(error.localizedDescription)
            }
        }
    }
}
Creating a simple UI to test the OpenAI API
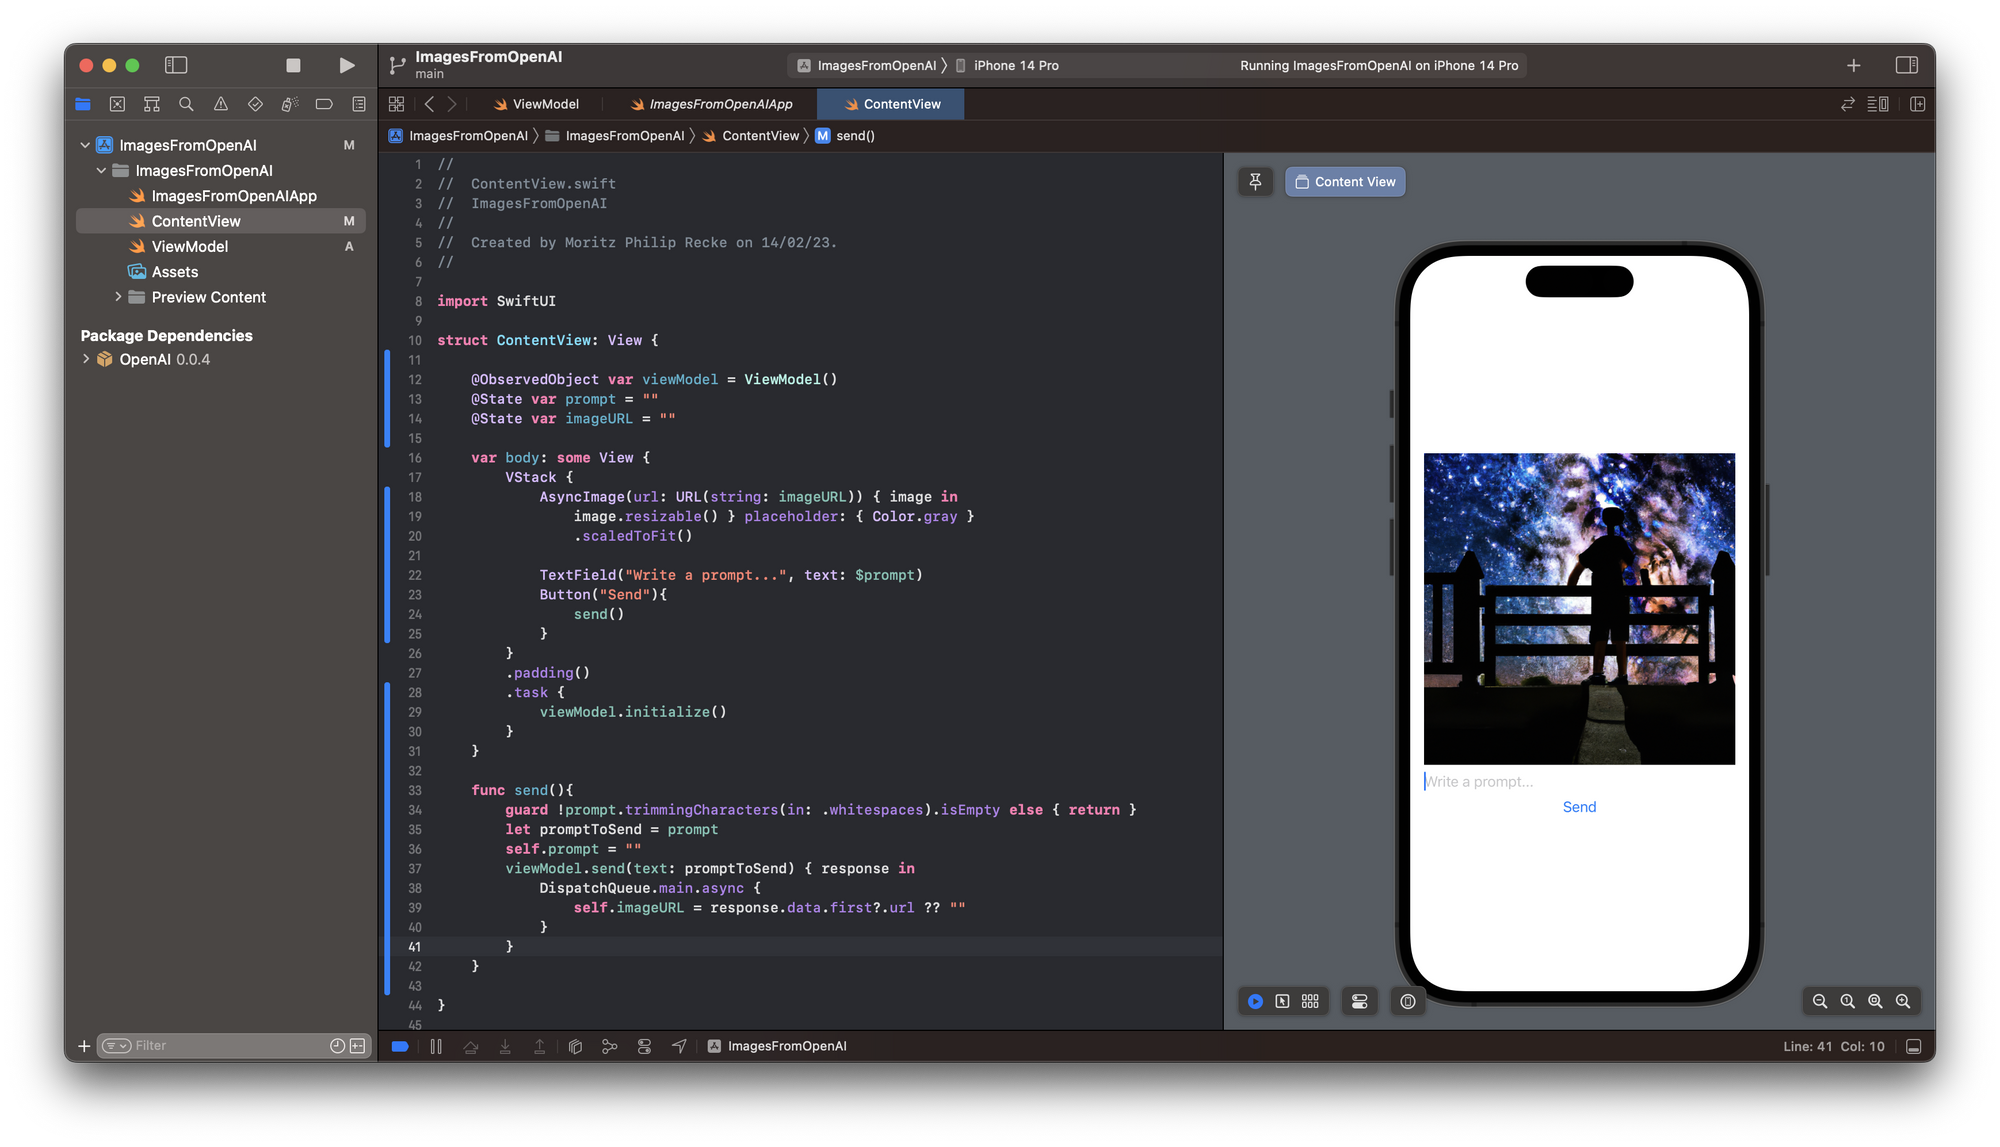
Inside the ContentView.swift file let's add the ViewModel as an @ObservedObject as well as 2 @State objects for the prompt and the imageURL. The prompt will be sent to the API and once the image is generated the imageURL is updated to then load the image and show it within the UI.
The interface itself contains a VStack to vertically align the content and display and AsyncImage and a TextField that has a @Binding to the prompt object and a Button to send the inserted text to the OpenAI API.
The interaction with the API is implemented in a send() function. It checks first, whether the TextField is empty or just contains spaces. In this case, it would not send anything to the API. In case the TextField is not empty, its content is sent to the API using the ViewModel function send() with a closure. Inside the closure, the API's response is asynchronously assigned to the imageURL object. As this is a @State object, it will cause the view to be rendered again and will cause the AyncImage to load the image from the provided url.
import SwiftUI

struct ContentView: View {

    @ObservedObject var viewModel = ViewModel()
    @State var prompt = ""
    @State var imageURL = ""

    var body: some View {
        VStack {
            AsyncImage(url: URL(string: imageURL)) { image in
                image.resizable() } placeholder: { Color.gray }
                .scaledToFit()

            TextField("Write a prompt...", text: $prompt)
            Button("Send"){
                send()
            }
        }
        .padding()
        .task {
            viewModel.initialize()
        }
    }

    func send(){
        guard !prompt.trimmingCharacters(in: .whitespaces).isEmpty else { return }
        let promptToSend = prompt
        self.prompt = ""
        viewModel.send(text: promptToSend) { response in
            DispatchQueue.main.async {
                self.imageURL = response.data.first?.url ?? ""
            }
        }

    }
}
With this basic setup, you can test the functionality of the OpenAI library. Then, OpenAI has far more capabilities than generating images, so you may also explore other features within the Swift package. For example, you can also use GPT-3 for text generation.
With this tutorial, you can now create your own OpenAI powered app to leverage its smart features. OpenAI also offers ChatGPT, a powerful conversational chatbot that you can also access conveniently through the OpenAI API Client Library in Swift by Adam Rush. We also have a tutorial to get you started with image generation witl Dall-E. To use the API in a production app, also keep an eye on the Open AI API Pricing page.
If you are curious, also explore our take on how you can use OpenAI's ChatGPT conversational machine learning model to create working code for SwitfUI apps within a few minutes. It's quite impressive.