Creating a SwiftUI App to generate Text Completions with GPT-3.5 through the OpenAI API
Understand how to use the OpenAI Swift Package to connect with the OpenAI API to generate text completions within your SwiftUI app.

Since the release of ChatGPT, OpenAI is as hot as ever within the field of artificial intelligence. Yet, OpenAI has many more capabiltites to offer beyond the conversational chatbot. For example, the ability to generate text completions with GPT-3.5 or even GTP-4 from natural language prompts.
MacPaw recently published an open-source OpenAI Swift Package that abstracts access to the OpenAI HTTP API and allows you to create apps that interface with the OpenAI capabilities easily. The library allow you to use GTP-3.5 or GPT-4 through the different model families, Dalle-E and other OpenAI features. Register at openai.com/api and obtain an API key to get started.
Follow along to learn how to generate responses with GPT-3.5, also called completions, through the OpenAI API with just a few lines of code.
Adding the MacPaw's OpenAI Package with SPM
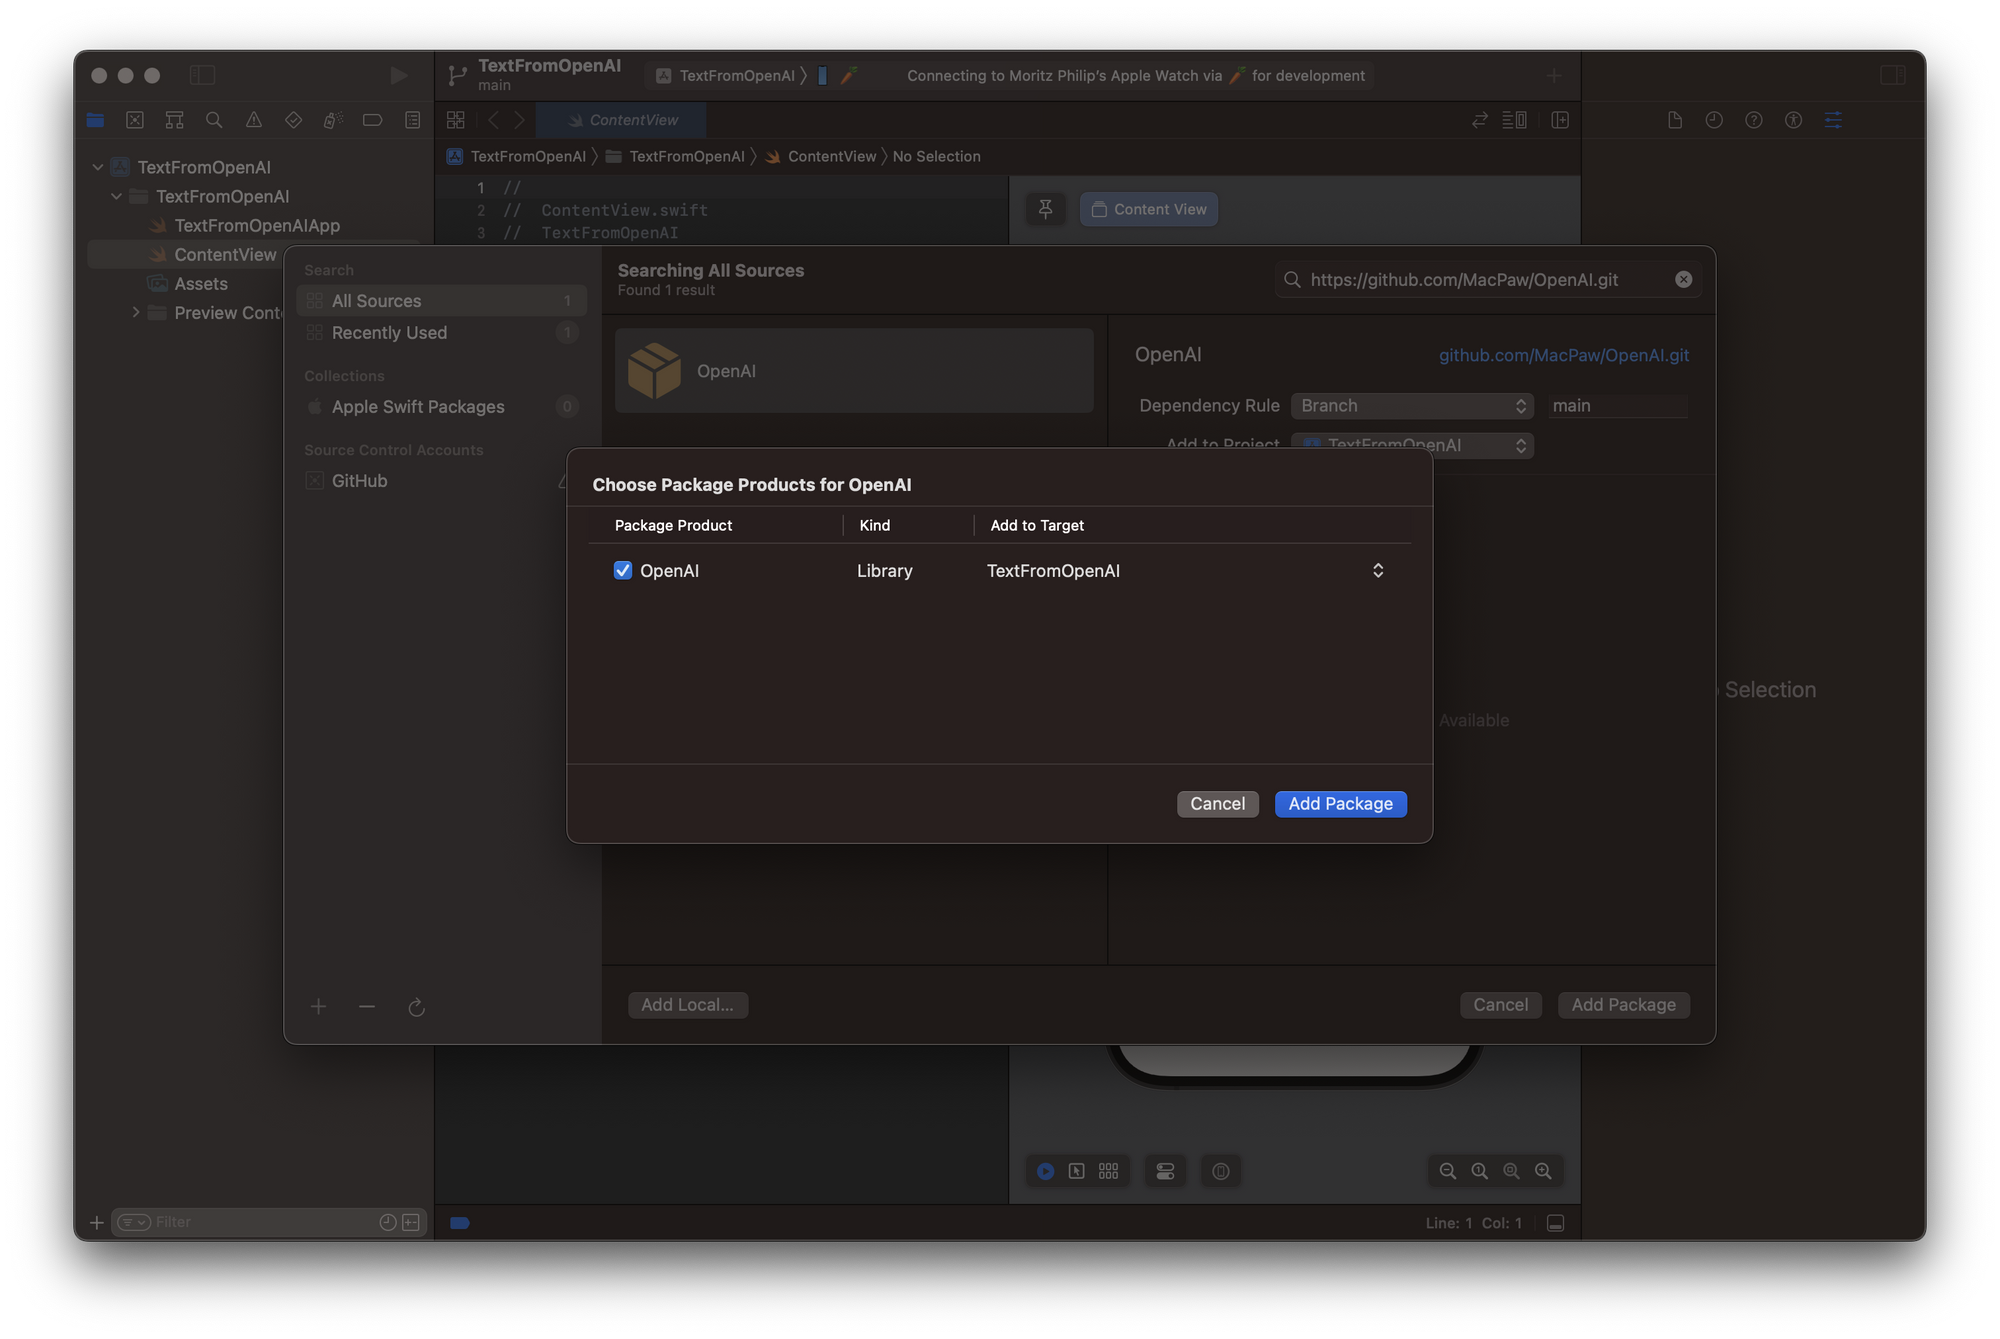
Within any Xcode project, you can add third party dependencies using the Swift Package Manager (SPM). To do this, select Add Packages from the File menu and paste the package's URL https://github.com/MacPaw/OpenAI.git to the search field. You can then select the OpenAI package product to add it as a library to your project.
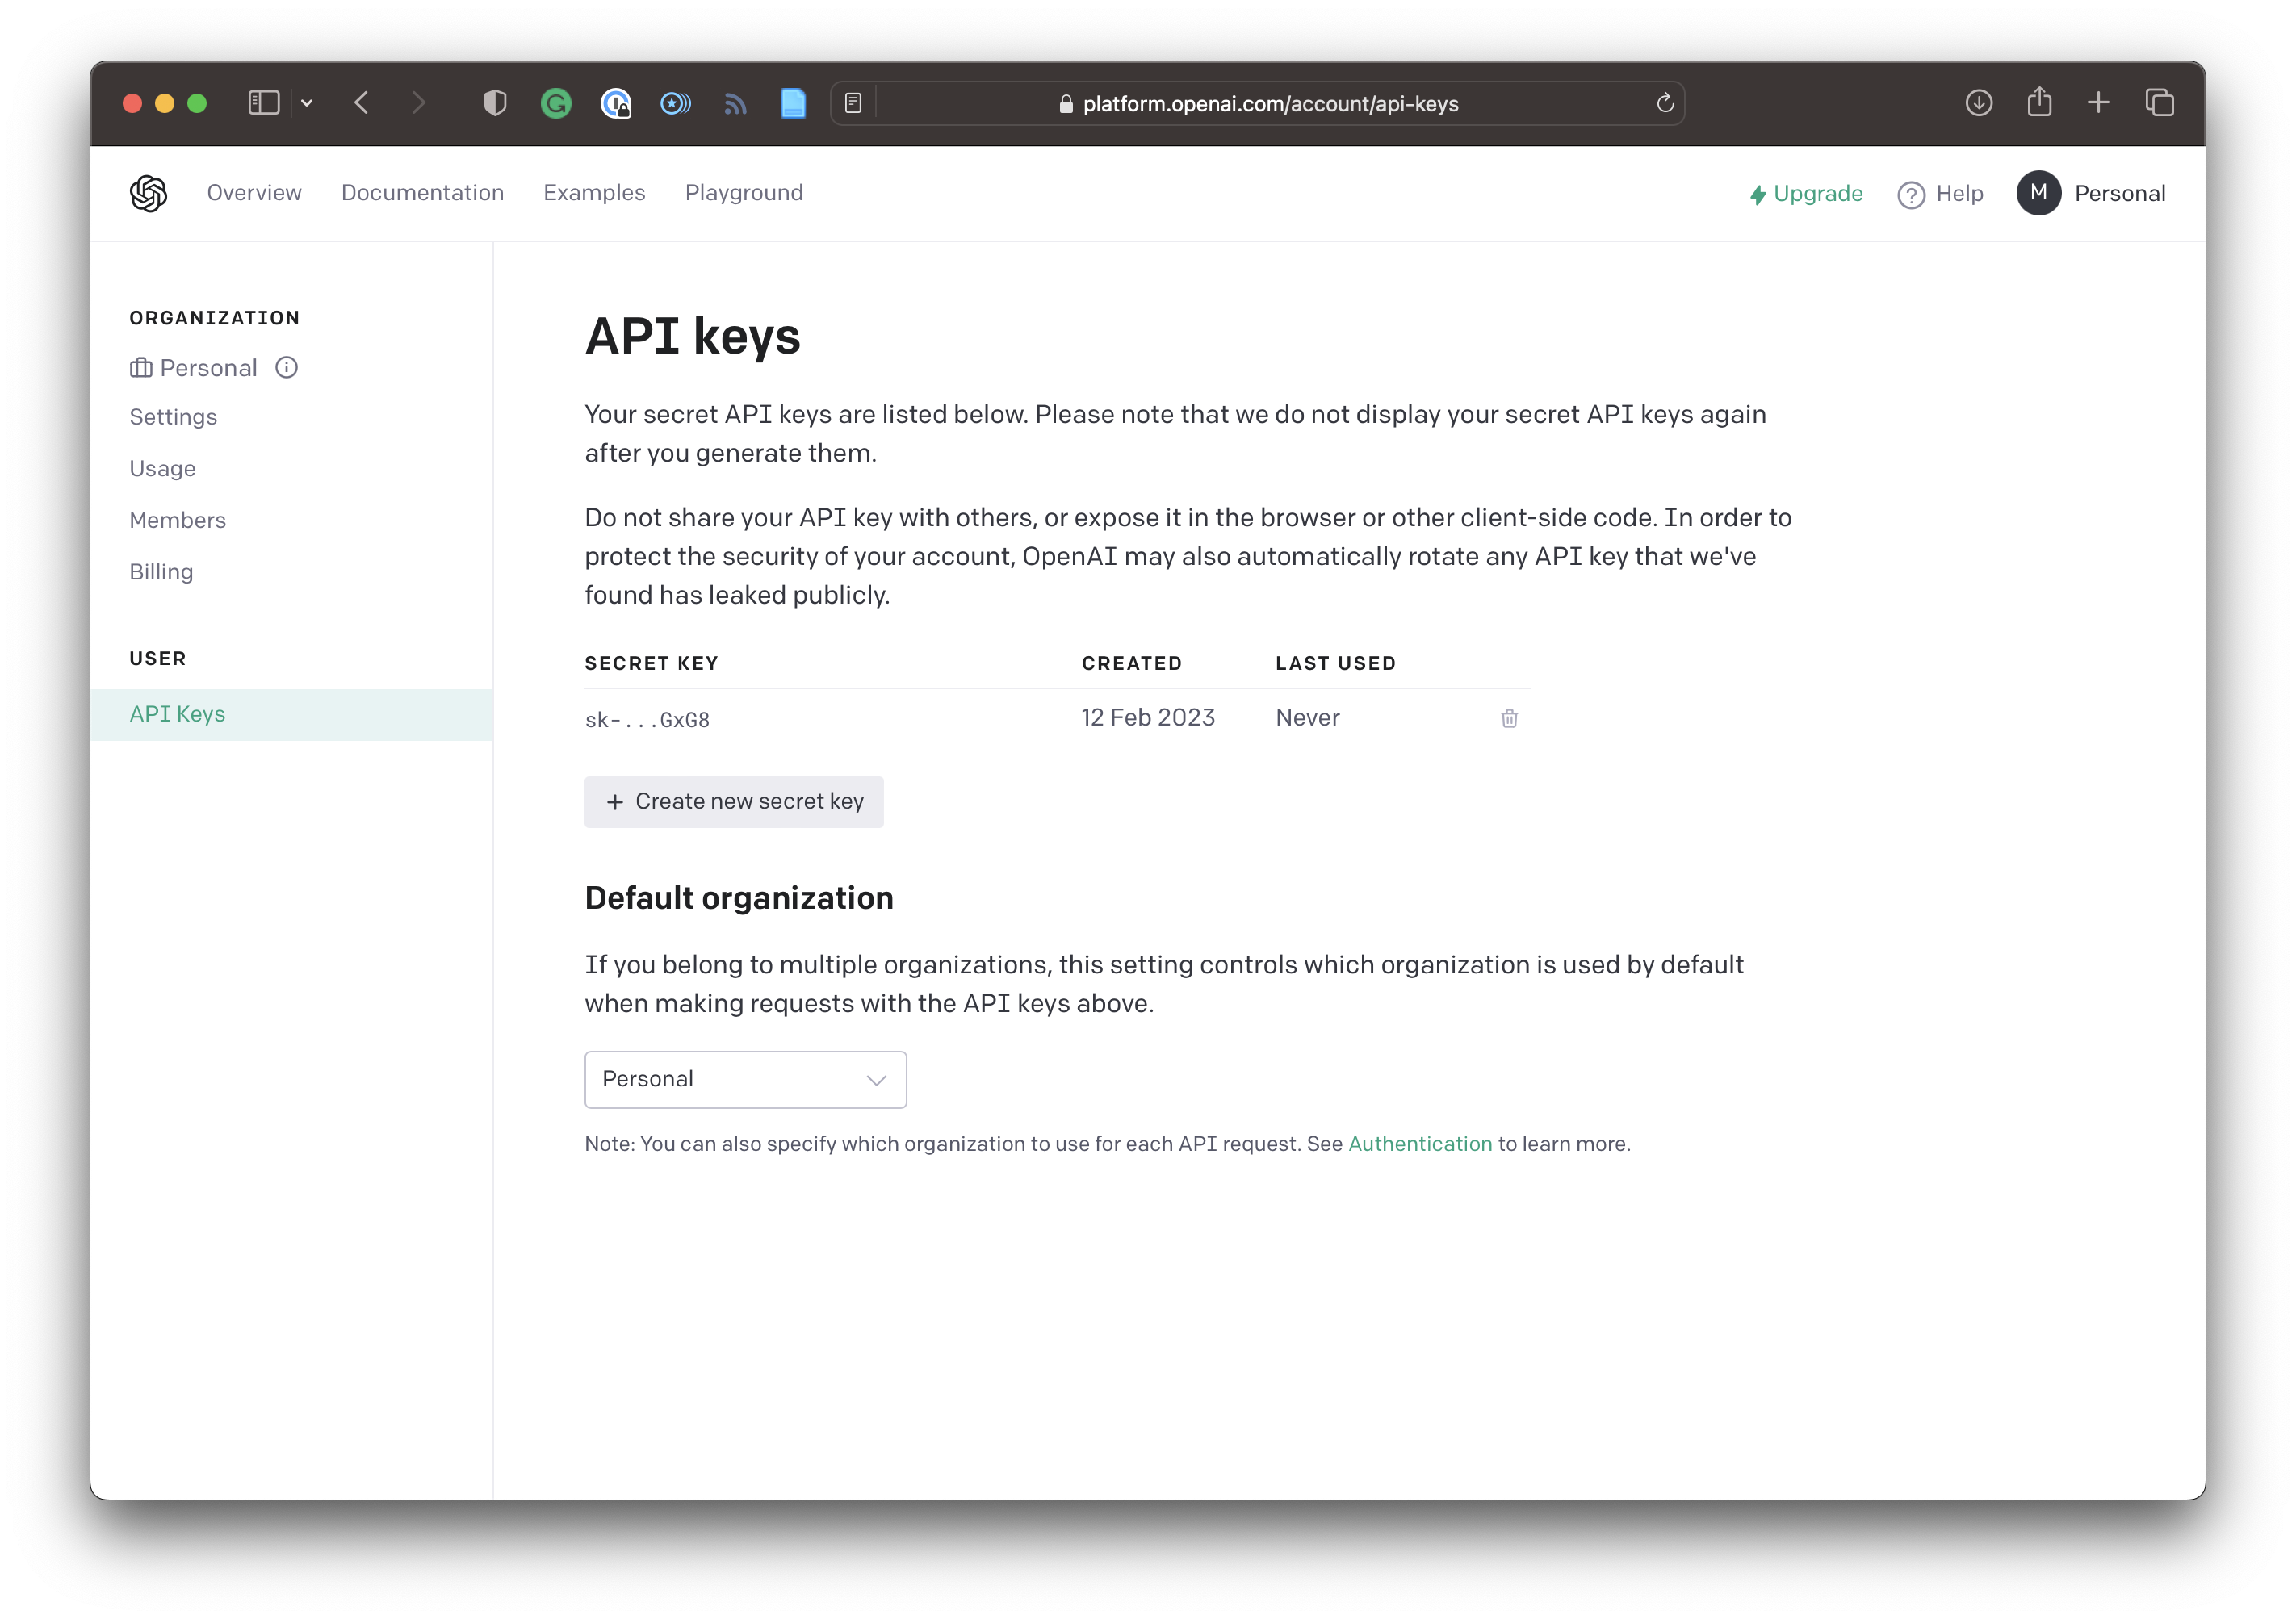
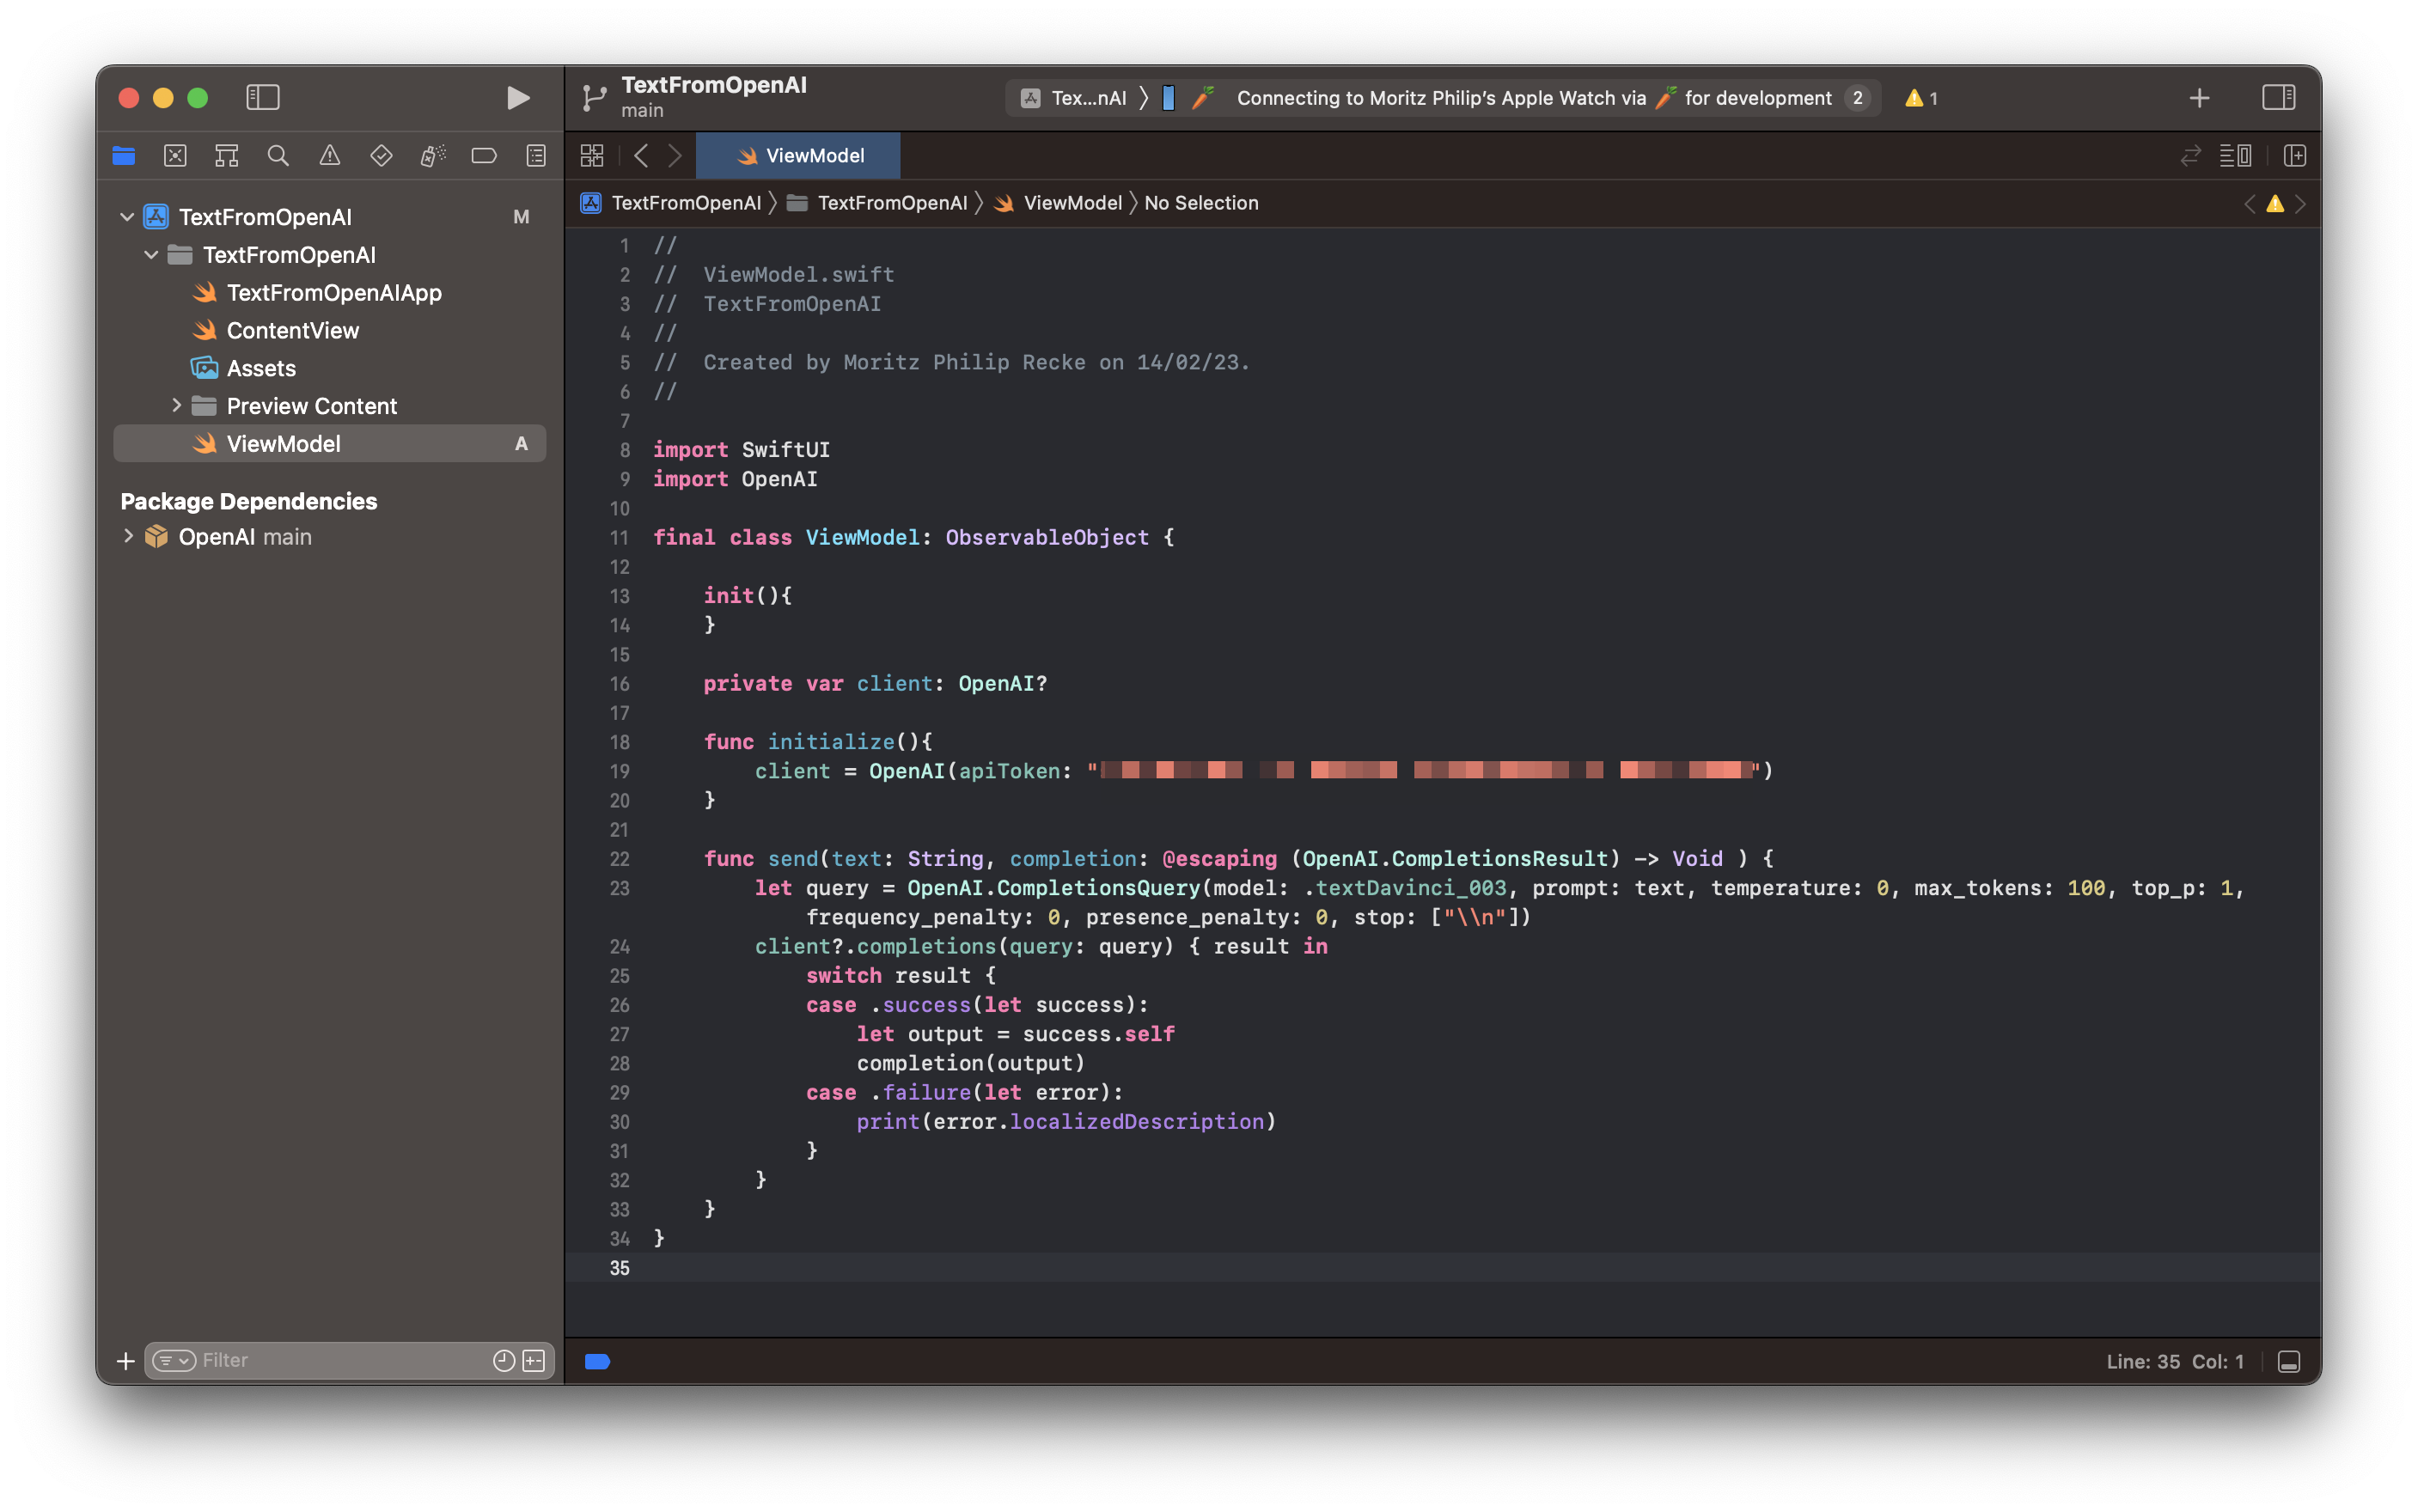
To keep it simple, create a final class ViewModel that also serves as an OberservableObject. This class manages the interaction with the OpenAI API through the external library we just added with SPM. To make use of the library, import OpenAI. The view model can have an OpenAI object as a private client variable as well as an initialize function by providing the API token from the OpenAI platform that can be generated and accessed at https://platform.openai.com/account/api-keys.
Beyond that, let's add a function to send requests to the API, called send(text: String, completion: @escaping (OpenAI.CompletionsResult) -> Void ). It takes a String as an argument. This is the prompt sent to the API to generate the response. The function is is an escaping function that is either returning the successful response or an error. In case the request is sucessful, the OpenAI.CompletionsResult contains the necessary data to process the result.
struct CompletionsQuery: Codable {
    public let model: Model
    public let prompt: String
    public let temperature: Double?
    public let max_tokens: Int?
    public let top_p: Double?
    public let frequency_penalty: Double?
    public let presence_penalty: Double?
    public let stop: [String]?
    public let user: String?
}

struct CompletionsResult: Codable {
    public struct Choice: Codable {
        public let text: String
        public let index: Int
    }

    public let id: String
    public let object: String
    public let created: TimeInterval
    public let model: Model
    public let choices: [Choice]
}
A detailed description of the Completions served by the OpenAI API, explore the official documentation. Most relevant, it provides a number of responses from which you can choose. In this example, we are using textDavinci_003 which is part of the GPT-3.5 model and can do any language task with "better quality, longer output, and consistent instruction-following". The ViewModel code looks like this:
import SwiftUI
import OpenAI

final class ViewModel: ObservableObject {

    init(){
    }

    private var client: OpenAI?

    func initialize(){
        client = OpenAI(apiToken: "YOUR API TOKEN")
    }

    func send(text: String, completion: @escaping (OpenAI.CompletionsResult) -> Void ) {
        let query = OpenAI.CompletionsQuery(model: .textDavinci_003, prompt: text, temperature: 0, max_tokens: 100, top_p: 1, frequency_penalty: 0, presence_penalty: 0, stop: ["\\n"])
        client?.completions(query: query) { result in
            switch result {
            case .success(let success):
                let output = success.self
                completion(output)
            case .failure(let error):
                print(error.localizedDescription)
            }
        }
    }
}
Creating a simple UI to test the OpenAI API
Within the ContentView.swift file you can add an @ObservedObject for ViewModel to manage the interaction with the API within the view. Then, add 2 @State objects for the prompt to the API as well as the response. The prompt will be sent to the API and once the response is received, it will get assigned to the response object to reload the view and display the result in the UI
The interface itself contains a VStack to vertically align the content and display a simple Text view for the response, a TextField with a @Binding to the prompt property, and lastly, a Button to send the inserted text to the OpenAI API.
The request to the API will be executed in a send() function. You can check whether the prompt actually contains text and not white spaces to optimise API calls. In case there is text inside the TextField, its content is sent to the API using the send function from the view model with a closure. Inside the closure, the API's response is asynchronously assigned a response object. Whenever the response changes, the view is rendered again to show the latest data received from the API.
import SwiftUI

struct ContentView: View {
    @ObservedObject var viewModel = ViewModel()
    @State var prompt = ""
    @State var response = "Ask me anything"

    var body: some View {
        VStack(alignment: .leading) {
            Text(response)
            Spacer()
            HStack{
                TextField("Write a prompt...", text: $prompt)
                Button("Send"){
                    send()
                }
            }
        }
        .padding()
        .task {
            viewModel.initialize()
        }
    }

    func send(){
        guard !prompt.trimmingCharacters(in: .whitespaces).isEmpty else { return }
        let promptToSend = prompt
        self.prompt = ""
        viewModel.send(text: promptToSend) { response in
            DispatchQueue.main.async {
                self.response = response.choices.first?.text ?? "no response"

            }
        }
    }
}
Now, you have all the basics to create an OpenAI-powered app. With these few lines of code, you can test the functionality of the OpenAI library. It allows you to access many features of the OpenAI HTTP API conveniently. For example, you can also use it to generate images with Dall-E. If you are curious, check our tutorial on how to generate images with the OpenAI API.
OpenAI also offers ChatGPT, a powerful conversational chatbot. If you want to explore that, you can also access it conveniently through the OpenAI API Client Library in Swift by Adam Rush and follow our tutorial to get started. To use the API in a production app, also keep an eye on the Open AI API Pricing page.
If you are curious, also explore our take on how you can use OpenAI's ChatGPT conversational machine learning model to create working code for SwitfUI apps within a few minutes. It may give a glimpse of the potential future of app development.