
Creating an interactive widget with SwiftUI
Learn how to add interactive widgets in a SwiftUI app project.


In this tutorial, we will explore how to add interactivity to a widget.
We are going to build up on top of the application created on the tutorial Adding a Widget to a SwiftUI app. In there, we covered the basics of WidgetKit by building a simple widget to present informative content directly on the home screen.
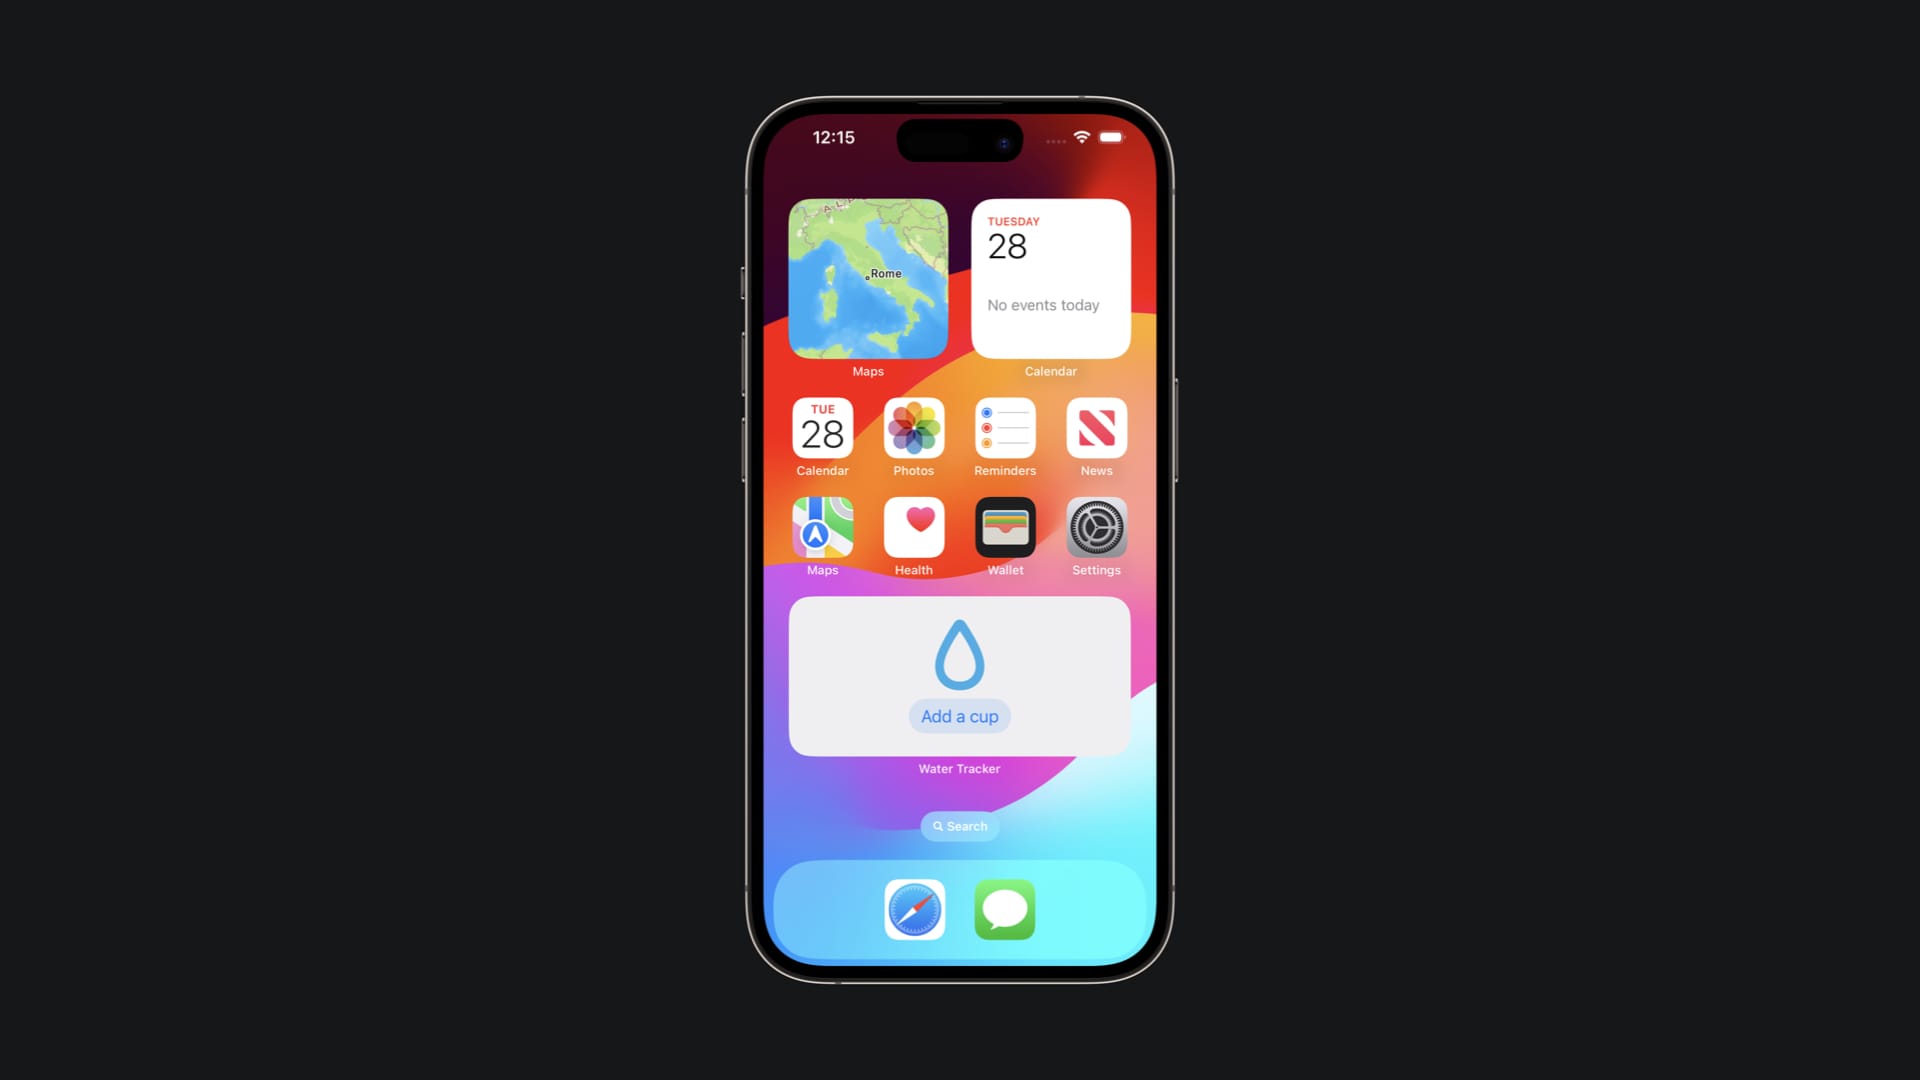
We are going to add a simple water tracker feature to the original application. It will let users keep track of how much water they drink during the day by featuring a widget that allows them to quickly add a cup of water to the current amount of water drunk.
By the end of this tutorial, you will learn how to share data between an app and a widget and add interactivity to your widget.
Before we start
To get started with this tutorial, it’s recommended to have a basic understanding of SwiftUI and be comfortable writing code in Swift. If you are new to WidgetKit, it would be helpful to go through our previous tutorial where we explored some of its foundational concepts.
We will start with the following project:
Step 1- Define the logic
As a first step, we'll define the logic for our water tracker. We'll store the number of cups drunk during the day using UserDefaults. This way, we can easily share the cup count between our app and the widget.
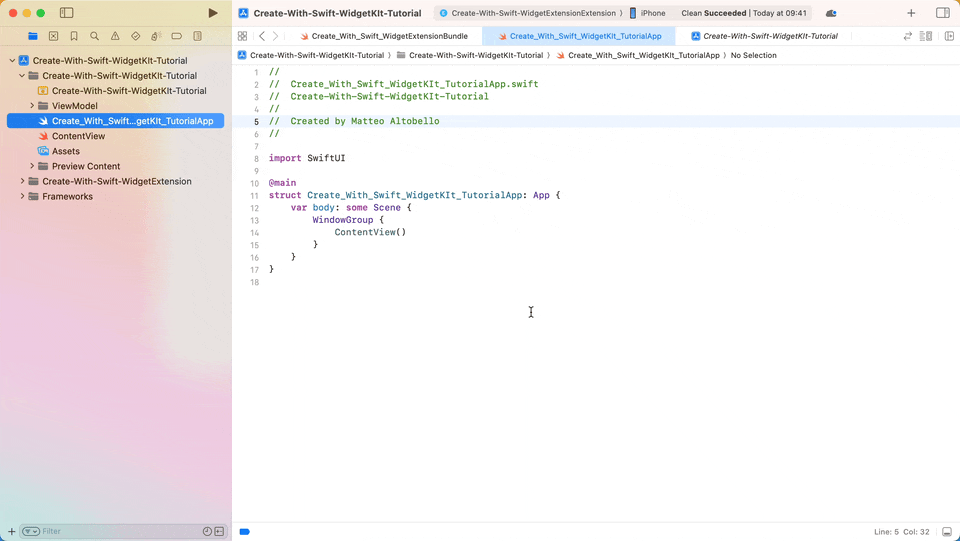
To start, create a new file called WaterCupTracker.swift.
// 1.
import SwiftUI
import WidgetKit

// 2.
class WaterCupTracker {
    // 3.
    static let shared: WaterCupTracker = WaterCupTracker()
    // 4.
    private let sharedDefaults: UserDefaults

    private init() {
        sharedDefaults = UserDefaults(suiteName: "group.watercup.shared")!
    }
}
- Import
SwiftUIandWidgetKit - Define a new class named
WaterCupTracker. - Define a static property of type
WaterCupTrackerrepresenting the shared instance of the class. This will allow us to access the same instance of the class across the app. - Define a property named
sharedDefaultsof typeUserDefaults. This property is used to store and retrieve data persistently. By initializing it and defining a domain identifier it will be easier to share data between the app and the Widget extension that will be created later.
Step 2 - Access and modify the stored data
Now let’s create the methods that will allow us to read and write in UserDefaults the number of cups of water drunk. We need methods for:
- Increasing the number of drunk cups by one
- Reading the current amount of registered cups
- Resetting the number of drunk cups
// 2.
class WaterCupTracker {

    ...

    // 1.
    func incrementCount() {
        var count = sharedDefaults.integer(forKey: "count")
        count += 1
        sharedDefaults.set(count, forKey: "count")

        WidgetCenter.shared
            .reloadTimelines(ofKind: "WaterTrackerExtension")
    }

    // 2.
    func currentCount() -> Int {
        sharedDefaults.integer(forKey: "count")
    }

    // 3.
    func resetCount() {
        sharedDefaults.set(0, forKey: "count")

        WidgetCenter.shared
            .reloadTimelines(ofKind: "WaterTrackerExtension")
    }
}- Create the
incrementCount()method to increase the count of consumed water cups. It retrieves the current count fromUserDefaults, increment it, and update the value back toUserDefaults. After that, it triggers a reload of widget timelines. - Implement the
currentCount()method to retrieve the current count of consumed water cups fromUserDefaults. - Create the
resetCount()method to reset the count of consumed water cups back to zero inUserDefaults. Additionally, it triggers a reload of widget timelines.
The content of the widget will change after the user interacts with it. Using the reloadTimelines(ofKind:) method we refresh the widget's timeline of a specific widget, ensuring that any changes made in the app are reflected on the Home Screen.
Step 3 - Designing the app view
We will start by creating a view that will be responsible for showing the progression of the user hydration. This view will be shown in the app interface and also in the widget that will be created in future steps.
Create a new SwiftUI view called CupCounterView and add the following code to it:
import SwiftUI

struct CupCounterView: View {
    @Binding var count: Int
    // 1.
    @State var dimension : CGFloat

    var body: some View {
        ZStack {
            Image(systemName: "drop")
                .resizable()
                .scaledToFit()
                .frame(width: dimension, height: dimension)
                .font(.largeTitle)
                .foregroundStyle(.cyan)


            Image(systemName: "drop.fill")
                .resizable()
                .scaledToFit()
                .frame(width: dimension, height: dimension)
                .foregroundStyle(.cyan)
                // 2.
                .mask {
                    Circle()
                        .trim(from: 0.0, to: CGFloat(count) * 0.1)
                }
        }
    }
}

#Preview {
    CupCounterView(count: .constant(5), dimension: 100)
}- The
dimensionproperty is important because the view will be displayed in different contexts. - Based on the
countproperty, the mask modifier will adjust the visualized portion of the filled drop image. This allows us to create an effect that fills the drop once the counter is incremented.
Now create a simple view that will have the basic controls to interact with the counter. Go back to the ContentView.swift file and add the following:
import SwiftUI

struct ContentView: View {
    // 1.
    @AppStorage("count", store: UserDefaults(suiteName: "group.watercup.shared")) var count = 0

    var body: some View {
        // 2.
        VStack(spacing: 60) {

            Text("Current Value: \(count)")
                .font(.title3)
                .bold()

            CupCounterView(count: $count, dimension: 180)

            HStack(spacing: 24) {
                Button("Reset") {
                    WaterCupTracker.shared.resetCount()
                }
                .buttonStyle(BorderedProminentButtonStyle())
                .tint(.secondary)

                Button("Increment") {
                    WaterCupTracker.shared.incrementCount()
                }
                .buttonStyle(BorderedProminentButtonStyle())
                .tint(.cyan)
            }

        }
        .navigationTitle("WaterTracker")
        .padding()
    }

}
- Using the
@AppStorageproperty wrapper we are able to access theUserDefaultstored property from theView - In this
ContentView, we display the current count, represented by theTextview. Below it, two buttons, "Increment" and "Reset", are provided to increase the count and reset it back to zero respectively
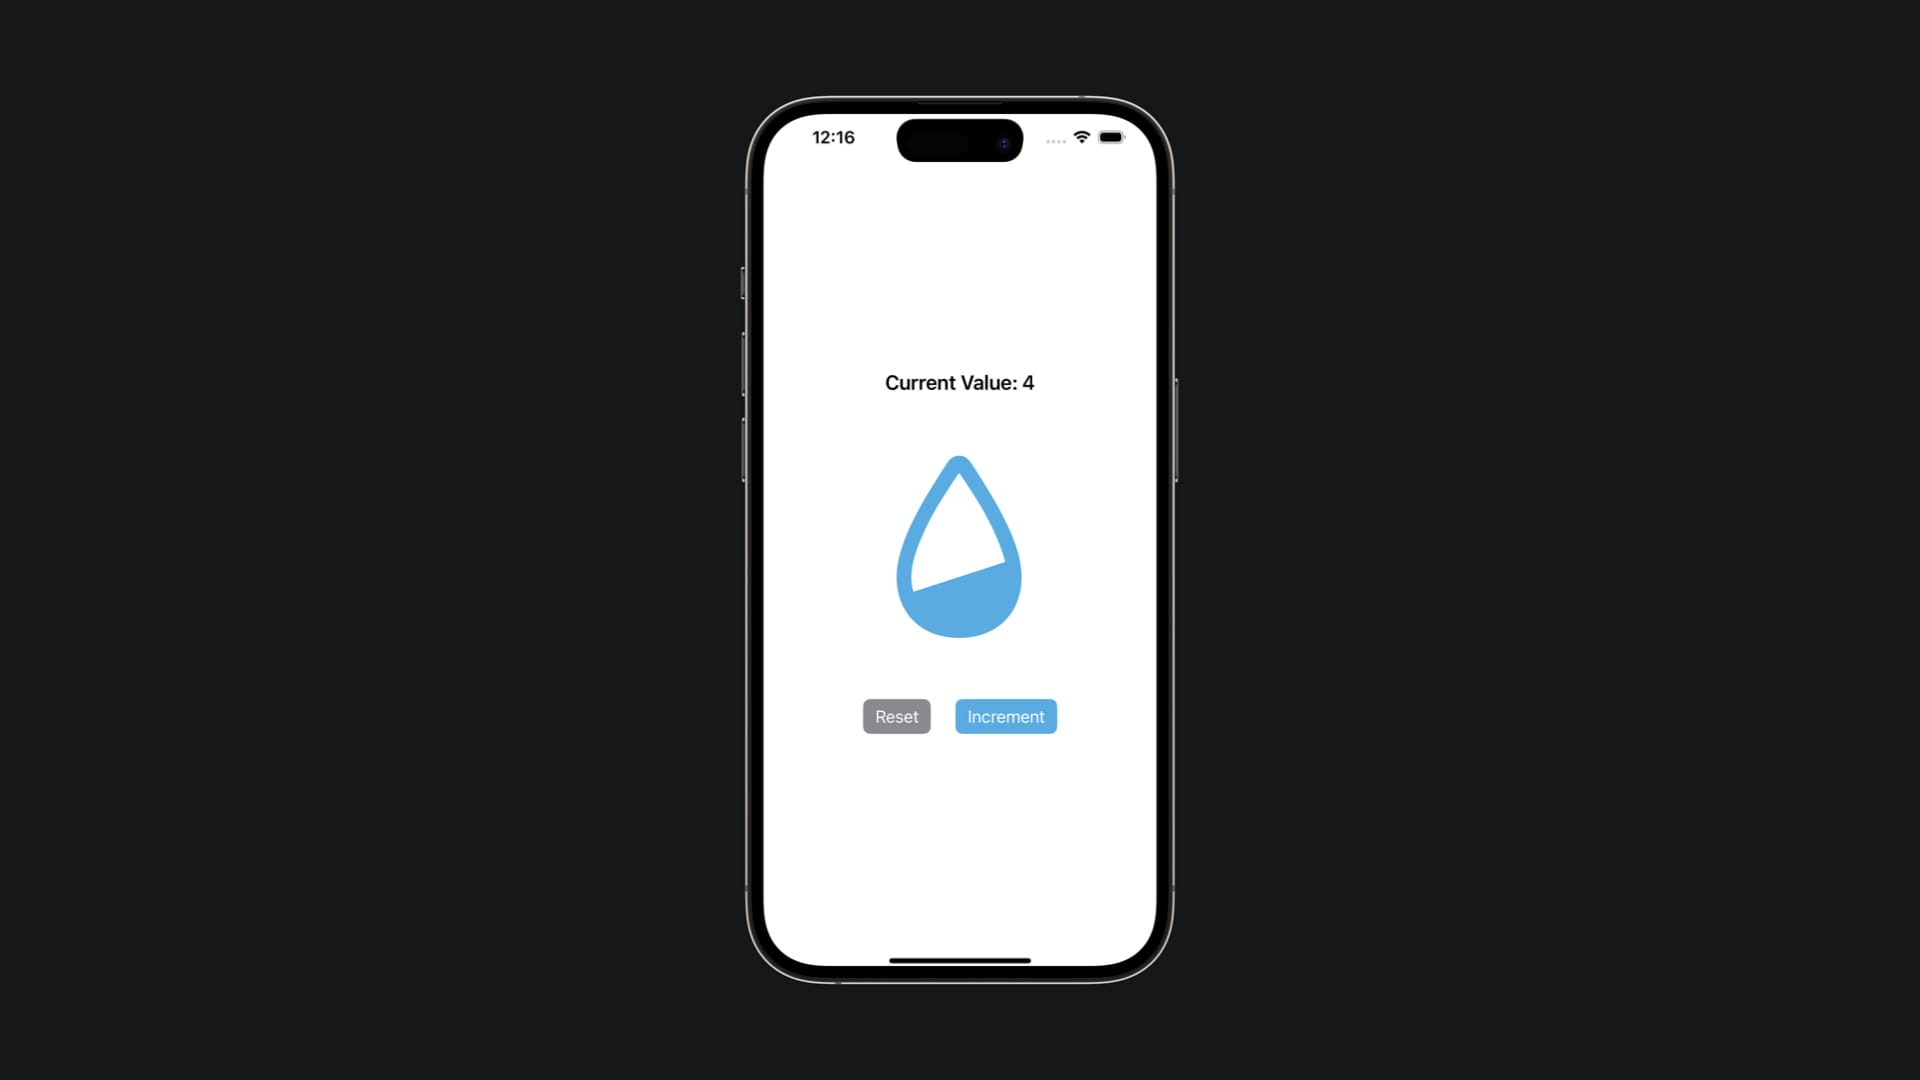
This completes the implementation of ContentView for our water consumption tracking widget.
Step 4 - Create an App Group
In the first step, we defined a stored property using UserDefault. To make this property accessible both from the app and from the Widget Extension we need to add the App Groups capability to our Xcode project.
For enabling the App Group capability:
- Select your app target.
- Go to the Signing & Capabilities panel.
- Add the App Group capability to the target.
When you add the App Groups capability, you need to enter the container ID in the dialog that appears. A container ID must begin with group. and then a custom string in reverse DNS notation. Enter group.watercup.shared that is the one that we used when we access the information with UserDefaults.
Step 5 - Create an App Intent
To add interactivity to our widget you can use controls like Button and Toggle. To define an action that can be executed by the widget extension we need to use an AppIntent.
Intents are self-contained types that act as a bridge between an app and an extension like a widget. Each intent encapsulates a single action that’s specific to your app.
Create a new file named IncrementCupIntent.swift in your app folder:
// 1.
import AppIntents

// 2.
struct IncrementCupIntent: AppIntent {
	// 3.
    static var title: LocalizedStringResource = "Add a cup of water"
    static var description = IntentDescription("Increment the number of cup of water")

    // 4.
    func perform() async throws -> some IntentResult {
        WaterCupTracker.shared.incrementCount()
        return .result()
    }
}
- Import the
AppIntentsframework - Define a new struct named
IncrementCupIntentthat conforms to theAppIntentprotocol - Define some properties to provide phrases that can trigger the functionality. Describe the needed data for the functionality you make available
- Define the method that performs the functionality. Once performed it will automatically reload the widget.
Step 6 - Create the Widget Extension
Now that we have everything ready the last thing that we need to do is create the new Widget Extension named WaterCupInteractiveWidget.
Add a new widget target to your Xcode project by going to File → New → Target and selecting Widget Extension. Name it WaterCupInteractiveWidget and after creating the target click on Activate on the prompt that will show up to activate the extension scheme.
In the file called WaterCupInteractiveWidget.swift replace all the code with the following code:
import WidgetKit
import SwiftUI

// 1. Create the Timeline Entry
struct WaterCupEntry: TimelineEntry {
    let date: Date
    var count: Int
}

// 2. Define the Timeline Provider
struct WaterCupProvider: TimelineProvider {

    func placeholder(in context: Context) -> WaterCupEntry {
        WaterCupEntry(date: Date(), count: WaterCupTracker.shared.currentCount())
    }

    func getSnapshot(in context: Context, completion: @escaping (WaterCupEntry) -> ()) {
        completion(WaterCupEntry(date: Date(), count: WaterCupTracker.shared.currentCount()))
    }

    func getTimeline(in context: Context, completion: @escaping (Timeline<Entry>) -> ()) {
        let timeline = Timeline(entries: [WaterCupEntry(date: Date(), count: WaterCupTracker.shared.currentCount())], policy: .never)
        completion(timeline)
    }
}
// 3. Simple View for the Widget
struct WidgetsEntryView: View {
@State var entry: WaterCupProvider.Entry
var body: some View {
VStack{
CupCounterView(count: $entry.count, dimension: 70)
Button(intent: IncrementCupIntent()) {
Text("Add a cup")
}
}
.containerBackground(.fill.tertiary, for: .widget)
}
}
// 4. Define the entry point
struct WaterCupInteractiveWidget: Widget {
    let kind: String = "WaterTrackerExtension"

    var body: some WidgetConfiguration {
        StaticConfiguration(kind: kind, provider: WaterCupProvider()) { entry in
            WidgetsEntryView(entry: entry)
        }
        .supportedFamilies([.systemSmall,.systemMedium])
        .configurationDisplayName("Water Tracker Widget")
        .description("Track your water consumption directly from the Home Screen")
    }
}

#Preview(as: .systemSmall) {
    WaterCupInteractiveWidget()
} timeline: {
    WaterCupEntry(date: .now, count: 1)
    WaterCupEntry(date: .now, count: 5)
}
- Define a
TimelineEntrymade up of two properties :dateandcountrespectively ofDateandInttype. - Define a
TimelineProviderwith all the necessary methods. This widget will be manually reloaded after every action so we don’t need to define a time interval to update the widget. For this reason, the reload policy is set on.never - Define a view with the droplet icon and a button that will execute the
AppIntentdefined before. - Define the configuration and the appearance of the widget by using the
TimelineProviderand theViewthat we defined before.
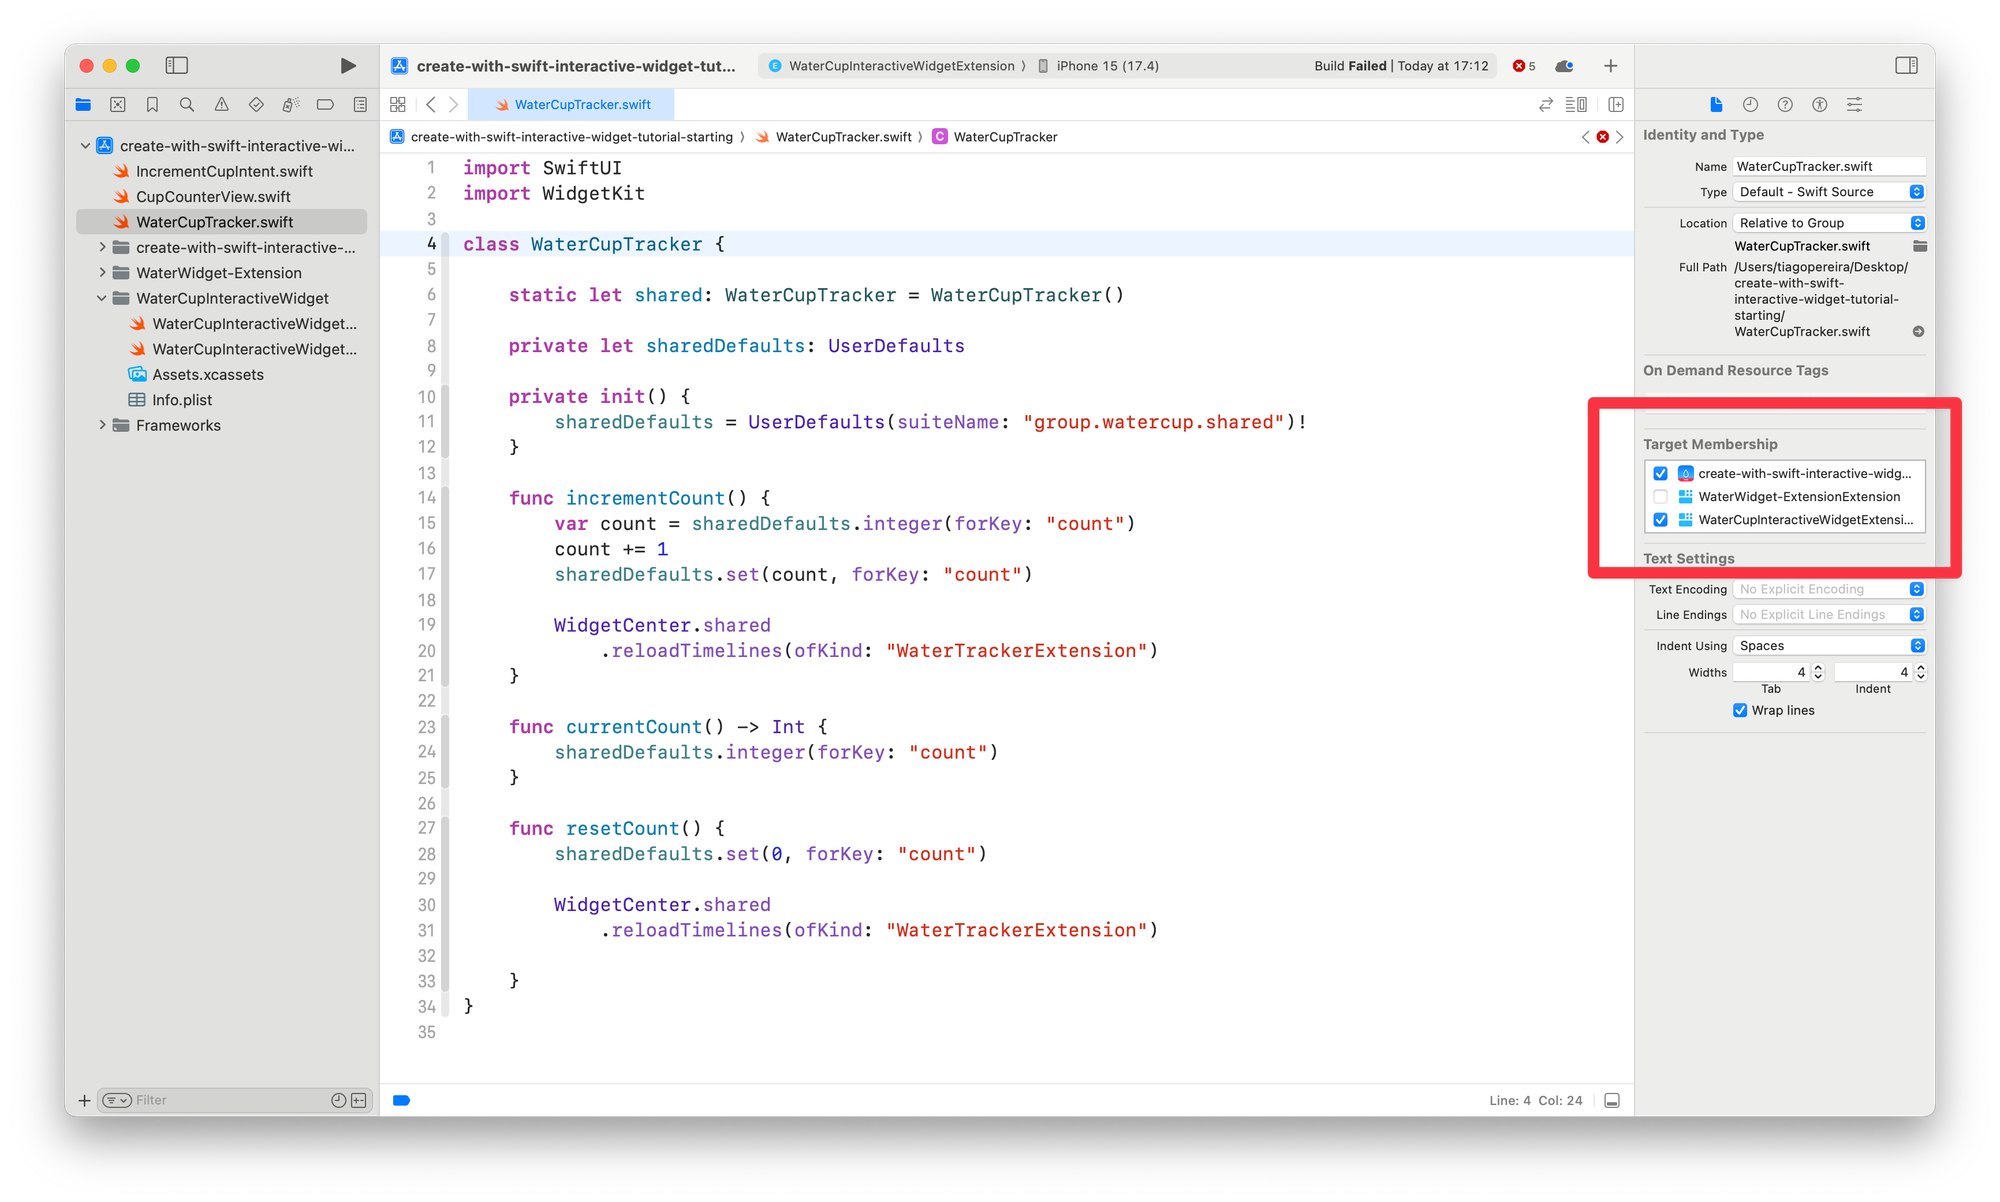
You will notice that the widget cannot find some of the types of the project, so let's fix it.
Setting up the widget target
At the moment you will have multiple errors telling you that Xcode cannot find multiple types of your code in the scope of the target. It can't find the following types:
WaterCupTrackerCupCounterViewIncrementCupIntent
Let's add them to the WaterCupInteractiveWidgetExtension target.
- Select the files WaterCupTracker.swift, CupCounterView.swift, IncrementCupIntent.swift one at a time
- Open the File Inspector on the right sidebar of Xcode
- On the section Target Membership check the WaterCupInteractiveWidgetExtension target
Adding the App Group
After creating the Widget extension we need to repeat step 4 to add the App Groups capability also to the created widget extension.
You must use the same container ID as before: group.watercup.shared.
Conclusion
Now, you're all set to run the app on your devices!
Experiment with incrementing the number of water cups either through the widget on your Home Screen or directly within the app itself.
Using an AppIntent we were able to add a simple button to our widget that updates the ingested water cup counter across both the widget and the app leveraging the App Group capability.