Ensure Visual Accessibility: supporting the Large Content Viewer
Understand what the Large Content Viewer is, how to use it and when.


We have discovered in Supporting Dynamic Type and Larger Text in your app to enhance Accessibility how to take advantage of Dynamic type to accommodate user-preferred text sizes and improve visual accessibility for users with visual impairments who require Larger Text sizes.
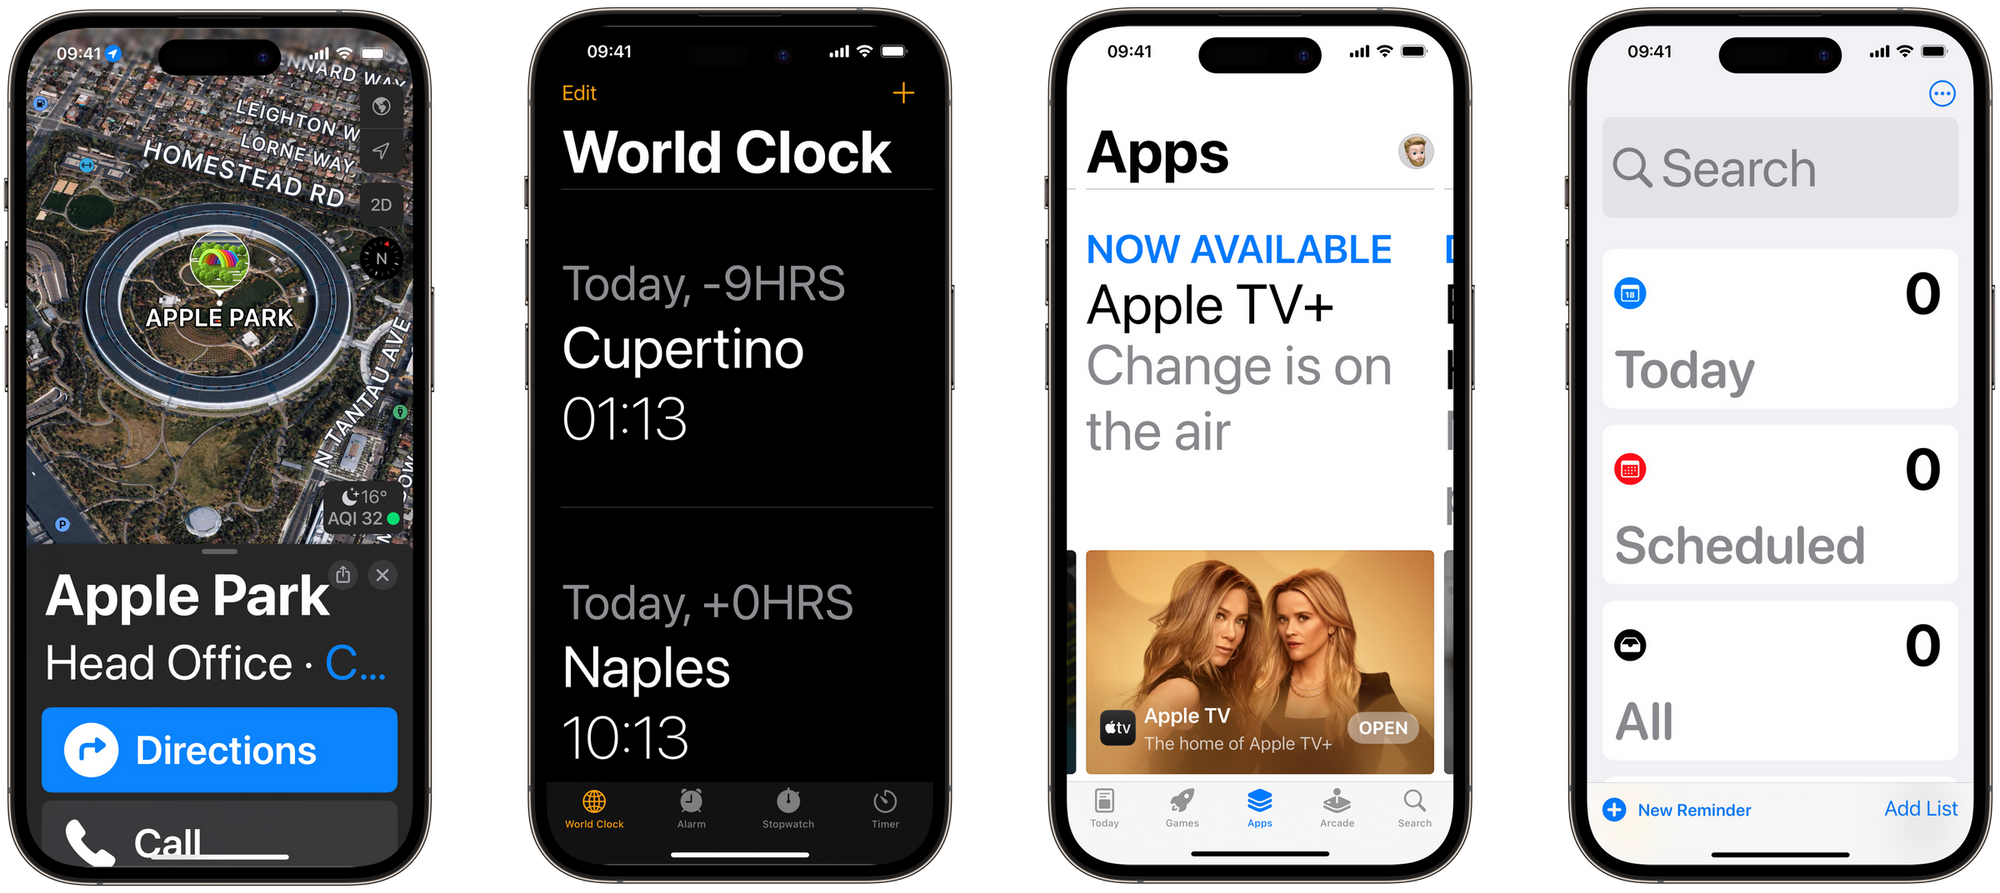
In the example made in the article about Dynamic Type, you can notice that not every element automatically adjusts with the preferred text sizes even if larger text sizes are enabled.
Tab Bar Items, Navigation Bars Items, and Toolbar Items in general don't scale with dynamic type and larger accessibility text sizes.
This is done to ensure that there is sufficient space available for the primary content of the app, while also preventing these items from covering the entire screen.
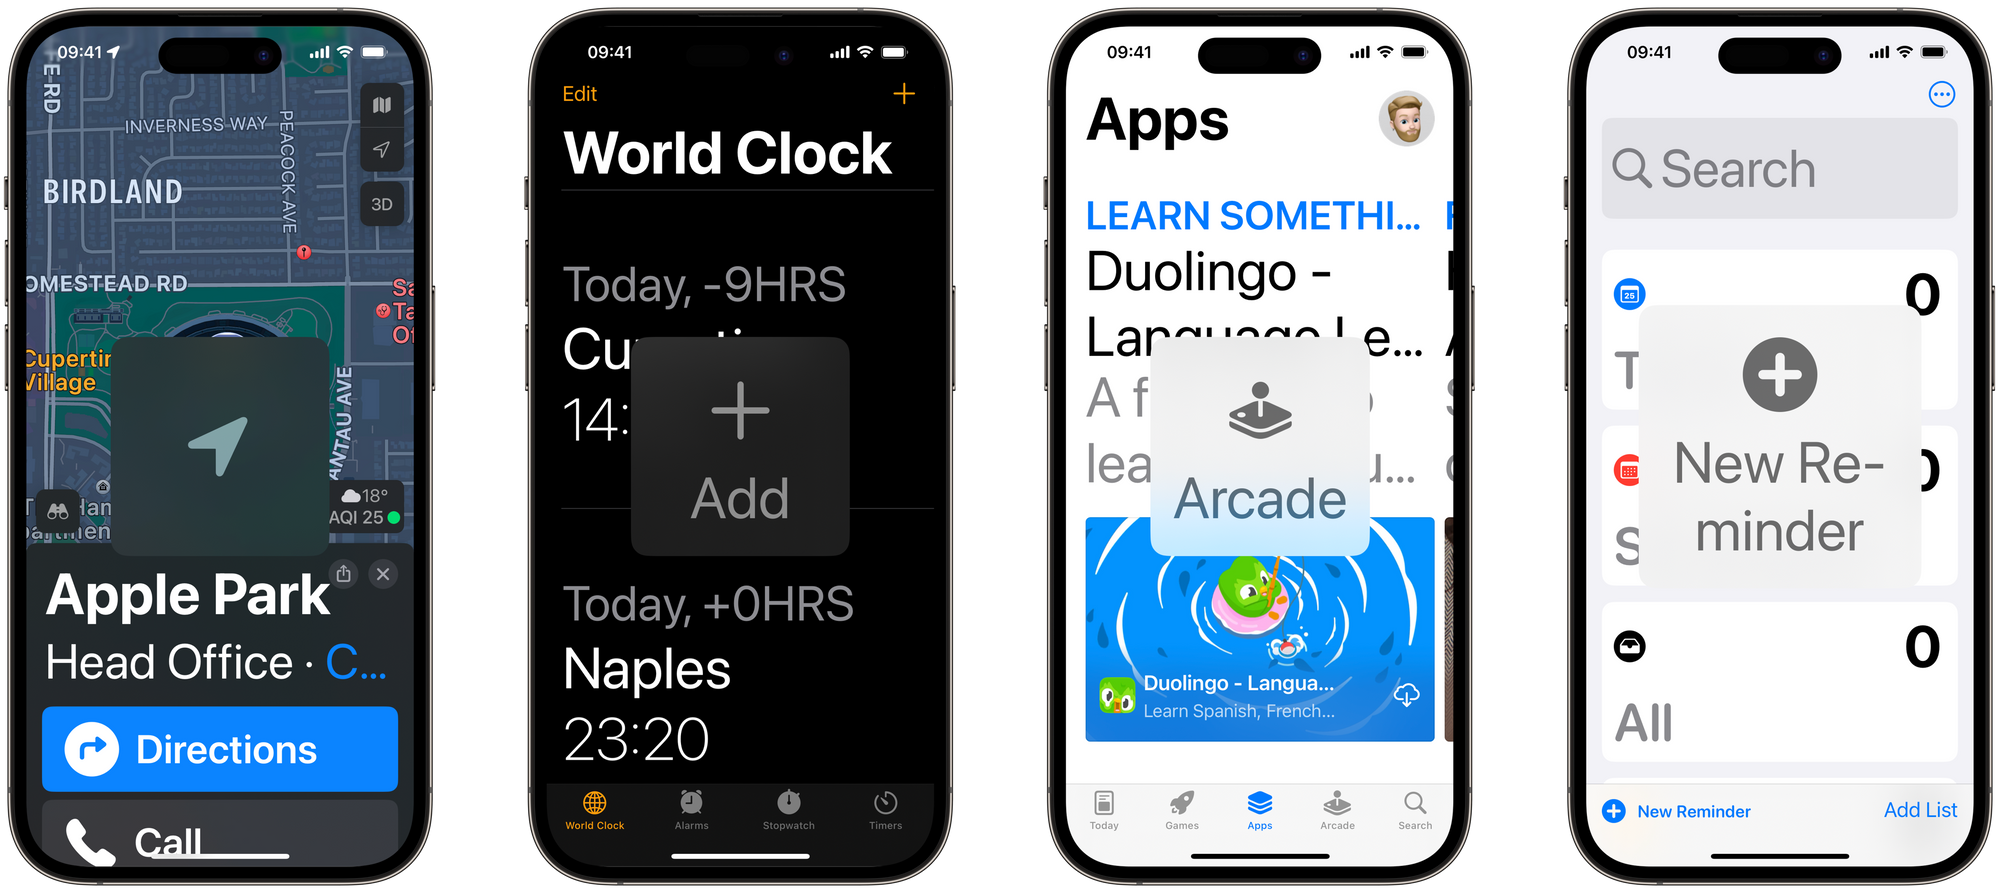
When Larger Text is enabled, the user can tap and hold on any element to view it in the Large Content Viewer. This viewer provides a larger view of the element the user is interacting with and allows the user to perform an action on it as soon as they let go.
How to use it
The Large Content Viewer is shown automatically for standard components like Navigation Bar Items, Tab Bar Items, Toolbar Items and even the Status Bar.
If you’re constraining the text size of elements, or if you are using custom components that should not grow for larger accessibility text sizes, you have to make sure there is support for the Large Content Viewer as well.
Let's explore how this can be achieved in UIKit and SwiftUI.
UIKit
Released in iOS 13, the UILargeContentViewerItem protocol defines all the properties of the view to describe how its Large Content Viewer should be.
var showsLargeContentViewer: Bool
A Boolean value that indicates whether or not to show the item in the large content viewer.var largeContentImage: UIImage?
An image that represents an item to display in the large content viewer.var largeContentTitle: String?
A string that describes an item to display in the large content viewer.var scalesLargeContentImage: Bool
A Boolean value that indicates whether the view scales the item’s image to a larger size or not.var largeContentImageInsets: UIEdgeInsets
Insets to adjust the position of the item’s image so it appears visually centered in the large content viewer.
Specify that the view will show the Large Content Viewer. You just need to set the showsLargeContentViewer property to true.
accessibleView = UIView()
accessibleView.showsLargeContentViewer = true
Specify that the view must show the Large Content Viewer
false by default. Later in the article you will understand why.After that, set the title of the element with the largeContentTitle property and the image that will be presented with the largeContentImage property.
accessibleView = UIView()
accessibleView.showsLargeContentViewer = true

accessibleView.largeContentTitle = "Visually Accessible View"
accessibleView.largeContentImage = UIImage(systemName: "accessibility.fill")
Set the largeContentTitle and largeContentImage properties in UIKit
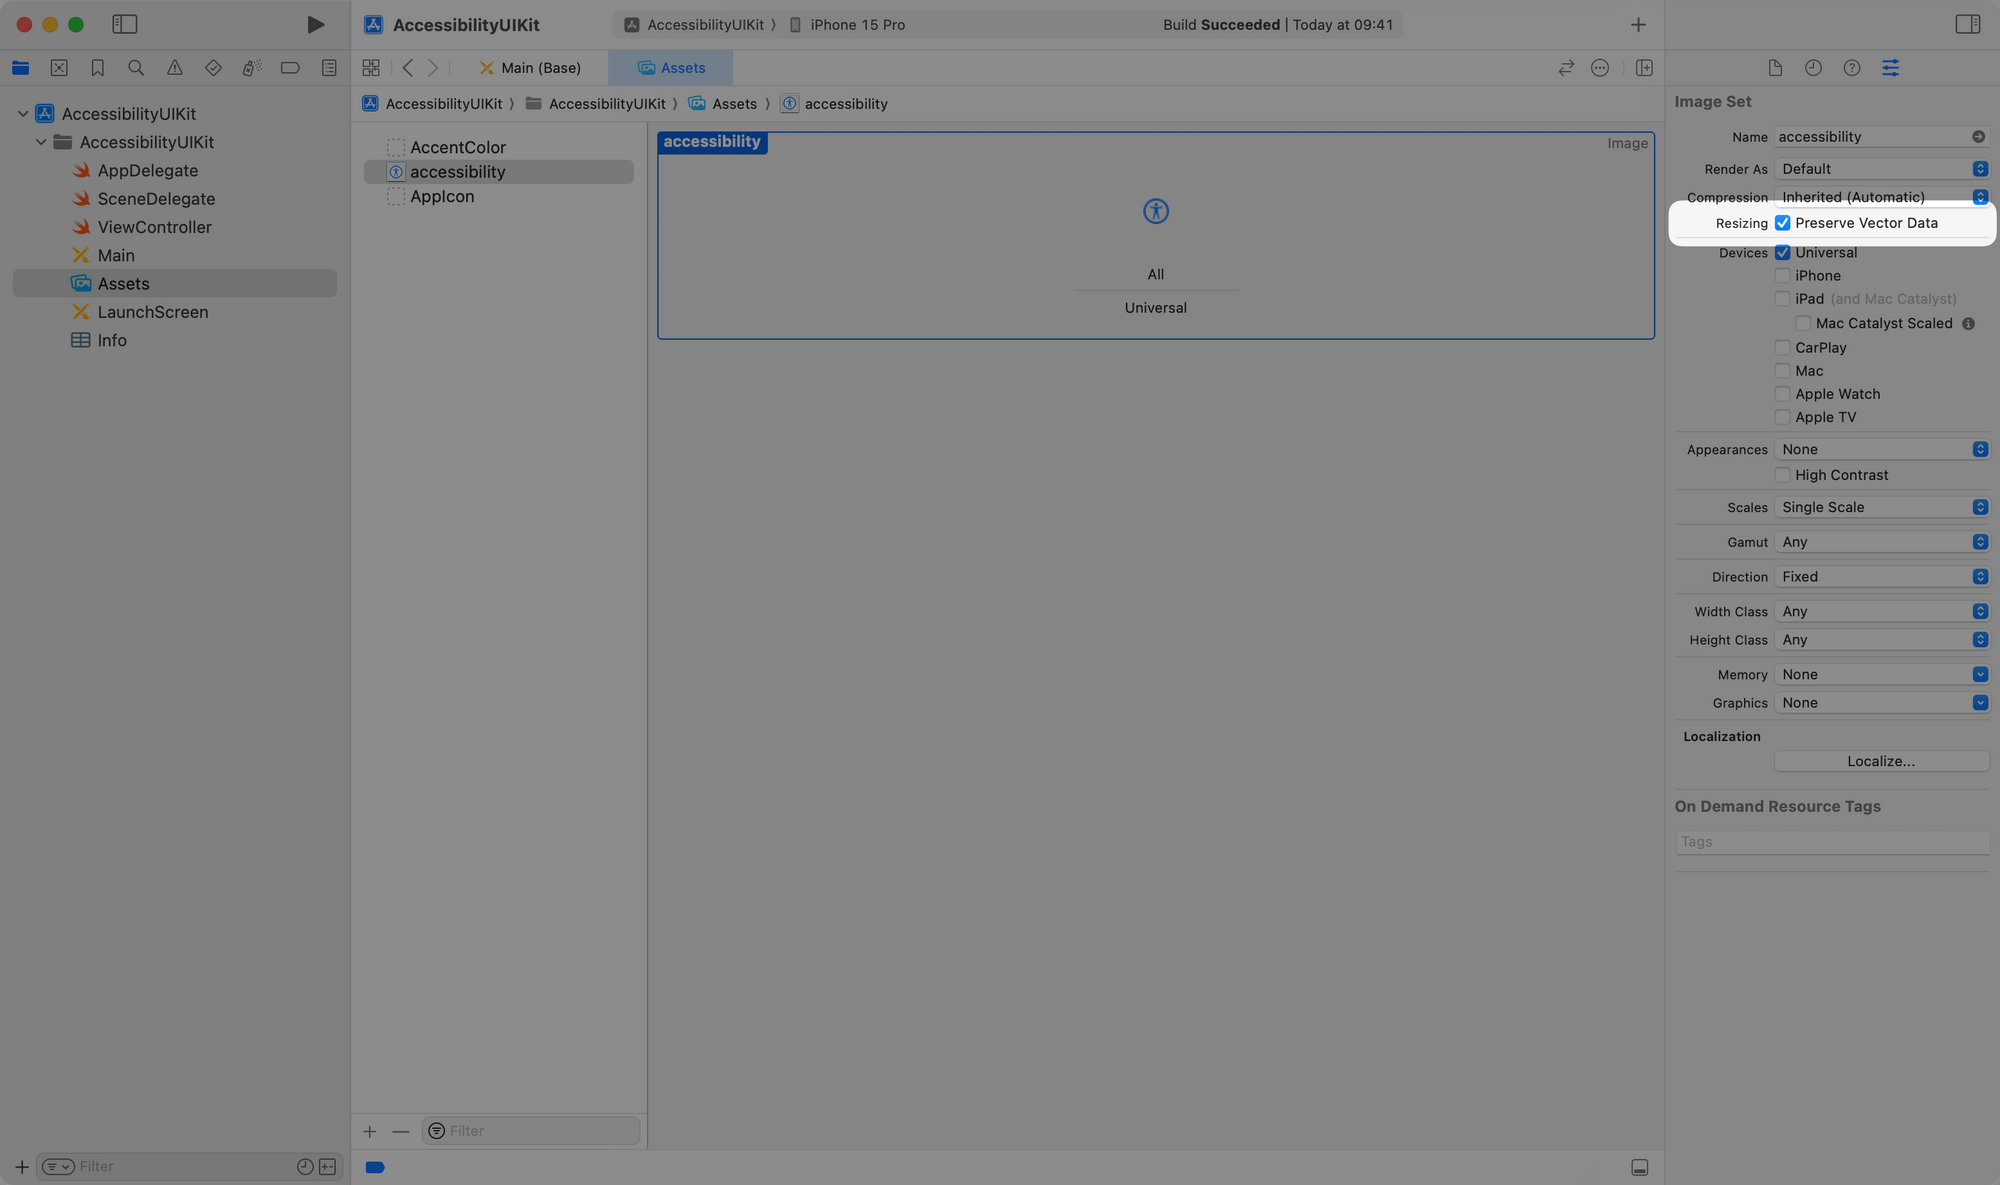
For the large content image is preferable to use SF Symbols since they will automatically scale for the Large Content Viewer. If you want to use your own symbols or a PDF image, make sure to enable the "Preserve Vector Data" option in the asset folder to avoid the symbol becoming blurred.
When setting the image with a PDF file you should also the scalesLargeContentImage property to allow the image to be scaled when presented.
accessibleView.largeContentImage = UIImage(named: "myPDFImage")
accessibileView.scalesLargeContentImage = true
Set the scalesLargeContentImage properties to scale PDF images in UIKit
If necessary, you can set also the largeContentImageInsets property to adjust the position of the item’s image. By default, this property is set to zero so the image will be centered.
Lastly, set up Large Content Viewer Interaction with the element by using the addInteraction method.
accessibleView = UIView()
accessibleView.showsLargeContentViewer = true
accessibleView.largeContentTitle = "Visually Accessible View"
accessibleView.largeContentImage = UIImage(systemName: "accessibility.fill")

accessibleView.addInteraction(UILargeContentViewerInteraction())
Adding the Large Content Viewer Interaction to an element in UIKit
UILargeContentViewerInteraction and add the interaction to the view if you want to use the standard interaction (long-press).SwiftUI
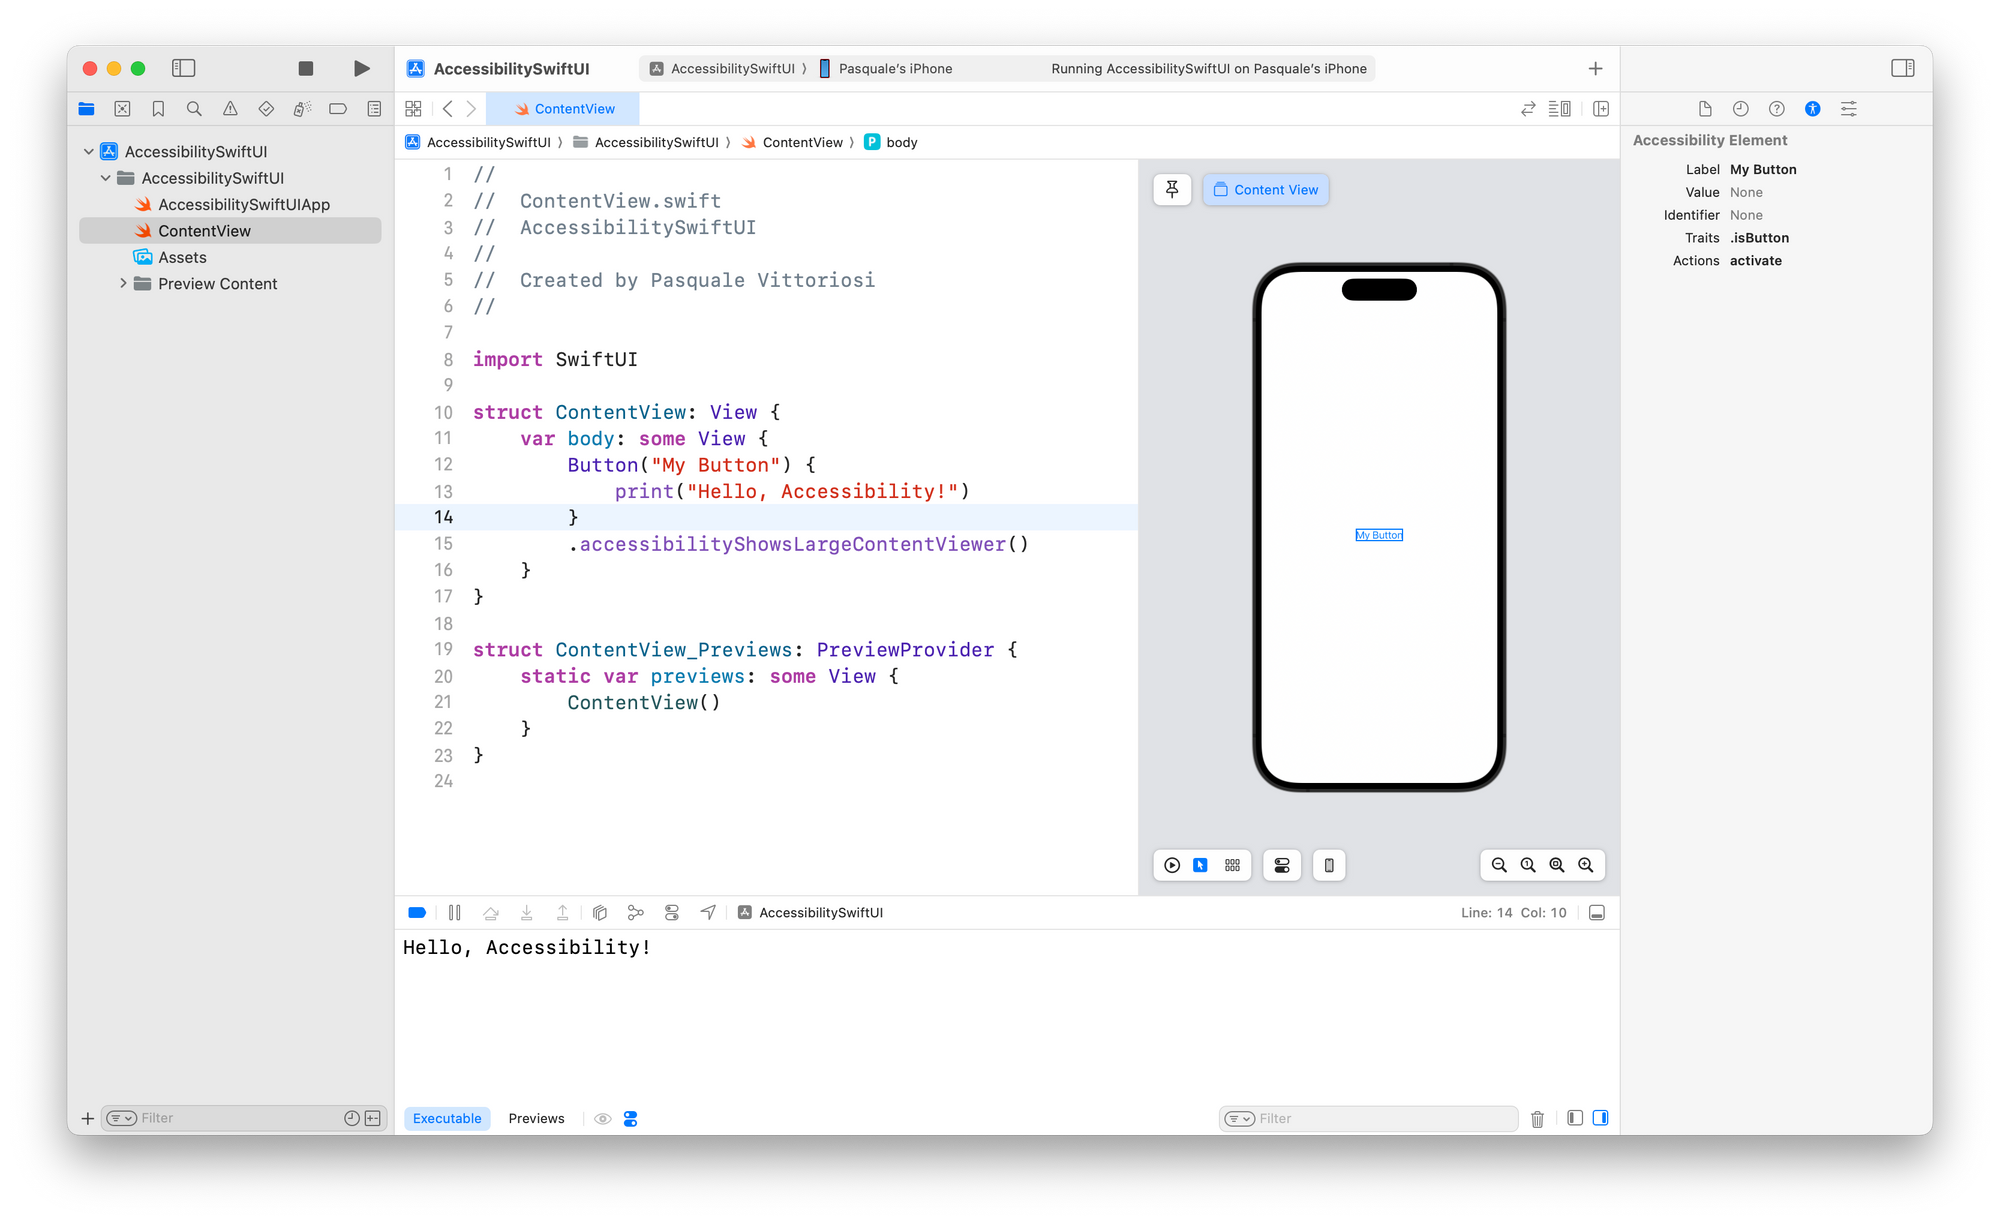
Not all SwiftUI modifiers are strictly related to assistive technologies (like VoiceOver). This is exactly the case of .accessibilityShowsLargeContentViewer().
Button("My Button") {
   print("Hello, Accessibility!")
}
.accessibilityShowsLargeContentViewer()
SwiftUI view modifier to add support to the Large Content Viewer
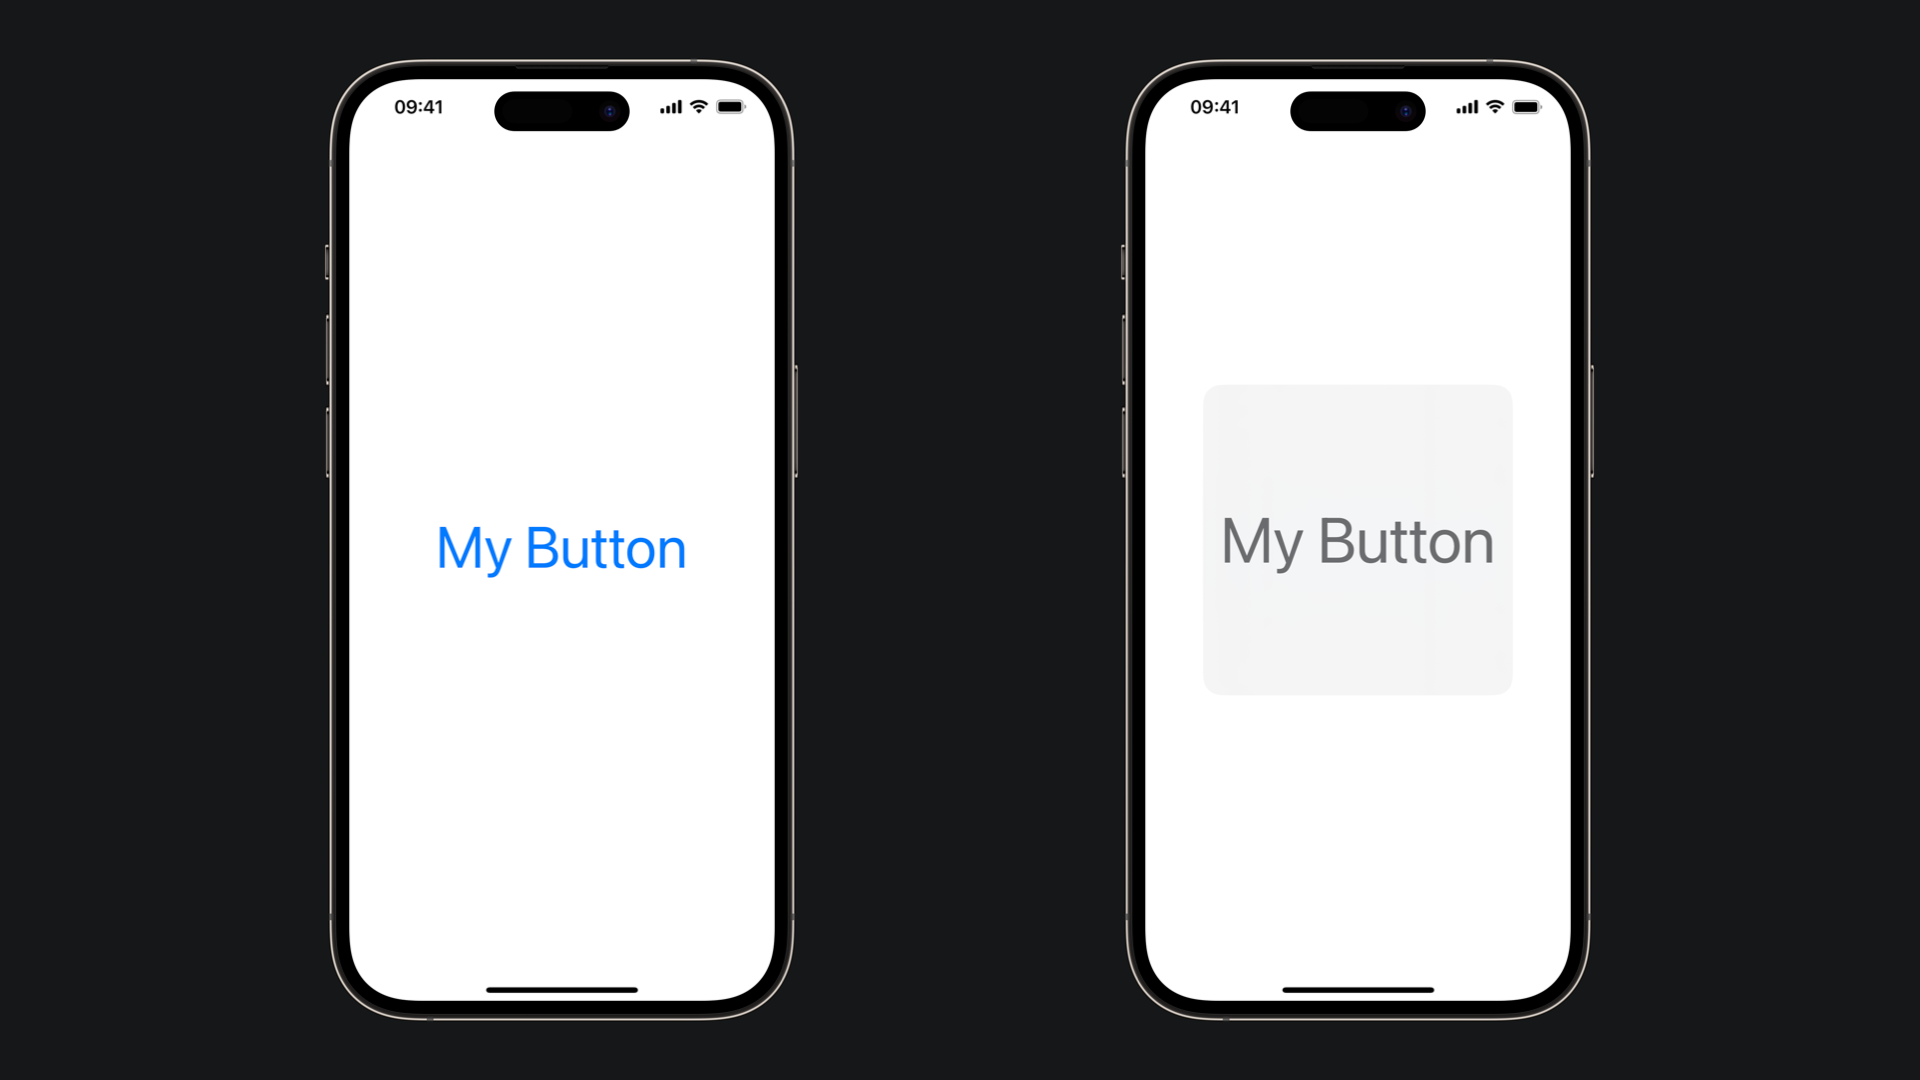
If you tap and hold on the button you will see the Large Content Viewer that will display the inferred text "My Button". As soon as you let go, the action of the button will be performed. In our example, the print("Hello, Accessibility!") will be executed, printing the message in the console.
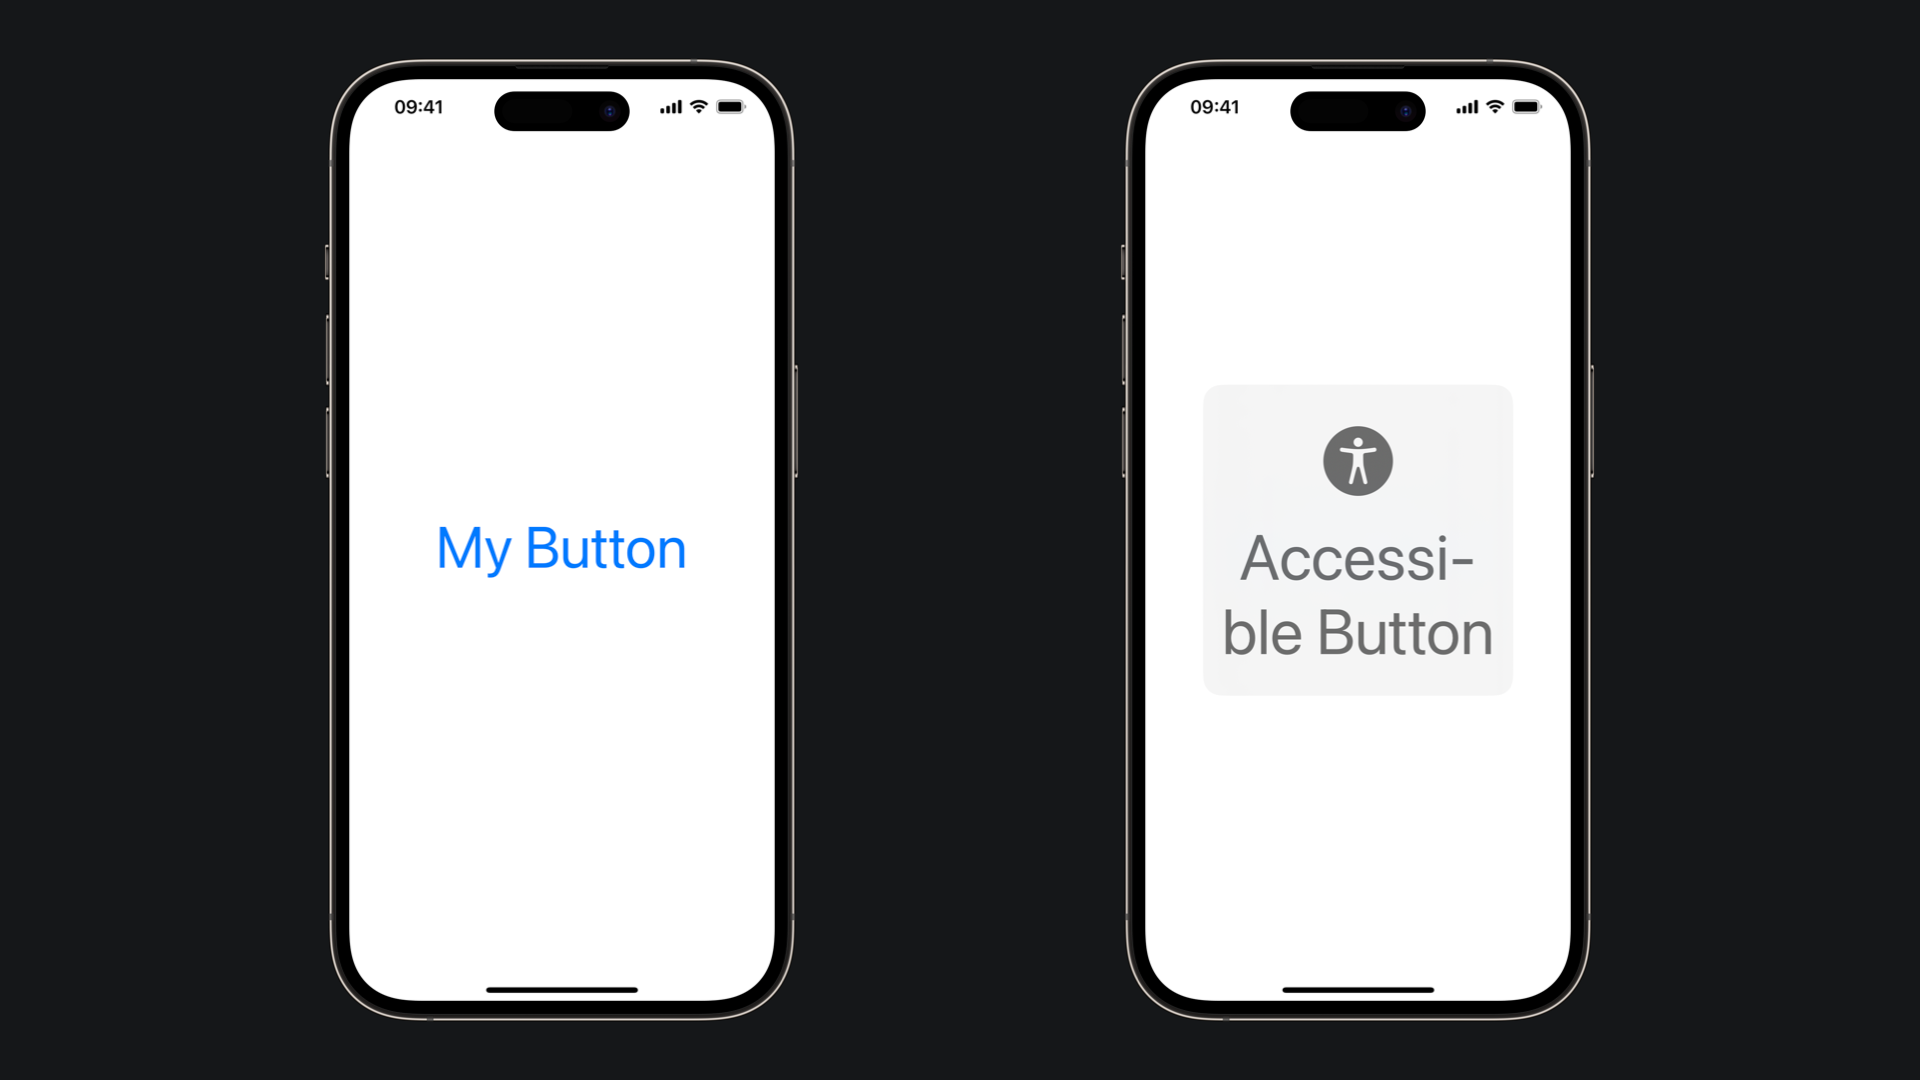
By default, the Large Content Viewer will display the button with its on-screen appearance, which in our instance is solely the text. However, using the accessibilityShowsLargeContentViewer(_:) modifier, we have the flexibility to modify its presentation. For example, combining both an image and a text label might be preferable.
Button("My Button") {
    print("Hello, Accessibility!")
}
.accessibilityShowsLargeContentViewer {
    Label("Accessible Button", systemImage: "accessibility.fill")
}
Support the Large Content Viewer with a specified view in SwiftUI
In SwiftUI, we can use the @Environment property wrapper to read and observe values of the environment that the frameworks create for your app, such as current device locale (device language), color scheme (Light or Dark Mode), dynamic text sizes (preferred text sizes), enabled accessibility options, and many other predefined values, which are available in EnvironmentValues structure.
You can read the accessibilityLargeContentViewerEnabledto check if the Large Content Viewer is enabled.
As stated in the official Apple documentation:
While it is not necessary to check this value before adding a large content view, it may be helpful if you need to adjust the behavior of a gesture. For example, a button with a long press handler might increase its long press duration so the user can read the text in the large content viewer first.
struct AccessibleView: View {

    @Environment(\.accessibilityLargeContentViewerEnabled)
    var largeContentViewerEnabled

    var body: some View {
        Label("Accessibility", systemImage: "accessibility.fill")
            .accessibilityShowsLargeContentViewer()
            .onLongPressGesture(minimumDuration:
                               largeContentViewerEnabled ? 3 : 1) {
            //Long Press action
        }

    }
}
Adjust the behavior of a gesture if Large Content View is enabled in SwiftUI
Dynamic Type and Large Content Viewer
Even if the user has the possibility to use the Large Content Viewer is always preferred to respect the user's preferred text sizes. Use the Large Content Viewer only when strictly necessary for unavoidable design constraints such as not covering a large portion or the entire screen.
Conclusion
In the world of app development, it's often the fine details that elevate an app from being good to exceptional. Features like the Large Content Viewer might appear like a minor thing to some, but they embody our belief that every user, regardless of their abilities or needs, should be able to seamlessly and fully engage with our apps.
After supporting Dynamic Type, it is also important to support the Large Content Viewer for every element that has been constrained to a specific text size or for your custom components. This will take your app one step closer to being more accessible... one feature at a time!