Static Site Generation with Swift using Publish, Plot and Ink
By the end of this tutorial, you will be able to create static websites generated with Swift using Publish, Plot and Ink.

I have been using Publish, a static site generator for Swift developers, by John Sundell, in recent months to generate JavaScript-free websites with just HTML and CSS from Markdown files. Publish uses Ink, a Markdown parser written in Swift, and Plot, a domain-specific language (DSL) for writing type-safe HTML, XML, and RSS in Swift, which was recently updated to build HTML components in a more SwiftUI like fashion.
Publish is provided as a Swift package and can be used with the Swift Package Manager by adding the package as a dependency within the Package.swift manifest:
let package = Package(
    ...
    dependencies: [
        .package(url: "https://github.com/johnsundell/publish.git", from: "0.1.0")
    ],
    ...
)
However, the easiest way to get started is using the command-line tool to set up new projects and deploy websites. To use the command-line tool, clone the Publish repository and run make in the local folder of the repository:
$ git clone https://github.com/JohnSundell/Publish.git
$ cd Publish
$ make
The command publish help provides instructions on how to use it. The basic publish new command will create a new project at the current location, which can then be edited in Xcode using the open Package.swift command.
$ mkdir AmazingWebsite
$ cd AmazingWebsite
$ publish new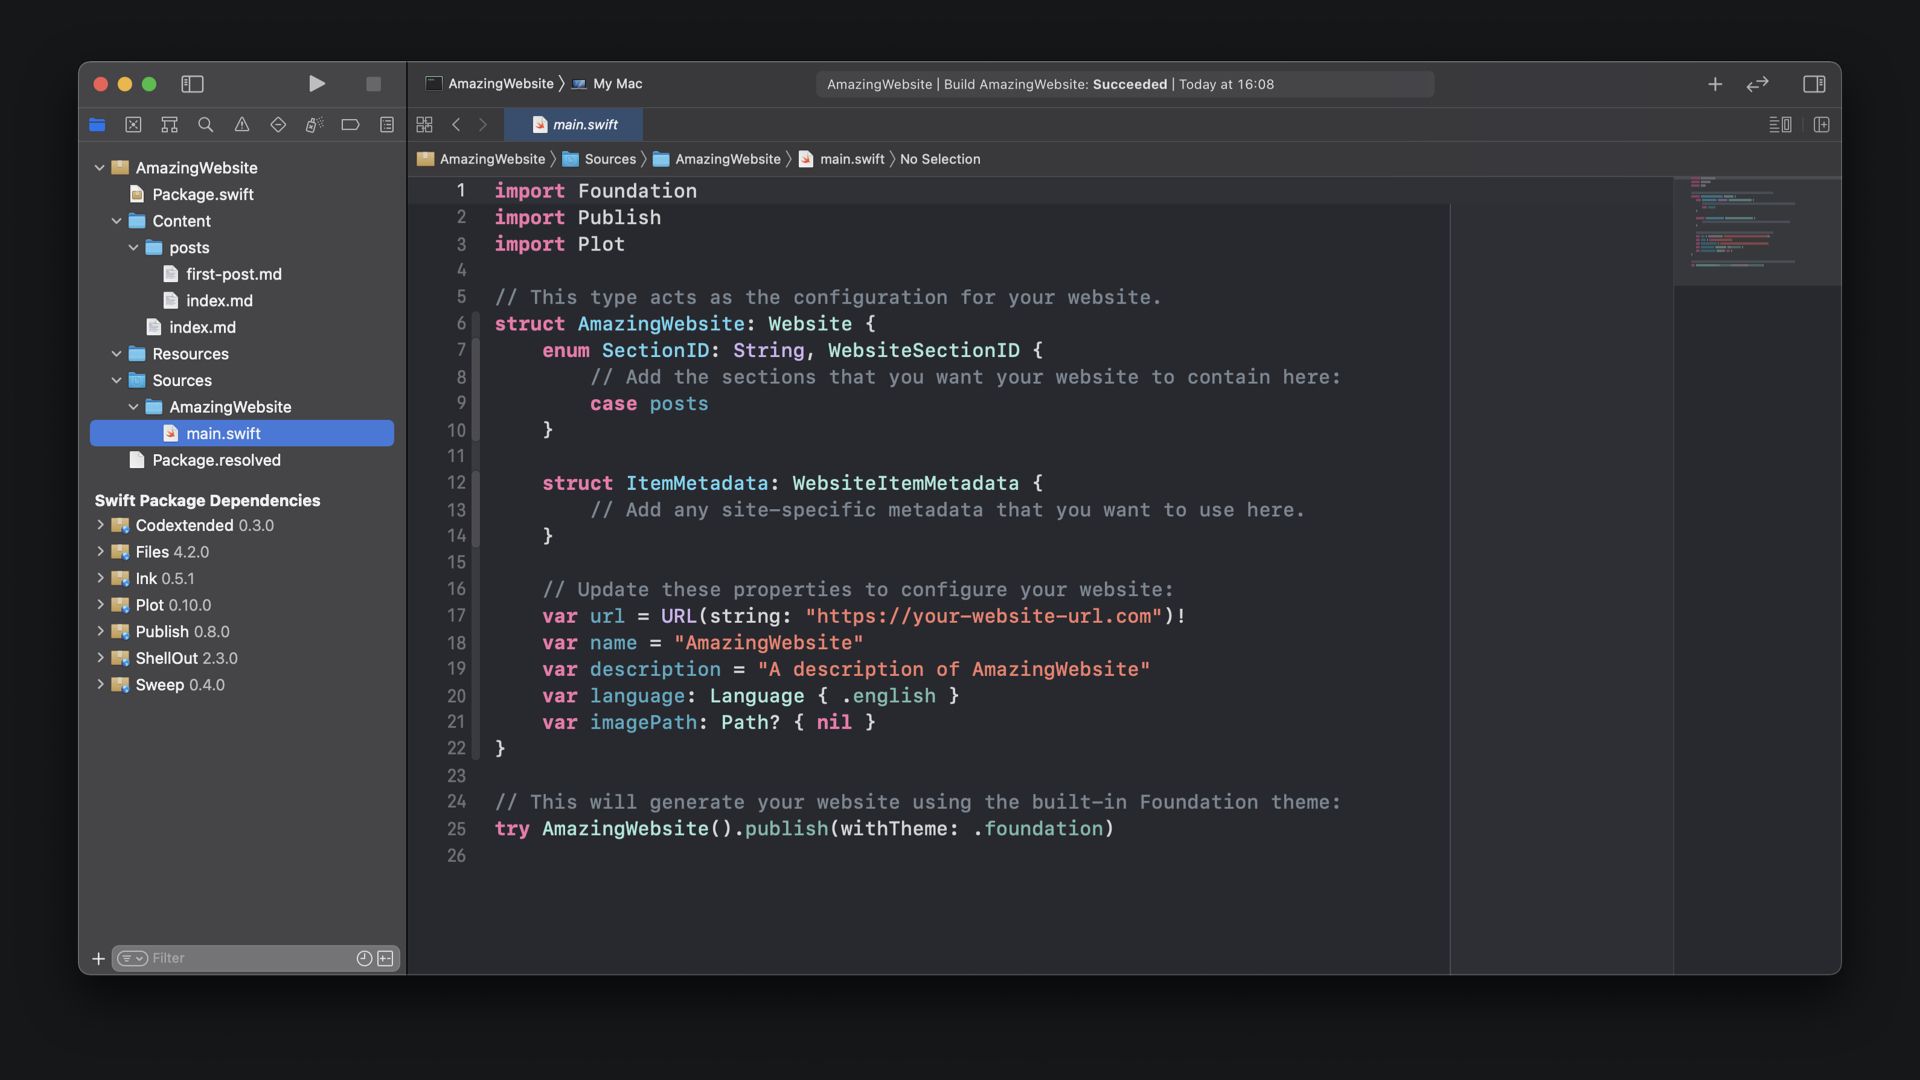
Now, let's have a closer look at how it works in detail.
The main.swift file contains the basic configuration of the Website and defines sections and metadata that you may want to use on it. Beyond that, you can define the website's URL (url), which will be used as the base URL for all links within the website.
You can provide a name for the website as well as a description, which will appear on the front page. Beyond that, the default configuration will allow you to define the site's language, as well as the default imagePath to the resources used in it. Lastly, the file contains the publishing pipeline that can be configured in several ways to customize the process of generating the static site.
Adding content to the site
The project comes with a number of folders that contain the files used to build the static site, these are:
- Content
- Resources
- Sources
The Content folder contains the content of the website. Content is added to the site using .md markdown files, which will then be converted to HTML in the publishing process. Ink parses the markdown and Plot creates the HTML. The Resources folder contains any resources the website may use, for example, images or CSS files. Lastly, the Sources folder contains all the source files to build the project, for example, the main.swift file or additional files that define custom HTML themes or additional functionality that is not added through Swift packages.
In the Content folder, there is a first-post.md file, which is the markdown file of the first post in the post's category of the website. You can add content to this file as you wish, using markdown syntax.
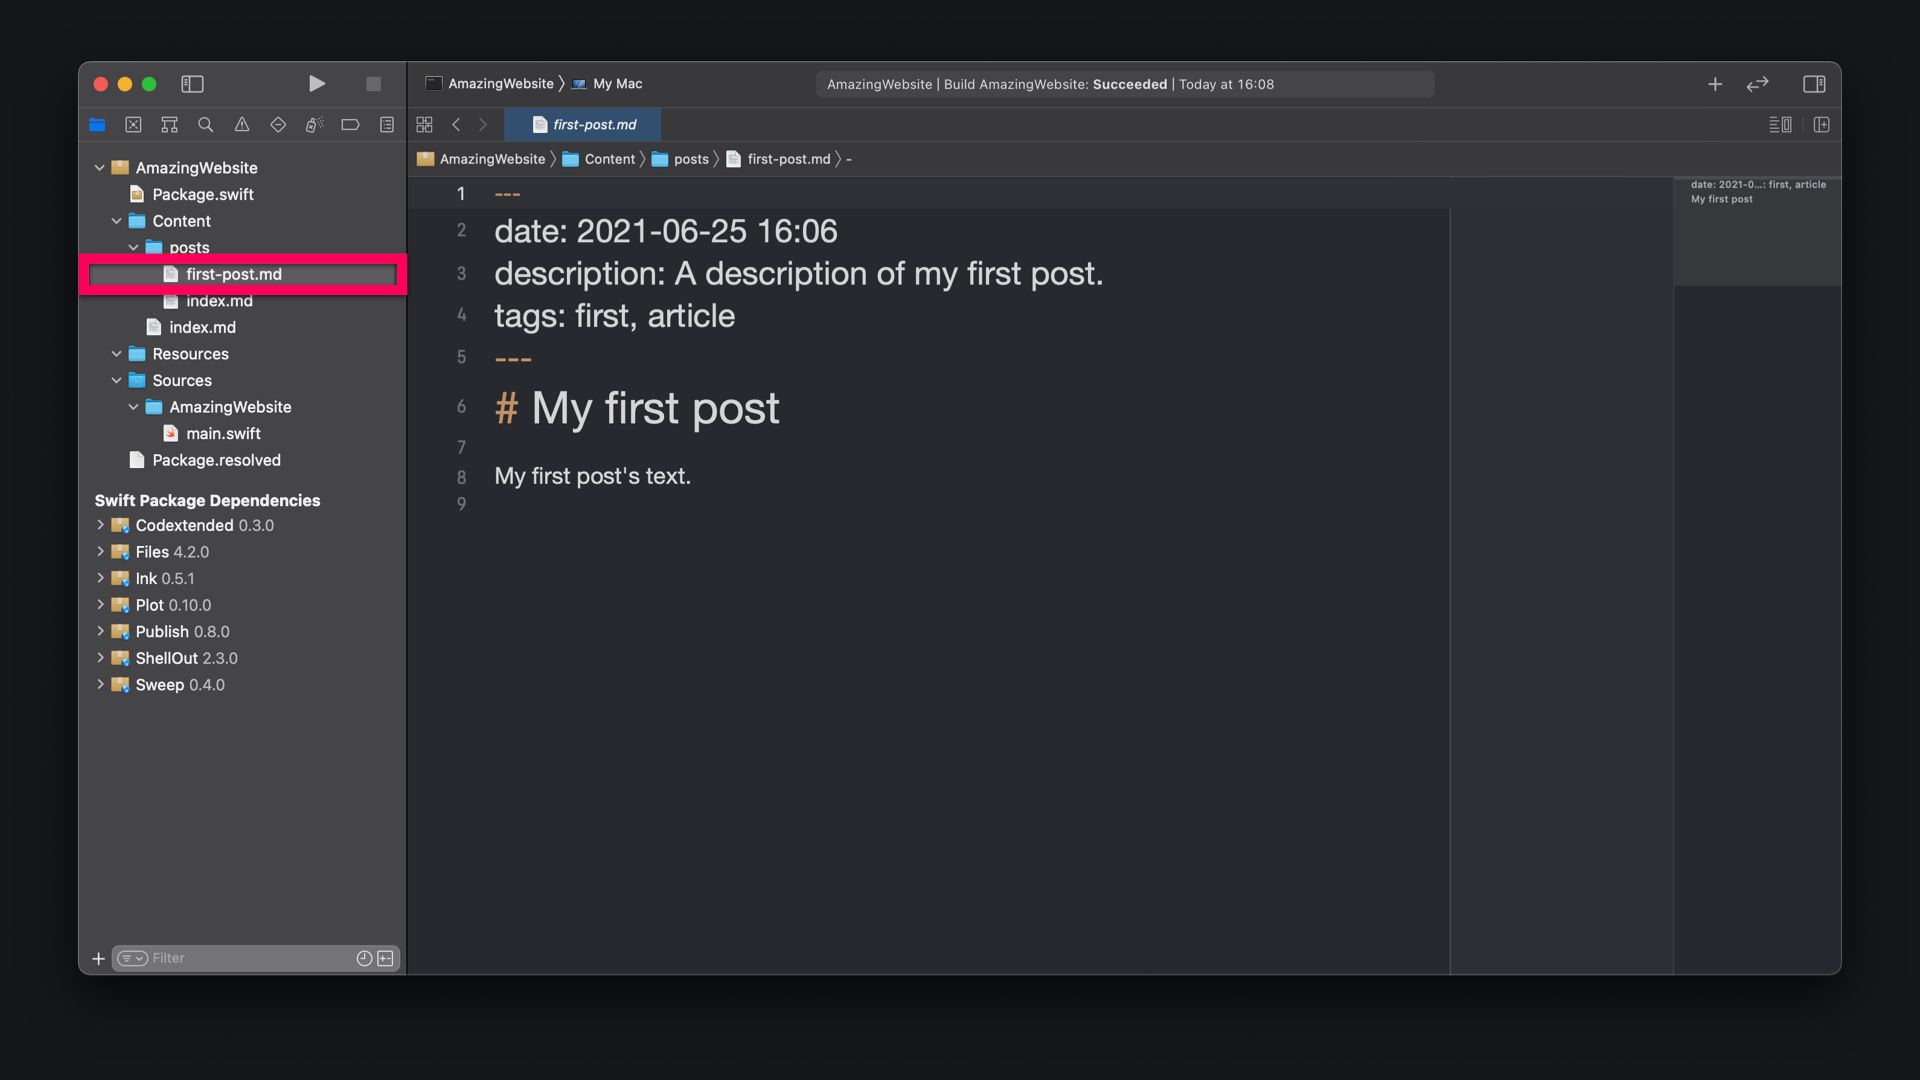
The top section of any markdown file in a Publish project uses specific syntax to define the metadata of each page, for example, the date, description, and tags of the article. Per default behavior, Publish will use the date to sort the articles in the posts section and the description as a preview text in the list of all articles. With tags, custom lists per tag can be accessed. All in all, pretty straightforward behavior.
Once editing is done, the static page can be generated via the command line, using the publish run command. Since the site is run locally, it will be made available at http://localhost:8000 by Publish, once the publication pipeline has been completed.
$ publish run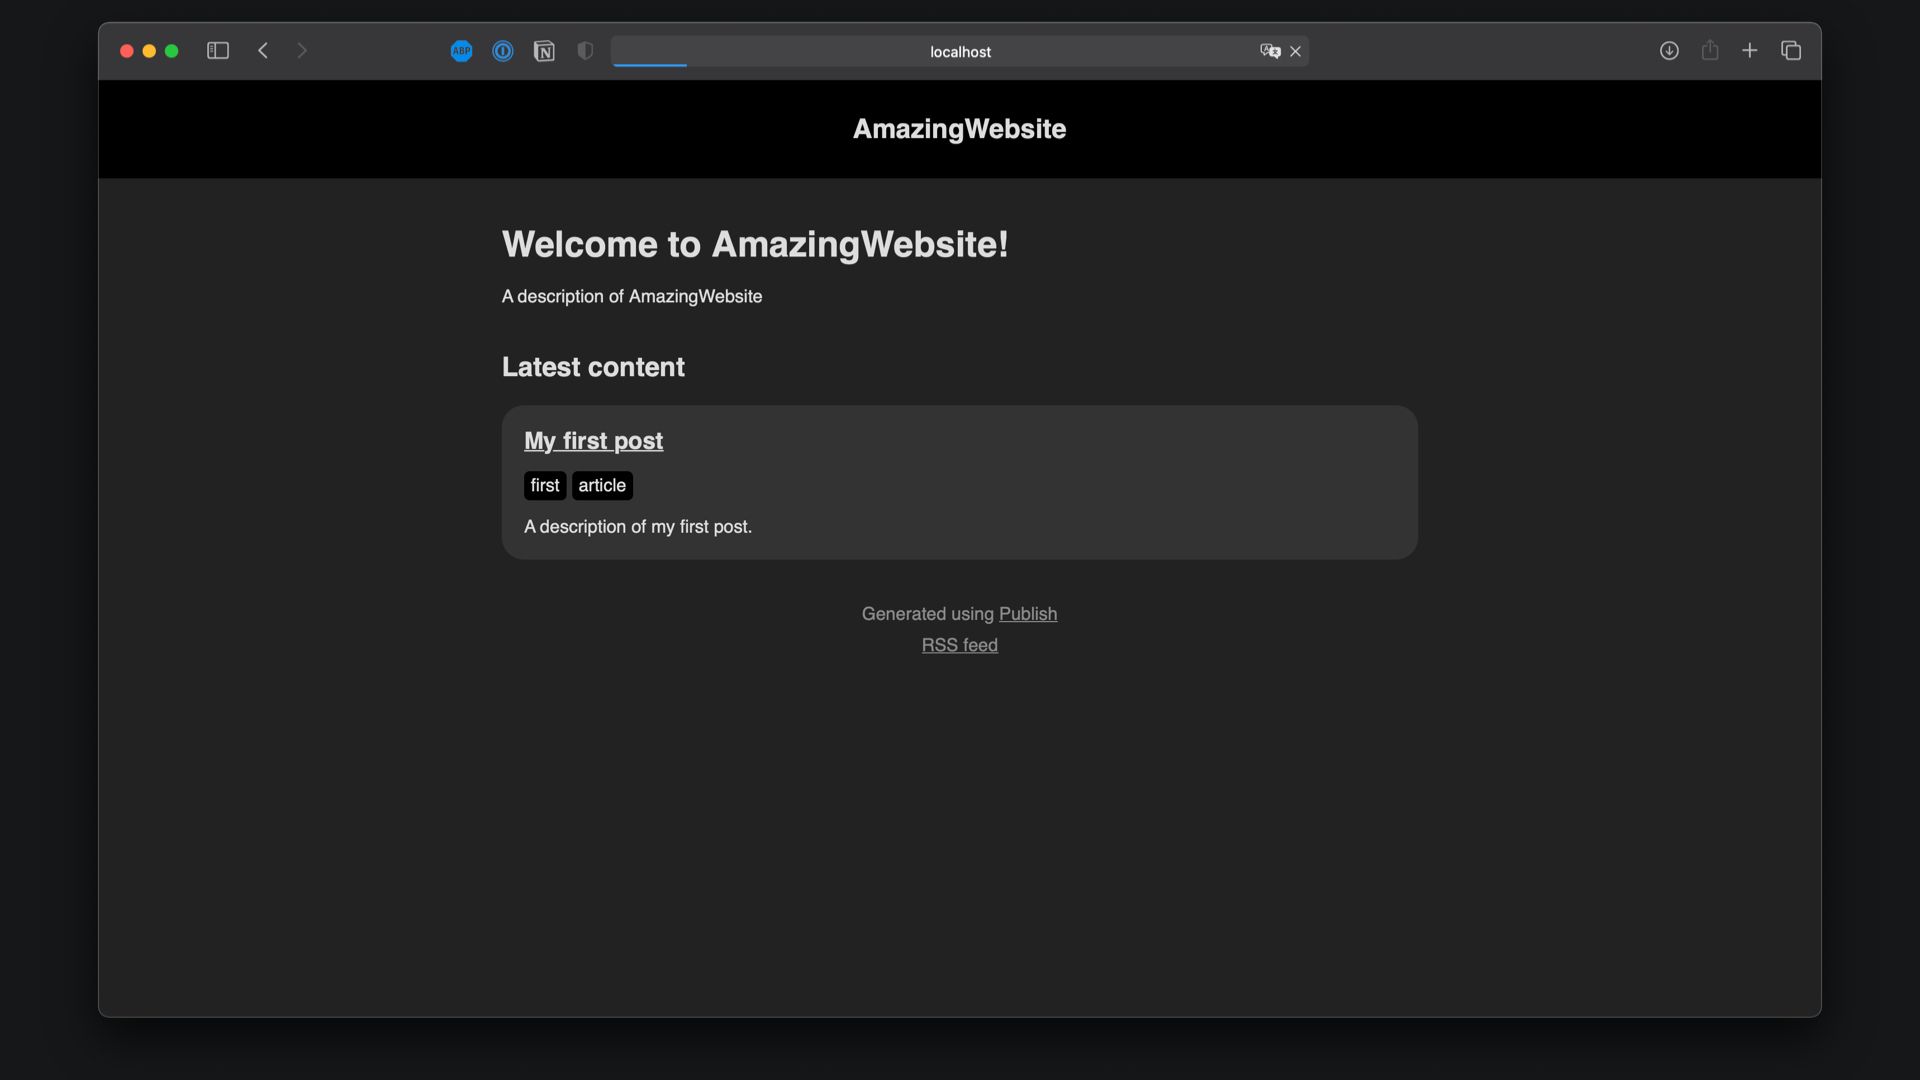
Adding sections to the site
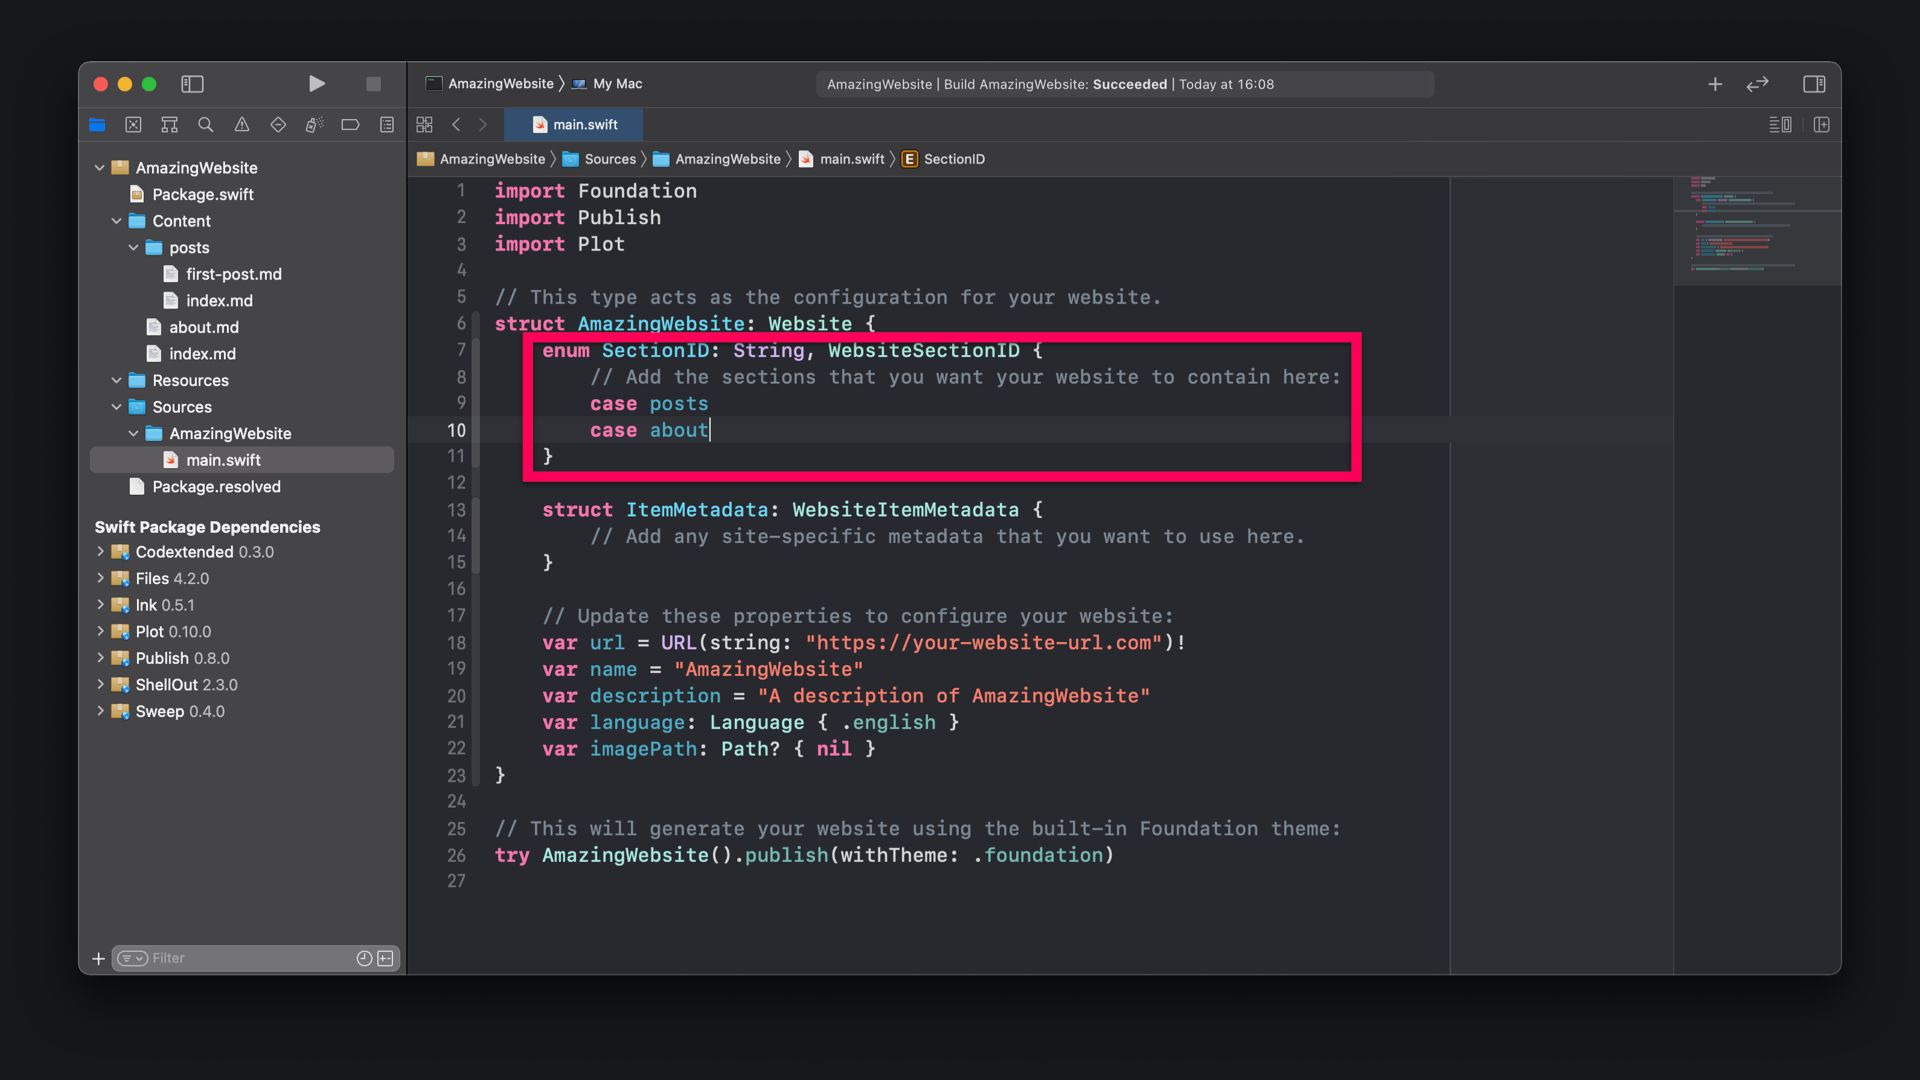
You can of course add additional sections to the website. For this, you have to edit the Website struct in the main.swift file by adding a new case. In this example, I am adding a new section called about to add an about page to the website
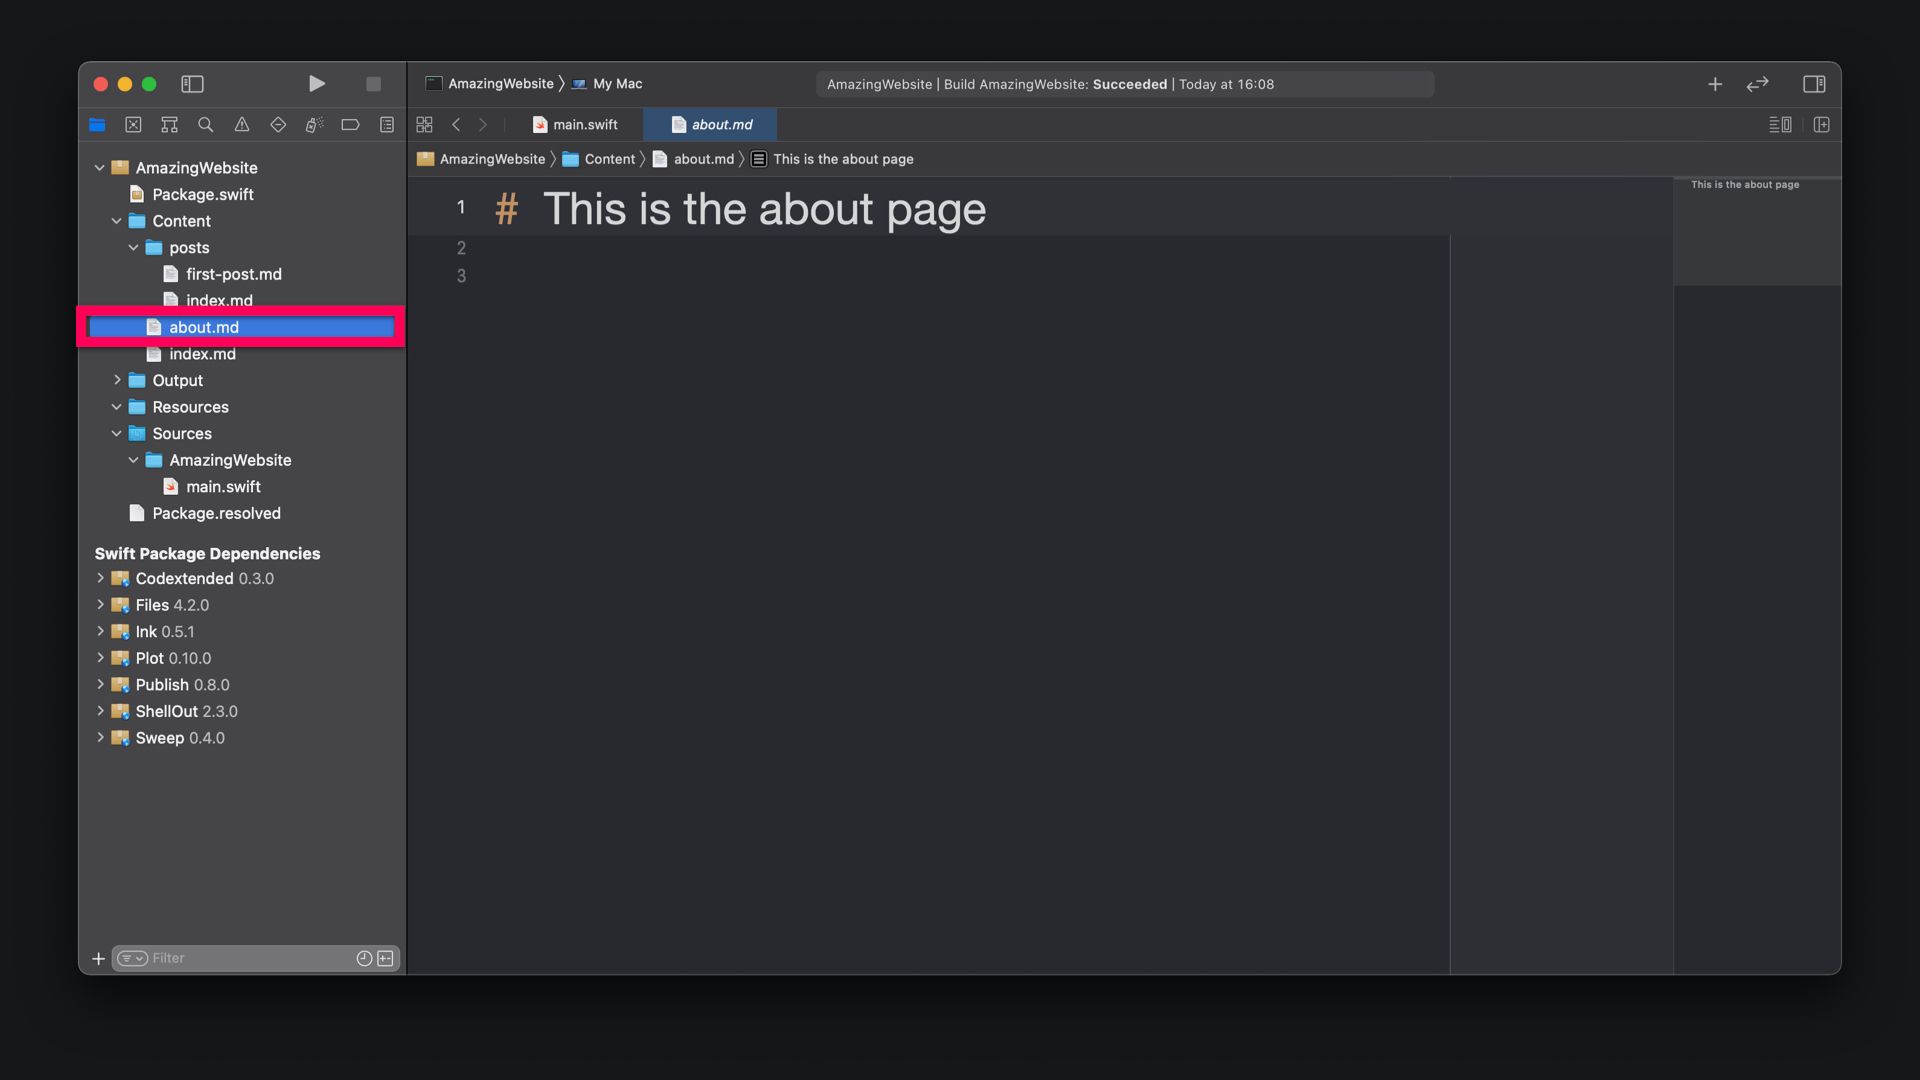
Then, in the Content folder, you can create a new about.md file and add the content for the about page using the markdown syntax. This will result in a static single page that is available under the /about slug of the website. Since it is a static site, the metadata on the top of the file is not necessary.
Alternatively, you can create a second category with child articles by replicating the structure of the post's category. For this, you need to create a new folder for the category and an index.md file inside to then add individual markdown files for each article in the category. For this example, we keep it at a static page.
Of course, you can also add images to your posts and pages with the markdown syntax. The appropriate image files have to be either at a publicly available URL on the web or be placed in the Resources folder with relative URLs.
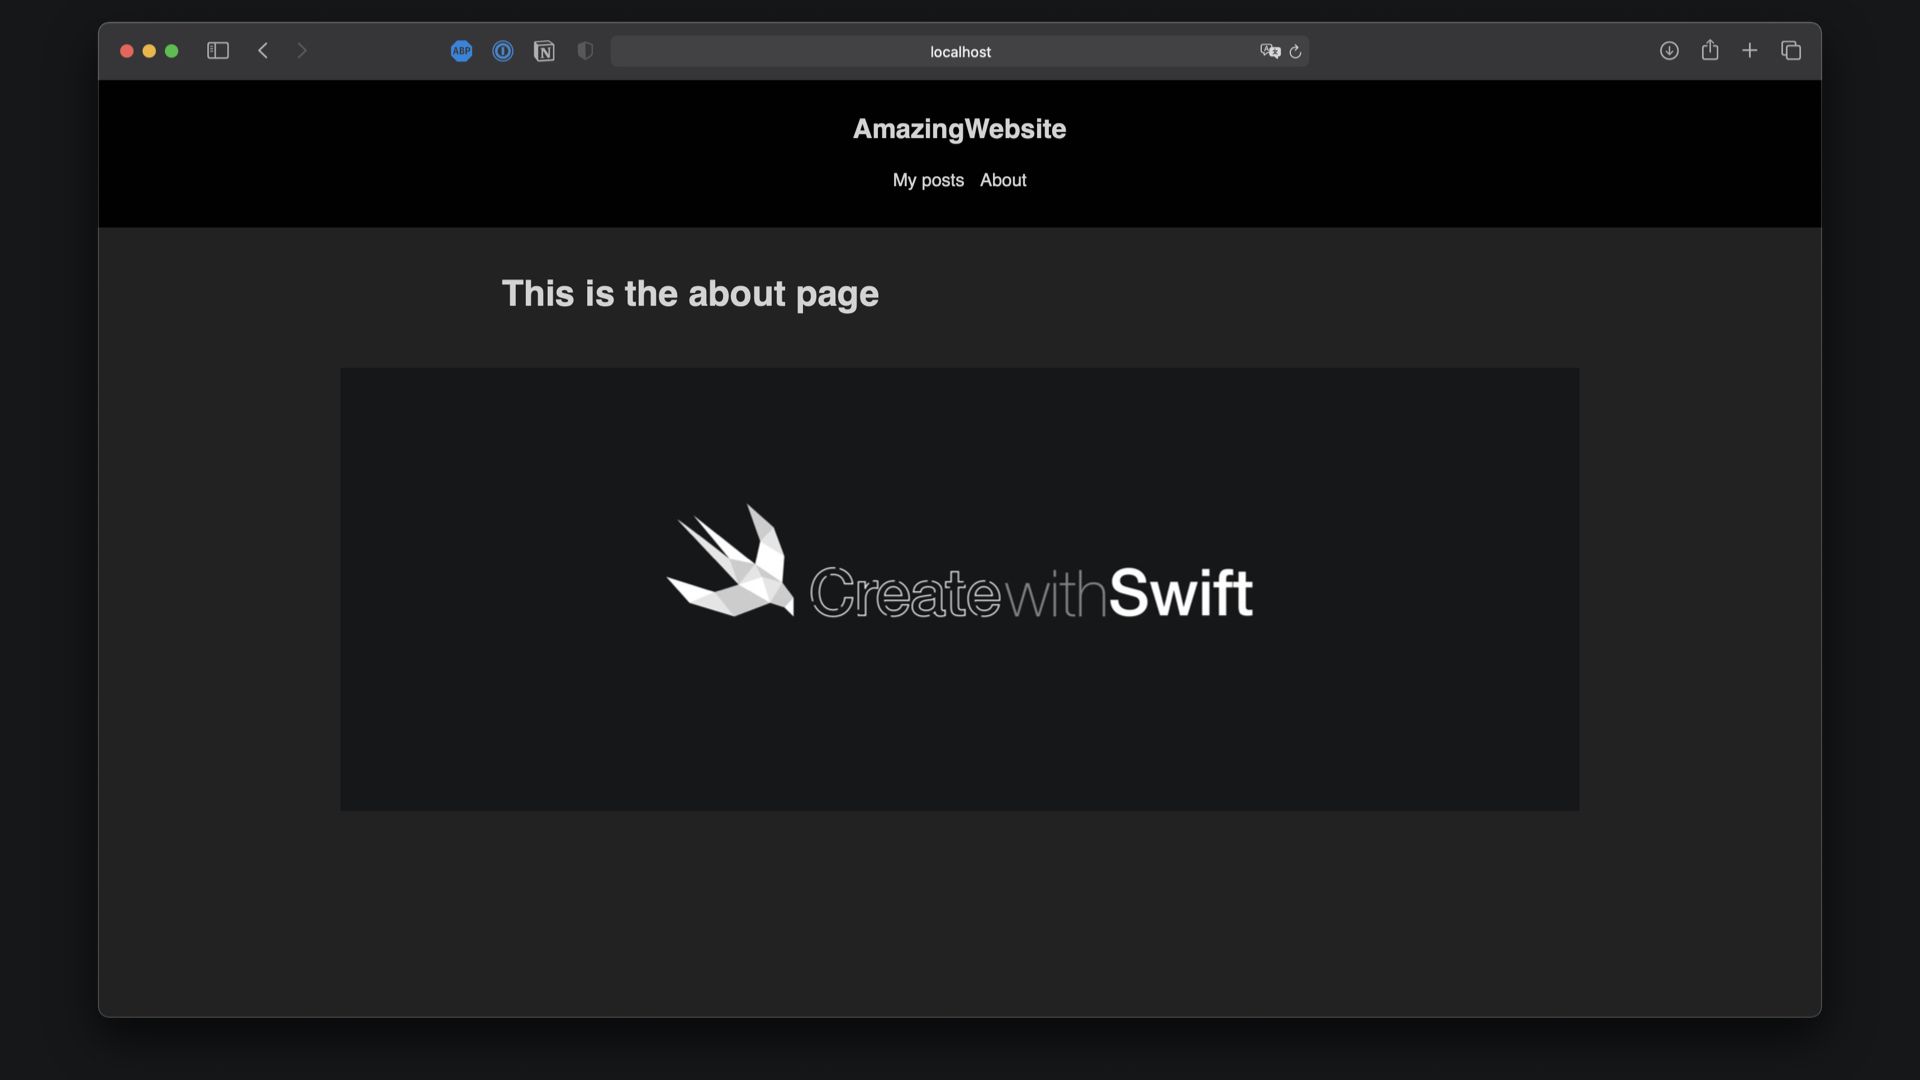
Then, when running the publishing pipeline again, the website will be built with a new about section in the header menu and the static content being rendered inside.
Adding syntax highlighting to the site
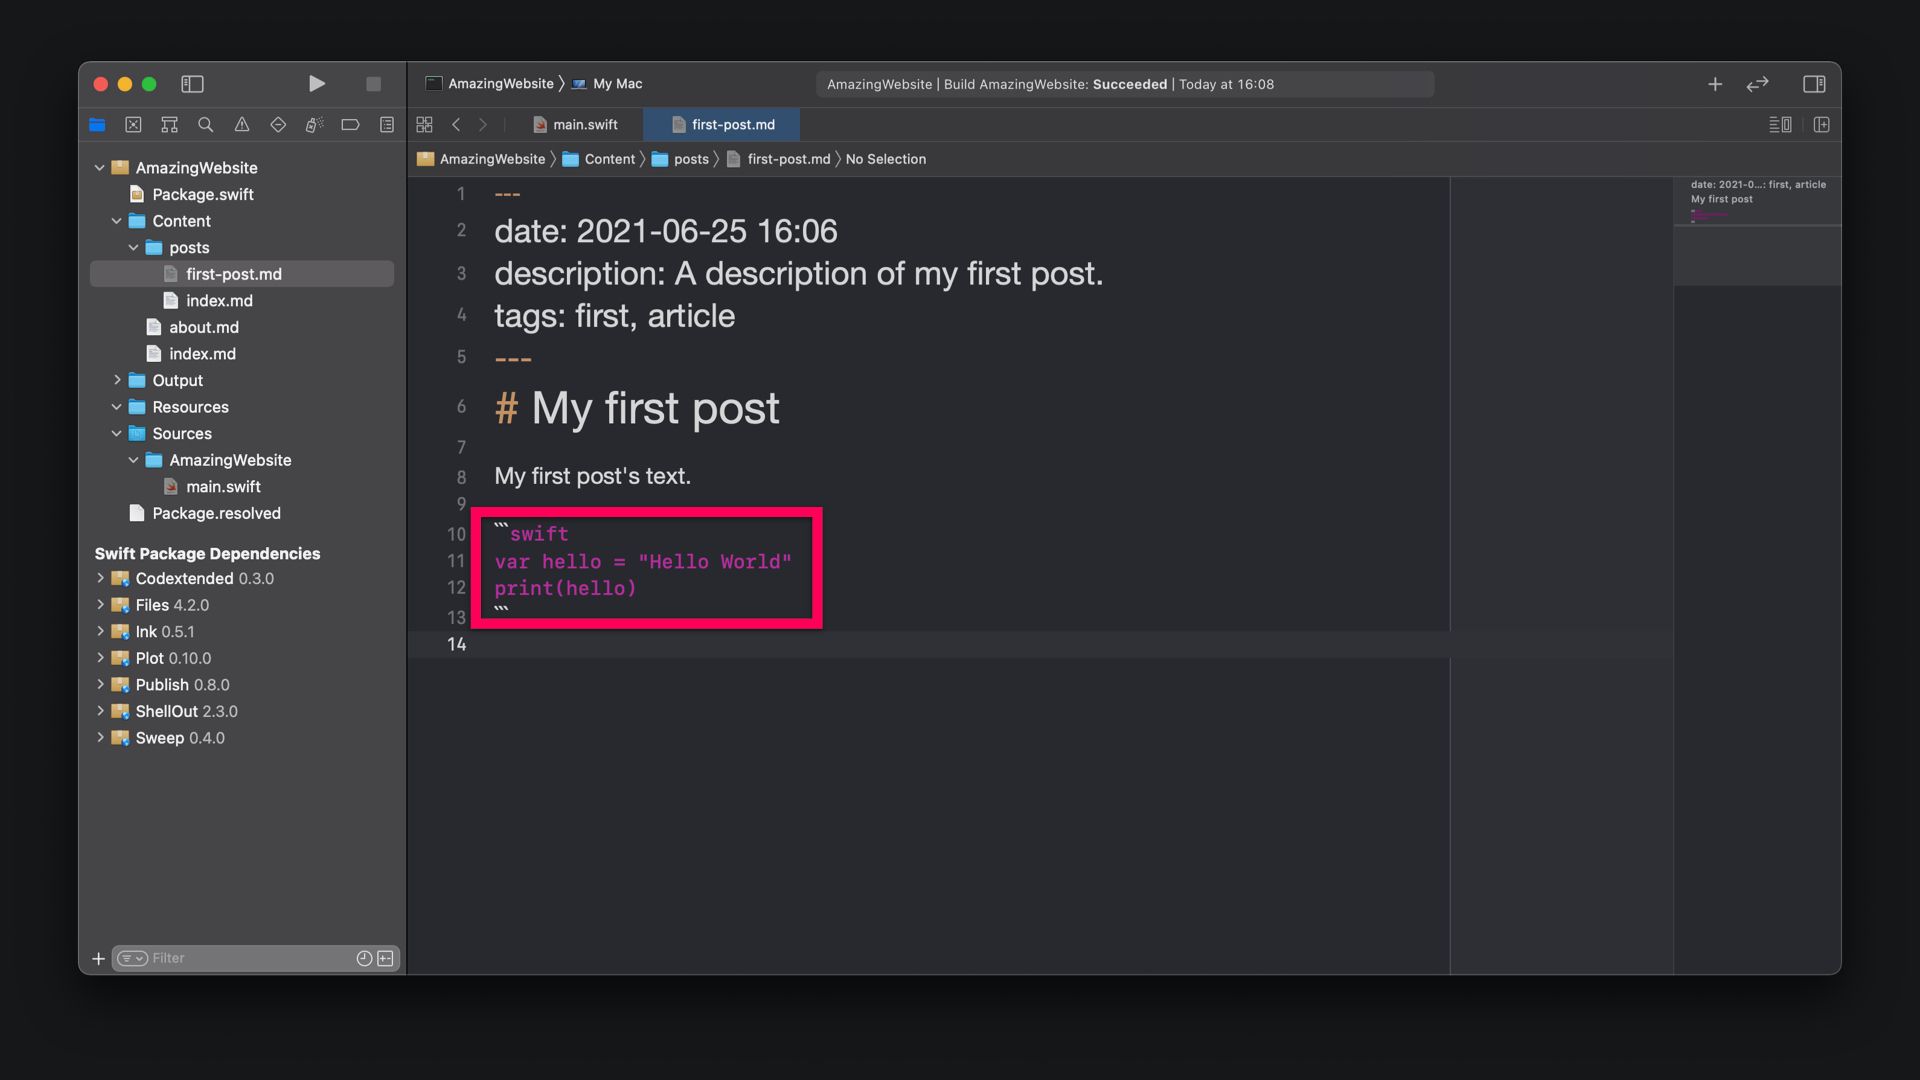
A typical use-case would be to add code snippets to articles, especially if they may be about app development with Swift. Such code segments can be added to any post, using the ``` markdown syntax.
Preferably, the site would use syntax highlighting to make this code stand out and adopt a nice color palette to distinguish between different components in the snippet.
Like with many other amazing features for Publish, this functionality can be added by integrating a plugin into the project and using a dedicated publishing step in the publishing pipeline. I am using the Splash plugin for Publish by John Sundell that conveniently integrates with Publish. There are many other plugins available in the community that can help to augment the features of your project, so it's worth checking it out.
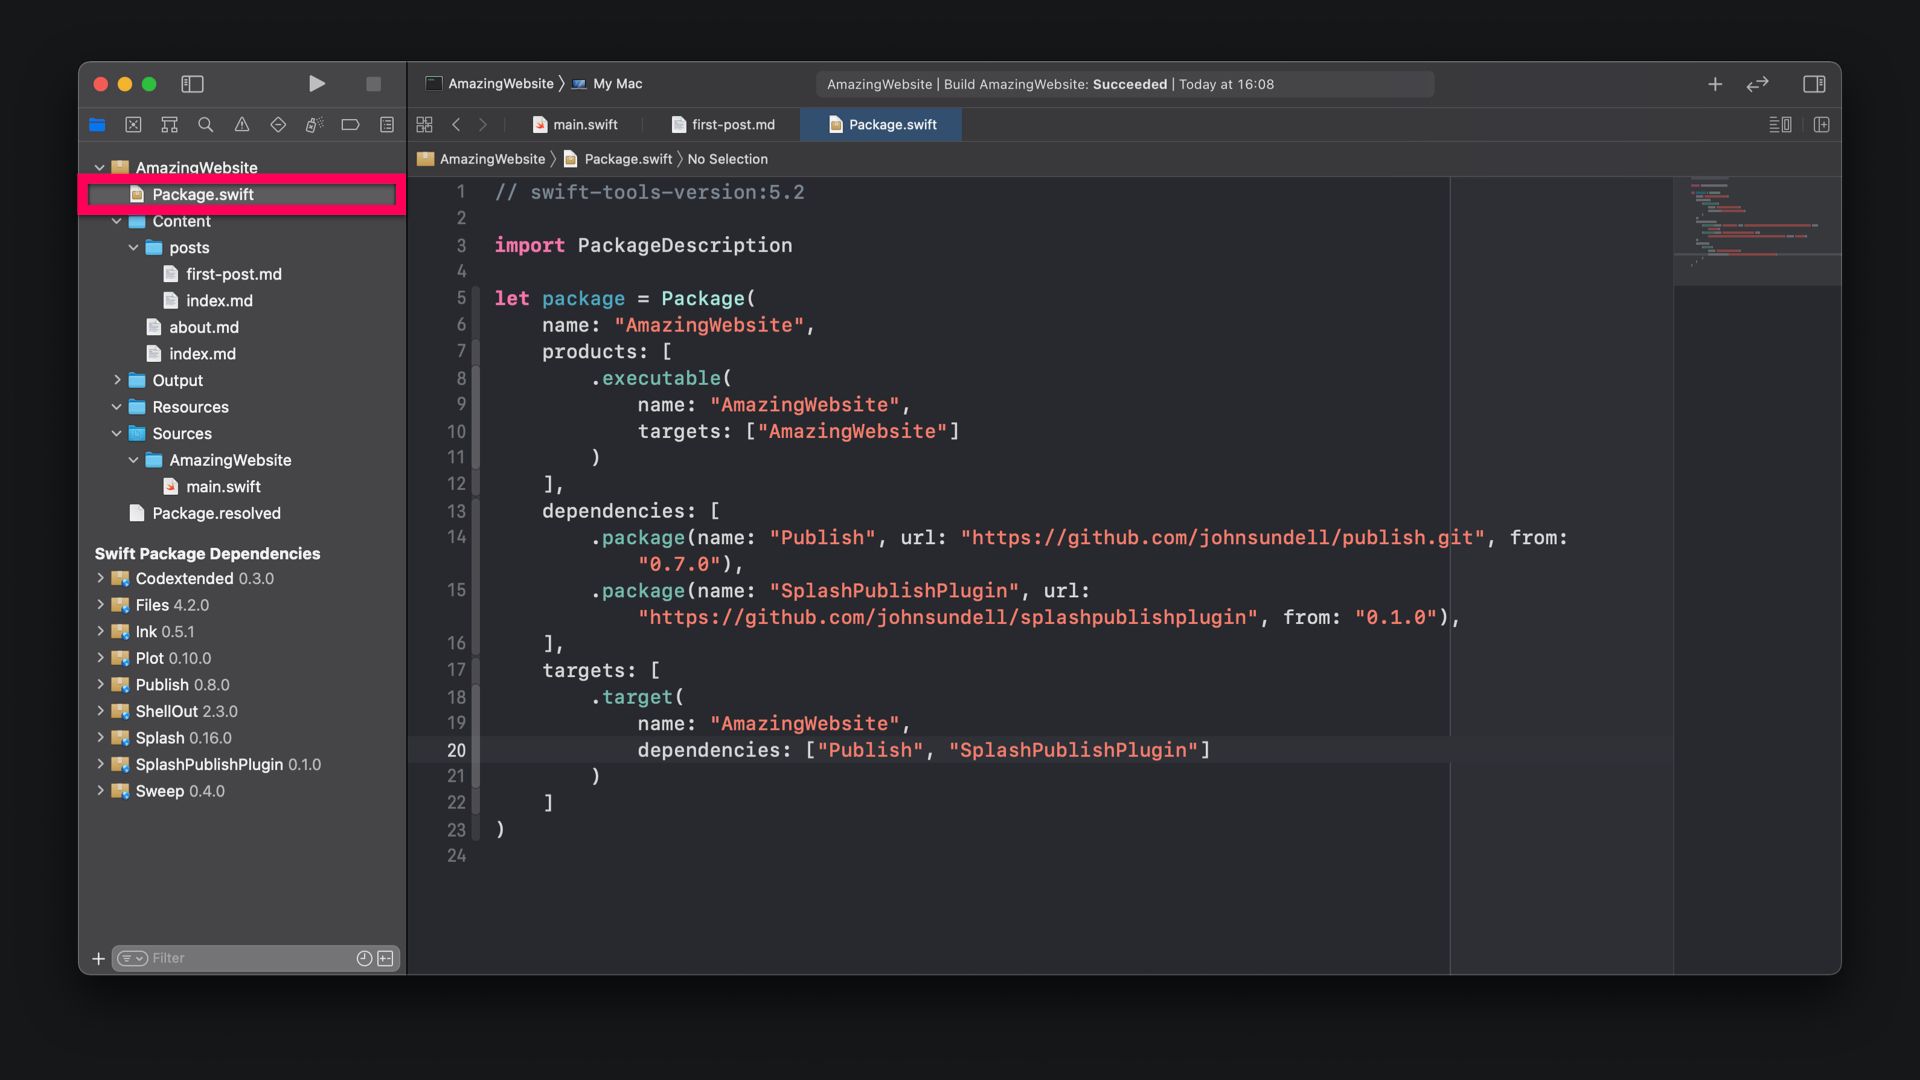
To add Splash features to the project, edit the Package.swift file and add a dependency for it. By adding the SplashPublishPlugin package, the desired functionality is added with just a few steps.
import PackageDescription

let package = Package(
    name: "AmazingWebsite",
    products: [
        .executable(
            name: "AmazingWebsite",
            targets: ["AmazingWebsite"]
        )
    ],
    dependencies: [
        [...]
        .package(name: "SplashPublishPlugin", url: "https://github.com/johnsundell/splashpublishplugin", from: "0.1.0"),
    ],
    targets: [
        .target(
            name: "AmazingWebsite",
            dependencies: ["Publish", "SplashPublishPlugin"]
        )
    ]
)
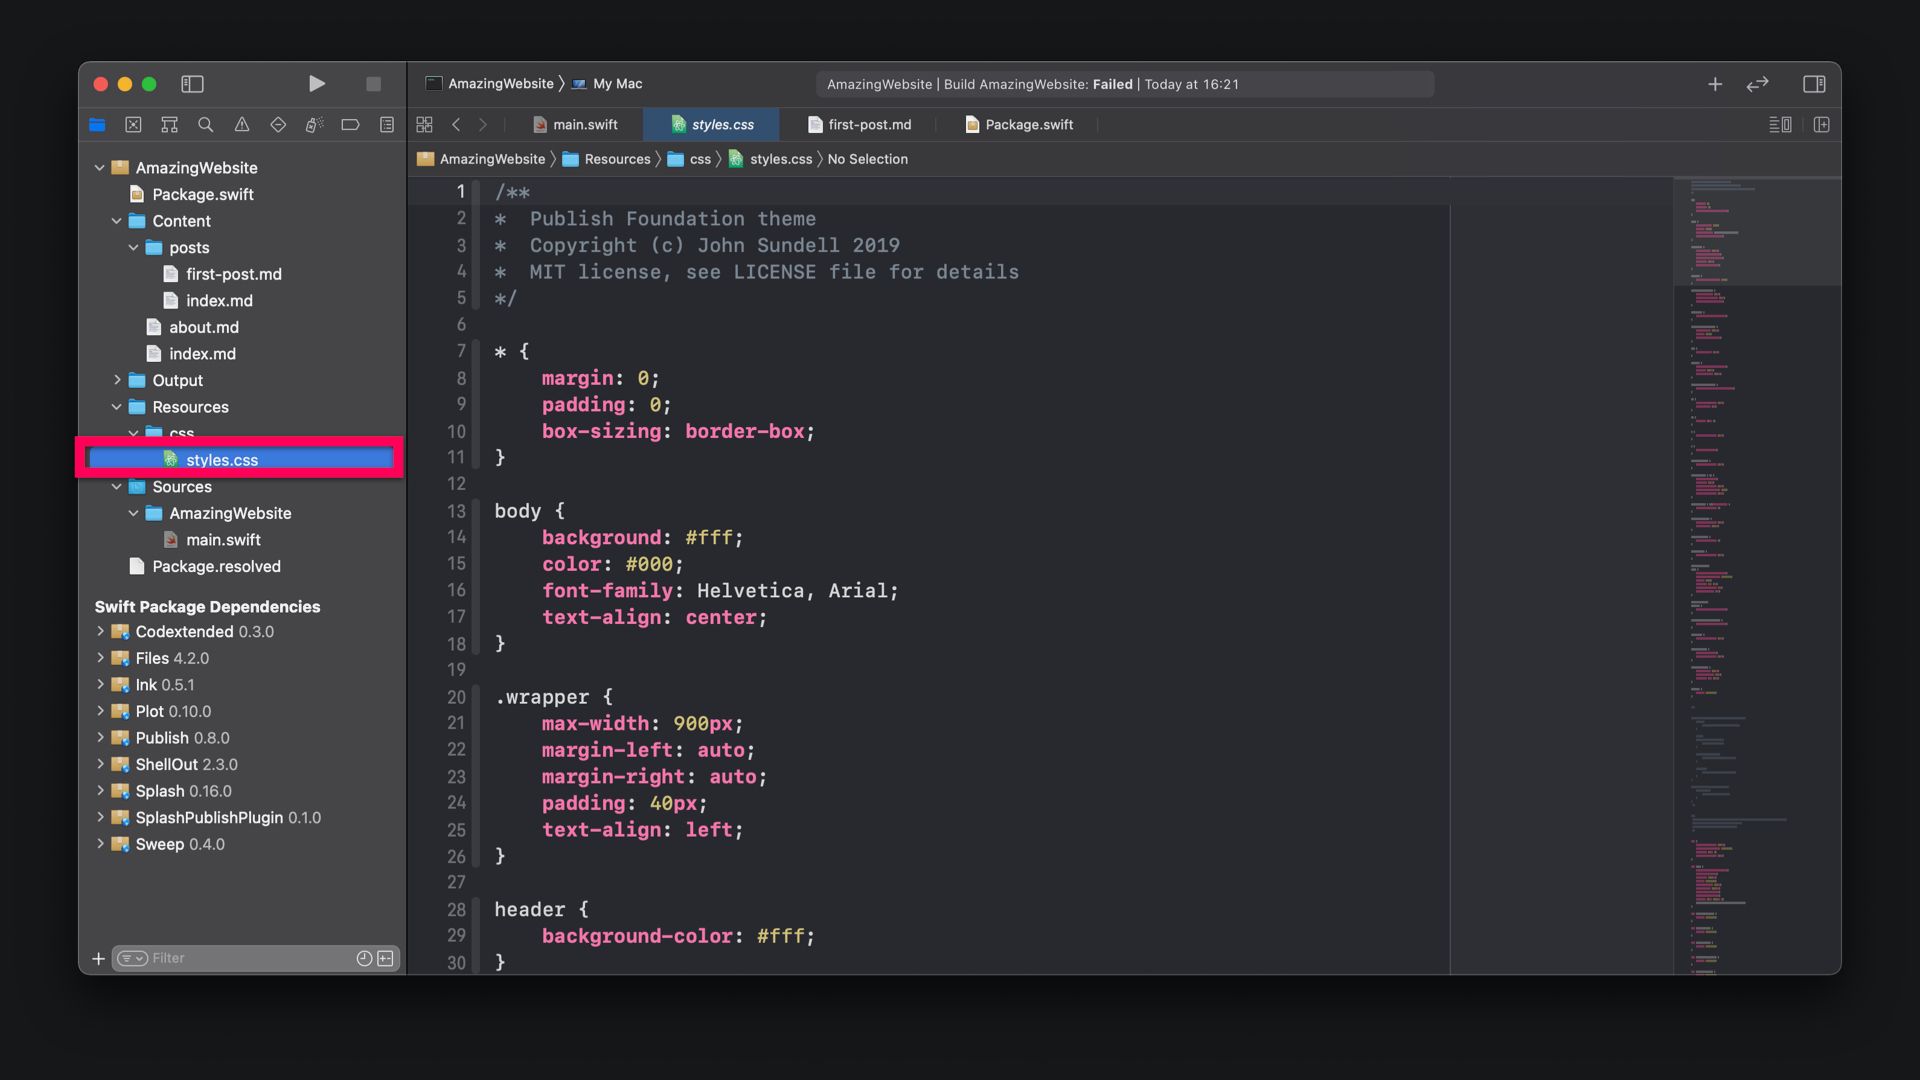
To make the highlighted syntax stand out, you need to specify custom CSS for code snippets. For this, you can add a styles.css files in a CSS folder inside the Resources folder. You can of course also customize the entire CSS of the website. Regarding this, the sky is the limit. John Sundell also provides an example CSS code to get you started:
/**
 *  Example CSS file that can be used to style Splash HTML output
 *  Copyright (c) John Sundell 2018
 *  MIT license - see LICENSE.md
 */

pre {
    margin-bottom: 1.5em;
    background-color: #1a1a1a;
    padding: 16px 0;
    border-radius: 16px;
}

pre code {
    font-family: monospace;
    display: block;
    padding: 0 20px;
    color: #a9bcbc;
    line-height: 1.4em;
    font-size: 0.95em;
    overflow-x: auto;
    white-space: pre;
    -webkit-overflow-scrolling: touch;
}

pre code .keyword {
    color: #e73289;
}

pre code .type {
    color: #8281ca;
}

pre code .call {
    color: #348fe5;
}

pre code .property {
    color: #21ab9d;
}

pre code .number {
    color: #db6f57;
}

pre code .string {
    color: #fa641e;
}

pre code .comment {
    color: #6b8a94;
}

pre code .dotAccess {
    color: #92b300;
}

pre code .preprocessing {
    color: #b68a00;
}
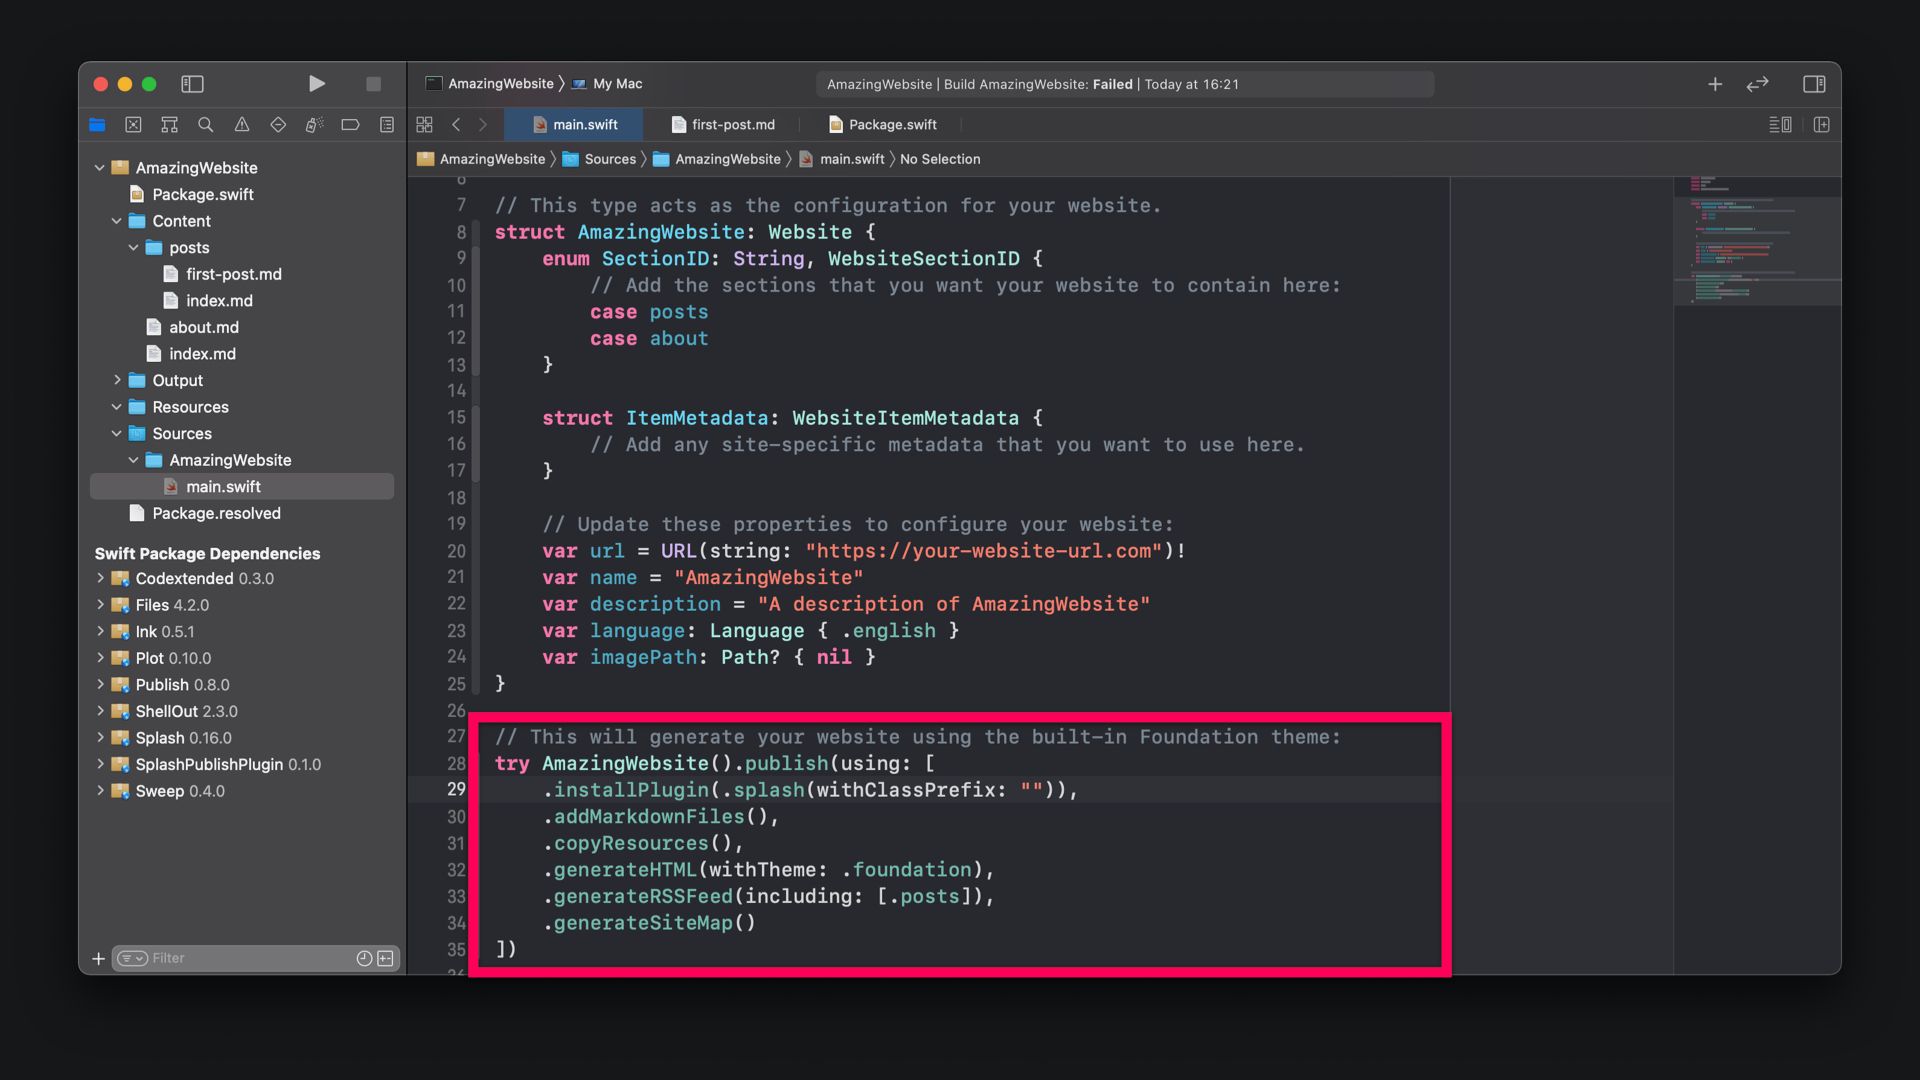
Then, in the main.swift file, the publishing pipeline can be adjusted to add the Splash plugin to detect and highlight syntax in the rendered HTML with custom CSS. In this example, I broke down the publishing pipeline into six steps:
try AmazingWebsite().publish(using: [
    .installPlugin(.splash(withClassPrefix: "")),
    .addMarkdownFiles(),
    .copyResources(),
    .generateHTML(withTheme: .foundation),
    .generateRSSFeed(including: [.posts]),
    .generateSiteMap(),
])
First, we are installing the Splash plugin, then we are adding the markdown files to the publishing pipeline, copy any resources to the Output folder and then generate the HTML with the default .foundation theme provided by Publish, and generate an RSS feed for all posts, and a sitemap.
Of course, you can also create your own custom HTML theme using Plot. It is super powerful and allows you to create type-safe HTML, XML, and RSS in Swift. For this tutorial, we will stick the the .foundation theme.
In the publishing process on the command line, using the publish run command you can now see the six steps as they are completed. Publish will also return errors and debug messages in this process for you to make the process simple to work with.
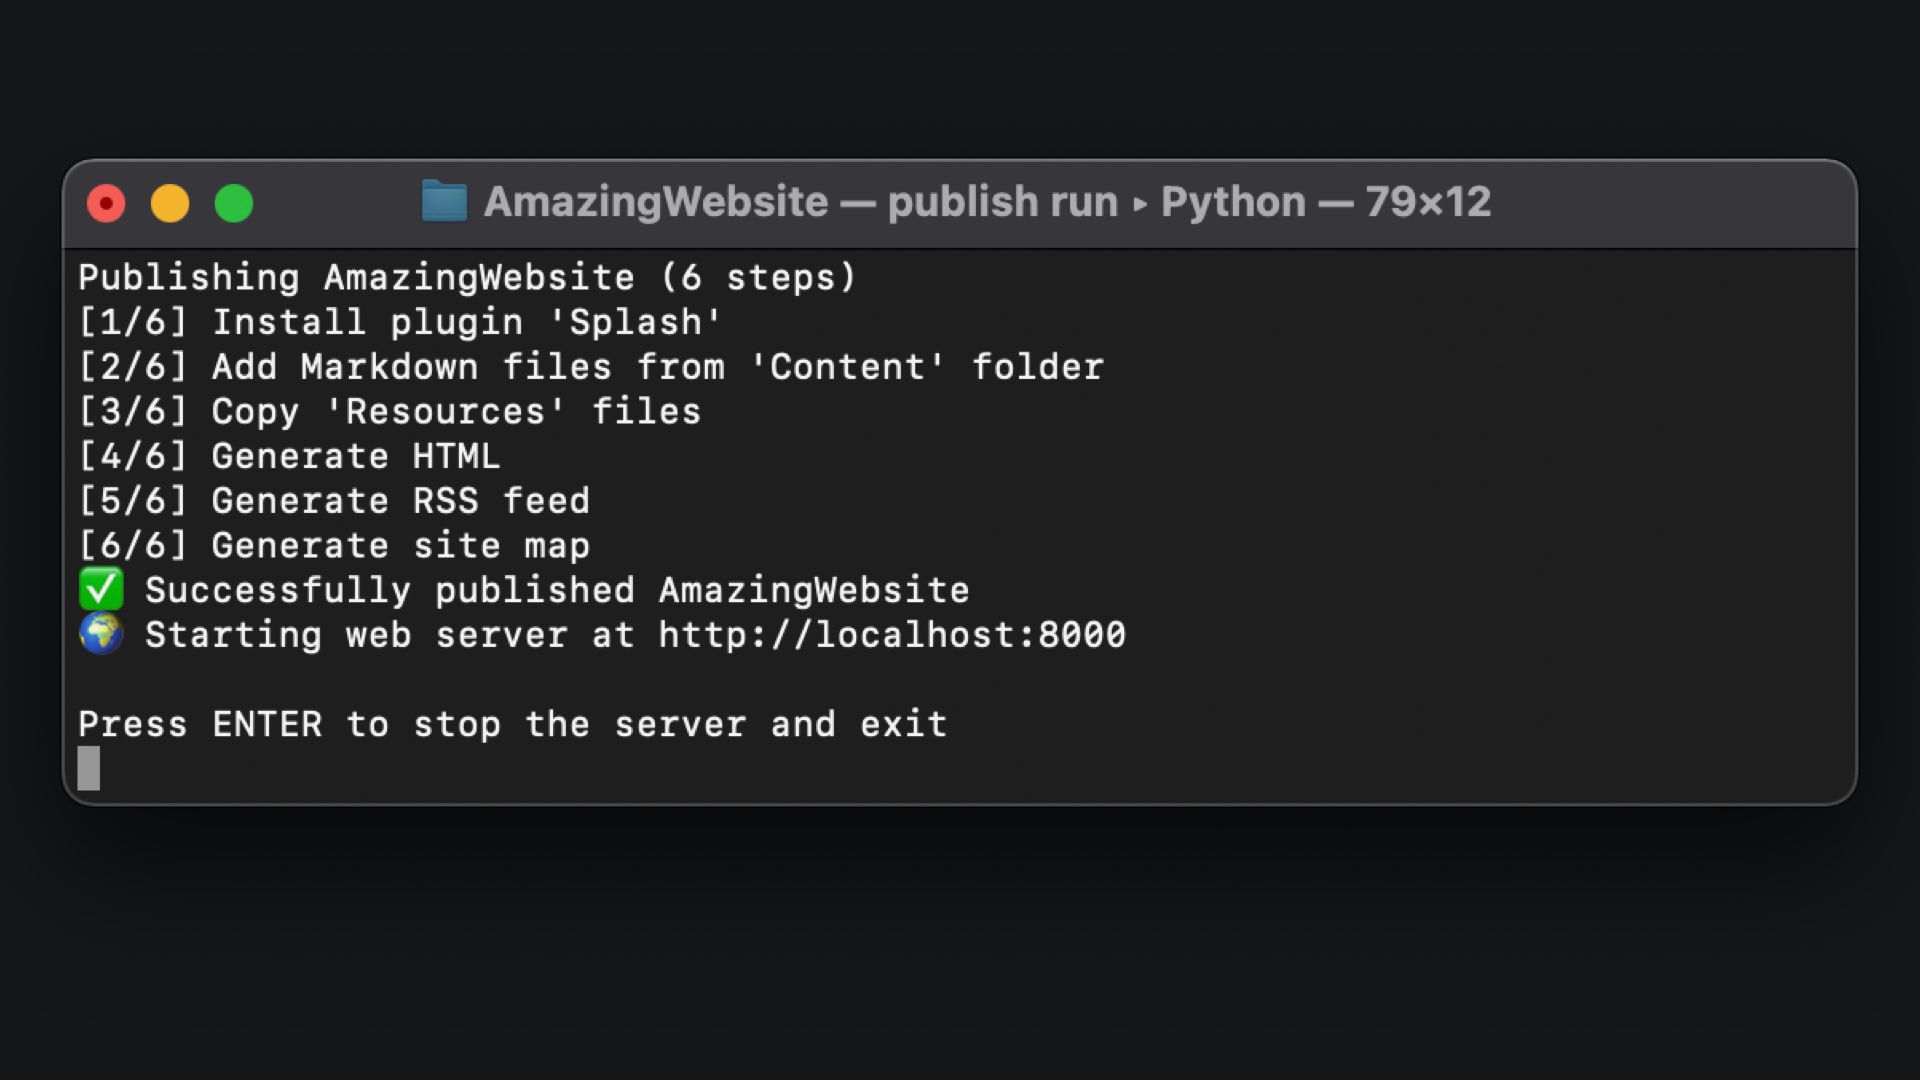
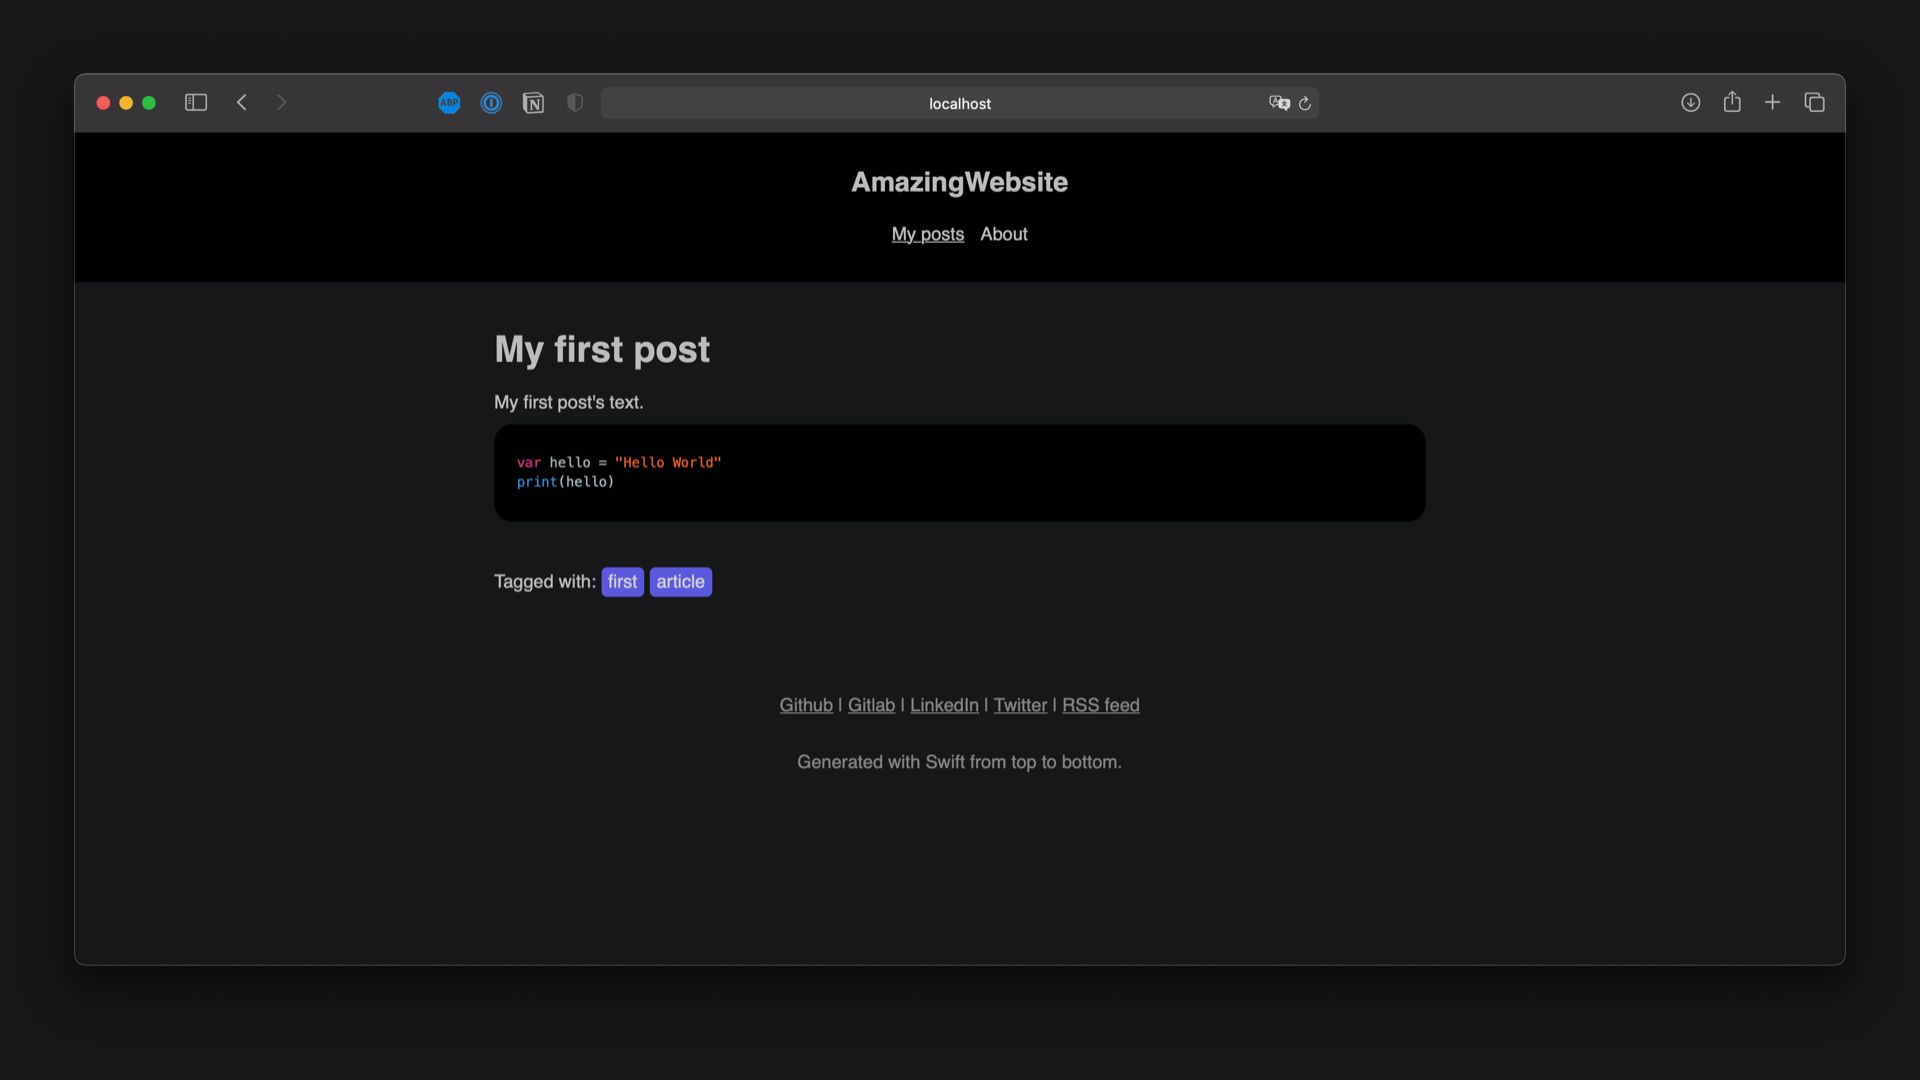
And magically, the resulting HTML and CSS will render the syntax with beautiful highlighting, just to your liking. This is basically all you need to get started with a static website done entirely in Swift.
There are many other features you can add to your Publish powered site, for example, to embed Twitter tweets, or Youtube videos, to add a reading time estimate to your posts or more technical capabilities like minifying the CSS or deploy on Amazon S3.
Deployment
The static website generated by Publish can be hosted on any web server able to serve HTML. For convenience, Publish also has a DeploymentMethod API to deploy the generated website to external services with built-in implementation for Git and GitHub environments.
If this is what you want to do with your static website, check out the tutorial "Deploying Static Sites generated with Swift and Publish with Gitlab CI/CD".