
Getting Started with Swift AWS Lambda Runtime
This tutorial shows how to get started with Swift AWS Lambda Runtime to create and deploy serverless functions on AWS with Swift.

Back in May 2020, a new open-source Swift AWS Lambda Runtime was released on swift.org. Among various collaborators, Fabian Fett was mentioned as a key contributor and he also shared some articles on how to get started and how to create your first HTTP endpoints. During WWDC 2020, Apple also shared a session on how to Use Swift on AWS Lambda with Xcode, which is part of the inspiration for this article.
I have been working with Swift AWS Lambda Runtime since it became available and used it extensively ever since in any AWS setup for projects I was involved with. There are many alternatives around of course, but I like doing things with Swift top to bottom. For example, it was used in the Alles Neu Land Media Streaming App that was built in just 7 Days using SwiftUI.
This article will introduce the Swift AWS Lambda Runtime and how to set up your local development environment with Xcode to simulate the AWS environment.
AWS Lambda: Serverless Computing
AWS Lambda is Amazon's event-driven, serverless computing platform. Serverless functions power critical microservices and data-intensive workloads or all kinds of use cases and allow developers to scale and control computing costs within an on-demand setup. AWS allocates machine resources on demand and only while the function is running and takes care of the servers, their configuration, capacity, maintenance, fault taulerance, scalability, etc.
It was introduced in 2014 and supports Node.js, Python, Java, Go, Ruby, C# and, as of 2020, also Swift as part of their custom runtime support. Typical use cases are uploading data to Amazon S3 buckets, updating DynamoDB tables, reacting to sensor data in IoT environments, etc. All of these can be conveniently set up through HTTP requests configured in AWS API Gateway, which can also handle authentication and authorization. This means, apart from writing some simple Lambda functions, the entire configuration of even fairly advanced AWS backends can be set up in the web browser just by provisioning services like S3, DynamoDB, CloudFront, or API Gateway.
Setting up Xcode for Swift AWS Lambda Runtime
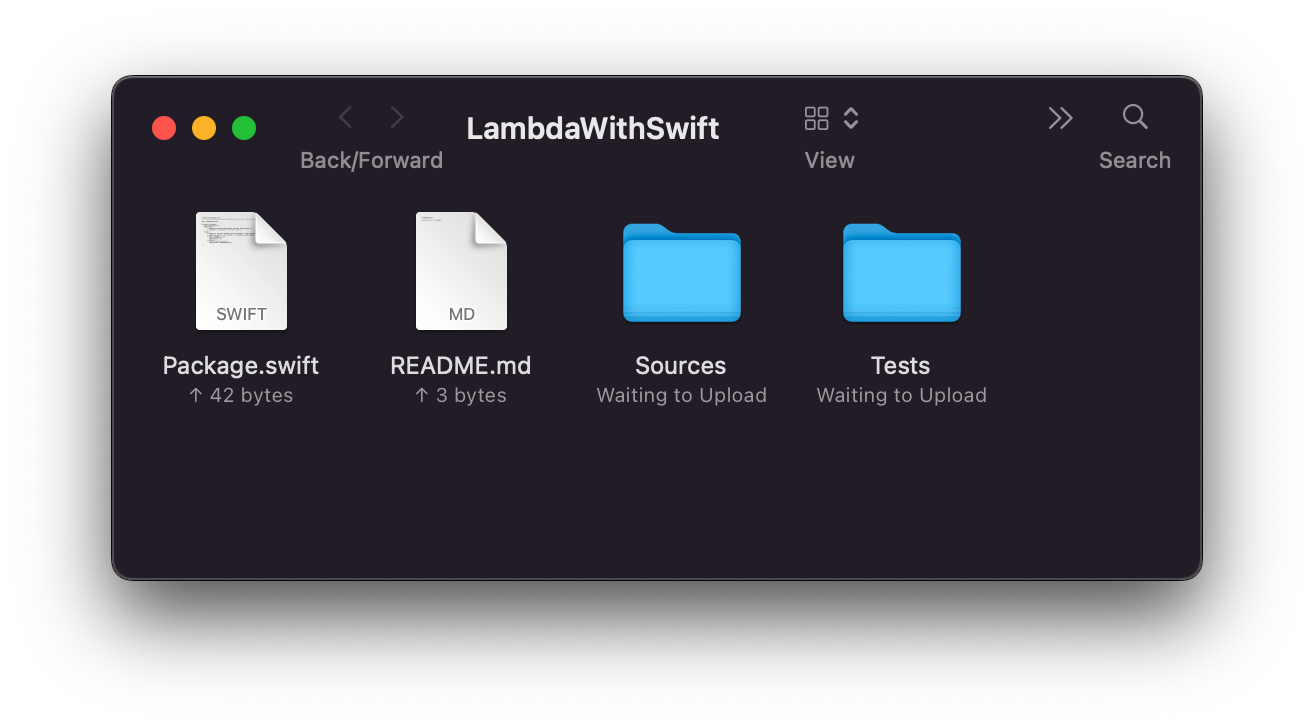
The easisest way to get started is to create a new Swift Package. To do this, create a new folder for your project, open Terminal, and navigate to the newly created folder. Then, you can initiate a new Swift package with the following command:
swift package init --type executable The command will create a default Swift Package with a Sources and Tests folder and a readme file. The Sources folder contains a file called main.swift, which is the entry point to the Swift package. The Package.swift file is used to configure the package. By opening this file, Xcode will load the package for you.
Inside the Package.swift file all dependencies, targets and supported platforms for the Package can be configured. For our endeavor, we need to add a dependency to the Package to load the Swift AWS Lambda Runtime. It also needs to be added the target as a dependency. To get started, your Package.swift file should look like this.
let package = Package(
    name: "LambdaWithSwift",
    platforms: [
        .macOS(.v10_14)
    ],
    products: [
        .executable(name: "LambdaWithSwift", targets: ["LambdaWithSwift"]),
    ],
    dependencies: [
        .package(url: "https://github.com/swift-server/swift-aws-lambda-runtime.git", .upToNextMajor(from: "0.5.0")),
    ],
    targets: [
        .executableTarget(
            name: "LambdaWithSwift",
            dependencies: [
                .product(name: "AWSLambdaRuntime", package: "swift-aws-lambda-runtime")
            ]),
        .testTarget(
            name: "LambdaWithSwiftTests",
            dependencies: ["LambdaWithSwift"]),
    ]
)
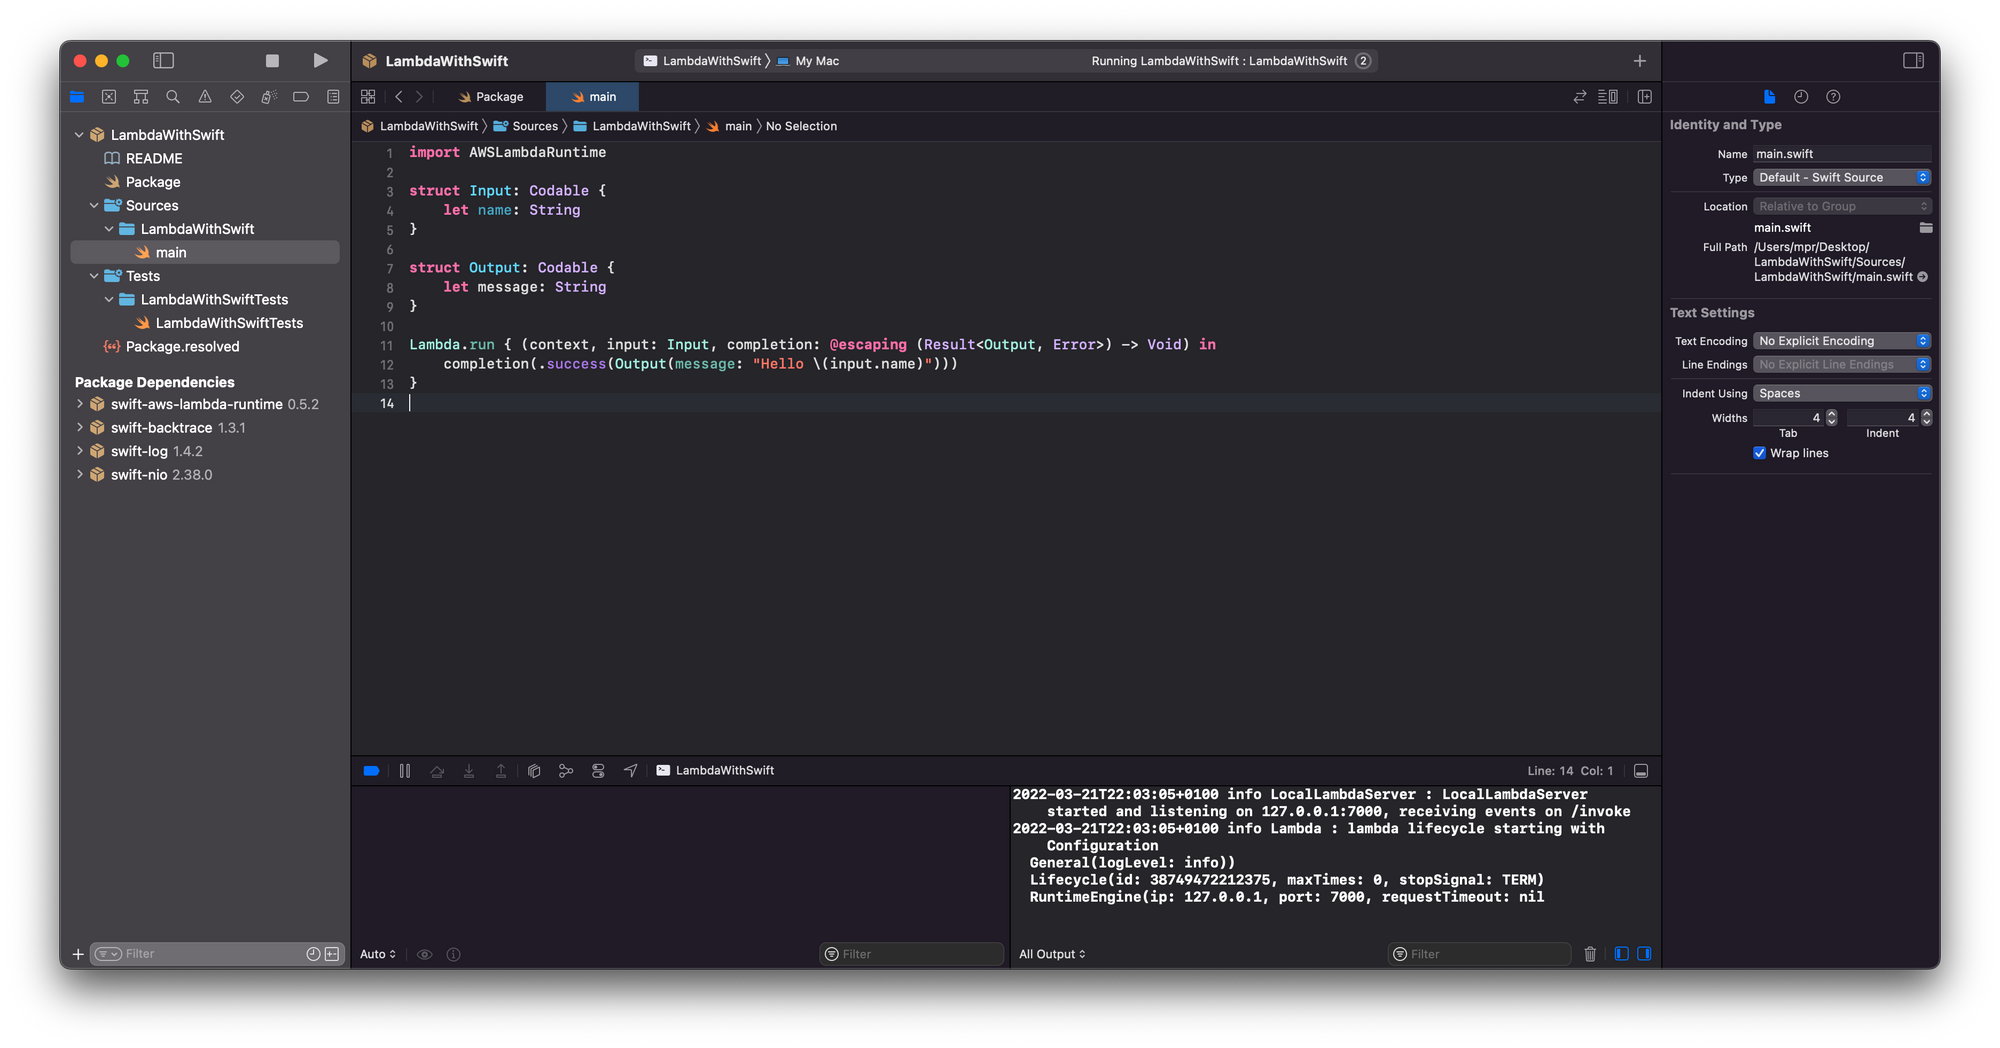
Then, inside the main.swift file, you can configure the simplest Lambda function imaginable. It is using a codable Input with only one String parameter, name in this example, and a codable Output with one String parameter, called message. We can use these for the Lambda function to expect a JSON object as the Input and then return a JSON object as the Output. For example, the input could be a name and the function would respond by saying hello to that name.
With Lambda.run the behavior of the function can be configured using a closure with the context, the input as well as a completion handler. Upon completion in case of success, we a returning the output message, using the Output to return a String constructed by using the name of the Input received.
import AWSLambdaRuntime

struct Input: Codable {
    let name: String
}

struct Output: Codable {
    let message: String
}

Lambda.run { (context, input: Input, completion: @escaping (Result<Output, Error>) -> Void) in
    completion(.success(Output(message: "Hello \(input.name)")))
}
For a more elaborate explanation of how the Lambda function and closures work, check out "Getting started with Swift on AWS Lambda" by Fabian Fett or "Introducing Swift AWS Lambda Runtime".
Testing your Lambda Function Locally
Before preparing your Lambda function for deployment on AWS, it can also be tested locally. Luckily, the Swift AWS Lambda Runtime makes this very convenient. The only thing needed is to add an Environment Variable to the Xcode project.
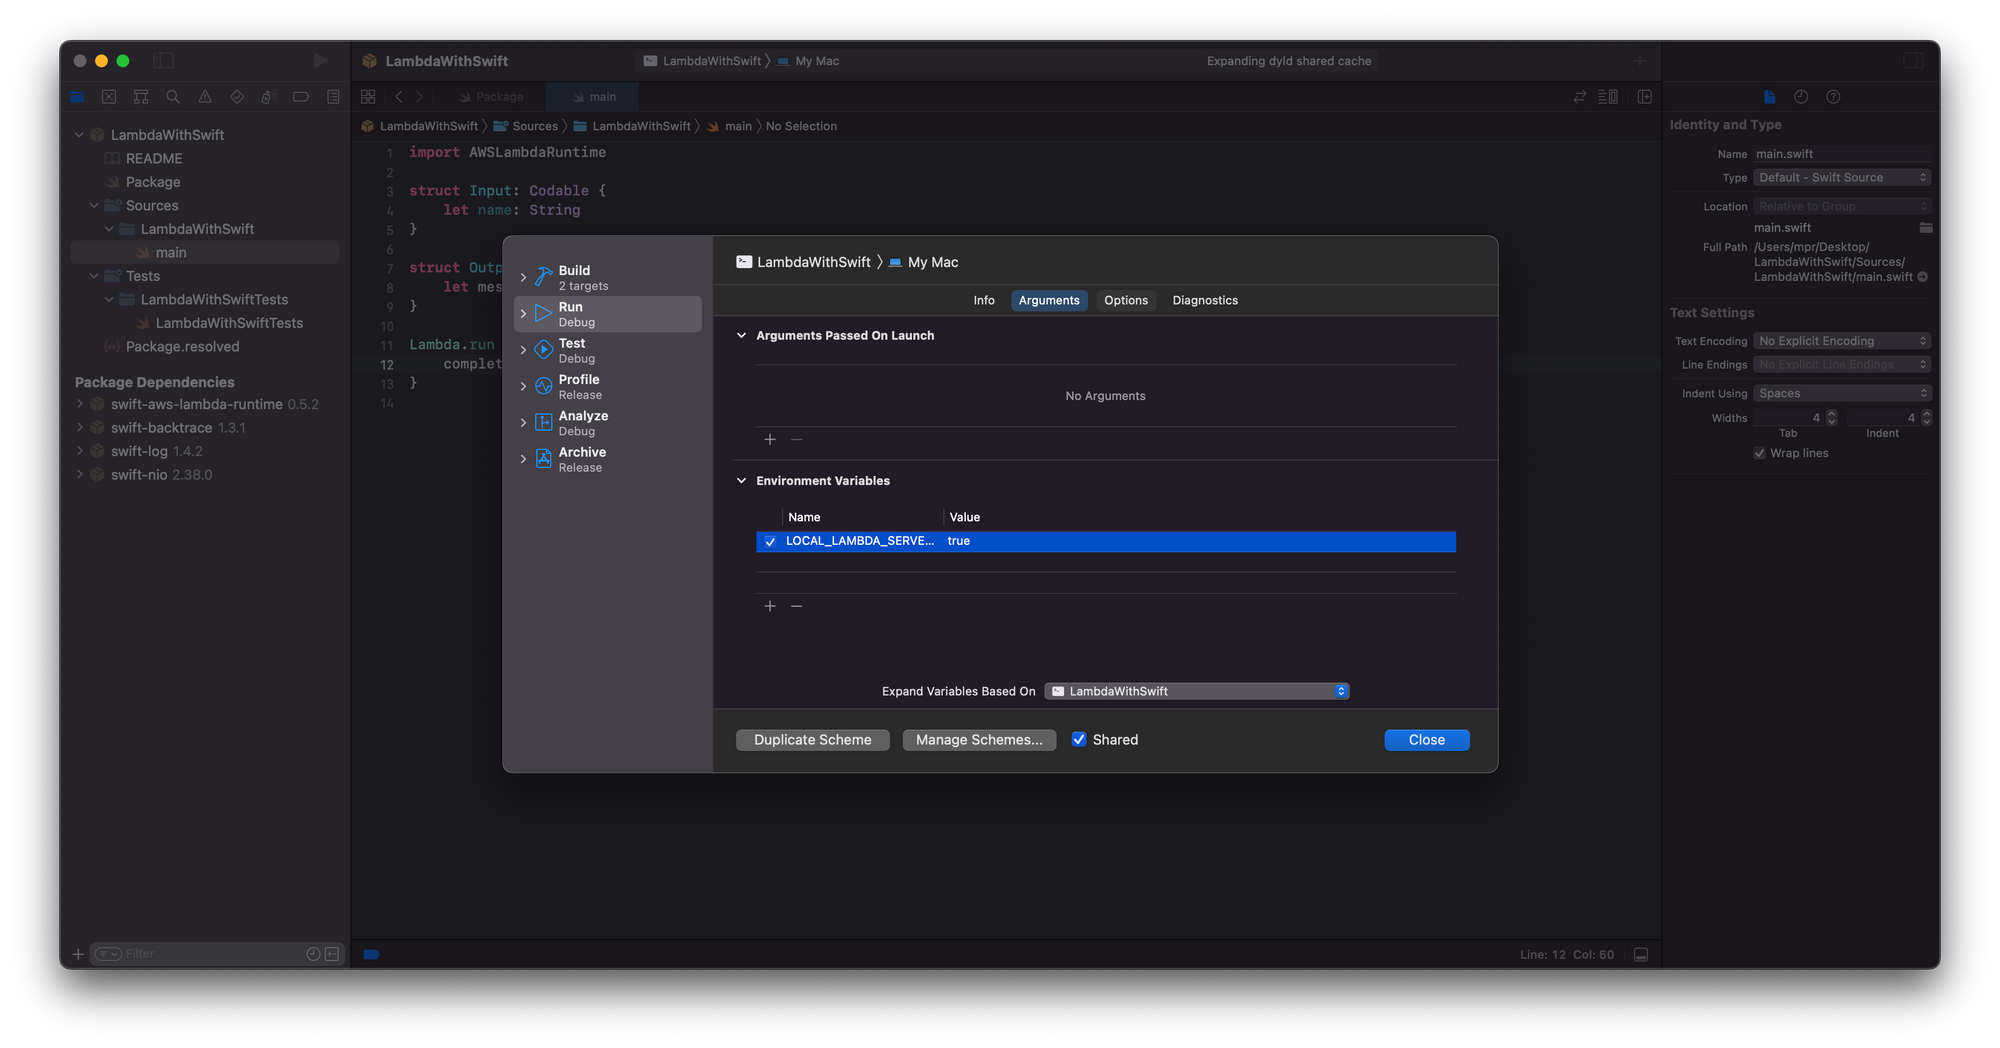
By adding an entry for LOCAL_LAMBDA_SERVER_ENABLED and setting it to true, the project can be run locally and will respond to HTTP messages being sent to 127.0.0.1:7000/invoke.
You can use curl from the command line of course, or install Postman for more convenient local testing. By creating a new POST request to 127.0.0.1:7000/invoke and configuring the body of the HTTP request with the JSON object expected as an Input, you will receive a response from the Lambda function configured as the Output in the Lambda.run closure.

Preparing the Lambda for Deployment with Docker
Once satisfied with the functionality you can prepare the Swift Package for deployment on AWS. For this you need to use Docker. If not done so already, you need to install Docker on your machine in order to build and package the Lambda function for deployment.
To get started, create a new file at the top level of your project called Dockerfile. Without going too much into the details on how Docker works, it basically contains the configuration of the Docker Image to be used, which in this case is swiftlang/swift:nightly-amazonlinux2. Also, it contains various other tools that will be installed on this image. There are many ways in which the Dockerfile can be configured. This one was taken from AmplifyDaysLambda by Nicki Stone and works for what we are doing.
FROM swiftlang/swift:nightly-amazonlinux2
 RUN yum -y install git \
 libuuid-devel \
 libicu-devel \
 libedit-devel \
 libxml2-devel \
 sqlite-devel \
 python-devel \
 ncurses-devel \
 curl-devel \
 openssl-devel \
 tzdata \
 libtool \
 jq \
 tar \
 zip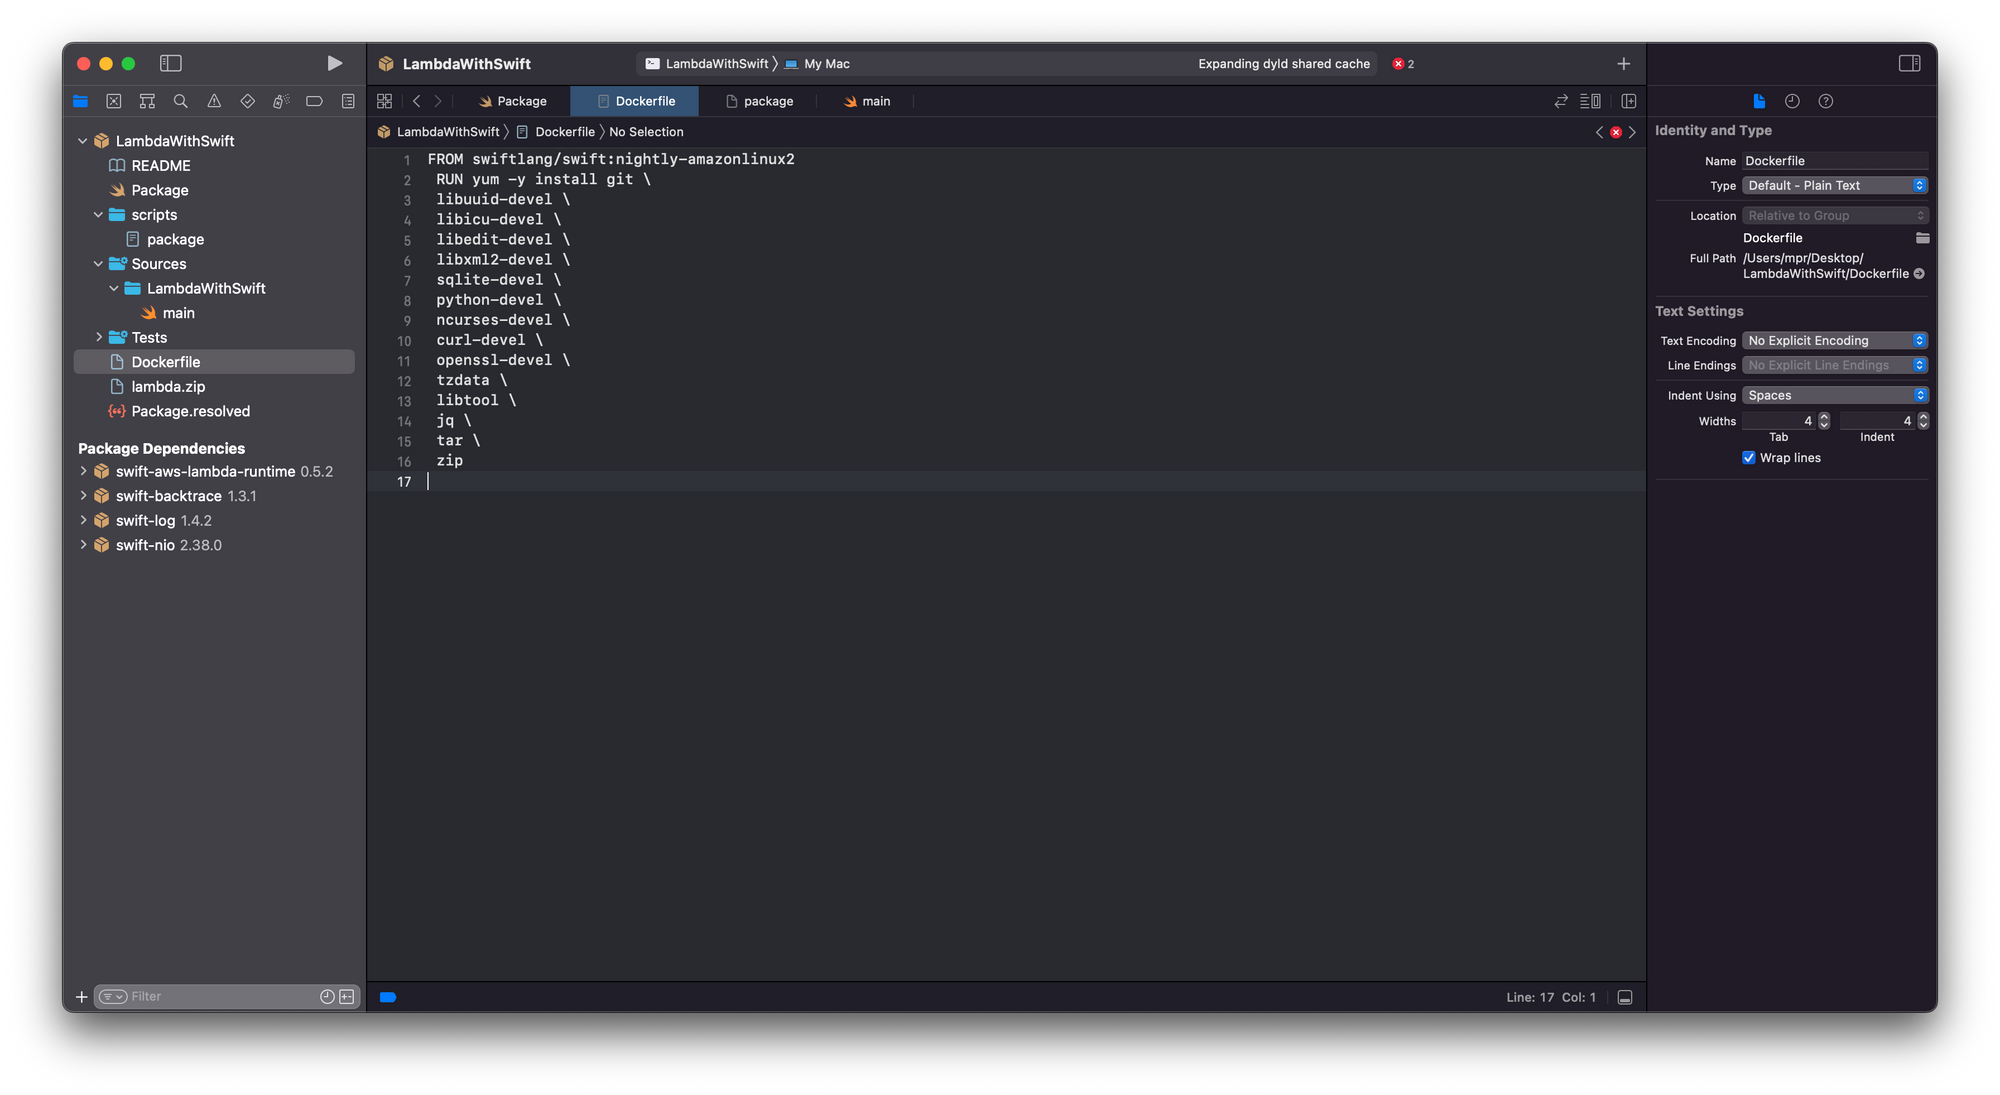
Once the Dockerfile was created, you can set up the Docker Image with the command line from inside the project folder.
docker build -t swift-lambda .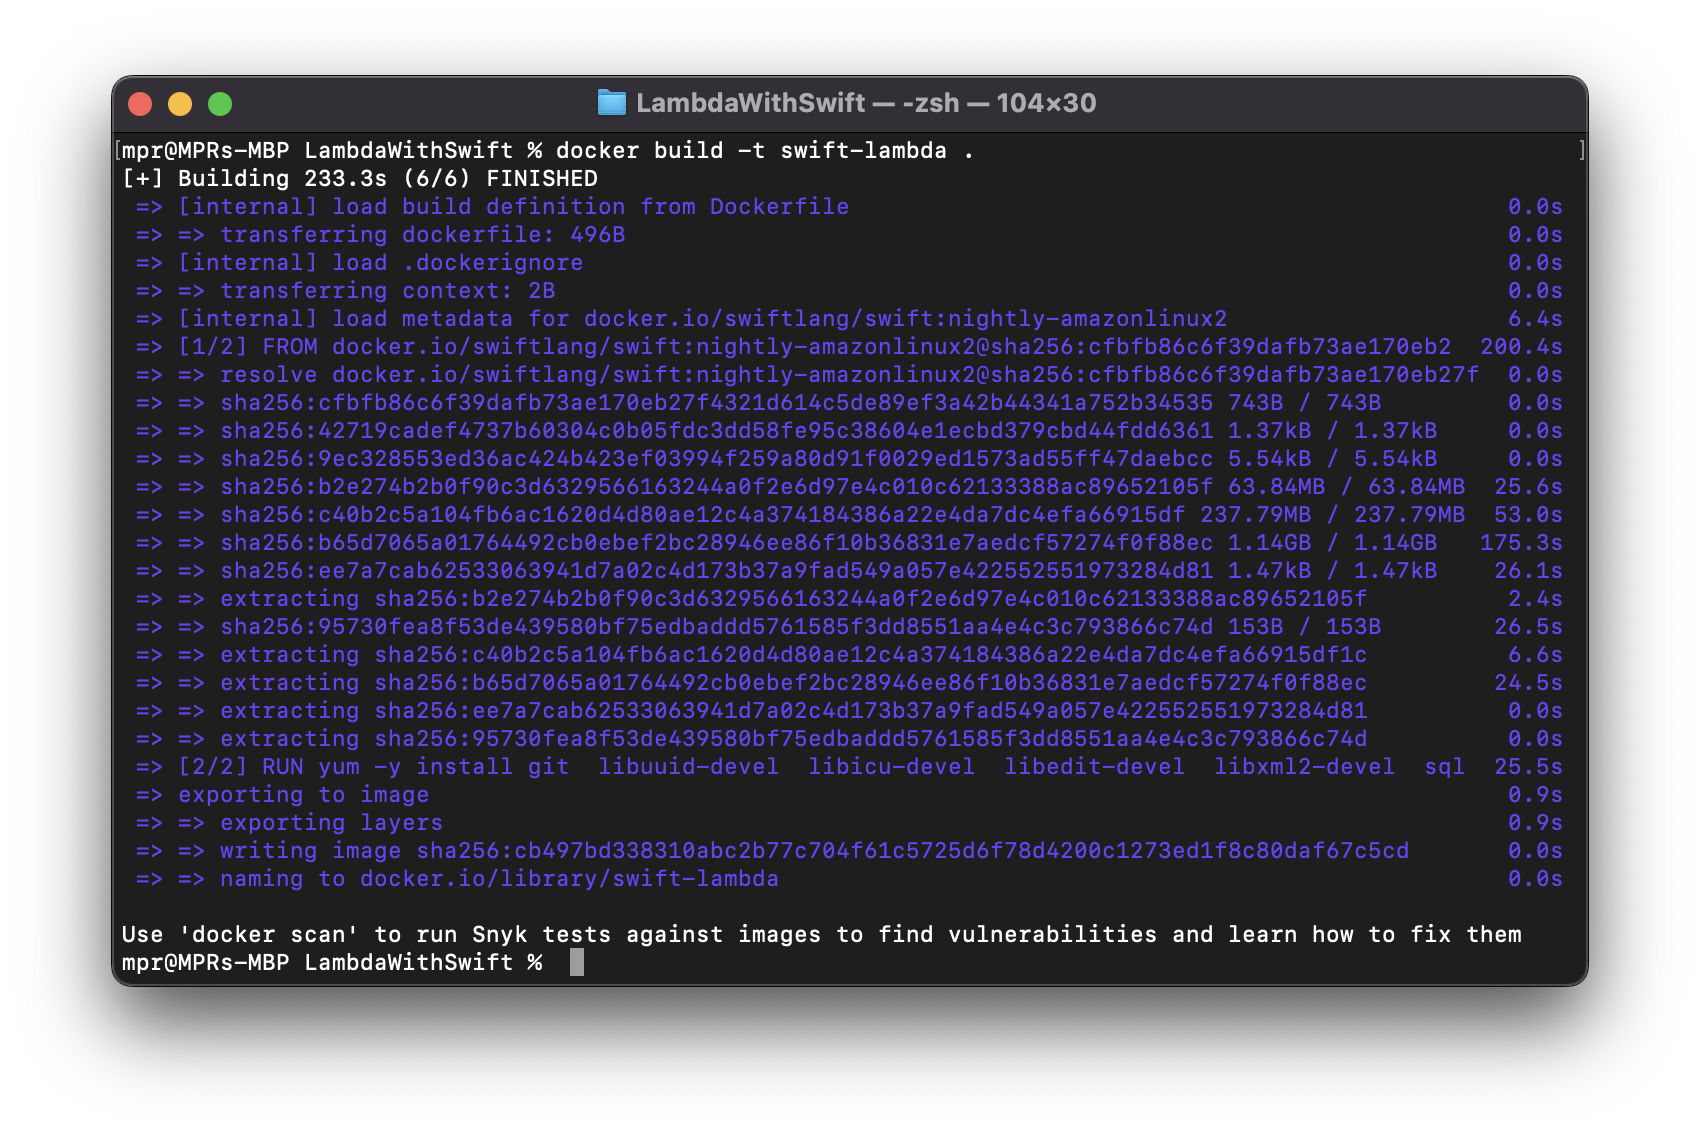
Then you can build the swift package inside a docker container by running the following command:
docker run \
     --rm \
     --volume "$(pwd)/:/src" \
     --workdir "/src/" \
     swift-lambda \
     swift build --product LambdaWithSwift -c release
The docker run command spawns a new docker container and removes it with the --rm flag after the command exits. Then --volume "$(pwd)/:/src" makes the docker volume available locally at the path /src. The container is mounted at the /src path with wthe --workdir flag. Then swift-lambda is the docker image used and lastly swift build --product LambdaWithSwift builds and compiles the LambdaWithSwift product as an executable. The -c relase flag ensures it is compiled in release mode.
The Lambda executable has to be packaged with a very specific folder structure to properly work with AWS when it is invoked. Most importantly, there needs to be bootstrap symlink for the executable. Then the folder can be zipped and uploaded to AWS. To make this more convenient, you can create a scripts folder in your project folder and add a package.sh file with the following commands:
#!/bin/bash

set -eu

executable=$1

target=.build/lambda/$executable
rm -rf "$target"
mkdir -p "$target"
cp ".build/release/$executable" "$target/"
cd "$target"
ln -s "$executable" "bootstrap"
zip --symlinks lambda.zip *
The script is provided as part of the examples in the swift-aws-lambda-runtime project on GitHub. Then, from the command line, you can run the docker command again, but this time executing the script.
docker run \
     --rm \
     --volume "$(pwd)/:/src" \
     --workdir "/src/" \
     swift-lambda \
     scripts/package.sh LambdaWithSwift
The zipped file will be created at .build/lambda/AmplifyDaysLambda/lambda.zip inside the project folder. This file can be uploaded to AWS Lambda to deploy the function.
Deploying the Lambda on AWS
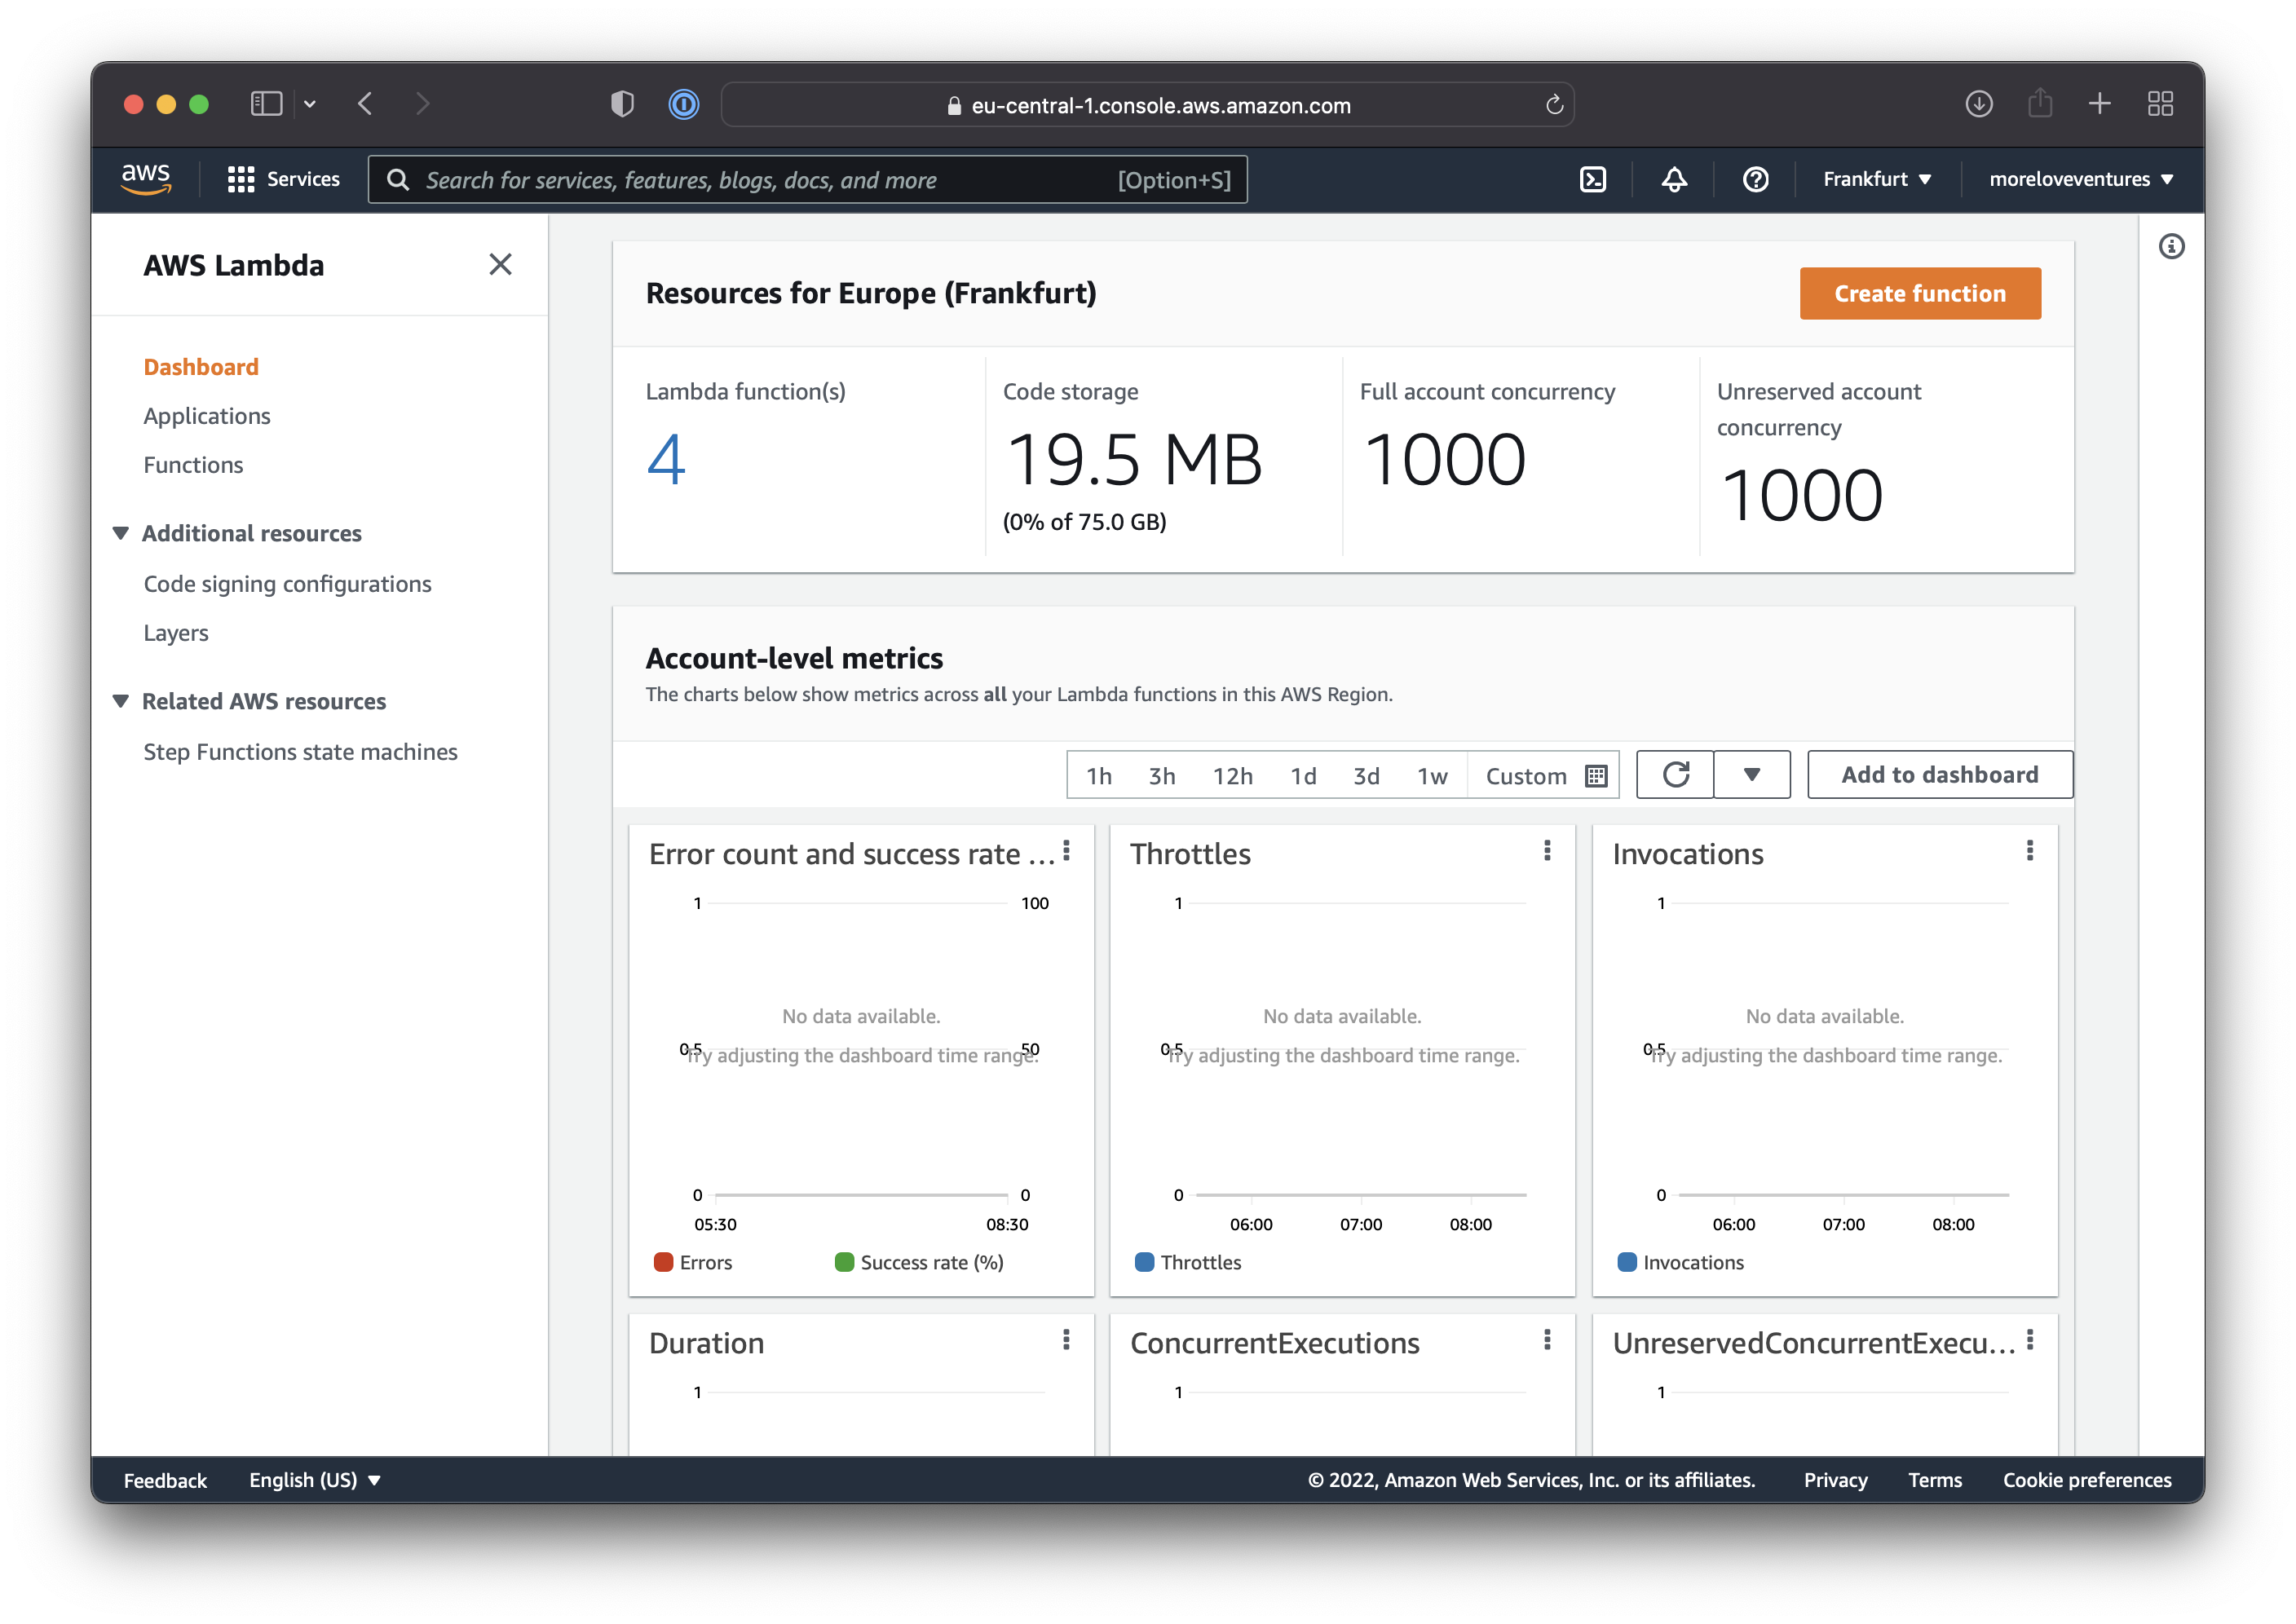
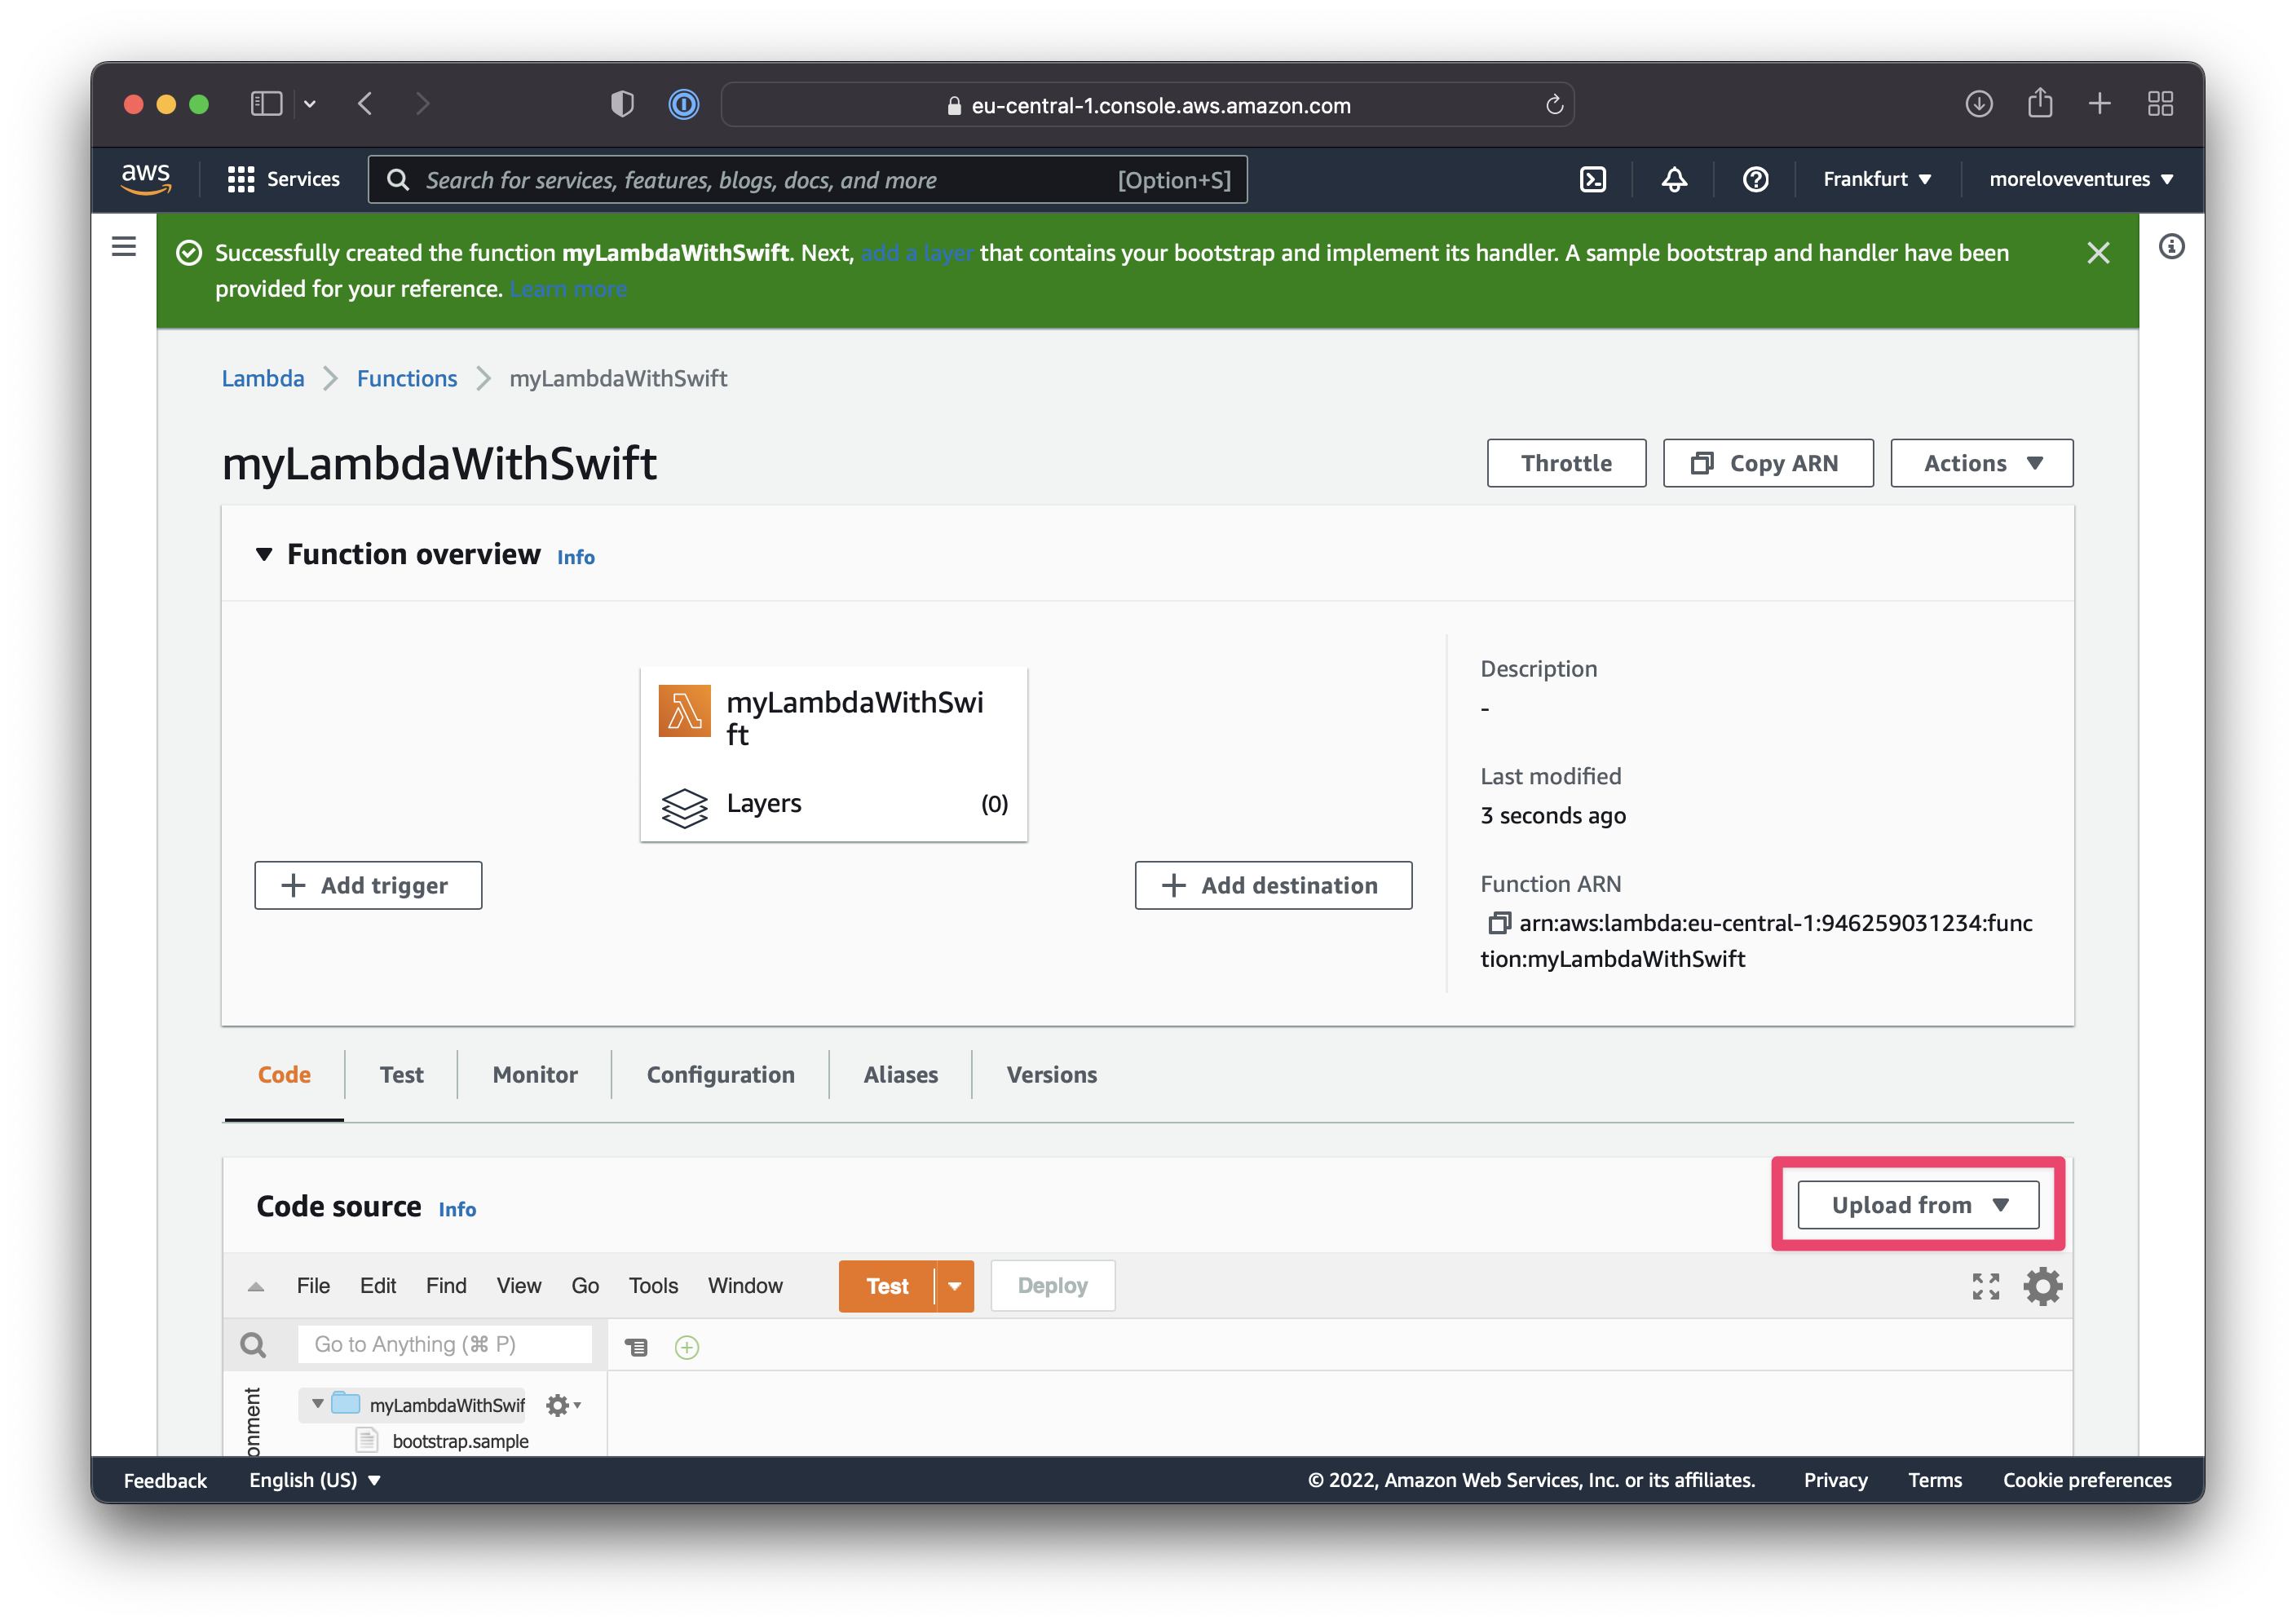
To deploy the lambda.zip on AWS, go to aws.amazon.com and log in with your AWS credentials to get started. From the services, select Lambda to reach the overview of the Lambda resources. In the top right corner, you can select "create function" to configure a new Lambda function.
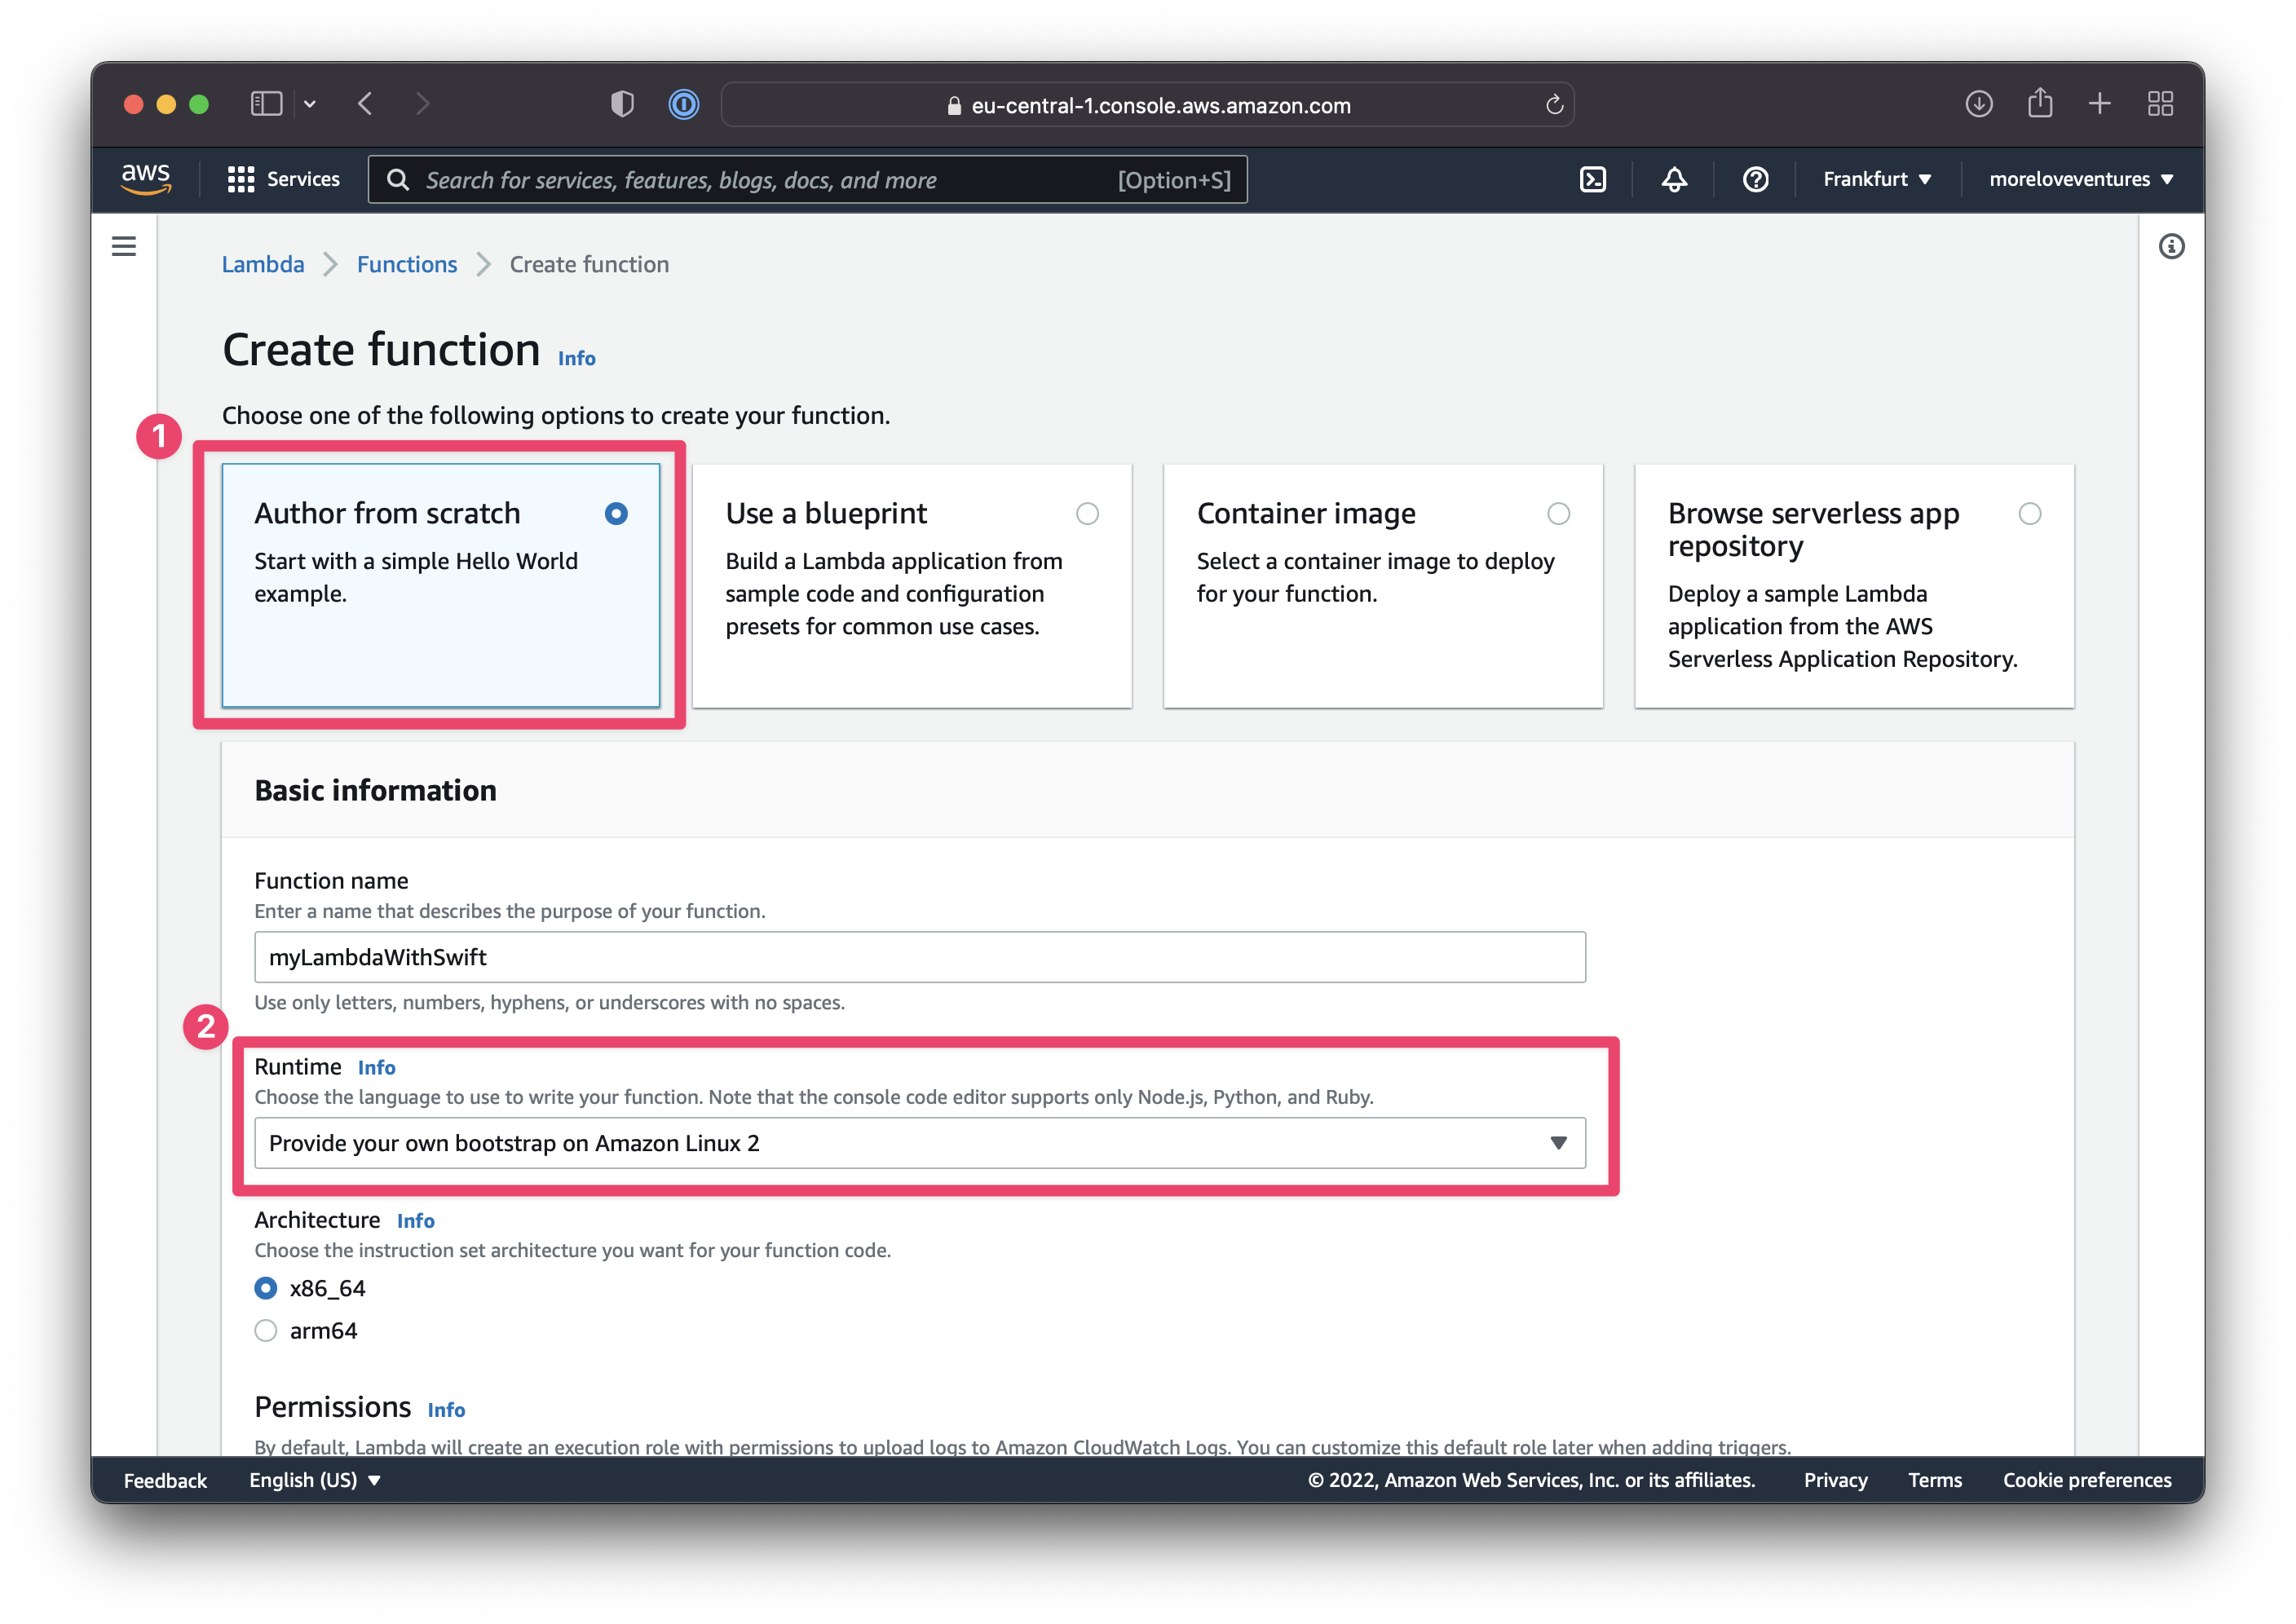
In the dialogue you can select the "create from scratch" option and provide a simple name for your function. Then for the Runtime, select "Provide your own bootstrap on Amazin Linux 2" and click create and the lower right corner. This will create the Lambda function and will allow you to upload the zip file.
You will be redirected to the newly created Lambda function and can select "upload from" to either upload a zip file or select a file from S3 storage. Upload the zip file created before and AWS will do the rest.
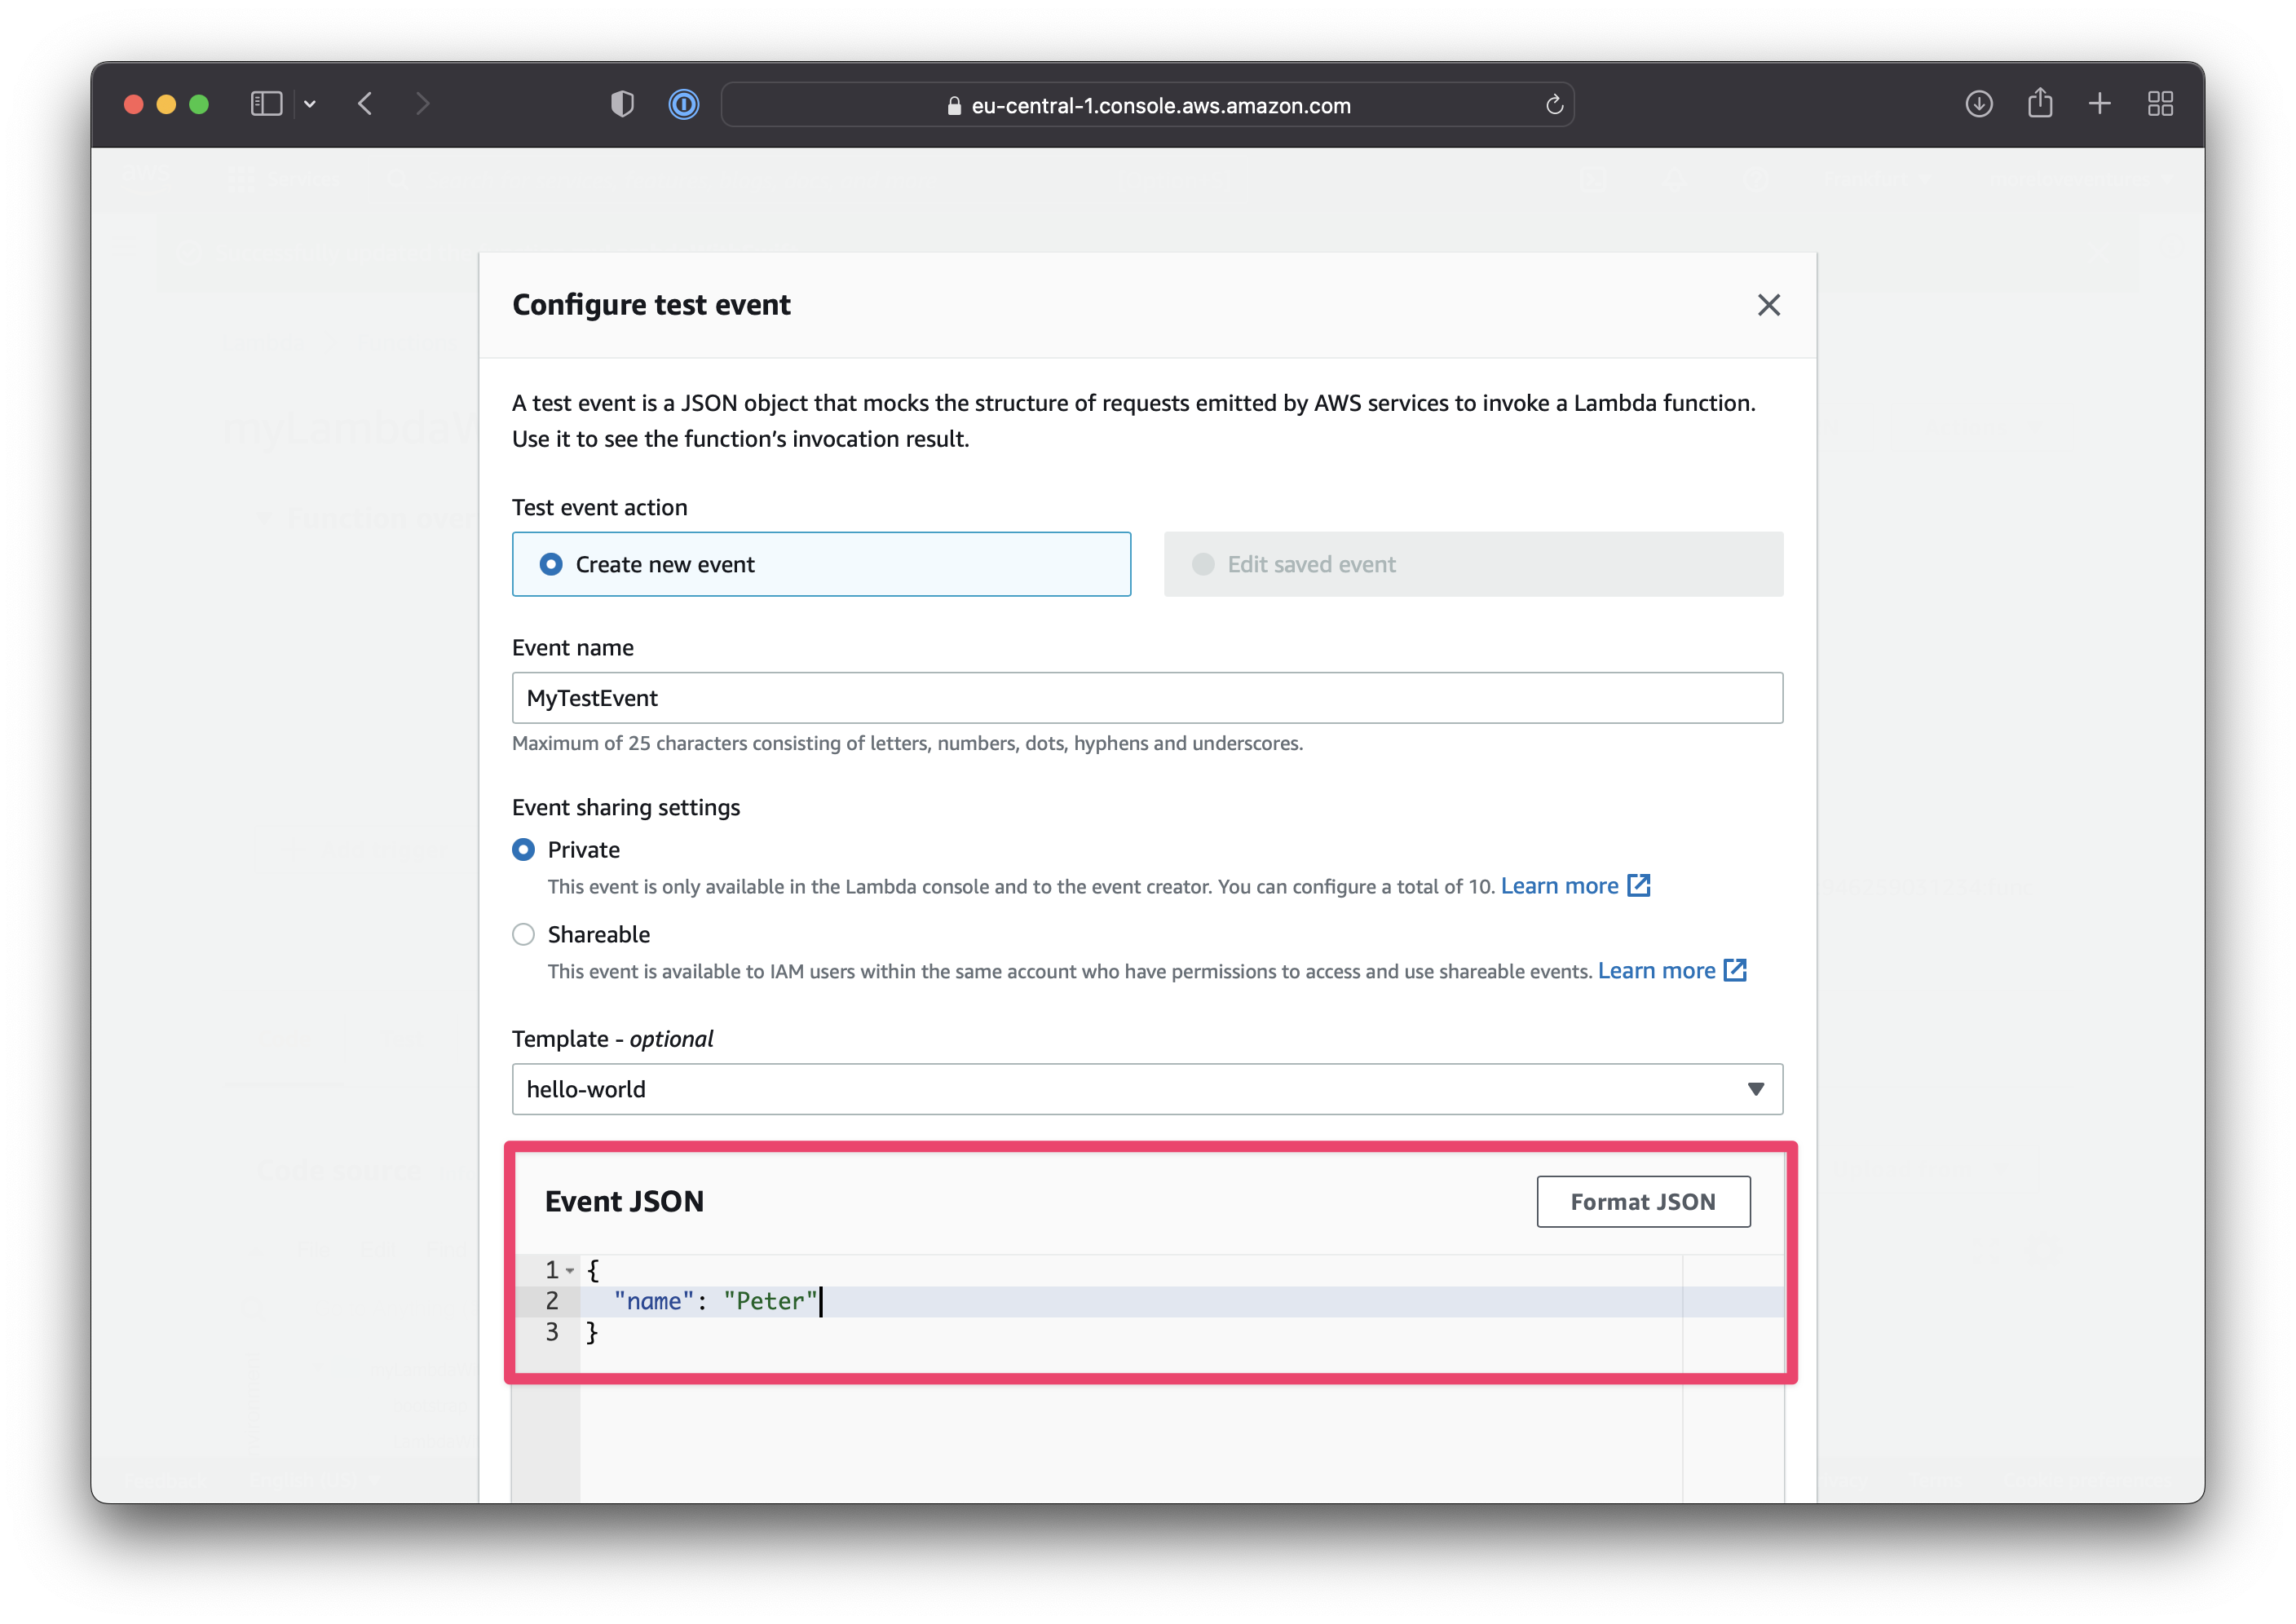
Afterward, you can click on "Test" to configure a test message to be sent to the Lambda function to verify its functionality. Here you can create a new test event by providing a name and the JSON for the event to be sent to the Lambda function. Same as in the local test with Postman, you can use the following JSON.
{
    "name": "Peter"
}
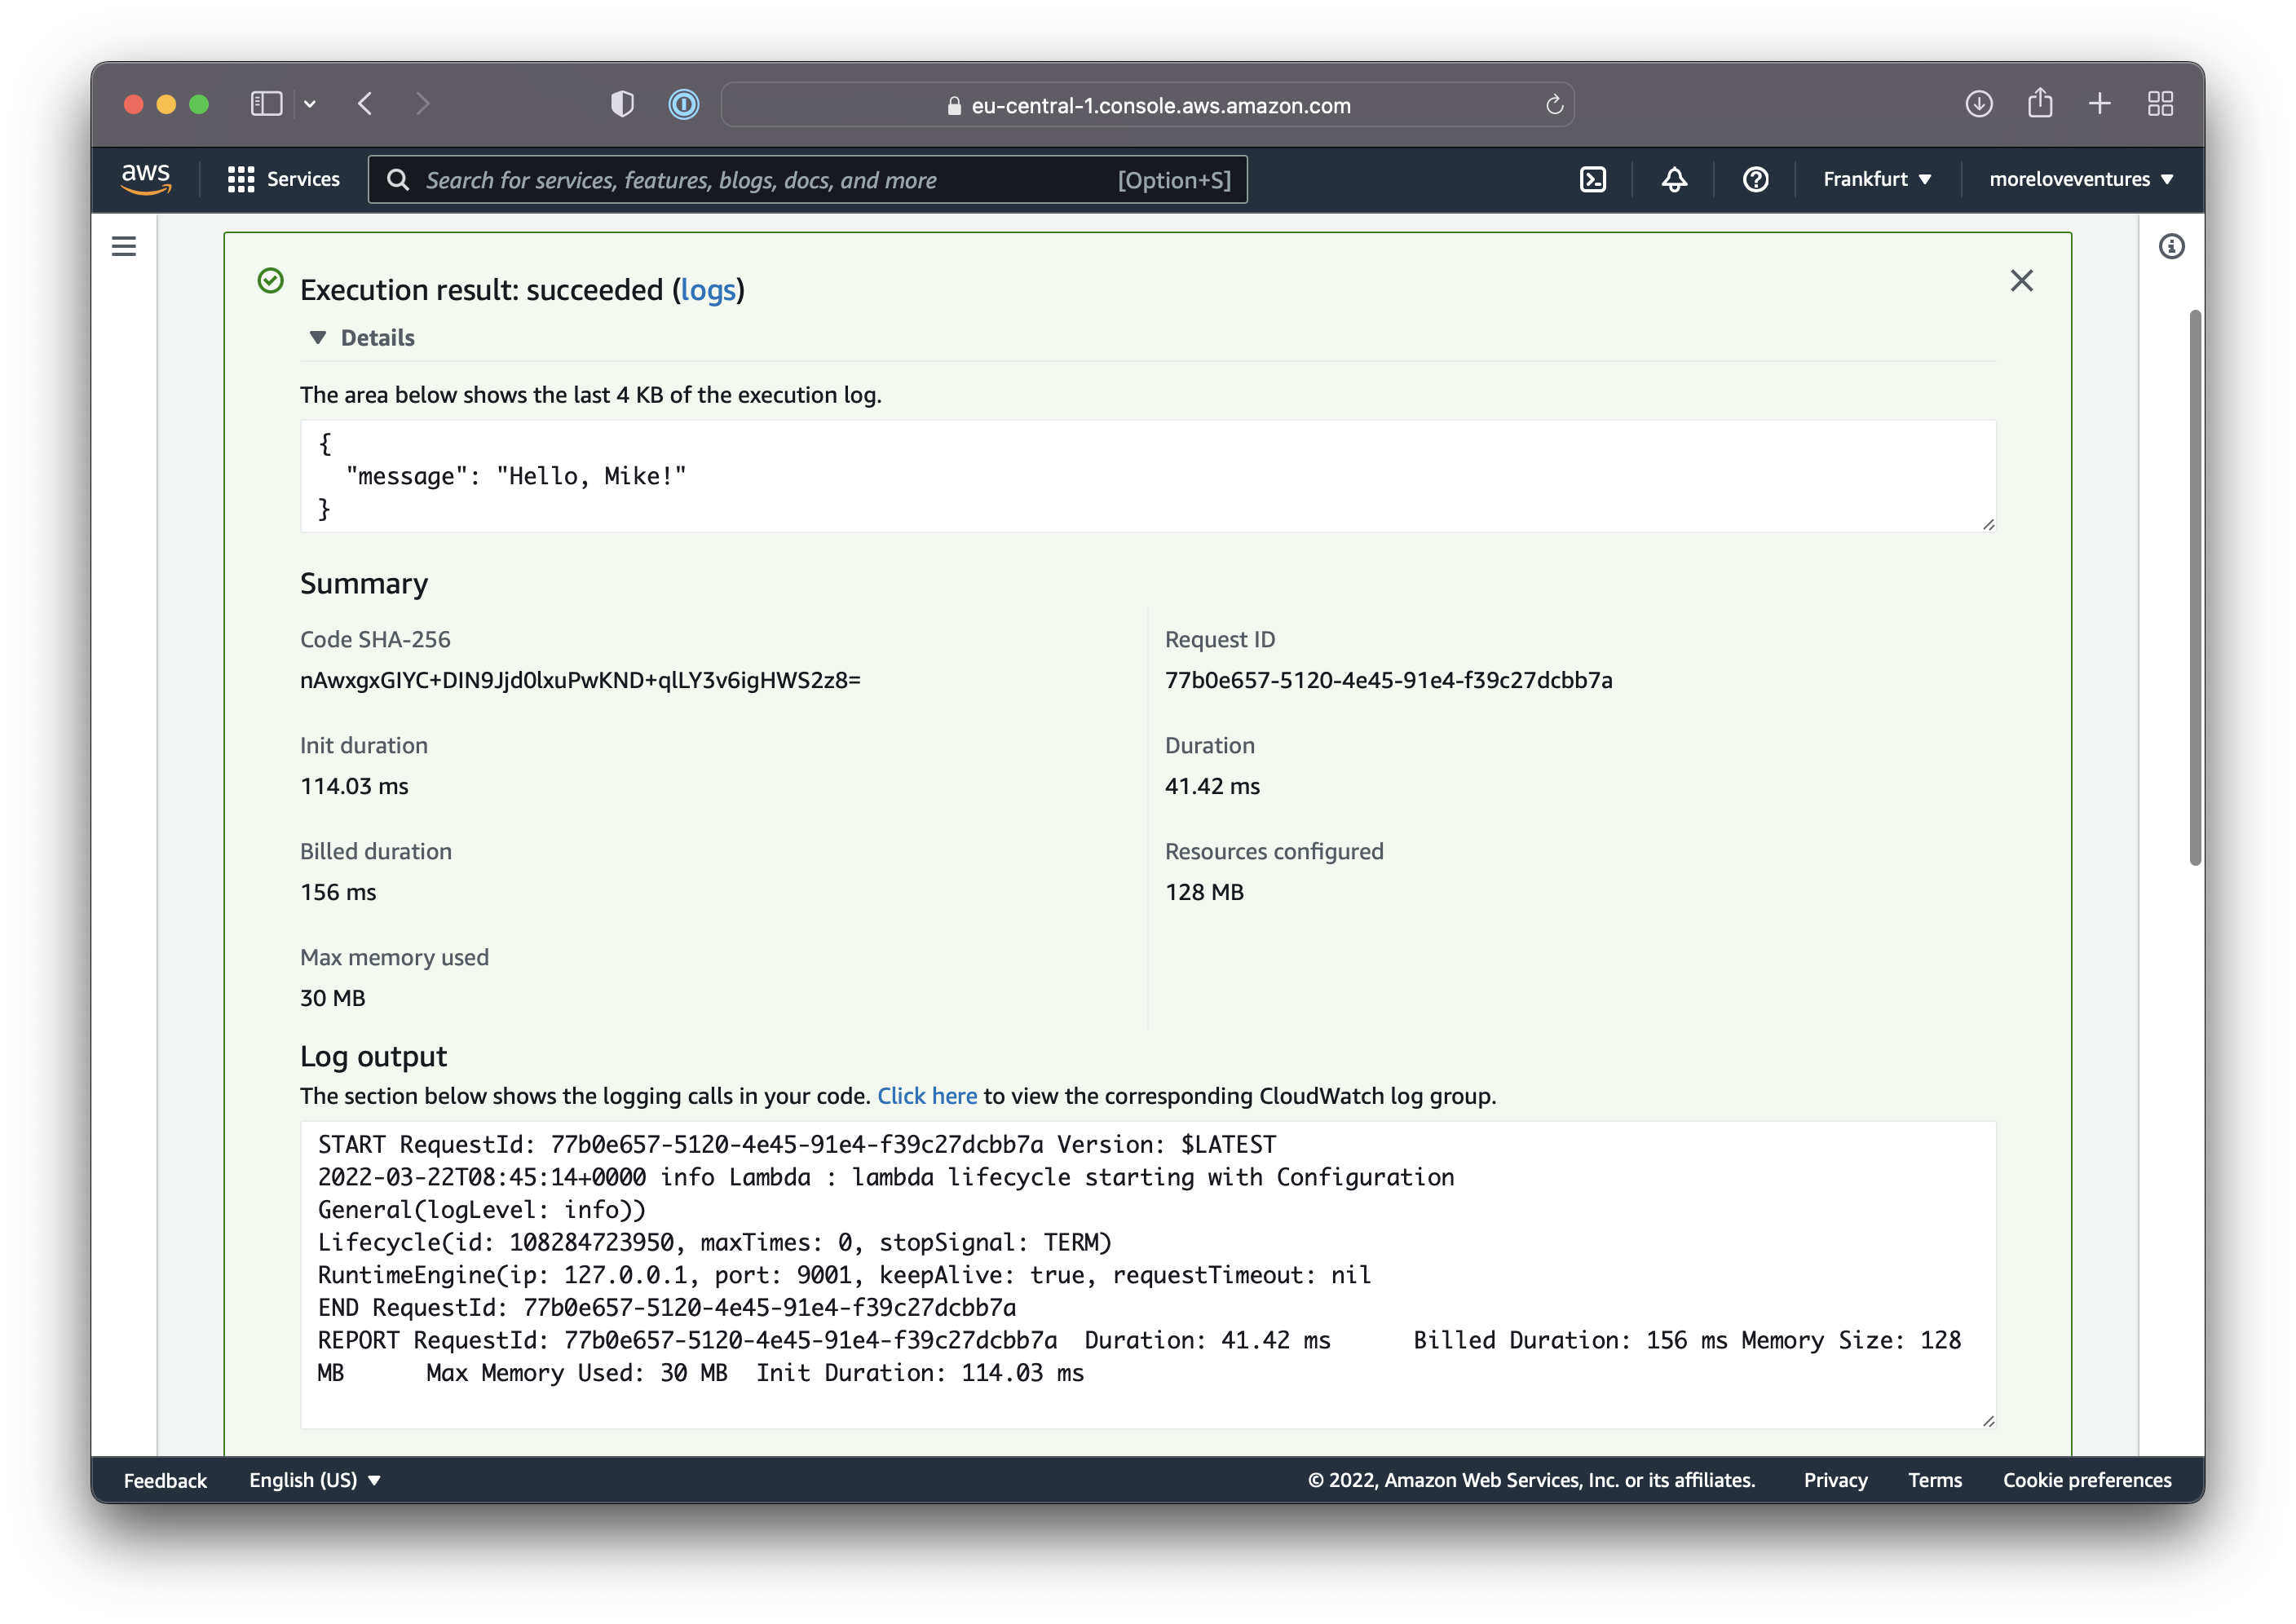
Once the test has been saved, you can execute the test to verify if the Lambda works as advertised. The console provides nice Execution results where you can see the execution log and whether the test succeeded.
That's it. The Lambda function is deployed and works as intended. There are also other ways to deploy your Lambda function, for example using the AWS SAM CLI. This might in fact be more convenient and also handles more complex settings for AWS. To explore this, check out the Swift Lambda example with SAM by AWS.
Adding an Endpoint URL to the Lambda Function
Even though you can theoretically add a URL to your Lambda function with the AWS CLI, it might be better to configure access to the function through AWS API Gateway.
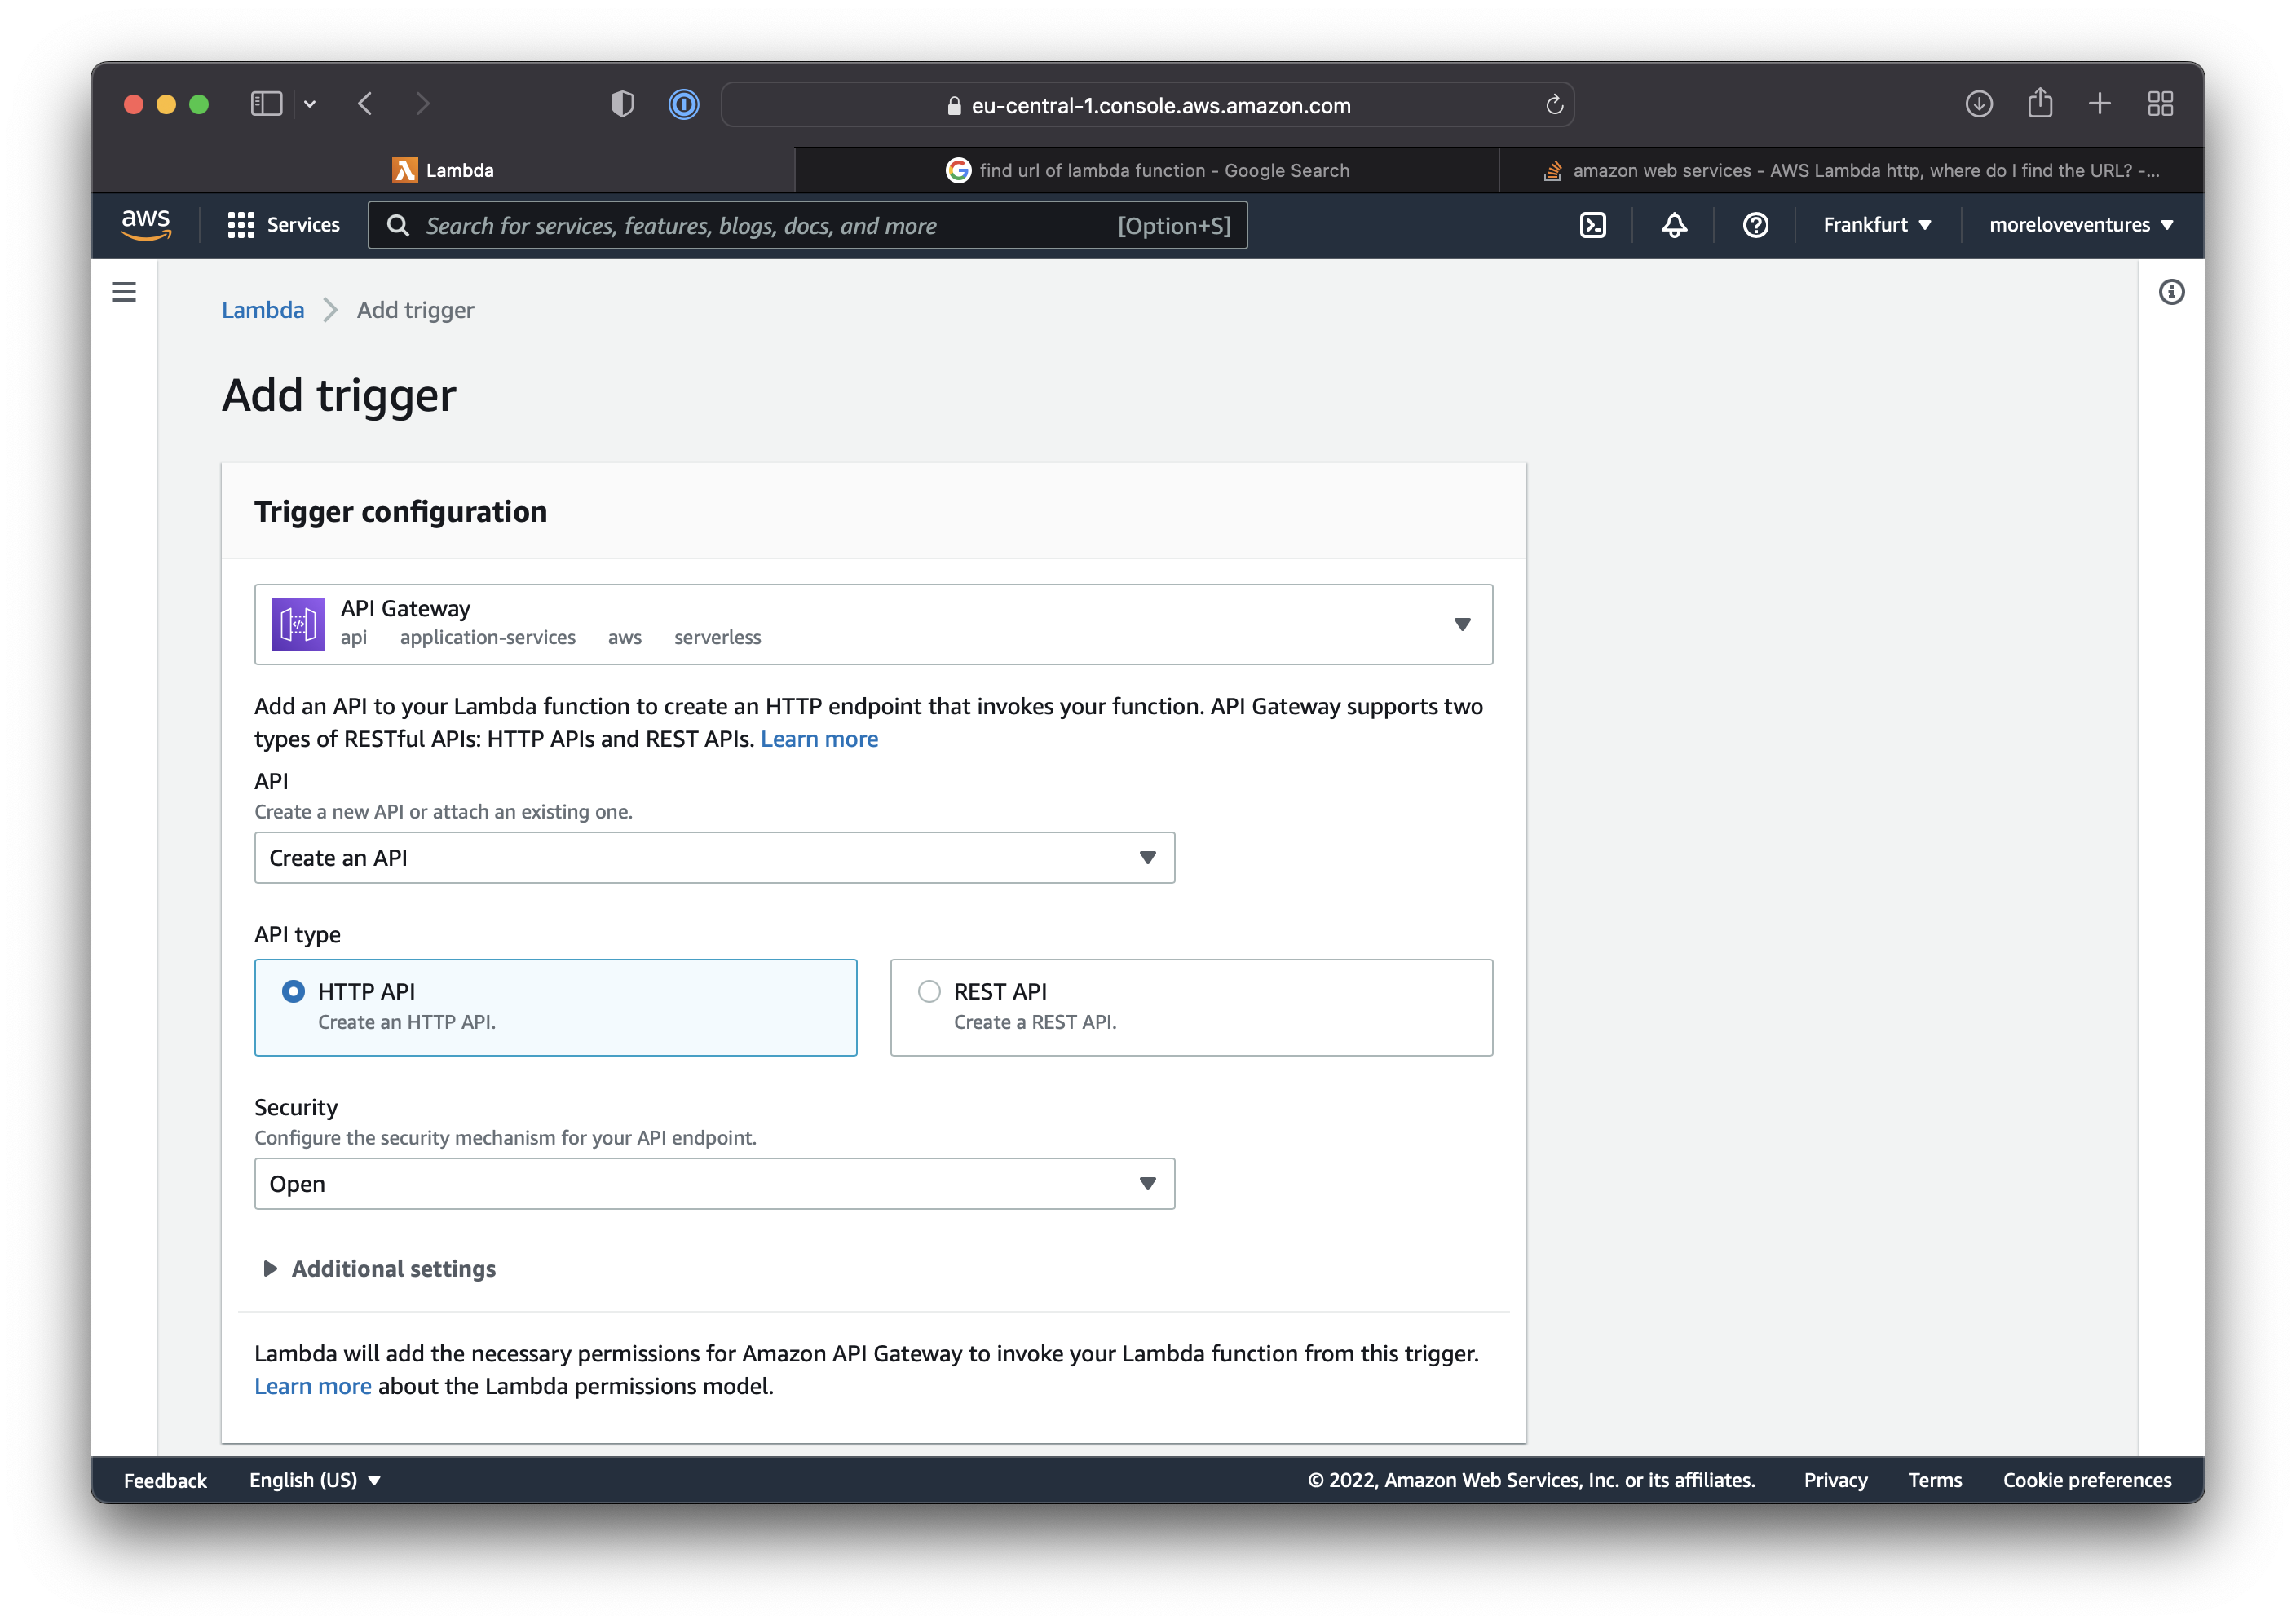
While this may come with some additional challenges like authentication, quotas, etc., for now, lets just create a public url to invoke the Lamda function. From the configuration tab in the Lambda function, you can select the "Triggers" from the preference pane on the left. Here, you can click "Add trigger".
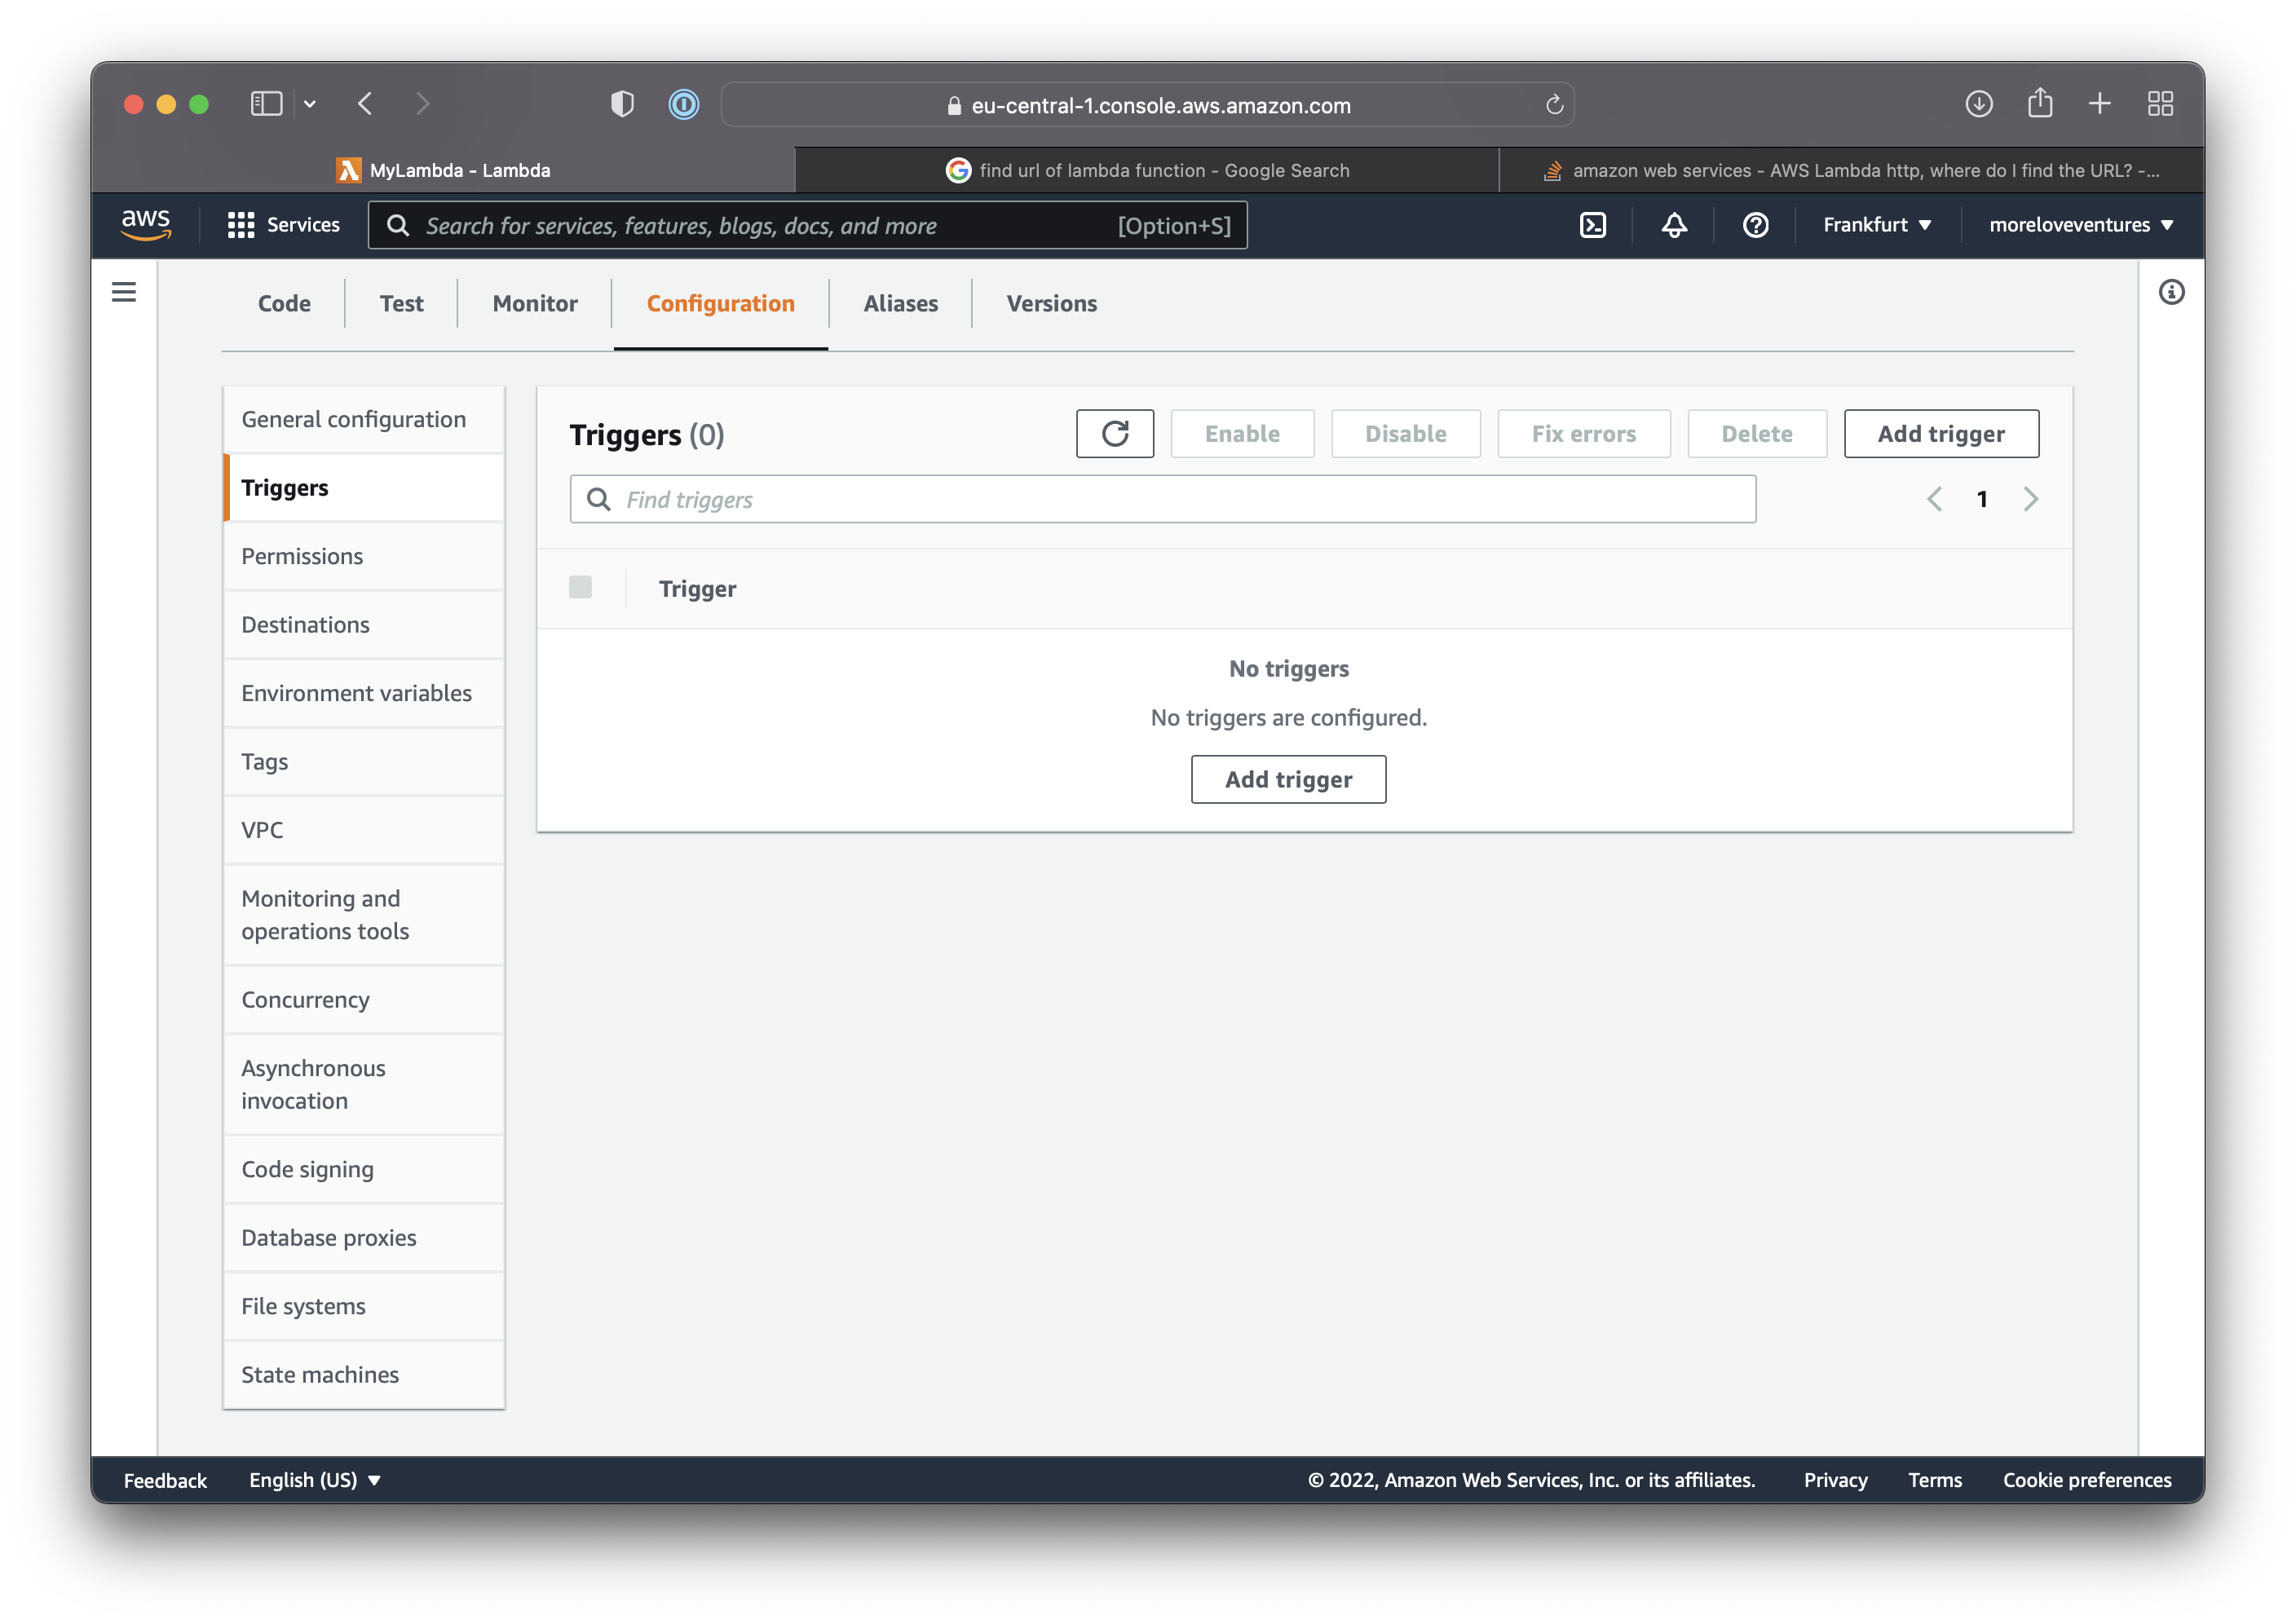
In the following setup assistant you can select API Gateway as a trigger then either select and existing or create a new API service. You can choose between HTTP and REST API and configure the security options for acces. If you select "open", anyone with the URL can access the Lambda function.
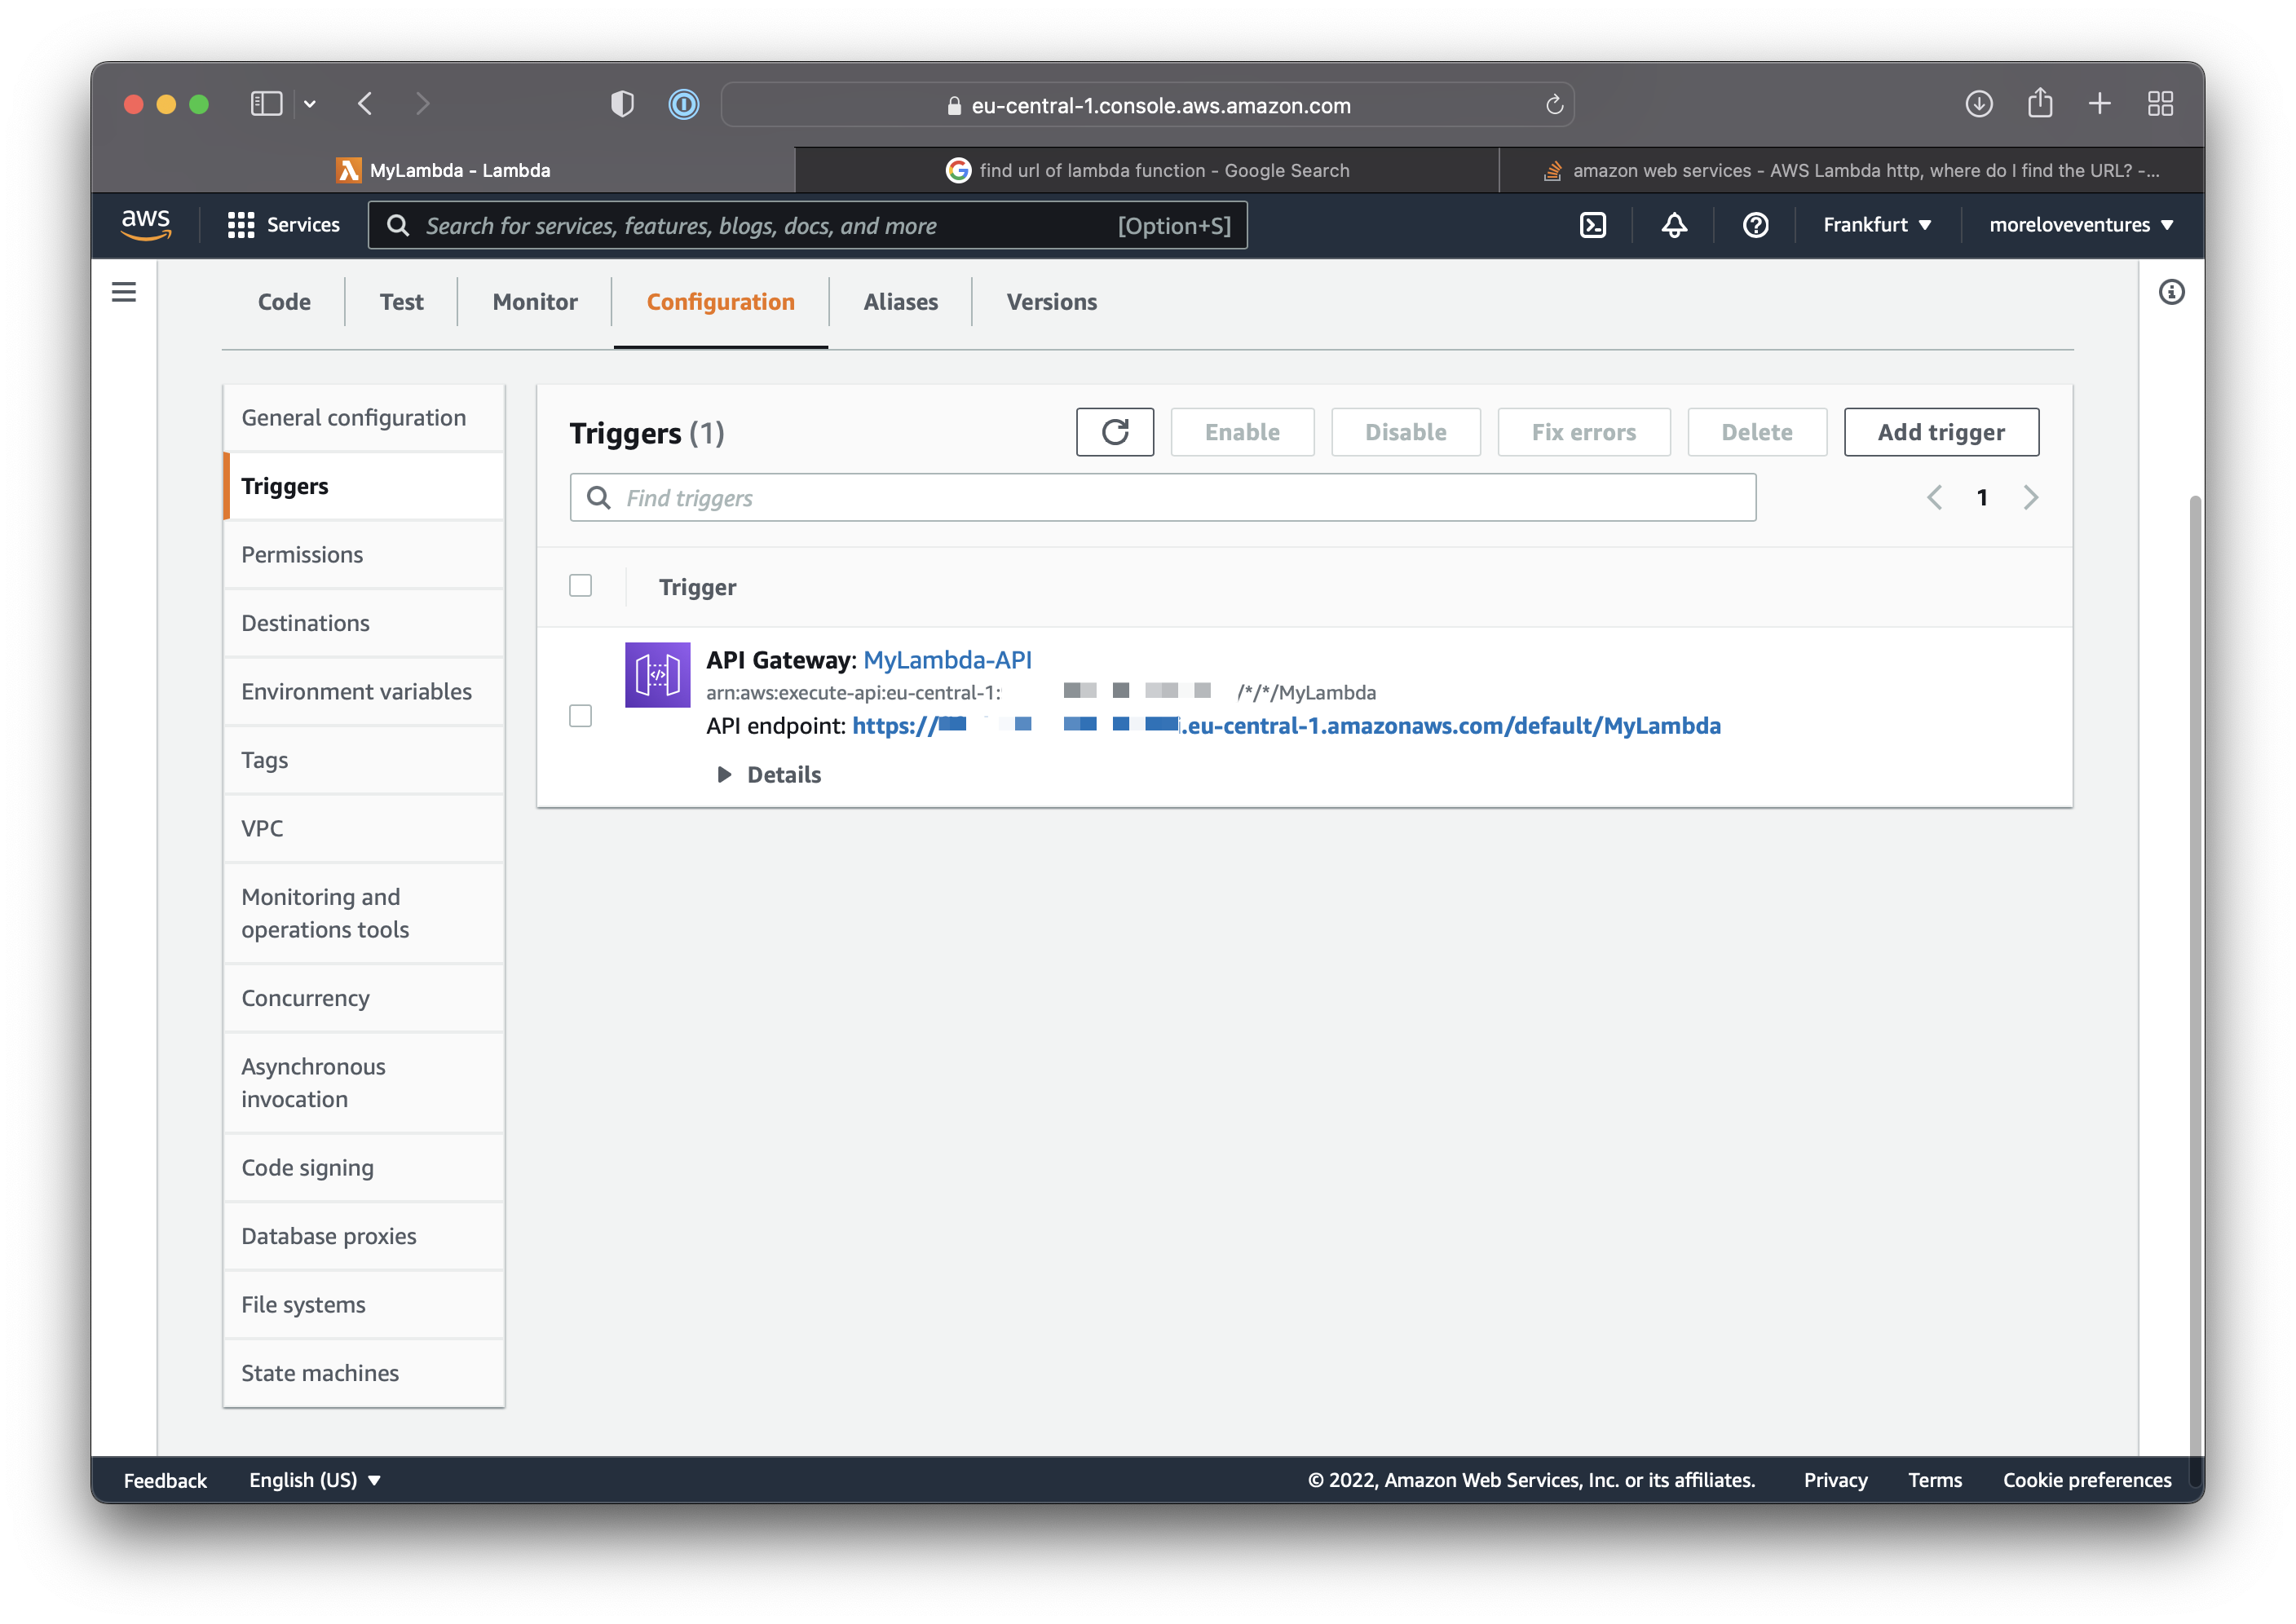
Once completed, you will be able to the API Gateway trigger for the Lambda function. The Lambda is now available at the API endpoint and works as intended.
To dive deeper into how to develop a more sophistiaced backend service with AWS Lambda, API Gateway and DynamoDB, stay tuned for the next article on the Swift AWS Lambda Runtime.